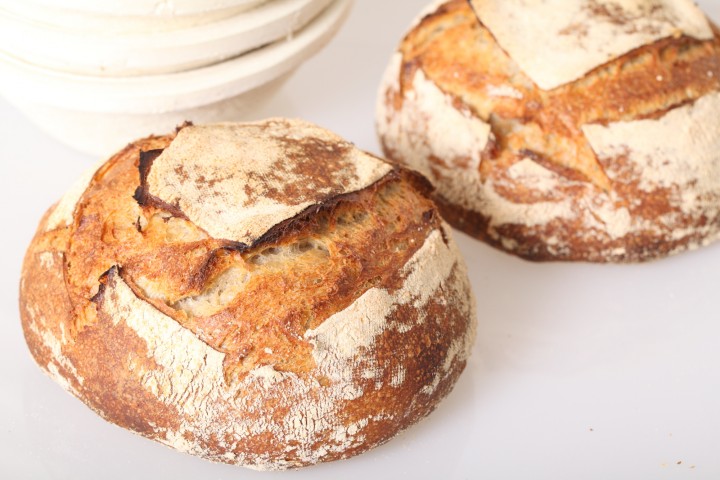
Daring to keep it simple can also produce great results…
Klik hier voor de Nederlandse versie
We started this recipe as a one-off experiment, thinking the result would not be that interesting, compared to the other bread recipes we already know and love. But the end result really surprised us. As you might expect, knowing some of our other favorite recipes, the key factors for this one are the same: time, timing and really good flour!
This recipe is the first to have a ‘dough calculator’ (see ingredients list). Other recipes will follow soon!
Although there does not seem to be strict definitions about French bread terminology, we simply call this bread ‘Pain Naturel’ or abbreviated PN. We chose this name because it stands for a basic yet full flavored sourdough bread, made just from ‘white’ bread flour. Using our own sourdough culture we found the bread gets a pleasant hint of sourness, which combines very well with the sweet flavor of the flour we use.
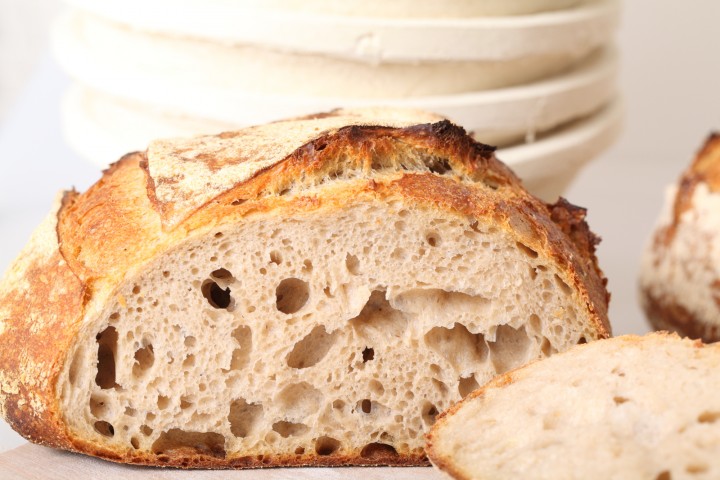
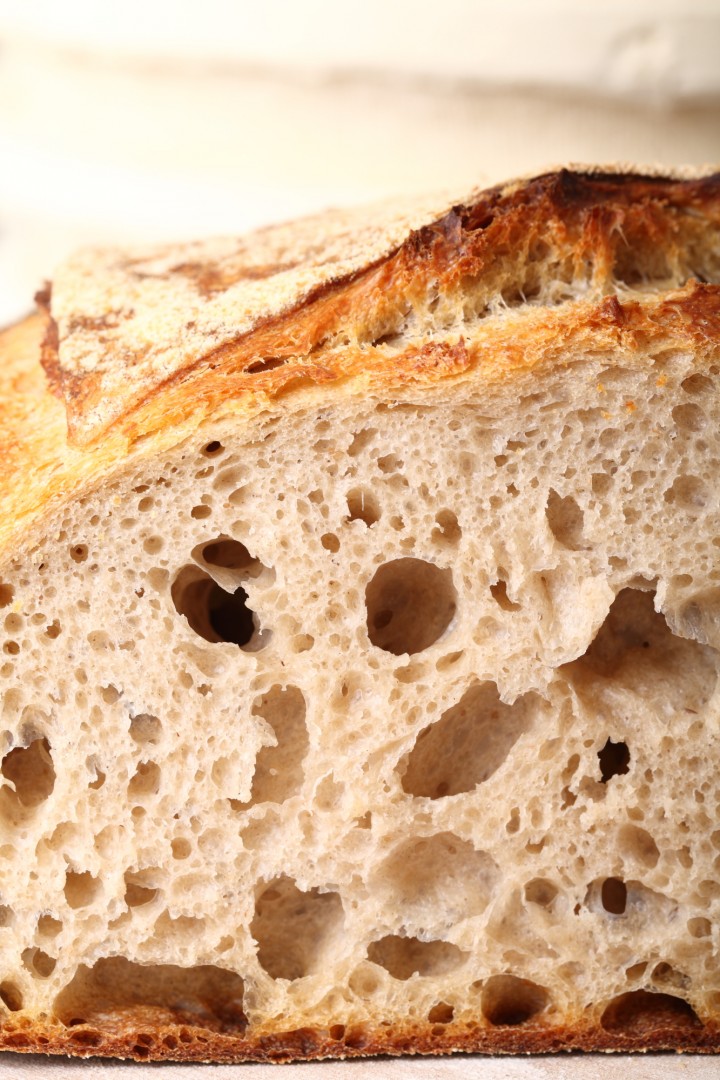
And especially because this bread is made with ‘white flour’ only, it is important to get the best quality, organic, stone ground flour you can get your hands on. When you do, we truly believe you will be rewarded with amazing taste and depth of flavor, better crumb structure and the crustiest of crusts.
Enjoy the recipe and let us know what you think. Also check out our handy sourdough tips to get the most out of your sourdough baking!
Before you start
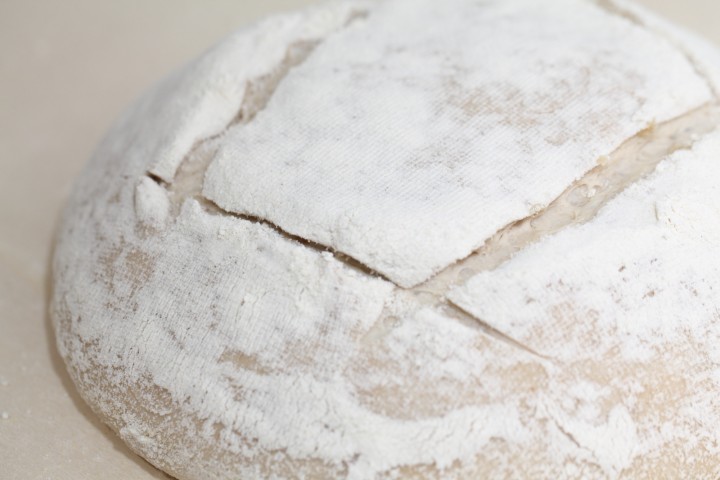
For this recipe we are going to make a starter named a poolish. A poolish is a type of wet sponge usually made with an equal weight of water and flour and a small amount of sourdough starter culture or yeast and NO salt. Making a poolish helps bring more taste and strength to your bread.
We use a sourdough culture which is made with 100% whole grain rye flour. A sourdough culture based on rye flour is easier to maintain, does not go into a slurry when you forget about it, is easier to stir because it has almost no gluten and smells very nice, a bit like fruit. It is also very forgiving in the amount you feed it, everything seems to be alright. Normally we only feed it once a week, after our weekend baking we give it a few table spoons of water and rye flour, stir, ready!
| Ingredients for the Poolish | ||||
|---|---|---|---|---|
| 115 | g | wheat (bread) flour | ||
| 115 | g | water (room temperature) | ||
| 15 | g | sourdough culture | ||
| Ingredients for the Pain Naturel | ||||
|---|---|---|---|---|
| makes 1 loaf | ||||
| the poolish from step 1 | ||||
| 340 | g | wheat (bread) flour | ||
| 180 | g | water | ||
| 7.5 | g | (sea) salt | ||
Making the Poolish
In a bowl stir together the 115 g flour, 115 g water at room temperature with the 15 g sourdough culture. Mix it well until you have a homogeneous slurry that looks like very thick batter. Cover the bowl with clingfilm and let the prefermenting begin. After 12 hours at room temperature it should be bubbly, light and ready for use. So if you want to begin your bread making in the morning, you should make your poolish at 9 in the evening.
Note: We use European flour which absorbs a few % less water than American type flour. People using American type of flour should add 5-15 ml water to the final dough.
Making the Pain Naturel
Put the poolish starter and flour in the mixing bowl of your standing mixer and add 2/3 of the water (do NOT add the salt yet). Now start mixing and gradually add the rest of the water and let the dough come together. Knead for only 1 minute, leave it in your mixing bowl, cover with clingfilm and rest for 20 minutes (this technique is also referred to as autolyse).
Now add the salt and knead for another 4 minutes. Transfer the dough to a greased bowl, cover and leave to rest for 50 minutes.
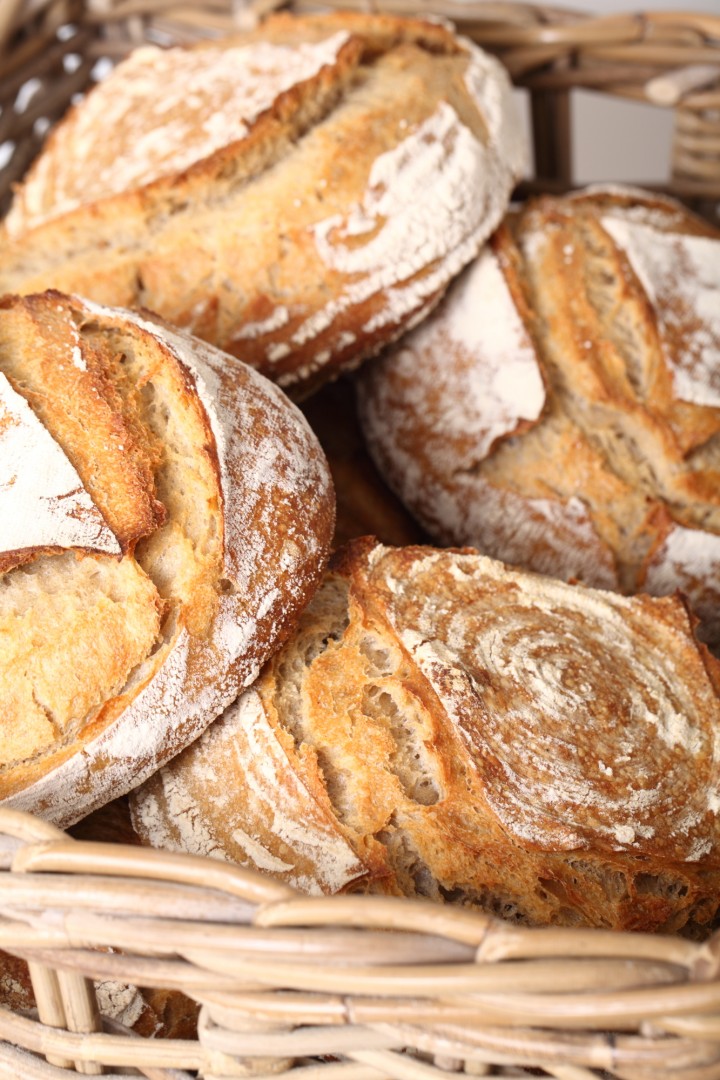
Ideally the temperature of your dough after mixing should be around 24-25 ºC / 75 ºF. You should adjust the temperature of the water you add, so the total dough reaches this temperature. For us this means in summer adding cold water to this recipe and in winter (when our little bakery gets much colder then the rest of our house) adding water up to 50 ºC /122 ºF. You can measure the temperature of water and dough with a food thermometer. These measurements are important because they correspond with the proving times in the recipe.
After the first 50 minutes rest take the dough out of the bowl and onto a floured work surface and do one stretch and fold (a full letter fold, left over right, right over left, bottom over top, top over bottom; watch our bread movie or our stretch and fold method video to observe this technique if you are not familiar with it). Transfer to the bowl, cover and again leave to rest for 50 minutes. Repeat the stretch and fold (full letter fold) one more time (so 2 times in total) and leave to rest for 50 minutes (so this is the third and last of your three 50 minutes resting periods). During each stretch and fold the dough should feel firmer and less wet.
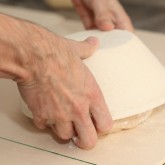
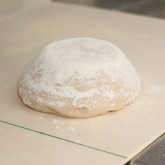
Now it’s time to shape. Shaping is a tricky subject. It’s something for which everybody develops his or her own favorite technique over time. You can make a batard or loaf shape or a boule (ball) shape like you see in the pictures. If necessary you can learn more on shaping from a good bread book, like the ones by Hamelman or Reinhart, or the Tartine Bread book. Or take a look at our boule shaping video.
Preheat your oven to 230 ºC / 445 ºF conventional setting (at what stage you preheat your oven depends on how long it takes for your oven to heat through, some take 30 minutes, some, like ours, with stone floors take a lot longer, up to two hours).
Transfer the shaped dough to a proofing basket / banneton, cover and leave to proof for 2 hours and 30 minutes (provided your dough has a temperature of around 24-25 ºC / 75 ºF, also check our tips on dough temperature). When you think it has risen enough, use your finger to carefully make a very small dent in the dough. If the dent remains, the bread is ready to bake, if the indentation totally disappears, the dough needs a little bit more time.
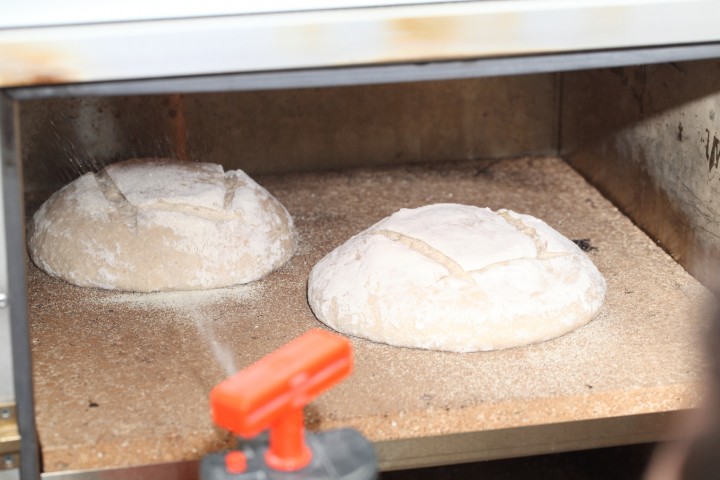
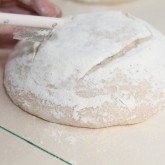
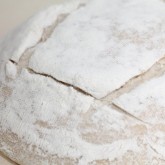
Now your loaf is ready for the oven. Slash the top of the loaf with a lame or bread scoring tool. To get a nice crust, try to create some steam in your oven by putting a small metal baking tray on your oven floor when you preheat the oven, and pour in half a cup of hot water immediately after putting the bread in the oven. Release some steam by setting your oven door ajar (perhaps with the help of a wooden spoon or oven mitt) 5 minutes before the bread is ready. If you are going to create steam with a baking tray, you may also want to turn your oven temperature a bit higher, because you are going to lose some heat in the process.
After 45 minutes of baking your loaf should be ready. Transfer onto a rack and leave to cool. This loaf also keeps very well in the freezer. But please make sure to eat at least some of it while fresh. This bread is great with just about anything, but also very tasty on its own.
Pain Naturel Time Table
Day 1 21.00 Make starter let ferment for 12 hours at room temperature
Day 2 0.900 Make final dough
- 09:00 – Add flour and water to starter, mix for 1 minute
- 20 minutes rest (autolyse)
- 09:20 – Add salt
- Knead for 4 minutes
- Rest for 50 minutes
- 10:14 – First stretch and fold
- Rest for 50 minutes
- 11:04 – Second stretch and fold
- Rest for 50 minutes
- 11:54 – Shape
- 12:00 Final proofing 150 minutes (2.5 hours)
- 14.30 – Bake for 45 minutes at 230ºC / 445ºF
- 15:15 – Your loaf is ready!




Ömer Seryfi Salur says
My breads are not like your breads from air wholes point of vieuw.Why?
Weekend Bakers says
Hello mr. Salur,
The most important thing to know is to handle the dough very carefully and not to press on it. Also, because it is wet and sticky, people add too much flour to handle the dough. Try to use a scraper to help you handle the dough. And try different flours, because that can make a difference too.
Other tips that can help you, you can find here:
www.weekendbakery.com/posts…ion-dough/
Good luck with it!
Jan says
So happy I found your site. I’m a novice sourdough baker. Only recently switched to your rye sourdough starter. I’ve had it going for a week now and it looks like yours. Very happy. After reading many of your recipes and comments from others, which has been very helpful, my one concern is the baking of your beautiful breads. I have a regular oven at home and am wondering what is the best method of baking. Am thinking of buying a cast iron dutch oven, but don’t know what size. I do have a small baking stone, but is it my understanding it would need a cover and also some steam? I live in the US and do have trouble getting good quality flours in my small town. I can get Bob’s Red Mill flour and King Aurthur’s flour, and Gold Medal flour, overwise it’s mostly generic. I plan on baking your No Kneed Soft Sourdough Rolls this weekend. Thought I’d start with something I hope will not be too difficult. Plan to graduate to the Pain Naturel. If you’ve already covered this topic, I apologize repeating the questions. Any advice would be greatly appreciated.
Weekend Bakers says
Hello Jan,
Great to read your comment. First of all it is very well possible to bake a good loaf of bread in an household oven. Preheating the stone and baking your bread on the stone in your oven, plus creating some steam will improve the bake.
You can read our tips on the subject of making the most of your oven and using steam here: www.weekendbakery.com/posts…your-oven/
Using ‘an oven in an oven’ by using a Dutch oven or cast iron pot can work really well and we have seen great results with it.
measure your oven and see what size pot you can comfortably fit in your oven, with still some space left around it. A good indication for a possible size would be 28 to30 cm /11 to 12 inches in diameter.
Hope this information helps you on your way!
Deb says
Will i mess with the process of the sourdough starter if it gets moved to a different bowl 12 hours later and not used until 24 or more hours later ?
Weekend Bakers says
Hello Deb,
You must understand that with any balanced recipe, changing things means a different outcome. So if you change proofing times and extend them to double or triple the given time, the starter will more than likely over-proof and even turn to soup. So, if you change things you have to either make sure the process is slowed down (use the fridge) or use less sourdough culture to begin with, so you extent the time in which the yeast can develop to be just right by the time you want to use it. Remember, it is better to use an under-rype than an over-rype preferment / poolish.
Jan says
Hi guys, just got my first breads out of the oven based on the rye starter. I am not completely satisfied. It looks like the breads could use some time in the oven but looked really really dark brown already. I used ‘meel’ Instead of ‘bloem’. Would that explain the difference in your and mine end results?
Looking forward to your reply! Jan
Weekend Bakers says
Hello Jan,
Using meel (wholegrain flour) instead of bloem (fine flour) makes a lot of difference to the end result. There’s a lot of fiber in it and (therefor) less gluten (development). The bread is denser, heavier, different in crumb and crust. It is a real challenge using 100% meel and we would advice to maybe try a loaf with only a % of meel. Also see this recipe www.weekendbakery.com/posts…vain-loaf/
As for the loaf browning too fast. If you at some point during the baking process (say after 20 minutes) you like the colour of the crust, temper the oven to around 180C so the bread will still bake for the remaining baking time but the browning will stop or slow down. Also make sure the bread is not too close to the heating elements when baking so put it on a lower tier if possible.
Good luck with it!
Marieke & Ed
James H Erickson says
I see the recommendation to use a Dutch oven if you don’t have a baking stone. One caution, use one that is raw cast iron. The hot temps. ruined an enameled one I had. So I’ve since got an unfinished model. Jim
By the way, your whole rye sourdough starter tips are great. I made up a rye starter, and pretty much replaced my wheat starter with it. As you said, it seems to much easier to grow and handle. Thanks for the tip.
Weekend Bakers says
Thanks again for a great tip Jim. We have used this method a few times with an enameled one, to try it out, but doing it more often / on a regular basis, would probably be hard on the material.
Glad the rye starter culture works well for you too!
Greetings and happy sourdough baking from Holland
Yet says
Greeting from Malaysia!
Thanks for your rye starter recipe and sourdough recipe off course. I manage to make my rue starter and do the poolish. I faced some problem in the moulding part. The dough is looks so slurry and sticky to handling. Is that should I cut lesser the water content? Or it is a must to use a proofing basket for the nice round shape of the dough? My dough is so sticky until I can’t even do the boule shaping 🙁
Weekend Bakers says
Hello Yet,
Working with high hydration dough needs a bit of practice (even dough with much more hydration can be shaped). It could be easier for you to start with a few less % water and built it up as you gain more experience. You can look at our video on shaping here: www.weekendbakery.com/posts…g-a-boule/
Also check out our tips on wet dough: www.weekendbakery.com/posts…ion-dough/
And if you do not have a proofing basket, try and proof the dough in something that replaces the basket, so the dough is supported during proofing.
Hope this helps!
Michaela Malsbenden says
Hello from Germany,i discovered your blog yesterday and i like it very much.My first attempt of the this pain naturel was a success. Great receipe.
Weekend Bakers says
Thanks for your very kind feedback Michaela.
Enjoy your baking!
Marieke
gerd gulickx says
Beste Ed en Marieke,
Ik heb 20 jaar brood gebakken, laatste helft alleen spelt, (wegens darmproblemen) maar altijd met gist. Mijn gezondheid is zo verslechterd dat ik al 1,5 j geen koolhydraten meer verdraag. Sinds september eet ik een paar keer per week enkele sneetjes zuurdesem spelt. Dat wil ik nu zelf leren bakken. Heb al uren zitten lezen in jullie fantastische bibliotheek; een waar genot (en wat een verleiding)!
Ik heb een beetje hulp nodig vrees ik: ik heb geen recept gevonden met uitsluitend spelt, meel of bloem. Ik wilde als uitgangspunt dit Pain Naturel gebruiken. Ik denk dat ik meest kans heb op succes met een poolish. Hebben jullie tips voor mij aub?
-ik heb gelezen dat spelt delicater is om te verwerken: mag ik mij houden aan het zelfde aantal min. kneden? En kan ik hiervoor mijn broodmachine gebruiken?
-Kan ik voor de eerste pogingen de hoeveelheden van dit pain naturel halveren, of wordt het dan moeilijker (om welke reden?)
-In een artikel over oude granen staat dat spelt koud moet rijzen. Denken jullie dat dat inderdaad nodig is voor een 100% speltdeeg?
-100% Spelt zou bij het bakken vlug uitzakken, en daarom alleen in een vorm kunnen gebakken worden. Klopt dit?
-Ik kan alleen variaties maken door verhoudingen in meel en bloem te veranderen , of de vorm (pitten verdraag ik ook niet) ; heeft dat gevolgen voor de juiste hoeveelheid water?
-Hebben jullie ervaring met “emmer”, of “einkorn” ? Misschien verdraag ik dat ook wel, maar dat schijnt helemaal “echt moeilijk” te zijn, maar wel heel lekker.
-Andere dingen waar ik rekening mee moet houden?
Bedankt voor jullie inspanning om alle kennis en ervaring te delen. Vind ik geweldig……
Weekend Bakers says
Hallo Gerd,
Dank voor je aardige woorden en sorry te lezen over je gezondheid.
-Je hebt gelijk spelt en de eiwitten in spelt zijn delicater en daarom moet het kneden ook niet te intensief of snel. Wij hebben zelf weinig ervaring met een broodbakmachine, maar meestal zit er onderin een wat kleiner deeghaakje en we denken dat dit in eerste instantie wat kneedwerk kan doen. Je zou zodra het deeg ‘samenkomt’ het nog heel rustig met de hand na kunnen kneden.
– Je kunt rustig alles halveren, daar wordt het in principe niet moeilijker van. Wel is het zo dat een kleinere hoeveelheid wat minder fijn werkt omdat je minder hebt om vast te houden en te ‘stretch & folden’.
-We denken dat rijzen op koele kamertemperatuur het beste is om mee te beginnen. Dat bedoel je waarschijnlijk met ‘koud rijzen’.
– Het is door de andere glutenstructuur en minder gluten-ontwikkeling inderdaad lastiger een 100% speltbrood hoogte te geven. Een vorm helpt met steunen van het deeg.
-Ja, dat heeft zeker gevolgen. Normaal moet je al met iedere zak nieuwe bloem het water aanpassen, je leert vanuit ervaring hoe het deeg er uit moet zien en wat nodig is. Met spelt is het zeker nodig om de hydratatie aan te passen. Over het algemeen wordt de hydratatie gereduceerd, met name om het ‘uitlopen’ van het deeg tegen te gaan.
-Wij hebben weinig tot geen ervaring met deze oude graansoorten in relatie tot verdraagzaamheid al helemaal niet. Maar er is vast wel informatie over te vinden. Deze soorten bevatten ook gluten overigens en natuurlijk ook koolhydraten. Langere rijstijden maken wel dat het brood lichter verteerbaar wordt, maar het blijft, ook met spelt en einkorn en emmer, een product met koolhydraten en gluten.
Wij zijn absoluut geen expert op dit gebied en we zouden dan ook aanraden om op zoek te gaan naar informatie van mensen met veel ervaring en deskundigheid over deze materie.
Veel succes en sterkte met de gezondheid.
Gulickx says
Sorry voor de late reactie (ziek), maar: Bedankt voor jullie antwoord. Het zal inderdaad wat zoeken worden….
Gerd
Weekend Bakers says
Beterschap Gerd en moge je zoektocht kort zijn!
Sarah S says
Hi all,
If I do not have a pizza stone what is the best way to bake my dough please? Many thanks in advance.
Sarah
Weekend Bakers says
Hello Sarah,
One of the best options, and the one lots of people are enthusiastic about is the Dutch oven or ‘oven in oven’ option. Provided you have enough oven space and are planning on only baking one loaf at a time. You use a Dutch oven pan / big cast iron pot or pan and place the loaf in the preheated pan in the oven (always being very careful with the hot pan of course!). The first part if the baking process is done with the lid on and the second without to allow browning of the loaf. Because the iron brings lots of heat directly to the loaf and good steam is created within the small space, you can get very good results.
You can also simulate the workings of a stone oven by starting your baking on a high temperature (250 C) and lower your oven temperature 10 minutes later to stop the browning, but still continuing the baking of the bread. The higher starting temperature will give you a better oven spring.
We do have other suggestions for you to make the most of your oven: www.weekendbakery.com/posts…your-oven/
Just to make sure: Do never, ever use stones that are not suitable to put in an oven, it is dangerous and they can possibly explode.
Good luck with it!
Greetings,
Marieke
Sarah S says
Hi Marieke,
Thank you so much for the tip. I used a big cast iron casserole pot and it has worked a dream. I look forward to making the recipe again and trying others from your site.
Best wishes,
Sarah
Weekend Bakers says
So glad the tip worked so great for you Sarah, excellent.
Happy baking!
CliveK says
Hi Guys,
This is an absolute failsafe recipe for amazing bread. I’ve made it lots of times and every time is a success, as are all your bread recipes I’ve tried.
As I write this a loaf has just come out of the oven and I can hear the crust crackling as it cools!
I cook my loaves in a ceramic “Dutch oven” which goes into our Aga at 230C as the Aga vents and a result is not good at holding steam. I take the lid off the Dutch oven for an extra 10 minutes at the end of the cooking time.
Thanks so much for your recipes and keep up the good work.
May your dough always rise and keep an (oven) spring in your step.
Thanks again
Clive
Weekend Bakers says
Hi Clive,
Thank you so much for all your very kind words. We love your enthusiasm for our recipes and for baking. Thanks for sharing your method with the Dutch oven and the Aga. Excellent!
Wishing you many happy hours baking and sharing the wonderful loaves with your family and loved ones.
Greetings from the Low Countries,
Ed & Marieke
Alette says
Hello, I am an American expat living in Amersfoort. I noticed you offer both English and Dutch recipes. Are you in the Netherlands? If so is it possible to attend a class in English and make this basic sourdough bread together with an instructor? I would also be interested in learning how to make the starter. I have a few friends who I believe would also be interested in learning. One last question. . . which “rogge” in the Netherlands do you buy to make your starter? Thanks for any help!
Weekend Bakers says
Hello Alette,
Thank you so much for your kind comment. At them moment we are not able to organize any classes ourselves, but we do have a page with lots of addresses of other bakers in Holland who do (organized by Province).
See: www.weekendbakery.com/posts…en-volgen/
You do need to check if the baker is able and willing to teach in English, but with a small group, for most of them, this should be no problem we hope.
Our favorite rogge for the culture is sold by mill De Zandhaas in Santpoort near Haarlem, but other mills sell good whole wheat flour too of course. Windmill De Vlijt in Wageningen for example.
We also have a list with mills: www.weekendbakery.com/posts…n-holland/
Hope this helps you on your way.
Happy sourdough baking!
Marieke & Ed
Karine says
Hello Ed & Marieke,
Your website is very well made and easy to navigate. The videos are very helpful and appreciated. I was wondering if you would suggest a humid environment for the final proofing (like the oven with a bol of hot water) or just a warm place? If kept in a warm place (I use my laundry room), do you cover your banneton with a towel or a plastic wrap?
I can’t wait to taste my bread.
Thank you for everything
Best regards
Karine
Weekend Bakers says
Hello Karine,
Hope you had a lovely Christmas time. The answer to your question is you can do both. In a humid environment, like a proofing cabinet or a make shift proofing cabinet there usually is no need to cover the bread, because it will not form a skin and dry out. A warm place also works very well, you just need to cover the loaves, to make sure the surface doesn’t dry out. We usually use plastic wrap with a coating of flour, to prevent sticking. Another good idea is to use a bigger plastic bag and place the banneton in the bag and inflate it and tie the bag. So you create a kind of balloon and the bag does not touch the loaf.
Hope this helps you.
Wishing you happy baking these last few days of 2017 and a many enjoyable baking hours in the New Year.
Greetings,
Ed & Marieke
Sandip says
Dear Ed & Marieke,
Firstly thank you so much for your efforts and this website. I am a new baker and am addicted to trying out your recipes. After having failed getting the Sourdough starter to work 2 times finally have this under control the problem is that our climate is hot hence room temp is normally 25C. This recipe worked out well the only thing is that the boule does not quite have the same rise as yours in the pictures.
Followed everything exactly so not sure why unless we we are not shaping the boule tight enough ? As once its in the Bannetton it sort of spreads out and hence when put in the oven it’s flatter though it rises but less.
Any ideas ?? Thanks again for all the detailed recipes they are great!
Weekend Bakers says
Hi Sandip,
Can you tell us what flour you use and what the protein content is? Could be you need stronger bread flour to give the bread enough structure to rise and hold its shape!
Sandip says
I use a strong white Bread flour with 13.4% protein content.
Weekend Bakers says
Hi Sandip,
That sounds good, so no problem with the bread flour. You can also look at the hydration of the dough and reduce the amount to around 60% hydration (because every flour has a different absorption). Could also be your sourdough culture is ‘too enthusiastic’ and is damaging the gluten structure or maybe the loaf is over-proofed.
But start with the hydration and see if this improves the result.
Good luck with it!
Carol Atherton says
Thanks for this site. It gives reasons why things should be done in a certain way and I appreciate that.
I’ve had a very successful rye starter and today made a Pain Naturel. All was well and the result looks good except that I had a problem turning the proved dough out of the Banetton onto my preheated Pizza stone.
Only just out the oven and crust looks amazing but have yet to try it. Feel it might be a bit dense and that could be due to it collapsing when turned out from the basket. It’s not a new one and I prepped it according to your instructions.
Any comments please?
Weekend Bakers says
Hi Carol,
Just make sure you also coat the side of the loaf that goes into the basket and in the beginning just give it a bit of extra flour, just to make sure the releasing goes well. When you turn the basket to release the loaf, just very gently wiggle it to and fro and let gravity do its work. Hope this helps.
As for the denseness, maybe it was a bit under-proofed. Just keep an eye on the dough temp while proofing and read our tips on the subject here:
www.weekendbakery.com/posts…mperature/
Happy sourdough baking!
James says
Hi Ed & Marieke,
First of all let me start by saying I am really happy with your site and the wealth of advice you share. I find your instructions easy to follow for a beginning baker and my bread making has improved since following your advice.
One of the challenges I face with this recipe is that despite trying to follow it step by step, my bread doesn’t rise as expected and my most recent attempt was very dense and chewey in the middle, while the edges of the bread had a nice structure and air pockets.
What could I be doing wrong? Is it a temperature issue, activity of the rye starter, over/under kneaded, over/under proved? I am a bit stuck for ideas.
Do you offer bread making workshops? If so I would be interested in doing one.
With kind regards
James
Weekend Bakers says
Hello James,
Thank you so much for your kind words. We do have a checklist of most important tips and tricks you can consult: www.weekendbakery.com/posts…king-tips/
It is very hard to judge for us, without seeing a loaf what goes ‘wrong’ exactly, but all the issues you name can be a cause. So for example, did you check the temperature of the dough and did it correspond with our advice? Did you indeed proof long enough? Did you use enough steam? Did you change flour or anything else in the recipe?
Just check these items and make notes and adjust.
At the moment we do not offer any workshops. We do have a list of workshop addresses (all in Holland): www.weekendbakery.com/posts…en-volgen/
Keep on baking and practicing with our tips and enjoy the process!
Greetings,
Marieke & Ed
James says
Hi Ed and Marieke,
I eventually figured out what I was not doing right! It was the flour… It turns out the ‘tarwe bloem’ (wheat flour) that I was using was not intended for bread making. I purchased some ‘harde tarwe’ (strong wheat) flour from my local windmill and the difference was amazing!
The bread finally looks and tastes great.👏🏻 Thank you for thinking with me 🙏🏻
Happy baking,
James
Weekend Bakers says
Aha, great you figured it out James, that should make indeed make a big difference.
Happy baking with the right flour from the mill. Excellent!
Marieke & Ed
misspatiss says
hello,
before beginning sorry for my english because I’m french.
I have a question about the quantity of the yeast for the poolish.
in this article www.weekendbakery.com/posts…lish-biga/ you wrote “Poolish up to 12 hours in advance – 0.1% – 0.2%”
When I calcule the amount of yeast for 12 hours, the result is: 115 flour/100×0,1= 0,115g. And you, you said 15g.
What is the right result? 15 g as you said or 0,115 g?
sorry if I am wrong!
thanks a lot.
Weekend Bakers says
Hello Misspatiss,
The amount of yeast you need for 115 grams of flour is between 0,115 g (0.1%) and 0,23g (0.2%) so 1 /10th or 2/10th of one gram, so very tiny amounts!
misspatiss says
Sorry, I confused yeast and sourdough!
Thanks for your answer
Stevyn McDonald says
Your recipes are brilliant and give such consistent results. This is our ‘go to’ sourdough recipe which we have made countless times. Unfortunately we threw out our proving basket a while ago (because it went mouldy). My question is to make one pain naturel loaf with the quantities given above, what diameter proving basket would you recommend? Many thanks, and keep up the good work!
Weekend Bakers says
Hello Stevyn,
Thank you for your very kind comment.
We can tell you that you can use any basket with a capacity for around 750 grams of dough. What this means for measurement and different shapes you can see by looking at the baskets in our WKB baking shop: www.weekendbakery.com/websh…neton-cane
For the diameter of a round basket it would be around 20 cm or 7.8 inches.
And hope to have some new recipes for this season for you soon!
Happy baking from Holland,
Marieke & Ed
Weekend Bakers
Cynthia says
Try keeping your wooden brotforms in a bag in the freezer (after drying them near the hot oven completely after baking). Prevents mine from hosting moths and so far, no mold.
Weekend Bakers says
Thank you Cynthia for your helpful suggestion. We had not heard of this one before!
Idar Alfred Johannessen says
A succesful morning variation: I sometimes make this great bread in the afternoon and evening and bake it in the early morning. I put it in the fridge for final proofing in bread baskets. In the morning, I turn it over on a baking tray with holes in it and put it straight into the cold steam oven, turn on the steam baking program and bake it for 50 minutes.
Weekend Bakers says
Hello Idar,
Thank you for sharing your method with us. We love this variation and the fact you can have your fresh loaf in the morning. we can do this only on a small scale ourselves because of lack of fridge space.
Happy retarding and sourdough baking!
T O Guy says
I now make my bread using the “no-knead” method, with commercial yeast, but have not tried using a wild yeast culture. I am going to take a stab at it when my sourdough poolish–using your rye method–is ready to use. Just out of curiosity, have you tried the no-knead method using a wild yeast culture?
Weekend Bakers says
Hi T O Guy,
Yes, we have and with good result. Hope you can give it a try soon.
One example is this recipe: www.weekendbakery.com/posts…ugh-rolls/
You could also make 2 bigger loaves with this recipe for instance.
This Tartine style loaf is one of our favorites, no kneading involved, only stretching and folding the dough.
Happy sourdough baking!
lydia says
hello firs i show polish sourdough i have been try more recipe from post of people on net but now I copy this recipe
something i wont know mean translate for English
because always when you buy good flour sometime in U.A.E is French on the recipe very difficult to translate sometime the cover all the following on recipe
what is on Carrefour mix flour writing on package. preparation pour pain bereiding voor brood
Weekend Bakers says
Hi Lydia,
We do not exactly understand your question but ‘preparation pour pain’ means preparation for bread which means this flour can be used to make bread.
Karen says
Brilliant recipe! After a few months of somewhat erratic results in my venture into sourdough, I came across the rye starter recipe here – and this recipe for pain naturel.
I have used a poolish before – but never for a sourdough.
I have made it a few times – great consistency, great taste – and the instructions are so easy to follow. The only downside is that my husband can eat a loaf in a day because it tastes so good!
Weekend Bakers says
Thank you so much for your enthusiastic feedback Karen. Hope you can keep up with the baking!
Greetings from Holland,
Marieke & Ed
Steve Twigg says
That is a great recipe! I hadn’t used the poolish method before, even though I have been baking since 1978 but I will be using it most of the time in future and adapting my recipes to suit. I have been creating my own website (for interest) for several months now and I will gradually be adding my poolish method recipes. Many thanks for the inspiration!
Weekend Bakers says
Hi Steve,
So great to add something new to your baking that can also make a big difference in the end result.
Happy baking!
Juan Alejandro says
Hello WB team,
I’ve got a question, If I feed my sourdough culture with all-purpose flour daily early in the morning (7am) at what time should I make the poolish?
Weekend Bakers says
Hello again Juan,
We would suggest, (depending on the recipe of course) that it would be perfect to make your poolish with your active sourdough in the evening and use it in your recipe the following day. Alternatively you can use the culture to make the poolish in the morning and feed the culture only after you made the poolish.
Happy sourdough baking!
Louisa Evans says
Hi there,
I would love to try this with some whole meal or granary flour. Should I use the same amounts of ingredients?
Many thanks and good wishes,
Louisa
Weekend Bakers says
Hi Louisa,
We would suggest taking this recipe as a base for that:
www.weekendbakery.com/posts…vain-loaf/
The main thing for this recipe to adjust would be the water quantity, whole meal absorbs more water (how much also depends on the amount of whole meal you want to use, so starting with this other recipe would be a good idea we think).
Good luck with it!
Matt says
Hey,
Thanks for this recipe. This is my 3rd attempt at a sourdough, having tried another recipe, from another site with very dense results.
I’m currently waiting for my shaped dough to prove and it’s not really rising. It’s risen a bit, but not much and when I poke it it springs straight back. I’m now up to 3 And a half hours thinking I’ll pop it in the oven if it gets to four hours of proving. What’s going on?
The poolish looked pretty active. I monitored the temperature and it stayed at circa 23 degrees C all the way through proving. I followed all the instructions to the letter, as I don’t feel confident enough in the bread making process to make a judgement call.
My starter is very active generally and doubled in size today after being fed
Any advice? Am getting desperate.
Weekend Bakers says
Hi Mat,
So sorry to read it is not exactly going according to plan. From what we can judge from a distance you are pretty much doing everything right. We would suggest the following: Take, if possible, the proofing temp to 26 to 27 C and see if this makes a difference (in theory it should almost double the speed). Another suggestion, if this does not help (enough) is to start another culture next to this one with other flour, although from what you tell us it should not be necessary.
Hope you will give it another try and get your excellent loaf soon!
Joy Roxborough says
Hello weekend bakers,
Does the 25g of starter that you to make the poolish have to be fresh and active, or do you use if straight the fridge.
Thanks
Joy
Weekend Bakers says
Hi Joy,
Yes it is best to use it fresh and active, but it is possible to use it straight from the fridge too (we do this often) provided it has been in there no longer than a week.
Hope you like the recipe!
Greetings,
Ed & Marieke
Louisa Evans says
Hi there
I am writing to say a massive thank you for providing all this wonderful advice! I have had many failures with sourdough over the past couple of years but a complete success with this recipe. Thank you for the hints (so many!) the lowering of the quantity water was a revelation – I always thought I was just doing it wrong – and for creating realistic amounts that are managable for the home baker. Thanks also for putting so much time into this and the patience with which you answer all our questions. I’m really looking forward to trying out some of your other recipes, including the tartine style bread, the panettone and the San Fran sourdough, amongst others.
A million thanks!
Weekend Bakers says
Hi Louisa,
Thank you so much for your very kind words. So glad your enthusiasm for baking has been helped by our recipe and tips. Hope you will have great success with the other recipes too. Let us know how it goes!
Greetings from Holland,
Ed & Marieke
Joshua says
Hey guys
I just made this recipe today as my first sourdough, sad to say it didn’t go well.
Things went well all the way up to the second stretch and fold however the proofing completely failed. I’m not sure if it’s due to the poolish being over ripe or the proofing temperature but sadly the loaf came out extremely dense inside. Any thoughts?
Cheers
Weekend Bakers says
Hi Joshua,
You say you do not know if the poolish was over ripe or what the proofing temperature was. This can easily be the cause of your not so good result. So you need to make sure your poolish is OK and also measure the temperature of your dough and keep an eye on it.
For the poolish you need to check it is nice and active and there is not yet a receding line in your bowl. If it goes too fast you need to adjust the amount of culture added and / or the temperature (find a cool place or also use the fridge). Baking is very much about adjusting the process to your ingredients, surroundings, equipment, until you get it right.
Read our tips on dough temperature to help you further: www.weekendbakery.com/posts…mperature/
Also make sure you use the right type of bread flour with enough protein content (use at least 12%).
Good luck with it and happy baking!
Magda says
Oh just a few more questions if I may. They just came to mind (while I was just feeding my starter). I have been keeping my starter at room temp, haven’t put it in the fridge at all even though I have only baked twice in the last 10 days. Do you think I should keep it in the fridge and not feed it every day? If yes, when I need to use it, when should I remove it from the fridge and/or feed it in order to be ready? And again, the same questions arises of when exactly is my starter ready to be used as asked before. Gosh I’m sure this is so simple for anyone who is familiar with starter and sourdough baking, but I’m so confused as a beginner with everything I’ve been reading. Would be grateful for your help. Oh and something else (I’m so sorry for all these questions), my starter is at 89% hydration. The recipe I followed which included rhubarb to start the fermentation and which is great if I may add, instructs to keep it at 89%, do you think I should change it to 100% hydration for simplicity’s sake? I see that most starters are at 100%, but I’m not sure why that is. Sorry again for my multiple questions. 🙂
Weekend Bakers says
Hello Magda,
Yes many questions and we can understand the confusion when reading lots of different ways and methods. They may all be valid of course and can all work. The thing is to find out what works for you. We want to simplify things for you, because at the moment you are making a day job out of it and that is really not necessary.
First of all we recommend keeping your culture in the fridge.
Take it out of the fridge and refresh it the day before you want to use it. You can aim for your 17 hours but you do not have to be so precise, it can be less and it will be no problem.
After you used it you add water and flour to restore what you took, wait 12 hours (or a bit more) till it comes up again and then store it in the fridge.
If you feel a bit more relaxed and you gained some experience we would suggest that if you use your culture from the fridge and it has been in there less than a week, you do not even have to refresh it before using. Use it direct from the fridge! This is what we do and it works perfectly.
Keeping it at 100% is indeed the way to go to keep it simple. Again you do not have to be this precise. Especially with our method and baking only one or two loaves at a time you use such a small amount of culture that it does not make a big difference in hydration. People keep a culture at higher or lower hydration rates also for reasons of ‘sourness’ which you can read about in our posting under ‘more sour please’: www.weekendbakery.com/posts…ough-tips/
Good luck with it and enjoy the sourdough baking!
Magda says
Thank you very much for your reply and your helpful comments. I will store it in the fridge then 🙂
Yesterday I made your sourdough bread but unfortunately not all went as planned. Everything went swimmingly until the final proofing of the dough. It was a hot day so I expected it to rise after your indicated 2,5 hours, but 4 hours passed and the finger poke test came back negative, meaning that the dough was springing back quickly after poking without even leaving a hint of a dent. It was plump and nice-looking though, but not quite as risen as it could have been. I’m sure it needed more proofing but didn’t have time, it was late in the evening, and went ahead and baked it anyway (perhaps I could have put it in the fridge for the next day?). The result was not bad (not that I can quite recognize good from bad sourdough at this early stage of my baking adventure), but could have been better I guess. The thing is, I took the temp of the dough during bulk fermentation and it was around 24C but during proofing, can you poke the dough with the thermometer probe? Won’t it deflate? So how can I know the temp?
Also, during the mixing phase in the stand mixer, at what speed do you mix the dough (at both the start and after the autolyse)? Many questions again, I hope I’m not being a nuisance to you.
Oh and something else. I know that the size of the proofing bowl make a difference but does the shape matter in the final bread rising? I don’t have a banneton so I prove my loaves on regular bowls that are rather tall and not too wide. Could this be a problem? Especially when I turn out the dough and it spreads? Because my loaves tend to spread quite a bit when turned out. Thank you once again for sharing you knowledge. I appreciate you very much.
Weekend Bakers says
Hi Magda,
When reading your account we tentatively draw the conclusion that perhaps your culture is still maturing for instance and it may be you need to use some more for a good result. All cultures are different and some are slower by nature also. After you have measured the temp of the dough and it is in a room with a constant temperature there really is no reason to measure it again. If you want to you can do so carefully on the side of the loaf.
Mixing / kneading depends on the machine you use. The speed we use could be described as slow for both processes.
The shape of the proofing bowl should not be an issue. The spreading of the dough can indicate not enough gluten strength so you need to look at the flour you use and the protein content (at least 12%) and also make sure the kneading and stretching of the dough is done correctly so the dough is developing properly.
Good luck with everything and also take a look at our tips on mixing: www.weekendbakery.com/posts…gh-mixing/
and Gluten:
www.weekendbakery.com/posts…ut-gluten/
Magda says
Dear Marieke, I plan to make this recipe and I’m very excited about it! After about 4 years, I gave sourdough baking another go and started my new sourdough starter about 2 weeks ago. I have already baked a couple of loaves with it with nice results but I’m hoping that your recipe will be more successful. My starter is doing very well, bubbling away predictably when I feed it and it seems to be on a 17-hour cycle, meaning that I feed it and after 17 hours it reaches its peak and starts to deflate slowly. My issue with recipes for sourdough is the time at which I need to start preparing the poolish etc. In your recipe, you say that I should start in the evening to make the poolish and your whole schedule makes so much sense. But, my starter is at its peak around 12:00 in the afternoon. I would appreciate it if you could help me with this. At which stage is a starter ready to be used? Is it once it’s reached its peak? Is it right when it starts to deflate slowly? Or much earlier than that when it has just doubled in volume? (because mine goes over double in volume before it starts deflating). Also, in your recipe, at which stage of my starter’s daily development can I use it?
Thank you very much and I look forward impatiently for your reply 🙂
Ryan says
Hello Ed & Marieke
I have made about 10 or 12 loaves using this recipe and playing around with different variables to see how the results change. I havent had too much trouble and every loaf i made got eaten very quickly so i am having some success. so first of all thank you for a great website and great recipes.
I have recently tried backing a couple of loaves using a marble stone but i find the base of the bread is not so crusty as compared to the top of the loaf. The base feels slightly undercooked. (I had been previously using a stainless steel pot inside the oven. This seems to get a more even result). Is this normal when using a stone?
Also. I was making fresh cheese from whole milk and a number of websites suggested that the whey that comes from the milk is good for making bread. Do you have any ideas, experience, or recipies for using whey in baking?
Thanks again for your efforts.
Ryan in South Korea
Weekend Bakers says
Hello Ryan,
Thank you for your excellent comment and the sharing your baking experience. You mention you bake on marble, but this is not the best stone to use. It does not ‘hold on to and give back’ heat as well as some other stones. We use chamotte stone which is excellent for bread baking. So if possible you need to find a type of stone (‘pizza stone’) which is good in heat retention and transfer.
We have never used whey in bread baking but this link might have the info you are looking for: www.thefreshloaf.com/node/…it-and-why
Let us know how it turns out. Cheese making is also on our list of things to explore.
Greetings from Holland to SK!
Ed & Marieke
James says
Excellent recipe! Did a slightly shorter final rise (I was tired and it was late!) and it still worked a treat. Also used 100% wholewheat flour although the sour I’m using is from unbleached white and added a bit of rye to the poolish. Most delicious sourdough bread I’ve ever made.
Weekend Bakers says
Thank you James. Great to read it all worked out perfectly.
Many more excellent loaves and happy baking moments!
Tammy says
Hello Ed & Marieke,
Good day! I am going to attempt in baking this fave bread of mine. Silly question from a newbie in bread-making world: what was the size of the banneton that you used for the above recipe?
Today is Day 2 of my sourdough starter – pray that it bubbles away!
Cheers,
Tammy
Weekend Bakers says
Hi Tammy,
If you open the dough calculator under the ingredients list, you will see that the total amount of ingredients for this recipe is 773 grams (so all the ingredients added up). For this recipe we use a banneton with a dough capacity of 750 grams (this comes closest to the total amount of ingredients) and this works perfect for us.
Good luck with the starter and the baking!
Marieke
Tammy says
Many thanks Marieke for your prompt reply – appreciate it.
I am on my Day 4 of the sourdough starter – **touchwood** so far so good. My question would be :- On Day 5 i.e. tomorrow, do I need to continue to feed it until Day 7 or let it rest at room temperature until Day 7 and put it in the fridge?
Can I make poolish on Day 7 itself?
Cheers,
Tammy
Weekend Bakers says
Hi Tammy,
Our advice would be to for day 5 to check if your starter has developed (doubled) on this day and has a good smell. Store it in the fridge let it rest until day 7. Take it out on day 7 and check if it still has a pleasant smell (and no funny fluffy stuff or strange colors) and then you can indeed use it for your poolish. As you keep using and maintaining it it will mature further. Under ‘how we maintain our starter’ you can read how to take it from this stage: www.weekendbakery.com/posts…asy-steps/
Other tips we can recommend if you have not seen them yet: www.weekendbakery.com/posts…ough-tips/
Good luck with it and happy baking!
Tammy says
Hello Ed & Marieke,
Today is Day 5 and when i checked, it sort of double in size. I did some simple calculation (weight as of today vs. empty jar) and realized that its only 94g – and not as 120g as yours. Is it right?
I realized that since Day 3, taking out two third of it and adding back 30ml H20 and 30g flour will not yield the amount as much as Day 2. Is this common? Two third of the starter seems quite a lot.
As I am not sure whether 94g is right or not, I have taken out half of the amount this time and added 30ml H20 and 30g flour to wait for Day 6 tomorrow.
Any feedback on the above? Hope that I am doing the right thing.
Thanks and cheers,
Tammy
Weekend Bakers says
Hi Tammy,
We know bread baking is close to an exact science, but in this case you do not have to be this precise and be a bit more relaxed about it. When we say 1/3 and 1/2 you can do it more ‘off the cuff’ and it will be alright. So if you have 94 g and want a bit more just add a bit more so it is closer to the 120 again. Smell, look and activity (bubbles and growth) are the things to keep an eye on.
And just make sure with your baking regime in mind you what will be the right amount for you to maintain.
Again good luck and happy baking!
Tammy says
Hello Ed & Marieke,
I made the wrong move. Today (day 6), the starter didn’t double much at all but I could see bubbles fortunately – I think that I might have “killed” my starter :(. Without giving up on it, I threw away half of it and added 30 ml H2O and 30g flour. Hope it bubbles away tomorrow!
Cheers,
Tammy
Weekend Bakers says
You are doing well not to give up!
Douglas W Entwistle says
My loaf ended up quite chewy. I’m thinking this is a combination of over kneading, bread flour and using an unbleached flour starter.
My plan is to calculate in 7.5g rye to get the rye-wheat ratio correct and machine knead 30 seconds to one minute less.
Is this appropriate?
Weekend Bakers says
Hi Douglas,
This sounds like a good assessment, although the nature of the crumb of this loaf could be described as slightly chewy (do not know if your crust was chewy too, because then we would look at baking times and temperatures and making sure your bread is cooked). The rye is not so important for the end result, it does not have to be this exact. Trying a different (brand of) flour could also very well give a different result.
Good luck with it end enjoy the baking!
Hanna says
Hi, I am happy to have a weekendbakery as my favourite guide for baking. I started form classic French croissant receips and now I am fun of sourdough bread. I got poolish from my frieds and now I am taking care 🙂 and feeding it at home:) My receip is very simple but gives fantastic results. Now I am looking for inspiration and that is why I am here:). I have read all informations, tips, receips and watched videos. Time for pain naturel, soon. Take care!! Hanna
Weekend Bakers says
Hi Hanna,
So great to read your enthusiastic comment. Let us know about your results with the pain naturel. Happy sourdough baking!
Ed & Marieke