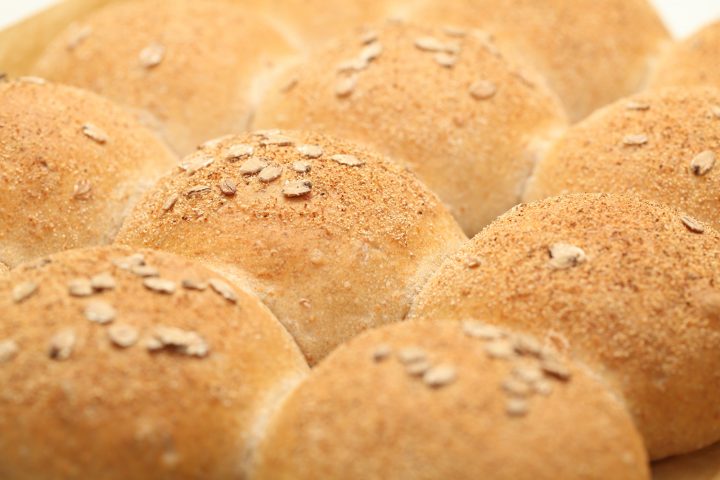
My dad said he liked these better than a piece of pie!
Klik hier voor de Nederlandse versie
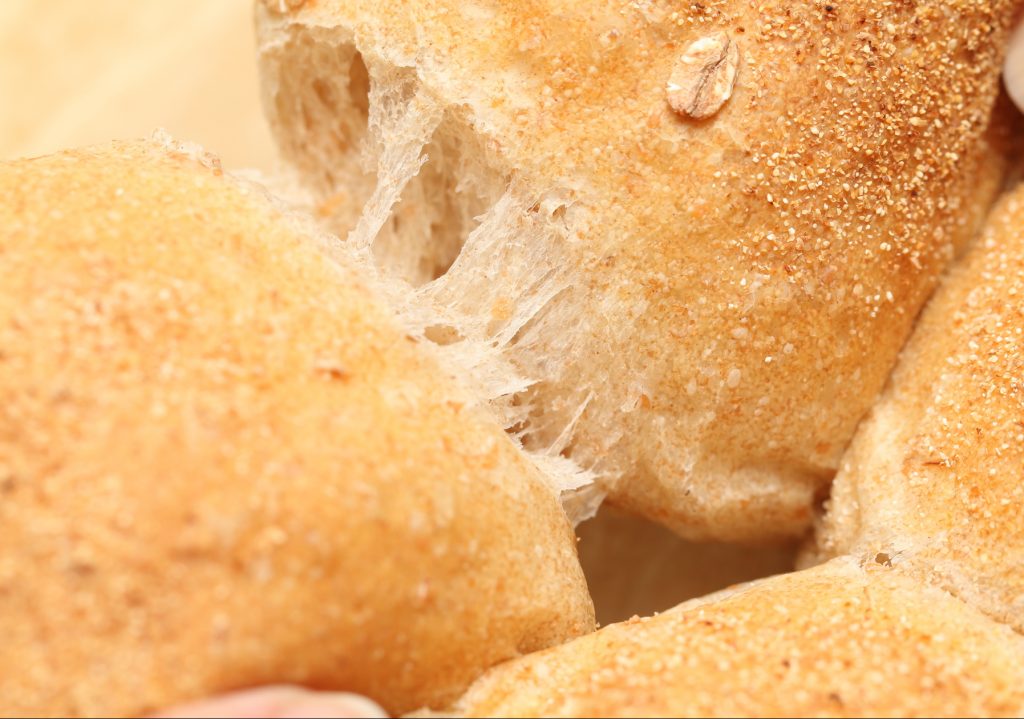
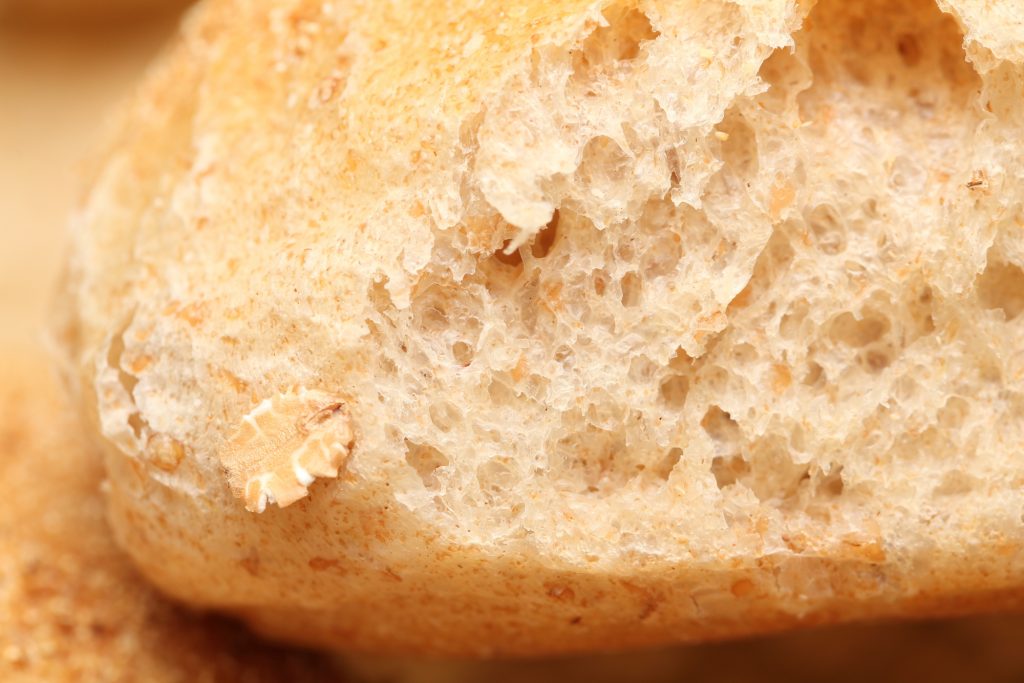
These buns are the perfect balance between light and airy and full of fiber. The crumb has such a nice bite and the taste is interesting on its own, slightly nutty with a hint of natural sweetness. The recipe is straightforward and can be made in one day or with an overnight poolish. All the spelt and oats go into the poolish / preferment and it makes this wonderful thick porridge like batter, partly caused by the soaking of the oats. The strong bread flour in the final dough is responsible for the lighter texture and a good rise.
This recipe is a great variation on the bun theme, showing you again a slightly different method, yielding a satisfying result. The shorter one day preferment method is great if you want to fit in some afternoon or evening baking with other activities, or you forgot to make a poolish the day before.
Hope you like them too. Stay happy and healthy and enjoy your baking!
Ed & Marieke
WKB
Carefully weigh all ingredients for the best baking result!
Step 1: Making the poolish
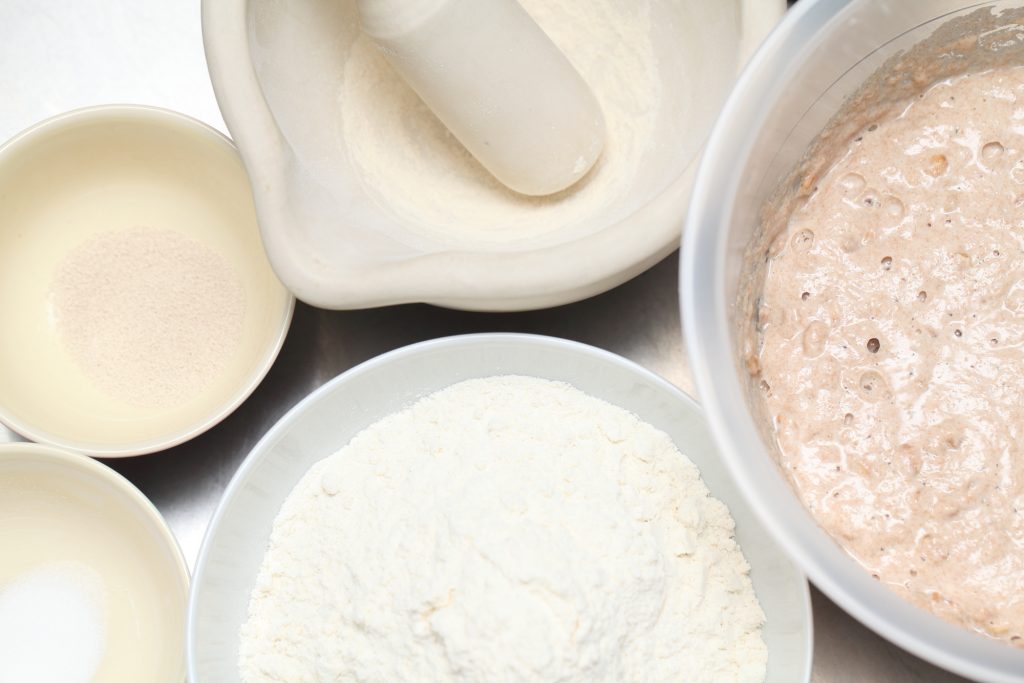
For this recipe we are going to make a preferment named a poolish. A poolish is a type of wet sponge usually made with an equal weight of water and flour and an extremely small amount of yeast and NO salt. Making a poolish helps bring more taste and strength to your bread while using less yeast. You can do the suggested shorter version with a 4-6 hour poolish or do an overnight preferment of 12 hours in the fridge. Just see what fits your schedule best. Read instructions below.
| Ingredients for the poolish | ||||
|---|---|---|---|---|
| 200 | g | whole spelt flour | ||
| 50 | g | oats (or oatmeal) | ||
| 250 | g | water (room temperature) | ||
| 1 | g | instant yeast | ||
In a bowl bring together all ingredients for the poolish and stir with a spoon or dough kneader for about 30 seconds until you have a homogeneous thick batter consistency.
Cover the bowl and let the prefermenting begin. After 4 to 6 hours* it is ready for use. Look for activity / bubbles but make sure the poolish is not over-ripe and even collapsed / retreated in the bowl, because the gluten will be damaged and the buns will not rise well. It is always better to use an under-ripe poolish in your final dough, so check the progress.
*Alternatively, you can use an overnight poolish with a 12 hour preferment in the fridge. The amount of instant yeast for this period is 1.5 grams, provided you put the poolish in the fridge for the 12 hour period.
Vitamin C in bread baking*
Next to being a well know food supplement, vitamin C, also known as ‘ascorbic acid’ can also used in baking as a bread enhancer. So, What does it do?
Due to the properties of vitamin C, it can be used as a dough (gluten) strengthener during fermentation, helping to improve the structure of the dough.Some flour types are sold with added vitamin C. The regular wheat and bread flour we use does not contain any vitamin C. So adding a tiny pinch to your dough can help improve your baking result. Professional bakers can buy ‘commercial grade’ ascorbic acid, but home bakers can also use crushed vitamin C tablets (it’s effectively the same stuff). The recommended amount is 0.07%. So this means that for this recipe, with 500 g of flour, you can use a vitamin C tablet and grind it to a powder. Take a pinch of the powder and it will probably be close to the amount of 30 to 40 mg needed. Weighing will not be an option for most home bakers, with these small amounts.
Step 2: Making the dough for the buns
| Ingredients for the bun dough | ||||
|---|---|---|---|---|
| makes 12 buns | ||||
| the poolish from step 1 | ||||
| 300 | g | strong bread (wheat) flour | ||
| 120 | g | water | ||
| 8 | g | (sea) salt | ||
| 5 | g | instant yeast | ||
| 20 | g | olive oil | ||
| 0.03 | g | ground vitamine C* (optional) | ||
In the bowl of your standing mixer, combine the poolish from step 1 with the bread flour, instant yeast, olive oil and salt (and optional vitamin C). Now add most of the water (slightly warm around 30ºC, also depending on the temperature of your poolish), but hold back around 30 grams. Start mixing at low speed and when the dough comes together, slowly add the rest of the water. This way the flour at the bottom will be picked up. Knead for 8 to 10 minutes on a low speed. If you knead by hand it takes about 15 to 20 minutes, depending on your technique. It should be silky and smooth and still stick to your fingers, where you can stretch the dough almost to a window pane stage before it tears a bit. Cover and leave to rest for 15 minutes.
Further developing the dough
Now turn out the dough onto your work surface and give it a stretch and fold. Do one full letter fold set (one set = right over left, left over right, bottom over top, top over bottom). If you are not familiar with it, check out how this technique works in this video first.
Stretching and folding helps you get a feel for the dough and it is great for its development. If your dough is still very cooperative, give it a few more stretches until it truly starts to resist. After the stretching and folding shape the dough into a ball, cover and leave to rest for another 15 minutes.
Shaping
Divide the dough into 12 equal parts and preshape into balls. Leave to rest for 10 minutes. Gently press the balls with your hand until slightly flat and round again into smooth balls. You can lightly dust your work surface with flour if needed but do not use too much or it will be very hard to shape them well. We do not use any flour when shaping these buns.
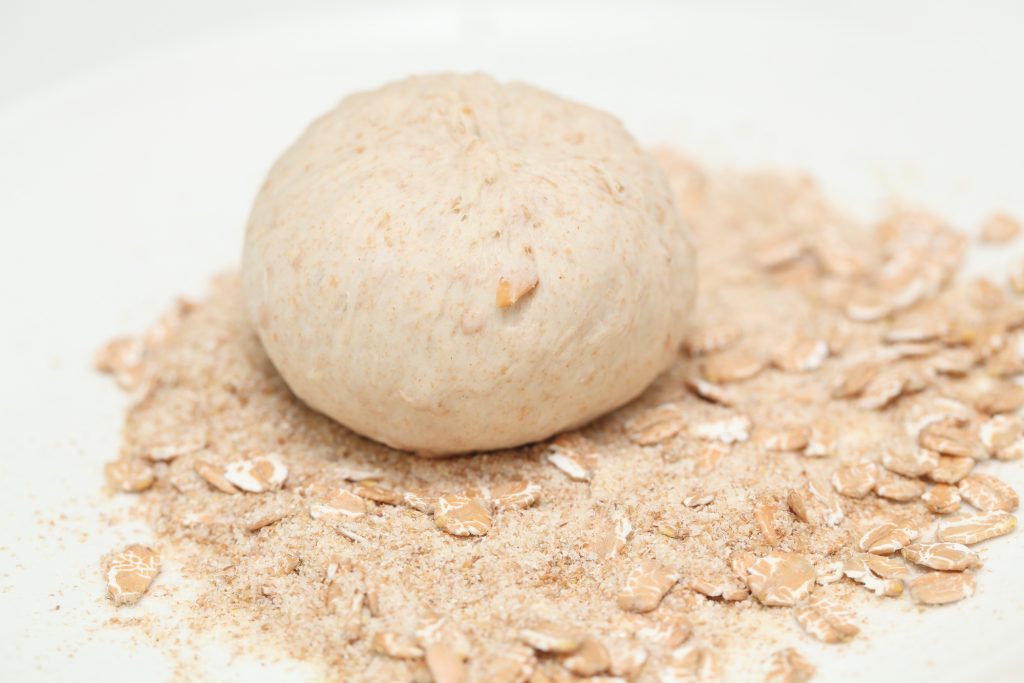
After shaping you can press the buns in some semolina or rice flour and oat flakes to give the crust a nice look and texture.
Place the buns on a baking tray lined with a baking mat or baking paper and make sure to leave some space (3-5 cm / 1-2 inches) between the buns so they can expand freely. It is no problem if they touch each other after proofing.
Proofing
Loosely cover them with floured clingfilm or a proofing cloth. To proof the buns to perfection they need quite some time, depending on the temperature of the dough. It will be between 2.5 and 3 hours. Just be patient and check regularly. When you think the dough has risen enough, use your finger to carefully make a small dent in the bun. If the dent partly remains (pops sort of half way back out) proofing is just right, the buns are ready to bake, if the indentation disappears, the dough needs more time. Give it another 15 minutes, then check again.
Baking
Somewhere during the final proof, preheat your oven to 210º C /410º F conventional setting. At what stage you preheat your oven depends on how long it takes for your oven to heat through, some take 30 minutes, some, like ours, with stone floors take a lot longer, up to two hours.
Take the buns to the oven. The total baking time will be around 16 to 18 minutes depending on your oven. Check regularly to see how fast the buns are browning. If you think the the buns have the desired color, you can temper your oven to 160ºC / 320ºF for the remainder of the baking time.
You can put the buns in a bag while slightly warm, this way they will keep soft. They also keep very well in your freezer for up to one month.
Bun time table
This table gives you an indication of the total duration for this recipe.
The poolish will take 4 to 6 hours at room temperature or 12 hours overnight in the fridge
00:00 Make the bun dough with the prepared poolish
+ 10 minutes kneading
00:10 – Initial bun dough ready
+ 15 minutes rest
00:25 – Stretch & fold
+ 15 minutes rest
00:40 – Preshape the buns
+ 10 minutes rest
00:50 – Shape the buns
+ 2 hours final proof (minimal)
02:50 – into the oven
Baking time 16 -18 minutes
03:06 – take out and leave to cool



Rosina says
Hey there your buns with poolih sound really great but I need to say that because i’am g/f person I can only use bob’s red mill 1to1 flour for second mix( the dough) I can tolerate the poolish made wth spelt flour though! I hope I won’t be disappointed wth your answer because I like to make your bun recipe?
Weekend Bakers says
Hello Rosina,
We are absolutely no experts on GF and do not know about the flour you mention, but since you also want to use the poolish, we would guess it is worth giving it a try.
Hope it works out well!
Chris says
This looks so good! Would it work as a loaf of bread, either in a bread pan or as a baguette or bâtard? What changes would I need to make? Thank you.
Liesbeth says
Wat een heerlijke broodjes zijn het geworden. Ik bak al jaren met jullie recepten en ik wil jullie dan ook hartelijk bedanken.
Liesbeth
Weekend Bakers says
Dankjewel Liesbeth, dat waarderen we zeer. We hopen de komende maanden nog meer van onze nieuwe recepten te delen.
Recent hebben we de Griekse yoghurt bollen al gedeeld. Deze zijn erg leuk om te maken en ook echt heerlijk van smaak.
www.weekendbakery.com/posts…olijfolie/
Heel veel plezier met het bakken,
Ed & Marieke
Bob says
This is the best bun recipe ever! My third time baking them, this time a double batch. The as-is recipe is perfect but for fun I added raisins and walnuts to half.
I always use commercial yeast for the poolish, but 30g of 1:1 sourdough starter for the base. They’re so soft, with a delicate texture and great complex taste.
Thanks for sharing this recipe!
Cheers from Northern California.
Weekend Bakers says
Thank you so Much Bob, excellent the buns are appreciated all the way across the world. And thank you for sharing your method and version.
Greetings from the low countries and enjoy your bun baking!
Marieke & Ed
WKB
Jeanette T says
Good Day Bob
I’m in AL and I concur. I made these before Thanksgiving and they were Outstanding. I used some spelt flakes because I had them. These are on my favorites list as many of Marieke & Ed’s recipes. If you haven’t tried the Old Friends Raisin bread, you gotta. Stay safe and Happy Baking!! Jeanette T
Ck says
Not sure where it went wrong..but the buns came out flat…to start with my dough was very wet and even after 4 stretch and folds it was not easy to create the dough balls. When I left them for proofing they pretty much turned flat. Very little rise in the oven as well. They were light with crumbs but flat. I made french toast out of them and they tasted quite good 🙂
Thanks
Weekend Bakers says
Hello CK,
Sorry for the late reply, but it could be that your flour could benefit from a little less water. Make sure the bread flour for the final dough is strong enough too, so at least 12 to 13% protein. If you did not use the Vit C this might make a difference too.
So, maybe try a few % less water and /or change the flour and see how that goes.
Enjoy the baking!
Beth says
Brilliant recipe
Slight crust on the outside and soft and airy inside.
Will be a trusted family favourite
Weekend Bakers says
Thank you Beth, for this positive feedback on the recipe.
Enjoy the baking and sharing!
Greetings from Holland,
Ed & Marieke
WKB
USMAN says
How it can modify for commercial use?
Weekend Bakers says
Are you a commercial baker and what is your experience and capacity? What quantities would you like to bake?
kavita nagpal says
What can i substitute for spelt. Dont get it in India.
Weekend Bakers says
Hello Kavita,
We understand. You can if possible use whole wheat flour or atta flour.
We hope it will be good!
Mariana says
Nice recipe. Thanks for sharing. It is a wonderful first bake. From Singapore.
Weekend Bakers says
Thank you for trying and linking the recipe Mariana.
Greetings from tiny Holland to lovely Singapore!
Anna says
Hello,
I am really pleased with this recipe, it worked really well and the rolls are delicious. Thank you for the detailed, easy to follow instructions.
Just one change I would make, the rolls were a little bit flat, it doesn’t affect the taste but I think its because the flour I used was 4% protein for wholemeal spelt and 10.1% protein for organic unbleached bread flour. I think the bread flour protein level was a bit low so next time I will try a stronger flour. I live in the UK, where 10.1% seems to be classified as bread flour?
Weekend Bakers says
Thank you so much Anna, for trying and liking the recipe. You are right about the protein levels, that is indeed low. When we talk about strong bread flour it is closer to 12 or 13% if possible. You will see (together with the Vitamin C if possible) it will definitely give a less flat result.
Enjoy your bun baking,
Marieke
WKB
Nigel Bamford says
Hi Ed and Marieke,
These look lovely. I will be making them this week, that’s for sure. Since I first saw your use of Vitamin C, I now regularly use it but I’d be interested to know whether I could use Diastatic Malt alongside it? Would that be too much in the way of additives? You have a whole section about your home-made diastatic malt (mine, I confess, is bought) and its benefits yet I’m surprised how infrequently you include it in your recipes.
Weekend Bakers says
Hello Nigel,
Vitamin C and diastatic malt both have different functions so you could use both, but we must confess we never do. Because of our rye starter in many bread recipes you already get an enzymatic working (amylase content in the rye flour) in the dough. If you use diastatic malt with that it can get too much and you can get a reddish crust with a gummy crumb. So we try to show different ways and methods but also not want to show people they would need an ingredient that is harder to obtain /buy or make. So you do not need these additives to get a good loaf but it is fun to see the difference in result and experiment with it. Vitamin C is a bit easier to apply, so we suggest it especially with white bread and buns because you do get that bit more fluffiness. These are our considerations if that makes sense.
Hope very much this recipe will be work for you too. Let us know how it goes!
Catherine says
Hello Ed & Marieke, Thanks for posting and inspiring us! Just tried this today. Everything looked great until mid-way through the final proof when the dough flattened. Then ended up a bit like English Muffins – airy but flat. Any suggestions or thoughts? (We used Bob’s Red Mill Artisan Bread Flour…we are limited to what we can get at the moment).
Weekend Bakers says
Hello Catherine,
Thank you for your feedback. We are not exactly sure, the bread flour sounds good to use, we assume it has a good enough protein content to hold the shape (12% or more). Did you maybe over-proof them or did you change anything else? If you did not add the Vitamin C, maybe you could try using this and see if it makes a difference.
Hope you will give it another try.
Natalie says
Can you use sourdough starter instead of yeast?
Weekend Bakers says
Hi Natalie,
Yes you can, but if you want to make soft sourdough buns it is best to follow the poolish procedure and proofing times of this recipe:
www.weekendbakery.com/posts…ugh-rolls/
Natalie says
How much rye sourdough starter would you use to replace the yeast?
Weekend Bakers says
Hi Natalie,
It is in the procedure of the other recipe. We would start with about 30 grams of your sourdough culture, add to the poolish and let ferment at room temperature (20/21 C). Keep an eye on the development.
Natalie says
Thank you so much for your help. I usually guess how much starter should replace the yeast. I greatly appreciate your website and your help.
Weekend Bakers says
Happy to help
Chris says
This looks delicious, although I’ll have to make it with whole wheat instead of spelt. Can this work for a loaf of bread, either in a loaf pan or as a baguette/batard? What modifications would I need to make? Thank you!