Daring to keep it simple can also produce great results…
Klik hier voor de Nederlandse versie
We started this recipe as a one-off experiment, thinking the result would not be that interesting, compared to the other bread recipes we already know and love. But the end result really surprised us. As you might expect, knowing some of our other favorite recipes, the key factors for this one are the same: time, timing and really good flour!
This recipe is the first to have a ‘dough calculator’ (see ingredients list).
Although there does not seem to be strict definitions about French bread terminology, we simply call this bread ‘Pain Naturel’ or abbreviated PN. We chose this name because it stands for a basic yet full flavored sourdough bread, made just from ‘white’ bread flour. Using our own sourdough culture we found the bread gets a pleasant hint of sourness, which combines very well with the sweet flavor of the flour we use.
And especially because this bread is made with ‘white wheat flour’ only, it is important to get the best quality, organic, stone ground bread flour you can get your hands on. When you do, we truly believe you will be rewarded with amazing taste and depth of flavor, better crumb structure and the crustiest of crusts.
Enjoy the recipe and let us know what you think. Also check out our handy sourdough tips to get the most out of your sourdough baking!
Before you start

For this recipe we are going to make a starter named a poolish. A poolish is a type of wet sponge usually made with an equal weight of water and flour and a small amount of sourdough starter culture or yeast and NO salt. Making a poolish helps bring more taste and strength to your bread.
We use a sourdough culture which is made with 100% whole grain rye flour. A sourdough culture based on rye flour is easier to maintain, does not go into a slurry when you forget about it, is easier to stir because it has almost no gluten and smells very nice, a bit like fruit. It is also very forgiving in the amount you feed it. Normally we only feed it once a week, after our weekend baking we give it a few table spoons of water and rye flour, stir and ready!

| Ingredients for the Poolish | ||||
|---|---|---|---|---|
| 115 | g | wheat (bread) flour | ||
| 115 | g | water (room temperature) | ||
| 15 | g | sourdough culture | ||
| Ingredients for the Pain Naturel | ||||
|---|---|---|---|---|
| makes 1 loaf | ||||
| the poolish from step 1 | ||||
| 340 | g | wheat (bread) flour | ||
| 180 | g | water | ||
| 7.5 | g | (sea) salt | ||
Making the Poolish
In a bowl stir together the 115 g flour, 115 g water at room temperature with the 15 g sourdough culture. Mix it well until you have a homogeneous slurry that looks like very thick batter. Cover the bowl and let the prefermenting begin. After 12 hours at room temperature it should be bubbly, light and ready for use. So if you want to begin your bread making at 9 in the morning, you should make your poolish at 9 in the evening.

Note: We use European flour which absorbs a few % less water than American type flour. People using American type of flour should add 5-15 ml water to the final dough.
Making the Pain Naturel
Put the poolish starter and flour in the mixing bowl of your standing mixer and add 2/3 of the water (do NOT add the salt yet). Now start mixing and gradually add the rest of the water and let the dough come together. Knead for 1 minute, leave the dough in your mixing bowl, cover and let rest for 20 minutes (this technique is also referred to as autolyse).
Now add the salt and knead for another 4 minutes. Transfer the dough to a greased bowl, cover and leave to rest for 50 minutes.

Ideally the temperature of your dough after mixing should be around 24-25 ºC / 75 ºF. You should adjust the temperature of the water you add, so the total dough reaches this temperature. For us this means in summer adding cold water to this recipe and in winter (when our little bakery gets much colder then the rest of our house) adding water up to 50 ºC /122 ºF. You can measure the temperature of water and dough with a food thermometer. These measurements are important because they correspond with the proofing times in the recipe.
After the first 50 minutes rest take the dough out of the bowl and onto a floured work surface and do one stretch and fold (a full letter fold, left over right, right over left, bottom over top, top over bottom; watch our stretch and fold method video to observe this technique if you are not familiar with it). Transfer to the bowl, cover and again leave to rest for 50 minutes. Now repeat the stretch and fold (full letter fold) one more time (so 2 times in total) and leave to rest for 50 minutes (so this is the third and last of your three 50 minutes resting periods). During each stretch and fold the dough should feel firmer and less wet.
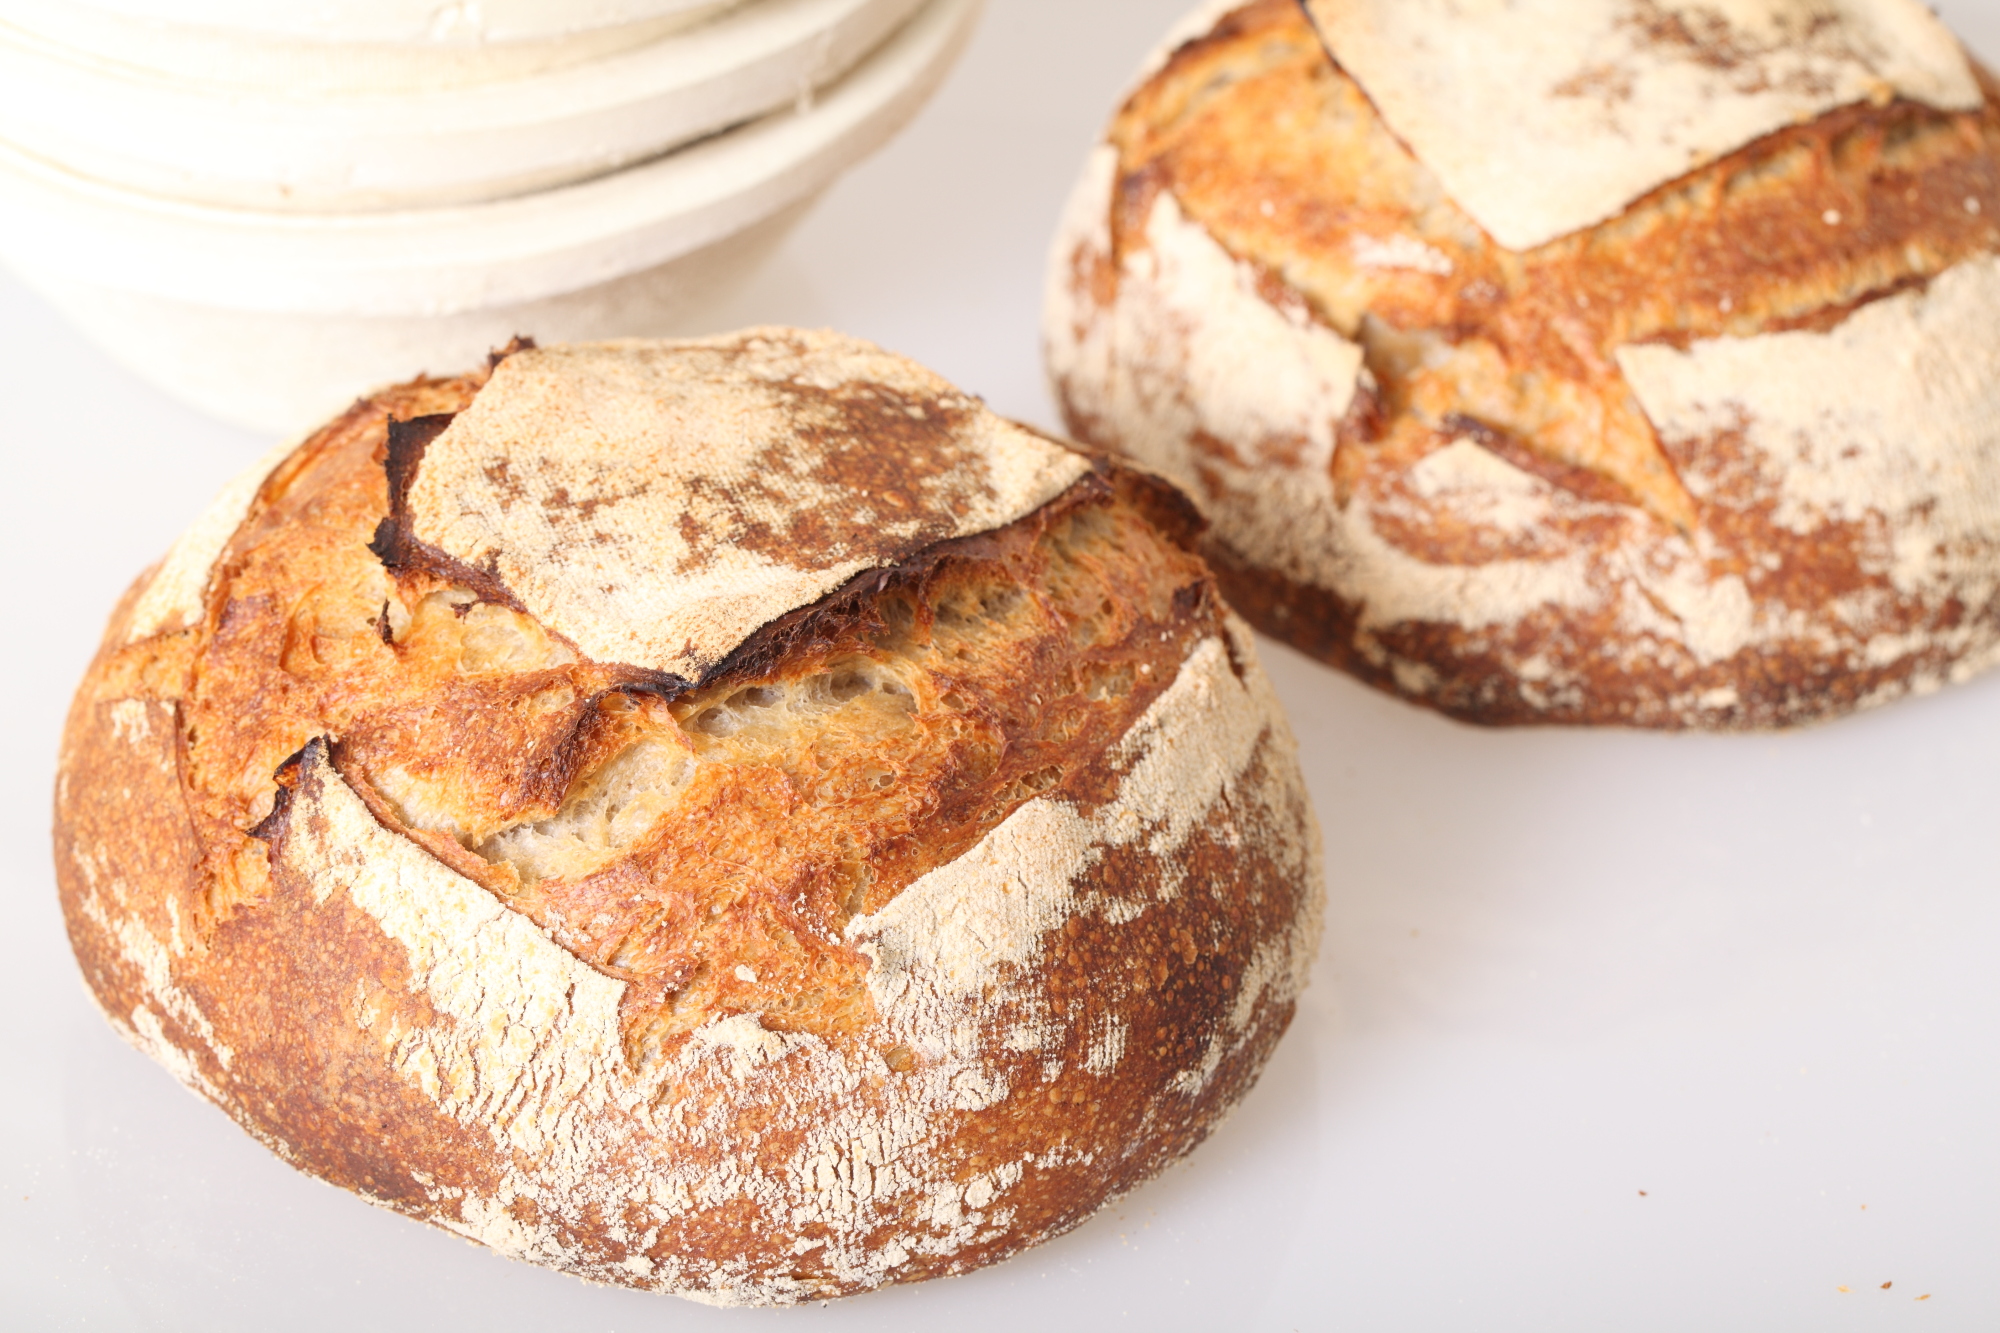
Now it’s time to shape. Shaping is a tricky subject. It’s something for which everybody develops his or her own favorite technique over time. You can make a batard or loaf shape or a boule (ball) shape like you see in the pictures. If necessary you can learn more on shaping from a good bread book, like the ones by Hamelman or Reinhart, or the Tartine Bread book. Or take a look at our boule shaping video.
Preheat your oven to 230 ºC / 445 ºF conventional setting (at what stage you preheat your oven depends on how long it takes for your oven to heat through, some take 30 minutes, some, like ours, with stone floors take a lot longer, up to two hours).


Transfer the shaped dough to a proofing basket / banneton, cover and leave to proof for about 2 hours and 30 minutes (provided your dough has a temperature of around 24-25 ºC / 75 ºF, also check our tips on dough temperature). When you think it has risen enough, use your finger to carefully make a very small dent in the dough. If the dent remains, the bread is ready to bake, if the indentation totally disappears, the dough needs a little bit more time.

Now your loaf is ready for the oven. Slash the top of the loaf with a lame or bread scoring tool. To get a nice crust, try to create some steam in your oven by putting a small metal baking tray on your oven floor when you preheat the oven, and pour in half a cup of hot water immediately after putting the bread in the oven. Release some steam by setting your oven door ajar (perhaps with the help of a wooden spoon or oven mitt) 5 minutes before the bread is ready. If you are going to create steam with a baking tray, you may also want to turn your oven temperature a bit higher, because you are going to lose some heat in the process.
After 45 minutes of baking your loaf should be ready. Transfer onto a rack and leave to cool. This loaf also keeps very well in the freezer. But please make sure to eat at least some of it while fresh. This bread is great with just about anything, but also very tasty on its own.

Pain Naturel Time Table
Day 1 21.00 Make poolish let ferment for 12 hours at room temperature
Day 2 0.900 Make final dough
- 09:00 – Add flour and water to starter, mix for 1 minute
- 20 minutes rest (autolyse)
- 09:20 – Add salt
- Knead for 4 minutes
- Rest for 50 minutes
- 10:14 – First stretch and fold
- Rest for 50 minutes
- 11:04 – Second stretch and fold
- Rest for 50 minutes
- 11:54 – Shape
- 12:00 Final proofing 150 minutes (2.5 hours)
- 14.30 – Bake for 45 minutes at 230ºC / 445ºF
- 15:15 – Your loaf is ready!
And if for any reason you are not able to get your own sourdough culture started, it is possible to ‘kickstart’ the process by buying a packet of sourdough starter. We know that Kensington Sourdough, based in Toronto Canada, are sending their dried San Fransisco Sourdough Starter all over the world since quite a few years now. Bakers are sending us positive feedback about their baking results with our recipe combined with the Kensington culture.
I tried to get some Kensington Sourdough but despite advertising a “Current Promotion: Free Shipping Worldwide!” they don’t ship to Australia.
Hello Denis,
That is disappointing. We were also under the impression that they ship all over the world.
Could we encourage you to make your own starter culture with our instructions?
www.weekendbakery.com/posts...asy-steps/
We have to say, when receiving the dried sourdough flakes from Kensington or somebody else, you basically are instructed to do most of these steps anyway, to get a ready and active starter, so why not give this a try maybe? We remember our first culture took 3 attempts to get it going, but after that it did the job for many years!
Best of luck with it
Greetings from Holland
Hi – This was the first loaf I tried a week ago, when my Kensington sourdough starter was ready and I have tried one other since – have to experiment in these early days! Your recipe worked out better, but the other had a bulk ferment and an overnight in the fridge, which seemed to build flavour. What do you think about adding the fridge overnighter? Thanks
Hello Brian,
Our advice would be to make the preferment in the early morning (if the period is a bit shorter than the 12 hours in the recipe, you can also put it in a slightly warmer place and take 8 to 10 hours to develop). Make the final dough in the evening (maybe adding one hour at room temp after shaping, depending on the development of the dough at this point) then putting it in the fridge overnight and bake it the next morning.
You can also find this process with our Weekend No Knead Sourdough where we give an option for a ‘day time build’ or an ‘evening build’ for the final dough, both using the fridge.
See: www.weekendbakery.com/posts...sourdough/
Give it a few tries to find your optimum process. Best of luck with it and enjoy your sourdough!
Marieke & Ed
Thank you. Will need a loaf for Saturday, so I’ll see how this goes!
Hi! I love this recipe! I have been following your bake instructions in the comments for baking in a Dutch oven – 20 mins lid on at 465 for 22 mins lid off for 10 mins and at 355 for the last 10 mins. If I split the dough in half to make two loaves what would be the bake time?
** Sorry I made a mistake in my comments
22 mins lid on 465
10 mins lid off 465
10 mins 355
Hello C,
Splitting the dough in halve means baking a small loaf of about 386 grams. This amount of dough we would bake as follows in the Dutch oven:
18 mins lid on 465
8 -10 mins lid off 465
Depending on the desired crust color:
temper the oven for the last 6 to 7 minutes to 355
So total baking time is between 32 and 35 minutes.
Just try it and keep an eye on the bread after removing the lid.
It also depends on how close the heating elements are to the crust, how fast the browning goes. For some it will not even be necessary to temper the oven if they desire a bit more color with these smaller breads.
Best of luck and enjoy the baking!
Thanks for sharing your recipe! Excited to try this with my new Kensington Sourdough starter!
If I’m baking this in a metal loaf tray (9×5), would it still be the same baking time/temperature of 445F for 45 minutes?
Thanks!
Hello Yasmin,
It is good of you to ask, because it can indeed make an added difference, compared to baking on a sheet or in a Dutch oven.
Because the sides are ‘protected’ by the tin, it takes longer for them to brown, while the top crust generally browns quicker, being closer to a heating element of the oven, because of the shape (this is all in general).
We would start with an oven temperature of 430 F and temper the oven to about 360F as soon as the crust has a slightly lighter shade than the desired color.
The baking time indication will still be 40 to 45 minutes, and we would advice to remove the tin after 25 to 30 minutes of baking, so the sides can brown too.
We would also advice not to score the top of the loaf and really make sure you proof it to the max. This way you get a nice sandwich style loaf with a domed top.
Best of luck with the sourdough baking!
I assume that if you just want to make two or three loaves, you simply double or triple the recipe. But I just thought I’d ask in case there’s any special instructions.
Hello Tanya,
Yes that is correct and with bread baking it is really that straightforward.
Under the ingredients list you see a black button that reads ‘bread calculator’. If you click on it and go to ‘number of batches’ you can change the number 1 to 2 or 3 batches. You can also print the recipe – at the top under the first picture you see ‘print this article’. It will print the recipe with the right amount of ingredients for the number of batches you have chosen.
Enjoy your sourdough baking
Is it still at 445 for 45 min in a Dutch oven?
Hello Marie-Ève,
These are our general instructions for use of the Dutch oven:
Preheat your oven with the Dutch oven inside at 240 ºC / 464 ºF, making sure it is super hot before you start your baking.
Indication baking time and temperature:
Bake for 22 minutes with the lid on at 240 ºC / 464 ºF
Bake for 10 minutes with the lid off at 240 ºC / 464 ºF
Bake for the last 10 minutes with the lid off at 180 ºC / 356 ºF
So a little bit hotter and shorter, but see what works best for you and for this recipe in particular. With our own household oven with Dutch oven we always stick to the 42 minutes total baking time.
Hope it will be excellent.
Enjoy your baking!
I love this recipe. How can I make mini sour dough laves using this recipe. I did try it, cut into quarters and there was no sour taste. What did I do wrong? Thank you.
Hello again,
Sorry I should have looked further. I found your recipe for the mini sourdoughs. I’ll will definitely try it.
Joanne Smith-Camm
Hello Joanne,
Great you found the mini boules recipe:
www.weekendbakery.com/posts...i-boulles/
If you lack sour in your sourdough loaves, maybe our tips can help you:
www.weekendbakery.com/posts...i-boulles/
Look under the subject: More sour please!
Hope it will be great.
Enjoy your baking,
Marieke
Awesome recipe, new to this having never made bread, and made it twice and came out brilliantly. Love it!
I’m trying to increase the rye content gradually without getting a really dense/close bake. When making the poolish if I use 20g starter (whole rye), 70g white rye flour and 45g while strong bread flour do I need to change the water volume or preferment time?
Thank you very much. Great the recipe is working for you too.
With what you are planning, you do not need to adjust anything, just stick to the recipe. Especially when using white rye, there is in general no need to adjust the hydration.
If you are going to use rye flour instead of bread flour in the final dough and want to use whole rye flour and substitute more than 5 to 10%, you may want to increase the hydration. Rye can soak up more water than wheat and especially whole rye.
It is a very good idea to gradually increase like you are planning to. It is a great way to learn what happens with each bake and end get to your favorite loaf.
Enjoy your sourdough baking!
Just wanted to know why your starter is made with plain flour only to make brown bread?
Hello Eva,
There could be a little bit ‘confusion of speech’ here, with our different backgrounds and translations of languages.
This bread is made entirely with bread flour, which is always made with wheat. Usually in bread flour the bran and germ are sifted out and you end up with a ‘white’ flour.
But to make sourdough bread we personally use a sourdough culture made with whole rye flour (see www.weekendbakery.com/posts...asy-steps/).
It is just a small part of the total recipe, but we think you can see some of the rye in the crumb of the bread.
So the 15 grams sourdough culture that we use is whole rye, the rest of the recipe is (white) bread flour. Of course you can also use a sourdough culture made with wheat flour for this recipe.
Hope this answers your question
I just started my starter 8 days ago using Kensington ! Great experience following their instructions. I will be baking my first loaf with your recipe❤️. More to come 🤞🏻
Enjoy the process and the baking. Best of luck and let us know how it turns out!
I bake this bread a few times every week for more than one year. My family loves it. My children are always happy to eat it. My friends’ families and my neighbors are very glad when I bake and share this bread with them.
This recipe is my favorite. I like the taste very much, and I am very thankful for the clear and detailed instructions. Thank you so much! I tried other recipes too, they were good, but this one is my main recipe.
Hello Anna,
Thank you so much for taking the time to share your enthusiasm about the recipe.
Wishing you many wonderful loaves and happy baking hours!
Ed & Marieke
Hello fellow sourdough enthusiast! Thank you for the recipe! I normally cold-proof over night with my old recipe after several stretch & folds. May I do the same to increase the tang? Is this step necessary so as to increase the sour flavor?
Hello Candace,
Your welcome. ‘Sounds’ like you know what you are doing and are an experienced sourdough baker. Cold proofing is no problem and yes you are right, the cold and slowed down process also slows down the yeast activity and lets the bacteria dominate and produce more sour acids.
A few more tips on sourdough and producing more sour notes can be found here:
www.weekendbakery.com/posts...ough-tips/
Enjoy your baking!
I’m still learning & have had some limited success with cold-proofing overnight. I’ll stay true to your directions this time & perhaps venture to the fridge next time! Thanks for letting me know it’s possible : )
Hello Candace,
May we also suggest our WKB sourdough bread recipe were we give you several options and schedules + use of the fridge to make one of our favorite sourdough loaves:
www.weekendbakery.com/posts...sourdough/
Hope you will give this one a try too.
All the best and happy baking from Holland!
If I do not have bread flour, can I use regular flour for this recipe?
Hello Diane,
We do recommend using bread flour. It will help you for several reasons. The main ones are the building of the gluten to give your loaf strength and the retention of moisture. The type and also quality of the flour make a very big difference for your end result. Look for good stone ground (organic) bread flour with a protein content of at least 12%.
Good luck with the sourdough baking!
How can I make a loaf shape or at least not round
Hello Diane,
We do not have the information for you on this site but we can recommend these very good instructions with two ways of shaping a batard or oval shaped loaf by Maurizio Leo from The Perfect Loaf:
www.theperfectloaf.com/guide...-a-batard/
Best of luck with the sourdough baking!
What size Banneron basket should I use for this recipe?
Hi again Lisa,
A basket, round of oval for around 750 grams of dough. A round one would be 20 cm in diameter of 7.8 inches, an oval basket about 24 cm long 24 x 14 cm wide / 9.5 x 5.5 inches.
Hope this helpt .
Happy sourdough baking 🙂
Can I use my starter straight from the jar , without making a poolish?
Hello Lisa,
If you have enough sourdough culture in your jar to take out 245 grams for the poolish / preferment, then yes you could do that. But you have to make sure the starter is recently refreshed because the strength of the gluten will weaken the longer you have not fed your starter. For the best result, we would still recommend to make a nice fresh poolish as described.
Enjoy your baking!
So I have to say this is easily one of my favourite websites due to your responsiveness in the comments. HUGE thank you for that cause it’s helped with the learning curve.
I’ve used this recipe about 5x so far and it’s easily my favourite! I’m still relatively new to sourdough, I’ve been baking about a loaf or two a week now for about 6-8 weeks. So far I’ve baked these loafs in my Dutch oven with the lid on for the first 30 mins and then I take it off at the end. This was recommended in the Flour Water Salt Yeast book. So far it’s worked fine but now that I’m more familiar with this recipe, I’m inclined to try it with the lid off (as your recipe doesn’t call for it being baked covered) and then I can incorporate the steam more readily. For the green bread baker, is this something I will notice a huge improvement with? What are the benefits of lid off and more moisture in the oven? Any tips/tricks are welcome!
Hello Jessica,
We want to thank you for your enthusiasm for our recipe and the help we try to offer.
Great to read you also found such delight in making your own bread. A skill for life 🙂
The Dutch oven really is a wonderful thing to use in a household oven, because it is very hard to create the same or better conditions without it, especially with the sourdough loaves. The exception is a dedicated bread oven (like our Rofco bread oven) with big chamotte stones that retain heat and that can take lots of steam sprayed directly on the oven walls without any problem (don’t do this in our household oven!) .
Baking it with the lid off from the beginning, we really do not have any experience with that, but you are right to give it a try and it will be very easy to incorporate steam indeed.
To create these conditions without a Dutch oven altogether, you would preferably also bake on a stone in your oven and create steam, usually with a tray on the bottom, pouring hot water on it and quickly closing the oven door.
We cannot promise you huge improvements, but there is no harm in giving it a try and compare the different methods. You will always end up with a good loaf .
Here are some extra tips for you on how to make the most of your oven when it comes to bread baking:
www.weekendbakery.com/posts...your-oven/
We wish you many happy baking hours and many wonderful loaves!
I am curious of two things… if baking in a Dutch oven, should I pre-heat the Dutch oven while heating the oven aswell?
And secondly, should I be putting the dough in the fridge at any of these 50 minutes or 2 hour waiting periods between folds or shaping, or is the counter fine?
Hello Delaney,
-Yes, you heat up the Dutch oven while heating the oven. Please be careful while handling the hot Dutch oven and taking off and putting back the lid. 100% focus and wear oven gloves at all time and think hot hot hot!
– The whole recipe is done without any fridge time. Also read the information in the recipe about the ideal temperature of the dough while developing it (Ideally around 24-25 ºC / 75 ºF.). If your room is very cold everything takes longer or you can, for example, use your slightly warmed up and turned off oven as a proofing cabinet to help your dough stay at the desired temperature during the process.
Hope it will be great. Enjoy your baking!
I have starter ready to bake. Can I do it in a zorushi bread machine? If so any suggestions? Thanks in advance
Hello Kendal,
As we understand it, people only use the bread machine to make the dough, then take it out to develop in the fridge overnight. There is no setting or possibility to make real sourdough bread in this machine. There only seems to be a recipe for ‘light sourdough bread’ which is not really a sourdough culture bread. It has vinegar and lemon juice added to the dough to aid with the sour part. We do not think this will yield bread that comes close to the complex taste of a good 100% sourdough bread. The bread maker is essentially used as a kneader / mixer.
If you google there is some more information to be found on the subject.
So if you want to make our Pain Naturel, you could use your bread maker for the start of day 2, the final dough mixing part, and then take the dough out and into a bowl as described and just follow the recipe from there. But you would need an oven on the end of the process of course to bake the bread. Sourdough takes time, but the actual ‘actions’ only take a few minutes. It is worth taking the time we think.
Good luck with the sourdough baking
This may be a dumb question, so apologies in advance, I am very new to sourdough and purchased Kensington Sourdough starter. I am day 7 of their instructions to activate the sourdough starter and was going to use this recipe for my first attempt at bread! Question: Do I take the starter to make poolish or do I skip to Day 2 and make the final dough? Thank you! -JP
Hello JP,
Not at all! Glad to help. You take 15 grams of your Kensington sourdough starter culture and make the poolish with the 115 grams of flour and 115 grams of water and just follow our recipe.
Please let us know if something still is not clear or you need some advice.
Good luck and have fun with it. It may take some time to make a recipe your own, but it is also fun to see the progression and get better. We always advice to make it several times, to get a ‘feel for the dough’.
Thank you!!
Your Bread movie is confusing. In your Poolish recipe you say to add the poolish starter and flower and 2/3 of the water (don’t add salt yet) Etc… let stand to AUTOLYSE.
Ok fine… No problem.
Then, I watch the movie. After the AUTOLYSE
you say add the SALT and YEAST. haven’t we already added the yeast? isn’t it in the Poolish that was made the night before?
And then you show a dry powder to boot.
You totally lost me!
What’s with the yeast after the Autolyse? are we adding more yeast now?
Please fix this it’s very confusing…
Thx,
A very confused sour Baker…
Hello Sour Baker,
Sorry to cause any confusion, we point to the bread movie and the stretch and fold clip only to show the technique of stretch and fold. The bread movie is from our Pain Rustique (so another recipe for a hybrid loaf with yeast) in which we also show the stretch and fold. So that is why it states: watch our bread movie or our stretch and fold method video to observe this technique if you are not familiar with it).
We will adjust it and only point to the Stretch & Fold clip, because you are right to have thought the bread video to also show how the pain naturel is made.
Thank you and sorry for any baking inconvenience.
Marieke
Hello. I’m hoping to try this recipe this weekend. The “timetable” lists a step that the recipe does not… “Final proofing 150 minutes (2.5 hours)” is on the timetable, but the recipe only describes the three separate 50 minute rests. Could you please clarify? Thank you.
Hello Elizabeth,
Maybe you just missed it in the text.
The recipe does describe the final proofing, it reads:
‘Transfer the shaped dough to a proofing basket / banneton, cover and leave to proof for about 2 hours and 30 minutes (provided your dough has a temperature of around 24-25 ºC / 75 ºF, also check our tips on dough temperature). ‘
Hope it will be great!
Marieke
I’m about to bake my first loaf using the Kensington starter. This starter used all-purpose flour. From this point forward, when I feed my starter can I switch to a good quality bread flour?
Hello Becky,
Yes, that is no problem at all. You can use AP, bread flour, whole wheat or whole rye flour (like we do). They are all suitable.
Lots of success with your first loaf!
Marieke
I am about to attempt my first sourdough baking with your recipe. I bought the starter from Kensington and it’s ready to go. I am using a Dutch oven, would that make a difference in cooking time and would you still steam the oven.
Hello Tammy,
Great to read your comment. We would stick to the cooking time in this recipe. About 20 minutes with the lid on the Dutch oven , then the rest of the time without the lid. We would also turn the oven down at around 30 minutes into the process to 170 Celsius (340 F), as soon as you see the bread having a nice light golden color. It will then still darken a few shades in the last stages. No need to add steam to the oven. Keep it simple and be careful with the hot Dutch oven, oven mits at the ready and focused on the process.
Hope it will be a good result. Enjoy the process!
I’m trying this recipe for the third time and my loaves are kind of small. So I’m doubling up this time. Can I bake this larger loaf the same way as the single? Or should I split it to the two smaller boules? Thanks!!
Hello EJ,
IF you want to bake one larger loaf, you have to adjust the baking time. This loaf will be around 1.5 kg, so the indication for the baking time would be 60 to 65 minutes. The other thing you can do is indeed split the dough into two equal pieces and bake two loaves. Then the baking time will stay 45 minutes.
Enjoy your baking!
I made Sourdough PN today, following your recipe exactly. I recently bought the Kensington Starter, and in their paperwork they suggested your website. Made me DOUBLY happy to have a wonderful bubbly starter, and a foolproof recipe to go with it. I’m telling you, my husband and I just kept MARVELING over how absolutely perfect the bread turned out. I’ve always enjoyed baking, but had not mastered sourdough…until now. Thank you!
So wonderful of you to share this with us. We are always so happy to hear a recipe working well for other bakers. And especially when you have already tried before and maybe got a bit disheartened about the whole sourdough bread baking. We are also sure Ben from Kensington thinks it fantastic the combination of the SF starter with our recipe turned out so well for you.
Wishing you many more excellent loaves and many happy baking moment!
Marieke & Ed
Been making sourdough bread for over a year but still not getting a nice big rise. (Tastes good though). Bought some Kensington starter and am on day 2. Once it’s ready, I’ve been directed to use this PN recipe. I’m surprised to see this bread is same day (other than making the poolish the night before). There is no cold retard overnight so is sour tasting and does it score easily? Can I cold retard it and if so, for how long? Thanks in advance.
Hello Pat,
Take another look at the recipe, it does ask you to make a poolish the night before 🙂
We would also ask you to first make the recipe, exactly as described before changing anything, so you have a good starting point, also to compare with if and when you want to change things, like cold retard (provided you are looking for more sour notes with a slower proofing process).
We are very satisfied with the taste of our PN with more subtle sour notes and a hint of ‘sweetness’ . We do not like it when sourness is too overpowering.
But look at our tips about more and less sour and more helpful hints if necessary: www.weekendbakery.com/posts...ough-tips/
We have no problem scoring the loaves, but if you do not have much experience with it, then we do have a few pointers for that too:
www.weekendbakery.com/posts...onfidence/
Hope this helps.
Good luck with the sourdough baking!
I’m looking to get into trying the add different things to my bread. Jalapenos and cheese. At what point should I add these?
Hello Carley,
There are a few ways you can do this. The most straightforward would be to add the cheese and jalapenos at the end of the 4 minutes kneading process and incorporate at slow speed for about 1 minute. You can also take the dough out, roughly make a rectangle shape, sprinkle on the cheese and peppers then roll it up and carefully pinch and mold the dough so everything is well distributed. Then let it rest for 50 minutes like it says in the recipe and continue with the rest. You can also take a look at the method of The Perfect Loaf for their method www.theperfectloaf.com/jalap...ugh-bread/. The cheese and peppers are added 30 minutes into the bulk fermentation in 4 stages.
We do not have experience with the incorporation of cheese in this recipe ourselves but we hope it will be great.
Enjoy the process
Update – it worked! I put the cheese and pickled jalapenos after the 4 minutes kneed and continued to kneed for 1-2 minutes.
Turned out fantastic
Hello Carley,
Thank you for sharing your result. Excellent and inspirational !
Enjoy your sourdough with all the extra’s
Hi there.
In the first few paragraphs you say white bread flour but in the ingredients you say wheat flour. Which should I use?
Hello David,
Sorry for any confusion on our part. It’s caused by us being from Holland and the lack of (or not comparable to other countries) a ‘flour system’. So for this recipe we use what we in Holland call wheat flour (We buy the best organic quality we can find from a good mill with a protein content of 12 to 13 %). On the bag in Holland it says wheat flour ( or in Dutch ‘tarwebloem’) but this quality and type of flour comes closest to what you very probably call bread flour. So we use wheat flour that is best suited for baking bread, without (most) bags ever saying anything like ‘bread flour’ on the label.
Please let us know if you have any more questions.
Marieke
Do you think I can add some toasted walnuts?
Hello Paloma,
The purpose of this recipe is to let the loaf ‘shine’ based on good quality flour and the method to develop a full and complex flavor. Adding walnuts will change this ‘objective’, and the walnuts will become the star of the show, adding a lot of taste and also texture. So we would always advice (if you have not done so yet) to first make the recipe as described. Having said that, there will be no problem or modifications needed if you add some walnuts to this recipe.
Enjoy your sourdough baking!
Thank you for your prompt reply. I have made this loaf now at 15 times and truly love. I will give it a try with the walnuts and let you know how it turns out. I did try your Loaf with Toasted Walnuts, Figs and Prunes recipe and I love that one too.
Thank you Paloma, for letting us know. As an experienced baker, also with this recipe, which undoubtedly you have made your own after 15 bakes, we know the walnut version will also be excellent!
Is it important to baked for the entire 45 minutes, or if my internal temp reaches 95C can I remove my loaf? I don’t want to underbake but the loaf seems like it will be overdone if I bake for the entire 45 minutes.
Hello Shandy,
Yes, measuring is excellent. The baking time may vary depending on the workings and true temperature of your oven and a lot of bakers do not measure or cannot measure the core temperature of their bread. But if you can, then this is a very good way of determining if it’s time to remove your loaf. So, if your loaf is ready at 42 minutes for instance, you can of course take it out.
Best of luck with the baking and be careful with the measuring and the hot oven!
Does it make a difference if I am using an all purpose flour?
Hi Sue-Ann,
Yes, that would not be the first option to use for this recipe. All purpose flour usually has a protein content of 10 to 11%. For this bread, for strength of the dough and taste of the bread it is best to get a very good quality (organic) bread flour with a protein content of 12 to 13%. If this is not possible for you, then you can use your AP flour, but there is a bigger chance the dough will not rise as good or might collaps, because of the lack of gluten (strength). Another aspect is the absorption of water. Stronger bread flour is also able to hold more water, something that is also important with these higher hydration dough recipes.