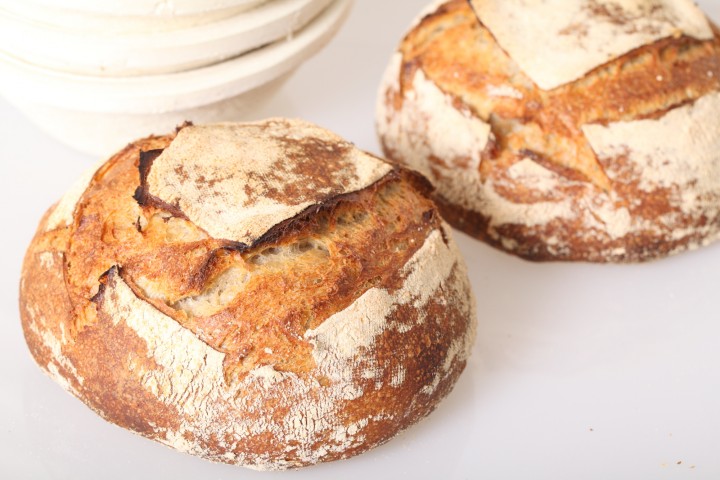
Daring to keep it simple can also produce great results…
Klik hier voor de Nederlandse versie
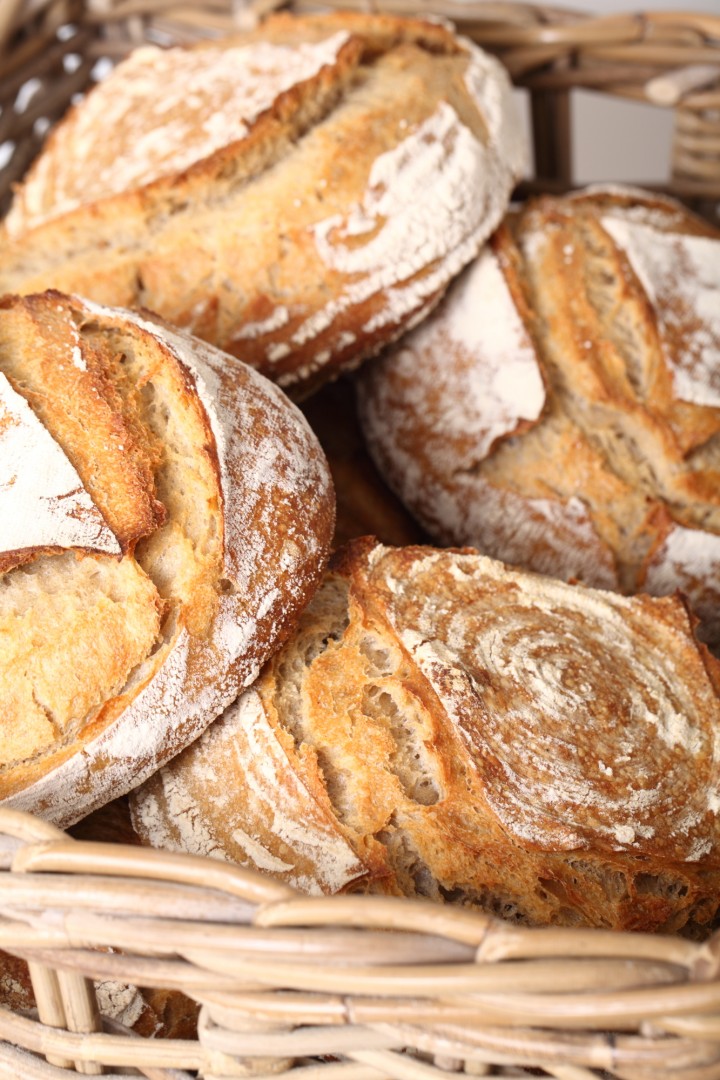
We started this recipe as a one-off experiment, thinking the result would not be that interesting, compared to the other bread recipes we already know and love. But the end result really surprised us. As you might expect, knowing some of our other favorite recipes, the key factors for this one are the same: time, timing and really good flour!
This recipe is the first to have a ‘dough calculator’ (see ingredients list). Other recipes will follow soon!
Although there does not seem to be strict definitions about French bread terminology, we simply call this bread ‘Pain Naturel’ or abbreviated PN. We chose this name because it stands for a basic yet full flavored sourdough bread, made just from ‘white’ bread flour. Using our own sourdough culture we found the bread gets a pleasant hint of sourness, which combines very well with the sweet flavor of the flour we use.
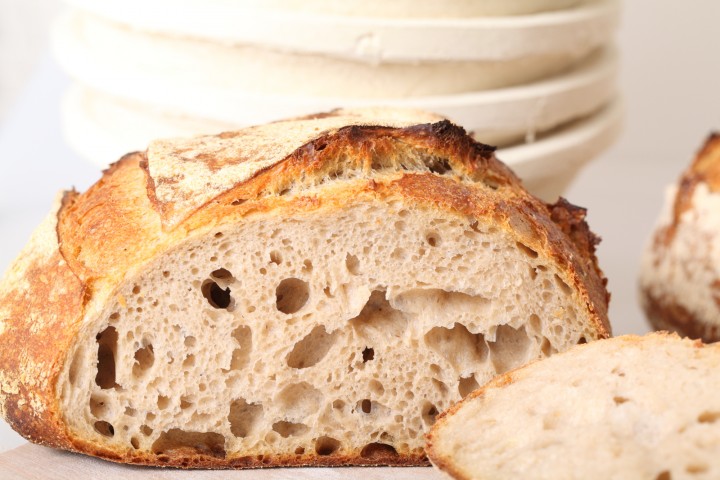
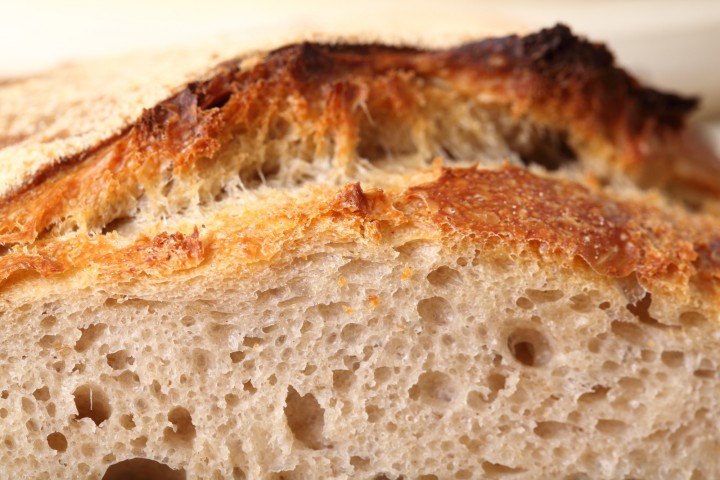
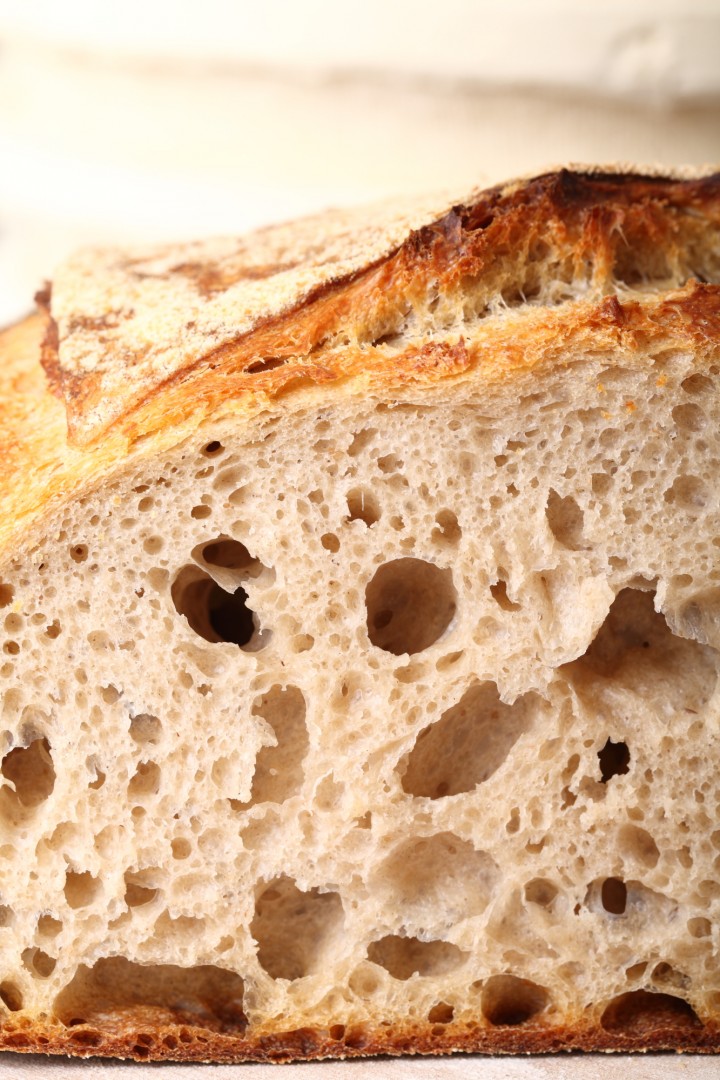
And especially because this bread is made with ‘white flour’ only, it is important to get the best quality, organic, stone ground flour you can get your hands on. When you do, we truly believe you will be rewarded with amazing taste and depth of flavor, better crumb structure and the crustiest of crusts.
Enjoy the recipe and let us know what you think. Also check out our handy sourdough tips to get the most out of your sourdough baking!
Before you start
For this recipe we are going to make a starter named a poolish. A poolish is a type of wet sponge usually made with an equal weight of water and flour and a small amount of sourdough starter culture or yeast and NO salt. Making a poolish helps bring more taste and strength to your bread.
We use a sourdough culture which is made with 100% whole grain rye flour. A sourdough culture based on rye flour is easier to maintain, does not go into a slurry when you forget about it, is easier to stir because it has almost no gluten and smells very nice, a bit like fruit. It is also very forgiving in the amount you feed it, everything seems to be alright. Normally we only feed it once a week, after our weekend baking we give it a few table spoons of water and rye flour, stir, ready!
| Ingredients for the Poolish | ||||
|---|---|---|---|---|
| 115 | g | wheat (bread) flour | ||
| 115 | g | water (room temperature) | ||
| 15 | g | sourdough culture | ||
| Ingredients for the Pain Naturel | ||||
|---|---|---|---|---|
| makes 1 loaf | ||||
| the poolish from step 1 | ||||
| 340 | g | wheat (bread) flour | ||
| 180 | g | water | ||
| 7.5 | g | (sea) salt | ||
Making the Poolish
In a bowl stir together the 115 g flour, 115 g water at room temperature with the 15 g sourdough culture. Mix it well until you have a homogeneous slurry that looks like very thick batter. Cover the bowl with clingfilm and let the prefermenting begin. After 12 hours at room temperature it should be bubbly, light and ready for use. So if you want to begin your bread making in the morning, you should make your poolish at 9 in the evening.
Note: We use European flour which absorbs a few % less water than American type flour. People using American type of flour should add 5-15 ml water to the final dough.
Making the Pain Naturel
Put the poolish starter and flour in the mixing bowl of your standing mixer and add 2/3 of the water (do NOT add the salt yet). Now start mixing and gradually add the rest of the water and let the dough come together. Knead for only 1 minute, leave it in your mixing bowl, cover with clingfilm and rest for 20 minutes (this technique is also referred to as autolyse).
Now add the salt and knead for another 4 minutes. Transfer the dough to a greased bowl, cover and leave to rest for 50 minutes.
Ideally the temperature of your dough after mixing should be around 24-25 ºC / 75 ºF. You should adjust the temperature of the water you add, so the total dough reaches this temperature. For us this means in summer adding cold water to this recipe and in winter (when our little bakery gets much colder then the rest of our house) adding water up to 50 ºC /122 ºF. You can measure the temperature of water and dough with a food thermometer. These measurements are important because they correspond with the proving times in the recipe.
After the first 50 minutes rest take the dough out of the bowl and onto a floured work surface and do one stretch and fold (a full letter fold, left over right, right over left, bottom over top, top over bottom; watch our bread movie or our stretch and fold method video to observe this technique if you are not familiar with it). Transfer to the bowl, cover and again leave to rest for 50 minutes. Repeat the stretch and fold (full letter fold) one more time (so 2 times in total) and leave to rest for 50 minutes (so this is the third and last of your three 50 minutes resting periods). During each stretch and fold the dough should feel firmer and less wet.
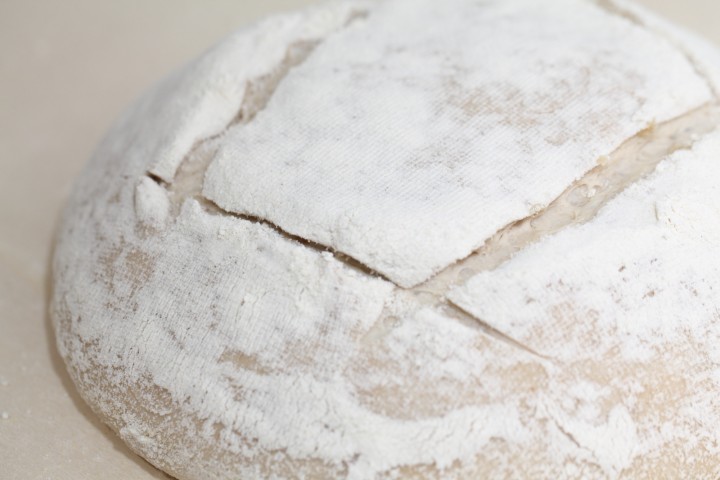
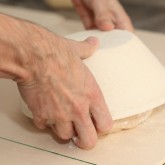
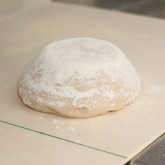
Now it’s time to shape. Shaping is a tricky subject. It’s something for which everybody develops his or her own favorite technique over time. You can make a batard or loaf shape or a boule (ball) shape like you see in the pictures. If necessary you can learn more on shaping from a good bread book, like the ones by Hamelman or Reinhart, or the Tartine Bread book. Or take a look at our boule shaping video.
Preheat your oven to 230 ºC / 445 ºF conventional setting (at what stage you preheat your oven depends on how long it takes for your oven to heat through, some take 30 minutes, some, like ours, with stone floors take a lot longer, up to two hours).
Transfer the shaped dough to a proofing basket / banneton, cover and leave to proof for 2 hours and 30 minutes (provided your dough has a temperature of around 24-25 ºC / 75 ºF, also check our tips on dough temperature). When you think it has risen enough, use your finger to carefully make a very small dent in the dough. If the dent remains, the bread is ready to bake, if the indentation totally disappears, the dough needs a little bit more time.
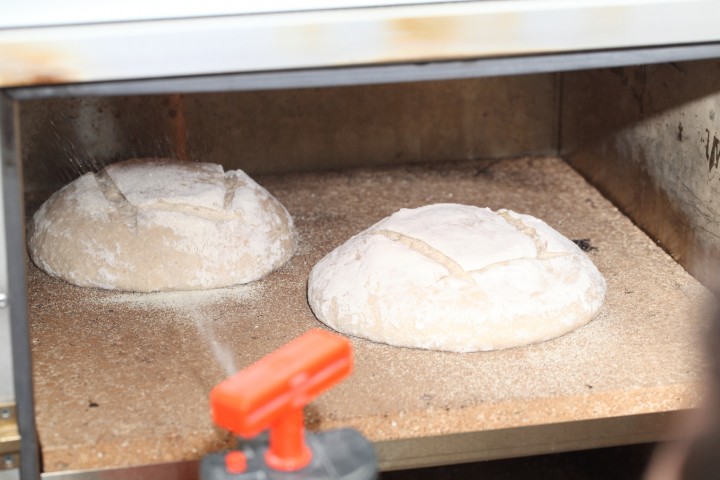
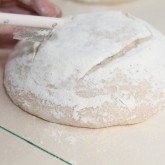
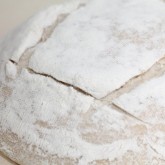
Now your loaf is ready for the oven. Slash the top of the loaf with a lame or bread scoring tool. To get a nice crust, try to create some steam in your oven by putting a small metal baking tray on your oven floor when you preheat the oven, and pour in half a cup of hot water immediately after putting the bread in the oven. Release some steam by setting your oven door ajar (perhaps with the help of a wooden spoon or oven mitt) 5 minutes before the bread is ready. If you are going to create steam with a baking tray, you may also want to turn your oven temperature a bit higher, because you are going to lose some heat in the process.
After 45 minutes of baking your loaf should be ready. Transfer onto a rack and leave to cool. This loaf also keeps very well in the freezer. But please make sure to eat at least some of it while fresh. This bread is great with just about anything, but also very tasty on its own.
Pain Naturel Time Table
Day 1 21.00 Make starter let ferment for 12 hours at room temperature
Day 2 0.900 Make final dough
- 09:00 – Add flour and water to starter, mix for 1 minute
- 20 minutes rest (autolyse)
- 09:20 – Add salt
- Knead for 4 minutes
- Rest for 50 minutes
- 10:14 – First stretch and fold
- Rest for 50 minutes
- 11:04 – Second stretch and fold
- Rest for 50 minutes
- 11:54 – Shape
- 12:00 Final proofing 150 minutes (2.5 hours)
- 14.30 – Bake for 45 minutes at 230ºC / 445ºF
- 15:15 – Your loaf is ready!




Teun says
Hello
Today I made my very first sourdough bread with this recipe. It turned out okish shapewise but it is quite sour. I have no comparison: is this bread supposed to have a clearly sour taste? Not sure I like this. I used a 2 wk old rye desem, which was maybe just past it ripeness when tapping of the 15 gr.
Another question: I am considering to buy a new oven, maybe a rofco. On pictures (also on your website) bread baked in Rofco ovens seems to have a pretty dark (maybe too dark) thick bottom crust. Is this indeed the case? I can imagine it is with the thick stone and bottom heater.
Thank you! Teun
Weekend Bakers says
Hi Teun,
First of all all cultures are different and behave different. But the fact you did not refresh yours can be a big part of how the loaf turned out. We do have some tips for you on how to get less sour in your sourdough here: www.weekendbakery.com/posts…ough-tips/
About the oven: We cannot really confirm what you are observing, it totally depends on the recipe / bread you are baking. Of course a stone oven does have a lot of heat from the stones, which gives the loaves a lift. But we see totally different results in crust if we compare a sourdough loaf with a white straight dough bread or a baguette. Plus you have a lot of influence on how fierce you want to bake the loaves and how dark.
But if you already do not like what you see, compared to what your preferred style of bread would be, maybe also look into other (convection) ovens, because it is a big decision to make of course!
Good luck with it,
Ed & Marieke
omer seyfi salur says
I see that you have you have changed the final proofing time from 1 hr to 2,50 hr’s
Weekend Bakers says
Hello mr. Salur,
The recipe has always been like this, from the beginning, because it is sourdough the proofing is this long.
omer seyfi salur says
I am sorry you are totaly wright. I am learning much every time I read weekend bakery. Thank you.
Natasha Waugh says
Hi guys,
I really like this recipe: I’ve made a few really lovely loaves with it…but also some not so good loaves. They’ve been very sub par recently.
For example, today I made some great dough, left it to prove, and after two hours, did a poke test. The dent remained, filling in slowly, indicating that it was ready to bake. I put it in a hot pre-heated oven, but it has had very little oven spring, is heavy and dense as though it has under or over proofed. My last 3 loaves have been the exact same, unfortunately.
I follow the recipe exactly, but I’m wondering could it be my starter? I took the 15g of the starter straight out of the fridge.
Any suggestions/tips would be greatly appreciated!
Weekend Bakers says
Hi Natasha,
We have two tips / suggestions for you. Take a look at your flour (did you change it, take a new bag) and maybe try a different bag / brand.
More important even is indeed your starter. Maybe it has become too sour and yeast does not like that. Next time take it out of the fridge and refresh it one day in advance and see if this helps. See our tips on the subject here: www.weekendbakery.com/posts…ough-tips/
Good luck with it!
omer seyfi salur says
I think, as you have mentioned that the yeast were cold that might be the problem. But also the room temperature is important.
Ömer Seyfi Salur says
Ihave changed my no knead artisan bread into this. Bcause it gave better taste and result. Thankyou
Weekend Bakers says
Thank you. Yes, no knead is excellent we found, to get people enthusiastic about baking their own bread with not so much effort. But the next step, with just a bit more technique, gives even better result and bread with great taste and texture.
Happy sourdough baking!
Nico Burrow says
Dear Ed & Marieke,
Thanks for the wonderful write-up and photos. This is excellent and I am looking forward to trying your very clear instructions using my 100% rye starter.
One question about the autolyse. I always thought this step was supposed to be done with only flour and water, and in particular NO leaven (whether commercial yeast or natural yeast, as in the starter). As I understand it, the water breaks down the starches in the flour into sugars, giving the yeast more material to feed on and thus creating greater rise, more volume, a more open crumb, etc.
But in your recipe, you have the autolyse step after the poolish has been added to the “final dough” flour (340g). So I’m confused about how this could accomplish what the process was originally intended to do.
Sorry if this is a stupid question, but I would appreciate any tips in clearing up my confusion. Thanks again!
-Nico
Weekend Bakers says
Hello Nico,
Yes you are right, not at all a stupid question of course. What you describe is the ‘purist’ way as intended by mister Raymond Calvel author of The taste of bread. However many ways lead to a good loaf and also with the addition of yeast the autolyse phase still has purpose and helps to reduce kneading time. It also takes some time for the yeast to get active, so the first 10 minutes or so will indeed work like you describe.
For us the end result is what counts and in this case the result is (we think) a very nice loaf with complex flavor and great texture and crust and taste (but other factors are at least as important in this, especially the quality of the flour used).
Feel free to experiment with both methods and compare the difference.
Bill says
I’ve noticed your recipes tend to use smaller amounts of sourdough starter than others I’ve seen online. Is this in order to have a less sour flavour? Would it be ok to increase the proportion of sourdough starter vs flour/water if you prefer a stronger flavour?
One other question. Have you tried baking with fewer stretches and folds, but simply leaving the dough to sit for a longer period? I saw one person online suggesting just to leave the dough for 12 hours of autolysing with very limited kneeding.
Lastly, thanks for all the tips! I am a relatively new resident in Holland and had no idea how much better the flour is from windmills vs supermarkets – luckily I have a great windmill just around the corner from me, and I wouldn’t have been going there to get my flour were it not for your recommendation.
Weekend Bakers says
Hi Bill,
We work with a two step system. When using a preferment (like a poolish or a biga) we use about 15-20 grams of sourdough for a sourdough loaf like our whole wheat levain and this pain naturel. With this small amount of sourdough you create a fully active sourdough preferment overnight which you then use to build the final dough. This way you can keep a small starter and still have the full sourdough flavor. Big advantage for home and hobby bakers is you are wasting far less precious flour when refreshing your culture than you would maintaining a big one! More on this here: www.weekendbakery.com/posts…ough-tips/
As for your other question: There are lots of ways and methods, the one you describe is close to no knead bread. The good thing is it will always become bread, and usually also very good bread. You just have to try different methods and techniques and see what you like best. With our flour we like the crumb structure and crust of the S&F method more than the one resembling no knead.
And so glad you found your ‘own’ windmill and discovered how great they can be. No way back 🙂
Many wonderful baking moments and lots of loaves and happiness in Holland,
Ed & Marieke
Bill says
Thanks very much for a very clear explanation! Makes sense. 🙂
Bill
Weekend Bakers says
Great Bill 🙂
Luit koedijk says
goedenmiddag, ik ben leerling kok en opzoek naar een zuurdesem brood als het pain naturel wat u op de site heeft staan maar mijn doel is zo krokant en luchtig mogelijk brood hebben. heeft dit te maken met mijn starter of met het meel (bloem) wat ik gebruik.
ik woon in santpoort noord dus kom vaak bij de zandhaas voor meel(bloem). welke soort zou u gebruiken voor het einddoel wat ik voor ogen heb.
met vriendelijke groet
Luit
Weekend Bakers says
Beste Luit,
Dat heeft zeker heel veel te maken met het meel (de bloem). Je moet op zoek naar een zo wit mogelijke bloem maar toch met een hoog eiwit-gehalte (gluten). Het resultaat dat je ziet op de foto’s is gemaakt met biologische tarwebloem van De Zandhaas. Voor jouw doel zou je kunnen vragen naar Manitoba, Italiaanse bloem van harde tarwe of je kunt een patentbloem gebruiken waar je glutenpoeder aan toevoegt.
Ook het desem dat je gebruikt zou op basis van tarwebloem kunnen zijn en niet roggedesem zoals wij in dit recept gebruiken.
Veel succes ermee!
Sarah says
This is such a great website! I’m so glad I found you! I had a go at the Pain Naturel. The flavour & texture were beautiful – best sourdough bread I’ve ever made, hands down! It came out a tad dark which, I’m sure, was because I baked it in an AGA – not quite so much temperature control – but it was still glorious and I’ll definitely be making it again! Thanks so much!
Sarah says
Tried again and moved the bread after 15 mins from the bottom of the roasting oven to a preheated sheet in the middle of the baking oven. Solved my problem. I’ve got another one on the go as we speak. So good 🙂 Will try the whole wheat levain loaf next.
Weekend Bakers says
So good to read your first and second comment one after the other. Great how you managed to get it right for your Aga already, because indeed it offers different challenges to other ovens.
Keep up the good baking and thank you for sharing!
Marieke & Ed
Steve says
Hello and thanks for providing a great resource for developing bakers.
I have just made the sourdough pain naturel. Due to my mind not being fully on the job yesterday morning, instead of refreshing my starter and allowing it to mature for 12 hours, I used it straight from the fridge and made up the poolish. Consequently everything was advanced by 12 hours on the proper schedule, and I ended up doing the fermentation overnight, and shaping, proofing and baking next day. Although the dough spread a little on the peel when turned out, it showed encouraging spring in the oven and seems to have baked well. It is cooling now, and tempting me to cut into it!
Since I don’t often bake white bread, I would like to use this loaf as a base to substitute some wholemeal flour for a healthier, nuttier tasting loaf. What would you recommend as the water requirements for, say, 25% wholemeal as a starting point? the wholemeal flour I use is British grown flour, about 12% protein.
Kindest regards
Steve
Weekend Bakers says
Hi Steve,
That sounds excellent, and will only get better as you make the recipe more your own.
We do have another recipe that would fit greatly with your intentions to use a % wholemeal. See: www.weekendbakery.com/posts…vain-loaf/
This loaf is 70% hydration so if you want to start a bit lower at 25% you could try around 68% as a starting point would be our guess.
Good luck with it and enjoy the happy and healthy baking in the New Year!
Dave says
Hi. A first timer and am at the proofing stage. Too late perhaps for timely advice on this occasion, but for next time at least….
1. Apart from the fact that proving is longer and the final stage, what is the difference between the two?
2. What are the required proving conditions? I have mine in a basket all inside a plastic bag to prevent dry-out.
3. During the stretch & fold sessions, I floured the dough and now the surface is quite dry, though inside it is still quite sticky. Should I moisten the surface with a spray atomiser to prevent it becoming too dry?
I noticed as well that
Weekend Bakers says
Hi Dave,
Do not know exactly what you mean by difference between the two (yeast and sourdough?)
2. Yes that is perfect, the plastic bag option. Next to that the temperature is of key importance, of dough and surroundings. See our tips here: www.weekendbakery.com/posts…mperature/
3. Using too much flour is a common mistake, especially when you are new to the wet dough. Yes, it is supposed to be sticky, so avoid the urge to make it less sticky. And follow our tips on how to handle this dough:
www.weekendbakery.com/posts…ion-dough/
Good luck with it and happy sourdough baking!
Dave says
Help! I tried to follow the recipe exactly, but my dough ended up very sticky. After I shaped the dough, I stepped to stick my finger in to see if it made an indention, but the dough just stuck to my finger.
Weekend Bakers says
Hi Dave,
The dough is supposed to be sticky, it can be a bit of a challenge, the trick is to work swift, keeping the contact time (hands on dough) as short as possible. If it is too sticky for you to handle you can use less water (try a few % less) and when doing the finger poking test, first dip your finger in some flour and very carefully make a small dent in the dough.
To help you we have some tips on handling high hydration dough: www.weekendbakery.com/posts…ion-dough/
Good luck with it.
Mimi Liew says
Hi, my name is mimi. I made my rye starter according to your instruction. All went well except on the 6th day, i noticed there 是a very thin layer of whitish mold on the surface. Must I discard the whole starter or can i jusr scoop the top layer away and change the container?
Thank you.
Weekend Bakers says
Hi Mimi,
We advice to throw everything away and clean the jar with very hot water and start over! Like we say in our tips: Any signs of fluffy stuff and strange colors on your culture. Something moved in that does not belong. Throw it away and start again! Check out more sourdough tips here: www.weekendbakery.com/posts…ough-tips/
Good luck with it
Chris Chapman says
I Cant Wait To Try. I Am Just About To Start My Rye Starter, So It Will Be A Week Or So Yet. I Have Everything Written Down Now. I Shall Send A Final Photo And Comment.
Weekend Bakers says
Hi Chris,
Hope it works out. Also check out our tips on sourdough baking for some handy background knowledge: www.weekendbakery.com/posts…ough-tips/
todd rensma says
is this 100% or 166% sourdough starter
Weekend Bakers says
Hi Todd,
The starter we use is about 100%
Nanda says
Thank you so much for the great recipe!
I’ve made the poolish, but it seems mine doesn’t get super bubbly and light… It has a few air holes but not many. I’ve used organic flour from the Zuidmolen and your rye-starter. Followed the exact recipe. All I could think of, that it may be to cold in the house. Does this affect the poolish like it does with the final dough? Would the solution be; adding warmer water to start the poolish or letting it sit longer?
Thanks again 🙂
Weekend Bakers says
Hi Nanda,
Yes, you are very right mentioning the cold, it does affect the poolish big time, like final dough! Both options you mention are valid, you can use warmer water or let it ferment longer or do a bit of both. Check out our tips on dough temperature to see how temperature is a very critical factor when it comes to dough development.
www.weekendbakery.com/posts…mperature/
Happy prefermenting and baking!
Robert MacDonald says
Hi
Did every in the recipe and yes it was wow . I have used other sough dough recipes and yours is the best.
Robert
Weekend Bakers says
Hi Robert,
Thank you so much. May we suggest giving one of our other favorites a try maybe one weekend? It’s this one: www.weekendbakery.com/posts…yle-bread/
It is also a really well worked out recipe and the method is fun to give a try we think.
Happy sourdough baking!
Harris says
Hi I have a question regarding the poolish.
How do you calculate the total amount of poolish needed for certain amount of flour? And how do you calculate the amount of sourdough needed in the poolish?
For example in another receipt for whole flour bread you have 65gr flour + 65gr water and 15gr sourdough. Here you use the same amount of sourdough with different amounts of water/flour.
Last question: what is the hydration of the sourdough? I had a 45%-50% hydration and now converted it to 100% hydration. Is it ok for this bread?
Thanks
Weekend Bakers says
Hello Harris,
Just to be sure, are you referring to this recipe? www.weekendbakery.com/posts…vain-loaf/
Harris says
yes
Weekend Bakers says
Hi Harris,
Usually you calculate a total amount of 30 to 50% of the total recipe for the poolish. The higher the percentage of pre-ferment you use the more your bread crumb will have a nice chewy texture. The amount of sourdough depends on the amount of poolish and the time you will give it and the temperature too. With yeast we can give you more exact calculations, with added sourdough it also depends on the workings and activity of your own sourdough. As you saw the recipes are slightly different, but because of the amounts used and time taken it will not make a very big difference in the end result. For the whole flour we used a bit more culture in comparison. The point is, after 12 hours your poolish can be a bit ripe, very ripe or anywhere in between, all giving a good baking result when used, as long as the poolish is not over-ripe. So you have to find an optimum for the use of your culture and see with what quantities and time your poolish or other preferment will be nice and active. Our recipe is a very good starting point, but practice and experience will bring you to your own optimum for your hands, ingredients, equipment and surroundings.
Happy baking!
Marieke & Ed
Kat says
Hi there, is it possible to do the kneading bit with a high hydration doughs like this (before first F&S step) in the Kitchen Aid mixer? And if yes, what speed and times are please? Many thanks! 🙂
Kat says
p.s. also, can it go for the final proof in the fridge overnight? Lets say at 9pm to be baked next morning at 9am (with being left at room temp for 1-2 hrs before baking at 9am)? Ta
Weekend Bakers says
Hello Kat,
Yes to both questions. Yes, you can use the Kitchen Aid and stick to the recipe as stated. We think speed 4 to 6 would do it. Aim for moderate gluten development after kneading, something resembling a dough but no need to go for the window pain, because stretch and fold will follow to further develop the dough.
And yes you can proof overnight, the exact times that are optimal under your conditions will become clear as you give it a few tries, but what you are suggesting is an excellent starting point.
Happy sourdough baking!
Elizabeth says
Please help – I have made pain naturel and even though it rises beautifully in the banneton it always deflates when I turn it out and slash it.
What am i doing wrong?
Weekend Bakers says
Hi Elizabeth,
A little bit of deflation is OK, because of the heat in the oven it should bounce back (oven spring) and get a good shape. If and when this does not happen there are some things that could be wrong: overproofing of the dough, not enough gluten in the flour to hold the water and get a good structure (look at your flour and make sure you have a strong bread flour and enough gluten development), and/or your oven is not hot enough (see our tips on the subject here: www.weekendbakery.com/posts…your-oven/)
Good luck with it and happy baking!
Deborah says
Dit weekend is het tijd voor mijn eerste zuurdesem brood! Vanavond begin ik met het voordeeg. Alleen wil ik graag weten hoe groot dat dit brood uiteindelijk wordt. Ik heb jullie kleinste rijsmandjes (rond en langwerpig) van 500gr. Kan ik het hele recept gebruiken of is het beter om de helft te gebruiken voor één brood? Alvast bedankt!
Deborah says
Inmiddels afgelopen weekend dit brood gebakken, met de helft van het recept, omdat ik een klein rijsmandje heb. Fantastisch! mijn eerste zuurdesem brood is geweldig goed gelukt. Mede dankzij jullie ontzettend goede aanwijzingen. Het is nu officieel, ik ben verslaafd aan brood bakken.
Weekend Bakers says
Hallo Deborah,
Wat goed te horen! We zijn natuurlijk wat laat met onze reactie, maar onze suggestie was geweest om 2/3 van alle ingrediënten te nemen (alles door 3 en maal 2 doen) dan kom je uit op een totale hoeveelheid deeg van 515 gram en dat zou heel goed bij de mandjes van 500 gram passen. Maar zo te lezen is dit ook heel prima gegaan.
We herkennen wat je zegt, dat wordt alleen maar meer bakken 🙂 en dat is helemaal niet erg!
Tom Kilenyi says
I am going bonkers! Hope you can help. I baked this recipe (Paine naturel) carefully measuring out the ingredients. The flour used was a well tried supermarket bread flour (protein 12.8%) but 12% of the total was coarse spelt flour. As the recipe suggests I add the last 2/3rd of the water while the mixer was running. Or more precisely wanted to add the water but the mix appeared so wet that I reduced the total water added by 15%. The dough was very wet, it was impossible to shape it, just had to pour it into the banneton. The result was a very flat loaf, although it tasted good. I thought I had made a mistake somewhere and next day repeated the process using exactly the same quantities -measured out even more carefully! The result: exactly the same. According to the actual quantities the hydration rate was 59% (rather than the recipe’s 65%) . Any comments?
Weekend Bakers says
Hi Tom,
Hope you are well… Very sorry we cannot exactly help you without seeing what you are doing, because everything you tell us seems to be correct, but still there has to be a mistake somewhere in your measurements. Are you measuring by weight or by volume? If you are using a scale, please double check your scale by measuring an object with a known weight. Because something does not add up, for you to end up with dough that you can pour. The recipe is tried and tested by us and many bakers, so hope you will try again and all will be as it should be, resulting in a wonderful loaf!
Edwina says
Thanks for your wonderful website, it is the most clear and accessible resource I’ve found for sourdough baking!
I’m having a terrible time trying to fit sourdough baking in to a busy family/work schedule and I’m wondering if it matters if I leave the poolish for longer than the reccomended 12 hour period (say 15 hours or longer)? My rye starter is nearly ready to go and I can’t wait to get started (I don’t think my next free weekend is coming for a while)!
Also, I’m wanting to try baking a sourdough rye as I buy a lot of it, do you have a recipe that is suitable for a beginner for a bread with more rye flour?
Thanks again,
Edwina (Sydney, Australia)
Weekend Bakers says
Hi Edwina,
Great to read and thank you for your kind words. Yes there is some room to wiggle with the poolish. If you already know you are going to take longer you can use less sourdough or yeast to start with or you can (partly) use the fridge to slow the process down. You just have to make sure the poolish is nice and active when you use it and has not collapsed.
Also see our tips and schedule here: www.weekendbakery.com/posts…lish-biga/
We have a wonderful rye bread in our collection: www.weekendbakery.com/posts…h-raisins/
There is a bit of yeast in the final stage, you can leave it out but then you have to at least double the proofing time given in the recipe.
And for the Holidays and colder weather and also with our favorite cheese we love this bread: www.weekendbakery.com/posts…etzenbrot/
Hope you will give it a try.
Happy baking and greetings from Holland,
Ed & Marieke
Bryce Carpenter says
Ed & Marieke, you have created a wonderfully helpful, accessible, and enjoyable website. Your tips are helpful to all levels of amateur bakers, and much appreciated. What a gift you have given to the worldwide community of home bakers!
I just made the pain naturel and my family approves. I am eager bow to try some other recipes on your site: they all look so good.
Many thanks for this incredible resource.
Greetings from Washington, DC, USA.
Bryce
Weekend Bakers says
Hello Bryce,
Thank you very much for your praise, much appreciated. And approval from family and friends leads to more baking we are sure!
Lots of loaves and greetings from Holland,
Marieke & Ed
StefanGourmet says
Dear Ed & Marieke,
Compliments for your great blog with detailed explanations and beautiful photos.
I’ve tried to make the sourdough pain naturel last Saturday, and I have a few questions. The bread turned out nice with great flavor, but not as good as I had hoped.
1) I maintain an “Italian style” sourdough starter that is made with 50% hydration, and that is what I used. Although the bread did rise, it took much longer than 2.5 hours to rise. The temperature was fine at 22C. I thought 15 grams was very little, Italian recipes usually use more, so that is what I will try next time. What are your thoughts?
2) 45 minutes at 230C is too much — the crust will burn. I usually bake bread for 30 minutes at 225C. What are your thoughts?
3) The times indicated in your time table do not leave any room to do the actions. E.g. if you start at 9:00 and mix the ingredients and then wait for 20 minutes, the next step will start at 9:25 or so instead of 9:20. Which is correct, the time table or the times indicated in the text?
Weekend Bakers says
Hello Stefan,
Thank you very much.
We work with a two step system. When using a preferment (like a poolish or a biga) we use about 15-20 grams of sourdough for a sourdough loaf like our whole wheat levain and pain naturel. With this small amount of sourdough you create a fully active sourdough preferment overnight which you then use to build the final dough. This way you can keep a small starter and still have the full sourdough flavor. Big advantage for home and hobby bakers is you are wasting far less precious flour when refreshing your culture than you would maintaining a big one.
See how much difference in time it can take if your dough is 22 C instead of 25 when proofing. Also, you did not use our method and your kind of starter and this can also make a difference.
Baking times are very important for the bread to be properly cooked. If your heating element is close to the top of your bread, turn down the oven to about 180C as soon as the crust reaches the right color, but do use the full baking time of around 45 minutes.
If the actions for a loaf take about 30 seconds to one minute, we do not add it in the schedule, longer kneading times are added. If it takes you a bit longer, we suggest adding a bit more time. With sourdough a bit more time is never a problem.
Good luck with the baking and lots of loaves!
Terry says
I’ve been trying to make sourdough for ages with my own starter and haven’t really succeeded until I found this recipe, easy and what a fabulous bread it makes, thank you
Weekend Bakers says
Hello Terry,
Thank you for your excellent comment, so good to hear.
Wishing you many more wonderful loaves,
Marieke
Elaine says
Hi
My dough rise a lot after 1st and 2nd stretch and fold but it didn’t rise as much during the final proofing in the banneton – it only rise as high as the height of the banneton. I used British organic flour and bottle water to try to make it as similar as your recipe suggested.
However, after three attempts, I still didn’t get air pocket inside my sourdough just like yours in the picture. Is it because the flour I used or is my dough too wet because I live in south east Asia? Any suggestion for me please? Many thanks in advance!
Weekend Bakers says
Hi Elaine,
This is a though call to make, but we definitely would suggest using / trying different flours. You can see here from our experiment that it can make quite a big difference:
www.weekendbakery.com/posts…nt-part-1/
Make sure your flour is suitable for this recipe and has enough protein content (between 12 and 13% is what we use).
Also make very sure your dough has the right temperature. It could be, due to your climate, that it is a bit too warm and things are going too fast and you should adjust the resting times around the stretch and folds (make them shorter) and leave some more ‘room’ for the final proofing. Otherwise try using the fridge for the final proof (maybe overnight).
Good luck with it and happy sourdough baking!
Jenna says
About to put this in the oven! I just want to say, while it did indeed rise for the final rise, it didn’t rise that much. I’m hoping it will rise in the oven?
Also, my risen loaves look a lot smaller then the ones in your photo. Is that okay?
Weekend Bakers says
Hello Jenna,
The first thing we would suggest is to look at the temperature of your dough and always make sure you get to the optimum proofing point before you go to the oven. It would seem you need more time. Here are some tips that can help you:
www.weekendbakery.com/posts…mperature/
www.weekendbakery.com/posts…e-in-size/ (see tips at bottom of article on how to check if dough is ready).
Good luck with it!
Anca says
Hello guys.
Thanks to you in this morning I had my first perfect loaf of Pain Naturel. I followed all your steps, except the final proof time ( I finished late in the evening). So, I retarted the final proof in the fridge until this morning.
You are doing an excellent job with the site and baking it seems to be piece of cake for the beginners like me. Keep doing! You are the best “teachers”.
Greetings from Romania!
Weekend Bakers says
Hi Anca,
Thank you for your lovely feedback. So glad you get such great results with our recipe. Good to hear about the retarding working well, something we do not do too often because of lack of fridge space.
Lots of loaves and greetings from Holland!
Vicente says
Hello guys.
I keep making this recipe, as suggested, and things are improving. I made it 4 times, all results were tasty and kind of worked, but in this last time I believe I finally got a very good loaf. 🙂 So thanks once more.
I got some general questions though:
1- I still looking for a “ear” in my loaf. I noticed that as soon as I score the dough, it opens very much in the bench. I believe this is one reason to not get my ears. As the “inner” dough is quickly exposed to same heat making a slightly softer crust. Although the result is fine and beautiful, I still seeking an ear. What are the possible reasons for the dough to open so much as slashed? To much water? Over or under proof? Or other reason? Shapping? I don’t now… I have make thing as precise as possible, with an scale, an watch and a thermometer, but as flours vary, perhaps I need to adjust the water amount, I don’t know. In this last batch I got a good steam and watched a good oven spring, but yet no ears. The bread was delicious though!!
2- Do you thing is possible to extend the final proof time by keeping the dough in the fridge during that period? I’m looking to make all steps in the evening, let the final proof happen in the fridge over night and bake in the morning. Do you thing this is possible? Any hint on how to try to calc the time of proofing in the fridge? Actually I’m already trying this tonight… Let’s see 🙂 But if you have any hints on that..
3- I’m learning each batch a little more about doughs, but would be great if we have an article helping understand and “detect” the effects of each thing on the dough. I mean, what is the result of a to wet dough? And of a to dry? How to know if the problem was under or over proofing? What the effect of a badly shaped loaf… And so on… Kind of a “bread doctor” guide. 🙂 As each experiment we do takes so long a guide to help understanding causes x effects could be a great help.
That is for now. Thanks for your time and dedication!!
Cheers.
Vicente.
vicente says
Hello, just stopped by to say that the “retarded” final proof worked very well!
This morning I had 2 marvellous loafs.
I made the recipe as its described above, until the shaping.
Then I put the bannetons inside plastic bags (the fridge is a drying machine) and let it proof in the fridge for 6 hours.
In the morning, the dough was proofed just right. I waited half an hour before baking them so it can warm up a bit (that was the time I had after all). The result was great, perhaps even better than the normal proofing. I got a very fluffy, full of holes, crumb, a nice crust and even a little ear (almost there…).
So I believe this can be helpful to fit the baking in the week schedule, not just the weekend, with the added benefit of having fresh hot bread for the breakfast. 🙂
I spent like 4 hours in the evening and 1 1/2 in the morning, and well… I slept 🙂
cheers.
Weekend Bakers says
Thank you Vicente, great to hear
May we suggest you experiment with different brands /quality of flour if possible of course, to see if this will also aid your baking result and getting even more ‘ear’. See our flour experiment for this: www.weekendbakery.com/posts…nt-part-1/
Thank you for your suggestion for a guide, we will definitely do our best to make such an item.
Great to read about your retarding results, you seem to have several benefits from it. This is wonderful and inspirational to hear.
Thank you for your shared enthusiasm and lots of loaves!
Ed & Marieke
vicente says
Hello Ed & Marieke. Thanks for the suggestion, I’ll definitely try different flours. Also I’m willing to experiment with the amount of water in the dough.
I have made a second batch with the retarded proof. Worked just great :).
The 2 loafs desapeared very fast in mother’s day breakfast.
I happened to come across this article with is kind of what I had suggested, if you guys want some inspiration on that. Worth a look.
www.seriouseats.com/2014/…-loaf.html
Thanks for YOUR shared enthusiasm :))
vicente
Weekend Bakers says
Thank you for sharing this with us Vicente. We will definitely take a look!
Vicente says
Hello. First I’d like to thanks you guys for this amazing site. It really pushed me to bake my first loaf. The content is wonderful and it also looks great.
So I made my starter, and my first bread, this Pain Naturel.
I know I should keep changes to one item at a time, but as I’m in Brazil, the flour is the first challenge. I end up finding a italian Semolina with 14% protein, and a whole wheat flour with around 12%, I think…
I made my starter with this very whole flour, In 4 days it was consistently more than doubling it’s size in 3, 3 1/2 hours. So I gave it a shot.
I made two loafs one with only semolina, and one with 50% whole wheat, 50% semolina.
I used a mixer that has a stand, mimicking the Kitchen Aid, It got a little hot but did the job.
I managed to have the second loaf (whole) to achieve a lower dough temperature, around 25ºc, the first was a little hotter.
I also had a terrible time laming the dough, the second one I used a scissor and it went better.
The result:
Both loafs are very good! They sound good, tasted good, have a nice crust and a crumb filled with air. Not so big holes as the ones in yours photos, but good ones…
But I’d like to get some hints on how to improve them:
The 1st loaf, badly lamed, didn’t really rip (open the crust) in the oven, also it grew less than the second, could it be ‘hold” because it was not properly lamed? This crumb had bigger holes.
The second, lamed with a scissor, kind of ripped, and get much bigger. Not really a rip as the ones in this photos here. It kind of made a new crust inside the rip, and the crumb did not “emerged” through. This crumb had smaller holes. But still soft and fluffy.
So could you give me some advices on that? Do you think the oven is the culprit? I measured more than 240ºc, but it looses some heat when I open and throw the water.
Or should I look some where else?
I’ll visit the post photo session of the site to try to post some pictures, so you can see what I mean.
Thanks a lot.
Saudações do Brazil.
Vicente.
Vicente says
Posted some photos via “Send Us Your loaf” session.
Vicente says
Just checked the glossary…
>The 1st loaf, badly lamed -> “badly scored”
>Not really a rip -> I meant the “ears”
Weekend Bakers says
Hello Vicente,
You are doing very well, baking with quite a lot of challenges, using different ingredients under different circumstances. To help you with the scoring (just take the time to practice again and again) check out our tips here: www.weekendbakery.com/posts…onfidence/
If you score deep enough at the right angle the bread should open up. But your oven and getting ‘oven spring’ also plays a big part in this. Also see our tips on the use of your oven:
www.weekendbakery.com/posts…your-oven/
Most important thing with your oven is knowing the real temperature inside and the use of enough steam.
Just keep baking and practicing and making notes and you will learn the most and already eat great bread in the process.
Happy baking!
Vicente says
Thanks for your reply. And again, congratulations on the site and the recipes. I’ll keep trying for sure.
A crazy idea passed my head about steam, have any one tried a handheld steam cleaner, like this one for example?
www.amazon.com/HLA-u…B003TJ4T8S
Cheers
Weekend Bakers says
Hello Vicente,
We think that could work, however it will be tricky to contain the steam as you have to apply it with the door open and you will lose it pretty quick. The advantage of spraying or adding water is that it will turn into steam after you have closed the oven door. But that is just a thought and we have never tried it, so it is worth a try if you have such a tool.
Heidi says
Hello!, your website is great. I’m very happy with the results. I made my pain naturel with whole wheat flour, and worked good. The taste is incredible. You gave my mommy the opportunity to revive some childhood flavors! Thanks a lot.
It’s my first bread with the sourdough starter and first time I make one. But I’m wondering, whow much time does the starter can live?, somebody told me about years, is that true?
Regards Heidi
Weekend Bakers says
Hi Heidi,
Yes that is true! If you take good care of it, it can go on and on for many years. After catching something nasty in our starter about 4 years back, we had to make a new one, but this one has been doing it’s job now for as many years and hopefully a while longer.
Great your starter is alive and kicking, resulting in a good loaf and a happy Mother!
Greetings,
Marieke & Ed
Laura Griffiths says
Loved it! I followed the recipe for the starter and then made this bread after 7 days and it was amazing! Very light and fluffy for a sourdough bread. It was a big hit! We made rustic sandwiches, crunchy cheesy garlic bread, ate it with cream cheese and jam, it’s very flexible! I’m sure it would make an amazingly gooey grilled cheese too!
Plus it looked gorgeous fresh out of the oven, and made me feel like a professional artisan baker… 🙂
Best comment I received: (after obviously filling everyone in every day of my process a certain curiosity was built.)
“This is so much better than the bread I buy at the market!”
Weekend Bakers says
Hi Laura,
Thank you for your excellent comment. Reading your words I can again conclude how absolutely rewarding real bread making is for so many people, both bakers and eaters!
Wishing you many more wonderful loaves to bake, share and eat,
Marieke
Ichiro says
What Flour do u use for this recipe? US flour or French flour?
Weekend Bakers says
For this recipe we use our stone ground organic wheat flour from the local mill from Dutch wheat with a protein content of around 12.5%. You could also use French T65 or US bread flour no problem.
SN says
Just enjoyed some of my first home-baked sourdough bread using your excellent instructions (for the bread and the starter)! I didn’t have white flour, so I made the recipe using whole spelt flour, and it worked just fine – a little denser, darker brown, and finer-crumbed than your pictures, but very tasty. Next time I’m going to try increasing the water a little bit, and lowering the baking temperature a little bit (I had gone a bit over the recommended temperature based on our oven’s behaviour, but that seemed to be too warm).
Also, for those of you like me who have limited break-baking tools, this break baked just fine in a normal bread pan – I just let it proof in the pan and then stuck it in the oven when it was ready.
Thanks again,
Simon
Weekend Bakers says
Hello Simon,
Thank you for your excellent feedback. Great to hear your spelt version turned out so well, because it is more challenging using whole spelt of course. Great to read you are already planning good adjustments for your next bakes and the bread will be even better.
Happy sourdough baking!
Ed & Marieke
pete summers says
Hello, what a great site! Thanks for all the baking info.
My question is:-
You say European flour absorbs less water than American flour. Please can you tell me where British flour fits in that spectrum?
Regards Pete
Weekend Bakers says
Hi Pete, we have never used British flour ourselves. From what I have read traditionally British flour is weak, and importing flours from the US and Canada has had a big impact on bread production in the past. I do not know about the newer wheat types which perhaps are now being used in the UK. I should think they are about the same now as here in the Netherlands.