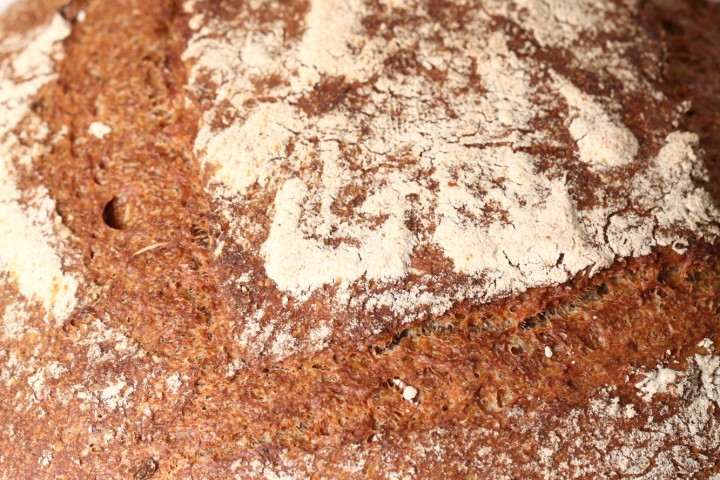
Yes you ambitious home bakers, you have to make a miche, if only once in your baking life…
Probably made most famous by Parisian baker Poilâne the miche can be defined as a very large rustic sourdough bread, usually a round loaf made from a natural leavening that also has a high percentage of whole wheat flour in it. Its very large size with low crust to crumb ratio means it also keeps better, which was important back in the day when people made bread only about once per week. For centuries, French villages had communal ovens where the townsfolk would bring their dough to be baked. To be worthy of the term miche, each bread has to weigh from around 1.5 to over 5 kg!
Our version of this bread, based on a recipe from the Hamelman ‘Bread’ book, could be considered a small miche, weighing around 1.6 kg before baking. It is made with a combination of mostly whole wheat flour and rye flour, water, leavening and salt and could therefor also be labeled a traditional or classic type of miche. Of course it is also fun to experiment with different percentages and types of flour, creating different crust and crumb structures.
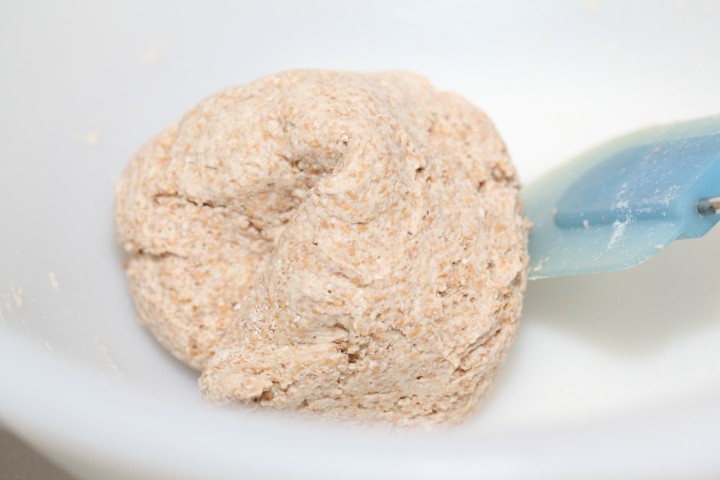
Ingredients for the preferment
30 g bread flour
150 g wholewheat flour
106 g water
36 g sourdough culture
Making the preferment
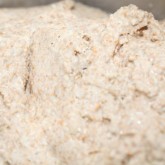
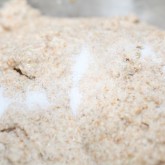
This miche is made with a stiff sourdough starter dough. You make the preferment the evening before you make the bread, provided you want to bake the next morning (it takes 12 hours to ferment). Make the preferment by dissolving 36 grams of your active sourdough culture (we use our rye sourdough culture for this recipe) in 106 grams of water and add 30 grams of bread flour and 150 grams wholewheat flour. Stir until it comes together and finish by kneading the dough by hand until you have a ball (about one minute tops). Put the dough ball in a bowl, cover with clingfilm and let it ferment for 12 hours at room temperature.
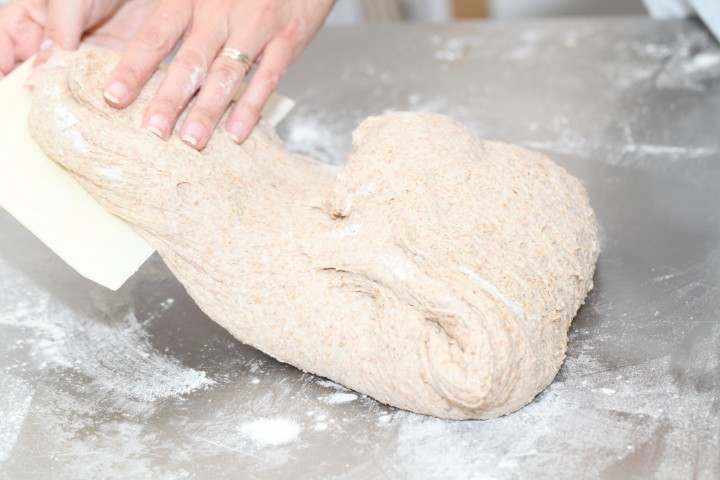
Ingredients for the miche
makes 1 Miche 1.6 kg
322 g sourdough preferment – 12 hours
110 g bread flour
110 g whole rye flour
500 g wholewheat flour
582 g water
15 g salt
Making the miche
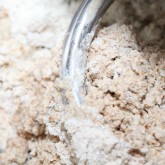
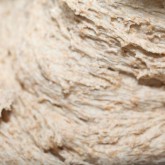
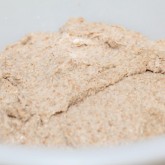
Dissolve the preferment in some of the water you are going to use. This makes it easier for the ingredients to combine. Put the sourdough starter and flour in the mixing bowl of your standing mixer and add 2/3 of the water. Now start mixing and gradually add the rest of the water and let the dough come together (see if you need all of the water or even a bit more, depending on the flour you use). Knead for 1 minute until you have a shaggy mass (as Hamelman calls it). Leave it in your mixing bowl, cover and let it rest for 30 minutes. This process is called ‘autolyse’.
After the autolyse phase distribute the salt evenly on top of the dough and knead the dough for another 5 minutes (about 10 minutes by hand, depending on your technique) and watch it turn into something more resembling bread dough. Return to a greased bowl and let it rest for 50 minutes.
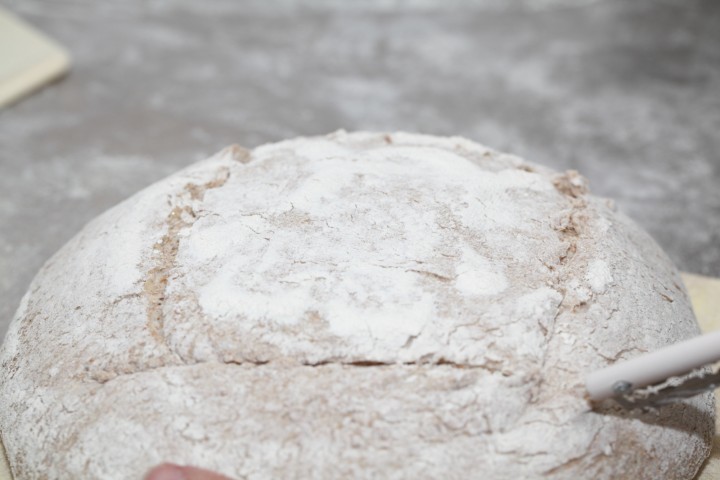
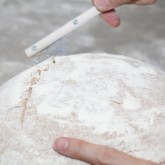
Slashing the dough around the windmill
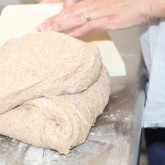
Now take the dough out of the bowl and onto a floured work surface and do one stretch and fold (see our video to observe this technique if you are not familiar with it). Transfer to the bowl, cover and leave to rest for 50 minutes. After 50 minutes again transfer it to the floured work surface and do another stretch and fold. Transfer to the bowl, cover and again leave for 50 minutes. This is your second stretch and fold.
Preheat your oven to 235 ºC / 455 ºF (at what stage you preheat your oven depends on how long it takes your oven to heat through, some take 30 minutes, some with stone floors take a lot longer, up to two hours. The preparation time from this point until the bread actually goes into the oven is about 90 minutes! So you might want to preheat your oven at a later stage but make sure it’s well heated).
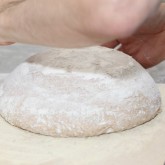
Now it’s time to shape. Shaping is something for which everybody develops his or her own technique over time. If necessary you can learn more on shaping from a good bread book, like the ones by Hamelman or Reinhart. Your big 1.6 kg piece of dough has to be shaped into a ball or boule. You can watch our short video clip to learn about a technique that works well for us. Sprinkle the top of your boule with flour, turn it upside down and transfer your boule to a prepared proofing basket (banneton).
Now cover and leave to proof for 90 minutes. When you think the bread has risen enough, use your finger to carefully make a very small dent in the dough. If the dent remains, the bread is ready to bake, if the indentation disappears, the dough needs a little bit more time.
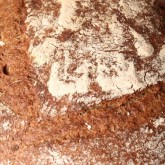
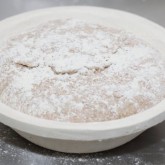
Now your miche is ready for the oven. Slash the top of the miche with a lame or bread scoring knife.
To get a nice crust, try to create some steam in your oven by putting a small metal baking tray on your oven floor when you preheat the oven and pouring half a cup of hot water immediately after putting the bread in the oven. Release some steam by setting your oven door ajar (perhaps with the help of a wooden spoon) 5 minutes before the bread is ready. If you are going to create steam with a baking tray, you maybe also want to turn your oven temperature a bit higher, because you are going to lose some heat in the process.
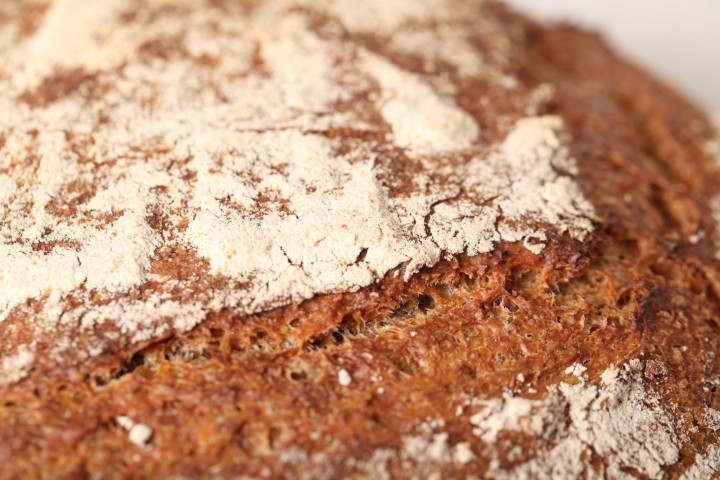
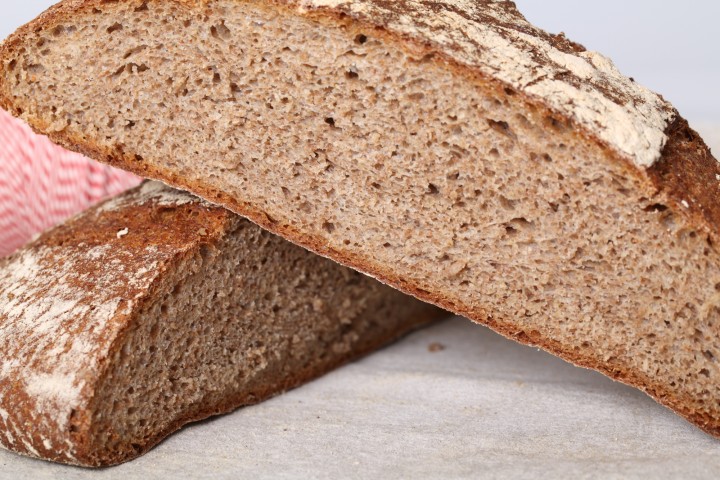
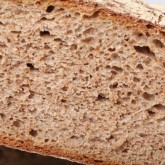
After 70 to 75 minutes of baking your miche should be ready. Transfer onto a rack and leave to cool. This miche stays very edible for several days and also keeps well in the freezer. It is best to leave this bread to cool and ‘set’ for half a day or so before cutting and eating.
Miche time table
day 1 22.00 h Make starter let ferment for 12 hours at room temperature
day 2 10.00 h Make the final dough
- 10.00 h Dissolve starter in some of the water
- Add flour and water and knead 1 minute
- Autolyse for 30 minutes
- 10.30 h Add salt and knead for 5 minutes
- Leave to rest for 50 minutes
- 11.25 h Stretch and Fold
- Leave to rest for 50 minutes
- 12.15 h Stretch and fold
- Leave to rest for 50 minutes
- 13.05 h Shape
- Approx 90 minutes final proofing at room temperature
- 14.35 h Into the oven for 70-75 minutes
- 16.05 h Out of the oven and leave to cool






Daniel Ihrke says
Next time I make this, I’m going to turn the heat down to 400 after 15 minutes. I’m also going to use a cast iron skillet for the steam – regular metal pan, i.e. a cake pan, doesn’t hold the heat well enough. Otherwise tasty and will probably bake it again
Debbi says
Wow! I usually use the refrigerator proofing method as that is where my sourdough journey started. Also I live in a humid climate. I tried the miche recipe 2 weeks ago and it has now replaced our staple 50/50 wholewheat boule for our daily bread. 3 loaves a week keeps my husband in bread and it is easier for me to mix and bake on the same day. I love the texture and taste. I do find slashing this one difficult. The proofing times are much shorter so I have to watch it carefully so it doesn’t over proof.
Andrea says
Thanks for this detailed, delicious recipe, however the step where the miche is finished proofing in the banneton, and then needs to be turned out of the banneton and slashed and put into the oven, is not covered. I am an experienced baker and I know what to do at this point, however I worry someone may think they can bake the bread in the banneton. They need guidance on how to get the proofed bread into the oven. I’ve re-read the recipe to see if I missed this part of the instructions.
Laura D says
Thank you for this comment— I am a first time baker and re read the recipe over and again thinking I must have missed something :). I’ll search around to see if I can find the directions but if you have a link to share I would be appreciative. Thank you. Laura
denise says
In het gerecht spreekt je van broodmeel??? Welk is dit aub. Gewone tarwe bloem voor brood of met een zeker percentage meel in?deze benaming ken ik niet. Het volkorenmeel is dit tarwemeel volledig? Ik ken de benamingen meel van bvb Tarwe of rogge de volledige gemalen graankorrel. En de benaming bloem de gemalen graankorrel gezeefd zonder de pel ( buitenkant) . Dank u voor de verklaring het is verwarrend.
Weekend Bakers says
Hallo Denise,
Wholewheat flour is volkoren tarwemeel, dus het meel van de hele tarwekorrel gemalen!
Hoop dat het zo duidelijk is.
Krister Willgren says
How would you do this with home ground flour (Mockmill) and a sifter?
Weekend Bakers says
Hello Krister,
Can you tell us what specific question you have about the use of the flour? Do you mean you want to use only one type of flour? Is it wheat flour that you mill yourself?
Alena says
Is it okay to halve the amount of ingredients at all steps (including preferment) to get a smaller miche(tte)?
Weekend Bakers says
Yes Alena, that is no problem. Just make sure to bake it for a shorter period, 40 to 45 minutes.
Enjoy your baking!
Alena says
Thank you! Especially for the timing note — I’d probably never have thought of it 🙂
Weekend Bakers says
Glad to help 🙂
SusAnna says
I made The bread the same besides after shaping I put in in the fridge from about 2 pm till next morning 10 am. It tastes super good but the outside of the bread is soft and not crunchy like regular sourdough. Is it supposed to be soft or did I underproof or over proof?
SusAnna says
Forgot to mention i halved them and baked in a Dutch Oven.
Weekend Bakers says
Hello SusAnna,
Did you also make the recipe as described before and did you get this same result? We think the crust issue could have something to do with the oven (temp) and the baking time maybe. It is hard for us to judge, because you changed the process and we do not know the temp of your dough or fridge or if you proofed the dough further after the fridge period, so we do not know if it could be over or under-proofed. We would not think you will get a soft ‘crust’ when underproofed.
Jennifer Pellegrino says
what is the dough put on or into? A dutch oven-what size? A stone-who size.
Weekend Bakers says
Hi Jennifer,
We bake this bread directly on a stone, but you can also use a Dutch oven. In both cases you need to allow for about 30 cm / 12 inches diameter to comfortably place the loaf in or on it, but for a stone a bit bigger is better.
Jukka-Pekka Kiviniemi says
Some photos at instagram, search jpkivi
Jukka-Pekka Kiviniemi says
Ive made these breads in school (Nord Utbildning, Övertorneå, Sweden) several times and we just love them. Link below to see some photos.
Weekend Bakers says
Hello Jukka,
Thank you for your wonderful feedback to this recipe. How great that you are baking this bread at your school!
Campbell Boyd says
Is there a reason why there is less water in the preferment than typical sourdough recipes which have the same weight of water as flour?
Weekend Bakers says
Hi Campbell,
There are all kinds of ways and methods when it comes to preferments. With this recipe you often see a more stiff preferment like a ‘biga’. A biga can be held longer at its peak compared to wetter sponges like a poolish. In general it is said that biga is used when you want breads to go up, and poolish for when you want breads to go sideways (just like what bigas and poolish do on their own). A stiffer preferment when you want strength, a wetter when you want more extensibility in your dough.
Campbell Boyd says
Well I tried both and the bigga certainly produced a much better rise. I may need to reduce the amount of water as the dough is still a bit sticky prior to baking. However, the flavour is wonderful.
Weekend Bakers says
Great to ‘hear’ Campbell, but do not be afraid of a slightly sticky dough, it can give you all kinds of benefits when it comes to the end result, including a lovely crust and crumb. Also see our tips on wet dough: www.weekendbakery.com/posts…ion-dough/
Enjoy your miche!
Momenat sohaib says
Thank you for sharing this beautiful recipe. I am in the process of making it right now. I have a concern. With the amount of dough that will be made from this recipe, how many bannettons will I need? Should they be 8 inches?
Weekend Bakers says
Hello Momenat,
The total loaf is about 1.6 kg, so for this you need one basket of around 9.5 inches like this: www.weekendbakery.com/websh…miche.html
Or alternatively you can make two loaves of around 800 grams and use two baskets of around 8 inches. If you make two loaves, do not forget that the baking time will be shorter than for one big miche. For two our indication is 45 minutes.
Hope it will be great!
Martine Van Hese says
Hello Ed en Marieke
Bedankt voor al de heerlijke recepten en de duidelijke uitleg.
Had reeds verschillende malen geprobeerd om zuurdesemstarter te maken maar lukte nooit tot ik jullie recepten vond.
Heb ondertussen het Pain naturel gemaakt, en het tarwe volkoren zuurdesembrood. Allebei mooi gelukt.
Nu bak ik voor de tweede keer een miche en heb de volgende vraag:
is het normaal dat het deeg na de autolyse en het kneden voor 5 minuten nogal plakkerig is. ik bedoel hiermee, ik krijg het deeg niet in een mooie deegbal zoals bij de andere twee broden waardoor het lastig handelbaar is.
Ik volg het recept zoals beschreven.
De laatste rijs doe ik ook rechtstreeks op de vakplaat bij gebrek aan banetton (komt er nog als ik zeker weet dat ik voldoende keren brood bak)
Verder nog de vraag ivm een Dutch oven, kan ik daarvoor ook zo’n gietijzeren kookpot met deksel gebruiken type Staub?
alvast bedankt voor de hulp
volgende project wordt de pizza
Martine
Weekend Bakers says
Hallo Martine,
Leuk je comment te lezen. Fijn dat het zo goed lukt. Wat betreft de miche, met name door de (volkoren)rogge kan het zijn dat de hoeveelheid vocht wat aanpassing behoeft. Je kunt rustig wat minder vocht gebruiken zodat het deeg iets minder plakkerig is, want wellicht neemt jouw meel wat minder vocht op dan degene die wij gebruiken.
En ja de Staub van gietijzer kan prima dienen als Dutch oven. Voorzichtig met de hete pan en deksel altijd en ovenwanten bij de hand wanneer je de deksel tijdens het bakproces wilt verwijderen!
Leuk dat je ook met de pizza aan de slag gaat. Geniet ervan en laat nog eens horen hoe dat gaat!
Happy baking & sharing,
Ed & Marieke
Joseph Chiha says
Hello
Fantastic recipes and I love love love them.
Do you have any tips on how to prepare the dough a day before baking and retarding it in the fridge? I often don’t have the time on the day I need it for all the rides etc and want to see if I can use the fridge to store the dough before the final proofing.
Much thanks
Joseph
Weekend Bakers says
Hello Joseph,
Yes, you can do the final proofing overnight in the fridge and bake the next morning. It will be a bit of a trial and error to get the process and times right. We cannot give you the exact details and have not done it ourselves with this specific recipe. It is dependent on the temperature of your fridge and the amount of culture used in the recipe and the hours in the fridge (factors you can all adjust to your needs).
So just give it a try and start with a shorter fridge time or if possible keep an eye on the development and see how fast it goes. Better to give it some extra proofing out of the fridge than an over-proofed loaf. After a few trial runs you will get it right, if not sooner.
Hope it will work out!
SABRINA says
GOOD MORNING, I LIKE SO MUCH THE BREAD BUT IN A LOT OF INGREDIENT IT IS NECESSARY A “sourdough culture” TO MAKE THE POOLISH.
I DON’T HAVE sourdough culture AND I CANNOT TO MAKE IT.
HOW I CAN CONVERT IN THE
FRESH YEAST?
THANK YOU SO MUCH
Weekend Bakers says
Hello Sabrina,
You can also make a poolish with yeast.
Depending on the recipe and time you would use around 1 gram fresh yeast in 100 grams of flour with 100% hydration (so 100 grams of water). But it depends on the recipe how you should continue. You can make our pain rustique for example which is a bread with sourdough and a bit of yeast in the final dough. If you want to make it only yeast you replace the sourdough in the poolish with 1.5 grams of fresh yeast for this recipe:
www.weekendbakery.com/posts…-rustique/
Good luck with it!
hayatte says
Hi where do you cook the bread, is it in the banetton or you take it off before going to the oven?
Weekend Bakers says
Hi Hayatte,
Bannetons are for proofing and not for baking! So you put the shaped loaf in the basket, let it proof. Turn the loaf from the basket onto the bread peel or baking tray and take it to the oven.
More on bannetons here: www.weekendbakery.com/posts…-banneton/
Happy baking!
Chris says
Just want to say thank you. I was looking to make a Poilane-style miche and found your site. Your instruction was very clear and the loaf came out great. My only hiccup was that my preferment weighed only 315g vs your 322g. Maybe it was a bit dryer than it should have been?
Weekend Bakers says
Hello Chris,
Thank you for the excellent comment. Glad you liked the recipe. Could be the sourdough in the preferment, always a bit harder to weigh exactly, but that small difference would not be a problem for the end result.
Happy baking!
Martijn says
Hi, This recipe sounds great! I am making it as we speak! One question regarding the bulk fermentation time. Usually for sourdough bread it takes 4 houts to ferment at room temperature (2h, punch down and another 2h). This recipe uses only 2,5 hours (3 times 50 min). Are you sure this is enough? Can you also explain why? Thanks a lot!
Weekend Bakers says
Hi Martijn,
There are probably other things different in this recipe too, compared to the other one you are referring to, like the S&F technique. They are both valid. In this one we do not punch on the dough, because we are aiming for a certain structure in the crumb, we want to keep the air in as much as possible. This works for us, but keep in mind that every sourdough culture used is different and it could be that an extra round of S&F plus 50 minutes rest would give a better result. All part of the ‘make it your own’ journey of each recipe, and you always need a few turns to get it right for your situation.
Happy sourdough baking!
Jamos says
Question when baking do you but in Dutch oven? Does it bake covered or uncovered? Could you bake on a strone in oven? Just curious as how to bake seems to missing in instructions. Thanks!
Jamos says
Any way you could give ingredients in cups, tbsp, and tsp?
Weekend Bakers says
We have a baking conversion page for you: www.weekendbakery.com/cooki…nversions/
But we really want to encourage every baker to use scales and carefully weigh ingredients if possible! As baking is an exact science, it is the only way to get consistent good results. Especially with weighing small amounts of yeast and salt, a precision scale that can weigh tenths of grams is something we couldn’t do without. You can buy it for almost the price of a good sack of flour.
Happy baking!
Weekend Bakers says
Hi Jamos,
No we do not, but if you have that option it would be perfect to use it for this bread, no problem. Usually you would cover it for the first half of the baking and then take the lid off for browning. The instructions for baking are in the recipe, maybe you just missed is:
“Preheat your oven to 235 ºC / 455 ºF (at what stage you preheat your oven depends on how long it takes your oven to heat through, some take 30 minutes, some with stone floors take a lot longer, up to two hours. The preparation time from this point until the bread actually goes into the oven is about 90 minutes! So you might want to preheat your oven at a later stage but make sure it’s well heated). “
Chris says
I made a mistake when baking this bread. I added about 2% fresh yeast to the main ingredients which turned the bread into a hybrid. The bread however tasted delicious!
Bruce Graham says
where do you get sourdough starter
Weekend Bakers says
Hello Bruce,
You can make it yourself. See our instructions here: www.weekendbakery.com/posts…asy-steps/
Happy baking!
Marinette T roost says
Ha die weekendbakkers!
nogmaals dank voor het aanbevelen van de Zandhaas, want wat een voortreffelijk meel/bloem. Erg smakelijk en fijn om mee te werken.
Jullie sourdough pain naturel heb ik nu twee x gemaakt: succès fou! Alleen niet zo mooi opengebarsten als die op jullie foto, maar ik heb dan ook geen Rofco..
Vandaag maak ik de miche, zij het met een ons meer roggemeel, omdat wij daar zo dol op zijn.
Maar nog even het volgende: in het recept voor het p.naturel en dat voor de miche staat niet dat de oventemperatuur na verloop van een bep.tijd omlaag moet. Ik heb dat wel gedaan, want ik vreesde voor een verbrand brood.. Of is het standaard na 10min. zoals in de ‘tips’ staat aangegeven…mag ik eens weten hoe dat zit?
Nou erg bedankt voor deze fantastische site,
Eet smakelijk,
Marinette
Weekend Bakers says
Hallo Marinette,
Fijn dat de Zandhaas ook zo bevalt. Ze hebben ons nog nooit teleurgesteld!
Wat betreft je vraag: Het ligt een beetje aan je oven. Als je een oven hebt waarbij de afstand van het brood tot het gloei-element / de warmtebron voldoende groot is kun je op dezelfde temperatuur doorbakken tot het einde. Maar zoals je zegt was je in jouw geval al bang voor een verbrand brood. Dat betekent dat het met jullie oven het beste zou kunnen werken om de oven te temperen zodra de korst een mooie kleur heeft. Het is natuurlijk wel belangrijk dat het brood goed gaar is. Dit weet je eigenlijk alleen zeker als je de kerntemperatuur van je brood meet met een digitale thermometer (en door ervaring met het recept en je oven). De ideale kerntemperatuur van een brood is rond de 93 Celsius (iets hoger voor nattere degen).
Bij ovens zoals de Rofco schakelen wij standaard terug. Maar deze oven heeft door de stenen en isolatie ook een heel goed warmte-retentievermogen zodat het brood toch goed gebakken wordt.
Het is dus toch even ervaring opdoen en optimaliseren voor je eigen situatie.
Succes ermee en alvast een goed (bak)weekend!
Marieke & Ed
Weekend Bakers says
Hi Edgar,
Yes you can double everything to make the dough. But because we have never baked such a big bread like you want to try now, we cannot really tell you accurately what the cooking time should be. It is of course more than the 70 minutes for the 1.6 kg, but we do not think it should be doubled, it would be less than that. We would suggest sticking to about the same temp probably. But maybe a bit of research on the web to check with other bakers who have baked 3 kg+ loaves to see about the times involved would be a good idea. Other than that using a thermometer to measure the inside/core is the only way to know for sure if it is properly cooked.
Good luck with it!
Marieke & Ed.
Edgar says
Hi,
Thanks for sharing all this good info in a really nice format 🙂
I will be baking this awesome bread soon and i want to bake the 3.2kg version which is double of what you outlined in your recipe ,
my question is ; do i just double everything you outlined on your recipe , and also would you be able to give me cooking temps and durations….
Many thanks 🙂
Bill in UK says
Have made this your way 2/3 times now and it is great. Have now tried a long and slow method also. After the final fold I let it stand for an hour then put it in the fridge overnight. 8 degrees. In the morning I shaped it then put it back in the fridge in the banetton. It went direct from the fridge to the oven after another eight hours or so. I am sure the bread doesn’t need this long but the flavours that develop are awesome. It is not a sour bread just a really tasty one.
Weekend Bakers says
Hi Bill,
Very interesting to hear about your method and the great results. Our ‘problem’ usually is lack of fridge space (because of multiple breads and all the weird and wonderful stuff we keep in our fridge) but it is such a great method to also give you some flexibility and of course the extra developed flavour is a big bonus too.
Happy Baking!
Bill in UK says
I am lucky in that I have a small fridge mostly used for bread and, because I am a geek at heart, I fitted it with a digital controller so I can have it any temperature I want + or – half a degree!
Weekend Bakers says
Sounds like something somebody I know by the name of Ed would do. You should see our coffee machine 😉
Happy Baking Bill!
Marieke
Doris says
Hi Ed and Marieke,
I tried bake this bread today! I baked it in the middle of rack for 50~55 mins only with 235c as the top of bread it’s burn. I checked it, the sound was hollow, that’s why I stop baking it and taste is good!! Please advice what should I do to avoid burn the top!?
Thank you for your advice!
Doris
Weekend Bakers says
Hi Doris,
The best thing to do is as soon as you notice your bread has the right colour, you turn the oven down a notch (this will be after 10 to 15 minutes maybe depending on your oven). If your oven has glowing spirals on the top for example, turning your oven to a lower heat will stop them from radiating, but the oven will still be hot enough to bake your bread, especially if you would bake on a stone. Otherwise I would suggest covering the top of the loaf with some alu foil.
Hope this helps.
Happy Baking!
Marieke
Bill in UK says
Hi guys. Tried this and it works great. Any ideas on how to adjust it to fit an overnight bulk ferment into the schedule. It would fit better with my normal routine when I am baking for neighbours etc.
Weekend Bakers says
Hi Bill,
I think you already had to make a decision yourself or…? Because I saw a baking result on twitter.
What did you do in the end? I think, depending on your schedule we would put the dough in the fridge right after the 5 minute mixing or maybe after the shaping. Next day get it out of the fridge and give it an hour or so to warm up, then continue with recipe. We have not tried it ourselves (usually not a lot of fridge space) but always love to hear if it works for other bakers!
Ed & Marieke
Elaine says
Hello and Merry Christmas!
I am very tempted to try making the miche, and I was wondering about the size of a 1.6 kg loaf. I bake in a cast iron enamel pot that is 27 cm in diameter. I normally make 500g breads and they fit beautifully with room to spare. I think I may need to half the recipe, but then it wouldn’t be a ‘real’ miche. With these adjustments I am thinking it should be done in less time, probably 50 min.
What do you think? Should I be changing anything else for a smaller ‘miche’.
I made your no-knead brioche for Christmas morning and it was a huge success. It disappeared before I could snap a picture! Thank you.
Elaine.
Weekend Bakers says
Hi Elaine,
I think you are spot on with your analyses. Making a small ‘miche’ of around 800 g and bake it for 50 minutes should work just fine. Great to hear about the brioche success. It is so rewarding to make people happy with your baking results.
Keep up the wonderful baking and let us know how the ‘mini-miche’ turns out,
Marieke
Rolf says
Hi,
Curiosity made me yesterday to bake your pain miche, following the recipe to the letter. With the steam and on a big tile. My oven is a digital Miele oven, so I can adjust the temperature exactly to 235 ̊Celsius.
It smelled wonderful and looked like the picture. It needed no scoring because when I took the dough out of the banneton, it scored itself. But regrettably something was wrong.
The crust was 7 mm thick, rock-hard, barely to cut and to eat. And it needs more salt.
So what went wrong and what to do?
I am very interested to have your advice.
Kind regards, Rolf.
Retie, Belgium
Since more than 25 years I do bake my own bread. And after buying in San Francisco a package of sourdough powder with the Lactobacillus sanfranciscensi I bake twice a week a sourdough bread. Since the dough is quit wet I had to use an oval cast iron Staub pan (capacity 2 quarts, 9,5 cm high) to prevent the flowing over of the dough. The dough rises to 10,5 – 11 cm.
Than I discovered and ussing the Composite Bobo breadpan (22,5 cm long, 12 cm wide, 11,5 cm high). I’m no longer troubled by overflowing.
Ingredients.
Sourdough starter: all purpose flour + water (166% hydration)
Poolish: 180 grams sourdough starter, 140 grams white spelt flour; 140 ml luke warm water.
Prefermented dough: poolish, 1 teaspoon ginger powder, 10 grams malt powder (to color the bread); 15 g running honey; 25 grams soft butter; 110 ml water.
Final dough: prefermented dough, 200 grams white spelt flour, 280 grams flour (whole wheat or whole grain spelt flour or multigrain), 14 grams salt.
Method:
9.00 making the poolish
11.00 preparing the prefermented dough
12.30 making the final dough. Kneading it with my Kenwood kitchen machine at the lowest speed for 10 minutes.
13.30 kneading the dough down. Putting the dough in the breadpan. Letting it rise to the brim of the pan.
± 14.30 baking the bread in the oven at 245 ̊Celsius.
This a well liked bread that keeps in a paper bag for several days. I often make it for my family and friends.
Weekend Bakers says
Hello Rolf,
Thanks for your question.
We were wondering, since your dough ‘cracked’ before baking, could it be you reduced the amount of water or did you not cover the shaped dough well enough while proofing maybe? The dough should be elastic and not so dry it cracks of course. The timings of course depend largely on dough and room temperature and of course the activeness of your sourdough culture. Maybe you can take a closer look at that too (also see our tips on dough temperature:www.weekendbakery.com/posts…mperature/). Also the quality and absorption of the flour used can make a difference. So if you think your dough does not feel elastic and sticky you should add some more water to get the right consistency and also try to use as little flour as possible while working the dough (stretching and folding and shaping) so not much extra flour gets incorporated into it.
About the salt: 15 g is on the low side (1.66%) which is our personal preference (not big salt eaters, also with other foods) but it can be easily changed to 2% for example which would be around 18 g.
Thank you very much for sharing your recipe, that is so kind of you! We are intrigued by the use of ginger powder in the recipe and will definitely check it out!
Happy Baking!
Ed & Marieke
Rolf says
Hello both of you.
Using ginger powder is an old habit since it enhances the working of yeast. And I think it’s still a nice tast in sourdough bread. You’ll find information among other things at the site – www.tammysrecipes.com/node/2814.
It could be possible that the final dough was to dry. I have no real banneton so I put it the bowl of my Siemens digital scale (disameter 27 cm, 8 cm deep), lined with kitchen paper, and that sifted with some all purpose flour. Since I couldn’t know how high the dough would rise I covered that bowl with a plastic bowl (diameter 30 cm, depth 13 cm). So it was not airtight. I forgot to m ention that I bake the bread in my recipe 45 minutes.
Remarkable was that after storing the bread in a paper bag, the cust was a lot softer, sough still a little hard, bur edible now.
You are right to minimize the use of salt. We do that to, but the the taste margin in bread is to my opinion critica.
Any way thanks for your repsonse and I will try it again.
Kind regards,
Rolf
Ana says
Dear Marieke and Ed,
thank you so much for Miche formula. I baked already 3 loaves. It’s perfect and the taste is wonderful. My regret is that I had to make two loaves instead one large because I don’t have a 1,6 kg bannetone.
Weekend Bakers says
Hello Ana,
Thank you for sharing your baking experience and your pictures. It is no problem making two loaves of course, the only thing is the baking time will be less than with the one big loaf of course (45 to 50 minutes should be enough).
Happy Baking!
Marieke
Weekend Bakers says
Hello Ana,
We bake the bread for 75 minutes (because of the weight of 1.6 kg) at 235C (we have an oven with chamotte stones and also temper it after a while (about 15 minutes)). So it is the same method you use, but because it is a big bread you have to make sure it is properly cooked and for that you would need 70 to 75 minutes. It also depends on the workings of your oven of course, 250 would be too much for us, but maybe for your oven it is the right temp. It always takes a bit of trying and tweaking to get a recipe just right for your own conditions as you would know of course.
Happy baking,
Marieke
Ana says
Hello,
at what temperature did you baked the miche? I would like to give it a try because it looks great. I usually bake at 250 grade C for 15 minutes (with steam) and then at 210 -220 grade C for another 30-40 minutes, depends of the type of bread. Thank you in advance for your answer!
Mike says
Hi guys,
It’s me again Mike.
I sent an inquiry minutes ago about the hydration of the dough whether it is correctly 76.9% correct or not. Hope you get it.
Now i have another question:
From my experience with the kind of WWF that i usually use, it is organic and very strong; in fact it’s extra strong to the point that when leaving the dough to autolyse for 20 mins. or so, i come back to see that the dough has already started developing even before S&F or kneading. So my question is, do you think i should cut down on one of three things: 1-Poolish proofing time, 2-Poolish amount or 3-amount of WWF used in the recipe. Honestly, i’m quite certain that if i use the same amounts described herein in you recipe i will have a dough breaking and developing holes in it.
So what do you think?
Mike
Weekend Bakers says
Hi Mike,
You cannot bring back the amount of poolish without also having to tamper with the times given in the recipe.
We would suggest using a little less of your very strong flour, keeping an eye on your dough during autolyse and maybe cut that short a bit too. And for the rest, if you have never made this recipe as described above, we would like to encourage you to try and make it, keeping as close to the original as you can, so you have a reference to start with and from there make small changes (the easiest being using less of your super strong WWF).
Good luck with it,
Ed & Marieke
Mike says
Your answer sounds reasonable. OK i think i will cut down on WWF by 100grs. thus making the percentage of WWF within the whole recipe nearly 60%.
Will let you know what happens, wish me luck 😀
Oleg says
Marieke,
I baked the Miche last weekend. It a perfect bread!!! I love it, my kids love it!
Thanks a lot fo rthr great recipe!!!!!
Just one more question: you wrote “This miche stays very edible for several days”. Would you recommend to keep it in plastic bag? In paper bag? or just cover in some kind of wollen fabric?
Thanks,
Oleg
Weekend Bakers says
Hi Oleg,
Sounds very good. What we usually do and what we think is the best method to keep bread as fresh as possible is to keep it in the freezer. We slice the bread, but it in a plastic bag (maybe even suck the air out of the bag) and when we want to eat the bread we take a slice and very quickly blast it in the microwave on a very high wattage (900 watts, 15 to 20 seconds). This way for us the bread comes closest to the fresh equivalent. If you do not put it in the freezer and want to preserve it for a few days a paper bag will be best (leave it whole, only slice the bread just before eating). You can also use a plastic bag but your crust will get soft sooner. Another thing that works well after two days or so is to give the bread a ‘pick me up’ by putting it in your oven for 5-7 minutes at 180C /350F. Very lightly toasting a slice in your bread toaster works also great with this bread.
Enjoy!
Marieke
Oleg says
Marieke
Thanks a lot for your answer! I am going to bake and send this bread to my friend in UK (from US) and was wondering what the best way is.
Also, one more question, in some book they recommend to took it out of proofing basket and wait about 10 minutes before slashing the top of the miche. I guess, the surface would be more dry after ten minutes and it will be easier to slash, but from another side the dough might lose it’s shape. What are your thought about it?
Thanks again,
Oleg
Weekend Bakers says
Hello Oleg,
I am sorry to say we have no experience with shipping bread. I know that some people bake it up to a certain point so it becomes a sort of bake off bread. I would try and make it as air tight as possible. The receiver can put it in the oven for a short while to give it a quick pick me up.
As for your second question no matter how wet our dough we never use the method of letting the dough (intentionally) dry out (bannetons will always absorb a little moisture). We think it is unnecessary and does not benefit the end result. Above all it does not allow you to get better at scoring your bread. We would advise to use the sharpest blade you can get and (with the use of thse tips: www.weekendbakery.com/posts…onfidence/) just keep practicing.
Good luck with it and would really like to hear about how the bread survives the journey!
Ed & Marieke
Oleg says
Ed & Marieke,
Just want to thank you again for the great web site!
I baked this bread a lot of times already and gave to my local friends (with huge success) and even sent it to my friend in UK. The delivery took 1 week and he did not pick it up for another week, but at the end he said it still had great taste and whole family (including kids) were fighting for it. I guess, using natural sourdough starter instead of yeast really increase the life time of bread.
Thanks a gain for all your effort!
Best regards,
Oleg
Weekend Bakers says
Thank you Oleg, for sharing this with us. We have never tried to send a bread this way as I told you, and did not know it would keep so well. What a great experiment!
Happy Baking and Sharing!
Marieke
Oleg says
Hello:
First of all let me thank you for such a great site!!! I found a lot of very useful info on it and value it much more than a lot of very expensive book I have read.
Few questions about “Miche” recipe:
Looks like there are 3 types of flour needs to be used: 1. bread flour, 2. whole rye flour and 3. wholewheat flour. There is no question about Rye Flour, but I am very confused about difference between “bread” and “whole wheat” flour. Sometimes I see the flour that said “Whole Wheat Bread Flour” like right here – www.amazon.com/Organ…B002T4XZR0
Do I need only this flour or it’s not really good and I have to buy bread flour and whole wheat flour separately? I am in the USA, so if you can give me example of the flour I can use (like King Arthur Flour) I would be really appreciated it.
Thanks a lot!
Oleg
Weekend Bakers says
Hello Oleg,
Thanks for your kind words. About the flour we can keep it very simple. Both bread flour and whole wheat flour are made of wheat. The difference between the two is that the whole wheat version still contains all the bran and germs (everything from the ‘whole grain’) and bread flour only a certain percentage. Using both types in baking gives a healthy bread on the one hand because of the whole wheat and (because of the lighter bread flour) a less compact result on the other. The rye (also made from the whole grain) also adds a healthy element of yet again a different taste. Of course you can mix and match and change all you want, but the traditional miche is made with the three types of flour.
Looking at King Arthur you can choose their unbleached bread flour (blue package) and their premium 100% whole wheat flour (red package).
Hope you can use this info.
Good luck with the flour and the baking!
Marieke
Oleg says
Marieke
Thanks a lot for your answer!!!
I’ll start baking it as soon as mine starter be ready.
Thanks again,
Oleg