

I love the size and shape of this ‘little whistle’ loaf
‘Fluitje’ is a Dutch word meaning little whistle. My dad is to blame for us calling this loaf a fluitje. So it is really a tribute to him and his tendency to ‘brand’ a concoctions that is new or different to him with a name of his own invention. But he isn’t the only one. Our pain rustique is also referred to as ‘Marieke bread’ by several people, it’s just easier for them I guess, although it’s not very fair to Ed who is usually doing most of the pain rustique making and baking.
This recipe is based on our recipe for pain rustique but there are a lot of differences. First of all this bread is made with spelt instead of rye to give it a slightly different flavor. Not immensely exciting of course, you can also use spelt in our pain rustique recipe. For us the excitement can be found in trying to perfect the shaping and scoring and the fact that we ‘redesigned’ the recipe so you’ll end up with two perfect little loaves of about 500 grams each. They will fit in almost any little household oven. Keep one for yourself and make somebody happy by giving one away.
In our Rofco oven we usually bake 9 ‘fluitjes’ at a time, three per stone. Like the baguettes they are proofed in a linen couche or proofing cloth. The scoring is also very similar to scoring a baguette s make sure you imagine a vertical line on the loaf and slash the dough at an ever so slight angle to the line. See our bread scoring with confidence tips for more info.
Happy Baking!

This recipe uses a hybrid method, meaning it uses both sourdough culture and a little bit of yeast to get to a very tasty and pleasing end result just a little bit faster than you would if you were making a loaf using just your sourdough culture.
For this recipe we are going to make a starter named a poolish. A poolish is a type of wet sponge usually made with an equal weight of water and flour and an extremely small amount of yeast and NO salt. Making a poolish helps bring more taste and strength to your bread while using less yeast.
Note: We use European flour which absorbs a few % less water than American type flour. People using this type of flour should add 3-8 ml water to the final dough.

Making the Poolish
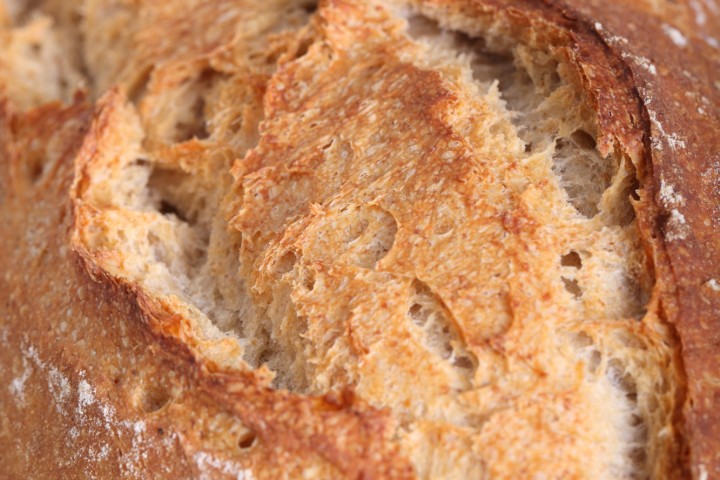
In a bowl stir together 240 grams of bread flour, 60 grams of whole spelt flour with 300 grams of water at room temperature with 15 grams of sourdough culture. Mix it well until you have a homogeneous slurry that looks like very thick batter. Cover the bowl with clingfilm and let the prefermenting begin. After 12 hours at room temperature it is ready for use. So if you want to begin your bread making in the morning, you make your poolish at about 9 in the evening.
Our sourdough starter is not very sour by nature, it gives a very mellow sour note to the bread and we like it that way. We have found that the sourness depends on the ripeness of the poolish. This means that using an under-ripe poolish gives you the flavor advantages but not the added sourness. We tend to use the poolish before they peak out and collapse. When this points is reached all depends on ambient temperature and sourdough culture activity. An over-ripe poolish has a weaker gluten structure which will result in a weaker dough and less oven spring.
We use a sourdough culture which is made with 100% whole grain rye flour. A sourdough culture based on rye flour is easier to maintain, it does not go into a slurry when you forget about it, it is easier to stir because it has almost no gluten and it smells very very nice, a bit like fruit. It is also very forgiving in the amount you feed it. Normally we only feed it once a week, after the weekend baking, we just give it a few table spoons of water and rye flour, stir and ready!

| Ingredients for the Poolish | ||||
|---|---|---|---|---|
| 240 | g | wheat (bread) flour | ||
| 60 | g | whole spelt flour | ||
| 300 | g | water (room temperature) | ||
| 15 | g | sourdough culture | ||
| Ingredients for the Pain Fluitjes | ||||
|---|---|---|---|---|
| makes 2 ‘fluitjes’ of slightly over 500 g each | ||||
| the poolish from step 1 | ||||
| 300 | g | wheat (bread) flour | ||
| 80 | g | water | ||
| 11 | g | (sea) salt | ||
| 3 | g | instant yeast | ||
Making the Fluitjes
Preheat your oven to 235 ºC / 455 ºF (at what stage you preheat your oven depends on how long it takes for your oven to heat through, some take 30 minutes, some, like ours, with stone floors take a lot longer, up to two hours. The preparation time from this point until the bread actually goes into the oven is a little under 2.5 hours).
Ideally the temperature of your dough after kneading should be around 24-25 ºC / 75ºF. You should adjust the temperature of the water you add to reach this temperature of the total dough. For us this means in summer adding cold water to this recipe and in winter (when our little bakery can get much colder then the rest of our house) adding water up to 50ºC /122 F. You can measure the temperature of water and dough with a food thermometer. These measurements are important because they correspond with the proving times in the recipe.
Put the poolish starter and flour (no salt and yeast yet!) in the mixing bowl of your standing mixer and add 2/3 of the water. Now start mixing and gradually add the rest of the water and let the dough come together. Knead for only 1 minute until you have a shaggy mass. Leave it in your mixing bowl, cover and leave for 30 minutes. This process is called ‘autolyse’.
After the autolyse phase you add the yeast and the salt and knead the mass for another 5 minutes (we use a spiral mixer for this job) and watch it turn into something a little bit more bread doughy. Cover and leave to rest for 40 minutes.
Take the dough out of the bowl and onto a floured work surface and do one stretch and fold (a full letter fold, left over right, right over left, bottom over top, top over bottom; see our bread movies to observe this technique if you are not familiar with it). Transfer to the bowl, cover and again leave to rest for 25 minutes.
Repeat the stretch and fold (full letter fold) part, one more time (so 2 times in total), and again leave to rest for 25 minutes.
Now it’s time to shape. Shaping is a tricky subject. It’s something for which everybody develops his or her own technique over time. We try to shape these smaller loaves into slightly stretched out short batards and let them proof in a linen couche or proofing cloth. You can make a batard or loaf shape or a boule (ball), whichever you prefer. If necessary you can learn more on shaping from a good bread book, like the ones by Hamelman or Reinhart. Also check out the shaping video (nr. 4, the batard shaping bit begins around 6:28 min.) on the King Arthur four website.
Cover the loaves, as they lay in the couche we cover them with floured cling film, and leave to proof for 30 minutes. When you think they have risen enough, use your finger to carefully make a very small dent in the dough. If the dent remains, the bread is ready to bake, if the indentation disappears, the dough needs a little bit more time.
Now your loaf is ready for the oven. Slash the top of the fluitjes with a lame or bread scoring knife, like you would a baguette, but only two slashes per loaf. To get a nice crust, try to create some steam in your oven by putting a small metal baking tray on your oven floor when you preheat the oven and pouring in half a cup of hot water immediately after putting the bread in the oven. Release some steam by setting your oven door ajar (perhaps with the help of a wooden spoon or oven mitt) 5 minutes before the bread is ready. If you are going to create steam with a baking tray, you maybe also want to turn your oven temperature a bit higher, because you are going to lose some heat in the process.
Check out our oven tips to make optimum use of your oven while baking bread.
After 35 minutes of baking your loaves should be ready. Transfer onto a rack and leave to cool. This loaf also keeps very well in the freezer. But please make sure to eat at least some of it while fresh!

Time Table
day 1 21.00 h Make starter let ferment for 12 hours at room temperature
day 2 09.00 h Make final dough
- 09:00 h – Add flour and water to starter, mix for 1 minute
- 30 minutes autolyse
- 09:30 h – Add salt and yeast
- Knead for 5 minutes
- Rest for 40 minutes
- 10:15 h – First stretch and fold
- Rest for 25 minutes
- 10:40 h – Second stretch and fold
- Rest for 25 minutes
- 11:05 h – Shape
- 11:10 h Final proofing 30 minutes
- 11:40 h – Bake for 35 minutes at 235ºC / 455ºF
- 12:15 h – Your fluitjes are ready!


Alain Pompey says
thanks for the recipes and formula great breads
Anna says
Hi Marieke and Ed,
Love this recipe. Many thanks for sharing. One question I am puzzled with… if I would like to incorporate some seeds in it (linseeds, sunflower…) at which stage should I add them and how much is reasonable (do not want to risk the dough totally collapsing) ? Should I first soak them in water ? If so, should I deduct the amount of water in which seeds are soaked from the total water added ? Appreciate your advise.
Kind regards, Anna
Weekend Bakers says
Hello Anna,
Thank you for the enthusiastic comment. You can add your seeds at the last stage of the kneading of the final dough (so the last minute of the 5 minute period). The amount can be adapted to personal preference. We would suggest to start with 15 to 20% of the total flour weight. You can lightly toast the seeds before adding them but it is not necessary. Seeds will absorb some of the liquid in the dough and when adding a lot you might need to compensate by adding extra liquid. But because this is already a wetter type of dough, with the amount we mentioned you can just stick to the recipe as described we expect.
Alternatively you can also make something called a ‘soaker’ with seeds and grains that can be added to a recipe where the grains and seeds are soaked (overnight) before adding them to the dough. We do not have a recipe at hand with this method, but you can find more info on sites like the fresh loaf about this.
Hope it will be great!
Douglas says
Great recipe as usual Marieke! I made this on a Friday and it came out perfectly, and that’s without using sourdough in the poolish and using whole wheat instead of spelt. You know a recipe is good when a few changes still produce a great result.
Btw, there are two discrepancies I noticed in the above entry. The first is in the directions for the poolish where it mentions whole wheat flour rather than spelt. This differs from the ingredient list. The second is in the directions for the bake, you say to preheat the oven to 235/455 but in the time line it states 230/445.
To those who don’t like sourdough or have family and friends who don’t like it, review the poolish/biga article on this site and use the formula given. For me, I made a 12 hr poolish using a 0.15% instant yeast amount (.45g).
Weekend Bakers says
Hello Douglas,
Thank you again so much for your enthusiastic comment and especially for pointing out the errors in the directions and time table. We already changed it, much appreciated!
Great the yeast-based poolish worked well and the result was to your satisfaction.
Happy baking from Holland
Sarah says
Another winner! I made these today and one of them has already disappeared. Great crust. Great crumb. Great flavour. I was wondering though, is it possible to make this one without the added instant yeast, just all sourdough? I imagine the texture might be slightly chewier and I’d need longer fermentation times. What would you recommend?
Weekend Bakers says
Hi Sarah,
Thank you for your excellent comment. We would suggest the following.
Use our mini boules recipe as a base: www.weekendbakery.com/posts…i-boulles/
Instead of 6 boules you make 3 loaves of around 500 grams with it and you can substitute the wholewheat of spelt in this recipe. This way you have a 100% sourdough recipe with corresponding times. Just make sure to also bake them for 35 minutes.
Alternatively you can double the resting times for this recipe and double or very probably triple the final proofing for this recipe, depending on the enthusiasm of your sourdough and the temperature of the dough.
Hope this is helpful.
Happy baking!
Sarah says
Thanks so much for this! Will try tomorrow and report back on results 🙂
Sarah says
Lovely little loaf! I used the mini boules recipe, divided by three for one loaf and increased the final proofing time.
I ended up giving the one I made on Monday away to a friend – it had just come out of the oven and he gave me puppy eyes – so I had to make another one yesterday to be able to tell you how it turned out (any excuse to do more baking, really!) I love the texture, soft but with a nice bite and of course a great crust! Thank you so much again! 🙂
Weekend Bakers says
Hi Sarah,
So good to read our suggestion was to your liking and inspired you to bake even more!
Alison says
This is gorgeous.
I started the poolish with my all Canadian Wheat Flour Starter and followed all your hints and tips, especially the video hints. My loaf is now fresh out of the oven dark golden brown and singing (crackling). I have already eaten the crust and it is divine!
It didn’t need 45 minutes – 35 was enough in my oven.
Thank you for your lovely website.
Weekend Bakers says
Thanks for your enthusiastic comment Alison. Great the recipe and tips gave you good results too. Love the singing, never get tired of hearing it!
Happy baking!
Ken says
Can I just say that despite being a pretty decent cook with a knife and hob, I’ve always been terrified of baking. Earlier efforts at cakes have always come out wrong.
Your website and recipe have helped me become a bit of a local celebrity (well, with my own family anyway) for my bread – I make a boule using your recipe above, and it comes out fantastically every time.
Thank you from Ken in Kew
Weekend Bakers says
Hello Ken,
That sounds awesome 🙂
Very good to hear you gave it another chance, overcame your baking fears and we played a part in your success.
Wishing you many more excellent loaves and high praise for them!
Happy baking,
Ed & Marieke
Mike Harvey says
Hi – I am thinking of trying a seeded Sourdough loaf based on the Fluitje recipe which seems to turn out very well for me. We can get a seeded Sourdough from some artisan bakers but I’ve never tried to make them.
In the UK we have a 6 seed flour available from a good miller which I use in regular breads 2 parts to 1 of strong white.
Before I start I have two questions (which I hope you don’t mind) firstly should I bother, or is it a step too far and secondly if I do does anything spring to your mind that I should take into account??
Thanks Mike H.
Mike Harvey says
Hi – I’ve been making the brilliant ‘Fluitje’ loaves every 2/3 weeks since I discovered your site last year – unfortunately it hasn’t helped my waistline (a oven fresh warm loaf mmm!!! ) but you can’t have everything.
With the winter coming on and a lot of produce from the garden we make and freeze a lot of soup – Good Soup needs a roll so I tried making rolls (about 70grm) with the Fluitle recipe.
The result was a good tasting roll but a little too hard for the size, the addition of 20gm of Butter with the Salt and Yeast cooked for around 18 min gives a really great result.
Happy baking Mike
Weekend Bakers says
Hello Mike,
Thank you for sharing, that sounds great. Yes, you are right mini versions do have a lot of crust and your solution is perfect.
Enjoy!
Hippietrip Duo says
I just wanted to drop a line to tell you guys that your website is totally amazing.
How you all made these wonderful pictures, the very detailled description of kinda everything, just so nice if you’re an just-started-bread-baker. 🙂
We are originally from the Netherlands (dus ik had ook op z’n Hollands kunnen schrijven), but we’re living in Hungary at our almost self-supporting farm. We don’t have an oven as you guys, we bake all our bread in our handmade clay-oven. Such a great challenge, and even more wonderful when everyting succeeded again. We wanted to share this with you since these ”fluitjes” are the first spelt-sour dough-small breads we’ve made in our clay-oven, and guess what? They’re smelling, looking and tasting wonderful!
Thank you very much for sharing all your knowlegde, inspiration, motivation, enthousiasm and wonderful pictures.
Greetings from Hungary!
Rowan and Gijs
Weekend Bakers says
Hello Rowan and Gijs,
How wonderful our ‘fluitjes’ are being baked all the way in Hungary! Great to hear they are such a success because your baking indeed sounds like more of a challenge than we have to face over here.
Thank you for liking and trying our recipe and wishing you all the best and many more breads from the clay oven,
Groetjes uit Nederland,
Ed & Marieke
Suganya lena says
Hi,
The recipe calls for wheat(bread) flour . Im confused !! In norway we have bread flour or white flour and the other one is 100%vwheat flour. Which one should i use. Thank u . Bread looks lovely. Cant wait to bake. Waiting for ur reply…
Weekend Bakers says
Hello Suganya,
I understand flour can be confusing, there are different indications and names for different countries. We did an article about flour types a while ago which you might find helpful too. I think the thing that is closest to what we know and use in Holland as wheat flour and which we also use for this recipe is your Norwegian bread flour. An indication (if such information is given on the label of your flour) of the protein content of our flour is around 12.5%. Anything between 12 and 14 % is good for this recipe.
Hope this helps and hope you will try and like the recipe too.
Happy baking and happy Easter,
Marieke
Remco says
Hi, I made a first attempt on making the fluitje. I had to adjust the ingredients because i don’t want to use wheat. So for the poolish i used rye (180) and spelt (120). I needed a lot more water (450 cc) to get it like in the picture, the original amount of water created a fixed lump of dough. Spelt is a thirsty flour. After 12 hours it was bubbly. The ingredient for the bread was only spelt (300+ 100 extra) and no water because i used that in the poolish.
When it came out of the oven it looked great. After slicing it it became clear that the dough inside was sticky. It was in the oven for an hour. I used your timing and the rest temp was about 20 C.
Anybody any comments on how to get it better?
Weekend Bakers says
Hi Remco,
You basically made a totally different recipe! Everything is different when using rye and spelt (rye has very little gluten and spelt also has less than wheat). And if you made 500 g loaves and baked them for 1 hour that is way too long. If you proofed at 20 C it will take a whole lot longer than the times given in this recipe too. Check our tips here: www.weekendbakery.com/posts…mperature/.
Good luck with it!
Roger Vince says
Hi Marieke and Ed
This is my very first attempt at making a sourdough loaf!
I made a rye sourdough culture using your instructions and reading all the comments on the blog, and then made two loaves following this recipe. I’ve been making your ‘Pain Rustique” – variations of – using instant yeast for several weeks but I’ve been wanting to try sourdough for some time. I followed your recipe and intructions quite closely but I found using only 80g water in the main mix left a lot of unabsorbed flour in the mixing bowl so, after the autolyse I added another 35g water which brings the hydration up to around 70%. Funnily enough, I found the same when making the Pain Rustique that in order to get all the flour to absorb I always ended up with 70 % to 72% water. I used the ‘slap and fold’ method to work the dough for about 10 minutes and then the 40 min rest, letter fold, another 25 mins, fold, leave another 25 mins. I “shaped” into two batards and left them to prove on a couche – and this is the bit I find most difficult with making bread – how long to prove? Your recipe called for 30 mins but it was a bit cooler than 24 degrees in our house so I gave it an hour. Although they had increased in size I couldn’t be sure with the finger poke test if they were ready. Anyway, I baked as recommended for 35 mins on the middle shelf of our pathetic domestic oven, around 225 degrees, and left to cool. On cutting the loaf I was a bit disappointed. There was a big hole running almost the entire length of the loaf near the crust and all the holes are near the top. The other loaf didn’t really have any holes. Have you any idea where I have gone wrong? I have found the same problem with many of my other loaves – if there are holes they are all near the crust, I get very little oven spring, and the slashes don’t open up very much.
Sorry this is such a long post but all my searching on the net hasn’t come up with any answers. This site is brilliant and I’m hoping you experienced bakers might spot my problem.
Many thanks, Roger
Elizabet says
Hi Ed en Marieke!
Reading Peters problem (I just experienced the same, but with a B30) I wondered if you know if the B30 has the same problem? My fluitjes were on the bottom stone, and are quite burnt. But I also loaded them first in line, so they’ve been on full heat longer than the other loaves, this could also be the reason..
Another question: I experience that I get a nice structure in my breads when I work with wetter doughs like this one, and the miche and baguette (although sometimes my boyfriend worries when he hears me cursing in the kitchen) but the further I get to the middle of the loaf, the more compact it becomes. So close to the crust (top, side, bottom not so much) it’s all nice and open and holey, but in the middle it’s far less open. This is of course quite logical (it’s the last place to really heat up) but it should be possible to have this structure through the whole loaf. Any ideas on how to achieve this? I bake with a B30, and use quite liberal amounts of steam (there’s always still loads of steam escaping when I op the steam holes) Or maybe it doesn’t have to do with the baking, but with the proofing?
Peter says
Hello Ed & Marieke,
I baked this recipe yesterday in a Rofco B5, which was kindly lend to me by a bread baking colleague. As per the instructions that came with the oven I baked at 8-10 minutes at 230C and then dropped to 50C for the remaining time. The oven rise was fantastic and I was very impressed by the browning after the heat was more or less switched off. However, after the 35 minutes of baking I removed the 2 loaves and found that the bottom was heavily burnt.
As you have been baking in Rofco ovens for such a long time would you be able to give me some advice on the initial baking times? I am tempted to shorten the initial baking at 230C to 5-6 minutes. Or do you think I should preheat at 210C-220C? Or both? I only have the oven for a couple of days so there is only so much experimenting I can do before I have to return it, which I know I will reluctantly do.
Thanks in advance for your help and advice,
Peter
Weekend Bakers says
Hello Peter,
First make sure the heat stabilizes through the whole oven, so minimal of 1 hour preheating!
With our Rofco B20, the bottom stone was closer to the heating element than the other two stones and also closed in. This mend that the bottom stone breads were a good deal darker at the bottom than the breads on the higher levels. To compensate we raised the bottom stone with some rectangular aluminum profiles, which solved the problem considerably. This way the heating elements did not touch the stone anymore. We can imagine this is also the case with the B5, because it has only one baking surface / stone.
We were wondering if the owner of the oven has experienced the same results as you have now, because you followed the instructions he or she gave I presume and which sound on average very valid BTW. Did you bake two fluitjes? Could be you have to drop a little bit sooner, it is the easiest and maybe only thing to try at the moment.
Hope we are of some help to you. Good luck with it!
Ed & Marieke
Claartje in UK says
Being cheeky (lazy) -and still without stand mixer- I kneaded the fluitjes dough with the good old hand mixer dough hooks this time. Great results!! Even better than the hand kneaded ones! Looking forward to baking again tomorrow!
Weekend Bakers says
Great! Just be careful the little mixer can take the heavy kneading and does not over-heat too much.
Levine says
Vandaag de Fluitjes gebakken. Heerlijk! Zie foto: www.flickr.com/photo…919677602/
Weekend Bakers says
Een prachtige kleur ook Levine! We zijn overigens ‘absolutely amazed’ over de hoeveelheid en diversiteit van al je baksels. En die Franse kaneelbroodjes zien er waanzinnig mooi uit!
Happy Baking,
Marieke
Peter says
Your recipes have been extremely helpful lately. After using your pain rustique with success a couple of times I am now tweaking your recipes to fit other purposes.
I took your Fluitje with spelt recipe and just took normal bread flour instead of a mix with some spelt and used a little more sourdough in my poolish and ended p shaping the final dough in baguettes. The results were fantastic. I am a convert when it comes to using sourdough and a little yeast to boost flavor. And it results n the best crumb I have ever baked.
On the baguettes crust, I think I baked them either a little too long or too hot because they were a bit too crunchy. Very much edible, though, but I would like them a little less hard.
Thanks for your recipes and step-by-steps. I hope to be using your recipes a lot more.
If you would like to see some ‘proof’ of my bakes have look at icookandbake.wordpress.com/. I have just started this blog so will be updating soon. If it’s OK with you I would like to link to your site and give credit for your recipes.
Peter
Weekend Bakers says
Thank you for Sharing Peter! It sounds wonderful and your loaves and baguettes look absolutely scrumptious.
Looking forward to more, and of course you can link to our site.
Keep up the wonderful baking and sharing!
Ed and Marieke
Peter says
I recently baked a bunch of loafs at a friends place using this recipe and baked on my chamotte stone in his oven, which can go up to 275°C. So we pre-heated at 275°C for two hours and lowered to 250°C when we loaded the loafs. We used a steam cleaner to create some serious steam in the oven. So far so good. However, despite reasonable slashing of the dough I found that the loafs didn’t open up as much as they do in my own oven. One of the loafs didn’t open up much at all and formed a bump at the bottom and made it almost tip over while baking.
I know these temperatures are much higher than what’s stated in your recipe. But my home oven usually pre-heats at 250°C to get the oven and stone as hot as possible. Opening the oven door a couple of times for steaming usually drops the temperature so much that I have to sort of compensate a little.
At first I though it simply was because we didn’t slash deep enough but I’m now thinking it could be that the oven was way too hot and despite the amount of steam the crust formed too soon. Do you have any thoughts on what could have happened?
Thank you for your advise,
Peter
Weekend Bakers says
Hello Peter,
I think you already answered your own question. We too think a big part of the problem is the crust formed too soon. Another thing is the steam, you can create a lot of steam but the key and challenge for a lot of ovens is to retain the steam for long enough to do the job. It could be the oven is not ‘steam tight’ enough and steam is escaping too soon. You can judge if this could be the case with the oven you used. And also, you have to know what the real temperature was of the oven you used. Your oven’s 250°C may differ from your friend’s oven 250°C so the real temperature difference between the two ovens could be even greater than it seems.
Maybe these oven tips will come in handy too: www.weekendbakery.com/posts…your-oven/
Good luck with it!
Ed & Marieke
Ann says
I made this Fluitje and it came out wonderful!
Thank you for your precise and professional recipes:)
Weekend Bakers says
Thank you for your kind words Ann!
Happy baking,
Marieke
Ian says
Did you use a 100% hydration rye starter to make your poolish?
Thanks.
Weekend Bakers says
Hi Ian,
I think it is between 70 and 80 % hydration, I keep a stiff starter.
Ed
Claartje says
Whoop whoop, they just came out of the oven looking and smelling fantastic! First time I baked with a poolish, first time I used my brand new baking stone, first time baking with sourdough starter ánd yeast. Your recipe is spot on! My shaping could do with some improving, but the link to the Hamelman video’s helped a lot.
Managed to wait an hour before cutting and tasting the fluitjes: a great crust and beautiful open crumb. Perfect!
I feel ready for a baguette now …..
Weekend Bakers says
Hello Claartje,
Delighted to hear! Shaping will improve the more you bake. It’s fun, the process of trying to get the hang of it.
Let us know about the baguettes will you?
Happy baking!
Marieke
Weekend Bakers says
Hello Tony,
Going from 60 g to 120 g will give you almost the same loaf, we know from experience. After that (say from 25% to 50% the more you change the bread flour for whole spelt the denser your loaf will become, less airy, less holes, less oven spring and ultimately say goodby to the baguette-like ears. But still a tasty and healthy bread, just more whole wheat style.
Happy baking and good luck with trying out different ratios
Tony says
Thanks guys
I’ve just bake two larger Fluitje loaves, (same recipe, double the ingredients) and they look great! I’ll certainly have a go with more spelt next time!
Weekend Bakers says
Hope they taste good too! Let us know how the versions with more spelt turn out…
Tony says
Hi guys.
I’d like to increase the Spelt content so how much do you thinK I could alter the spelt to white flour ratio without altering the bread?
Tony
Claartje says
Nice sized loafs!
I’ll definitely try this next weekend: my local shop ordered spelt and yeast in, my starter is alive and kicking, so I’ll be all set and ready!
Weekend Bakers says
Great! Let us know how you get on 🙂