

You will not be going anywhere for a while! Tell your family you will be stretching and folding for the next 3.5 hours…
The last few months we have been making quite a lot of these loaves. We made them with tiny variations and alterations, experimenting with flour, water, times and temperature and above all quantities. We even developed a hybrid version for the baker in a bit of a hurry. We are now pleased enough with the results to share them with you.
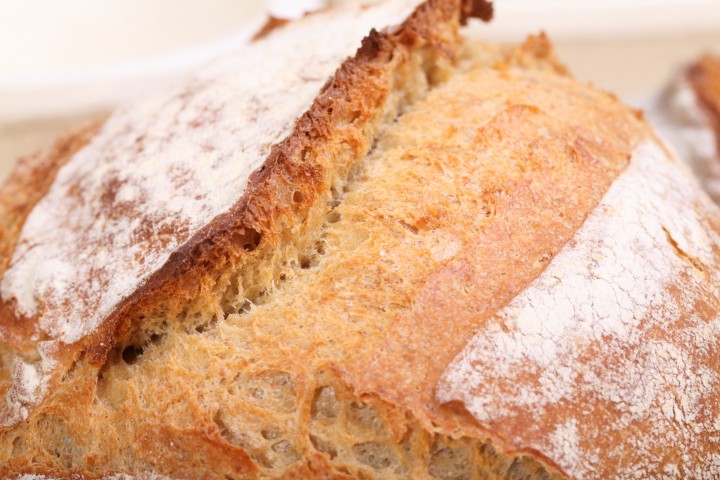
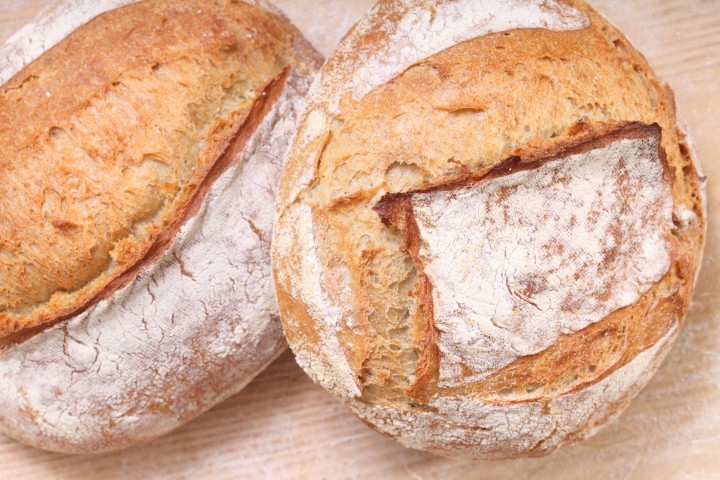
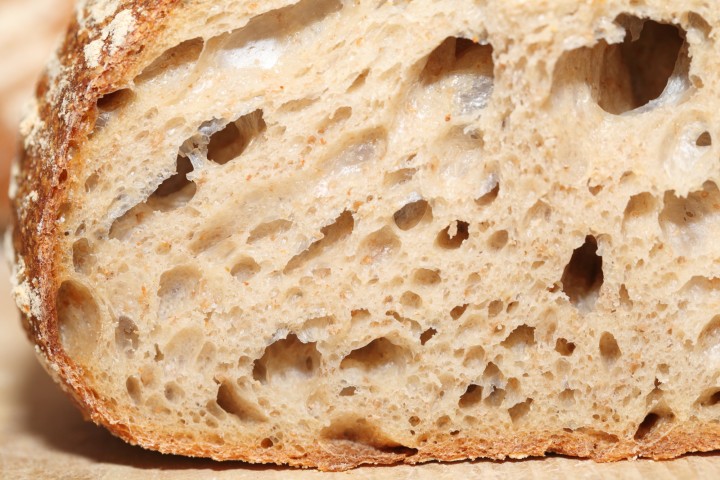
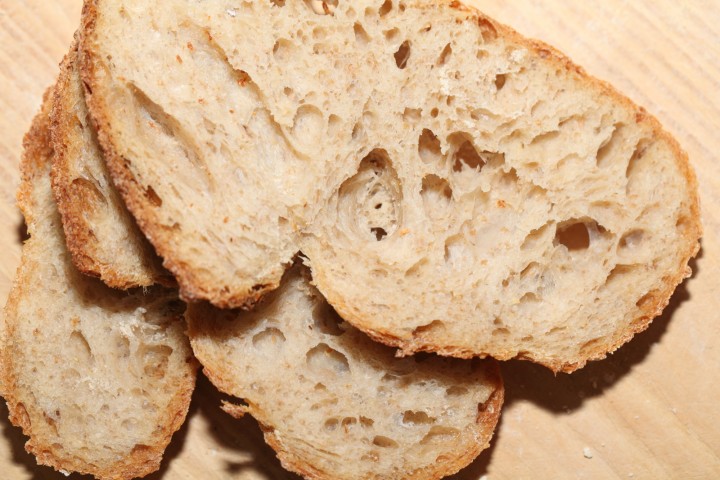
To most bakers the name Tartine does not need further introduction. A lot of home bakers will know the book, the bakery in San Francisco or even the bread. When you look at the pictures in the book, you just want to make that bread too! It’s attractive and impressive. Just one tiny remark about the recipes. We found that some of the essential information was pretty well hidden in a lot of text and it needs careful reading to avoid mistakes and there seems to be some errors in the bakers percentages. We tried to be clear and unambiguous with our version of this recipe and for that we made a few changes. The result to us is an outstanding bread with a very pleasant crumb structure and ‘bite’ and complex taste.


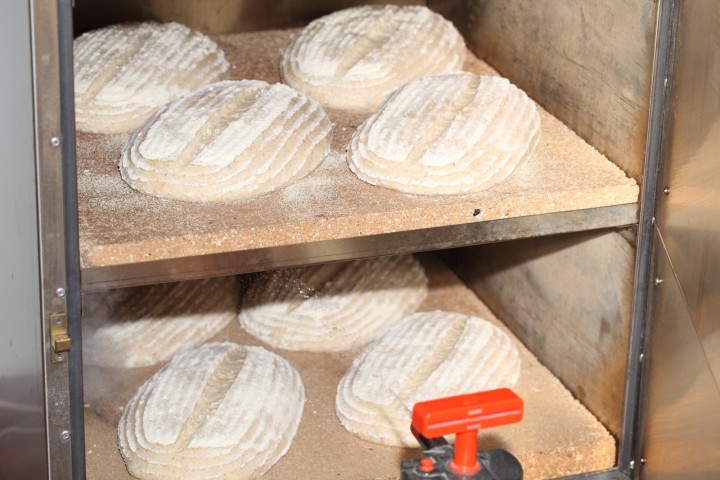
We make these loaves in both cane and wood-fibre proofing baskets and shape as boules or batard. Whatever your personal preference, the wonderful taste stays the same!
What’s different from the original?
The most important change we made is one that all home bakers should be pleased with. We scaled the amount of sourdough culture back to manageable proportions, avoiding unnecessary waste of flour. Instead of maintaining a 400 grams culture all the time, we changed it by building a poolish the night before with a small amount of sourdough culture.
We recalculated the ingredients to a smaller loaf of about 770 grams. In the recipe below you will also find the percentage of whole wheat flour a bit higher than the original.
Also we recalculated and adjusted the hydration level to be 70% as our European flour absorbs less water than American and the original Tartine recipe does some strange bakers percentage calculations.


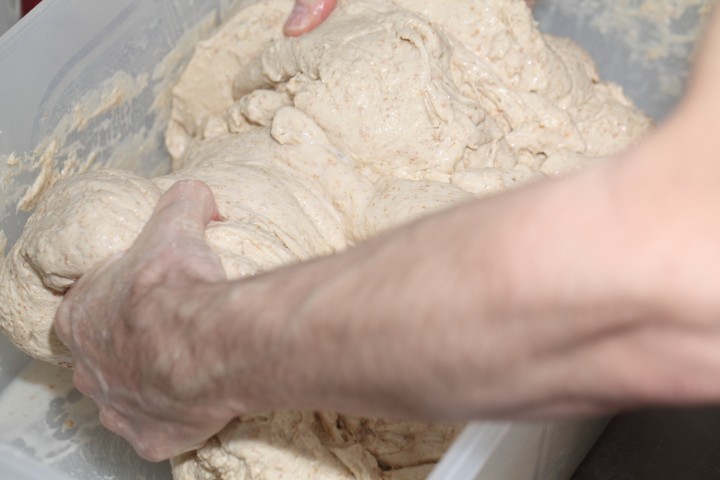
No need to knead, but….
There is some serious stretching and folding to be done. It is also the beauty of this recipe that all the dough is developed without the aid of a mixer. So even if you want to make 12 loaves, no worries about mixer capacity with this recipe. Everything is done by hand. You feel the dough changing under your hands. We use a big rectangle food grade plastic container to make batches of 12 breads.
Use our Dough Calculator
Below the ingredients lists you will see a ‘dough calculator’ button. Click on the button to open. Now it is very easy to change the total amount of loaves and amounts of flour to make smaller or larger breads. You can also change the bakers percentages to adjust the ratio between the ingredients like water or salt. And last but not at all least you can calculate the exact temperature of the dough!
Before you start
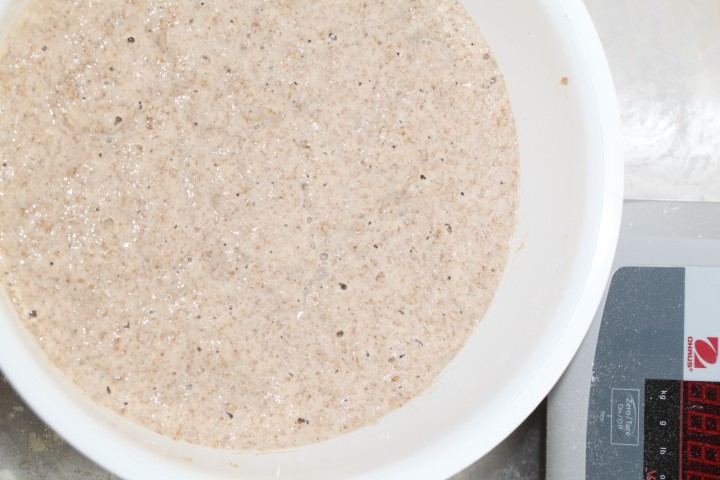
For this recipe we are going to make a starter named a poolish. A poolish is a type of wet sponge usually made with an equal weight of water and flour and a small amount of sourdough starter culture or yeast and NO salt. Making a poolish helps bring more taste and strength to your bread.
We use a sourdough culture which is made with 100% whole grain rye flour. A sourdough culture based on rye flour is easier to maintain, does not go into a slurry when you forget about it, is easier to stir because it has almost no gluten and smells very nice, a bit like fruit. It is also very forgiving in the amount you feed it, everything seems to be alright. Normally we only feed it once a week, after our weekend baking we give it a few table spoons of water and rye flour, stir, ready!
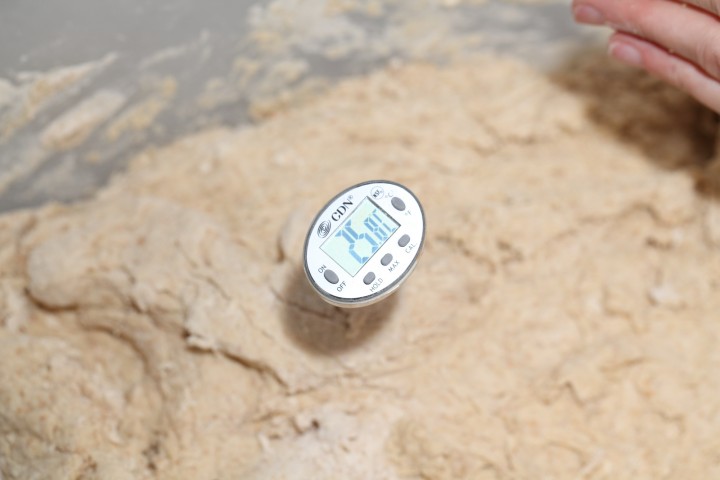
Ideally the temperature of your dough after mixing should be around 24-25 ºC / 75 ºF. You should adjust the temperature of the water you add, so the total dough reaches this temperature. For us this means in summer adding cold water to this recipe and in winter (when our little bakery gets much colder then the rest of our house) adding warmer water. You can measure the temperature of water and dough with a food thermometer. These measurements are important because they correspond with the proving times in the recipe.


| Ingredients for the Poolish | ||||
|---|---|---|---|---|
| 25 | g | wheat (bread) flour | ||
| 25 | g | whole wheat flour | ||
| 10 | g | sourdough culture | ||
| 45 | g | water (room temperature) | ||
| Ingredients for the Tartine Style Bread | ||||
|---|---|---|---|---|
| makes 1 loaf | ||||
| the poolish from step 1 | ||||
| 350 | g | wheat (bread) flour | ||
| 40 | g | whole wheat flour | ||
| 240 | g | water part 1 | ||
| 20 | g | water part 2 | ||
| 6.5 | g | (sea) salt | ||
| 2 | g | instant yeast (optional hybrid version, see text at bottom recipe!) | ||
Making the Poolish
When we make this recipe we make 12 loaves at a time and that is why we do not make the poolish in the big box we use for the final dough (it would spread too thin). But if you make less loaves it totally makes sense to make the poolish and your dough in the same bowl. A good method for making this bread and keeping your worktop clean!
Now in your bowl stir together the bread flour, whole wheat flour and the water at room temperature with the sourdough culture. Mix it well until you have a homogeneous slurry that looks like very thick batter. Cover the bowl with clingfilm and let the prefermenting begin. After 12 hours at room temperature it should be bubbly, light and ready for use. So if you want to begin your bread making in the morning, you should make your poolish at 9 in the evening.
Making the Tartine Style Bread
Take your bowl with the poolish and add water part one (around 32ºC) plus all of the flour but NO SALT. Combine with your hands or a dough whisk until all the water is incorporated.
Leave the dough in your mixing bowl, cover and let rest for 20 minutes (this technique is also referred to as autolyse).
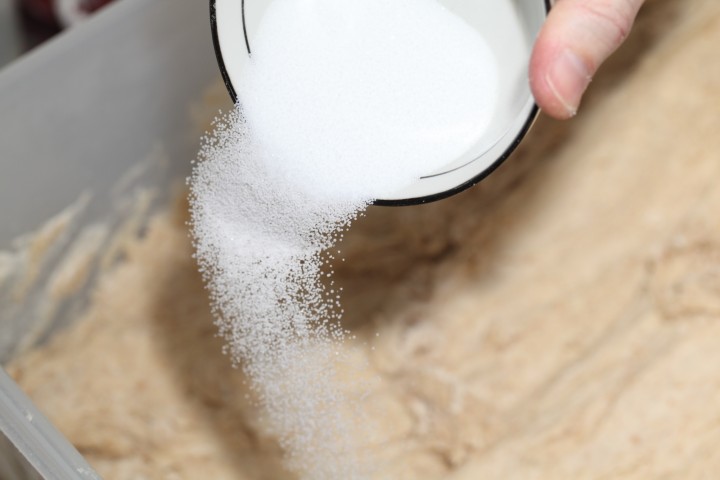
Now add the salt on top of the dough and then add water part two, making sure the salt gets wet. Squeeze the dough with your hands to combine water and dough until smooth and all water has been absorbed. This should take only 1 or 2 minutes.
Again leave the dough in your bowl, cover and let rest for 30 minutes.


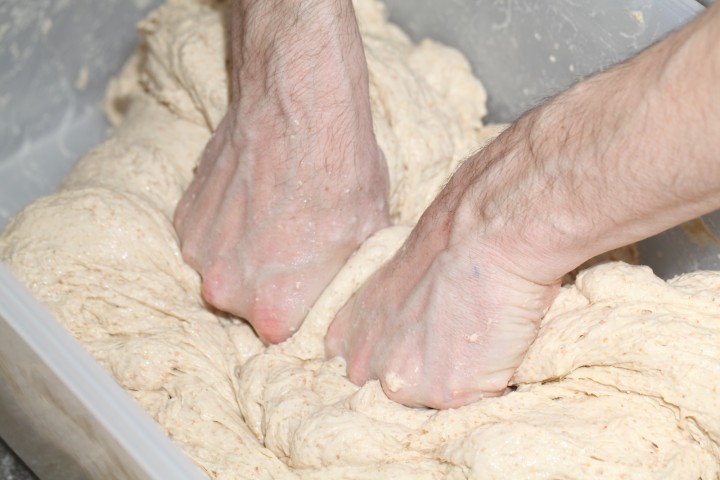
Stretching and Folding Stage
Wet your hands a bit before you start to stretch and fold, this will make it easier to handle the dough. Now do your first stretch and fold while leaving your dough in the bowl. Do a full letter fold, left over right, right over left, bottom over top, top over bottom. Watch our bread movie or our stretch and fold method video to observe this technique if you are not familiar with it.
Cover and again leave to rest for 30 minutes. Repeat the stretch and fold (full letter fold) five more time (so six times in total) each time leaving the dough to rest for 30 minutes. The whole process takes 3,5 hours.


Shaping and Proofing Time
After the last 30 minutes rest it is time to shape your dough. You can make oblong (batard) or round (boule) loaves of bread, whichever you prefer. For instructions on how to shape a boule, take a look at our boule shaping video.
Because this is a true sourdough bread, the final proof will take quite a long time. Please take that time and make sure your dough is really ready for the oven.
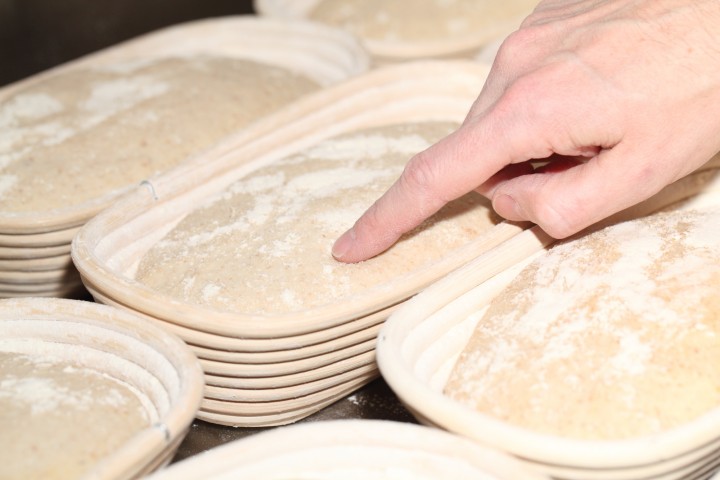
Transfer the shaped dough to a proofing basket / banneton, cover and leave to proof for 2 hours and 30 minutes. When you think it has risen enough, use your finger to carefully make a very small dent in the dough. If the dent remains, the bread is ready, if the indentation totally disappears, the dough needs a little bit more time.
Baking
Preheat your oven to 230 ºC / 445 ºF (at what stage you preheat your oven depends on how long it takes for your oven to heat through, some take 30 minutes, some, like ours, with stone floors take a lot longer, up to two hours.
Now your loaf is ready for the oven. Slash the top of the loaf with a lame or bread scoring knife.
To get a nice crust, try to create some steam in your oven by putting a small metal baking tray on your oven floor when you preheat the oven, and pour in half a cup of hot water immediately after putting the bread in the oven. Release some steam by setting your oven door ajar (perhaps with the help of a wooden spoon or oven mitt) 5 minutes before the bread is ready. If you are going to create steam with a baking tray, you may also want to turn your oven temperature a bit higher, because you are going to lose some heat in the process.
After 45 minutes of baking your loaf should be ready. Transfer onto a rack and leave to cool. This loaf also keeps very well in the freezer.
Tartine Style Bread Time Table
Day 1 – 21.00 h Make poolish let ferment for 12 hours at room temperature
Day 2 – 0.900 h Make final dough
- 09:00 – Add flour and water part 1 to starter, combine
- 20 minutes rest (autolyse)
- 09:20 – Add water part 2 and salt, combine
- Rest for 30 minutes
- 09:50 – Stretch and fold 1
- Rest for 30 minutes
- 10:20 – Stretch and fold 2
- Rest for 30 minutes
- 10:50 – Stretch and fold 3
- Rest for 30 minutes
- 11:20 – Stretch and fold 4
- Rest for 30 minutes
- 11:50 – Stretch and fold 5
- Rest for 30 minutes
- 12:20 – Stretch and fold 6
- Rest for 30 minutes
- 12:50 – Shape
- 12:55 – Final proofing 150 minutes
- 15.35 – Bake for 45 minutes at 230ºC / 445ºF
- 16:20 – Your bread is ready!
Making the Quicker Hybrid Version
If you want to make a quicker version of this recipe you can opt for the hybrid version. With hybrid we mean a bread that uses both sourdough culture plus a small amount of yeast to speed up the proofing of the final dough.
For this version you must use 2 grams of instant yeast per loaf in the final dough. You add the yeast together with the salt on top of the dough after the autolyse fase.
You can limit the stretching and folding to 2 hours but do two sets of complete stretch and folds every 30 minutes, 3 x 2 sets in total. The final proofing will be around 1 hour.


Jacobim says
Hi all, thank you so much for this wonderful recipe – one of the best breads I’ve ever baked (and thank you for replying to my comment in the Boule video thread :-)!
After doing this recipe twice now, I wanted to ask if there is another one you have in your arsenal that’s a bit less time intensive, or if not time, labor? Say, some kind of loaf where I can start the poolish in the AM, get home from work and make the dough, do a stretch or two, proof overnight and bake in the AM, or even the following PM? That is to say, I don’t mind thinking ahead a day or two, but sometimes due to my schedule I can’t sit around stretching every 30 minutes. Thank you again!
Weekend Bakers says
Hi Jacobim,
We do have a few suggestions for you. First of all one you can really fit to your needs and adapt to your schedule:
www.weekendbakery.com/posts…ugh-bread/
It may need a few rounds to get it right, but the bread is also a style you would really enjoy.
This rye loaf is really different but also has a lot of room for adaptation:
www.weekendbakery.com/posts…h-raisins/
And finally a bread with lots of character like the Tartine but less work and attention and possible proof overnight in the fridge:
www.weekendbakery.com/posts…n-naturel/
Hope it works out and you will have the best loaves to fit your lifestyle!
Tom Swedenburg says
I love Tartine bread and have trying to bake it in a cast iron dutch oven most of the time rather than freestyle on a baking stone. I’m not sure I see any difference. Do you see any difference in the result between the two methods?
Sometimes I get hardly any oven spring. What do you feel is the primary reason people don’t achieve oven springs when they’ve had it before?
Weekend Bakers says
Hi Tom,
Did you use a different flour maybe, this can make a huge difference as you can see in these pics: www.weekendbakery.com/posts…nt-part-1/
This would be our main guess. Other things we can think of is variation in the use of steam and shaping…
Uli Seng says
Hi, I would like to make this bread but have a question regarding the flour. You mentioned that you tailored the recipe to suit European flours, which absorb less water. Do you recommend adding a bit more water if I’m using American flour?
Weekend Bakers says
Hello Uli,
Yes that is correct. When using American flour we would suggest to start with the addition of around 2 to 3 % water to the final dough and see how that goes.
Hope it will be great!
Linda Finlay says
Is it possible to use 100% red fife flour to make this recipe? What adjustments would I need to make? I grind the flour at home.
Thanks,
Linds
Weekend Bakers says
Hello Linda,
Until you wrote your comment we had never heard of fife flour. Hope somebody can help you with this based on experience. If it’s whole wheat / home ground flour you are using, it is to be expected the dough could do with a slight increase in hydration.
Linda Finlay says
Thanks for your quick response. Red fife is a hard spring heritage wheat. Here’s a link to information: en.m.wikipedia.org/wiki/…Fife_wheat
Cheers,
Linda
Weekend Bakers says
Thank you Linda, hope we can try this flour one day, that would be great.
Naomi says
Fantastic recipe! I made a loaf as per the recipe a few days ago (except started with a wheat not rye starter). It was amazing! So light and fluffy. I have just made 2 more loaves – one in a tin (for the kids’ school lunches) and one boule (proofed in basket). This time I increased the amount of whole wheat flour and added some rye flour, plus I added soaked linseeds. They are delicious and again, amazing. Thank you for the recipe, and the calculator is useful too – to save me having to use my own brain ; )
Weekend Bakers says
Hello Naomi,
Thank you so much for sharing your passionate comment. We love to read using our recipe leads to such wonderful results for other bakers. Sounds like you made the recipe your own in no time. Excellent! We are still very fond of this recipe, because of the method and the crust and crumb it gives. And thank you for mentioning the calculator. great stuff 🙂
Enjoy the baking, eating an sharing!
Sharon Rossy says
Just want to say that I love the calculator! Thank you! I’ll be trying this very very soon! Your website was one that I frequented often when I first started my sourdough starter journey.
Weekend Bakers says
Thank you so much for letting us know Sharon. Glad you find it useful too 🙂
Michael says
I’m assuming that the yeast for the dough goes in with water part 1 but unless I am missing it, I don’t see it in the instructions
Weekend Bakers says
Hi Michael,
For the hybrid version with instant yeast in the final dough we give instructions at the bottom of the recipe under ‘Making the Quicker Hybrid Version’. Indeed the yeast goes in with the water part one, but we only mention it in these instructions at the bottom to avoid confusion with the original version. We refer to these instructions via the optional yeast mentioned in the ingredients list.
Happy sourdough baking!
Ömer Seyfi Salur says
I have a question. After the sixth fold and strech if I put the dough in refregirator to be baked early in the morning is it possible.
Weekend Bakers says
Hello Mr. Salur,
Yes, that would be possible, but how long the dough can stay in the fridge without over-proofing we cannot say, so try and start if possible with a shorter period. Better if it still needs some extra time to proof out of the fridge than the over-proofed dough of course. Also this extra retarding of the dough makes that the end result will be different, probably more sour and with a (slightly) different crust and crumb.
Let us know how it goes!
Bridget Steele says
Am I able to make this bread using my own sourdough starter for the polish? If so, how much should I use? When making my bread, I usually use about 200 g of starter.
Weekend Bakers says
Hi Bridget,
We work with a two step system. When using a preferment (like a poolish or a biga) we use about 15-20 grams of sourdough for a sourdough loaf. With this small amount of sourdough you create a fully active sourdough preferment overnight which you then use to build the final dough. This way you can keep a small starter and still have the full sourdough flavor. Big advantage for home and hobby bakers is you are wasting far less precious flour when refreshing your culture than you would maintaining a big one!
So, you could just take 10 g of your own starter culture and stick to the recipe as described. Or you could use around 100 grams of your (active) starter to the final dough, but make sure the ratio of water / flour is the same as in our recipe for the amounts to be correct for this recipe.
John says
I must be doingngsomething wrong as this laborious recipe was no better than my standard sourdough recipe with a 12 Hour bulk proof in fridge followed by 10 hour in fridge secondary proof
Weekend Bakers says
Hi John,
Thanks for your comment. That’s true, Tartine is not know for the effortless method. We really like the results we get but you probably will get back to your great working sourdough recipe.
Wendy says
Hi,
I’ve never used SD starter before, but would like to try this recipe. Two questions: 1) is SD culture the same as starter and, 2) will this work with a SD starter made from all-purpose wheat flour rather than your rye flower? If I use the latter, do I need to change anything in the recipe?
Thanks,
wendy f
Weekend Bakers says
Hi Wendy,
To make a starter or preferment for a sourdough bread you need a sourdough starter culture. To make a starter culture you can follow our instructions here:
www.weekendbakery.com/posts…asy-steps/
This is our method and there are many methods and names and it can be confusing.
In this posting you can read all our good tips on sourdough and why our method works so well for home bakers: www.weekendbakery.com/posts…ough-tips/
You can use wheat flour for your starter culture, but we would advice to use (organic) whole wheat flour to develop a good culture.
Good luck with it!
Ed says
Thank you for your website it is very informative. Can I ask what temperatures you run your Rofco oven at for this recipe? Do you preheat to 270 and then turn it down to 210 top 230 bottom on loading? I am interested to know the best solution
Weekend Bakers says
Hi Ed,
For the B40: We preheat at 240C for 1.5 to 2 hours, then load the oven. Then after about 14 to 17 minutes we temper the oven (turn it back to 50 so the fans are still running, but the browning will almost stop). This is ‘baking on a falling temperature’ to simulate the workings of a wood fired oven. If you want to bake continuously, you keep the temp stable at 200 to 210 (only possible with the B40).
The method above works for us, but we have to say we have never tried your suggestion.
The important thing is also to find out about the exact workings of your thermostat, because it is a mechanical version, it can be off by -10 to +10, although Rofco uses a high quality one.
Don’t know if you also saw our tips for these ovens:
www.weekendbakery.com/posts…ven-users/
Good luck with it!
Annie says
I have only recently started my sour dough journey and found this recipe delicious! The video on stretching and folding was very helpful and I now know exactly how you are supposed to do it, thank you.
Do you have any tips on using 100% spelt starter and whole spelt flour?
And when would be the best time to add seeds to the dough?
Weekend Bakers says
Hi Annie,
Thanks for liking the recipe and video. Your spelt starter can be used instead of our rye starter without any adjustment in our recipe. The use of whole spelt is a different matter, because it would mean first of all handling the dough very carefully (the gluten in spelt are different, there’s less and they are more ‘delicate’). Next to this spelt absorbs moisture in a different way. Spelt is more water-soluble than wheat, so you normally need less liquid than with whole wheat. We would suggest starting with a percentage (20% for example) and see how this turns out, and slowly increase the amount.
You can add seeds to dough at different times, but most recipes will tell you to add it when you make the initial dough.
Enjoy your baking!
Hank says
Thank you so much for your website, which is now my go-to place for bread recipe ideas. I find your recipes are precise and instructive without getting too bogged down. I followed this one pretty much as written and ended up with a fantastic bread with a moist crumb, great hole structure, sweet and just slightly sour. The main difference is I sifted the whole wheat flour. My wife says it’s my best yet. Even my five year old daughter, who is not a fan of sourdough, likes it.
I came to your site having found your whole wheat bread recipe but this one is now my favorite. It really showed me what the stretch and fold method can do to develop the gluten of the bread.
I hope you keep up your great work on the site.
Weekend Bakers says
Thank you so much Hank, for your enthusiastic feedback. We do love this bread and the method too, although you cannot go anywhere for quite a while, it is so worth it.
Happy sourdough baking!
Ed & Marieke
Sheila says
Love your website and the great instructions and advice. Never made sourdough bread before and my bread making has always been to use the bread machine to mix and rise then oven bake. So I made your sd starter as instructed, although I didn’t get as much rise as shown in your video, it did have air bubbles in it so I kept going. After about 6 days I made the poolish from it. It didn’t look like much had happened the next morning, although I could see some little bubbles, but I went ahead and made your tartine loaf. The final rise took a bit longer than the 2.5 hours in the recipe (about 3 hours), and I had added a little less than 1/2 tsp of yeast dissolved in the 20g of water and the salt. I also added about 1/3 tsp. of diastatic malt. The loaf turned out great, except I think my oven needs a lower setting than the recipe calls for because it was starting to burn on the outside after 40 mins. The inside, however, was brilliant, light and fluffy with lots of little air holes. It tasted good too, but not quite as sour as I would like. How can I get a more sour flavour?
Sheila says
By the way, I used organic white all purpose flour. Can’t seem to find organic bread flour here in Vancouver.
Weekend Bakers says
Hi Sheila,
Thank you for your comment and great to read about your already excellent results. Just turn the oven temp down (try around 180C after probably around 20 minutes) as soon as your crust has the right color and bake for the remaining time. So still start at the high temperature to get a good oven rise.
We do have some tips for you to get more sour in your loaf. You can find them here (see under ‘More sour please!):
www.weekendbakery.com/posts…ough-tips/
Happy sourdough baking!
Sonia says
Hi Marieke and Ed,
It’s me again…I finally had the chance to try this bread. It is fantastic!!! I found the whole process of making the dough and the folding and then rolling very therapeutic. I really enjoyed making it AND I loved eating it hahaha….
The smell in the house as the bread was making was torture, hahaha, but when it was ready I couldn’t help myself and didn’t wait long for it to cool off, I had some warm with butter. What an amazing loaf. I will be making it again next weekend.
Thanks again for an incredible recipe. Can’t wait to try more of them.
Sonia
Weekend Bakers says
Hi again Sonia,
So great to read you like it too and recognizing your feelings of anticipation and excitement (it does not get less with us no matter how often we bake). Bread and butter what else do you need to be perfectly happy 🙂
Greetings,
Marieke & Ed
Alex says
Thanks for a delicious and simple recipe!
I’ve made this bread twice now, each time with slightly different (high quality) flours, and both times it’s been amazing.
A question, is it possible to modify this recipe to use Spelt instead of one/both of the other flours?
If so, what else would need to change with the recipe?
Even if the answer is yes, I realize that the recipe modifications are not something you can answer without experimenting yourselves, but are there any general rules regarding replacing wheat flours with spelt flours?
Thanks again!
Alex
Weekend Bakers says
Thank you Alex,
It would be possible to make a spelt version, but we cannot advice you from our own experience with this recipe. We would experiment by starting with a percentage of spelt and not 100% spelt right away.
In general the gluten are different and more delicate and you need to carefully build them up, so be gentle with the dough. The hard part is to give the bread enough structure. Next to that the amount of water needed will be different, also depending on using whole wheat or white spelt flour or a mix. It is often advised to use less water to handle the dough better and to keep the proofing loaf from spreading too much.
Best to just work your way to it and experience in steps what is needed.
Hope this helps a bit and best of luck with the spelt baking!
Marieke & Ed
Alex says
Thanks for the tips, Marieke & Ed
In case you’re interested, my search for Spelt sourdough lead me to bake this last week:
www.breadwerx.com/make-…ead-video/
A very tasty bread.
This one would have been interesting loaf too, and looks easier:
www.breadwerx.com/champ…ipe-video/
Best,
Alex
Bill says
Thanks for posting this Alex – I had the exact same question re: spelt, very useful links!
Weekend Bakers says
Great to see Alex, very interesting. Thank you for pointing it out to us.
Mimi Liew says
Hi Weekend Bakery,
Thank you so much for sharing this recipe ( hybrid version).
It always turn out super amazing!
I think I am going to stick to this recipe for a while 😊
Mimi
Weekend Bakers says
Hi Mimi,
Thank you for your very kind comment. This method is still one of our favorites and the taste that develops during the process is one of the absolute best!
Happy baking from Holland,
Ed & Marieke
Chris says
Hi, great recipe! Thanks. I’m trying to do this with 100% wholemeal spelt flour and my loves are coming out a little flat. Do you have any suggestions as to how I might adjust the recipe accordingly?
Thanks 🙂
Chris says
Loaves not loves!
Weekend Bakers says
Hi Chris,
It is very normal for a 100% wholemeal (spelt) loaf to be more compact and flat. First of all the gluten in spelt are less and also different from those in wheat and the wholemeal makes your loaf heavier. Other than adjusting the water (How much more we cannot really say) and extra sets of S&F it is a case of accepting that this loaf will be different.
Anna says
Morning weekend bakery! Thanks for your great recipes. I have a question about the starter. You say you feed it once a week after your weekend baking. Does that mean you use a hungry starter straight out of the fridge for the poolish? Or do you take it out, feed it and then use it? When it is at its most active point?
Thanks for replying!
Weekend Bakers says
Hello Anna,
Yes, if it is within the one week time frame we do use it straight from the fridge (with hybrid versions it could be even two weeks). But because every culture acts differently it could be a good idea to refresh it one day in advance and use it the next day in your poolish. Just experiment a bit with it to find out if it would make much difference in the end result. We do have some more tips that you might find helpful:
www.weekendbakery.com/posts…ough-tips/
Enjoy the baking!
Ed & Marieke
Vampirec says
Hi 🙂 i have tried recipe and Bread was DELICIOUS :D. Just one question – how about night 10 – 12 h. Proofing in the fridge?
Weekend Bakers says
Hi Vampirec,
Proofing in the fridge is no problem, but you have to adapt proofing times accordingly of course.
Bill says
Did this recipe exactly to the instructions, and got fantastic results. Thank you!
Just one thing – I followed your advice to put the temperature slightly higher if creating steam in the oven, but the colour on the outside was darker than I would have liked (all that evil acrylamide…). So I think next time I will just stick to 230 C.
Weekend Bakers says
Hi Bill,
Great to hear and yes, you are right to test it at 230 and see how that works for you. You can also temper your oven after you have reached the desired color (say after 20 minutes or so). It all depends on the workings and true temperature of your oven. Also see our tips on the subject: www.weekendbakery.com/posts…your-oven/
Happy baking!
Janel Grimm Gallatin says
Could you tell me where your conversation chart is I had it now lost it. I’m very new to this. I know it was a light green button
Weekend Bakers says
Hello Janel,
We do not recognize the green button but hope you mean this page:
www.weekendbakery.com/cooki…nversions/
Happy baking!
Jonas says
Thank you for this recipe and this great website! It’s a true joy for the enthousiastic home-baker.
I have a question about dough temperature: I aimed for the advised 25 deg C but ended up slightly warm at 27,5. But by the first S&F, I noticed that the dough had already dropped to 21 C. Is that a problem / will development take longer than indicated that way?
Maybe the problem is that I’m only making 1 loaf, so the quantities are small and so the dough will lose temp much quicker than if making a batch of e.g. 8?
Weekend Bakers says
Hello Jonas,
Yes you are right in your assumptions. And for these reasons it is important to find a spot where your dough can stay the desired temperature during proofing. You can even use an oven for this that you slightly preheat and then turn off.
Good luck with it and happy sourdough baking!
Ömer Seyfi Salur says
Today I tried, I made the poolish at 22:00 hors and started to make the poolish tartin; first thing that was the time of 30 minutes of 6 break was, ok but it seemed a little bir to me. The result was wonderfull but, the only one point was not good salt it was not salty at all.
Weekend Bakers says
Hello mr. Salur,
We use the amount of salt that is recommended nowadays, and we are used to this amount and the flour we use also has lots of taste. But it is very easy to add a bit more. We would think, if you like it more salty or are used to more salt we would suggest using between 8 and 9 grams per loaf.
Thank you for trying the recipe!
Elena says
hello! I keep on studing your article, and I was surprised with the amount of salt. 1,48% seems to be too little for my taste. (I used to put 2,5% – I guess that is why the fermentation of my dough is too slow)
but my question is not about the recipe this time but about the proofing basket. could you, please tell if the volume of the basket is important. I mean should the sides of the basket kind of support the dough? or this is not important? maybe you can recommend how to chose the size of the busket. thank you very much.
Weekend Bakers says
Hi Elena,
If we take this recipe as an example: It has a total of 764 grams for ingredients. You choose the basket that comes closest to this amount, so a basket for around 750 grams. Yes the basket is there to support the dough, but if your dough is strong enough (right amount protein) it is no problem if the top of the dough comes above the level of the basket. The baskets you see in the pictures are also the 750 gram ones.
As for the salt level, that is very personal and easily adapted. We think the amount of taste developed in this bread, using good quality flour, is so great, too much salt would spoil it. We would advice never to go over 1.8 to 2 %, but please feel free to follow your own taste in this.
Happy sourdough baking!
Elena says
thank you very much!!!!!!
Gerhard says
Hello, congratulations – this bread looks phantastic and as a great fan of open
crumb breads I will shortly try this recipe. I was wondering whether you think
that instead of taking the dow out of the bowl for S & F I could to the turns Chad
Robertson showed in one of the videos or do you think that’s not as effective ?
Thanks a lot – great website for bread people, such a lot of valuable infos.
Thanks Gerhard
Weekend Bakers says
Thank you Gerhard,
Do not know if you have tried the CR method in the meantime, but it should work very well. Would be interesting to compare results of the two maybe..
Happy sourdough baking,
Ed & Marieke
Gerhard says
Hi Ed & Marieke,
Thanks a lot – I haven’t baked in the meantime so I will try both methods and
get back with a feedback.
Gerhard
Bob says
Hi
I did the workaround for calculator, it worked a treat.
Thanks for your reply.
Weekend Bakers says
Thanks for trying it Bob, glad to hear. But still need to fix it of course!
Marta says
Hello, greetings from Warsaw!
I just baked your tartine style bread using spelt flour for sourdough and the bread itself. I didn’t manage to get the tartine look, despite baking sourdough bread 2- 3 times a week for the last 2 years this “holy grail” still eludes me 🙂
Spelt bread worked nicely and it is really tasty. I will be using this recipe again.
Could you please advise on changing the recipe slightly by using more whole grain flour?
Instead of 350g bread flour and 40g whole grain- 310g bread and 80 g of whole grain. How much more water should I use? 10-15g more?
Thank you!
Weekend Bakers says
Hi from Holland Marta,
It is no problem using spelt, but the result will be a bit different compared to wheat, often more compact. The gluten structure in spelt is more ‘fragile’ and can break down. Could be that you need to slightly alter the hydration too and use less liquid to begin with and judge the result.
To answer your question, if you use bread flour with more whole grain you should indeed use a bit more more liquid, (15 g is a good start) but if you use spelt like you say, it is again a different story, like we describe above.
Marta says
After reading your reply I smiled because taking into consideration your comments my bread worked fantastically :). It was nice and fluffy with open crumb (but no big openings like tartine bread), I managed to form a ball shaping it and it kept it’s shape while being baked.
So next time tiny bit less water and I have my perfect recipe for free formed spelt bread! Yuppi! All my previous spelt breads were baked in a tin (too wet to shape) but the good old friend got very rusty after two years of sourdough bakes and I didn’t managed to find a replacement of the same dimensions yet.
Thank you for sharing your experience!
Weekend Bakers says
Hi Marta,
Thank you for the feedback, so good to hear.
Wishing you many excellent loaves!
Bob tremeer says
Hi, I recently found your website after attending a baking course in the UK.
I tried the tartine recipe and it was fantastic. The question I have is, if I want to make two loaves using your calculator, at which stage of the folding technique would I divide the dough into the two loaves.
Also when I tried to use your calculator to make a larger loaf, I changed the amount of flour, but when I pressed the calculate button, the original weight of flour returned giving me the original recipe amounts.
I want to make a 1kg loaf.
Great site, especially like the timetable at the end of the recipe. Makes it so much easier to calculate times for making bread.
Thank you
Weekend Bakers says
Hi Bob,
Thank you very much for letting us know. There seems to be a small bug in the calculator (we will correct this) when trying to change the amount of flour. The work around is to change the amount and not click on calculate but click in the white space next to the calculate box. Sorry for this!
Time to divide the dough is the stage you also shape the dough (so at 12.50 in the time table).
Happy sourdough baking and lots of loaves!
Ed & Marieke
Elena says
hello! thank you for sharing your version of Tartine. I have a question. you explained about the temperature of water which you add to the dough. and there are notes in your recipe, like “let ferment for 12 hours at room temperature”…
here where I live the room temperature can be 30 C in summer and 11 C in winter.
could you please, tell what room temperature you meant, then I can adjust the schedule of my dough.
PS. you have great recipes here on your site! I am glad I found you! 🙂
Weekend Bakers says
Hello Elena,
Thank you for your nice comment. Usually when talking about room temperature the indication is somewhere around 20 to 22 degrees. You can adjust by using less sourdough culture, ferment for a shorter period or partly use the fridge when it gets too hot and you want to slow down the process and of course the opposite when it is very cold (use warmer water too for example). Also see our tips on dough temperature: www.weekendbakery.com/posts…mperature/
Happy sourdough baking!
Elena says
thank you very much!!!!!
Roosje says
I made this bread exactly as the recipe stated and it came out absolutely perfect. I cannot believe how delicious this bread is, and even even though it takes some time, it is actually very easy. I’m looking forward to making this again!
Weekend Bakers says
Hi Roosje,
That sounds more than excellent, thank you for the feedback. This bread stays our firm favorite too!
Lots of loaves
Yishmoel Van Buskirk says
I made two loaves of bread following this recipe exactly as it is stated, but my dough was kind of loose and I got rather flat loaves. Should I increase the amount of flour due to the altitude of the city I live 6,300 feet? Or what should I do?
Weekend Bakers says
Hello Yishmoel,
We think rather than the altitude the first thing you should look at is the flour you use. It should have the right amount of protein. If possible buy a strong(er) bread flour with at least 12% protein so you can develop enough gluten strength to get your loaves to rise and ‘stay strong’ too.
Good luck with it!
Fredy says
I will try your recipe and schedule method tonight but I had a question. What you guys think about the French Technic of “slap & fold” the dough ? I saw the French Boulanger Richard Bertinet baking a sourdough bread using this technic and I did the same in the past on a french baguette and could noticed that doing this way the dough gets fast structured for the last bulk fermentation. the result in a sourdough bread gets any difference ?
Thanks in advance.
Weekend Bakers says
Hi Fredy,
We know this method and many people use it and like it. We have never really tried it, because we use other techniques which work well for us. We think you could very well use this technique for this recipe too, no problem. We know it can only be a bit of a challenge to use this technique with small quantities of dough (not so much to slap around) but this is also true for the S&F method.
Good luck with it!
Barry says
Hey there
What sort of hydration would you use if you were using flour from De Zandhaas? I made a Tartine-style loaf earlier (first sourdough in the Netherlands!) and it tastes wonderful but is a bit of a pancake! That was at 65%. Is it too high for that flour? Another loaf with instant yeast looked better so I’m thinking it’s my lack of practice with sourdough maybe.
Any tips on the flour would be gratefully received!
Thanks!
Barry
Weekend Bakers says
Hi Barry,
Can you tell us what flour you are using exactly? The recipe above was made with De Zandhaas organic flour (Eko tarwebloem) at 69% hydration. The non organic version could have less protein and need more development maybe (extra S&F sets).
It is important to weigh the water so you know exactly how much you are putting in, so no measuring cups but scales also for the water.
Ed