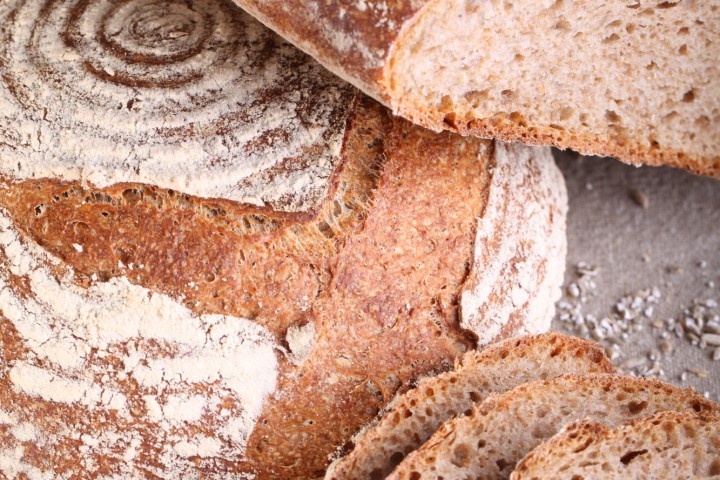
After all those years, who would have thought, but I ♥ you whole wheat!
Klik hier voor Nederlandse versie
Do you need a bit of encouragement to start making a super healthy whole wheat loaf? Awful childhood memories like me of stale and even rancid bread? Get out and buy the best fresh! organic whole wheat you can find and give this loaf a chance! It is nothing like your memories, it is about 1000 times better, or frankly incomparable, with an intense flavor that is the opposite of bland. Close your eyes and you can see the wheat fields gently swaying in the wind.
This recipe is not highly original of course, there are many whole wheat levain recipes and they are all more or less the same. But it is a great loaf to have in your bread repertoire. This is our version of it and the recipe contains the exact details on how we create our loaf. People have told us (and we believe them) that they really work for them so here it is.
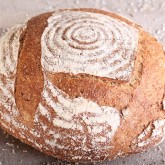
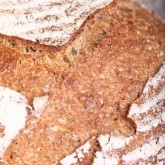
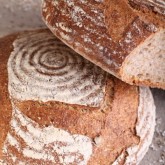
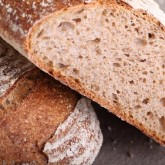
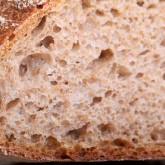
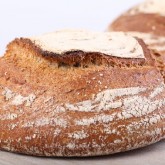
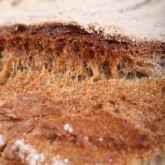
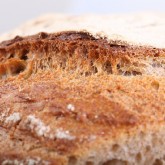
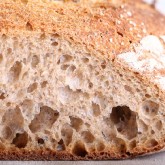
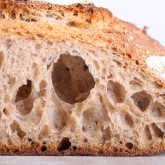
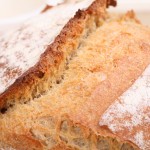
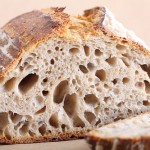
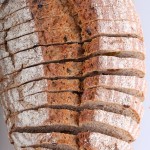
We started out by making a 55% whole wheat loaf. Gradually we started making more of this 65% loaf, the one described in this recipe, and people just love it. You can compare the two versions by looking at the first (65%) and second (55%) gallery of pictures below. The thing we love most about the recipe is you end up with a bread still very much crusty and creamy crumb, with a complex, sweet taste, while having this high percentage of whole wheat goodness in it.
For this recipe we are going to make a starter named a poolish. A poolish is a type of wet sponge usually made with an equal weight of water and flour and a small amount of sourdough starter culture or yeast and NO salt. Making a poolish helps bring more taste and strength to your bread.
We use a sourdough culture which is made with 100% whole grain rye flour. A sourdough culture based on rye flour is easier to maintain, does not go into a slurry when you forget about it, is easier to stir because it has almost no gluten and smells very nice, a bit like fruit. It is also very forgiving in the amount you feed it, everything seems to be alright. Normally we only feed it once a week, after our weekend baking we give it a few table spoons of water and rye flour, stir, ready!
Making the poolish
In a bowl stir together the 65 g whole wheat flour, 65 grams of water at room temperature with 15 grams of sourdough culture. Mix it well until you have a homogeneous slurry that looks like very thick batter. Cover the bowl with clingfilm and let the prefermenting begin. After 12 hours at room temperature it should be bubbly, light and ready for use. So if you want to begin your bread making in the morning, you should make your poolish at 9 in the evening.
| Ingredients for the poolish | ||||
|---|---|---|---|---|
| 65 | g | whole wheat (bread) flour | ||
| 65 | g | water (room temperature) | ||
| 15 | g | sourdough culture | ||
| Ingredients for the whole wheat loaf | ||||
|---|---|---|---|---|
| makes 1 loaf | ||||
| the poolish from step 1 | ||||
| 225 | g | whole wheat (bread) flour | ||
| 160 | g | wheat (bread) flour | ||
| 250 | g | water | ||
| 7 | g | (sea) salt | ||
Making the loaf
Put the poolish starter, flour and salt in the mixing bowl of your standing mixer and add 2/3 of the water. Now start mixing and gradually add the rest of the water and let the dough come together. We use European flour which absorbs a few % less water than American type flour. People using American type of flour should add 5-15 ml water to the final dough. Knead for 6 minutes, leave it in your mixing bowl, cover with clingfilm and rest for 50 minutes. The dough should feel a bit wet and even a little bit sloppy or tacky, there should be moderate gluten development.
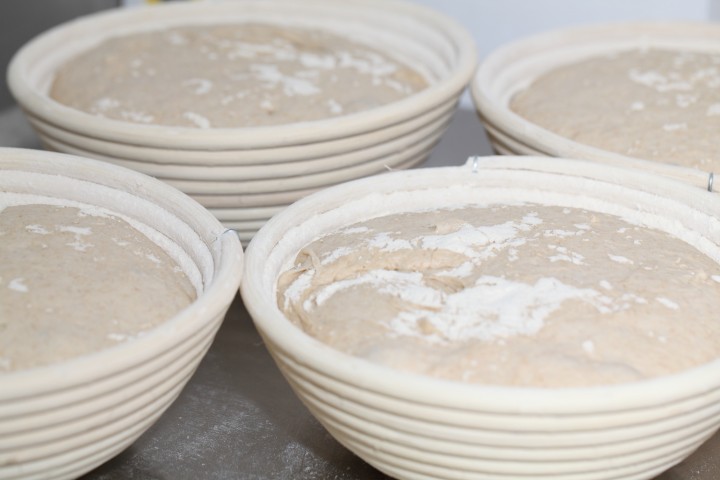
Ideally the temperature of your dough after mixing should be around 24-25 ºC / 75ºF. You should adjust the temperature of the water you add, so the total dough reaches this temperature. For us this means in summer adding cold water to this recipe and in winter (when our little bakery gets much colder then the rest of our house) adding water up to 50ºC /122 F. You can measure the temperature of water and dough with a food thermometer. These measurements are important because they correspond with the proving times in the recipe.
After the first rest take the dough out of the bowl and onto a floured work surface and do one stretch and fold (a full letter fold, left over right, right over left, bottom over top, top over bottom; watch our bread movie to observe this technique if you are not familiar with it). Transfer to the bowl, cover and again leave to rest for 50 minutes. Repeat the stretch and fold (full letter fold) one more time (so 2 times in total) and again leave to rest for 50 minutes. During each stretch and fold the dough should feel firmer and less wet.
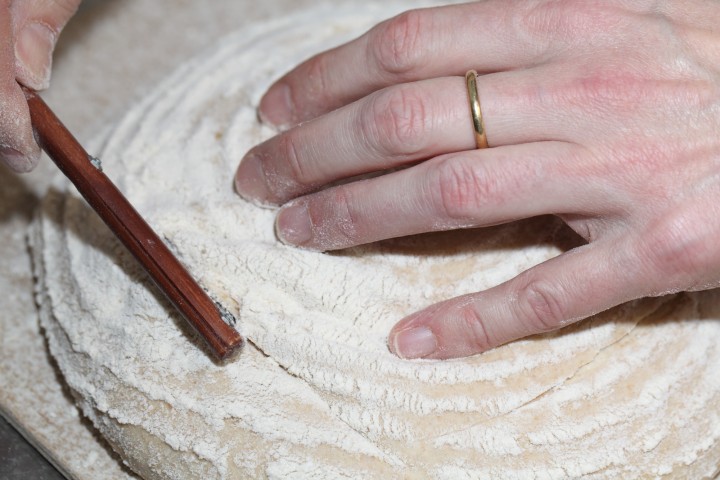
Now it’s time to shape. Shaping is a tricky subject. It’s something for which everybody develops his or her own technique over time. You can make a batard or loaf shape or a boule (ball). If necessary you can learn more on shaping from a good bread book, like the ones by Hamelman or Reinhart, or the Tartine Bread book. You can also check out our video on how to shape a boule.
Preheat your oven to 230 ºC / 445 ºF (at what stage you preheat your oven depends on how long it takes for your oven to heat through, some take 30 minutes, some, like ours, with stone floors take a lot longer, up to two hours.
Transfer the shaped dough in a proofing basket or baking pan, cover and leave to proof for 2 hours and 15 minutes (provided your dough has a temperature of around 24-25 ºC / 75ºF). When you think it has risen enough, use your finger to carefully make a very small dent in the dough. If the dent remains, the bread is ready to bake, if the indentation totally disappears, the dough needs a little bit more time.
Now your loaf is ready for the oven. Slash the top of the loaf with a lame or bread scoring knife. To get a nice crust, try to create some steam in your oven by putting a small metal baking tray on your oven floor when you preheat the oven, and pour in half a cup of hot water immediately after putting the bread in the oven. Release some steam by setting your oven door ajar (perhaps with the help of a wooden spoon or oven mitt) 5 minutes before the bread is ready. If you are going to create steam with a baking tray, you maybe also want to turn your oven temperature a bit higher, because you are going to lose some heat in the process.
After 48 minutes of baking your loaf should be ready. Transfer onto a rack and leave to cool. This loaf also keeps very well in the freezer. But please make sure to eat at least some of it while fresh!
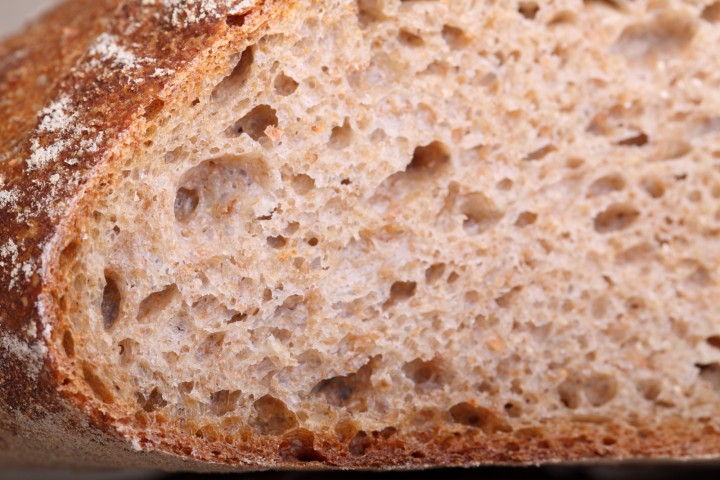
Whole wheat levain time table
day 1 21.00 h Make poolish and let ferment for 12 hours at room temperature
day 2 0.900 h Make final dough
- Starter + all other ingredients 6 minute mixing
- 50 minutes rest
- Stretch and fold nr. 1
- 50 minutes rest
- Stretch and fold nr. 2
- 50 minutes rest
- Shape
- final proofing 2 hours and 15 minutes
- bake for 48 minutes at 230ºC / 445ºF
PS: A lot of people still believe the a whole wheat loaf should be very dark in color. The darker the bread, the healthier. This is a big misconception. These factory breads are filled with burned malt to give them that ‘healthy’ dark appearance. Don’t let them fool you…Just buy the best fresh flour you can find, take your time to make a good loaf and you’ll never look back!
PPS:Like with all the recipes you find on our website, this one was tried and tested by us at least 8 to 10 times before we published it.





Petra Robinson says
I baked this bread today, but instead of Wholewheat flour I used Wholemeal flour and it is sooooooooo good.
The Stretch and fold Method is fantastic.
I am nor sure why but the biggest hole in my bread are mort at the top.
I so love your Site.
Anna says
Ik heb een ‘probleempje’, ik heb namelijk een heteluchtoven en mijn korst komt er net iets te hard uit, terwijl de binnen kant nog iets te nat is! Wat is de oplossing voor dit probleem? Zou het alleen aan de oven liggen, of doe ik iets fout bij het brood zelf?
Alvast bedankt
Anna
Weekend Bakers says
Hallo Anna,
We denken inderdaad aan je oven. Het zou een goed idee zijn je oventemperatuur (minimaal) 20 graden naar beneden bij te stellen denken we. Wat je ook doet, de baktijd moet wel echt altijd 40 tot 45 minuten zijn. Als je korst de juiste kleur heeft kun je zelfs de oven nog verder temperen naar 180 graden. Het is de bedoeling dat het brood aan de binnenkant ‘uit-kookt’ en gaar wordt en daarvoor moet het een temperatuur bereiken van ongeveer 93 graden. Dit kun meten met een digitale thermometer, dan weet je het echt pas zeker dat je brood goed gaar is (zie ook onze oven-tips: www.weekendbakery.com/posts…your-oven/). Daar zie je ook de tip over ‘je echte oventemperatuur’.
Hopelijk lukt het hiermee.
Succes en happy baking,
Ed en Marieke
Elvira says
Beste bakkers,
Gisteren voor het eerst een desembrood gebakken, volgens jullie Whole Wheat-recept. Ge-wel-dig lekker! Niet te zuur, lekkere korst, smeuïg kruim… Echt een heerlijk brood.
Maar… ik ben een beetje afgeweken van het recept en daar had ik wat vragen over.
– Ik ben helaas niet in het bezit van zo’n superstandmixer, dus ik heb een handmixer gebruikt. Omdat ik vermoedde dat die niet voldoende hard zou kneden, heb ik het deeg een extra rustperiode + stretch & fold gegeven, om zich goed te kunnen ontwikkelen. Is dat een logische redenering?
– Ik vond het deeg aanvankelijk erg stug, en heb er daarom ietsje extra water bij gedaan. Uiteindelijk, na al die rustperiodes en stretch & folds, werd het zo zacht en soepel dat het waarschijnlijk z’n vorm niet zou behouden in de oven. Dus toen heb ik het laten rijzen in een rijsmandje, de oven voorverwarmd met daarin een gietijzeren pan met deksel (à la no-knead bread), en het deeg toen – hup – in de gloeiendhete pan gekieperd en met deksel 30 minuten laten bakken en zonder nog eens 30. Het resultaat: geweldig, zoals gezegd.
Nu vraag ik me alleen 2 dingen af: 1.) Had ik dat extra water achterwege moeten laten? Is het zo dat deeg met al dat rusten en stretchen & folden vanzelf soepeler wordt? (Ik heb nog niet zo veel broodbakervaring.) En vraag 2.): Is het zo dat het deeg-in-de-panconcept zorgt voor een goeie vochthuishouding? M.a.w: de eerste 30 minuten blijft het vocht uit het brood in de pan, wat zorgt voor een mooie ‘oven spring’?
In elk geval werkte het wel, maar ik wil altijd graag weten waaróm iets werkt ;-). Hoop dat jullie het weten, hartelijk dank alvast voor jullie antwoord én voor de inspirerende website!
Vriendelijke groet,
Elvira
Weekend Bakers says
Beste Elvira,
Als je deeg kneedt wordt het eerst wat droger en als je dan door kneedt wordt het langzaam weer wat vochtiger. Het oogt vrij snel wat droog in de eerste minuten van het kneden maar dit is geen goede indicatie voor hoe het later wordt. Dus..volgende keer zelfde recept en methode maar zonder dat extra water want het recept heeft al een hoge hydratatie (verklaard ook waarom je deeg zo zacht en soepel werd!). De deeg in pan is helemaal top en je hebt helemaal gelijk wat betreft de waterhuishouding en stoomvoorziening. Je zou zelfs de deksel er al wat eerder af kunnen halen, want het brood is dan gestabiliseerd en de stoom heeft haar werk ook na 20 minuten al gedaan (eigenlijk al veel sneller). Ook de baktijd zou misschien terug kunnen naar 45 tot 50 minuten (voor 750 g deeg). Maar omdat je al zo een goed resultaat had zou ik zeggen, niet te veel tegelijk veranderen en eerst even alleen dat extra water weglaten zodat je goed kunt beoordelen hoe dat uit pakt.
Fijn dat het al zo geweldig gaat. Ga zo door!
Happy Baking,
Ed & Marieke
Elvira says
Beste Ed en Marieke,
Dank jullie wel voor het heldere en uitgebreide antwoord. Ik heb vandaag opnieuw dit brood gebakken en toch twéé dingen veranderd (ik ben nu eenmaal eigenwijs ;-)): ik heb geen extra water toegevoegd en ik heb de baktijd verkort met 8 minuten. Het is nog beter geworden dan de vorige versie! Hoger gerezen, heerlijk smeuïg kruim en een geweldige smaak. Wel heb ik nogmaals de extra stretch & fold + 50 min. rust gedaan; dat lijkt een goede compensatie voor de matige kneding met de handmixer.
Ik had nog wel één vraag: zijn er standaarden voor de baktijd ten opzichte van de hoeveelheid deeg? Stel dat ik een brood wil maken dat 20% zwaarder is (mijn gietijzeren pan is tamelijk groot), verleng je dan ook de baktijd met 20%? Of is dat te simpel gedacht?
Bedankt voor het delen van jullie rijke bakkennis!
Vriendelijke groeten,
Elvira
Weekend Bakers says
Hoi Elvira,
Zo werk je toe naar je eigen perfecte brood! Heel mooi.
Wat betreft baktijden kun je aanhouden dat je voor elke 250 gram extra deeg je ongeveer 10 minuten extra baktijd hebt (dit gaat niet oneindig door maar gaat wel op voor deze hoeveelheden deeg).
Uitgaande van 25 minuten bij 250 g deeg. Dan krijg je 35 minuten voor 500 g deeg, 45 minuten voor 750 g en 55 minuten voor 1 kg. Jouw 20% plus deeg zal dan zo rond de 50 minuten baktijd liggen uitgaande van bovenstaand recept.
Succes ermee en nog veel meer mooie broden!
Lots of loaves,
Ed & Marieke
Elvira says
Bedankt voor de rekenmethode; heel handig om te weten!
Intussen zijn er al prachtige broden uit mijn oven gekomen. Ik ben volop aan het experimenteren met verhoudingen meel/bloem, met de hydratatie (mijn biologische tarwemeel vraagt toch iets meer water dan het recept voorschrijft, ben ik inmiddels achter), met de kneedmethode (ik kneed intussen met hand + deegschraper; gaat prima met dit tamelijk vochtige deeg) en met de baktijd.
Volgende week maar eens een van jullie andere broodrecepten proberen. Leuk hoor, dat bakwerk!
Bedankt voor alle informatie,
Elvira
Candy says
Your website is wonderful! Thank you for such wonderful instructions for making healthy bread. I have been trying to teach myself to make bread for several years and your site has the most complete instructions that I have found.
However, I am confused about the flour types used in this recipe. I have a grain mill and usually grind my four fresh. I have some hard wheat berries and some soft wheat berries. This recipe calls for whole wheat bread flour and wheat bread flour. I am thinking that the soft wheat would be used for the whole wheat bread flour and the hard wheat for the wheat bread flour. Would that be correct?
Weekend Bakers says
Hi Candy,
Thanks for your very kind words. Very nice to have your own grain mill!
In general hard wheat with higher protein content and more gluten is used for bread. Hard wheat (usually hard spring wheat) has a higher gluten content (between 11% and 13%) and is excellent for baking bread. Soft wheat has a lower gluten content (between 9% and 11%) and is often used in all purpose flour and pastry flour which gives a more crumbly texture. Soft flour is usually divided into cake flour, which is the lowest in gluten, and pastry flour, which has slightly more gluten than cake flour. To make things more complex, you can make whole wheat flour from soft wheat and patent flour from hard wheat and vice versa.
So in your case it would help to know the protein content of your flour, but that is difficult of course. Our suggestion would be to try and use the hard wheat first.
Whole wheat: The coarse ground complete wheat grain, contains the whole kernel ((extraction rate: 100%). Wheat flour has a percentages of the bran sifted off (the wheat flour we use as our basic bread flour has an extraction rate of around 78%).
Also check out our little piece on flour types: www.weekendbakery.com/posts…our-types/
Hope this information is helpful to you.
Happy milling and baking,
Ed & Marieke
Joel says
Hello,
I used your site to make my first wild yeast sourdough starter using wild yeast caught in Dubai, and this whole wheat loaf sounds like a great use for it.
I have one question about the recipe, though. I don’t have a mixer, just a bowl, spoon, and my hands. What would be your instructions to mix the dough by hand? Do I need to knead it? I’m specifically referring to the “mix for 6 minutes” part of the recipe.
—->Joel
p.s. The instructions for the starter were fantastic, I especially liked the picture of the jar with all of the markings. That made everything clear for me. Thanks for making the instructions available!
Weekend Bakers says
Hi Joel,
It all sounds very good, keep up the fantastic baking and starter making and maintaining! You can indeed replace the 6 minute mixing by kneading the dough with your hands. Keep in mind that this will take a bit longer (also depending on your kneading skills) around 10 to 12 minutes. Hope you will have great results. Don’t forget to check out our tips on dough temperature and the use of your oven for example. They can really help you achieve better baking results. See: www.weekendbakery.com/posts…king-tips/
Happy Baking in Dubai,
Marieke & Ed
Erik says
Hoi Ed en Marieke,
Met dit recept heb ik het probleem dat het deeg aan de banneton blijft plakken. Ik heb dit recept nu drie keer gemaakt en telkens blijft het deeg aan de banneton plakken. De derde keer heb ik nog veel extra meel in de banneton gedaan maar dit mocht niet baten. Hebben jullie enig idee waarom dit gebeurd en nog belangrijker, hoe ik dit kan voorkomen? Heeft het misschien met het soort bloem of meel te maken waardoor ik iets minder water moet gebruiken? Ik gebruik trouwens een banneton van houtpulp.
Erik
Weekend Bakers says
Hoi Erik,
Om je vraag beter te beantwoorden: Mogen we vragen hoe lang je deeg gemiddeld in de mandjes zit /rijst en hoe nat (percentage) je deeg is?
Erik says
Hoi,
Ik heb dezelfde verhoudingen gebruikt als beschreven in jullie recept, dus 70%. En ik heb ongeveer 3 uur laten rijzen op kamertemperatuur (20-21 graden). Het brood zelf was heerlijk en was ook aardig gerezen in de oven, maar doordat hij vast plakte aan de banneton is hij zijn vorm verloren en plat geworden.
Nu zit er een brood in de oven met een water percentage van 65%. Het deeg kwam nu wel beter uit de banneton, maar het plakte er toch nog een beetje aan vast. Ik merkte op dat het deeg vooral plakt aan de randen in de banneton en niet aan de groeven. Heb je misschien tips hoe ik ervoor kan zorgen dat er meer meel op de randen blijft zitten? Is het misschien een goed idee om “how to break in a banneton
” proces nog een keer te herhalen? Voorheen kwamen de broden trouwens perfect uit de banneton.
Erik
ps. Bedankt voor deze goede site met veel heerlijke recepten en duidelijke uitleg!
Weekend Bakers says
Hoi Erik,
Je geeft eigenlijk al antwoord op je eigen vraag 🙂
Ik zou het proces inderdaad nog een keer herhalen en zorgen dat het hele mandje inclusief randen goed ‘behandeld’ is. Bij het inbloemen, voor je het deeg erin legt, gooi je als het ware de bloem ook goed tegen de wanden van het mandje aan. Misschien moet je in eerste instantie nog een beetje overdrijven met inbloemen (je kunt de overtollige bloem dan na het bakken nog wat afborstelen).
En als je brood met het omkeren van het mandje er niet meteen uit valt dan moet je even rustig heen en weer wiegen met het mandje en de zwaartekracht haar werk laten doen, niet te veel en te hard schudden.
Hoop dat je er wat aan hebt!
Happy Baking,
Ed en Marieke
Erik says
Hoi Ed & Marieke,
Bedank voor jullie reactie. En ik ga het mandje de volgende keer nog beter inbloemen. Hopelijk wordt hij dan helemaal perfect. 🙂
Groeten,
Erik
Lesley Broadbent says
Hi, what a wonderful website this is! I have only been making bread since April when I watched Paul Hollywood on TV in the UK and he inspired me to have a go.
I made my own sourdough starter and it’s been performing very well. I made your white bread Pain Levain the other day and I can honestly say it’s the best bread I’ve ever made – my husband was so impressed. Today I have been making the wholewheat version of the Pain Levain and it’s now on its final proof in the banetton. However, I have one question for you. Do I have to use the poolish within 12 hours of making it? I can’t always get the timing right and something comes up to divert me. This morning I used it after it had sat for 14 hours and I didn’t know whether it would work as well. So if you can give me some guidance I’d be very grateful. Obviously I realise that the ambient temperature in the kitchen makes a lot of difference. I put last night’s poolish in my pantry as it is a little cooler so I’m hoping that’s OK?
Thanks again for any help you can give.
Weekend Bakers says
Hello Lesley,
You’ve already figured some things out for yourself and made the right decisions by looking for a cooler place if you want to slow down the fermentation process. Next to temperature you can also control it by the amount of yeast you put in. This is a handy schedule:
Poolish up to 8 hours in advance – 0,23% – 0,33%
Poolish up to 12 hours in advance – 0,1% – 0,2%
Poolish up to 16 hours in advance – 0,03% – 0,08%
The first row if figures is for warmer weather, the second for colder.
Your prepared will not suddenly collapse after 12 hours by the way (I think the poolish you made will be fine the way you handled it). But If you are working with pre-fermented doughs like poolish or biga it is important to make sure not to ‘over ripe’ your pre-ferment. This is especially true when using larger percentages of preferment in your final dough (think up to 50%) because over riping will kill the gluten in your preferment (the yeast will eat them all) and you will end up with a weaker and hard to handle dough. You will notice this by the shrinking of the poolish in the bowl.
So if you think you will not be using your poolish for quite some time over the 12 hour period it is best to keep it in the fridge and take it out an hour or so before using it.
Hope this helps and you will have more wonderful loaves!
Marieke & Ed
Lesley Broadbent says
Hi again,
Thanks for all the information. I think I understand about the amount of sourdough starter in the poolish. If I put in less, then the preferment will be slower? I just have to get used to the fact the making bread your way means a lot less sourdough starter, so I will have to start giving it away.
Yesterday’s final proofing went completely to pot! I didn’t get back in time to put it in the oven and so its final proofing was over 4 hours. When I tipped it out of the banetton it collapsed and went quite flat. It was still delicious, but today I am making another and I won’t make the same mistake again! I suppose I should have put the banetton in the fridge and brought it out when I was ready to give it my full attention.
Anyway, I am learning and hopefully tonight’s loaf will be much better. Thank you for all your help and encouragement.
Weekend Bakers says
Yes Lesley, next time the fridge would be a good option if you cannot predict how long you will be away!
Happy Baking!
Marieke
Miki says
Hi, I enjoyed this recipe very much. I am experimenting with sourdough, and this was my second bread. The first was the Tartine recipe, which was also very nice but unfortunately the dough got stuck to my proofing basket so I think wiggling it out affected the rise. Nevertheless, the taste was wonderful
The only adaptation I made to the recipe is that I baked it on a pizza stone while the bread was covered by a cast iron skillet for the first 25 minutes at 230 degrees celsius and then I baked the bread for another 15 minutes uncovered. I had a nice oven spring en the crumb was nice as was the colour of the crust. I also used a bit more salt, 9 instead of 7 grams, because I know in general I like my bread a bit saltier.
The only thing I may try is to incorporate an autolyse in order to make the handling of the wet dough easier.
tini says
Hi there,
I just got my bread out of the oven and it turned out great. The taste is yummy and the crumb is nice as well, but I didn’t get as much rise as you did and also the “pores” of my bread are smaller than yours. Any ideas?
Thank you! Even one of my 3 year olds wanted some for “coffee”, also she then also switched to cookies, like her twin…
Tini
Weekend Bakers says
Hi Tini,
We do have a few suggestions for things to look out for with your next bakes. First of all the dough temperature in relation to the proper proofing of the bread. Maybe there is some improvement possible especially with these tips on dough temperature:
www.weekendbakery.com/posts…mperature/
Also try to keep the use of extra flour while handling the dough to a minimum, because otherwise you will change the hydration and thus the structure of the bread. More tips that may help you in this area: www.weekendbakery.com/posts…ion-dough/
Finely the oven is a big factor in how the bread turns out. Maybe you did not use steam or not enough steam to aid your bread with the important oven rise, the first minutes of of the baking time. Yesss…even more tips on this subject: www.weekendbakery.com/posts…your-oven/
It usually is a combination of these factors that determine how your loaf turns out. You just need to tackle them one by one, make notes and bake a lot to get to that perfect loaf. But in the meantime as you have already discovered together with the 3 year olds, already eat delicious bread!
Happy Baking!
Marieke & Ed
Kat says
Thanks! Yes, I’m going to give it a go later this week. I really hope I have success and will let you know how it goes. Like you say, might need some tweaks before I get it right.
Kat says
Well….it was a success! I started the poolish yesterday morning and then followed recipe from 8-11 last night. After I shaped the bread I put in banneton, in an airtight bag and put in fridge. Took out this morning 10.5 hours later, but finger print was fully springing back so left it a bit longer. Only took an hour at room temp then was ready to bake! Came out lovely.
Now I’m sure its not perfect (but then again I’m not sure mine usually are) but its as good as it usually is…and I’m delighted. Evenings are no problem for me but with a small child I wasn’t making as often as I’d like as we need to get out the house in the day.
Also made pain rustique which was also a success!
Thanks for the site!
A happy baker 🙂
Kat says
Sorry – also made pain naturel!
Weekend Bakers says
Hee Kat,
That sounds absolutely marvelous! Thanks for the feedback. It is always great to hear about these variations that work out as planned.
Keep up the good baking!
Ed & Marieke
Kat says
Hello! Love this loaf and so easy to make. I was wondering if you can give Mr some guidance on doing the final proofing in the fridge? I would like to make this more often than time will allow and if I could proof it overnight and cook in the morning occasionally it would be very helpful. Is it ok to do this?
Weekend Bakers says
Yes that is very well possible. The retarding of the final dough is something that is done by many bakers. We have not tried it ourselves (never enough fridge space) so we cannot help you much with what the exact outcome will be and what times and optimum amounts of culture would produce the best bread following this method (a bit of tweaking might be in order). Usually you will see some blistering on the crust of the bread. Funnily enough American bakers view this as an asset, French bakers find it a defect. One tip we can give you is to put your proofing basket inside a big plastic bag and inflate it, so the dough has no contact with the plastic and it does not dry out.
Maybe you will be so good as to let us know how the method turned out for you too?!
Good luck with it and happy baking!
Marieke & Ed
Chris says
Yesterday, very late, out of the oven. This morning a couple of delicious slices of this whole wheat loaf. Nice crispy crust a firm crumb with a nice bite. Taste….? Well, not enough words to describe. Let’s call it ‘delicious’!
Shapewise there is room for improvement. Out of the proofing baskets it looked ok. One of the two was slashed a bit deeper than the other and, once in the oven, turned out flatter than the other. I guess there was not enough tension in the dough to keep shape.
Next time (soon!) a chance to improve.
Greetingz!
Chris
Weekend Bakers says
Hee Chris,
That’s what also keeps you baking, immediately after the last bake you have these ideas on how to do it just a little bit better or different. For us it really helps to take notes, so next weekend we take our notes and still know exactly what we did last bake and want to do now (score less deep, bake 5 minutes more, slightly different oven temp, more water etc.).
Good analyses on the tension, the shaping plays a big part in how the bread can develop in the oven.
The great part is, not perfect home made bread is still delicious and way better in many ways than store bought.
Happy Baking,
Ed & Marieke
Anna says
Hello Ed en Marieke,
I would like to ask you where I can find more recipes (books) which use a little amount of sourdough starter. In a poolish or otherwise. I like the fact that I only have to maintain one (rye) starter, use and store just less of it than in most other recipes I found. Also the bread doesn’t taste as sour, using a little bit of starter.
Thanks!
Anna
Weekend Bakers says
Thanks for your comment Anna. The method you find in our own recipes has evolved from studying different bread books and combining things we thought would work. For example the pain rustique started out as a yeast bread without any shaping and with us became a hybrid (with sourdough) with added shaping technique.
There is (to our knowledge) not one book that is full of only sourdough recipes that uses the method (with maintaining the small amount of starter) that we prefer too. All books (and bakers) have their own method and lots of them use /maintain larger amounts of starter. So we usually do some recalculating and adapting to come to a method and recipe that works for us. The book that has worked and is in our eyes still the best book around to learn everything there is to know about artisan bread is still ‘Bread’ by Jeffery Hamelman. There are several sourdough recipes in this book but also lots of other (yeast based) bread recipes.
Other recipes we can truly recommend that use the preferred method are our pain naturel: www.weekendbakery.com/posts…n-naturel/
the ‘miche’ bread: www.weekendbakery.com/posts…g-a-miche/ (Big loaf but you can make half for a smaller loaf). And the San Fransisco sourdough: www.weekendbakery.com/posts…ugh-bread/
Happy Baking!
Ed & Marieke
Tom says
Het is goed gelukt. De smaak is echt lekker! Ik vind jullie website fantastisch 🙂
Een ding: mijn deeg is precies niet zo goed gerezen. Ik had een brood van 22cm diameter en 6 cm hoog. Of is dat normaal dat hij niet zo hoog is. Ik heb het deeg wel laten rijzen op een plateau en niet in een rijsmandje. Zou zo’n mandje helpen?
Tom
Weekend Bakers says
Hallo Tom,
Ja, dit nattere deeg kan tijdens de rijs wel een beetje steun gebruiken, en een rijsmandje geeft ook vorm aan het deeg. Maar ook het juiste vormen zelf (shapen) van het deeg en het goed opspannen helpt mee, evenals de condities in je oven. (zie tips: www.weekendbakery.com/posts…your-oven/). Het is juist een uitdaging om het de volgende keer net weer wat beter te krijgen. Wat betreft het rijzen kun je ook eens goed naar de temperatuur van je deeg kijken.
Deze tips kunnen je daar zeker bij helpen: www.weekendbakery.com/posts…mperature/
Heel veel bakplezier en mooie broden!
Ed en Marieke
Anna says
I noticed that you use very little sourdough culture, compared to the recipes I’ve seen or tried. For instance, the bread I baked today contained 130 grams of culture, 243 grams of flour, 130 grams of water and 6.2 grams of salt. A lot of culture. And I still managed to create I brick instead of a nice bread! 🙂
Is there a reason why you use so little culture and how come it is enough to create a voluptuous dough/bread? (and I created a small brick instead?)
Groet,
Anna
Weekend Bakers says
Hello again Anna,
There seem to be two schools of thought when it comes to using sourdough cultures in recipes for bread making. One tells you to refresh your starter the day before baking and add a large amount of this starter to your final dough on baking day. The second tells you to build a poolish by using a small amount of sourdough added to equal amounts of flour and water and let it ferment (ripe) for usually around 12 hours. It more or less comes down to the same result as in the first method you use your starter as a poolish, but the downside of this is you have to maintain a large amount of starter. With the second method you maintain a small amount and let it increase in size the day before baking in a separate container. With this second method you do not have to throw away as much starter when you refresh (feed/ maintain) it.
This is also why most of our recipes use this method that tells you to build a poolish type preferment with a small amount of culture.
Another advantage of this method is you can use a rye starter (easier to maintain) with regular white sourdough loaves, as the amount of rye used is so small you will (almost) not notice it in the final bread.
If you want to try ‘our’ method we can recommend starting with this recipe for pain naturel: www.weekendbakery.com/posts…n-naturel/ The resting and proofing times given in the recipe are correct only if your dough is about 24 to 25 degrees Celsius, if it is less, it can take longer. So it is important to be patient when making and baking sourdough bread.
Good luck with the baking and a very good weekend!
Marieke
Anna says
Thanks so much for getting me started. I have a lot of questions, don’t I !? 🙂 But I’m sure I’ll get the hang of it eventually.
The recipes I’m trying for this weekend, use a large amount of starter, but in a poolish! They also say that I have to get the amount of starter needed, out of the fridge at night and make the poolish the night after. But if I feed my starter and put it somewhere at room temperature, 6-12 hours rest should be enough, right?
Can I, using your method, take some starter out of the fridge in the morning, feed it in a separate container and make the poolish the same evening? Took some out at 8 am this morning and now it has already tripled its former size!
Thanks again and my compliments on the website!
Anna
Weekend Bakers says
Yes, you should be absolutely fine doing that. You can always adapt the water temperature (use lukewarm) if your culture should need a bit of help and you want to speed things up, but sounds like at the moment it is already very active so no problem making the poolish later and hopefully some wonderful bread baking tomorrow!
Have a great baking weekend,
Marieke
Tom says
Na jullie Crusty white loaf wil ik deze eens proberen.
Ik heb 2 vragen:
– moet je voor 2 broden ook de poolish verdubbelen?
– ik heb gewoon volkoren tarwemeel staan, maar ook volroggemeel, Kan het volroggemeel hier ook voor gebruikt worden?
Het crusty white loaf was trouwens overheerlijk!
Tom
Weekend Bakers says
Hallo Tom,
Ja, voor twee broden moet je alles verdubbelen dus ook de poolish!
Voor dit recept kun je het beste volkoren tarwemeel gebruiken. Met roggemeel krijg je echt een ander resultaat. Rogge bevat minder gluten, dus je brood zal dan wat compacter en platter worden en ook de opname van vocht is iets anders met rogge.
Als je van rogge houdt kunnen we ook dit brood van harte aanbevelen: www.weekendbakery.com/posts…h-raisins/
Fijn dat de crusty white al zo goed is bevallen. Heel veel mooie broden nog!
Marieke & Ed
Caren says
Dear Weekend Bakery,
many thanks for this recipe! I just tasted my first home made sourdough loaf and it is so delicious! Crusty on the outside and soft and light on the inside. YUM! And I even used a cheap flour so it should be even better with nicer ingredients. As a German in England I do miss good bread and I am glad I found out how to make it thanks to you. I also learned how to make a starter sourdough from your website. It is really easy, and your recipes are very clear and easy to follow.
I am looking forward to trying out other recipes on your website as well. Thank you for sharing your knowledge 🙂
Caren
Weekend Bakers says
Hi Caren,
So glad to hear you like it and thank you for your praise. We can also really recommend the sourdough mini boules: www.weekendbakery.com/posts…i-boulles/
Or with your German roots, maybe something with rye like these two recipes:
www.weekendbakery.com/posts…h-raisins/
www.weekendbakery.com/posts…rye-bread/
Happy baking!
Ed & Marieke
SloppyBaker says
Hello Ed & Marieke,
Many, many thanks for your instructions. Kneading turn out to be key. My old baking machine ended up in the dustbin, and I developed muscled hands! No more sloppy work.
Today I made my best loaf ever. (Pity I cannot post a picture)
Sloppy
PS. I found out that the flour from the IJsselstein mill is also tremendous!
Weekend Bakers says
Hello Mr. Sloppy,
Glad to hear it all worked out as expected. From here on the only way is up and I am sure you will bake many more delicious loafs. Keep up the good work and thanks for sharing the tip about IJsselstein.
Happy Baking,
Marieke
PS: We are working on the picture adding thing!
Carla says
Hello Ed and Marieke,
Yesterday I made my version of this bread recipe with a part whole wheat flour and a part dutch organic “meergranenmeel” (don’t know the english term for this kind of flour). I also used your sourdough-culture in the preferment. The taste of the bread was great!!!!
There was one thing I noticed while I was making the dough; I’ve made this type of bread a couple of times now but with my own sourdough-starter which is made from rye and bread flour (50-50) and water with equal quantities water and flour-mixture. When I’m making the final dough I have to use more water then mentioned in the recipe but with the poolish made from your 100% rye-starter the dough didn’t need extra water. Is this because of the difference in flour-content in the sourdough-starter that the dough absorbs less water?
Anyway the results matters and this recipe is fantastic!
Thank you for sharing your recipes and experiences through this website with us!
Carla
Weekend Bakers says
Hi Carla,
So glad the rye culture is alive and doing well and giving great results. We discussed a few ‘theories’ as to why you did not need to use more water like you normally do, but we can only come up with with things that would make just a tiny bit of difference. Like the fact that we made our culture rather stiff so if would survive the journey to you. But after that you fed it and the difference in water content with your regular starter would be minimal.
We found that each time we open a new bag of flour, same type, same brand, there can still be a difference in water absorption and we regularly have to adjust the amount of water, somewhere between 1 and 4%.
Anyway, glad you like the recipe so much and you we love to share much more bread recipes and theories in the future!
Happy baking,
Marieke & Ed
Carla says
Hi Marieke & Ed,
I just read your commend on my scribble and you gave me the answer to my “water” problem/puzzle. The adjustment of 1-4% water with different bags of flour is right in comparison with my own experiences. When I’m adding extra water it is about 1 or 1,5 tablespoon of water so that is within the mentioned margin. Glad to read that you have to make such adjustments as well, it gives me the confidence that I’m doing alright.
Thank you and till next time,
Carla
Weekend Bakers says
About opening a new bag of flour and where this difference may come from: Jeffrey Hamelman writes in his book ‘bread’ about the difference in spring and winter wheat and the difference the use can make in baking results. Winter wheat is considered best for baking artisan loafs, in general it contains a bit less gluten but the ‘kind’ of gluten it contains is better suited for long fermentation.
Naomi says
Gisteren het deeg bereid en in de nacht in de koelkast laten rijzen. Vanochtend extra vroeg opgestaan om het in de oven te doen (dus niet eerst nog gevouwen en laten rijzen) en in de oven. Helaas kon ik het niet aansnijden voordat ik naar mijn werk ging, maar het huis rook heerlijk!
Had ook een prachtige ovenrijs (het insnijden – ‘scoring’) lukt mij nog niet zo goed, dus het brood rees alle kanten op.
Terug uit het werk zag ik dat het brood al half op was, kennelijk heeft manlief er van genoten! En ik ook. Wat een heerlijk brood!
Heel erg bedankt voor het recept. Zal het zeker vaker gebruiken!
Weekend Bakers says
Hallo Naomi,
Het is heel dankbaar ‘werk’ broodbakken voor jezelf en anderen en alleen de geur al is een geweldige beloning.
En bij iedere nieuwe poging krijg je het een beetje meer in de vingers, ook het insnijden, gewoon blijven oefenen!
Misschien heb je nog wat aan onze tips over ‘scoring with confidence’: www.weekendbakery.com/posts…onfidence/
Happy Baking,
Marieke
SloppyBaker says
Hello Weekend Bakers!
I desperately want to be able to bake levain breads like the one’s you describe on your gorgeous site!
I am trying this for several months now, starting with recipes from other sites. Your recipe here, although I followed it to the letter, brought me no luck either.
Two things go wrong always, whatever recipe I follow:
1: The final proofing takes endless! Ten hours or more is no exception.
2: Whatever I do (knead, stretch and fold) the dough remains wet and sloppy.
I did succeed in making the rye sourdough starter, that now, as far as I can see, has the qualities you describe in your instructions. (smell, structure, etc.)
During the whole process I kept the dough at a temperature of 23-26 degrees C., thermostat controlled.
I use whole wheat flour of organic origin.
For the final proofing I use a proofing basket (boule). When I finally have to decide that it has taken enough(!) time, and try to turn the basket over, the dough runs out as a sloppy mass. It looks like a cow dropping! It sticks to everything it touches……
Somewhere, somehow, I do something consistantly wrong. But what?
Weekend Bakers says
Hello Mister SloppyBaker,
Without having the benefit of looking at your dough it looks like your flour could be low in gluten. Did you ever try to bake a crusty loaf with yeast (recipe on our website) to check out if your gluten in your bread flour are able to make a good bread?
And did you use 45% bread flour and 55% whole wheat as in our recipe or did you use 100% whole wheat, because you need a bread flour, high in protein, to make a lighter whole wheat loaf. 100% whole wheat loafs tend to be more ‘brick’ like, you will not get the result you see in the pictures above.
Proofing for 10 hours is very long and will also weaken the gluten structure.
Have you read our article on how to check if your loaf has proofed and the story about double in size? Can be helpful too maybe: www.weekendbakery.com/posts…e-in-size/
And you can see what our dough for this recipe looks like in this little clip so you can compare: www.weekendbakery.com/posts…g-a-boule/
Really want you to get that wonderful loaf. Just give it another go, (so maybe change brand of flour also) and you will get there!
Good luck with it!
Marieke & Ed
SloppyBaker says
Dank Marieke en Ed voor jullie prompte reactie.
Nu maar in onze moerstaal:
Ja, ik bakte vele broden met gist, met succes. Hydratatie 60% (300 g water op 500 g meel, maar ook met gist slaag ik er niet in een stevig deeg met een hogere hydratatie te maken)
Ja, ik volgde jullie recept tot op de gram nauwkeurig.
Ja, ik las jullie artikel over rijzen, en weet dat je er een deukje in moet drukken dat net niet terugkeert. (Volumevergroting treed bij mij pas na úren op!)
Ik laat mijn meel in de eerste fasen ‘rusten’ in een kom in een rijstkoker die ik met een geijkte thermostaat op temperatuur hou. De rijsfase zelf in een duits rijsmandje in de oven, opnieuw voorzien van een externe thermometer… (plm 24 gr C.)
Ik probeerde van álles en wordt er nu toch wel een beetje gek van..
Ik kocht mijn meel in de groene winkel: Demeter volkoren van “De Nieuwe Band”. De bloem is minder verantwoord: “Bloem voor witbrood” van Soubry.
Tja, wat kan ik zeggen? Of ligt het misschien aan het feit dat ik het initiële meng- en kneedwerk aan een oude broodbakmachine overlaat?
Veel dank voor jullie prachtige stek!
Sloppy
Weekend Bakers says
Hallo meneer Sloppy,
Aha, die laatste zin, voordat je ons bedankt, over die broodbakmachine, dat is wel een beetje een ‘eye opener’ voor ons. Wij kunnen ons niet zo goed voorstellen dat je met zo een minuscuul deeghaakje op de bodem van de gemiddelde broodbakmachine voldoende glutenontwikkeling krijgt. In de meeste broodbak-mixen zitten allerlei toevoegingen om dat kleine deeghaakje te compenseren en toch vooral een redelijk brood te krijgen uit de broodbakmachine.
Wij kneden het deeg voor dit recept 6 minuten met een flinke deeghaak waarbij een gemiddelde glutenontwikkeling ontstaat. Onze suggestie zou dus zijn om dit initiële meng- en kneedwerk anders aan te pakken of in ieder geval een flink aantal minuten met de hand na te kneden.
Een tweede suggestie zou zijn om toch eens een ander ‘merk’ meel en bloem te proberen. Misschien heb je ook een molen in de buurt waarvan je wat zou kunnen uitproberen. Onze ervaring is dat ook daar grote verschillen in kunnen zitten. Wij hebben goede ervaringen met biologisch meel van De zandhaas uit Santpoort en ook over dat van de molen in Woudrichem horen wij enthousiaste berichten. De molen in Groesbeek (Zuidmolen) bij Nijmegen heeft ook biologische melen en ook heel veel andere soorten en ze bezorgen ook bij je thuis. Ten opzichte van het Demeter meel zou het ook nog wel eens goedkoper kunnen uitvallen.
Mocht dit niet het gewenste resultaat opleveren dan zou je nogmaals eens naar je starter cultuur kunnen kijken en die voeden met een ander merk biologisch roggemeel (misschien ook van de molen).
Maar beginnen met het kneedwerk dat lijkt ons de meest voor de hand liggende optie.
Succes ermee!
Ed en Marieke
Richard Garcia says
I have been playing around with various sourdough recipes scoured from around the Internet. The recipe here has been one I have tested successfully a few times. My children are very appreciative of my efforts! Yesterday I experimented with retardation of the fermentation in the refrigerator. I followed the recipe here, but then placed the dough in the refrigerator after the autolyse and first stretch and fold. The next morning I did one cold stretch and fold, then proofed in a basket for 4 hours. The result was a loaf with a wonderful crumb, moist and filled with holes. There was not an overwhelming sourness either.
I have also successfully reproduced the pain rustique, but prefer the natural leavening and whole wheat utilized in this sourdough. I really appreciate what you have done here and look forward to attempting some of the other recipes on this site.
Thank you!
Weekend Bakers says
Hello Richard,
Thank you so much for your very nice comment. The whole wheat is a favorite of many of our bread friends. It is also interesting to vary the amount of whole wheat or try the recipe with whole spelt flour. So many options.
It has surprised me how well children love this bread and the pain rustique, because I would have expected them to go for white and fluffy, but I was totally wrong. They love it, even eating it plain. It is so very rewarding to bake while people of all ages are so appreciative of your efforts 🙂
Keep up the happy baking!
Marieke
Nancy says
Hello Weekendbakers,
In your recipes you make a Poolish first and with the Poolish you make the bread. What is the difference with recipes in which you start with flower, water and sourdough and salt.
At the moment I’m still busy with the sourdough starter, but I can’t wait to start baking my own sourdough bread.
Kind regards,
Nancy
Weekend Bakers says
Hello Nancy,
There are different methods for making preferments, one of which is a poolish, equal parts flour and water, no salt, another method is making a ‘complete dough’ (simulating using leftover dough, like the French do, Pâte Fermentée is a French term that refers to a dough that is made before the bulk of the main bread dough is put together and allowed to mature or ‘ferment‘.) There’s also the ‘biga’, like poolish but less wet. The reason we prefer to use poolish is the more elastic structure of the crumb in the end result and the easy stirring when preparing the poolish. So, a matter of personal taste and preference really:). It is interesting to try different preferments and see what you like best.
Also see: www.weekendbakery.com/posts…lish-biga/
Good luck with the starter and the baking,
Marieke
Kevin says
Hi,
Quick question on this bread…should the dough double in size between the initial mixing of everything and the final shaping?
Weekend Bakers says
Hi Kevin,
During the bulk fermentation phase of 150 minutes you should definitely see good growth in dough size (double in size is a tricky subject, we are busy doing a posting on that topic). Just make sure your dough temperature is around 25 degrees Celsius so the timing corresponds with the timing in the recipe to get the best result.
See also our tips on this subject: www.weekendbakery.com/posts…mperature/
Good luck and happy baking,
Ed and Marieke
Kirsten says
I tried this one after a failed attempt with another sourdough recipe (from another site). I have to say I didn’t expect much because this recipe calls for only a small amount of sourdough starter. The one I tried earlier needed a lot more and it was still very dense and brick-like.
The dough didn’t rise that much during the final proofing so I was expecting the same result as before but I decided to pay extra attention to creating enough steam in the oven for any oven spring that might occur and try it anyway. The first few minutes didn’t really do much (I camp out in front of the oven during the first 5-10 minutes because I love to watch the oven spring!) but then the natural yeast kicked in and it sprung up. The bread has huge airpockets, a great crumb and is very tasty to boot. Succes! This one is definitely in the running to become our daily bread.
I also tried the Pain Rustique (so I would have a back-up if this one didn’t work out) and I loved that one too but I prefer more whole wheat for daily use.
Weekend Bakers says
Hi Kirsten,
Great to hear your success story! The steam definitely plays a big part in the bread being able to expand during the first part of the baking. Also fun to use different percentages of whole wheat and see how it changes the end result.
Happy baking and happy New Year!
Claartje says
Trying to work out the timing to bake in the morning (and have a fresh loaf for lunch!). Would a final proofing overnight in the fridge be an option? (9/10 hours)
Love your website!
Weekend Bakers says
Hi Claartje,
Yes that is very well possible. The retarding of the final dough is something that is done by many bakers. We have not tried it with this recipe ourselves (never enough fridge space) so we cannot help you much with what the exact outcome will be, what times and optimum amounts of culture would produce the best bread following this method. Usually you will see some blistering on the crust of the bread. Funnily enough American bakers view this as an asset, French bakers find it a defect. One tip we can give you is to put your proofing basket inside a big plastic bag and inflate it, so the dough has no contact with the plastic and it does not dry out.
Maybe you will be so good as to let us know how the method turned out for you.
Lots of (retarded) loaf,
Marieke & Ed
Rene de Winter says
Heb na heel lang niet gebakken te hebben weer aan de bak gegaan.
Met het desempje die ik van jullie heb gehad er 3 broden van gebakken met wel een iets andere samenstelling meel en gebuild meel (80 % ) bloem had ik niet had het natuurlijk wel kunnen zeven maar daar had ik even geen zin in.
Het is in iedergeval prima gelukt .
Heb een vraagje hoelang kneden jullie het in die blauwe Haussler min of 3-4 of …
Weekend Bakers says
Hallo Rene,
Fijn weer aan het bakken en met goed resultaat! Kneden in de Haussler is 5 a 6 minuten met dit recept.
thelittleloaf says
Just discovered your blog via Twitter, it’s fabulous! Love the step by step guides and your loaves look wonderful. Will definitely be coming back again soon 🙂
Weekend Bakers says
Hello little loaf,
Thank you so much, also for the twitter follow! Have you checked out our little bread baking movie? www.weekendbakery.com/posts…the-movie/
You might recognize the song 😉
Happy (weekend) baking!
Marieke
Bob says
Marieke/Ed,
When baking breads with high amounts of whole grain flour ie: whole wheat…. do you ever supplement your mix with vital wheat gluten flour in order to get more lift/raise?
Bob
Weekend Bakers says
Hi Bob,
We do not have any experience with this, we never use it. We usually have a combination of whole grain (mostly whole wheat) with lighter wheat flour (maybe called bread flour by you) which we think gives the bread the right balance of airiness, texture and taste. We use 35 to 50 % of the bread flour depending on the bread mood we are in…
Ann says
My whole wheat bread just came out of the oven, and it was perfect, it was nicely browned with a really good crust, and an open crumb, with lots of holes. I am very pleased with the way it came out and the instructions were very easy to follow. I will be making this again by mid week.
Ann
Weekend Bakers says
Thanks Ann, for the feedback! That is a wonderful result. And with your new mixer it will be an even greater feast to make this dough! Hope you don’t have to wait too long…
Happy mid week baking 🙂
Marieke
Ann says
I have a very mature 100 % rye starter which is alive and well. I am going to try your whole wheat bread tomorrow. I hope it comes out as beautiful as yours.
Regards,
Ann
PS. My Haussler Bread Mixer is on order.
Weekend Bakers says
Oh, that is exiting, hope it will arrive soon and in good order.
Making the whole wheat tomorrow too. Always curious to know how yours turns out. Hope you will like it.
Marieke
Ann says
Healthy bread, love the open crumb will have to try it soon. I am in the process of making some rye starter. Question: How long does it take for a starter to mature?
Ann
Weekend Bakers says
Hi Ann,
It takes about 5 days in total, but the best thing is to start using it after a week maturation and after that it should get better and better as it matures further. You can read all about it in our posting about how we make and maintain our own rye starter. www.weekendbakery.com/posts…asy-steps/
There is much more useful info in the bread baking tips section of our website. They are also being used in a few baking courses.
Hope your starter will be a live and well soon!
Happy baking,
Marieke
Rene de Winter says
Dat ziet er TOP uit !!!
Weekend Bakers says
Thanks Rene,
Leuk dat je onze site bezoekt en als @steenbakkertje nu ook actief bent op Twitter! Rofco bakers stick together like high hydration dough on a ‘flourless’ surface :))
Menno says
Ik mis de “like” knop op dit antwoord 🙂
Mike says
Hey guys, you are unbelievable with this awesome recipe of 65% Whole Wheat bread.
Today i tried it, i followed your instructions literally, and here’s the outcome:
Color: Just beautiful golden caramel.
Smell: Very appetizing
Crust: Very crunchy and about 3 m.m thick, which i like 😀
Crumb: Fluffy, light, chewy, sweet and with lots of openings in it —-horray 😀
Taste: Now this i can’t find the words to describe. Sweet with a hint of sourness…and unbelievably delicious
Shape: I made it batard, with very good shaping, slashed it length wide with one big slash, like you have.
The only thing is, it rose in the oven but like the 75% hydrated dough, is there a reason behind this?
Overall, it is a bread that i feel so happy that i made…and guess what, it’s become my favorite Whole Wheat Bread as well not only yours 😀
Thanks Marieke & Ed for such great recipe, and the thorough explanation you are taking the effort to make.
Cheers, now i’m going to enjoy my loaf 😀
Weekend Bakers says
Wow Mike, great job!
The reason behind the oven spring? Don’t know exactly but it is a good thing right?!
Seems everything came together in perfect harmony 🙂
Keep up the wonderful baking!
Marieke
Mike says
Sorry Marieke, i meant to say the oven spring did not happen like the 75% hydrated dough, a bit less. But overall it was very good.
Weekend Bakers says
Aha, I understand. But that is completely normal, the fibers are much heavier and need to be lifted by the dough bubbles and also they break the bubbles and weaken the gluten strands because they have sharper edges. So no spectacular spring (which is normal) but still a lovely loaf by your description :))
M.
Judith says
Is de temperatuur van het deeg of de omgeving tijdens de eerste rijs ook nog van belang of maakt dat niet zoveel uit? In onze keuken is het zo’n 20 graden overdag.
Groetjes van Judith
Weekend Bakers says
Hi Judith, natuurlijk kun je ook broodbakker in een ruimte van 20 graden. Wij gebruiken normaal lauw water (behalve in hartje zomer) om tot een deeg temperatuur van rond de 25C a 26C graden te komen. Dan help je het gist op gang en is ook is het deeg niet te koud (koud kraanwater kan wel 6 graden zijn). Met een deeg van 26 graden en een kamer van 20 graden moet het zeker goedkomen!