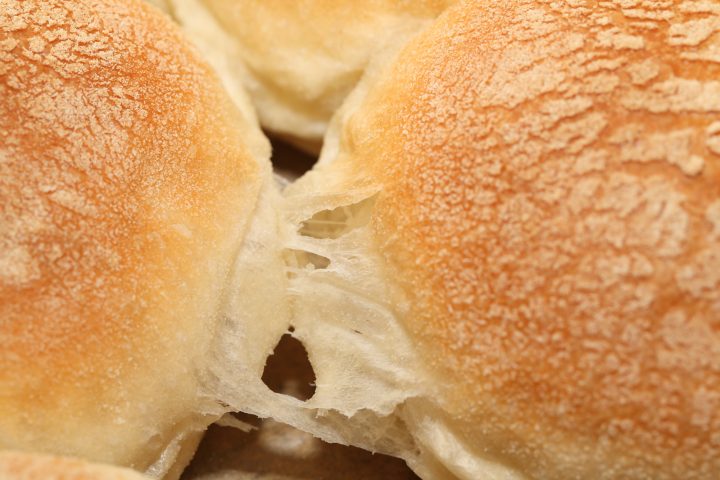
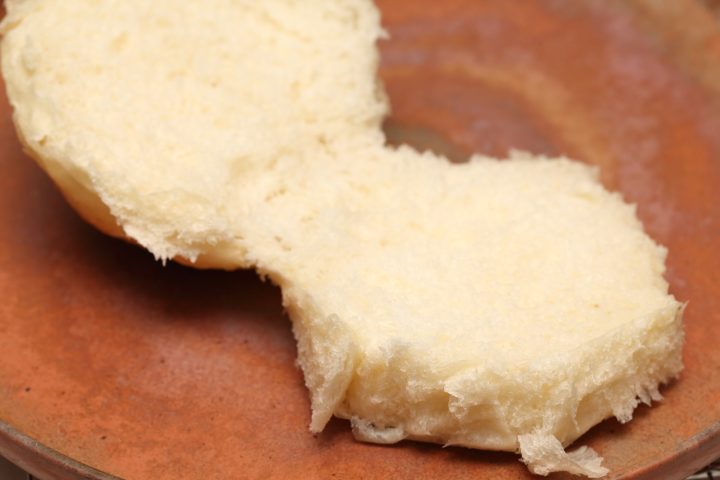
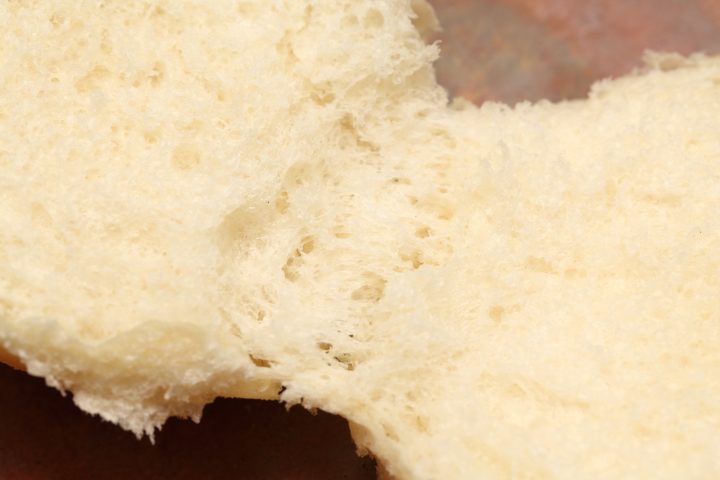
Experience baking with yogurt with this recipe. A very comfortable manageable dough, a creamy, tender and airy crumb and a small ‘crunch’ await you.
Klik hier voor de Nederlandse versie
I came up with this Greek yogurt buns recipe and also used Greek olive oil, and even raw Greek honey, because I had it available. Of course it is no problem if you choose a different olive oil and honey or a vegetable alternative, the end result will still be good.


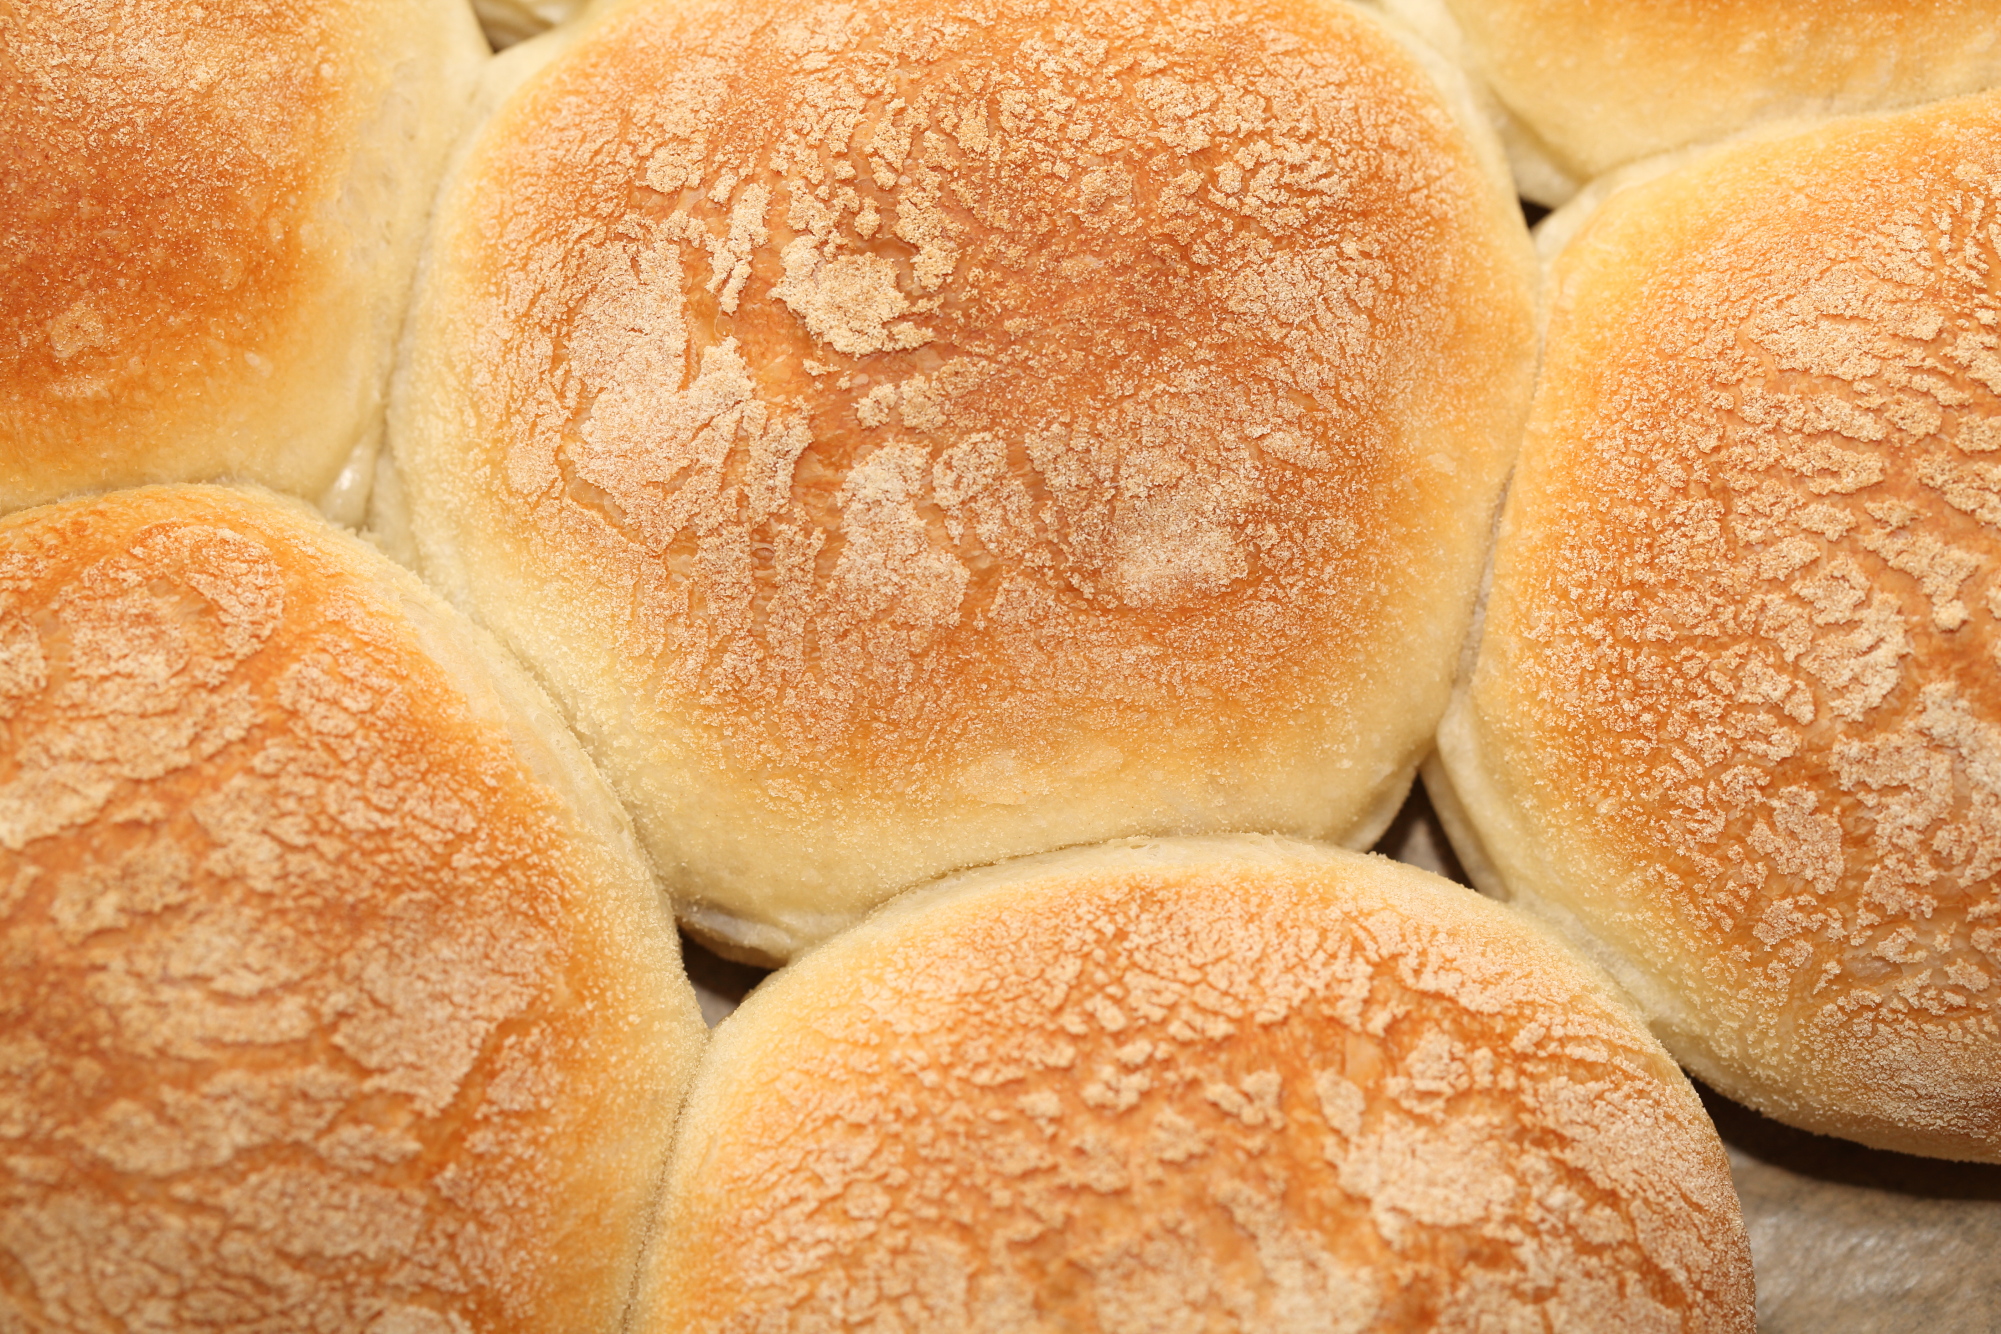
I also made the buns with thyme honey and after baking the taste really came trough in the bread. It’s fun to experiment with it. The semolina crust adds an extra bit of texture and it looks nice. It also reminds me of the buns (‘kadetten’) that my father used to get for me, although they were coated with rice flour.
I made the buns quite big, almost twice the size of an average bun, so it is a generous carrier of any topping you might fancy.
With every recipe we share, we change things up a bit, to show there are more ways than one to a good loaf or delicious buns.
These buns are a good combo with oven-grilled vegetables and feta. If you have any leftovers from a tray bake, feel free to place it between a bun with a small drizzle of oil and some fresh pepper. Or make a haloumi burger (a Greek unripened cheese made from original sheep’s and goat’s milk) with herb mayo, thin strips of raw zucchini and tomatoes and some homemade pickles, for example.
Enjoy your baking!
Ingredients for the preferment
200 g wheat flour / bread flour (12 to 13% protein / protein content)
200 g water
1 g instant yeast = approximately one third (1/3) teaspoon
Ingredients for the Greek Yoghurt Buns
8 buns of +/- 112 grams each
The preferment from step 1
300 g wheat flour / bread flour (12 to 13% protein / protein content)
8 g salt
6 g instant yeast
50 g water, lukewarm
100 g Greek yoghurt with 10% fat
15 g honey or vegetable substitute (St. John’s bread syrup is a good neutral sweet option)
20 g Greek olive oil or other vegetable oil
Flat dish with some semolina for dipping the moistened top of the balls
Optional: pinch of vitamin C, crushed powder*
Vitamin C in bread baking*
Next to being a well know food supplement, vitamin C, also known as ‘ascorbic acid’ can also used in baking as a bread enhancer. So, What does it do?
Due to the properties of vitamin C, it can be used as a dough (gluten) strengthener during fermentation, helping to improve the structure of the dough.
Some flour types are sold with added vitamin C. The regular wheat and bread flour we use does not contain any vitamin C. So adding a tiny pinch to your dough can help improve your baking result. Professional bakers can buy ‘commercial grade’ ascorbic acid, but home bakers can also use crushed vitamin C tablets (it’s effectively the same stuff). The recommended amount is 0.07%. So this means that for this recipe, with 500 g of flour, you can use a vitamin C tablet and grind it to a powder. Take a pinch of the powder and it will probably be close to the amount of 30 to 40 mg needed. Weighing will not be an option for most bakers, with these small amounts.
Baking tools: Standing mixer (or knead by hand), Danish dough whisk, scraper, spatula, bowl, digital thermometer, timer, baking tray (approx. 30 x 40 cm) lined with baking paper.
Weigh all ingredients carefully for best results!
Make the Greek Yogurt Buns
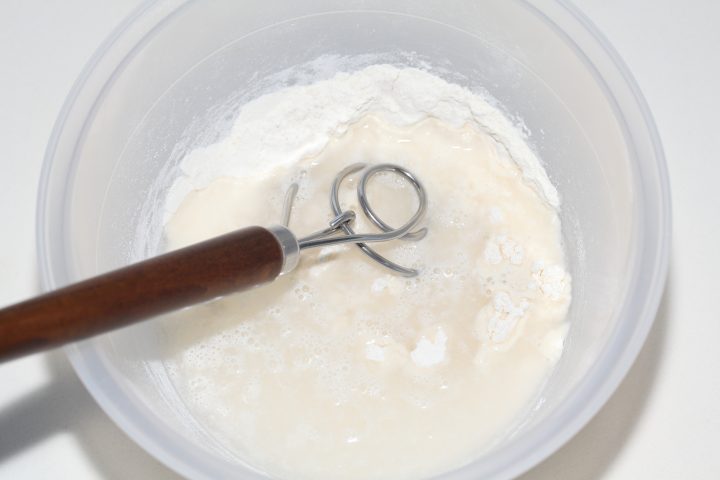
Whisk and ferment
Whisk the flour, water and yeast in a bowl for 30 seconds until smooth. Cover the bowl and let this mixture develop for 4 hours at room temperature.
- Flour
- Water
- Yeast
Mix all ingredients
Combine flour, salt, instant yeast, honey, oil and yogurt with the preferment from step 1 in the bowl of a standing mixer. Add the water and start mixing (reserve a little bit if necessary and watch the dough come together, then add as needed.
- Flour
- Salt
- Instant yeast
- Honey
- Oil
- Yogurt
- Preferment
- Water
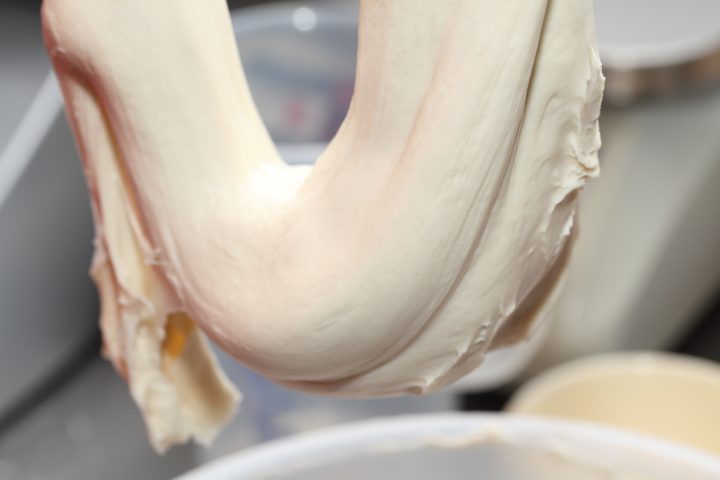
Knead the dough
Knead the dough on medium speed (when we knead with our Bear Teddy mixer, this is at approximately speed 2) for 7 minutes (at least 15 minutes by hand). Ideally, the dough will come loose from the sides of your bowl but will still stick slightly to the bottom. Another indication that you can pay attention to is that the dough will start to shine nicely at the end of the kneading time (see photo). When you’re done, the dough should still feel a little sticky.
- Dough from previous step
First rest
Cover the dough and let it rest for 30 minutes.
Stretch and fold
After the first 30 minutes rest, take the dough out of the bowl and do one stretch and fold (a full letter fold, left over right, right over left, bottom over top, top over bottom; watch our bread movie or our stretch and fold method video to observe this technique if you are not familiar with it).
Second rest
Transfer to the bowl, cover and again leave to rest for 30 minutes.
Tip
If you need some support on how to form balls and make buns or rolls? Check out the instructions from The Perfect Loaf.
Divide and shape
With a dough cutter, divide the dough into 8 equal pieces of approximately 112 grams each. Use a scale to get equal pieces of dough. Form into balls.
You can very lightly dust your work surface with flour if necessary, but don’t use too much or it will be very difficult to form the balls properly. We don’t use flour at all when forming these buns.
- Flour (optional)
Ball resting
Let rest for 10 minutes (time starts when the first ball is formed).
Flatten and re-form
Carefully flatten the balls with your hand and form them into smooth balls again.
Coat with semolina
Moisten the top of the first ball with some milk or water and dip it in the bowl with semolina. Place this ball on a baking tray lined with baking paper.
- Milk or water
- Semolina
- Baking paper
Second proofing
Continue like this with the next balls. Place them a bit apart because they grow towards each other during rising and also grow considerably in volume.
Cover and let rise for about 2 hours, maybe even longer, in a warm environment of 25 to 27 ºC (try to take it to the edge of ‘almost over-prooved’ if you dare, to get the best fluffy and light texture).
Tip
In a bake at home situation we use our minimally preheated and switched off oven for proofing. We measure the temperature of the inside of the oven and the dough with an infrared thermometer and aim for a temperature of 25 to 27 ºC (77 to 80 ºF). Make sure it doesn’t get too warm, because above 35 ºC / 95 ºF the yeast is effectively dormant or dead.
Tip
When you think the dough has risen enough, use your finger to carefully make a small dent in a bun. If the dent remains, the bread is ready to bake, if the indentation disappears, the dough needs more time. Give it another 10 to 15 minutes, then check again.
Preheat the oven
Preheat the oven to 195 ºC / 385 ºF conventional oven setting in the final stage of the rising process. At what point exactly depends on the heating time of your oven. If you used your oven as a proofing cabinet, you should of course take the bread out of the oven first.
Bake the buns
Bake the buns for about 18 minutes until lightly golden brown. If they have the desired color, around 2/3 of the baking process, you can temper the oven to 165 ºC / 330 ºF until the end of the baking process.
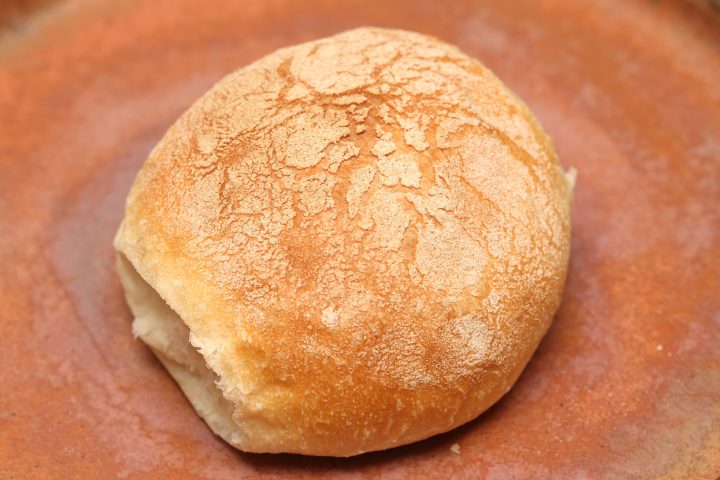
Cooling and storing
Remove the buns from the oven and let cool. If you are not going to serve them yet, it is best to put them in a bag while they are still a bit lukewarm to prevent them from drying out. Freezing these buns works very well, they retain flavor and structure quite perfectly for several weeks. And just for fun, press on a bun and see how it springs back and compare this with your average store bought bun!
Would zero % fat Greek yoghurt still work for this?
Hi Gaz,
While the fat has certain properties that do something to the crumb / bite and also the handling of the dough, making it soft and light, there is no reason why you cannot use the zero fat version and still get a very good result. Because there is less fat in your yogurt, you get slightly higher hydration. You can compensate for that by using a little less yogurt (90 grams). Hope your version will be great. Let us know how it goes!
Enjoy your baking
Greek yoghurt buns :- no mention on when to add the yoghurt ?
Hello Kevin,
Thank you for noticing and bringing it to our attention. The yogurt is added to the final dough, together with the other ingredients. We immediately corrected it in the recipe. It is one of the key ingredients of course 😳
Enjoy your baking!
guessed as much just waiting for them to cool down.bit of a challenging dough but they look good.
p.s used your sourdough starter recipe still going strong after 8 years ,well done keep the recipes coming.
Glad you ‘persevered’ Kevin, hope it will be good.
And congrats on keeping the culture alive and well for 8 years already. Very nice!
We just got some dry sourdough starter from a baking friend in Canada and we are going to activate it and compare it to our own culture, also as an experiment, see how they compare, ‘behave and taste et cetera. If it is interesting enough we will also post about it.
Also hope to post more recipes this year!
Enjoy the buns