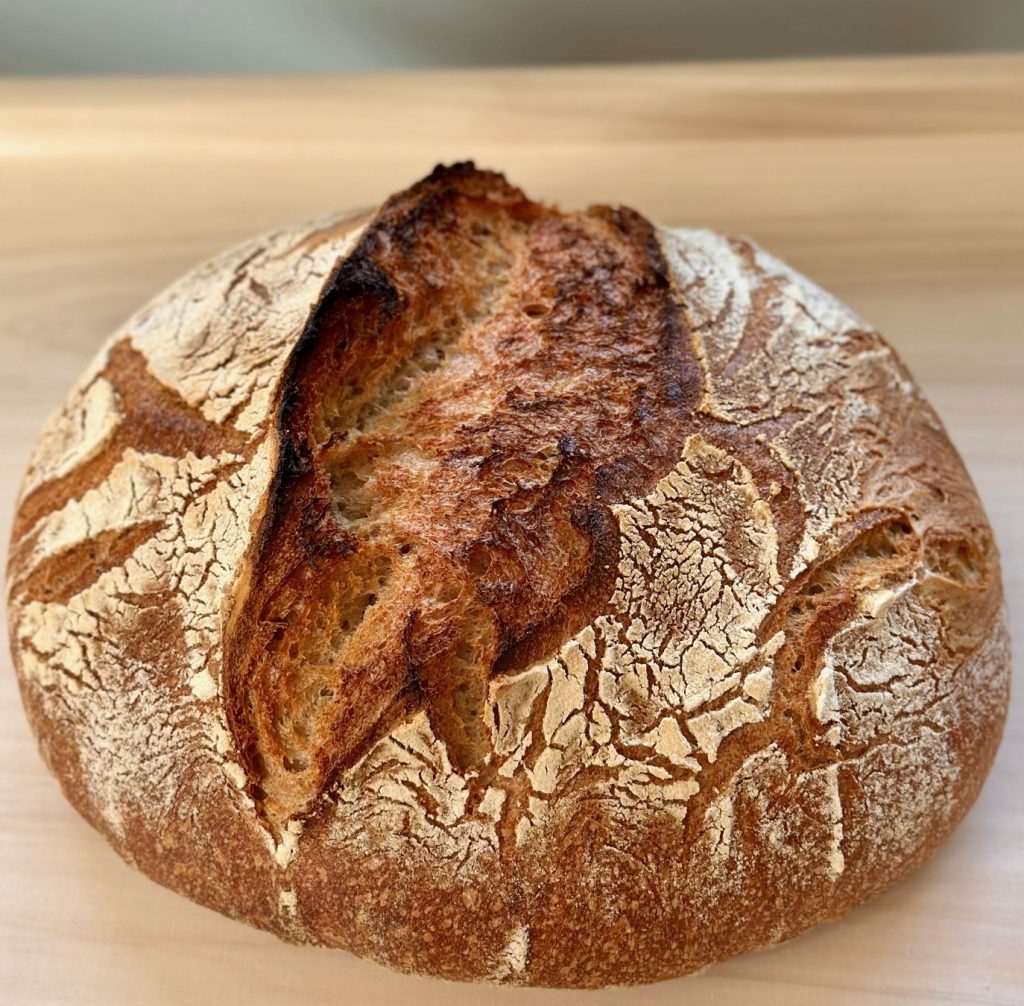
This is our absolute favorite big loaf!
Dutch version will follow!
Probably made most famous by Parisian baker Poilâne ‘La Miche’ can be defined as a very large rustic sourdough bread, usually a round loaf made from a natural leavening that also has a high percentage of whole wheat and / or dark rye flour in it.
Its large size with low crust to crumb ratio means it also keeps fresh longer, which was important back in the day when people made bread only once a week. For centuries, French villages had communal ovens where the townsfolk would bring their dough to be baked. To be worthy of the term miche, each bread has to weigh from around 1.5 to over 5 kg!


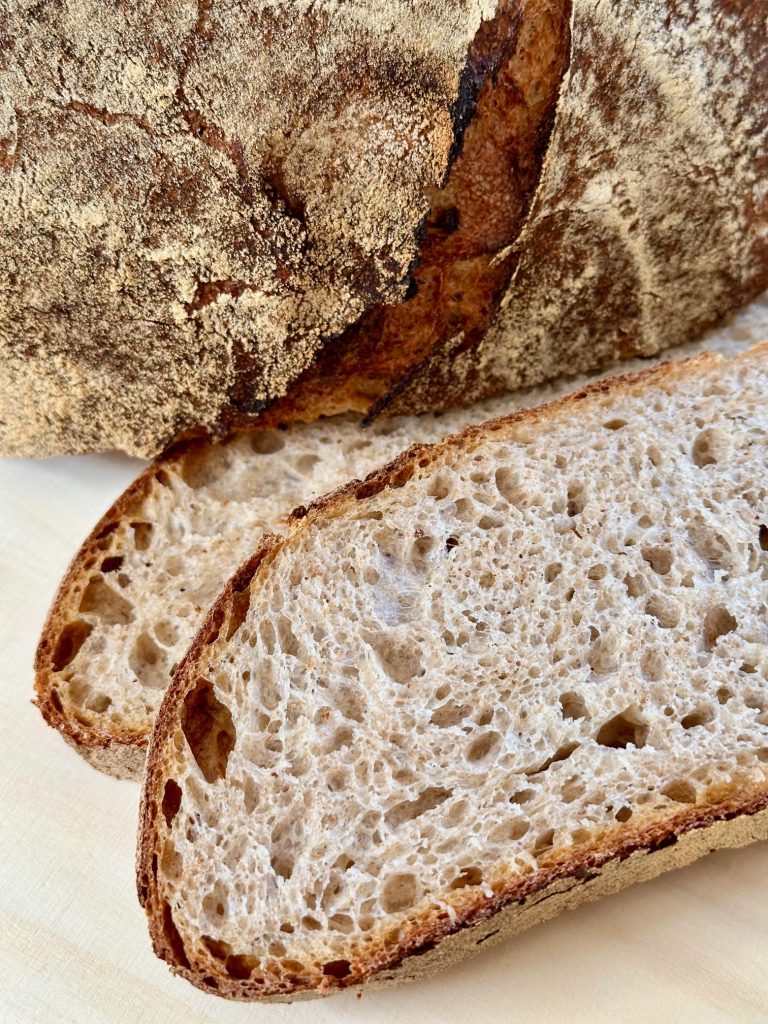
Our version of this bread, based on a, slightly simplified and adapted, recipe from the impressive Modernist Bread recipe collection, could be considered a smaller miche, weighing 1.6 kg before baking. It is made with a combination of bread flour, whole (dark) rye flour, water, leavening and salt.
Of course it is also interesting to experiment with different percentages and types of flour, creating different crust and crumb structures. But before you do, make this version, because it is truly one of the best tasting loaves, especially when baked a bit darker.
Enjoy your Miche baking
| Ingredients for the Preferment | ||||
|---|---|---|---|---|
| 75 | g | bread flour | ||
| 90 | g | whole (dark) rye flour | ||
| 45 | g | sourdough culture (100% hydration) | ||
| 165 | g | water (room temperature) | ||
| Ingredients for the Miche | ||||
|---|---|---|---|---|
| makes 1 loaf | ||||
| the preferment from step 1 | ||||
| 600 | g | bread flour | ||
| 150 | g | whole (dark) rye flour or whole wheat flour or combination | ||
| 500 | g | water | ||
| 17 | g | (sea) salt | ||
Before you start
For our preferment, we work with a two step system . When using a preferment we use between 15-30 grams of sourdough for each sourdough loaf, and a bit more for this bigger miche bread. With this small amount of sourdough you create a fully active sourdough preferment which you then use to build the final dough. This way you can keep a small starter culture and still have the full sourdough flavor and development. Big advantage for home and hobby bakers is you are wasting far less precious flour when refreshing your culture than you would maintaining a big one!
We use a sourdough culture made with organic 100% whole grain rye flour. A sourdough culture based on rye flour is easier to maintain, does not form hooch or turn into a slurry when you forget about. It is easier to stir because it has almost no gluten and smells very nice, a bit like fruit. It is also very forgiving in the amount you feed it. Normally we only feed it once or twice a week. After our weekend baking we give it a few table spoons of water and rye flour, stir, ready!
Ideally the temperature of your dough after mixing should be around 25 ºC / 75 ºF and you should keep the dough around this temperature until the shaped loaf goes to the fridge for final proofing. You can adjust the temperature of the water you add, so the total dough reaches this temperature. You can keep the dough at the right temperature in an ever so slightly warmed up oven (don’t forget to turn it off!) or a (makeshift) proofing cabinet. You can measure the temperature of water and dough with a food thermometer / infrared thermometer. These measurements are important because they correspond with the proofing times in the recipe.
Making the Preferment
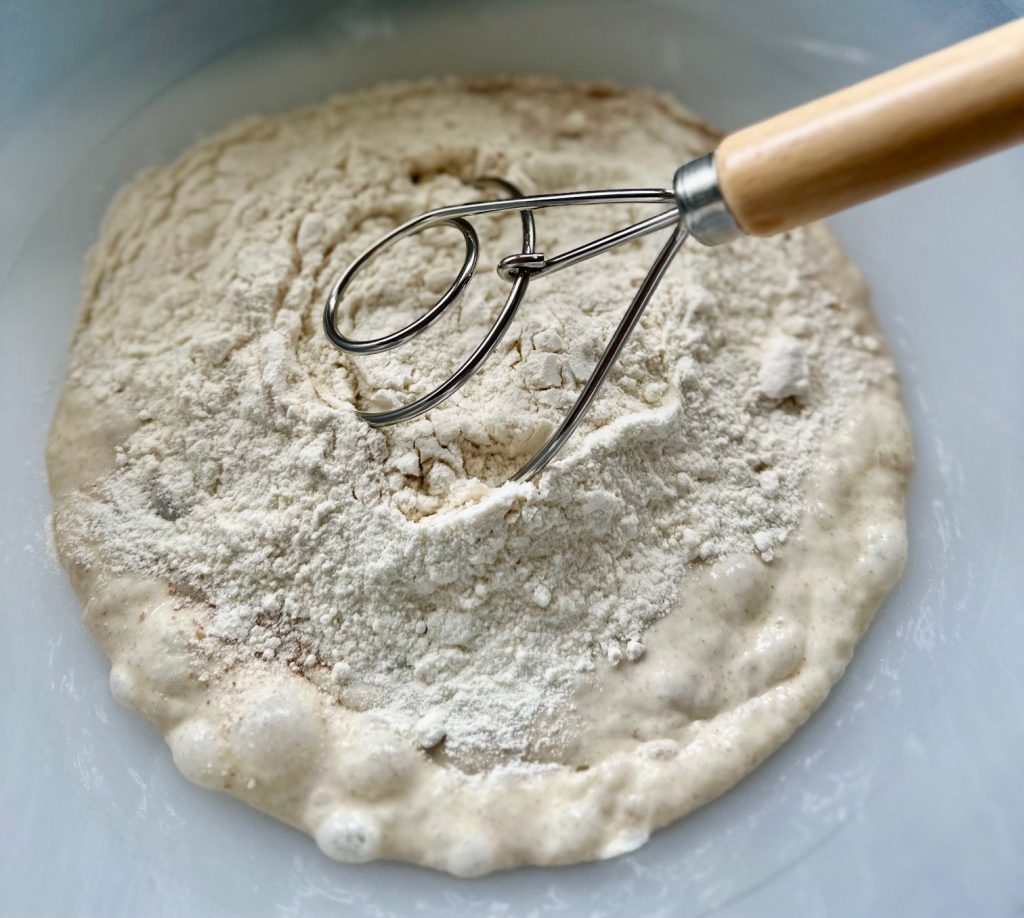
Stir together the bread flour, whole rye flour and the water with the sourdough culture. Mix it well until you have a homogeneous slurry that looks like very thick batter. Cover the bowl and let the prefermenting begin. After 10 to 12 hours at room temperature it should be bubbly and ready for use.
Making the miche
Put the preferment and flour in the bowl of your standing mixer and add 2/3 of the water. Now start mixing and gradually add the rest of the water and let the dough come together. Knead for 1 minute until you have a shaggy mass. Leave it in your mixing bowl, cover and let this mass rest for 30 minutes. This process is called ‘autolyse’ or with sourdough also fermentolyse .
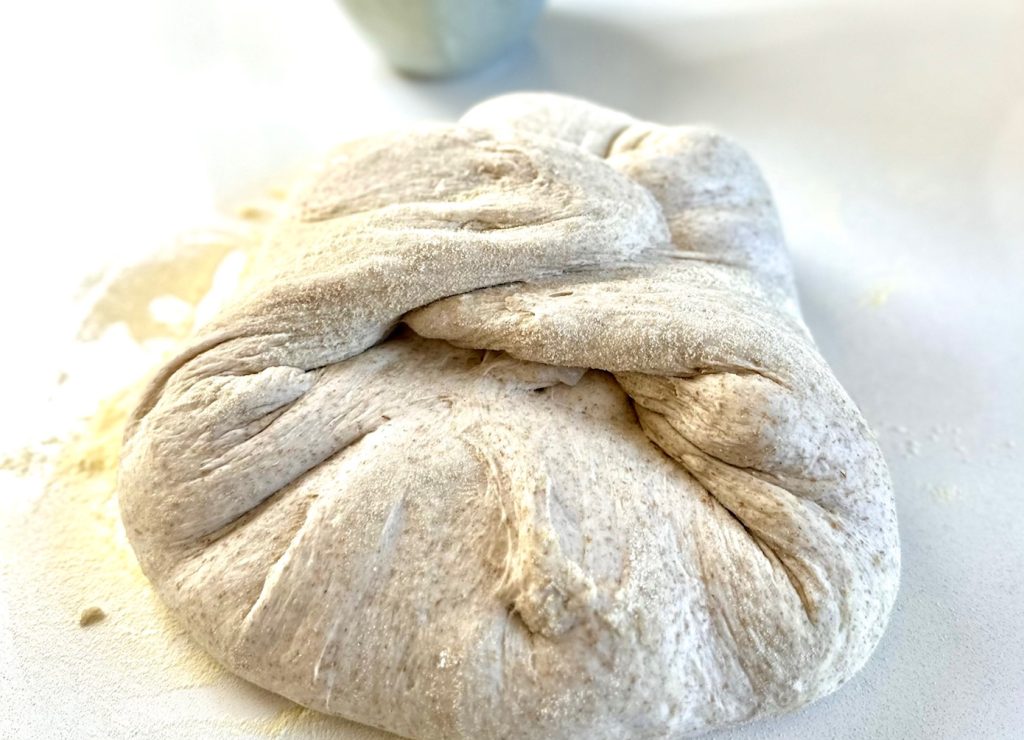
After the fermentolyse phase, distribute the salt evenly on top of the dough and knead the dough for another 4 minutes (about 10 minutes by hand, depending on your technique) and watch it turn into bread dough with medium gluten development.
Return the dough to a greased bowl and let it rest for 60 minutes.
Take the dough out of the bowl and onto a lightly floured work surface and do two full sets of stretch and folds (see our video to observe this technique if you are not familiar with it).
Transfer to the bowl, cover and again leave to rest for 60 minutes.
Then, once more transfer the dough to the lightly floured work surface and do another 2 sets of stretch and folds.
Transfer to the bowl, cover and leave to rest for 30 minutes.
Shape & Proof
After the 30 minutes rest it is time to preshape your dough. If you make several loaves this is also the point where you divide the dough. Shape the dough into a ball and leave it on your worktop, for 15 minutes. No need to cover the dough this time.
Now it’s time for the final shape. Traditionally the miche bread is shaped like a boule, but if you prefer an oblong / batard shape that’s fine of course. Also make sure you have enough oven space to accommodate this bigger bread.
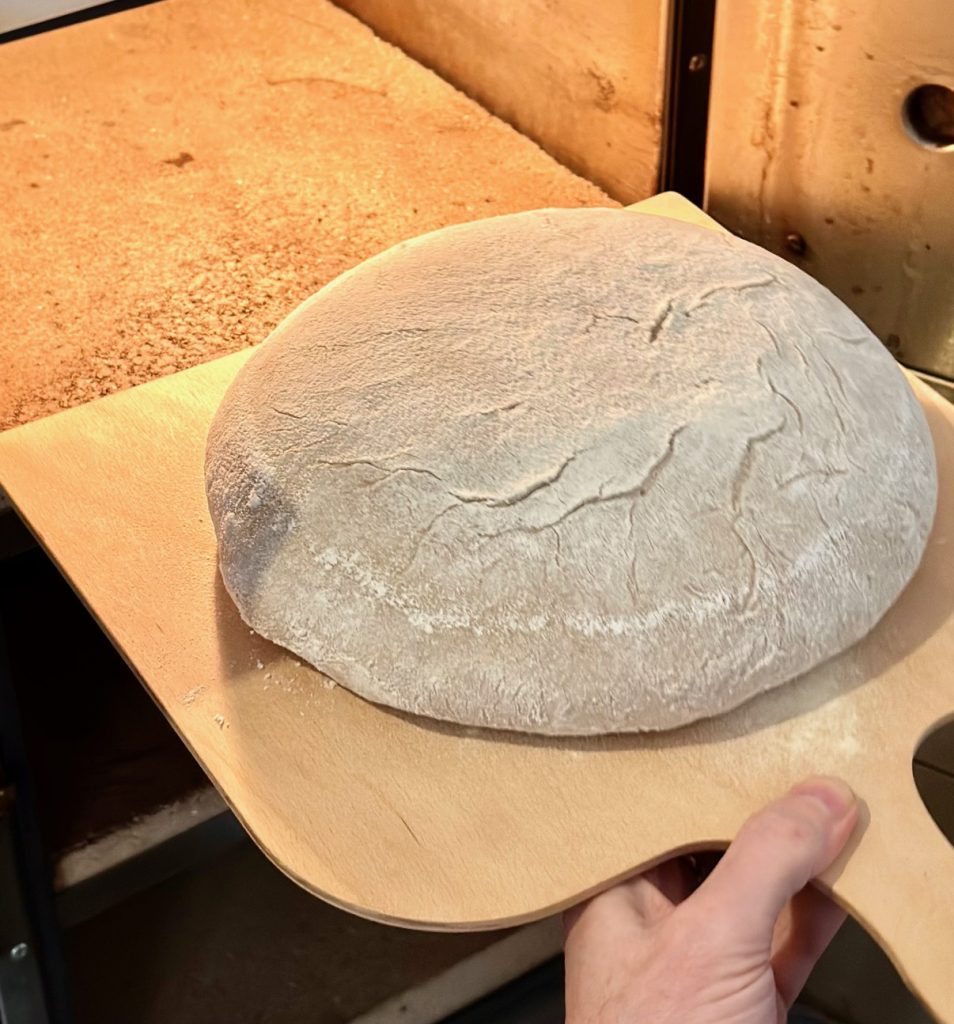
Now comes that part that is slightly different than usual. Put the dough ‘right side up’ in the proofing basket. So the smooth side is now facing you. The next morning, when you turn it out the side where the dough came together (the wrong side or bottom) will be facing you.
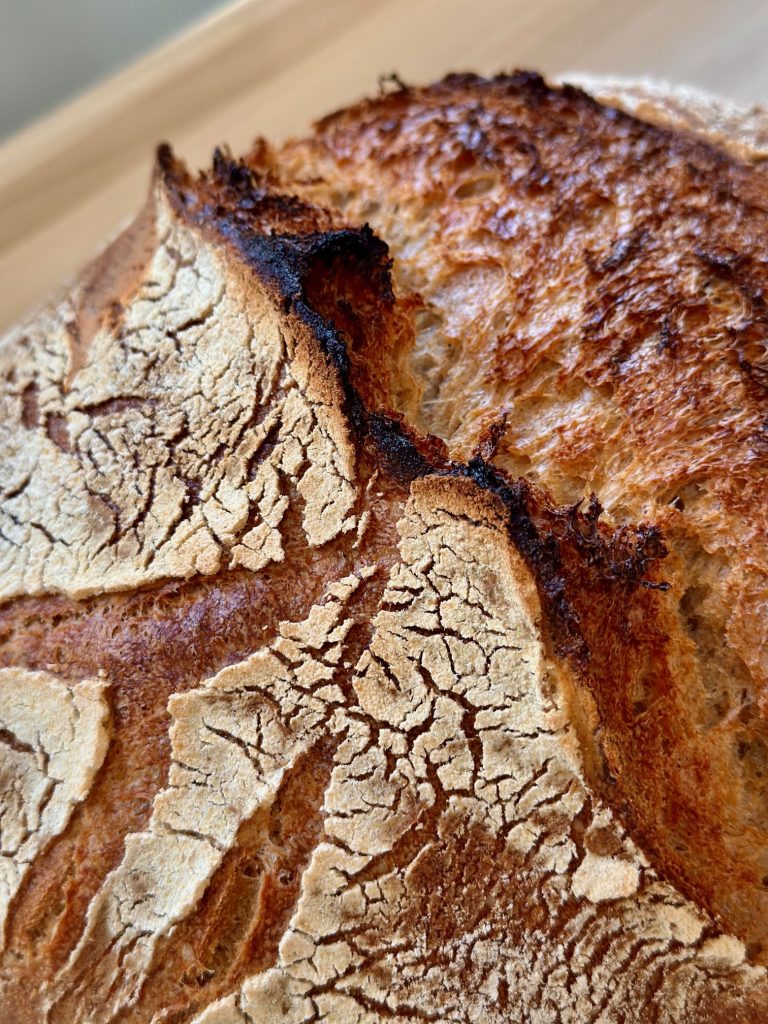
It is the intention not to score the dough and let it tear and rupture where it will. This will give you the fun effect you see in the pictures. Of course we have tried this many times now, and each time the outcome is different, but overal very pleasing to the eye. If you want to go the traditional route and shape and score as usual, that will also work of course.
Cover and leave to proof in the fridge overnight.


Bake
The next morning, preheat your oven to 240 ºC / 465 ºF. At what stage you preheat your oven depends on how long it takes your oven to heat through, some take 30 minutes, some with stone floors take a lot longer, up to two hours. Just make sure your oven is well heated.
Take your loaf out of the fridge. You can bake the loaf straight out of the fridge. Depending on the temperature of your loaf going into the fridge and the actual temperature of your fridge, after 12 to 14 hours, your dough has proofed to the point where it is ready for the oven.
Turn it out on a baking plate or on a bread peel with which you take it to the oven onto the baking plate or baking stone. If you used our upside down method you do not need to score the bread, if you choose the conventional method you can now score the bread as desired.
Try to create steam in your oven by putting a small metal baking tray on your oven floor when you preheat the oven and pouring half a cup of hot water immediately after putting the bread in the oven. Release some steam by setting your oven door ajar (perhaps with the help of a wooden spoon) 5 minutes before the bread is ready.
For this type of bread we really like using our Rofco bread oven with the stone floor, also baking it a bit on the dark side. Of course you will also get a great tasting bread baking it in a household oven. The Dutch oven method will be a bit of a challenge with this big round loaf. You can make two smaller loaves with this recipe or make halve the recipe, as shown in the picture with the two small boules.
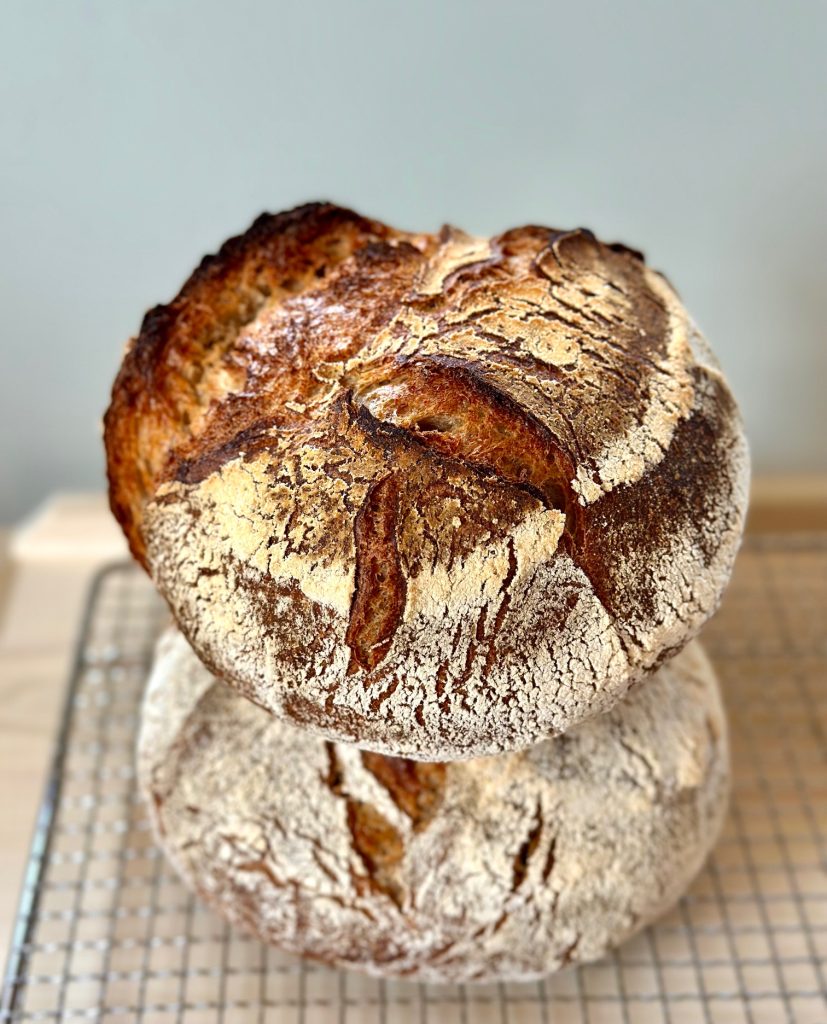
After 60 to 70 minutes of baking your miche should be ready. Transfer onto a rack and leave to cool. This miche stays very edible for several days and also keeps well in the freezer. It is best to leave this bread to cool and ‘set’ for half a day or so before cutting and eating.
Miche time table*
day 1 Make preferment and let ferment for 10-12 hours at room temperature
day 1 Make the final dough in the evening
- Dissolve preferment in some of the water
- Add flour and rest of water and knead 1 minute
- Autolyse for 30 minutes
- Add salt and knead for 4 minutes
- Leave to rest for 60 minutes
- 2 sets Stretch and Fold
- Leave to rest for 60 minutes
- 2 sets Stretch and fold
- Leave to rest for 30 minutes
- Preshape
- Shape and put in the fridge
- Next morning: Into the oven for 60-70 minutes
- Out of the oven and leave to cool