

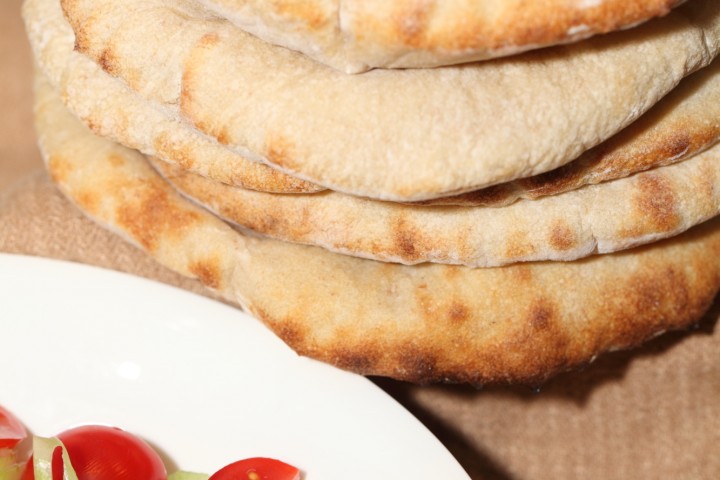
Pita bread is ancient, but still best when eaten fresh of course…
Klik hier voor de Nederlandse versie
Simplicity is key for this recipe. I think flatbreads, from all over the world, be it naan, chapati, lavash, pita, or tunnbröd from the Northern regions, are meant to be everyday, unsophisticated and natural. They are old fashion fast food and that is why making flatbreads should not be overly complicated or laborious.
With this recipe, because we are talking sourdough, you have to plan ahead a little bit. It takes longer for the dough to develop than if you were using a yeast based dough. Personally I find it works best to make the dough 24 hours in advance. For example, when you come home from work you make the dough that you are going to use the following day. Next day, you come home, preheat the oven, do some shaping and bake the pita bread, while preparing the things you want to eat with them.
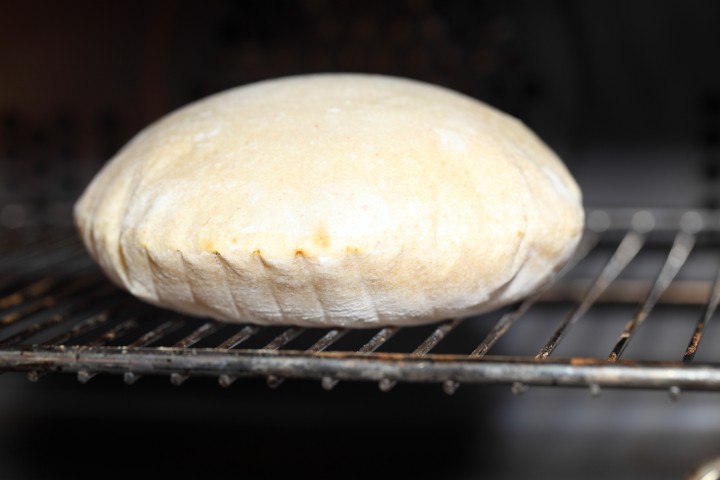
The best thing about this bread is the ‘puffing up’ part. I can never get enough of watching the bread inflate just a few minutes after trowing the dough in the oven. I still jump up and down with joy when that happens. And watching this, you can be sure you will have your bread pocket to fill after it comes out of the oven.
Lets get baking!


| Ingredients for the Pita | ||||
|---|---|---|---|---|
| 500 | g | wheat (bread / plain) flour | ||
| 280 | g | water | ||
| 9 | g | (sea) salt | ||
| 20 | g | sourdough culture (100% hydrated, equal parts flour and water: see our recipe here) |
||
| 15 | g | olive oil | ||
Making the Pita
Make the dough by kneading all the ingredients in a free standing mixer for 4-5 minutes (by hand 8 to 10 minutes). Place the dough in a greased bowl, cover with clingfilm and leave to rest for up to 24 hours at a cool room temperature (18 – 20°C / 64 – 68°F). Like I said in the introduction, 24 hours works perfect for me and my sourdough culture to get the right dough consistency and taste development. But every culture is different and can act different so you have to give it a few tries to find your own optimum.


For the next step you divide the dough in 8 equal parts (slightly over 100 g each) and shape into balls. Cover and leave to relax for 10 minutes while you preheat your oven as hot as possible. Some ovens go to 250°C / 480°F, but if yours goes to 300°C / 570°F, that’s even better. Make sure the stone or rack you are going to use is also in the oven while you preheat, because you want your bread baked directly on a hot surface. I preheat our household oven to 300°C / 570°F conventional setting and just before I put the first pita in the oven I switch to the convection setting (which only goes to 250°C / 480°F). It is a sort of trick to get the best from both settings, first get the oven as hot as possible and after that the hot air helps with the puffing up part.
Now take a ball of dough and gently shape it by hand to a disc shape (see first picture in the gallery above). Take a disc and, with a rolling pin, roll out the disc to a circle of around two to three millimeters thickness. I love to practice my skills to get the perfect circle, but you can also make oval shapes. The bread will be equally delicious. You can also do this second shaping part by hand, but I have found that the puffing up bit works best when I try and roll out the dough evenly. Always roll from the middle to the edges and turn the dough a few times, so it will be rolled out evenly and round.
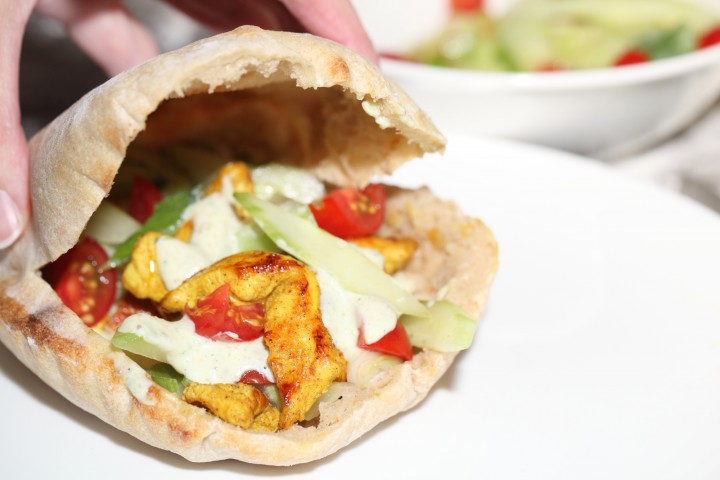
This pita is filled with spicy shoarma chicken and a garlic yoghurt dressing, but it is also classically good with falafel for instance
Now ‘throw’ a rolled out disc on the hot rack or stone. Be swift so your oven does not drop in temperature too much. You can bake several at once of course, but it is best to do a trial version of one pita first and see how that comes out. Now watch how it puffs up (the fun part!) and take it out after 3 to 4 minutes. Repeat the process with the other dough balls.
You can keep the baked pitas warm between two tea towels (they will stay warm for quite a while this way). I think they are best eaten fresh and warm but you can freeze leftover pitas (no longer than a few weeks). Thaw them and give them a minute in your toaster. Still delicious!
Also check out our other favorite flatbread recipes like Indian Naan or Nordic soft Polar Bread.
If you want to make a quick yeast version of this recipe use 290 grams of water and 7 grams of instant yeast for the dough. Leave to proof for 1 hour, divide and make balls and leave to relax for 10 minutes. You can follow the recipe from there.


Christine says
Thanks for this recipe. I needed to make these in a shorter time frame to go with dinner. So, I increased the starter to 50 grams. The dough was ready to bake in three hours. They were delicious!
Weekend Bakers says
Excellent, great to read your version was a success!
Wishing you well and enjoy your baking and sharing in these challenging times.
Greetings from Holland,
Marieke & Ed
Natalie says
Hi there, these look great! Just curious to know if it really just needs 20g starter?
Thanks for sharing!
Weekend Bakers says
Yes Natalie that is correct. The dough gets to ferment for 24 hours before you use it.Hope you will like the recipe too!
Natalie says
I thought that might’ve been the case. Really keen to try these out. Thanks so much!
Weekend Bakers says
Let us know how it goes!
Jessi says
These came out perfect! I used the stovetop method someone else commented, but less hot since I used a nonstick pan. They still puffed and taste amazing. It’s recipes like this one that make it hard to believe bread is just flour water oil salt.
Weekend Bakers says
Hello Jessi,
How wonderful. Thank you so much for sharing, we are sure lots of people like to use this method and are glad to read it was such a success for you too.
And thank you for your kind words. Hope you will enjoy lots of excellent baking in 2020!
Kascia says
Thank you for this delicious recipe. We love sourdough and we love pita. So sourdough and pita together…YUMMY!!!!!
Weekend Bakers says
Thank you Kascia for your enthusiasm, hope the recipe will be a success!
Elizabeth says
Worked beautifully for me! I have tried for years to find a pita recipe that actually worked and I can not express how very,very excited I am to say they all “puffed”.
Weekend Bakers says
Wonderful! Thank you for lettiing us know, and so glad we can be part of your successfully puffed up pita’s!
Enjoy your baking weekend
Amy says
What is the recipe to the starter be bubbly and active, or needing a feed?
Amy says
Sorry for the typos! I mean for this recipe, should the starter be active and bubbly or should it be flat and needing a feed?
Weekend Bakers says
It should be active and bubbly Amy!
Hope it will be great
Moe says
Hi,
In your recipe you give the option of bread or plain flour. I used plain flour but (wholemeal). I preheated my fan oven to 250C.
I proofed my flour overnight plus another 8 hours. My pitta did not rise 🙁
What can I do?
Thanks
Distressed Moe
Weekend Bakers says
Did you use 100% wholemeal Moe? This could be a bit of a challenge compared to a type of bread flour that has less fiber. Do you also mean, like the previous commenter, your pita did not puff up or…?
So, like we answered below, it could be a challenge if the steam within the pita is not capable of puffing up the dough because of lack of heat created. Maybe your oven indicates 250C but the real temperature of your oven can be lower (see our tips here: www.weekendbakery.com/posts…your-oven/). Lots of ovens can also drop an enormous amount in temperature, just by opening the oven door, especially the bigger ones. Make sure you take the time to really preheat it well and keep the time for opening of the oven door to a minimum.
We could imagine that your lack of puff is caused by a combination of the use of heavier wholemeal flour and not enough heat to get the steam going.
Molly says
This didn’t rise for me at all.
I’m wondering if maybe I need to combine flour and water and sit it out overnight and the next morning add everything else. Adding the salt right away stops it autolyzing
Weekend Bakers says
Hello Molly,
Did you mean your dough did not develop or the pita’s did not puff up?
The first would mean your sourdough culture is not working properly, the second usually has to do with your oven not being hot enough to quickly develop steam within the dough to let it puff up before the outer crust dries out.
John says
I was thinking the same thing. Everything else I make with an autolyze step always says to add the salt the next morning. I followed the steps and mixed everything and the dough didn’t rise at all. Our starter is very active. We use it multiple times per week and things rise like crazy.
Weekend Bakers says
Autolyze usually only lasts 15 to 20 minutes, then the salt and other ingredients are added (so after a short period). It is done to prevent oxidation of the dough, to keep the kneading times as low as possible but still get good dough development.
We cannot explain why the dough would not rise with the amount of salt added. Maybe the the culture needs slightly warmer surroundings to get this dough started.
Nicole says
Thank you so much for sharing this wonderfully easy recipe! I just started a few different sourdough cultures for the first time a few months back and have been trying different recipes to see what I like. Yours is definitely a keeper and I have a feeling I will be using it often.
I made this using 100% white whole wheat flour and starter and it fermented for about 22hrs. I preheated my oven and ceramic stone to 525 F which is as hot as this oven will go, no convection either, just a cheap stove. I rolled out to 2mm thickness and they puffed up nice, so fun to watch! Unfortunately on my 3rd one my stone cracked in half 😥 I kept going anyways and most of them worked out ok. Tasted great with a good sourdough flavor. Next time I guess I will try directly on the oven rack while I search for a baking steel. Also I am planning to try this with einkorn flour and starter since thats my other starter and see what happens.
Weekend Bakers says
Thank you Nicole, great to read your comment and experience with the recipe. Very sorry about your stone, hope you will be able to replace it with a good one.
The rack has always worked well for us, no problem to get good pita pockets this way too.
Never done an Einkorn version though…so much stuff we also want to try…not enough time to bake everything that inspires us!
Enjoy your pita baking and filling 🙂
Lucian says
I’d love to try this with yeast instead of sourdough culture. How much yeast should I use? for 24h fermentation time.
Thank you!
Weekend Bakers says
Hello Lucian,
Yes, no problem, here’s an indication for you:
If you ferment the dough at cool room temperature of around 20 Celsius for 24 hours you only need 0.2 grams of instant yeast (so that is less than 1/8 of a teaspoon, very tiny amount!!). Alternatively if you would choose to ferment the dough in the fridge at 6 Celsius you would need to add 2.2 grams of instant yeast (or halve a teaspoon plus a quarter teaspoon of yeast).
Enjoy your pita baking
Brooke says
Could this be done with 100% light rye instead of wheat?
Weekend Bakers says
Hello Brooke,
We would not advice to use 100% of the light rye straight away, because of the delicacy and lack of gluten of the flour, but to start with a 30% version and see how this goes. You probably need to adjust the amount of water too, it may need more.
But, take into account that we do not speak from experience with a 100% version for this particular recipe. We do so with other recipes, and even with a 70% rye loaf like this one www.weekendbakery.com/posts…h-raisins/ it is almost more like handling clay when it comes to shaping.
Enjoy your pita baking!
Karin says
Can you make these pita on a cast iron pan on top of a gas stove?
Thanks
Love your website I have learned lots and pass on your website 👍😄🌷
Weekend Bakers says
Hello Karin,
Although we never make them that way, we know it can very well be done. But you must be prepared for the puff up effect not being that dramatic and you will have no real pocket to use. Make sure the pan is hot before putting dough on it. Maybe it needs just a bit of oil too.
Thanks for the kind words and good luck and much enjoyment with the skillet baking!
Karen says
I always make my pitas one by one on the stove top in my cast iron fry pan. They ALWAYS puff up and create a perfect pocket. The secret is to be sure the pan is good and hot, lay the dough in the hot pan, count to 10 and flip it, this seals the dough and makes it easy for the steam to form and puff it up. Cook it about 30 seconds to a minute and flip it again, it should puff up like mad…I have never made them with this sourdough recipe but I have it rising now and can’t wait to try it tomorrow afternoon once the dough is ready.
Weekend Bakers says
Thanks for adding your knowledge and experience with the stove top and fry pan Karen! Hope the sourdough version works just as well.
Neil says
24 hours was too much when I tried it was over-proved. It may be better to try a shorter proving time first depending on where one lives. I live in a warm climate. I achieved a tasty result but more like naan than pita probably because it was over- proved and therefore did not blow up properly. I should get it right next time. Thanks anyway.
Weekend Bakers says
Hello Neil,
Your assessment is spot on. You will always have to compensate for your conditions: Temp and humidity, elevation, they all play a roll in the process.
So we are sure with one or two turns you will get it exactly right and you will see the pita puff up!
Enjoy your baking journey…
Adrien Dubuis says
Why such a low hydration?
I made these and they were definitely too dry.
Weekend Bakers says
Hello Adrien,
The hydration is around 56% without the olive oil, which adds extra moisture too. Depending on the flour you use (for instance American flour always needs a few % extra moisture compared to European flour) you should always adjust for your situation. So, while this recipe works well for us and for handling and rolling the dough, if your dough is too dry, we would always encourage you to add more liquid to get it right. Maybe 300 g water, so 4% more, would be OK for you?!
Brian says
I have been making sourdough bread for years and yours is the very first recipe I tried to make pita and I am happy to say it worked perfectly the very first time. Thank you. Interestingly I tried a different recipe weeks later and it didn’t puff up at all which I am guessing was due to the fact that the recipe called for 4x as much starter and as a result the dough was too weak after 24 hours… it was overly fermented, I think. Adding additional flour didn’t even help. To experiment in the future, I will always start with your basic recipe and only make small changes to see the effects.
I work my dough by hand a couple times during the day as well just to get a feel for it. When it feels firm yet still moist and doesn’t stick to my fingers I know it will puff up for sure. What I have discovered is that the moisture content of the dough and very high heat of the oven is absolutely key in getting them to puff up. Also key is as soon as they puff up in the oven, take them out and cover with a towel immediately. If you continue to cook them after puffing up, they will become hard and dry.
Weekend Bakers says
Thank you Brian for sharing your experience and thoughts, we very much agree. These will be truly of value to other bakers too. So glad our recipe can function as your base.
Enjoy the baking and watching of puffing!
Zanzoona says
I hope one day I can meet you to express my deeply thanks for teaching me your delicious recipes..
My question is Why not all the Pitas puffed up?
Weekend Bakers says
Hello again Zanzoona,
We think it might have something to do with how you handle the dough. So maybe you ‘fumbled’ a bit too much with some of the pitas when rolling them out, pressing harder on them (let the dough relax for a minute if it starts to ‘fight back’ and will not roll out easily . If you stick to the method and gently handle the dough, they should all puff up 🙂
Happy pita baking
Zanzoona says
Thank you so much dear friends 😘 😘.. Happy weekend
William says
Is 20g of sourdough starter enough?
Weekend Bakers says
Hello William,
Did you see the development of the dough takes 24 hours? So in this time the yeast gets lots of time to develop, so 20 grams should be enough. If your own sourdough culture is a bit of a ‘slow starter’ you can use a bit more, no problem.
Cindy says
Thank you so much for this wonderful recipe. So simple, with brilliant results! They are now a firm favourite in our house 🙂
Weekend Bakers says
Hi Cindy,
Thank you for taking the time to share your enthusiasm about the recipe. Much appreciated! Enjoy your pita baking and sharing!
Gordon Cruikshank says
Thanks for this recipe
Changes:
250 g all purpose
125g spelt
125 g whole wheat
80 g sourdough starter
Warm water
Rest, like the recipe
Will griddle cook in two hours.
Let us see how it works
Weekend Bakers says
Hope it was great success with your version!
Zanzoona says
How to make the sourdough culture, pls ??
Zanzoona says
I mean I’m using usually 3 spoons of All Purpose Flour with warm water and 1 scratch garlic.. I put them after completely mixing in well -closed ball for whole night.. Then I take 2 spoons from it and add them to my dough and leave the dough for another 1 night to make my bread in the next morning.. I take 2 spoons from my dough before puffing up and add them to my old sourdough to revive the sourdough again and again, then I put it in a very cold place… Now what’s yours pls??
Weekend Bakers says
Hello Zanzoona,
You can find the instructions for our sourdough starter culture here:
www.weekendbakery.com/posts…asy-steps/
Hope you can give this a try too.
Cynthia says
I use a 75% starter and am wondering if you know how much additional water I would add to compensate. I often just eyeball it but always try and figure the math though I’m terrible without a formula. I was estimating a max of 20 additional grams of water?
Weekend Bakers says
Hi Cynthia,
This recipe uses 20 grams of culture, consisting of 10 grams of flour and 10 grams of water. Your culture has only a few grams less water in it (1.43 grams to be exact), so with these amounts there is almost no need for compensation. But on the other hand there could be a reason for compensating because of the different flour you use with different absorption of the liquid, but start with 5 grams and see how that goes, 20 grams is a lot.
Good luck with it!
Denisa says
Thanks so much for the recipe and the beautiful photos!
I haven’t made it with sourdough but I made the recipe with the yeast, it would be wonderful if you could check it out www.breadnewbie.com/how-t…ita-bread/
Weekend Bakers says
Hello Denisa,
Thank you for trying our recipe. Your enthusiasm for baking shines through. You will not be a newbie for long!
Happy baking and all the best with your blog,
Ed & Marieke
Patience Renzulli says
I’m very excited. This is the first thing I’m making with my starter. The dough looks great and it’s starting its 24 hour ferment. One question – may I cook these on a very hot griddle instead of in the oven? Thank you for this wonderful site!
Weekend Bakers says
Hello Patience,
Although we do not have personal experience with the griddle method, we know from others that it has given good results with these flatbreads and the method has been used by many people and cultures for many years. Hope it will be great!
Thank you for your kind words and happy (baking) weekend,
Ed & Marieke
Simon Leadbitter says
Hi Patience,
I make these in the oven during winter and on the BBQ in the summer. Both methods work beautifully. My BBQ does have a lid and so I don’t think it would work so well on an open griddle.
I hope that helps a little.
Weekend Bakers says
Thanks for sharing your advice Simon!
Marlo says
What are the measurements in ounces
Weekend Bakers says
Hello Marlo,
Maybe you have scales that also can convert to grams and kilos.
This is the conversion
the 500 g flour is 1 lb and 1.6 oz
280 g water is 10 oz
9 g salt is 0.3 oz
20 g culture is 0.7 oz
15 g olive oil is 0.5 oz
We also have a conversion page that you can find here: www.weekendbakery.com/cooki…nversions/
Happy baking!
Tere Van Diest says
I look forward to making these this weekend. I use to purchase Pitas for my 3 sons…way back in the 70’s-80’s and they’d fill them with Swedish meatballs and sauce, beef Stroganoff (no noodles) and even meatloaf. Various veggies added too.
My boys figured out that Pita’s have few limits….if any.
We all love them.
Weekend Bakers says
Hello again Tere,
We totally agree, we have many fillings for pita, meat and veggie (like small meat balls or falafel (fried chick pea balls)) and we never grow tired of watching them in the oven. Plus they are so much better than anything store bought. You can make these as sourdough or (if you are pressed for time) you can follow the instruction at the bottom of the recipe and make the quick yeast-based version.
Hope you like(d) the making and baking!
Erika says
These are delicious. I use this recipe as a pizza crust as well!
Weekend Bakers says
Hi Erika,
Thank you so much, and your suggestion for the pizza crust is much appreciated too!
Zo @ Two Spoons says
This worked so well!! So fun to watch too 😀 Thanks!
Weekend Bakers says
Thank you for trying ZO
hillel says
looks great.
do you think i can make it 100 whole wheat?
Weekend Bakers says
Hillel,
We would advice starting with a percentage whole wheat and if you like it try to increase the %. Whole wheat acts differently and absorbs more water too, so maybe you want to add a bit extra.
Shirley says
Hello.
I just made the quick version of these; the recipe is simple to follow and the pitas turn out perfect! Not all puffed up evenly though, but tasted delicious nonetheless. Mine took about 30 secs – 1 min more to get the brown spots.
Thank’s for sharing this recipe guys!
-Shirl.
Weekend Bakers says
Thanks for the feedback Shirley, excellent!
Zsuzsi says
Ok, this is it, I must comment now. I made 2 breads and the bread rolls from your site (sourdough all and more than once) with impeccable results every time but this pita bread recipe is simply perfection. Simple, easy (I used the bread-maker pizza setting and stopped after 10 mins, left it in the machine for 24 hours)
Tastes divine, looks very impressive with all the pillowy puffiness.
Thank you ever so much to make these easy to follow, foolproof recipes in this aesthetically pleasing, pretty format.
Do you think I could freeze the pittas before or after cooking?
Zsuzsi
Weekend Bakers says
Hello Zsuzsi,
Great to read your very enthusiastic comment on our recipes. Freezing is very well possible with this bread after cooking, though there will always be some loss of quality compared to the fresh version. We do not have any experience with freezing the unbaked pittas, but it can be worth a try of course, if only with a few of them. Maybe you can let us know if and when you give it a go.
Happy baking from Holland,
Ed & Marieke
gabrielle says
Hello!
Cant wait to try this! When you say sourdough culture (100%) does that mean a 100% hydration sourdough culture? ie equal amounts flour and water
Weekend Bakers says
Sorry for the late reply. Yes, that is 100% correct!
Happy sourdough baking,
Marieke
Kathy Schmidt says
Hi, and thanks for the great site and this recipe in particular!
Just a note on the 100% starter question: it generally means equal amounts unfiltered water and flour by WEIGHT, not volume.
Happy baking!
Weekend Bakers says
Thank you Kathy for this addition. Yes, that is why we indicate everything in grams, including the water. So for accuracy we recommend weighing the water too instead of measuring.
ay says
Excellent recipe. My family had a delicious meal with these pitas. Thank you!
Weekend Bakers says
Hi Ay,
Thanks for the feedback and liking the recipe too.
Happy pita baking!
Angela says
I am an avid sourdough Baker. But many recipes use sourdough and yeast, but I am trying to avoid yeast. Thank you for the properly fermented all sourdough version! I made these for dinner using einkorn flour and a preheated cast iron skillet as my pizza stone. They were stellar! I actually only fermented them from morning under dinner time rather than all 24 hours since I was low on time. This recipe is a keeper!
Weekend Bakers says
Thank you Angela for your feedback and inspiration with the Einkorn and the skillet. Excellent!
Traci says
We made this today to have with Taco’s. Absolutely perfect!!
Weekend Bakers says
Sounds like a great combo Traci!
Mary says
Hello
I have just made and eaten the quick yeast version and they were great! Thank you again for your wonderful website and recipes.
Weekend Bakers says
Hi Mary,
Thank you so much for trying it and liking it. Cannot get enough of making flatbread myself. Can recommend trying this one too: www.weekendbakery.com/posts…hoe-bread/
The nigella seeds are such a wonderful combination with the bread.
Happy baking!
Marieke