

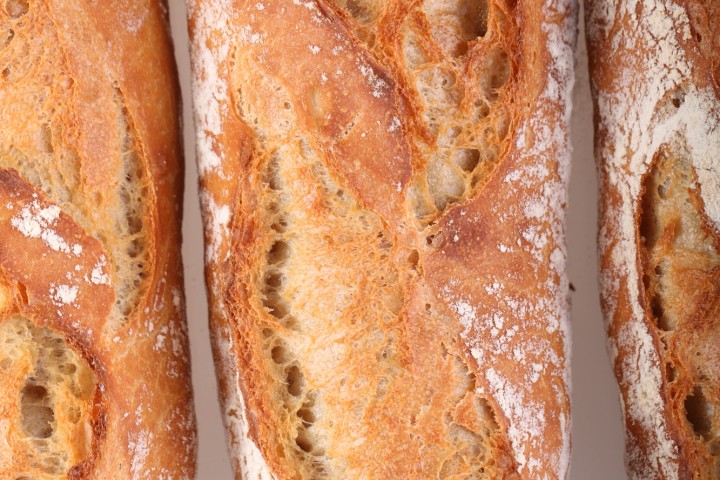
Even if the shaping is not perfect, this is the best baguette I have ever tasted!
I was very intrigued when I saw the baguette recipe that Akiko posted on the Fresh Loaf, both by her pictures of the baguettes and by the mentioning of the 80% hydration (Thank you Akiko, you are truly inventive and inspiring!). I liked it immediately and could not wait to try it. Several tries and tweakings further, with lots of sharing and baguette debating with Akiko, I can say from the heart that this recipe lives up to it’s expectations.
So give this recipe a try too and let me know what you think!
Do not forget to watch me take on the 80% baguette dough and see me stretch and fold on my video; Watch it here…
Take a look at our baguette log and follow our baguette baking progress and learn from our experiences and mistakes!
If you consider yourself a novice baguette baker our ‘easy’ baguette recipe might be a great place to start for you!
Before you start, you might also want to check our tips for bread scoring with confidence and handling wet dough.

Making the ‘Poolish’
Normally a poolish has equal parts of water and flour, however this time we make a poolish of 80% water which will give you a preferment resembling something between a biga and a poolish. So it is less wet and much less slurry than an actual poolish. In a bowl stir together 380 grams of bread flour with 304 grams of cold water and 3 grams of instant dry yeast. Mix it until you have a consistency that looks like very thick dough-like batter. Cover the bowl and leave for one hour at room temperature. After this hour at room temperature you put the poolish in the fridge for 10 to 17 hours. So if you want to begin your bread making in the morning, you can make your poolish the evening before.
| Ingredients for the Poolish | ||||
|---|---|---|---|---|
| 380 | g | wheat (bread) flour | ||
| 304 | g | water (room temperature) | ||
| 3 | g | instant yeast | ||
| Ingredients for the Baguettes | ||||
|---|---|---|---|---|
| 1 batch makes 4 baguettes (346 g each) | ||||
| the poolish from step 1 | ||||
| 380 | g | wheat (bread) flour | ||
| 304 | g | water | ||
| 12 | g | (sea) salt | ||
| 1.5 | g | instant yeast | ||
Making the Baguettes
The times given in this recipe work best if your room temperature is between 19ºC / 66ºF and 23ºC / 73ºF. If your room is colder, use room temperature water instead of cold water (straight from tap) in the final dough.
Please note: There is no real mixing or kneading in this recipe. It’s all stretch and fold!
Now on with the final baguette dough making: Take the poolish directly from the fridge and first add the 304 g of water to dilute it. Then add the other ingredients (flour, salt and yeast) and combine until you have a shaggy mass. Cover and leave to rest for 10 minutes. Now turn out the mass onto your working surface and stretch and fold for 2 minutes. Keep on at it because it doesn’t look like it’s going anywhere but it will be OK. Put the dough in a greased bowl, cover and leave to rest for 45 minutes.
Stretch and fold a second time, doing two sets ( letter fold: right over left, left over right, bottom over top, top over bottom, repeat)
But back in your bowl, cover and again leave for 45 minutes.


Repeat the above stage another 3 times, but now each time doing only one set of stretch and fold.
Every stretch and fold is followed by a 45 minutes rest in a covered bowl except for the last one. After the last stretch and fold you leave the dough covered with some clingfilm (now looking nice and plump) on your bench for only a 10 minute rest (bench rest).
Preheat your oven to 240ºC / 465ºF (at what stage you preheat your oven depends on how long it takes for your oven to heat through, some take 30 minutes, some, like ours, with stone floors take a lot longer, up to two hours.)
Now divide the dough into 4 equal parts. You are going to pre-shape the dough parts one by one by carefully stretching the corners making a rectangle of each of the 4 pieces and rolling them up. Try to make your rectangle and roll as even as possible without fussing too much with the dough. Use enough flour to handle the dough, but try to keep it to a minimum because you don’t want too much extra flour in the carefully build up 80% hydration dough. Cover and leave to rest for 15 minutes.


Take a roll of dough (which has flattened a little bit during the bench rest) and gently shape it into a baguette shape. My way of shaping this high hydration dough is to sprinkle it with a little flour and press it softly down into a rectangle with a short and a long side. The more even the rectangle the nicer the baguette will look in the end. With a plastic dough scraper you flip 1/3 of the long side onto itself and tuck it in to get some tension on the outside of the dough, now repeat it two more times until you have a roll shape. Make a rolling motion with your cupped hands from the center to the side with a soft touch to make the baguette a bit longer and to make nice pointy ends on both sides of the baguette. Practice makes perfect, do not be hard on yourself, it is not an easy job with a dough as sticky as this.
 Place the baguettes in a couche made of proofing linen or in a baguette pan, or something of your own invention, but make sure the baguettes have enough side support to hold their shape. Cover them and leave to proof for 25 minutes.
To check if the baguettes are ready, dip your finger in some flour and gently poke in your dough.
If the hole disappears completely: under-proofed
If the hole dent pops half way back out: proofing is just right
If the hole stays entirely dented in: over-proofed
Score the top of the baguettes with a lame/bread scoring tool. Cut as straight along the long axis of the loaf as possible. Mentally divide the baguette into lengthwise thirds, and keep the cuts within the middle third. You can practice the scoring on a piece of paper or a kitchen paper roll first. Overlap the cuts by about one third of their length,while holding the knife at a 30 degree angle. Also check out this very useful video on proper baguette scoring.
Bake in the preheated oven for 25 minutes. Leave to cool on a wire rack.
To get a nice crust, try to create some steam in your oven by putting a small metal baking tray on your oven floor when you preheat the oven and pouring a half cup of hot water immediately after putting the bread in the oven. Release some steam by setting your oven door ajar (perhaps with the help of a wooden spoon or oven mitt) 5 minutes before the bread is ready. If you are going to create steam with a baking tray, you maybe also want to turn your oven temperature a bit higher, because you are going to lose some heat in the process.
Baguette Time Table
Day 1
Make ‘poolish’
Day 2
Mix ingredients until shaggy mass
00:00- 10 minutes rest
00:10 – 2 minutes stretch and fold
45 minute rest
00:57 – 2 letter folds
45 minute rest
01:42 – 1 letter fold
45 minute rest
02:27 – 1 letter fold
45 minute rest
03:12 – 1 letter fold + bench rest
03:22 – divide + pre-shape
03:37 – shape + proof
04:02 – into the oven
04:27 – take out and leave to cool
PS: If you are interested in linen couches / proofing cloths like we use ourselves, you can find them in our WKB webshop.


paul angelucci says
Thank you mucho for this recipe. Besides producing excellent bread, the dough is very forgiving! Without going into details, I am obliged to keep returning the dough to the fridge two, three, even six days, playing havoc with the recipe instructions. It still works! The rise, the holes, the taste—wonderful. Also, I bought a marble slab which greatly aids my technique. Might want to post this for those baking-interruptus folks out there.
Weekend Bakers says
Excellent Paul, we actually have never pushed it that far, but great to get this information based on your experience. The marble slab too, we know that can be great for bread and also working with chocolate.
Enjoy your fearless baking and crusty baguettes!
Ed& Marieke
David says
Thanks for bringing this 80% hydration recipe into our home. We have made all sizes of baguettes with this recipe with success. Its been a wonderful experience teaching and sharing with friends. Thanks for sharing. David
Weekend Bakers says
Wonderful to read your comment David. Thank you so much, it brings a smile to both our faces!
Enjoy your baking and sharing.
Greetings from Holland,
Ed & Marieke
Angela says
Hi,
Sorry if I’m asking a dumb question. Is it OK to increase rest time if I leave it in the fridge?
Weekend Bakers says
Hello Angela,
What stage do you mean exactly? The proofing of the actual baguettes? The poolish already goes into the fridge.
Gosia Becker says
Made this for the first time and it turned out amazing!!!!
Thank you for posting the video, it was very helpful.
Weekend Bakers says
Very happy you had such a success with our recipe already at the first try. Enjoy your results and wishing you many more crusty baguettes!
Tim says
Hello. Wonderful website. In the second part of the mixing for this recipe, is the 1.5 grams of yeast correct? Or is it support to be 15 grams? 1.5 grams just seemed light. I’m right in the middle of it and I’m going w 15 grams. I guess I’ll find out if my assumption is wrong, lol.
Weekend Bakers says
You are wrong, it supposes to be 1.5 grams! Hope it will be OK.
Rena says
I have a few questions, one would I be able to make this without a mixer and just doing it by hand? (I saw the easier baguette recipe stated I would need one).
Also if I only want two baguettes can I just halve everything in the recipe since the ratio remains the same and will I need to alter the times?
Weekend Bakers says
Hello Rena,
Thia 80% hydration recipe is all done by hand. There is no real mixing or kneading in this recipe. It’s all stretch and fold with this one.
You can indeed divide the recipe in halve without changing anything else. But please note that the handling of the dough becomes a bit harder because it is such a small amount you are left with.
Enjoy your baking!
Rena says
Thank you! I managed to follow the recipe but scoring was extremely difficult for me. The dough kept “eating” the blade and getting stuck. They’re in the oven now but I’m not very hopeful.
Weekend Bakers says
Have you seen our tips on scoring Rena?
www.weekendbakery.com/posts…onfidence/
They might help you. Also, this is something that takes some practice with this dough, so do not be discouraged.
Quinn says
You need very sharp knife or blade, and wet the knife or blade with water (or oil for very wet dough).
Melissa says
Hi WB,
This was my first time using this technique for baguette and I love it even though I had a couple of issues.
I think maybe I have to use a lower percentage of water in both the poolish and dough because the loaves came out a bit too moist. The humidity is high now where I live and that might be the reason, even though the air conditioning registered at 23 degrees throughout the process. What water percentage for the dough and poolish would you recommend with this scenario?
I used a baguette pan for three baguettes and thus used more dough in each of the three since this recipe is for four baguettes. Maybe that is the problem, and it’s not a water issue? I would really appreciate your expertise for my second attempt in the coming days.
Thank you in advance!
Melissa
Weekend Bakers says
Hello Melissa,
We understand what you mean. We would always suggest only altering the final dough and not the poolish water %, because in this recipe the poolish has already less water than a normal poolish and it is very easy to correct the water amount with the final dough.
Our other suggestion would be to try this other recipe with 75% hydration:
www.weekendbakery.com/posts…te-recipe/
Or to alter this one and also go down to 75% and see how you like that result. If you use more dough per baguette, then the baking time will also be a bit longer, but certainly not longer than 3 to 5 minutes extra. If you are able to measure the core temperature of the bread, for this type it should be 96C/ 205F to be done.
Good luck with it!
Melissa says
Thank you so much for these tips!
I will make my second attempt soon.
Might start with the easier version on this one😀
Weekend Bakers says
Yes, it’s a great way to ease into it…
Happy baguette baking!
ChezGigi says
Do you have any thoughts on using convection or not when baking baguettes?
Weekend Bakers says
Hi Gigi,
The stone bread oven we use uses conventional heat. The main way to bake bread in general is always with conventional heat and not convection. An important reason for this is the first 5 to 10 minutes (oven spring) the dough needs to remain somewhat gelatinous so it can expand. Hot dry air will dry out the outer skin of the dough much quicker so it will have less time to do so.
So we would advice to use conventional settings and if possible bake on a stone so with direct heat contact at the bottom of the bread.
Richard says
Hi,
Would love to give this recipe a try but I am struggling with one thing before I start.
Reading your recipe on how to calculate the amount of yeast needed to make a poolish and you say for 200g of flour and 200g of water you need 0.2g of yeast.
But . . . In this recipe you state that you need 3g of yeast for 380g of flour. Is this a typo? Should it be 0.3g or does this recipe simply call for more yeast.
Many thanks,
Richard
Weekend Bakers says
Hello Richard,
No the amount is absolutely correct! The amount is needed because in this case, the poolish is going into the fridge so it needs more yeast to develop at low temperatures. It is part of the method of this recipe and if you make it the first time we encourage you to follow the recipe steps exactly and we hope it will be great!
Marc Provost says
Really like this recipe, the crumb is nice, airy and tasty. However, the crust often becomes too elastic and somewhat stiff after cooling down.
This is not the first time I experience tougher crust. How could I address this issue.
Thank you
Marc
Weekend Bakers says
Hi Marc,
Sorry for the late reply. This is a challenge we know and also the reason bakers in France bake baguettes several times a day, so they can sell them as fresh as possible.
The first thing is to make sure your baguettes are properly baked. If there’s still too much moisture in the bread it will travel to the surface and make the crust soft. A guideline to check if your high hydration loaf is done baking is to measure the core temperature with a digital probe thermometer. For wet dough, like this baguette, the core bread baking temperature should be around 96C/ 205F.
-Secondly if your surroundings are very humid this could also have an impact on the crust of the bread.
You could return the baguettes to the oven (preheated at 175C / 350F) for 5 minutes before you want to eat them.
Just to make sure, I presume you know that you should always let bread cool on a rack so moisture can escape from the bottom too, otherwise your crust will get soft very quickly.
And as a natural process bread will first be crusty just from the oven, then it will soften a bit after an hour because of a little bit of moisture still left and then it will get crustier again.
Hope this helps, good luck and enjoy the baking!
Ed & Marieke
Steven says
Thank you for sharing this recipe!
I’ve been practicing making baguettes with this recipe for a few months now. After experimenting quite a bit and correcting my mistakes, I’ve finally realized that it is critical getting tension in the dough during final shaping. I wish the recipe highlighted that a little more. Maybe this could be a separate how-to post? 🙂
After shaping into a roll, I use a scraper to create tension on the surface before dusting it with flour. I found this video helpful: www.youtube.com/watch…EG1BjWroT0
Another thing I noticed is that the total fermentation time of the recipe maybe on the short side. Possibly the ambient temperature in PNW of U.S. is lower and needs more time for yeast to work?
Weekend Bakers says
Thank you Steven, for sharing your experience and helpful hints. You are very right about the tension part of shaping, it is critical and very challenging to get right. And it may not come across well enough in our video or instructions. There are so many factors and each baker seems to encounter a lot of the same but also different challenges, due to their surroundings, equipment, ingredients, hands et cetera.
And yes, it could very well be your dough needs a bit more time and you should always take it, if after testing the dough you find it is net quite there yet. After a few runs and if possible some measurements and taking the ambient temperature into account you will get to your optimum final proofing time. But also take into account that for baguettes, slightly under-proofed can also give a very nice oven spring when baking.
Enjoy your baking journey and thank you for trying our recipe!
Caleb says
Thank you so much for the recipe! I just made this yesterday and it tasted delicious, but the crumb was not as open as the ones in your pictures. How can I improve?
Weekend Bakers says
Thank you Caleb, great to read your comment. We would suggest trying different (brands of) flour because this can make a difference and also see our tips on handling wet dough: www.weekendbakery.com/posts…ion-dough/
Above all, try not to add much flour while handling the dough just because it is sticky, use a scraper to help you and emulate what you see in the video.
Practice will get you there we are sure!
Enjoy the process 🙂
Rob says
My problem with this recipe is the total ferment time is too short. Read about the many reasons that all sourdough should be fermented for at least 8 hours. I may try and adapt this to some time in the fridge.
Weekend Bakers says
Ehh Rob,
Sorry but this is not a sourdough recipe plus there is a lot of fermentation time in the poolish of course.
Frank says
Thank you so much for the speedy response and answering my question.
Weekend Bakers says
Happy to help 🙂
Frank Thomas says
I just made this poolish for the first time. It is very thick and sticky and not batter like at all. It’s like any other bread dough I’ve made. Is it correct that the amounts of flour and water for the poolish are identical to that for the baguette dough?
Weekend Bakers says
Hello Frank,
Yes that is correct, it is identical and it does not consist of equal parts water and flour like a regular poolish. So more flour and less water means more like dough and less like batter, but still very sticky (80% hydration!). That is why we say in the recipe: “resembling something between a biga and a poolish. So it is less wet and much less slurry than an actual poolish.”
Also take a look at the baguette video to judge what it looks like.
We can assure you the amounts are correct, but as with every recipe, always leave some room for some adjustment with the liquid in the final dough, because you will be using a different (type , brand) flour than ours with possibly a different absorption level. American flour will absorb more water and always needs a few % more for example and for this you can always compensate in the final dough.
Hope it will be great!
Katherine Radcliffe says
I have made your French Baguettes several times and they have turned out great.
I was wondering if the dough can be frozen and baked at a later time?
Thanks.
Weekend Bakers says
Hello Katherine,
We are not a fan of freezing dough because of the loss of quality, especially with this very wet dough. But people do it and claim good results, so it is possible.
Let us know if and when you try it with this recipe, it will be interesting to hear about your experience!
Happy weekend baking
Mike says
If this makes 4 but my store can only handle 2 how do I adjust the times?
If I go straight through and put the first 2 in, the second ones will have proofed for an extra 25 minutes.
Guessing there’s another way?
Weekend Bakers says
Hello Mike,
The easiest way would be to proof two of them in cooler spot to slow them down a bit or use the fridge if you think they need even more slowing down.
Mike says
Ugh. I’ve got the Polish resting on the counter waiting to go into the fridge but just realized I used AD yeast instead of instant.
How screwed am I?
Weekend Bakers says
No problem Mike,
You usually need to use 20% extra when using AD yeast. You could give the poolish a bit of extra time to develop. Just watch for some nice bubbles. But if you use it slightly under-developed it is still not a problem.
Enjoy your baguette baking!
vicky benson says
Thanks I enjoyed the video & learned a lot.
As to the Poolish I am confused. The small batch is separate from the actual quantity of 380 grams or 3.5 cups flour, right?
Thank you
VBenson
Emily says
Hello!
I have tried this recipe three times now, and each time I have not managed to acheive anything more than an extremely sticky, sloppy dough. I make a lot of bread and haven’t had these problems before so i’m really confused. I’ve been very meticulous with my proving times, temperatures, measurements, stretching and folding techniques, etc, but I can’t figure out what is going wrong. I’m using french T65 flour.
Thanks in advance for your help! 🙂
Weekend Bakers says
Hi Emily,
What hydration level are the other breads you regularly make?
Because 80% is very high in hydration and it takes some getting used to. The flour should not be a problem. But maybe it is a good idea to start with a slightly lower hydration level (say around 75%) so the dough is a little bit easier to handle. We can also recommend trying our other French baguette recipe as a starting point : www.weekendbakery.com/posts…te-recipe/
Enjoy your baguette baking!
Nico says
Hi
I am regularly baking with T65 and it is indeed a rather weak flour. I really like the flour from Viron, but it may be difficult to come by.
As per hydration levels I found 70% rather on the limit for this flour.
Hope this helps.
Weekend Bakers says
Thanks for sharing Nico!
Whyker says
I’m going to try the 80% hydration baguette recipe this coming weekend but would like to use my sourdough starter instead of yeast in the poolish & dough. What quantities of starter for each would you recommend? Any other tips in this regard?
I have been baking your Pain Natural recipe with my starter for quite a while now with great success & love the crust, crumb & taste.
Weekend Bakers says
Hello Whyker,
Thank you very much. Your question is not as straightforward as it may seem. Using sourdough instead of commercial yeast is possible of course, but it means the recipe changes too and the end result will be different. Because we are not the biggest fans of sourdough baguette, we do not have the exact worked out sourdough 80% hydration baguette recipe for you.
We do have a hybrid version with the smaller baguettes called ficelles:
www.weekendbakery.com/posts…sourdough/
Otherwise you could try another sourdough baguette recipe that already has the right amounts and proofing times. Or…you could give this recipe a try. It is very different from the sourdough pain naturel of course, but because of the method and high hydration you get such a wonderful (yet different) crust and crumb and sweet aroma. Hope you will give it a try!
Deborah says
I am having trouble getting ears on my baguettes. The first time I made baguettes, I used a 60% hydration dough and I had good ears, but the crumb was not good. I have tried twice more with an 80% hydration recipe, including this one, and cannot get any ears. I’ve tried to put tension into shaping the baguettes, I’ve tried to make the slashes properly, I use steam, and I follow the directions exactly. Is it because of the high hydration? Thank you.
Weekend Bakers says
Hello Deborah,
This is really hard to judge for us, because there can be several factors at play. We assume you did not change the flour you used for the other recipe, so the cause could not be a change of flour?! Another thing with the flour, because they all are different with different absorption levels, it could be your flour absorbs less than the one we use
Also it is really hard getting tension with this dough and it takes some practice and could explain the lack of ears.
Our suggestion would be to reduce the water to around 75% and give it another go. Alternatively, you could give our slightly less laborious recipe a try, which already has a hydration dough of 75%. See: www.weekendbakery.com/posts…te-recipe/
Good luck with it!
Deborah says
Thanks for your response. I don’t want to take the easy way out so I’m going to keep trying. The flavor was delicious and the crumb was beautiful so at least we will enjoy them until I eventually get the ears. Thanks for your great website!
Weekend Bakers says
Thank you and enjoy your baking!
Ali Cameron says
Hi Deborah
Late reply I know, but in case you haven’t managed to get your ears back, here’s a suggestion:
Allowing a little more drying of the skin on the dough during the final proof seems to help with ear formation, in my experience.
I started as a newbie with lower hydration dough and the ear formation was never a problem. As I graduated to higher hydration, though, it became harder to form the ears. I’d always kept the loaves very humid for the final proof – covered with a floured cloth and then with a sheet of plastic spritzed with water on the underside. Now I’ve found leaving the plastic off, or even leaving the loaves uncovered – depending on atmospheric humidity – forms more of a taut skin on the loaves, ready to burst open in the oven..
Hope it’s a little helpful!
Ali
Weekend Bakers says
Thank you Ali, for your helpful suggestions for Deborah and other bakers too we’re sure!
Steve says
I have made this recipe several dozen times – doubling up to make six baguettes per session. We devour one loaf still warm, and freeze the rest. Amazingly good, reliable recipe – batch after batch. Thin crispy/chewy crust, pretty ears, open crumb – random bubbles. I’ve pushed it up to 82% hydration with no problems as long as you use good wet dough technique – keep things moving. It is actually our daily bread in our household. Add a little butter and homemade strawberry jam – heavenly. Thanks for the recipe!!!!
Weekend Bakers says
Thank you Steve, for your enthusiastic share!
Wishing you and your family lots of happy baking and sharing moments!!
Miyuki says
Hi, I made these yesterday.Even though they were the first baguettes I’ve made, they turned out amazing! Totally lovely texture, crust, taste, everything seemed to be perfect. I’ve never made bread that takes this long to make but I’m happy I tried these.
Weekend Bakers says
Hello Miyuki,
Thank you for a lovely comment and great to read about your excellent result.
Making the recipe a few more times, you will see the process will become more familiar and easy and you will notice that the lead time may be long, but the actual ‘hands on dough’ time is no more than 10 to 15 minutes.
Happy baguette baking!
Miyuki says
Hi, I made them again today. This time I made 4 baguettes instead of two, improved a little in shaping and scoring, added 160g whole wheat flour instead of plain flour, and they are delicious! Thank you so much for posting this recipe. I will definitely make them many more times and hopefully get faster at doing each step.
Weekend Bakers says
We are sure you will. Enjoy!
Joseph Falcone says
I made this 80% hydration Baguette recipe today. It was the best tasting bread I’ve ever made. I let the sponge sit in the frig covered with plastic wrap for around 18 hours. I remove the sponge from the fridge & let it sit at room temp for 2-hrs. I then made the dough up. I followed the recipe and it turned out fantastic. The crumb was out of this world. Thanks for the recipe. Getting used to the high hydration was a challenge but by using a dough scraper & wet hands the fold & stretching worked out well.
Thanks Again.
Joseph Falcone
Desert Hot Springs, California.
USA
Weekend Bakers says
Hi Joseph,
Thank you, that sounds more than excellent. Great result, proud baker!
You did well with the dough scraper, it works so well for this dough.
Greetings from Holland,
Ed & Marieke
Emma says
If I were to halve this recipe, how would I need to change the proofing times?
Weekend Bakers says
Hello Emma,
It is very simple, also with halve the recipe you can stick to the proofing times given. The only thing is, the smaller the amount of dough the ‘harder’ it is to handle the dough. It’s easier to stretch and fold with a bigger lump of dough, but we understand you’ll be wanting to make a smaller amount.
Hope it will be great!
Corinne says
This was my first time ever making baguettes and I thought this recipe was very informative and made it pretty simple. They turned out tasting really great and having a great crumb.
Weekend Bakers says
Hi Corinne,
Thanks for sharing your experience with the recipe. Glad it turned out so well.
Don’t know if you have seen it but we also have a fun and versatile variation on the baguettes with this recipe: www.weekendbakery.com/posts…he-recipe/
Happy baguette baking!
Willi says
I will try this receipe this weekend. Can i take fresh yeast for it and if yes how much should i take?
Thank you very much.
Weekend Bakers says
Hello Willi,
Yes of course you can use fresh yeast. The normal conversion from instant yeast to fresh yeast is times 3 so three times as much as indicated for the instant yeast. But keep an eye on the poolish, fresh yeast can be a little bit more enthusiastic than instant, so if possible check it sooner (closer to the 10 hours) to make sure it is not over-ripe. It is better to use an under-ripe poolish in the final dough than a poolish with possible damaged gluten.
Happy baguette baking!
Steve says
I have made this fantastic recipe many dozens of times now – scaling it up to make six baguettes at a time. This is our family bread – goes amazing well with Spanish chorizo, lomo or jamon serrano slices, strawberry jam, etc.. I’ve probably gained ten pounds since starting this baguette quest. Here are some small variations learned/evolved from experience..
I let the poolish develop at room temperature for up to 24 hours, carefully controlling the development by the amount of yeast added – a scant pinch in summer, maybe a full pinch when it’s cold, finishing at its maximum rise height. This is the secret to amazing, complex flavor that only a poolish (or biga) can deliver! Slow ferment = taste.
High hydration makes a great, open crumb full of bubbles – well worth learning how to handle it. Keep it moving, use wet hands and a dough knife to help fold and never let it sit for more than a few seconds on unfloured boards/counters. A small unfloured section of the board can be useful to momentarily push against as you fold the dough by hand to build gluten structure. High hydration requires active choreography!
One tip — lately, I have moved to doing all the ingredient mixing and dough fold handling, rising in a large acrylic container, eliminating the need to get loose dough/flour on the counter. Minimizes washing tasks.
Very important to really dose the couche heavily with flour before adding the baguettes. I actually prefer rice flour to keep high hydration doughs from sticking. It really works well at moderate levels. Without couche support, any baguette dough will flatten. I started with kitchen towels and finally ordered a real couche from the internet. I use a long flat board to gently transfer the risen baguettes from the couche to minimize dough trauma. I lift up the couche peak and carefully tip / roll the baguette onto the board, letting it fall onto the board by its own weight. I then transfer the baguette from the board onto parchment paper that sits on an inverted cookie pan. I bake three baguettes at a time, lifting / sliding the parchment off the cookie pan with the baguettes onto my baking stone. I reuse the parchment paper for the second batch.
Scoring the baguettes with a lame or super sharp knife blade is critical for a good oven spring. I do five scores per baguette at a slight angle, overlapping the scores by 30% or thereabouts. I have learned to be confident, firm and fast, coming in at about a 30 degree angle while lightly holding the baguette with the other hand. The angle will create the pretty “ears”. It takes practice – took me a dozen batches to get it okay.. I actually learned how to do this by watching YouTube videos taken in actual French bakeries. Before scoring, I usually toss some flour on top of the baguettes – makes a pretty contrast after baking.
For critical oven moisture generation, I use a small roasting pan filled about 1 inch high with lava stones underneath the stone – once the baguettes are in place, I pour approximately 1 cup of water into the pan and shut the oven door. 450 deg F oven, 18 minutes – open oven door briefly after 10 min to release the trapped moisture. Actual time, moisture addition and temperature balance required to achieve a perfect, crispy crust while getting adequate cook, slightly glistening open crumb is oven dependent – like always, practice makes perfect!
Just wanted to share. A lot of it was learned by trial-error. I’m very grateful for weekendbakery for the initial advice with this recipe. Thanks.
Weekend Bakers says
Hello Steve,
Thank you for sharing your baking experience and wisdom with us and other bakers. We really appreciate your additions. One tip that stands out is the one using the container for the dough handling, which is excellent. Don’t know if you saw this recipe for a ‘Tartine Style’ sourdough bread where we use a big container too, because this recipe also involves a lot of dough handling and no actual kneading. www.weekendbakery.com/posts…yle-bread/
Impressed by your knowledge and great tips. Wishing you many enjoyable baking moments in the New Year!
Greetings from Holland,
Ed & Marieke
Weekend Bakers
Eric says
Made my poolish last night and I’m trying the recipe this morning!
Eric says
This is the first high hydration recipe I’ve tried. The last recipe I used came out looking very good and professional but did not have the open hole crumb. The taste was awesome but I cannot stand the dense crumb. So far so good. I am at the stage of shaping into a baguette preparing to put them in the oven soon. Will let you know how they come out.
Weekend Bakers says
Hope it will be a success Eric, our tips on handling high hydration dough might come in handy too: www.weekendbakery.com/posts…ion-dough/
Enjoy the process!
Cheryl S says
Your site is indispensable. I will be making this baguette recipe for sure!
Weekend Bakers says
Let us know how it goes Cheryl!
Melinda says
I think there is a mistake with regards to the amount of yeast in the poolish. It should be 0.3 gram, instead of 3 g written in the given recipe.
Weekend Bakers says
Hello Melinda,
The amount of 3 grams is correct. The poolish ferments in the fridge after one hour, so not at room temperature.
Melinda says
Thanks for your prompt reply. I was just a little confused after sawing the
calculations for yeast percentage on the linked article “biga and a poolish” of this recipe. Anyway, I had just finish making the poolish following your instructions and hopefully the baguatte will turns out well. Finger crossed !
Weekend Bakers says
Yes, we understand that can be confusing, this being a slightly different recipe, with its own method and very high hydration and the use of cold water et cetera. Maybe it takes a few turns because this dough is quite challenging because it is so wet. But with our tips for handling this dough and a bit of practice you will soon get used to it (presuming you aren’t already of course):
www.weekendbakery.com/posts…ion-dough/
Hope it will turn out great!
John says
So I tried this recipe and despite being pretty meticulous with timings and temperature etc I simply could not get the dough to come together. In the end my baguette were as flat as a pancake. I should say that I am a pretty experienced baker and used to working with doughs of around 78% hydration. I always have time in the fridge for both gulf proof and secondaryvprooof so maybe this is why it failed. Any advice would be welcome. I am based in London and use French T55 flour
Weekend Bakers says
Hi John,
Maybe try a bread flour with slightly higher protein content (around 12.5%), will probably also act differently with the hydration / absorption.
Do not really understand your sentence about the gulf proof and fridge…
Hope you will give it another try
Harumi says
Hej,
I just made baquette with 80% hydration also yesterday. It was my first time using poolish preferment. However instead of using white flour i used 50 – 50 ratio (all purpose and wheat flour ratio). It turned out very nice brownie looking with nutty smell.
In that recipe i followed the technique from Jeffrey hammelman poolish baquette recipe which requires to be kneaded in traditional way.
Despite the stickiness i was glad that I can pass the windowpane test.
However it was worth of try and I am really happy with the end result.
Thanks for sharing.
Weekend Bakers says
Thank you for sharing your method and experience with us Harumi!
Greetings from Holland,
Marieke & Ed
Charles B says
Wow, this recipe is awesome. I’ve made it 3 or 4 times already, including one variant where I added 1/3 cup Herbes de Provence as a special flavoring. So good.
A couche or baguette pan is definitely needed as I tried once with the final proofing simply on a baking sheet and the loaves flattened significantly and continued to spread out during baking.
Like someone else mentioned, I too find it difficult to score. It’s like the outside of the dough dries out too much during the last proofing. It’s not easy to “cover” the set of 4 loaves in the couche as that is a large footprint. How do you cover it – with a towel? Maybe a damp towel would help slow any drying? I have also been using a single-edge razor blade, just holding by hand, and decided to go ahead and buy a lame.
The other comment I have concerns the poolish and what I think I see in your video. The first time I made the recipe I was frustrated by what appeared to be some mistake I had made. However, this has happened every time and I just push through it and, fortunately, still get an excellent end result. The poolish comes out of the fridge as a thick mass and when I add the second batch of water to it, “to dilute the poolish” as you describe, it is just a big rubbery blob floating in the water. There is no way I can use a spatula to mix the two as it looks like you do in your video. I use my hands to squeeze and massage the poolish in the water until it is stretched out and extruded through my fingers and starts to cloud the water. It never really mixes with the water. I then add the additional flour, salt and yeast at which point I *can* use a spatula to finish mixing the dough.
I wish there was a way to attach a photo here as I wanted to show the crumb from my latest batch. Amazing. Here is a photo you can access from my Google Drive: drive.google.com/file/…sp=sharing.
Weekend Bakers says
Hi again Charles,
We cover the baguettes with clingfilm coated with a layer of flour, we would not use a damp towel because it would be too heavy and can stick.
We do have some scoring tips (which you might have already seen?!) www.weekendbakery.com/posts…onfidence/
Your other issue sounds peculiar to us, perhaps it has something to do with the (type of) flour you use? We have not seen or heard this before. Good you can solve it like you do and get an excellent result, judging from your picture. Very nice crumb indeed!
You can share pictures of your bakes, if you would want to, on our website, by uploading them here: www.weekendbakery.com/send-…your-loaf/
Thank you so much for sharing your baking experience and happy baguette baking,
Ed & Marieke
Wendy says
I had the same issue with my polish – I ended up mixing it in my mixer with the kneading attachment to break it up. The baguettes turned out pretty good for a first attempt! I didn’t do a very good job with the scoring, and they were a tiny bit long for my baking stone, so they are not very professional looking – but the taste is out of this world.
I LOVE this website! I learn so much from you – THANK YOU!
PS: I didn’t have a ‘couche’ so I improvised by taking some heavy cotton cloth left over from a sewing project, rubbing flour in it, and then bracing on either side of the end ‘peaks’ with sheet pans. Worked perfectly.
Weekend Bakers says
Hi Wendy,
Glad you persevered and also got creative with the tools at hand. Excellent tips for other bakers too!
Scoring will get better and better with more practice. And we keep saying it of course and totally agree, even the less beautiful loaves that are homemade with love and good ingredients and their freshness are soooo much better than most store bought stuff.
Enjoy your baking journey!
Ed & Marieke