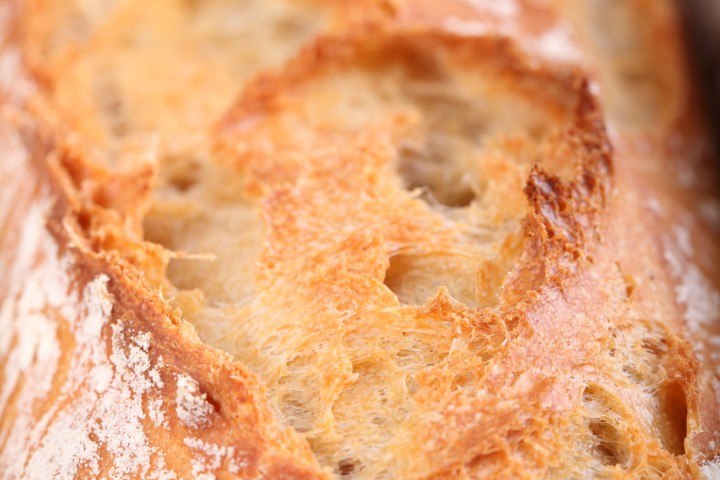
Is it French, is it Japanese, is it both? It sure is sticky dough at 80%!
Keeping track of my baguette baking trials and errors with the goal of eventually becoming a true proficient.
I looked at many recipes and the only one that really intrigued me was the 80% hydration one posted by Akiko on The Fresh Loaf. I immediately liked everything about it, the crust and crumb of the baguettes, the process of the recipe, the Japanese angle and the very extensive research Akiko put in. You can find my version of the recipe here, (with the blessing of Akiko).
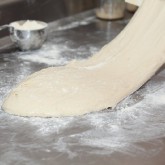
I made a video of my baguette stretching, folding and shaping. Watch it here…
Also check our tips for scoring bread with confidence and handling wet dough.
And take a look at this great little clip. It shows exactly how to score and especially NOT score a baguette!
And if you have some more time you must see this great video of Julia Child and Raymond Calvel making baguettes. Brilliant!
*******
MY BAGUETTE MAKING LOG
June 2012
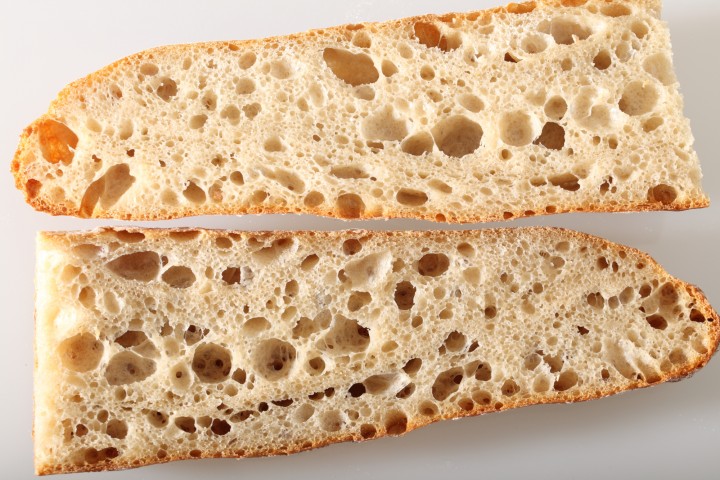
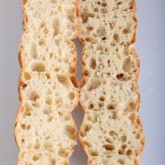
We perfected our ‘easy French baguette recipe’. The method is simpler, the recipe has less steps, the dough is less wet than our 80% hydration baguette recipe, and yet this one also yields wonderful baguettes. If you were to compare the two recipes you could say this easy version has a little less depth of flavor and the holes in the crumb are less impressive, but it is also less laborious and less sticky to handle. It will saves you 2 hours on baking day. The flavors are actually very much comparable and eaten in combination with other foods like cheese, it will be hard to notice much difference in taste.
You can find our ‘easy’ recipe for French baguettes here
May 2012
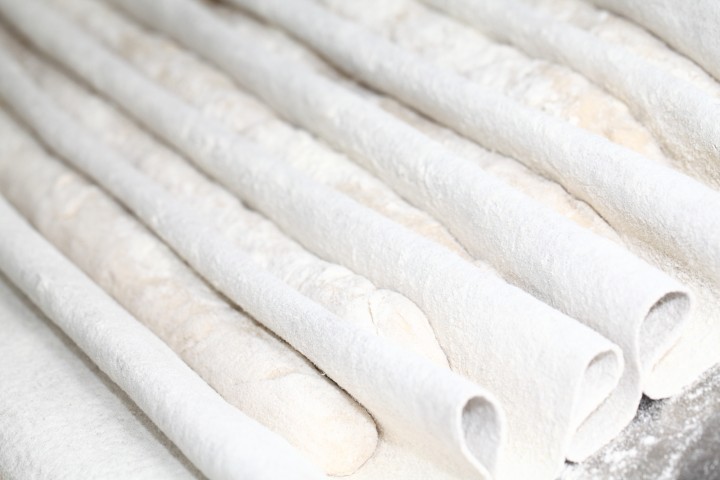
Currently we are working on a recipe to simplify the baguette making procedure that will still give the same amazing result (taste and texture!) as the 80% hydration recipe we have been using for quite a while now. The first test results are very encouraging. We will give it a few more turns and then share the new recipe with you. The idea is to reduce the number of steps and time to make the baguettes, however in contrast to the current recipe, you will need a standing mixer for this one.
Take 10, 11, 12…
December 2010
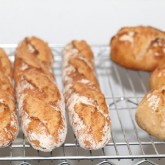
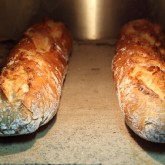
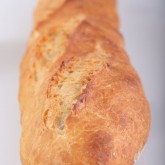
Still baking and still improving on the baguette making. Shaping is going better and I managed to get an even more baguette-like shape with pointed ends. Challenges remain because the Rofco oven only allows me to make 45cm long baguettes. I did manage to make 3 on one stone, so I can now make 9 baguettes in one go.
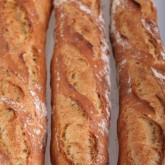
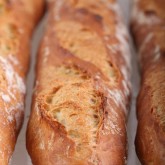
Scoring has also improved. I now carefully hold the baguette with one hand at the part where I want to score, and gently but decidedly slash it with the lame in my other hand. It’s a bit hard to explain sometimes, what it is that you do exactly. It’s like a counter movement, to hold the dough in it’s place, while you quickly do the scoring. Confidence is key with slashing, because if you hesitate, you will get the lingering tears you are trying to avoid.
I also remember thinking how sticky the dough was, the first time I made this 80% hydration baguette. The more I handled the wetter doughs, the less sticky I seemed to find it. It wasn’t any less sticky of course, I just got better at handling it or should I say handling it less. As your handling techniques get better, you tend to do less of unnecessary fumbling with your dough. I am sure you will recognize this too.
Hope I can keep improving and also hope, in the near future, to get my hands on an oven that lets me make 60cm baguettes!
Keep you posted.
*******
Take 9
September 18
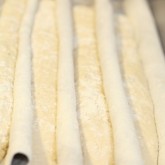
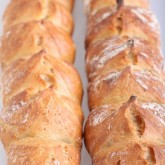
Back to 80% hydration, although 76% also works very well, but 80% is a bit more fun to work with, more of a challenge. I have changed a few little things; first of all after mixing the poolish with the ingredients I now have used a little ‘autolyse’ of 15 minutes to hydrate the newly added flour. After 15 minutes the 2 minutes of stretch and folds were easier because of the autolyse. I also did not do the last stretch and fold at 03:00 just before the bench rest, I went directly into dividing and preshaping. While preshaping I was a bit more ‘aggresive’ on getting the rectangle right to aim for a more evenly shaped baguette. I used the same technique on the preshape as on the shape, a little bit of flour, press the dough down and out with your palms and tuck and roll into a cylinder. This way I got a nicer baguette shape and the shaping was more predictable and I needed less rolling to get to the right length. Actually it was a bit to easy, because all my baguettes were a bit to long. It did not seem to have a negative effect on the crumb and hole structure. I almost forgot, I made 6 baguettes at once this time instead of 4 so I did load 3 baguettes on one go instead of 2. A bit more fun stress! I made 3 of them in the dragon tail pattern.
*******
Take 8
September 15
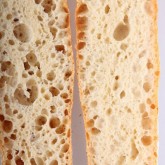
I tried the dough with 76% hydration today. The plus side is that it is a lot less sticky! The minus side is that the holes in the crumb are a little less uniform. I also tried the dragon tail cut because Marieke waved scissors in front of my face and jumped up and down, asking me to make her one. Very, very nice pattern, fun to do and it also gives the baguettes a lot of room to expand and because of this the crumb had a nice uniform hole structure.
September 14
We use European flour which absorbs a few % less water than American type flour. Which means that when I make this 80% hydration dough, my dough is wetter than the American version. So if I try to make a version with my European flour at 76-77% hydration it will probably be about the same as the 80% American flour ones. Or if people want to try my version with American flour they should go to 82-83% hydration. Think I will just give the little less hydration version a try next, to see what comes out, although I am perfectly happy with the European 80% hydration ones.
*******
Take 7
September 12
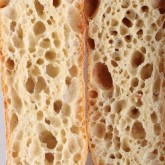
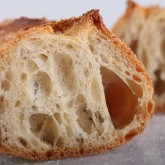
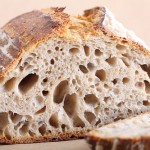
I have baked the baguettes again yesterday and they came out great as well. The only thing was I did not divide the dough evenly so two were bigger and less nicely shaped than the other two. But the crumb, taste and holes were the same as my other pictures.
The fun thing of this accident was that the smaller two of the baguettes had a nicer oven spring with nicer opening of the cuts. I think they weigh about 310-325 grams instead of the 350 grams. Normally a baguette in France needs to be 60cm instead of the 40cm I can make. I think they call the smaller slightly thicker bread ‘a pain’ instead of baguette.
*******
Take 6
September 8
Baked again today, 0.8% yeast for 1 hour at room temperature and from 21:00 until 16:30 in the fridge. I used 0.4% yeast in the final dough. My new shaping technique is working perfectly and I have filmed everything.
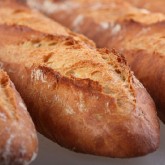
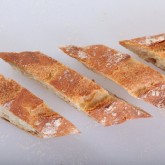
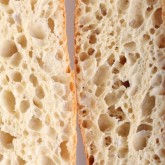
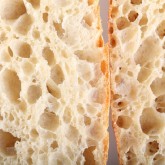
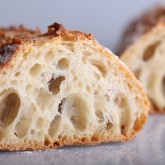
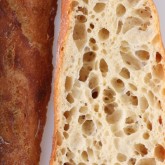
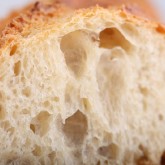
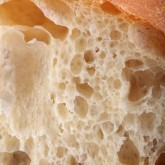
The baguettes are superb! The best I have had up till now. Crispy, light (22% baking ratio) and full of flavor. This way they have the perfect balance between crumb and holes.
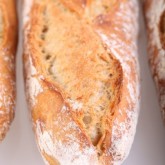
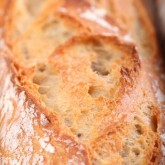
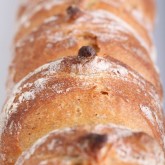
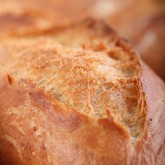
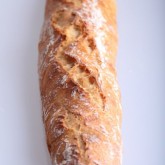
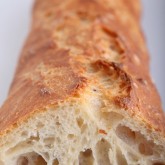
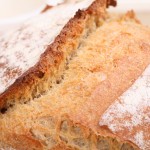
Also my scoring is getting more even and more aligned, so I am very very happy with the ears on my baguettes! I have practiced with a pen on a piece of paper. I drew a vertical line on the paper and then tried to ‘score’ the line. I practiced this about 20 to 30 times. I am using ‘bread pan oil spray’ to spray on my homemade lame. It is a dual-edge razor blade mounted on a wooden stick. With the oil and a swift stroke the scoring is ok. You only have to break the ‘skin’ on the baguette, not really cutting very deep. My cuts were only about 2-3mm deep. The oven spring made the scoring break open.
*******
Take 5
September 5 – Today I made some baguettes again to practice and it went great. I used 0.8% yeast in my poolish and I used 0.4% yeast in the final dough. I only kept the poolish about 1 hour on room temperature and I stored it for about 8 hours in the fridge. I wanted to see if I got a crumb which was in between 0.4 and 0.8 and if I could shorten the time in the room and in the fridge. I have watched some videos on youtube about shaping baguettes but all of videos use a dough with a lot less hydration and are not usable on your 80% dough but I got some ideas from it. I have made up my own shaping technique and it worked perfectly. All 4 baguettes are looking like baguettes and have a nice shape. One of baguettes hit the back of the oven and has a little bent but that is easy to do better next time. I also tried to score as good as I could and you almost have to score in a straight line, very funny. These are the nicest looking baguettes I have ever baked but….. I forgot to put in the salt…
0.8% yeast in poolish and 0.4% yeast in final dough;
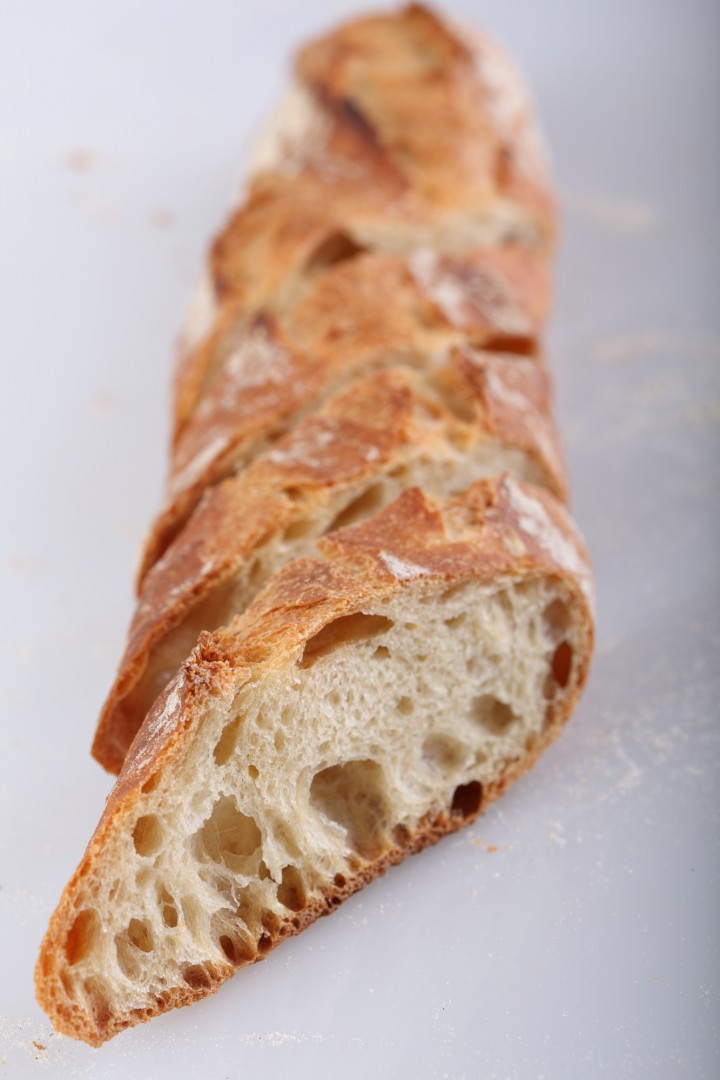
September 6 – The baguettes without the salt did crackle a lot. They did not feel very light, they felt like normal baguettes. The baking ratio was 21.2%. I have the Hamelman book, as I have a lot of bread books including the Calvel book.
Note: The percentages and times for poolish by Hamelman are for room temperature and for fresh yeast instead of active dry yeast (21 degrees Celsius). So you have to divide the percentages by 3!
Here is a link to a PDF of one chapter of the Hamelman book, it is located on the website of the publisher; it is the chapter about poolish dough;
*******
Take 4
September 3 – The poolish for the baguettes is now ready and in the refrigerator. I will give it a go tomorrow.
I gave a baguette to my work colleague and he loved it too. He is a bit of a bread snob and he goes on holiday to France also a lot, so he can be a good judge to my progress.
I did stretch and folds for 1 minute and 45 seconds the last time it tried during the first stage.
September 4 – I have tried the great recipe by Akiko again and I am getting better at it. The shaping went much better this time. Two out of four do now look like a kind of proper baguette and the other two are OK instead of a disaster.
With putting the first two baguettes in the oven I got so excited because they looked so good that I forgot to score the baguettes. I found out when I put the other two into the oven on the second stone. So I decided to score the first two while they where in the oven for 60 seconds and already had some oven spring. They have never looked better 😉
We just ate a baguette with some cream cheese and it was lovely. Marieke is also in love with the taste of the baguette. I have thanked Akiko, for her great recipe and hard work and great article on the fresh loaf.
*******
Take 3
august 31 – I tried again tonight and it worked out OK. My shaping skill is still not very good, especially with the 80% hydration dough, but it is getting better. The crumb is now very good, I used 0,4% yeast and I did about 2 minutes of slow folding at the first stage. At every further stage I did 4 folds, and I divided my dough after the bench rest.
September 1 – I measured the weight of my baguettes before and after baking it to establish the ratio of how much water the baguette lost.
A ( The baguette’s weight before baking ) – B( The baguette’s weight after baking) ÷ A x100 = Ratio
1380 gram before baking (calculated by adding up the ingredients)
1100 gram after baking
so the ratio is 20,28%
September 2 – I think the taste of the baguette is already amazing, the best baguette I have ever tasted, and I have been on holiday to France a lot! Most baguettes from bakers in France nowadays are very bad and taste, look and smell like cotton. They use intensive mixing and low hydration dough and very little preferment. However some bakers are going back to the ‘old’ traditional recipes and they are much better.
*******
Take 2
august 29 – I just started a poolish for 4 baguettes (it is 21:54 evening) with only 0,4% yeast (=1,5 gram) because it has to stay for 17 hours in the refrigerator during my daytime job until 17:00 tomorrow.
august 31 – I tried to make baguettes yesterday but I made a big error during the process and the dough was not strong enough during shaping. So I will try again tonight!
*******
Take 1
august 28 – I have tried the recipe of Akiko (Teketeke on the fresh loaf) (the first version without the helpful fold and shape pictures) and I had a lovely baguette. I use my Rofco hearth oven and linen couches to proof the baguettes. This is my third try with three different recipes and yours is the best of the three. The Hamelman recipe I tried before did not give me the right crumb.I will give it soon another try to perfect the handling and shaping of the 80% hydration dough. The dough looked like a sloppy disaster at first but after some time and a lot of stretch and folds it came together.
august 29 – I want to thank Akiko very much for all the updates to her recipe. I will give it a try this week as I want to perfect my baguettes like hers. While scoring I did not use any shortening or fat in the cuts, I just cut it at an angle and put it in the oven.













Isabel says
I shared your video on FB for someone to see who was ‘stuck’. I hope this is OK. If not, I’ll remove it promptly
Weekend Bakers says
No problem!
Jo Smith says
Flour Protein: What protein is your bread flour?
Weekend Bakers says
Hello Jo,
Depending on the batch a bit, but it is around 12.5%. It is also organic and stone ground.
Jo Smith says
This recipe is great, I just wish it had Baker’s percentages
Weekend Bakers says
Hello Jo,
It does have baker’s percentages. Below the ingredients list of most of our recipes you see a button that says ‘dough calculator’. If you click on that you will see the BP plus you will be able to also change the number of breads or the amount of flour to make more, smaller or larger breads. Also you can change the bakers percentages to adjust the ratio between the ingredients like the water or salt.
Hope you like it.
Happy baking,
Marieke
Rick says
What if instead of making a poolish, you make the entire dough all at once and refrigerate for three days before making the baguettes? The reason I ask is because only half the flour is in the poolish and the rest is added the same day they are baked. So almost half the flour has no time to interact with the yeast to yield complex flavors and texture.
Weekend Bakers says
Hello Rick,
We have a few remarks that you might want to keep in mind when executing your plan. Retarding the complete dough for three days could weaken the gluten too much for a proper baguette to be formed. You can try it of course and we must say we have never tried it and it could work, but you have to keep in mind that each recipe has a balance to it, trying to create an optimum with all the ingredients, time and technique, fit for the kind of bread you want to bake. And on baking day there still is time in this recipe for the dough to develop (4.5 hours).
We think the crumb structure and look will be different (more ‘opaque’ too).
But the best results are yielded with these experiments and if and when you try your method please let us know about the results! We also hope you will try our recipe so you will be able to compare.
Happy baguette baking!
Ed & Marieke
Miranti, The High Heel Gourmet says
Have you ever used starter to make baguette?
I’m trying my teacher’s recipe (Ciril Hitz from Bread Hitz the owner of the clip how to score the baguette) using poolish and Chad Robertson’s recipe from his Bread book, using poolish and starter. Both of them using less than 80% water. I’m developing an open crumb and not very happy with both recipes. I might try to add more water to my dough and will let you know my result. I want to make one that use purely sourdough starter with open crumb and not so crusty crust.
Weekend Bakers says
Hello Miranti,
Thanks for your comment. Other than adding some of our sourdough starter for extra flavor, we have not yet actually baked a sourdough baguette. We would like to hear more about your results of course.
Keep us posted and happy baguette baking!
Ed & Marieke
Mary says
So happy to have found your recipe for baguettes. I’ve become used to working with a wet dough for baking bread in a cast iron pot. However, I couldn’t get your recipe working to make the dough ‘stable’… not globby. Is it because I didn’t refrigerate first (left it out in room temp all night) or could it be that I used bread flour? I’m determined to master making baguettes and will certainly try again. Would appreciate any advice.
My first batch was edible: the crust was perfect but the crumb was still a little chewy.
Thanks
Mary
Wiarton, Ontario, Canada
Weekend Bakers says
Hello Mary,
I think not using the fridge could well be part of your problem (the amount of yeast is exactly right for slow development in the fridge, so yours will have gone somewhat over the top). We suggest that you stick to the recipe and try it one more time and see what comes out. Using bread flour is good for this recipe. For the record, the crumb in this type of baguette is mend to be slightly chewy, certainly not cotton wooly and light like you get with so many of the factory type baguettes over here. But of course it is also a personal preference, some people like light and airy, some like a heavier type bread. You can also play with this by adjusting the amount of water.
Hope this helps,
Happy baking!
Jan says
Hi Ed and Marieke,
I made your baguette today, it was not as good looking as yours but it was a good start and great to eat.
I think it was 90% of what it should be so I will keep on practising.
You have a fantastic website, I learn a lot from it.
Cheers,
Jan
Weekend Bakers says
Hi Jan,
Great to hear it went so well. The shaping is the tricky part really, and maybe practice will not make totally perfect, making the baguettes more often will certainly also make them look better. But no matter how they look, we think the taste is the main reason for making them. You will struggle finding anything that good and fresh in a store.
Thanks for your kind feedback and keep on baking and sharing!
Jan says
Thanks Ed,
With a bit af luck I will be able to make them next week.
I will keep you informed of the result.
Best Regards ,
Jan
Jan says
Hi Marieke,
I have a Rofco B10 and would like to try this baguette can you tell what temperature settings you use and when you open the damp key.
Thanks, Jan
Weekend Bakers says
Hi Jan,
These are the steps to bake in our B20;
– Heat up the oven to 230 degrees Celcius.
– When placing 2 baguettes on each stone turn back the Rofco to 50 degrees at about 10 and a half minutes when they are a bit colored.
– Open the damp keys at 15 minutes.
– The baguettes are ready at 24 minutes.
Enjoy the baking,
Ed
Marieke says
Hello Marilyn,
We talked about it together and we came up with a few suggestions. First if you are going to use the convection you have to take into account that the ‘perceived’ temperature for your bread will rise (provided you keep your thermostat at the same temperature of course) and you have a chance the loaf will get too dark (and at this stage ideally you don’t want the bread to color anymore, only to get a ‘full bake’ . We also have an oven probably like yours (a Siemens that we use for pastry) and these ovens generally are not so ‘air tight’ or in this case, ‘steam tight’, in other words, it’s harder to retain steam/ moisture in them, than to get it out, so our guess is the bread will benefit most from setting the oven door ajar for the last 5 minutes (provided your oven doesn’t turn itself off automatically when you open the door, like ours does) to let out the moisture that’s left at this stage. But of course you know your oven best so maybe it’s an idea to try both ways and compare the results.
Enjoy the baking,
Marieke & Ed
Marilyn Mason says
Thank you both for sharing all that you learned in this process. I’m going to try again. Mine will be different in that I have a Bosch oven with convection bake and regular baking options. I’m wondering which would be best. I’m thinking starting with the regular hot oven to retain some of the steam and then during the last 15 minutes switching to the convection to perhaps dry the crust. Any ideas are welcome.
Bill in UK says
Great stuff
It would be really helpful to have your current BEST version of the recipe so I can see how it fits together. I now have the Haussler Primus oven and am still learnign how to get the best out of it and have so far only had one go at Baguettes.
Thanks
Bill
Weekend Bakers says
Hi Bill,
You can find the recipe here: www.weekendbakery.com/posts…-baguette/
It is still the same as a while ago, the only thing that is changed is as you make it more often, you more and more get the hang of it. Little changes and adaptations are done when we get a new batch of flour or the weather gets warmer etc. The challenge is the dept of our little oven. We have decided to buy another slightly bigger oven (the Rofco 40, in which we can bake 9 to 12 loafs in one go and maybe 16 baguettes) and then there (again) will be room for improvement and longer baguettes. We want to congratulate you with your Haussler. That is super and if I go by our mixer, also an object of German craftsmanship and beauty. Would love to see some pictures if you have them…
Happy Baking!
Bill in UK says
Would happily send you some pictures though the oven does not look veryimpressive at the moment as it is on the floor in out hall waiting construction of the new kitchen. However it is wired in and producing bread. I found I couldn’t add picture to the comment or on contact me though.
Bill
Weekend Bakers says
Hi Bill,
You are right that no pictures can be added. I have send you an email.