

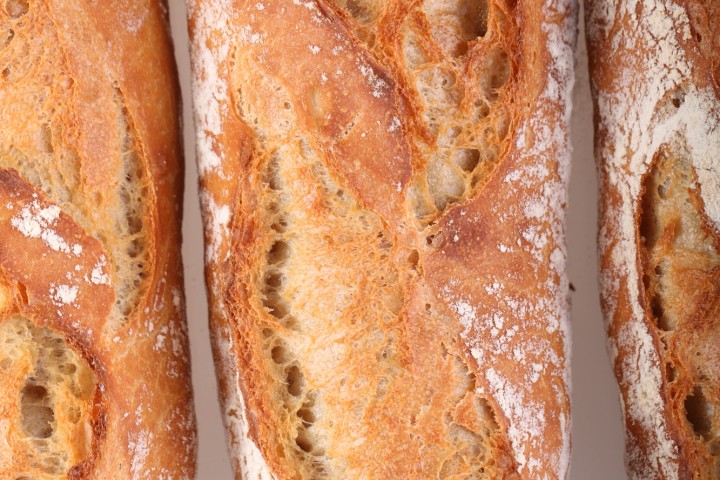
Even if the shaping is not perfect, this is the best baguette I have ever tasted!
I was very intrigued when I saw the baguette recipe that Akiko posted on the Fresh Loaf, both by her pictures of the baguettes and by the mentioning of the 80% hydration (Thank you Akiko, you are truly inventive and inspiring!). I liked it immediately and could not wait to try it. Several tries and tweakings further, with lots of sharing and baguette debating with Akiko, I can say from the heart that this recipe lives up to it’s expectations.
So give this recipe a try too and let me know what you think!
Do not forget to watch me take on the 80% baguette dough and see me stretch and fold on my video; Watch it here…
Take a look at our baguette log and follow our baguette baking progress and learn from our experiences and mistakes!
If you consider yourself a novice baguette baker our ‘easy’ baguette recipe might be a great place to start for you!
Before you start, you might also want to check our tips for bread scoring with confidence and handling wet dough.

Making the ‘Poolish’
Normally a poolish has equal parts of water and flour, however this time we make a poolish of 80% water which will give you a preferment resembling something between a biga and a poolish. So it is less wet and much less slurry than an actual poolish. In a bowl stir together 380 grams of bread flour with 304 grams of cold water and 3 grams of instant dry yeast. Mix it until you have a consistency that looks like very thick dough-like batter. Cover the bowl and leave for one hour at room temperature. After this hour at room temperature you put the poolish in the fridge for 10 to 17 hours. So if you want to begin your bread making in the morning, you can make your poolish the evening before.
| Ingredients for the Poolish | ||||
|---|---|---|---|---|
| 380 | g | wheat (bread) flour | ||
| 304 | g | water (room temperature) | ||
| 3 | g | instant yeast | ||
| Ingredients for the Baguettes | ||||
|---|---|---|---|---|
| 1 batch makes 4 baguettes (346 g each) | ||||
| the poolish from step 1 | ||||
| 380 | g | wheat (bread) flour | ||
| 304 | g | water | ||
| 12 | g | (sea) salt | ||
| 1.5 | g | instant yeast | ||
Making the Baguettes
The times given in this recipe work best if your room temperature is between 19ºC / 66ºF and 23ºC / 73ºF. If your room is colder, use room temperature water instead of cold water (straight from tap) in the final dough.
Please note: There is no real mixing or kneading in this recipe. It’s all stretch and fold!
Now on with the final baguette dough making: Take the poolish directly from the fridge and first add the 304 g of water to dilute it. Then add the other ingredients (flour, salt and yeast) and combine until you have a shaggy mass. Cover and leave to rest for 10 minutes. Now turn out the mass onto your working surface and stretch and fold for 2 minutes. Keep on at it because it doesn’t look like it’s going anywhere but it will be OK. Put the dough in a greased bowl, cover and leave to rest for 45 minutes.
Stretch and fold a second time, doing two sets ( letter fold: right over left, left over right, bottom over top, top over bottom, repeat)
But back in your bowl, cover and again leave for 45 minutes.


Repeat the above stage another 3 times, but now each time doing only one set of stretch and fold.
Every stretch and fold is followed by a 45 minutes rest in a covered bowl except for the last one. After the last stretch and fold you leave the dough covered with some clingfilm (now looking nice and plump) on your bench for only a 10 minute rest (bench rest).
Preheat your oven to 240ºC / 465ºF (at what stage you preheat your oven depends on how long it takes for your oven to heat through, some take 30 minutes, some, like ours, with stone floors take a lot longer, up to two hours.)
Now divide the dough into 4 equal parts. You are going to pre-shape the dough parts one by one by carefully stretching the corners making a rectangle of each of the 4 pieces and rolling them up. Try to make your rectangle and roll as even as possible without fussing too much with the dough. Use enough flour to handle the dough, but try to keep it to a minimum because you don’t want too much extra flour in the carefully build up 80% hydration dough. Cover and leave to rest for 15 minutes.


Take a roll of dough (which has flattened a little bit during the bench rest) and gently shape it into a baguette shape. My way of shaping this high hydration dough is to sprinkle it with a little flour and press it softly down into a rectangle with a short and a long side. The more even the rectangle the nicer the baguette will look in the end. With a plastic dough scraper you flip 1/3 of the long side onto itself and tuck it in to get some tension on the outside of the dough, now repeat it two more times until you have a roll shape. Make a rolling motion with your cupped hands from the center to the side with a soft touch to make the baguette a bit longer and to make nice pointy ends on both sides of the baguette. Practice makes perfect, do not be hard on yourself, it is not an easy job with a dough as sticky as this.
 Place the baguettes in a couche made of proofing linen or in a baguette pan, or something of your own invention, but make sure the baguettes have enough side support to hold their shape. Cover them and leave to proof for 25 minutes.
To check if the baguettes are ready, dip your finger in some flour and gently poke in your dough.
If the hole disappears completely: under-proofed
If the hole dent pops half way back out: proofing is just right
If the hole stays entirely dented in: over-proofed
Score the top of the baguettes with a lame/bread scoring tool. Cut as straight along the long axis of the loaf as possible. Mentally divide the baguette into lengthwise thirds, and keep the cuts within the middle third. You can practice the scoring on a piece of paper or a kitchen paper roll first. Overlap the cuts by about one third of their length,while holding the knife at a 30 degree angle. Also check out this very useful video on proper baguette scoring.
Bake in the preheated oven for 25 minutes. Leave to cool on a wire rack.
To get a nice crust, try to create some steam in your oven by putting a small metal baking tray on your oven floor when you preheat the oven and pouring a half cup of hot water immediately after putting the bread in the oven. Release some steam by setting your oven door ajar (perhaps with the help of a wooden spoon or oven mitt) 5 minutes before the bread is ready. If you are going to create steam with a baking tray, you maybe also want to turn your oven temperature a bit higher, because you are going to lose some heat in the process.
Baguette Time Table
Day 1
Make ‘poolish’
Day 2
Mix ingredients until shaggy mass
00:00- 10 minutes rest
00:10 – 2 minutes stretch and fold
45 minute rest
00:57 – 2 letter folds
45 minute rest
01:42 – 1 letter fold
45 minute rest
02:27 – 1 letter fold
45 minute rest
03:12 – 1 letter fold + bench rest
03:22 – divide + pre-shape
03:37 – shape + proof
04:02 – into the oven
04:27 – take out and leave to cool
PS: If you are interested in linen couches / proofing cloths like we use ourselves, you can find them in our WKB webshop.


Saad says
Hi, thank you for the great recipe. Just a question about the poolish. The directions are to place the poolish in the fridge after an hour being left in room temp. I noticed that after 1 hour, it’s no where near looking like a mature classic poolish. Is the idea to kickstart fermentation in room temp and then allow it to mature in the fridge?
Weekend Bakers says
Hello Saad,
You are exactly right, it is not ready but it gets a kick start and after that is allowed to develop at a slower pace in the fridge overnight!
Kelly says
Dear chefs
I will be attempting your 80% hydration recipe today! I have some questions regarding poolish and baguette making in general and I hope you can help me out!!
I was comparing the 75% hydration baguette recipe to this and the yeast amount use in this recipe is significantly higher, why is that so?
Also this recipe does not follows the general guideline for the amount of yeast used in poolish making that I read in your post (tips for poolish and biga). Is the bigger % of yeast in the poolish helping with something?
Some other recipes I read online do not add additional yeast to the final dough but only to the poolish. Which I am confused about because wouldn’t there be not enough yeast for the whole recipe?
Lastly!! How would the texture differs between a 75% hydration dough vs a 80% hydration dough besides the larger holes?
Thanks chefs!!
Weekend Bakers says
Hi Kelly,
When you compare the recipes you will see that the method is different and the 80% version uses the poolish directly from the fridge. And yes the bigger % yeast in this recipe is helping the development of the colder dough. It is just a different method allowing different development of flavors through time and temperature.
All methods are valid which lead to bread, you can add yeast to the final dough in a recipe or not, it is just a sum total of factors (the amounts, times and temperatures) that need to come together in a certain way to get a good end result.
Like we say in the 75% recipe:
If you were to compare the two recipes you could say the easy version has a little less depth of flavor and the holes in the crumb are less impressive, but it is also less laborious and less sticky (saves you 2 hours on baking day). The flavors are actually very much comparable and eaten in combination with other foods like cheese it will be hard to notice much difference in taste.
If you are not that used to wet doughs we would always recommend starting with the 75% version first.
Happy baguette baking!
Allan Stokes says
Ed & Marieke,
I see you’ve specified “cold water” for the poolish, but you haven’t given a desired post-mix temperature. I normally aim for about 75°F post mix, unless I read otherwise.
Today I drew 74°C water from my “cold” tap. My room was a bit warm, so I ended up with 77°F poolish. I decreased the room-temperature rise by 10 minutes, but it still looks pretty vigorous in the fridge just a few hours later. Was that too warm?
I made my first baguettes _ever_ earlier this week using a 74% hydration recipe from John Kirkwood. They came out fabulous. Perfect interior. (I was surprised.) To be a bit picky: not enough crust formation. (Turns out I overdid the water for the steam.)
As good as they were, I wanted a slightly more developed flavour, so now I’m trying your overnight recipe.
I had little trouble with the hydration in my first effort because I’ve been making a lot of pizza dough in the 68% range … and now I’m feeling brave enough to try 80% … famous last words. Today I even cut up some blueprint tubes and then taped them all over with transparent duct tape to make four nicely-ribbed baguette trays that are somewhat kitchen-mess resistant (I figure 80% is going to need all the support it can get).
Now I’m mostly all set. Would be nice, though, to have a specific post-mix temperature for the finished poolish.
Thanks for the great resource.
Weekend Bakers says
Hello Allan,
It also depends on the fridge temp of course. If you judge it too vigorous we would suggest adapting it to the 74 to 75°F temp because we think is better to use the poolish even slightly under-ripe than over-ripe. You already did good adjusting to your room temperature. Normally it just needs a few turns to get it exactly right for your conditions, because as we said, the fridge temp and even place in the fridge can also make a difference.
Good luck with it!
Emma A says
Thank you for a great recipe and tutorial! I had heard of the stretch and fold method, but hadn’t tried it. I was thinking it was going to be a difficult recipe, but I actually found it pretty easy – easier to work with a wet dough this way than in a mixer, actually. Made a beautiful soft dough, the loaves rose well, and I had the best crust I’ve had on a baguette. This is now my go-to recipe. Yes, it takes a while, but it’s mostly hands-off.
I’m in the US, and used King Arthur organic all-purpose flour. I also used baguette pans instead of proofing in a cloche. I misread the directions, and did 45 minutes for the initial rise instead of 10. Still worked.
Weekend Bakers says
Hello Emma,
Great to read your feedback. Glad it turned out so well, and you already made the recipe your own.
Wishing you many more fresh, crusty baguettes!
Ed & Marieke
Weekend Bakers
Simon Tye says
Hi,
I’ve followed the instructions as laid out but the dough is very very liquid at the end. Should I fold more next time during the process? What could I have done to firm it up a little so that it has more the consistency in your video? At the moment it is more like the consistency of a cheese fondue
Weekend Bakers says
Hello Simon,
Yes a good idea to start with a little less hydration to handle the dough better and get used to it. Take a look at your flour and make sure it has enough protein too (around 12 % is around the same as we use). Keep in mind that each flour is different and it could well be that your flour needed a bit less water to begin with. And you can always ad some more S&F if you feel the dough needs it.
Good luck with it!
Bart says
Hi there!
Trying to get the hang of this recipe, and working with the sticky dough, but oefening baart kunst 😉
One question I have though.
I find it a bit of a shame to work on the baguettes during day time, finish them off in the evening, and then dealing with not so fresh bread anymore during breakfast in the morning.
What would be the best way to deal with this? Putting the pre-shaped dough parts in the fridge over night, then shape and bake in the morning? Or par-bake the baguettes at a lower temperature in the evening, and finish off at high temp in the morning?
Many thanks.
Weekend Bakers says
Hi Bart,
Sounds like you are having fun with the sticky and are on your way to handling it better and better.
As for your question, we do not have the winning answer with exact times. Plus you very probably need to reduce the amount of yeast for the fridge method to avoid over-proofing.
We have never tried the par-bake method, but of course it could work.
Hope you can give both methods a try and see what works best for you and maybe let us know so we can profit from your experience.
Enjoy the (par)baking!
Charles B says
I found that putting the cold (day-old) loaf in a 400 deg oven for 10 min or so will not only warm it but will re-crisp the crust. Just keep and eye on it and feel the crust after 5. Squeeze it to feel the crispness and/or to hear that tell-tale cracky sound. The cold bread also toasts to perfection – either in a toaster or in a skillet.
Alejandra ( alex) says
Love your way of explaining things it will be my first time trying this type of bread making. I always used the easy way. You know proofing yeast for 10 min or so then knead till dough says no more. Love this way. But I found out about the really hydrated doughs and I was gotta try it. Been doing some research and you got me. I am yours. Lol well not that way. I mean like a fan and a follower. Lol Not a pro baker learning as I go. Thanks for your help.
Weekend Bakers says
Hi Alex,
Thank you for your lovely words. Let us know about your results.
And you might want to check out the tips we refer to in this posting too.
Best of luck with it and happy high hydration baking!
Ed & Marieke
Fong says
What a great recipe ! The dough was indeed very wet, I did the stretch and fold as required but couldn’t really shape it, so I just shaped the 2 loaves into oval. I did the spraying 3 times within 10 minutes, and took the bread out after 30 mins from the oven as it was quite dark and when I tapped on it, it had the hollow sound. The crust was amazing and the crumb was holey!!! I love it ! I’m giving some to my family and friend. Thanks for the great recipe! And will shape it into long log the next time !
Fong says
Oops Actually this comment was for Baguette Boules 😄
Weekend Bakers says
Hi Fong,
Just glad you liked the boules! The shaping bit will get better too as you get used to the wet dough more and more. You can always adapt the hydration level just a bit and make it a few % less wet to get used to it and work your way up again.
We also have some tips to aid you with the handling:
www.weekendbakery.com/posts…ion-dough/
You can also lower your oven temp as soon as you like to crust colour (say after 15 to 20 minutes) and bake the remaining time at 185C for instance. The bread will still be cooked but the crust will not darken very much more after the tempering.
Enjoy the baking!
Christina says
Hi!
Could I use my stand mixer with this recipe?
Thanks,
Christina
Weekend Bakers says
Hi Christina,
Yes, you could but then it would not be the same recipe with the same result.
If you want to use the mixer we recommend using our other baguette recipe:
www.weekendbakery.com/posts…te-recipe/
But for the purpose of texture and taste, do not omit the stretching and folding in this recipe and also stick to the time schedule.
Hope you enjoy the baguette baking!
Ed & Marieke
Ginger Dave says
Hello, total beginner here (just curious at the moment, not attempting a loaf like this for a while!) If the total water is 608g and the total flour is 760g, why is the hydration not 608/1368= 44% ?
Weekend Bakers says
Hi Ginger Dave,
Someone at some point has decided that when it comes to bread baking calculations you always start with the flour as being 100% and the other ingredients are calculated as a percentage of that. In this case 608 is 80% of 760.
Also check out our posting on how baking percentages work:
www.weekendbakery.com/posts…mystified/
Brian says
Any chance we could convert this to a “sourdough only” recipe?
Weekend Bakers says
Hello Brian,
We have never tried this with this recipe, because we are sourdough fans, but not especially when it comes to baguettes and croissants and that sort of French classics. Of course it is possible to convert a recipe, but it will take some tweaking and much longer proofing times of course. Making the poolish into a sourdough version is the easiest part, but after that you would also have to adjust the resting and proofing times of course. Because of our own lack of experience with this for this recipe, we would rather suggest to start with a recipe that is already a sourdough baguette recipe.
Happy baking
Sam chef says
Very fantastic Mr chef good job similar to my recipe bt something else I learn from you
Keep it up
Weekend Bakers says
Thank you very much and we never stop learning and improving!
Paul says
Thanks for this recipe. I am an amateur for sure, but I love to cook. I have been trying to bake good New Orleans style Po-Boy bread forever with no luck. I recently went to Paris and while there took a fun baguette class ( I recommend La Cuisine Paris). Although it was not reasonable to assume we could bake a great loaf in a 3 hour class, we did pretty well. Anyway, when I got home I tried the recipe from Paris. It worked out but, then I ran across your recipe and WHOA it is the real deal. I have baked it a dozen times by now and it is simply the best baguettes ever. Now I need to work on po-boy bread.
Weekend Bakers says
Thank you Paul, that is excellent! We would be very interested to hear from you if and when you crack the po-boy code!
Happy baking weekend,
Ed & Marieke
Ali says
Wow, it ‘just works’!
I think this recipe must get all the fundamentals right, because it’s very forgiving (I found).
For instance:
– I used generic “high grade” flour (a quasi standard in NZ), protein content only 11.5%
– I forgot(!) the salt in the final dough; noticed the problem only after the second 45 min rest (folds were having no effect); I stretched well and sprinkled the salt over the available area.
– I found a little pocket of dried yeast which I’d somehow failed to moisten (resisted the temptation to knead the dough to incorporate it – see next misstep)
– I got ‘interrupted’ badly and had to park it all in the refrigerator for about 30 hours (which probably gave the salt and desiccated yeast time to incorporate themselves)
– I have only a domestic gas oven with a huge temperature gradient (hot at the top cooler at the bottom
The last problem I overcome with a 20mm thick stone slab which I heat as hot as I can get it over the gas flames on the hob (this is perfect because it serves as an oven tray – it’s super easy to transfer the proven, scored baguettes onto the stone on the stove top and then just put it in the oven).
I’m no longer in search of ‘the perfect’ baguette recipe for my setup; all I need is right here – thank you!
Ali
Weekend Bakers says
Hello Ali,
Really enjoyed reading your comment. A bit of luck and a lot of inventiveness and yes, the 30 hours fridge time probably helped too.
So glad you got good results and hope next time with less challenges it will be even better!
Happy baguette baking and a great weekend!
Ed & Marieke
Ali Cameron says
Hi again Ed and Marieke
Thanks so much for replying – you must be some of the friendliest web masters around!
Further progress: I’ve successfully adapted the recipe to use my sourdough starter (at least we call it that but I don’t know if that’s accurate; 100% hydration, fed with white flour weekly and lives in the fridge; really a wild yeast levain?)
I think the high hydration of this starter reduces its sourness, so the resulting flavour and crumb are almost indiscernible from the those with commercial dried yeast.
I read in another of your comments that you guys don’t like the sourdough flavour in your baguette, and I’m with you on that one; I’ve had some artisan sourdough ‘baguette’ that was quite unpleasantly sour and also had the sourdough crumb with its kind of heavy/stodgy/tough quality. I don’t think that’s baguette in anything more than shape.
I will try and get some ok photos to post here next time I do it (though I’m still a little self conscious over my shaping and scoring skills!)..
Thanks again for your wonderful website :o]
Cheers
Ali
Weekend Bakers says
Thanks very much Ali, we totally agree with your comment and about what’s wild and what not you could probably write a book.
We do have some tips and pointers for sourdough bakers that you might find interesting (provided you haven’t seen them yet) www.weekendbakery.com/posts…ough-tips/
If you want to share some pics on our website (always love to see results of crust and crumb!) you can do so here: www.weekendbakery.com/send-…your-loaf/
Greetings from Holland,
Ed & Marieke
Seb says
Hi, love your site!!
Tartine say use their baguette dough for English muffins but I prefer your baguettes – would this work well for English muffins done in a pan?
Thanks so much!
Seb
Weekend Bakers says
Hello Seb, and thank you,
We really and truly would not know the answer to your question. Hope you want to give it a try and let us know!?
Nel Bringsjord says
Hi Seb,
I have made these baguettes and do think you could use the recipe for English muffins. In fact, I am making the bread today and will try the dough in a few muffin rings. Great idea!
Nel
Nel Bringsjord says
Hi Seb,
Great idea! I made the baguettes today and set aside some dough for English muffins. It works GREAT! Perfect!
When you get to pre shape, use your bench scraper to cut pieces the size of a Clementine tangerine. Let rest
Flatten to shape using cornmeal on both sides to keep from sticking and let proof.
Bake on top of stove in a cast iron pan, slightly greased. I used lard, it gave it a smoky flavor.
I’m going to make a batch of this dough for English muffins tomorrow.
Nel
Weekend Bakers says
Hello Nel,
Thank you so much for trying and sharing. Great to know!
Lozz says
Please can I ask what percentage protein in your bread flour? I have french flour at 9.5%, English at about 11% and Canadian at about 14% (not exactly since the packets aren’t in fromt of me).
For your excellent results what did you use? You would imagine that the French T55 would be the prefect choice
Weekend Bakers says
Hello Lozz,
The bread flour we use for this recipe has a protein content of around 12.5%. The French flour would be a good choice if it had a protein content of 11% or more. You could also use a combination of flours to get to the right percentage. You just need to give it a few turns to find out the results with different flours and/or combinations and see which ones you like best.
Happy baguette baking!
Robert says
Im having an issue with the dough being so wet and sticky after the stretch and fold process that it wont form well. I mean its visibly wet. Not smooth enough at all. Maybe less water or more flour next time? Any thoughts? I use a type 1 bread flour here in Brazil.
Robert says
Imagine a piece of spaghetti.
Weekend Bakers says
Hi Robert,
That sounds interesting. The dough is supposed to be very wet and it is a challenge to handle, but you can judge from the video if yours is really too wet:
www.weekendbakery.com/posts…tte-movie/
Could be your flour absorbs less water and so it would be best to lower the hydration to around 75% to start with. It is also very important to stick to the extensive stretch and fold regime to build up the dough (and depending on the strength of your flour, the protein content is important, at least 12%).
Good luck with it!
Mandy says
Hi, you mentioned that the time given in this recipe is best for room temperature between 19 to 23 degree Celsius. Im living in Singapore and my kitchen room temperature is around 30degree Celsius. What shall I take note if I wanted to use this recipe?Please advice
Thanks
Weekend Bakers says
Hi Mandy,
There are several things you can do. You need to make sure that the dough develops at the right temperature (this way the times given in the recipe will be pretty accurate). So a thermometer to measure your dough would be a good investment. You can then play with the temperature of the water you add, even take water that has been in the freezer if necessary. You can also make sure your other ingredients like the flour are cold before you use them by storing them in the fridge for a while. Another route you can take is to use less yeast in both the poolish and final dough, to slow the process down. It takes a bit of experimenting to know what quantities work best in your situation. You can also shorten the fermenting and proofing times. We would suggest using less yeast (start by using 2/3 of the amounts given) and keep an eye on the dough when proofing so it will not over-proof. If possible use a cooler spot in the house for the fermenting and proofing or use the fridge to slow down the process.
Good luck with it!
uyen says
Can I add black sesame seeds and black sesame paste into the dough?
Weekend Bakers says
Hello Uyen,
The sesame seeds are no problem, the paste is not something we have tried ourselves, but we think it will be no problem to add it too. Let us know how it turns out!
Guy says
Hi!
I would like to replace the 3g of instant yeast for the poolish with some of my (whole wheat) sourdough starter. How many grams of sourdough starter should I use instead of the instant yeast?
I really appreciate your website and your passion for baking!
Kind regards,
Guy
Brian says
Hi, Im having difficulties with the measurements on this one. Can you tell me what the amount of water is in mls for this recipe please? I cant really work out the water in grammes on my weighing scale
Thanks Brian
Weekend Bakers says
Hello Brian,
The beauty of water is that 304 grams of water is also 304 mls of water, so they are (virtually) the same. Only weighing is more exact than measuring and gives you more accuracy and therefor consistency in your baking results.
Brian says
Thank you
Xan says
Yes but how do you transfer from the proofing linen into the oven tray without upsetting the dough
Weekend Bakers says
Hello Xan,
If you watch the video you can see how we transfer the baguettes from the linen couche to the peel with another small baguette peel. See: www.weekendbakery.com/posts…tte-movie/ If you are a bit DIY handy you can make something like it yourself.
Charles B says
You can make a simple peel by cutting out a large rectangle (like 24″ x 7″) from very thick cardboard (like from a box used for shipping electronic equipment or a large appliance). I have 4-5 such in my pantry bound with a rubber band. I pull one out when needed. Hold the edge of the peel at a 30-45 degree angle to one side of the loaf and pull up on the opposite side of the couche to roll the loaf onto the peel.
Weekend Bakers says
Thanks for this addition Charles, this will be very useful for a lot of bakers!
Robert Smythe says
Quick question, as I just came back from Paris and many, many baguettes: what type/number of flour do you use?
Weekend Bakers says
Hi Robert,
We use a Dutch wheat flour with a protein content of around 12.5% for this recipe. Maybe a French type 65 would come closets to it. A combination of type 55 and 65 would also work. Also see our piece on flour types here: www.weekendbakery.com/posts…our-types/
Layla says
Everything went beautifully but the baguette dough is really wet when scoring, so it’s hard to score, even with a brand new razor blade. ;(
Jenna says
I feel so annoying, I’m sorry for all these questions – thank you for responding. The baguettes taste delicious, and the crumb is absolutely beautiful.
Two questions: the dough when rolling the baguettes seems to have a lot of air bubbles which makes me think that’s what gives them that great open crumb? The air bubbles are normal right? I can feel them popping as I roll!
And, for some reason my scoring isn’t showing as well in this recipe. I tried again, cutting deeper but not a huge difference, but a bit better. The baguettes are also very bulky, could this be from not proofing long enough? I weigh my baguettes to 1 lb 2 ounces. I also try and roll them as thin as possible, but they seem to get bulky either way. I swear I’m following the directions to a T! Maybe I’m using too much dough? Here is a photo of them: imgur.com/JKC1gSW
imgur.com/mCH8TWN
Weekend Bakers says
Hi Jenna,
Yes, air bubbles are certainly not a problem. Funny thing is that in the US it is considered a sign of great artisan bread while in France it is traditionally considered a defect. When you retard / proof in the fridge you have a big chance of seeing tiny bubbles al over your bread. As for the shaping and bulkiness of your baguettes, we do not know what length you reach that fits in your oven, but you should maybe consider using less dough per baguette and make them even thinner. You should also try and add (more) steam if possible (also to allow the dough to expand during the first stages of baking). On the subject of scoring: Next to the depth the angle at which you score is also very important and it takes a bit of extra practice with this recipe because of the very wet dough of course. More tips on this subject here: www.weekendbakery.com/posts…onfidence/
Good luck with it!
Jenna says
They turned out beautifully. I wonder – if I shaped these into loaves and let them proof a bit longer on the last rise, would that work? Would I have delicious white bread?
Weekend Bakers says
Yes, that is actually almost what we did with this recipe: The Baguette Boules
www.weekendbakery.com/posts…he-recipe/ (just a little less hydration).
Happy baguette (boules) baking!
Jenna says
All I have is white bread flour – will this work?
Weekend Bakers says
Yes certainly, that is no problem!
Steve says
I have a near perfect recipe for homemade no knead baguette of relatively fair hydration. It is very simple. The finished product is superb. Requires little skill and only flax linen and a good lame or razor blade. I would be happy to share this recipe with anyone willing to try it out
Steve says
I also have variations that produce both a crusty hard exterior and softer more sandwich style exterior as well as ratios and recipes for utilizing sourdough starter instead of dried yeast and how to create your own wild yeast leavin for this recipe.
Lieven De Bruyn says
Hoy Ed & Marieke,
Alles goed met jullie?
Tried this superbe recipe today, and although my scoring skills leave a lot to desire, the taste, crunch, and lightness of the resulting baguettes make a man beat his chest and declare; ” kneel for me, you peasants, for it is I who made this, I am the devine creator! ” 😁 😉 Just one tiny little question; do I understand correctly that it is best to let this dough proove and rest at 19 to 23 ° C ( that’s what I did this time )? The bigger loafs I usualy proove in a homemade contraption with high humidity and at about 29 ° C but I thought to understand that this is not right for this recipe? Maybe not for any? ? I must say that the high hydration of this dough caused far less problems than I expected, maybe I’m just getting used to sticky dough! ? I followed Richard Bertinet’s recepies before and, as you propably know, sticky is his middle name. . . Looking forward to your guidance! Thank you guys for everything! Grtz, Lieven.
Weekend Bakers says
Hi Lieven,
Yes, that is correct, times and temperatures match that way for this recipe. It can differ per recipe, but you don’t want it to go too quickly because of the development optimum for the dough. 29 is also valid and will work but it will give a different result.
It could be interesting to try both and see which one you like best.
+You really have a way with words too. You are a writer and a baker!
kojak says
Where has this site been all my life? Very well done. Great graphics, easy to navigate, and excellent guidance.
Regarding the 80% hydration baguette, I was wondering how much flour did you use on the bench prior to the French folds? What ever the amount, was it included in the total flour used when calculating the hydration?
Fred says
I would to complement you for this great website. Your bread is amazing. The poolish is the place to put the secret ingredient for flavor. So much fun so little time 🙂
thank you
Fred in Stonewall
Weekend Bakers says
Thank you Fred. Any secret ingredient you would like to share?!
Arwa says
I made this fantastic recipe today, and was marvelous. I have tried some baguette recipes before but this one stands out. The recipe is straightforward and the out come is fabulous. Beautiful and tasty crust and soft, airy and open crumb. Thank you for sharing that. Defiantly will try your other recipes.
Weekend Bakers says
Thank you so much Arwa! Much appreciated.
Happy baking!
ichiro says
Hi,
Do you use pure T65 french flour for your baguette?
Best of regards,
Ichiro.
Weekend Bakers says
Hello Ichiro,
We do not use type 65 French flour but something that would be very close to it. We use a stone milled organic wheat (bread) flour with a protein content of around 12.5% grown in our own country (Holland). The same we used for the baguettes you see in the pictures.
Diego says
How would you adapt this recipe if one wanted to replace the dried yeast with sourdough (levain)?
Weekend Bakers says
Hi Diego,
It is indeed possible. You need about 15 to 20 grams of sourdough in the poolish. But you really have to adapt the times, because it will take much longer. We think the sourdough version gives a very different taste profile, one we ourselves do not really prefer for a baguette. That is why we never make a sourdough baguette, but rather other sourdough loaves and boules. To start with you would at least need to double the times given and take it from there to adapt this recipe to a sourdough version. Please let us know your results, because we are always curious to learn more from other bakers.
Greetings,
Ed & Marieke
Eva Arnold says
Hi,
Just would like to thank you for all the recipes on your website. This is the third which I tried with great success ( Tartine style, focaccia) , and the best baguette what I ever made. The only thing I am not happy with is my scoring but hopefully time and practice will solve this problem:))
Thank you again, Eva
Weekend Bakers says
Hello Eva,
Thank you for letting us know. Wonderful to hear several of our recipes are working out for you too. Have you seen our tips on scoring with confidence? www.weekendbakery.com/posts…onfidence/ Maybe they could be useful, but the best tip would still be practice and practice some more.
Happy baking and scoring!
Ed & Marieke