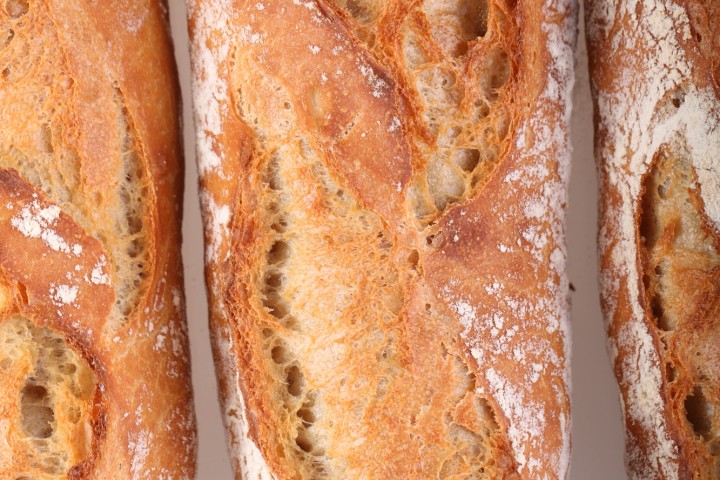
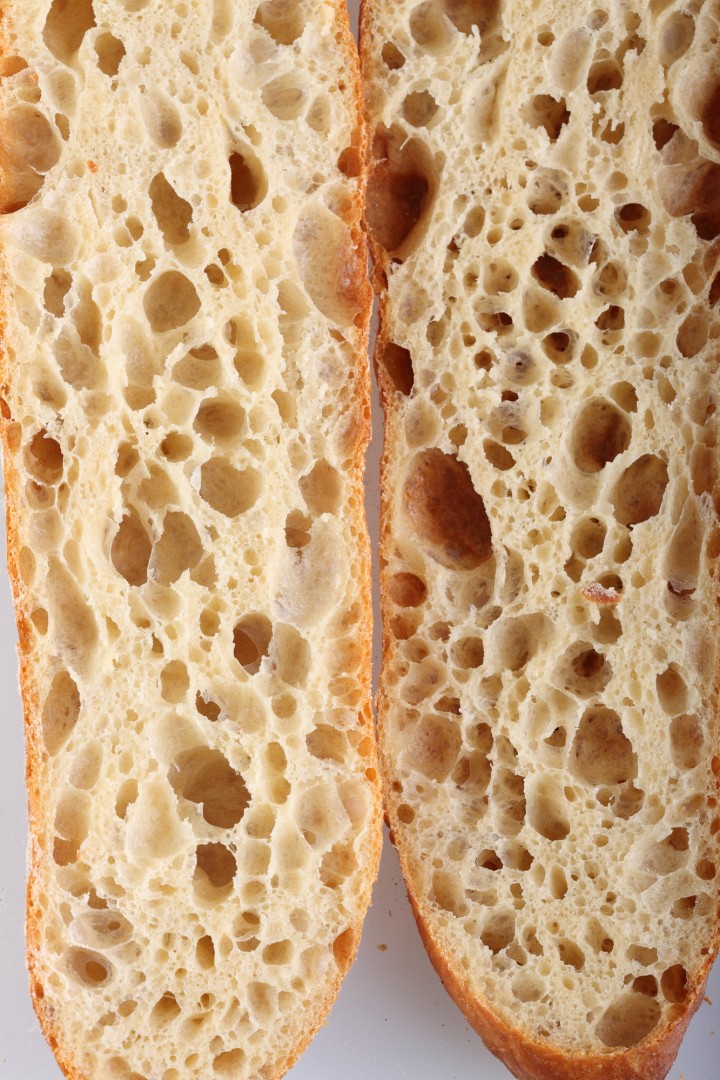
Even if the shaping is not perfect, this is the best baguette I have ever tasted!
I was very intrigued when I saw the baguette recipe that Akiko posted on the Fresh Loaf, both by her pictures of the baguettes and by the mentioning of the 80% hydration (Thank you Akiko, you are truly inventive and inspiring!). I liked it immediately and could not wait to try it. Several tries and tweakings further, with lots of sharing and baguette debating with Akiko, I can say from the heart that this recipe lives up to it’s expectations.
So give this recipe a try too and let me know what you think!
Do not forget to watch me take on the 80% baguette dough and see me stretch and fold on my video; Watch it here…
Take a look at our baguette log and follow our baguette baking progress and learn from our experiences and mistakes!
If you consider yourself a novice baguette baker our ‘easy’ baguette recipe might be a great place to start for you!
Before you start, you might also want to check our tips for bread scoring with confidence and handling wet dough.
Making the ‘Poolish’
Normally a poolish has equal parts of water and flour, however this time we make a poolish of 80% water which will give you a preferment resembling something between a biga and a poolish. So it is less wet and much less slurry than an actual poolish. In a bowl stir together 380 grams of bread flour with 304 grams of cold water and 3 grams of instant dry yeast. Mix it until you have a consistency that looks like very thick dough-like batter. Cover the bowl and leave for one hour at room temperature. After this hour at room temperature you put the poolish in the fridge for 10 to 17 hours. So if you want to begin your bread making in the morning, you can make your poolish the evening before.
| Ingredients for the Poolish | ||||
|---|---|---|---|---|
| 380 | g | wheat (bread) flour | ||
| 304 | g | water (room temperature) | ||
| 3 | g | instant yeast | ||
| Ingredients for the Baguettes | ||||
|---|---|---|---|---|
| 1 batch makes 4 baguettes (346 g each) | ||||
| the poolish from step 1 | ||||
| 380 | g | wheat (bread) flour | ||
| 304 | g | water | ||
| 12 | g | (sea) salt | ||
| 1.5 | g | instant yeast | ||
Making the Baguettes
The times given in this recipe work best if your room temperature is between 19ºC / 66ºF and 23ºC / 73ºF. If your room is colder, use room temperature water instead of cold water (straight from tap) in the final dough.
Please note: There is no real mixing or kneading in this recipe. It’s all stretch and fold!
Now on with the final baguette dough making: Take the poolish directly from the fridge and first add the 304 g of water to dilute it. Then add the other ingredients (flour, salt and yeast) and combine until you have a shaggy mass. Cover and leave to rest for 10 minutes. Now turn out the mass onto your working surface and stretch and fold for 2 minutes. Keep on at it because it doesn’t look like it’s going anywhere but it will be OK. Put the dough in a greased bowl, cover and leave to rest for 45 minutes.
Stretch and fold a second time, doing two sets ( letter fold: right over left, left over right, bottom over top, top over bottom, repeat)
But back in your bowl, cover and again leave for 45 minutes.
Repeat the above stage another 3 times, but now each time doing only one set of stretch and fold.
Every stretch and fold is followed by a 45 minutes rest in a covered bowl except for the last one. After the last stretch and fold you leave the dough covered with some clingfilm (now looking nice and plump) on your bench for only a 10 minute rest (bench rest).
Preheat your oven to 240ºC / 465ºF (at what stage you preheat your oven depends on how long it takes for your oven to heat through, some take 30 minutes, some, like ours, with stone floors take a lot longer, up to two hours.)
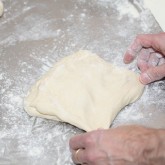
Now divide the dough into 4 equal parts. You are going to pre-shape the dough parts one by one by carefully stretching the corners making a rectangle of each of the 4 pieces and rolling them up. Try to make your rectangle and roll as even as possible without fussing too much with the dough. Use enough flour to handle the dough, but try to keep it to a minimum because you don’t want too much extra flour in the carefully build up 80% hydration dough. Cover and leave to rest for 15 minutes.
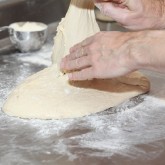
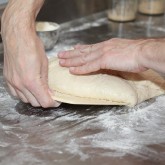
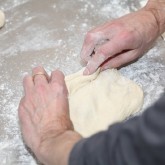
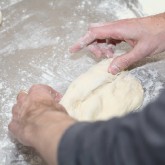
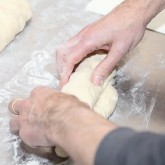
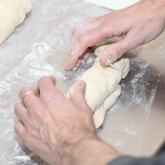
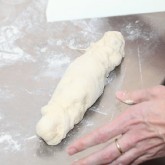
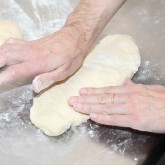
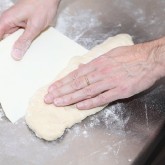
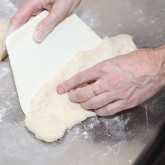
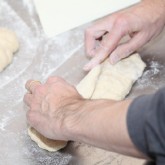
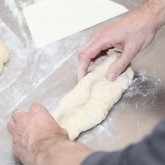
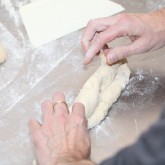
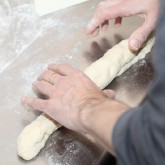
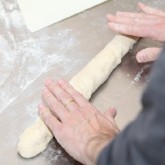
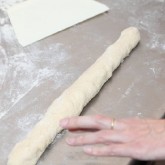
Take a roll of dough (which has flattened a little bit during the bench rest) and gently shape it into a baguette shape. My way of shaping this high hydration dough is to sprinkle it with a little flour and press it softly down into a rectangle with a short and a long side. The more even the rectangle the nicer the baguette will look in the end. With a plastic dough scraper you flip 1/3 of the long side onto itself and tuck it in to get some tension on the outside of the dough, now repeat it two more times until you have a roll shape. Make a rolling motion with your cupped hands from the center to the side with a soft touch to make the baguette a bit longer and to make nice pointy ends on both sides of the baguette. Practice makes perfect, do not be hard on yourself, it is not an easy job with a dough as sticky as this.
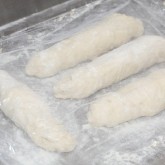
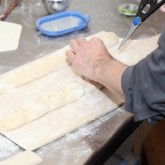
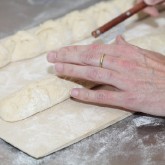
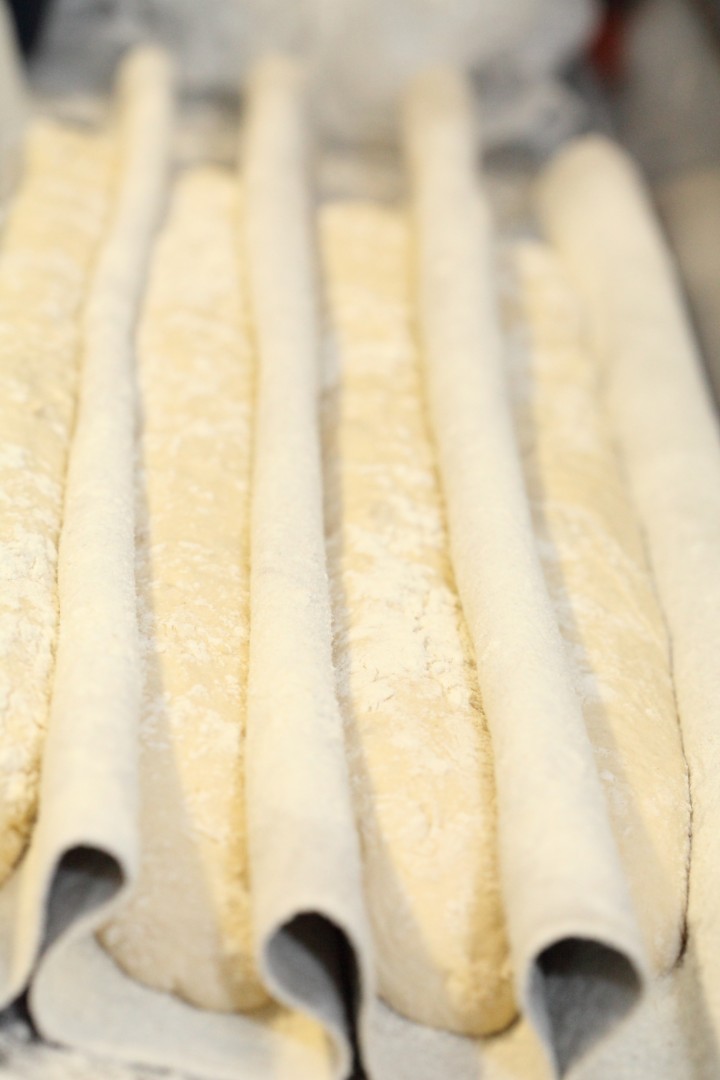 Place the baguettes in a couche made of proofing linen or in a baguette pan, or something of your own invention, but make sure the baguettes have enough side support to hold their shape. Cover them and leave to proof for 25 minutes.
To check if the baguettes are ready, dip your finger in some flour and gently poke in your dough.
If the hole disappears completely: under-proofed
If the hole dent pops half way back out: proofing is just right
If the hole stays entirely dented in: over-proofed
Score the top of the baguettes with a lame/bread scoring tool. Cut as straight along the long axis of the loaf as possible. Mentally divide the baguette into lengthwise thirds, and keep the cuts within the middle third. You can practice the scoring on a piece of paper or a kitchen paper roll first. Overlap the cuts by about one third of their length,while holding the knife at a 30 degree angle. Also check out this very useful video on proper baguette scoring.
Bake in the preheated oven for 25 minutes. Leave to cool on a wire rack.
To get a nice crust, try to create some steam in your oven by putting a small metal baking tray on your oven floor when you preheat the oven and pouring a half cup of hot water immediately after putting the bread in the oven. Release some steam by setting your oven door ajar (perhaps with the help of a wooden spoon or oven mitt) 5 minutes before the bread is ready. If you are going to create steam with a baking tray, you maybe also want to turn your oven temperature a bit higher, because you are going to lose some heat in the process.
Baguette Time Table
Day 1
Make ‘poolish’
Day 2
Mix ingredients until shaggy mass
00:00- 10 minutes rest
00:10 – 2 minutes stretch and fold
45 minute rest
00:57 – 2 letter folds
45 minute rest
01:42 – 1 letter fold
45 minute rest
02:27 – 1 letter fold
45 minute rest
03:12 – 1 letter fold + bench rest
03:22 – divide + pre-shape
03:37 – shape + proof
04:02 – into the oven
04:27 – take out and leave to cool
PS: If you are interested in linen couches / proofing cloths like we use ourselves, you can find them in our WKB webshop.






Weekend Bakers says
Hello Jasmine,
Thank you very much.
We would not advise to do that. First of all the poolish has to slowly ferment to develop taste, this takes some time and will certainly not be done in an hour. Secondly the fridge is used to assure the slow fermentation, so not putting it in the fridge will again defeat the object. If you are going to change the temperature (by using dough that is not fridge cold but room temp) to begin with, you have to change times and amounts of yeast as well. This is possible, but the end result will also be different.
Good luck with the baking and have a nice weekend,
Marieke & Ed
Jasmine says
Hi!
Very nice video and cute song.
Question for the “Poolish”, after the hour of rest is it possible to use it immediately? and can I not put in the fridge to rest?
Happy New Year.
Jasmine
Oskar says
What a delicious bread! Great instructions, easy to follow and many good pictures to show the way!
Just a question from a beginner-breadbaker: How should i store my bread once it’s cooled from the oven?
Regards from Sweden!
Weekend Bakers says
Hello Oskar,
Thank you so much!
I think you will agree you should always try and eat some of it fresh of course, no surprise there.
We like to store our bread in the freezer as soon as it is cooled, because we found that this is the best way to keep it as close to fresh as possible. From the freezer it is best to consume the bread within a few weeks. We have found that defrosting it in the micro wave, very short time on high wattage, works best for us.
If you do not store it in the freezer, some bread, like the pain rustique type of loaf, will be very edible for a couple of days, stored in a bread bin or a (paper) bag. We also make toasties with older baguette halves in a big toaster type thingy, it works great. Do NOT put bread in the fridge, it will dry out very quickly that way.
You can also revive stale bread by dipping it in water and baking it at 175ºC / 350ºF degrees for 7-10 minutes. You can do this only ones, because your bread will still dry out from this exercise.
Just try out different things and see what suits you. It can be different methods for different types of bread.
Once your bread is stale you can still do nice things with it. See our tips: www.weekendbakery.com/posts…w-it-away/
Happy Baking and Eating,
Marieke & Ed
Jean-Sebastien says
Hello,
First, thank you for posting such a great recipe, I really like the results you’re getting. I have a question: what temperature is your “room temperature”?
Thanks!
Weekend Bakers says
Hello Jean-Sebastien,
Room temperature can usually be read as anything between 20 ºC /68 ºF and 22 ºC /71.6 ºF. The temperature of the room we use most for our poolishes and preferments is about that temperature most of the year.
Maybe you’ve already seen our tips on dough temperature but if not, you can find them here: www.weekendbakery.com/posts…mperature/
Happy baking and happy new year!
Jean-Sebastien says
Thank you.
Happy new year to yourselves,
Nicole Meeuwse says
Marieke & Ed,
Hallo! Had too many things on my mind & so made the silly mistake of not reading the instructions completely. I’m used to making ‘poolish’ with warm water so warmed my water up. Then I read the instruction to use cold water….I keep my flour in the freezer so I’m hoping it cooled the water down. We’ll see, I guess! I’ll keep you posted.
For future reference, why cold water?
Thanks!
Nicole
ps. Quite fond of your site, glad it exists!
Weekend Bakers says
Hi Nicole,
Thanks for the fondness :))
The temperature of the water has to do with the timing of the recipe. If you use warmer water for example, you can place the poolish immediately in the fridge, without leaving it at room temp for an hour. There are more ways than one to tackle a recipe and you can play with times and temperatures but you have to remember that there is a balance to everything. This recipe works and has the final result in taste and texture because of the way it is made. Changing it can give different results, although they do not have to be bad. We went through. lot of iterations to develop this recipe, together with our baking friend Akiko, who also tried many different versions. This recipe is the end result of those efforts and the one we liked most, no surprise of course.
Good luck with the baking and Happy New Year!
John OToole says
Hi,
I gotta tell y’all. I love this recipe! Perfect instructions and pictures. Prior to this I never made a high hydration dough and the first time results were delicious. Made it again today and turned it into a sage, provolone, and black pepper focaccia. I still have more in the refrigerator for tomorrow.
Thanks again,
John
Weekend Bakers says
Hello John,
Thank you so much! And we are very much inspired by your sage, provolone, and black pepper combination!
We have recently been experimenting with a focaccia based on a wet ciabatta dough and it turned out great.
Happy baking,
Ed and Marieke
Andy Foster says
Following your email to me in June, I have bought a Rofco B30 with the steamers. The baguettes as your recipe was one of the first breads to try. Great result, thanks very much.
Weekend Bakers says
Hi Andy,
So great to hear about your results. Very glad you are off to a flying baking start!
Many happy baking days with your Rofco!
Ed & Marieke
Chris says
Im pretty new to the baking scene(i just figured out what crumb is and landed here). Why do you recommend releasing the steam? Also is a large tray of water on the bottom rack good enough for steam production during the baking process? Im planning on bringing it up to boil on the stove then into the over and give it a few minutes to come back up to temp. Once i see the water boiling i know i can start baking yeah?
Weekend Bakers says
Hello Chris,
Exiting to begin your bread baking journey, lots to discover and learn. We can recommend getting your hands on a good bread book like ‘Bread’ by Jeffrey Hamelman.
Steam is used to allow the dough to expand at the beginning of the baking process (oven spring). It is released at a later stage to allow the crust to form, retaining moisture would mean the crust stays soft.
The method you describe is partly right but you have to make sure your bread is in the oven together with the steam and closing the oven door very quickly to make sure the steam stays in. I understand you want to bring it to boil and then open the oven to put the bread in. This way you would lose a lot of the steam again. Best is to have the tray in the oven, put bread in the oven, poor the hot water on the tray and quickly close the door so the steam is trapped. You can also try putting (sauna) stones in the tray in your oven on which to poor the water. The hot stones will create a lot of steam. Another option is to spray the oven walls with water but you have to make absolutely sure your oven is not damaged by doing this (electronics, oven window, ceramic walls can all damage from water or sudden temperature shock , the simpler your oven, the less stuff can get damaged).
Hope this information is helpful to you.
Happy baking!
jack mosevich says
Do you recommend steaming or spraying the oven when introducing the baguettes? Also, do you leave the bread in with the oven door open for 5 min at end of bake as some authors recommend? I can’t wait to try this recipe…
Weekend Bakers says
Hello Jack,
Yes we spray our oven walls with water, but you have to be careful and know if your particular oven will not be damaged by doing this! If in doubt it is better to create steam by using a tray like we suggest in the recipe. We also put our oven door ajar the last 5 to 7 minutes of the baking process to make sure all steam is released again.
Hope the recipe will turn out great for you!
Happy baking,
Marieke
colin sneller says
Well I tried your recipe and it came out fantastic – what a revelation! The only thing was, was that my dough at the end was wetter than yours looked in your video although I measured everything exactly. It made it more difficult to move the formed baguettes onto the board prior to putting them in the oven. Maybe my flour is different to yours or something like that. Anyway they were the best baguettes I’ve ever made so thanks for sharing!
Bye, Colin
Weekend Bakers says
That is so great Colin,
And different types and brands of flour, and even different batches of flour can act differently and absorb more or less water. So next time, with a little adjusting it will be even more perfect!
Weekend Bakers says
Hi Colin,
Yes, the recipe is correct. I know it is a little different with everything being cold, but the amount of yeast and the time for resting and proofing in the recipe is tuned to that. You should just give it a try and see if and how it works for you.
Happy baking!
Marieke
colin sneller says
Hallo Marieke
I’ve been making baguettes with a poolish from the day before for some time but have only recently discovered the stretch and f0ld method. I was really turned on by your demo video so I tried it out and I was very impressed by the result. So much so that I’ve decided to try your recipe too. The thing that bothers me about it though, is that you mix the poolish with cold water, put it in the fridge over night and complete the dough the next day again with cold water. I start the poolish with warm water, leave it at room temperature over night to ferment and complete the dough the next day again with warm water. Have I understood you right with the cold water because it’s hard for me to believe that you can get a good rise that way when the dogh is kept so cold?
Colin
umaier says
For years I have been baking 80% hydration baguette. While this type of bread has a very open crumb structure one has to realize that the texture of baguette in France is very different. Recently I have been searching the internet in order to find a more authentic french baguette recipe.
I was successful and found a recipe “Baguette de tradition française sur poolish” from the INBP(Institut National de la Boulangerie Pâtisserie) website.
This baguette has a hydration of 65% and is actually really easy to make and has a surprisingly open crumb structure. The crust and crumb of the bread is the closest to the real baguette that I have had many many times in France.
The link to the recipe: www.cannelle.com/RECET…ipool.html
I used Bing(right click and select”Translate with Bing”) to translate the recipe into English.
Bake the baguette on a pizza stone to get the expected oven spring and open crumb structure. Baking the baguette on a baking sheet won’t work.
Cheers and happy baking.
umaier says
Just a couple of points that I forgot to mention in my post.
I have tried many types of yeast throughout the years, fresh yeast is by far the best. However because I don’t bake every day which makes keeping a big block of fresh yeast in my fridge not very practical. OK so I am back to dried yeast. I found the “Fleischmann’s Traditional yeast” to be the closest thing to fresh yeast in terms of color, taste and texture of the resulting bread. I did not like the bread when using fast rising/instant yeast.
One thing I do is that I use about twice as much yeast as the recipe calls for in the final dough about 1% in terms of bakers percentage. This is because my kitchen is a bit on the cool side and because I have to use dried yeast and not fresh yeast as french bakers do. Just to say that getting the amount of yeast right depends on local condition and one might have to experiment a bit.
Another component that is critical is the flour. I used white all purpose from “Baker’s Hood” and was surprised how good the bread came out. I tried the bread also with about 10% whole wheat flour but the resulting bread was entirely different and I went back to using 100% white flour.
Just one more thing. The recipe calls for resting the divided dough pieces for 30 minutes before shaping the final baguettes. Don’t cut that resting period short! This 30 minute period allows the dough to really relax which makes shaping the baguettes much easier and maintains the desired open crumb structure of the final loaf.
Cheers and happy baking
Weekend Bakers says
Hello,
Thank you very much for your contribution. We recognize what you are saying. We will check out the recipe for sure!
Marieke
Joanna says
Must make some baguettes soon again and I’m going to try your way next. What a great post you’ve put together here! I was wondering if you guys had ever tried making knackebrod or had come across any good recipes/techniques in your travels. Kindest regards, Joanna
Weekend Bakers says
Hey Joanna,
Thanks! Please let us know what you think of the recipe if and when you make it.
I was actually looking for a good knackebrod recipe myself (I have this flatbread book with a lot of recipes but it does not contain a recipe either). I have made the soft style Scandinavian flatbread but never this famous crispy one. I have been making a lot of Italian crackers more recently called ciappe and I will post a recipe for them soon.
Lots of Loaf,
Marieke
Joanna says
I think I have the flatbread book too…. There is a baker in Edinburgh who makes beautiful swedish style knackebrod. Peters Yard. There are lovely, interesting ingredients in there like honey. We need to find a Swedish baker/blogger and ask them I suspect.
Floury hugs,
Joanna
Weekend Bakers says
Yes I have heard of them, never tasted it though. I have found this blog by Anne from Stockholm, maybe it is a good starting point: annesfood.blogspot.com/2007/…lower.html
She actually has two recipes, one with honey.
Kim says
Thank you Marieke for your great advice, it worked out alright!! The baguettes turned out wonderfully (my standard)! There was definitely room for improvement. The crusts where rustic and crunchy. There were some details that I neglected such as scorching the top (was preparing dinner at the same time, not a good idea). I had some leftover dough because the loaves didn’t fit across my sheet that I attempted some mini loaves of epi baguettes. They were wonderful!! The crusts and dough were perfect. I am already going to start my second attempt in which I will mix 1/2 white and 1/2 whole wheat flour and adjust the water according to your advise above. I love this recipe! I gotta say — it was fun handling the sticky dough!!
Kim says
I meant scoring – not scorching – the top of the baguettes.
Weekend Bakers says
Hi Kim,
That sounds great! You will see you will make progress with every new batch you bake, as you can see we did in our baguette log: www.weekendbakery.com/posts…akers-log/
Scoring and using steam will also make a big difference, but like I said, even without it looking perfect that can still taste wonderful!
Happy baguette baking!
Marieke
Kim says
I just made another batch of baguettes, they are gorgeous!!! I wish I can send you a picture of what they look like.
Weekend Bakers says
We would love to see a picture!
Kim says
My family loves French baguettes. I just got the ‘poolish’ started and continue with the recipe in the morning. I was concerned the the ‘poolish’ was like a dough and not a very very batter and added an extra 1/4 cup of water (hope that will still turn out alright–keeping my fingers crossed). How you you adjust the measurements if you were to make whole wheat baguette? Thanks in advance for your response.–Kim
Weekend Bakers says
Hello Kim,
I hope the extra water will not be a problem! It needs to be very very thick, so it does not really look like a poolish as we say in the recipe. We would suggest you HOLD BACK this 1/4 cup when you go on with the next stage of the recipe, because the dough is already very wet, and when making it for the first time, it would even be better to make it a little less wet, so it can be handled easier.
When working with whole wheat, as a rule of thumb, add 15 to 20 ml of extra water to every 100 g of flour. (about 4-5 teaspoons for every cup). But you have to see how your particular type and brand of flour reacts, it can differ a lot, so in the end it is the experience with the recipe and the dough that will teach you what is the right amount in your case.
Hope this information helps.
Lots of loaf (and baguettes!)
Marieke
Josefin says
Hi!
I bake quite a lot of sourdough bread but have not yet succeeded with baguettes. The recipe contains instant yeast, however, I cannot find this is Sweden. We have active dry yeast or fresh yeast. How would you convert instant yeast to dry or fresh?
Thanks,
Josefin
Weekend Bakers says
Hello Josefin,
Yes baguettes take a lot of practice, but are also fun to make and even though they do not look the part yet, they can taste it most of the time.
As for the yeast question, here is our answer:
When using fresh yeast multiple the amounts in our recipes by 3
When using active dry yeast multiple the amount in our recipes by 1.2
Hope this helps.
Lots of loaf,
Marieke
Phil says
Did you know there is a link to this post on a French website for professional bakers ?
www.boulangerie.net/post2…ml#p238751
In the comments section, they seem to like it a lot !!
I do too. Your baguettes look nicer than many I have seen in bakeries here in Paris. Well done !
Phil,
Baker in Paris.
Weekend Bakers says
Hi Phil the French baker,
That is a big compliment indeed :D! We are going to check it out, but it seems we have to register before we can see the comments. We will try tomorrow and see how far we get with our very basic understanding of the French language…
Ed & Marieke
jerome says
hello
the french traditional baguette is born in 1930 hydratation 70 per cent
this year the best baguette in paris is made with an autolyse of 24 hours the minimum is 1 hour
just mixing water and wheat floor
after this time you mix yeast and after salt proof 1 hour and half at 20 degree c
each 30 min you make a fold
and let proof 24 hours to cool 3 degree c
after this time you divide proof 20 min
you shape proof 20 min
this is the real baguette
Weekend Bakers says
Thanks for this Jerome, I would love to taste the best baguette in Paris!
Keefuss says
I tried this recipe after very carefully studying the video several times. I really think this recipe “Rocks”. The only thing I will change the next time is to up the kosher salt to 13 grams ……..Also, where can one find a lame? I think the hardest thing I ever face with making baguettes is the proper depth of scoring without depressing the loaf. I have tried razor blades without success.
Weekend Bakers says
Thanks, glad you like the recipe. Ed makes his own lames and we always have a few extra ‘lying around’. You can see it here: www.weekendbakery.com/webshop/
It is also equipped with a razor blade but the way it is placed in the handle makes it easier to score swift and precise and at the right angle. He made it himself because he could not find anything he liked either.
We can send you one for € 5 / £ 5 for shipping and material costs if you want. (if so you can send us your details via our contact form).
Have you seen our tips on scoring with confidence? www.weekendbakery.com/posts…onfidence/ Hope they are of use to you too! One of the tips people find really useful is the controlling the dough with one hand (not pinching but lightly guiding) and scoring with the other hand.
Happy Baking!
Marieke
Mrs. Edwards says
This recipe works but I added just a slight *tweak*. See I watched Peter Reinhart’s video at amazon for one of his bread books. We have literally been trying to make holes in our baguettes for about a decade but not having any luck. In Reinhart’s video he used olive oil on his hands and on the counter where he was making the bread.
That, along with your recipe seems to work. And I don’t use a lot of oil, I just wipe the bowl with oil before I put it in there, wipe the counter with olive oil and wipe my hands with olive oil. We get the big holes in our bread now. The only thing we haven’t been able to do yet so far really is score the bread, I guess because it’s too “wet” but that’s fine, though I love scored bread.
Another thing we do since we have an electric oven is use our bbq on HIGH for bit to get the oven spring, then turn it down after a bit. Today we really don’t want to go outside due to the weather so we’re going to try to put this in the oven, with ice cubes to get it to steam properly and get the oven spring that makes these so light and airy.
My husband just said “it’s more of a crumpet” type of bread or a “ciabatta” type but he said “I love crumpets”. So, just wanted to add this in.
Weekend Bakers says
Hello Mrs. Edwards,
Thank you for your lovely bread story. So good to hear that mister Reinhart’s video in combination with our recipe gave you what you were looking for. As for the scoring, have you seen our tips for bread scoring with confidence?
www.weekendbakery.com/posts…onfidence/
Maybe these can help you with the scoring of wetter doughs.
Hope you will bake many more loafs, baguettes and crumpets!
Marieke
Carolyn says
I just found your site and I am hoping to try this recipe soon. It looks fabulous! I wanted to ask if it’s possible to use fed sourdough starter instead of making the ‘polish’ described above. If so, how much should I use (by weight)? Also, are there any additional changes that I need to make by using a sourdough starter?
Marieke says
Hello Carolyn,
We haven’t tried this one ourselves yet but will do so very soon (one of the weekends to come). It requires an adaptation of the recipe, also in things like resting and proofing times. So it’s best we first work it out until we are satisfied with the result and then we will post it of course. I know there are many sourdough baguette recipes but I am not sure about the 80% hydration ones.
If you find anything in the meantime or try out another recipe we would be very interested to hear about it and your results and experiences!
Marieke and Ed
Carolyn says
Thank you so much for your response. I’m pretty much a novice at this, so it’s best I wait for your instructions on sourdough. I will definitely try the recipe as posted, though. Thank you again for the recipe and your advice. Have a great weekend!
Carolyn
AG says
I would also like to see your adaptation of this recipe for a sourdough starter. In the meantime I will try this one.
Weekend Bakers says
It’s in the planning to do a sourdough adaptation of this recipe. This is going to take some adapting and testing for us to get it just right, but when we do we will surely post it on our website.
Frank Hodges says
I made the poolish this morning according to measurements and it was very much like a dough, not a slurry?? the measurements were accurate, can I just add more water to get the consistency needed??
Marieke says
You are correct. The recipe consists of two times a 80% dough put together and separated by time. So the ‘poolish’ (please note the quotes around the word poolish) is not an actual poolish and so it appears more dough like. Please do not add more water, it will work out in the end!
Menno says
Just wanted to let you know that I’ve made this recipe this weekend. I was the first time I ever made it, first time to work with such wet dough but it turned out beautifully! A thin, cripy crust, soft but strong crumb with nice holes in it. because it was my wife’s birthday we a friend from France visiting and she doesn’t like the French baguettes at all, but she just kept eating from it 🙂 All the proof I need to know to keep this one on the recipe radar!
The only mistake I made was overestimating the size of my Rofco B30 🙂 I just bent the sticks to a “U” shape just before putting them in the oven, problem solved! 🙂
Thanks for sharing this wonderful recipe!
Menno
Ede, The Netherlands
Marieke says
What a great story! Glad you like the recipe. Did you make a picture (did you post on bakkerswereld forum?) because I would love to see that U-bend :-). Would also like to collect pictures of other home bakers baguette making efforts and showcase them on our website. And I know how you feel trying to fit the baguettes in the Rofco, I sometimes give them a little nudge to fit them in. It would be great to have an oven that can handle 60 cm baguettes. For us it’s a wish for the future, but no hurry.
Menno says
I was planning to take pics, but someone let loose the birthday guests a little too early 🙂 I’ll make pics next time and post them on TFL and bakkerswereld. I’ll be trying some other recipes this week and I have to bake some whole wheat bread my neighbors have ordered 🙂
Just wondering: how do you get steam in your Rofco? The old fashioned water spraying way or do you use a real Rofco steamer?
Marieke says
I use a Gardena pump garden water sprayer 🙂
Edwin says
Hello Kallol,
Have you seen this posting? : www.weekendbakery.com/posts…e-bb-loaf/
Maybe this is what you are referring to. Yes, shaping can be an issue (maybe too tight?). Another tip is using a (pizza) stone in your oven and setting the temperature a bit higher at the beginning of the baking process so you create a lot of initial heat conduction from the stone into the bread. Most home ovens can not hold the temperature after you have loaded the bread, so the increase in heat and a pizza stone can help. My experience is that the batard (oval) shape works better than a boule shape, if you are looking for a nice even, airy result. Maybe you can try this shape next time and see how it goes.
Success,
Ed
Kallol says
Hi Ed,
I tried your baguette recipe & it came out very well with an excellent crumb. Using the same dough i made some boules too(small ones), but they were not that airy. More specifically, when i cut the boule horizontally through the middle, the edges have nice large holes, but the centre is dense! Probably a shaping fault but i have tried a few times and failed.
Do you have any suggestions, have you made airy boules. A recipe or shaping video would be great.
br,
kallol.
codruta popa says
hi Ed. it helped a lot. I make bread for almost 3 years, i’ve experienced a lot during this time, from almost disastrous breads to magnificent ones, never really knowing what i did wrong or right. your blog gave me simple answers to my incertitudes. thank you, codruta
Marieke says
Hi Codruta,
I use a ‘transferring board’ that I have myself made especially for this purpose. I transfer the baguettes onto the board and from this board onto another board I use to shove the baguettes into the oven. You can see me do this when you watch the baguette movie:
www.weekendbakery.com/posts…tte-movie/
it starts at about 4 minutes 25.
You can see that I hold the board at an angle and pull a bit on the couche to help the baguette roll more easily onto the board.
Hope this helps,
Ed
codruta popa says
i have a question: how do you transfer the baguettes from the couche onto baking sheet? every time i do it, the baguette is losing its beautiful shape. :((
Kelly says
I did try it again and the bread came out wonderful, although this time I tried to stretch and fold the poolish for 2 minutes – that’s what I get when I try to make bread right after I get up in the morning. *sigh* I was amazed at the crumb, though – I never thought I would get a crumb like that. I could still work on the crust a little, so I will attempt to improve that. I am making another batch today to have some ready for tomorrow and it’s the whole recipe today, not just half. I have some friends that want to try the bread, but I want enough to save for myself as well. Yeah, I’m kind of selfish that way!
Thank you so much for posting the recipe!
Marieke says
Hi Kelly,
A very recognizable baking mistake, we all make along the way, right up there with forgetting the salt or the egg whites.
About scales: Give a man 6 artisan breads and he’ll eat for 6 days, give a man an electric scale and he’ll bake and eat forever ;-)!
Yes, we are fan of our scales because it’s so fitted for the precision that baking (both bread and patisserie) requires and doesn’t leave room for discussion (100 g is 100 g if you pack it or not). They’re great for repeating the exact same results bake after bake.
I hope you are not too disappointed and that you will try the recipe again!
Kelly says
Duerrr……I have a red face. It’s not a lack of flour, it’s an excess of water. I had done the conversion right, but I had halved the recipe and apparently I can’t divide by 2. Converted and halved correctly, the amount of water I should have used was 2/3 of a cup. I actually used almost an entire cup in both the poolish and the recipe and that extra water makes all the difference. So try, try again. *goes to start another poolish*
Kelly says
I am wondering about how much flour needs to be used when the poolish is added to the baguette recipe. After I added the poolish, I had to double the amount of flour in the recipe because I did not have a shaggy mess, I had a liquid. I double checked the amount of water and flour used and it was correct. But the dough literally poured out of the bowl and there was no such thing as stretch and fold. So I did a French fold for two minutes and am now letting the dough rest, but I really doubt it will become doughy enough to continue with any envelope fold. The poolish was not in the fridge for 17 hours, because my fridge is too cold for anything to rise, so it sat out for about 20 hours and got all nice and bubbly.
I also could not weigh my ingredients, so I used a grams to cups converter and that may be part of the problem. I used this converter here:
southernfood.about.com/libra…blconv.htm
I have been told a scale here can be had for about $30, or the amount of money I pay for one month’s electric (in summer) or one week of food. I am baking bread to save money, not spend it and for $30, I could go out and buy 6 loaves of artisan bread, so I also wish that recipes would include both the grams and the cups measurements, as wizarddrummer said. And having been brought up on recipes that called for a dash of this and a pinch of that, I would probably consider .72 of a teaspoon to be slightly less than 3/4 of a teaspoon. Not exact, I know, but to me, certainly doable.
At any rate, if this baguette doesn’t turn out, I will redo it and just make sure I put in more flour next time. The poolish itself smells absolutely wonderful – it smells like I’m making wine in my kitchen and I can only imagine what the bread will taste like!
Marieke says
Dear Drummer,
Thank you very much for your addition. I want to add that we Europeans cannot live without scales and we so hope that American people are going to warm to the idea of using them because it makes your baking life so much easier (we don’t know how you would measure o.72 tbsp?). I don’t now what they cost in America but our largest scale that weighs to 5 kilo’s with accuracy to 1.0 grams cost 19 euro’s, and we use it almost every day. The ones that way more precise (0.1 grams) are more expensive.
Very creative with the cardboard accordion!
Wishing you good baking results,
Marieke
wizarddrummer says
Hi,
Lovely video, loved your procedure, but for those of us that do not have the elaborate equipment that you have (two digital scales) some of us are forced to use the “spoons” method. I also have to improvise with some cardboard (accordion style) proofing gadgets.
Here are the quantities expressed in volume for us poor folks:
Poolish
Flour (100%): 380 g | 13.4 oz | 0.84 lbs
Water (80%): 304 g | 10.72 oz | 0.67 lbs
IDY (.79%): 3 g | 0.11 oz | 0.01 lbs | 1 tsp | 0.33 tbsp
Total (180.79%): 687 g | 24.23 oz | 1.51 lbs |
====
Dough
Flour (100%): 380 g | 13.4 oz | 0.84 lbs
Water (80%): 304 g | 10.72 oz | 0.67 lbs
IDY (0.394%): 1.5 g | 0.05 oz | 0 lbs | 0.5 tsp | 0.17 tbsp
Salt (3.157%): 12 g | 0.42 oz | 0.03 lbs | 2.15 tsp | 0.72 tbsp
Total (183.551%): 697.5 g | 24.6 oz | 1.54 lbs
Calculations graciously provided by a wonderful little tool located here:
www.pizzamaking.com/dough_tools.html
cheers
Mike says
Hi guys, how’s it going?
Can i replace the IDY with my very active sourdough? And if yes, how much S.D do you suggest i add to the ingredients? And does the same principle of S & F apply here or must i leave the bread dough to preferment for some time before shaping?
Thanksm
Mike
Weekend Bakers says
Hello Mike,
Completely switching yeast for sourdough will change all the timings of the recipe and will also change the taste profile and crumb structure of the baguette. In other words, it will be a totally different recipe. However, if you only switch yeast for sourdough (suggest 30 g) in the ‘poolish’ and use yeast in the final dough the recipe will probably work as described (including the S&F) and you still have the added sour back note of the sourdough. If you only want to use only sourdough there are recipes on The Fresh Loaf you could check out.
We want to add that the baguettes we know and love (also the good ones we tasted in France) always have that sweet taste of the wheat without the sour after note of the sourdough and we really prefer that in our own baguettes too. We like sourdough in many types of bread, but not so much the baguettes.
Wishing you wonderful results and happy baking,
Ed & Marieke
Mike says
Thanks guys, i’ll take your advice into account. I will add 30gr. SD to the Poolish and yeast to bread dough, and follow same instructions as described and let you know.
Wish me luck 😀
Weekend Bakers says
Good luck Mike 🙂 !
Mike says
My dough is proofing now getting ready to go into the oven. It was a nice and new experience to handle such high hydration sort of dough.
Hope the end result would be worth the effort.
I shall keep you posted with what i get.
Cheers.
Mike says
Guys,
One question: is it usual for this kind of dough to get that much of air bubbles in it?
My dough was about to fly in the air because of that unprecedented amount of bubbles in it!! I hope the result would be good, keeping my fingers crossed. 😀
Weekend Bakers says
Yes, the air bubbles are very much a part of it.
No worries I think.
Marieke
Jim says
There are 125 grams of white flour per cup so 380/125=3.04 cups. .04 cups=5grams since there are 16 tablespoons per cup and 5/125=.64 tablespoons just use 1/2 tablespoons and you will be close enough or .14 tablespoons short. This calculation was based on the bulk density if ground white flour. The conversions given above this post might be helpful. However, considering that your average cook uses tablespoons and cups the conversion I have given might be of some help as well. I also have an infrared thermometer which is very helpful. They are now selling these thermometers for kitchen cooks at very reasonable prices. When making bread, I have found that, using filtered water with 1 tablespoon of sugar and heating it to 115F then putting 1 tablespoon of instant yeast from fridge into water you get a great reaction. I use an 11 cup cuisinart food processor for a single loaf. I have a commercial Hobart commercial mixer and a Kitchenaid but the food processor works the fastest. Use the chopping blade first to make your cake then put the kneading blade in and add the flour. Find an Amish white bread recipe and use the food processor. It takes a little more than 14 minutes to make the dough and comes out great every time. Hope this helps
Weekend Bakers says
Hello Jim,
Thank you very much for this useful information. As Europeans and avid scale users we cannot help but adding they also sell kitchen scales at very reasonable prices. It will make baking life so much easier and help no end to consistency in baking. The same recipe scaled multiple times can vary by as much as 10% relative to the true weight of the ingredients. This is often the reason that people find that a particular recipe “fails” when they try to reproduce it. Scales work faster and there’s less clean up. Next to the infrared thermometers and commercial mixers, surely there must be room for a scale ;).
Happy baking!