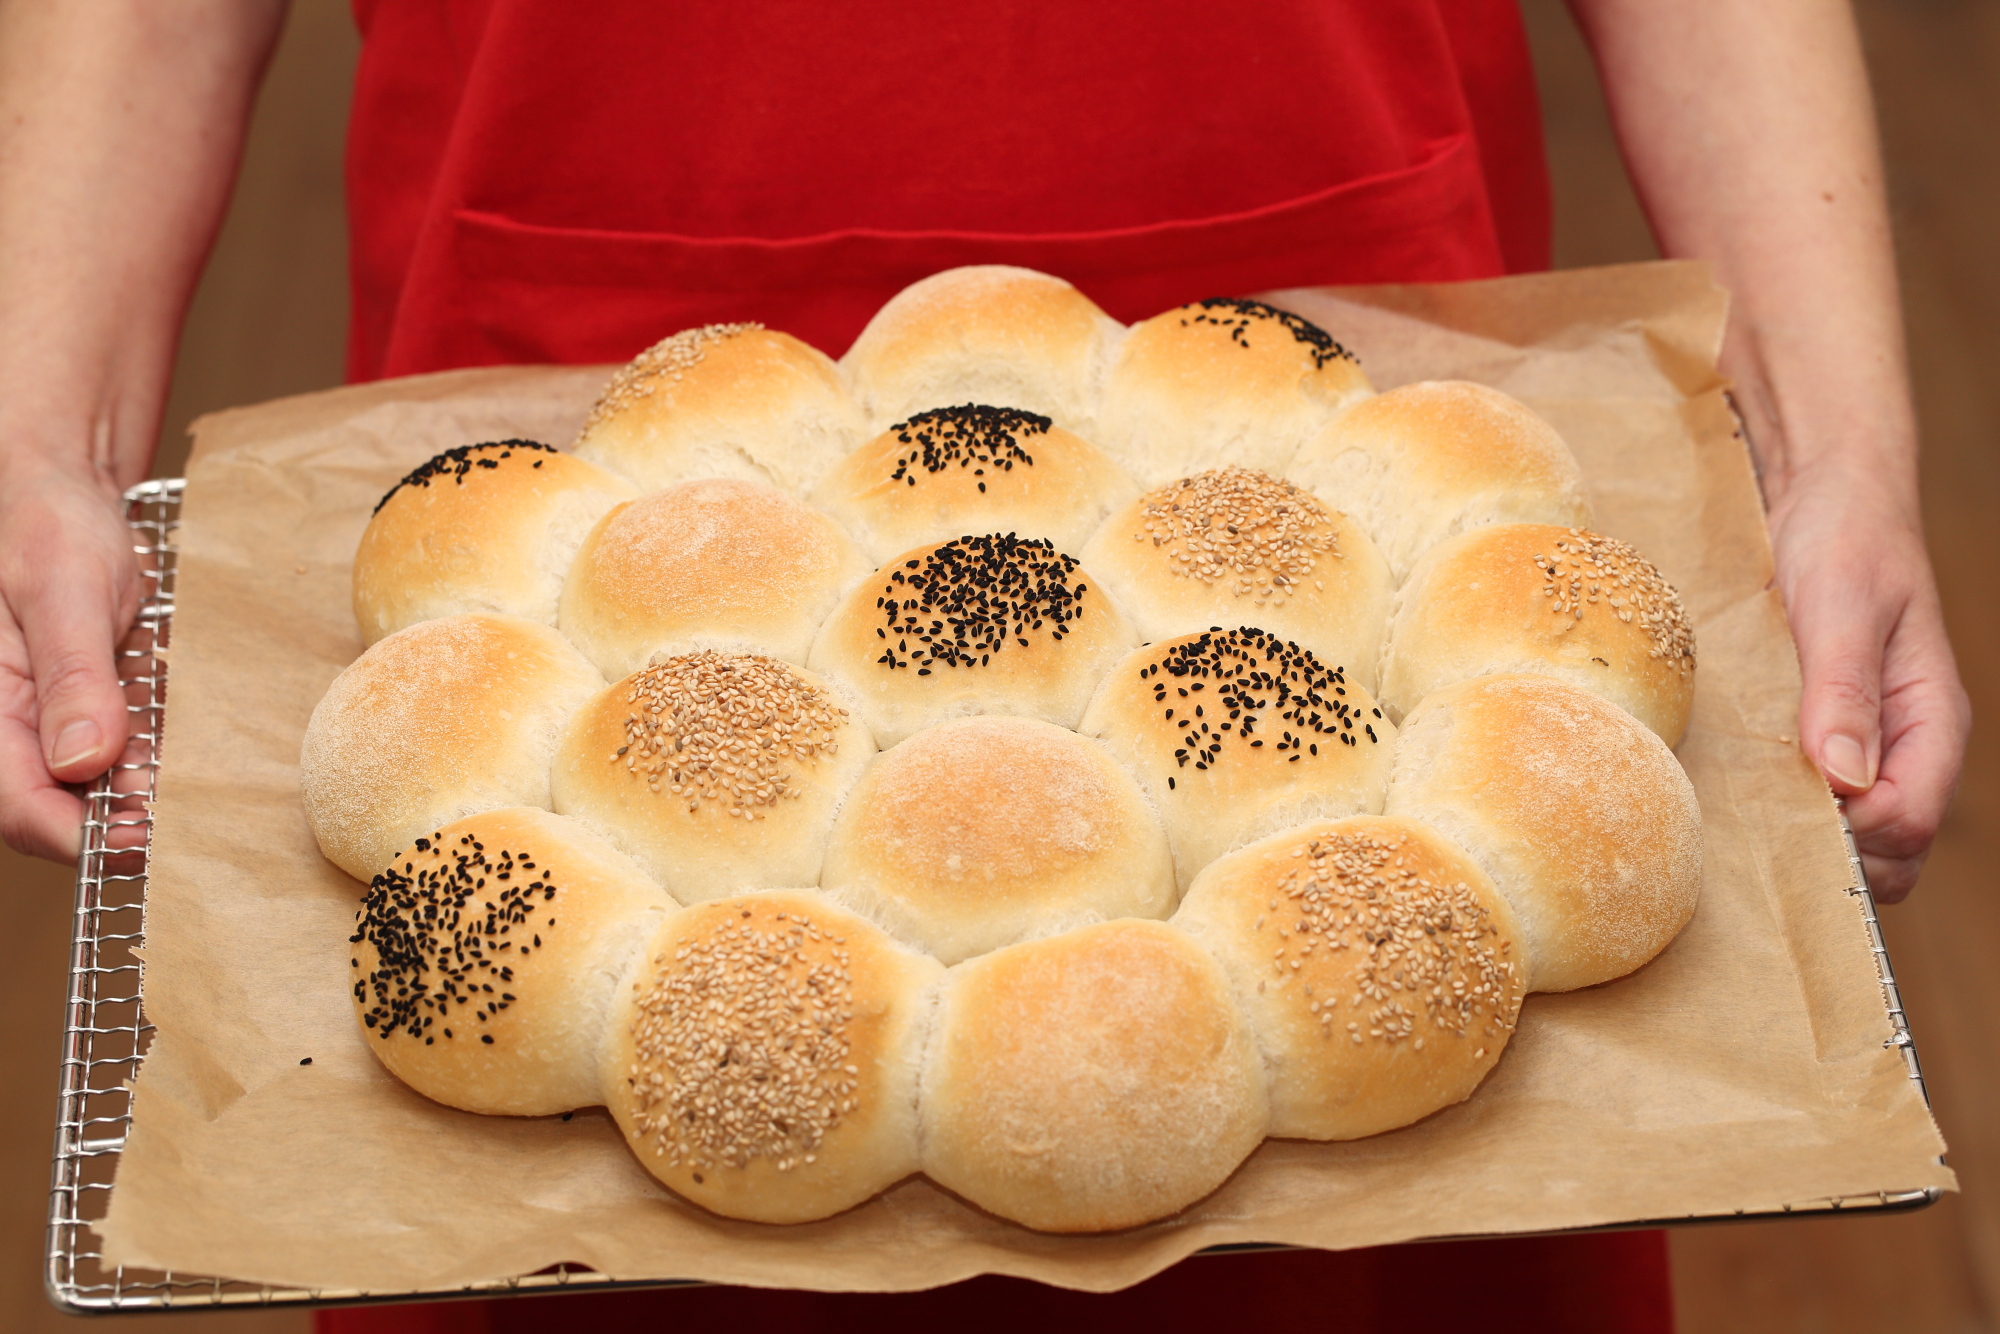
A centerpiece for brunch or as part of your celebration meal. A joy to make and bake for novice and advanced baker!
Klik hier voor de Nederlandse versie
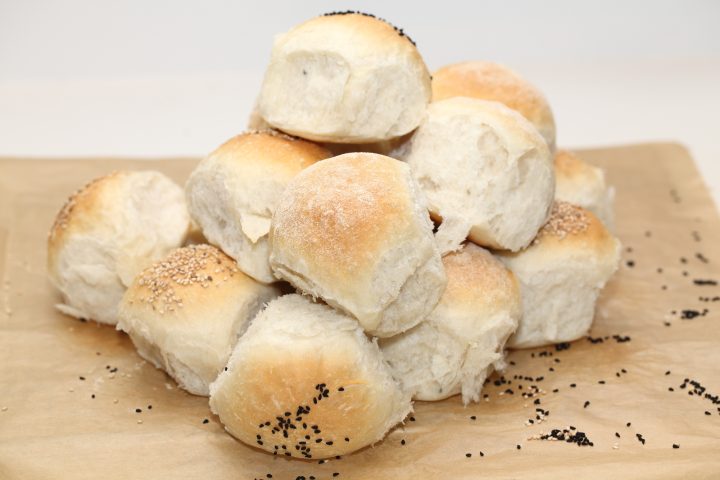
Never made a version of pull apart bread before? Then try the recipe below. It’s easy and fun. The recipe is simple and with some patience and the right temperature at the final rise you get a fantastically airy creation with wonderful taste that is also very attractive to present. I chose the toppings because they combine well with almost all dishes you are planning on making.
This bread fits exactly on a 30 x 40 cm / 12 x 15.7 inches baking sheet of a standard (European) household oven. And thanks to the 19 small buns you are making you get some extra practice to perfect your bun-shaping skills.
*Happy Baking & Sharing*


Ingredients for the preferment
200 g bread flour (12 to 13% protein content
200 g water
1.5 g instant yeast = halve a teaspoon
Ingredients for the final dough
19 buns to form a circle
The preferment of step 1
300 g bread flour
8 g salt
6 g instant yeast
70 g water, hand warm
1 medium egg / 50 g egg
20 g honey or other syrup of choice
30 g soft butter or 25 g olive oil or vegetable oil
Optional: pinch vitamin C, finely powdered with pestle and mortar*
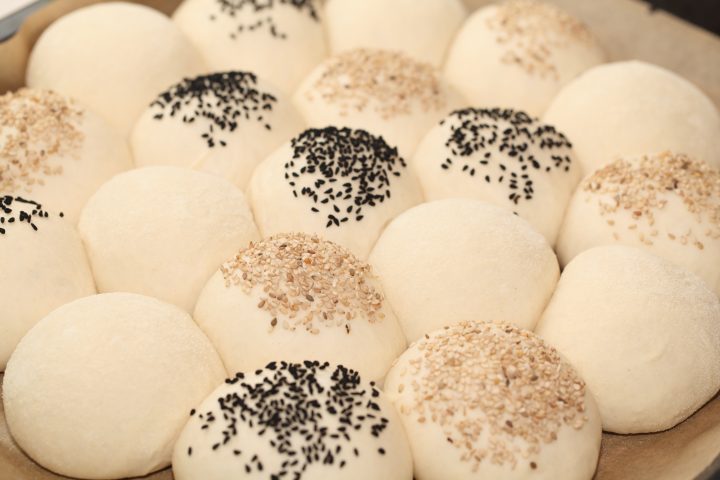
Ingredients for decorating
2 tablespoons nigella seeds or poppy seeds
2 tablespoons sesame seeds
2 tablespoons coarse semolina flour
Milk or water to moisten the tops of the buns

Baking tools: Standing mixer (or knead by hand), dough cutter, spatula, bowl, digital thermometer, timer, baking sheet (ca. 30 x 40 cm / 12 x 17.5 inches) covered with baking paper.
Weigh all ingredients carefully for the best result!
Vitamin C in bread baking*
Next to being a well know food supplement, vitamin C, also known as ‘ascorbic acid’ can also used in baking as a bread enhancer. So, What does it do?
Due to the properties of vitamin C, it can be used as a dough (gluten) strengthener during fermentation, helping to improve the structure of the dough.
Some flour types are sold with added vitamin C. The regular wheat and bread flour we use does not contain any vitamin C. So adding a tiny pinch to your dough can help improve your baking result. Professional bakers can buy ‘commercial grade’ ascorbic acid, but home bakers can also use crushed vitamin C tablets (it’s effectively the same stuff). The recommended amount is 0.07%. So this means that for this recipe, with 500 g of flour, you can use a vitamin C tablet and grind it to a powder. Take a pinch of the powder and it will probably be close to the amount of 30 to 40 mg needed. Weighing will not be an option for most bakers, with these small amounts.
Step 1: Make the preferment
- In a bowl combine the flour, water and yeast and beat for 30 seconds until smooth. Cover the bowl and let this mixture develop for 2 hours at room temperature.

Step 2: Make the final dough
- The the bowl of your standing mixer, combine flour, salt, instant yeast, egg, honey and butter or oil with the preferment from step 1. Add the water and start mixing (reserve a little if necessary and watch the dough come together, then add as needed.
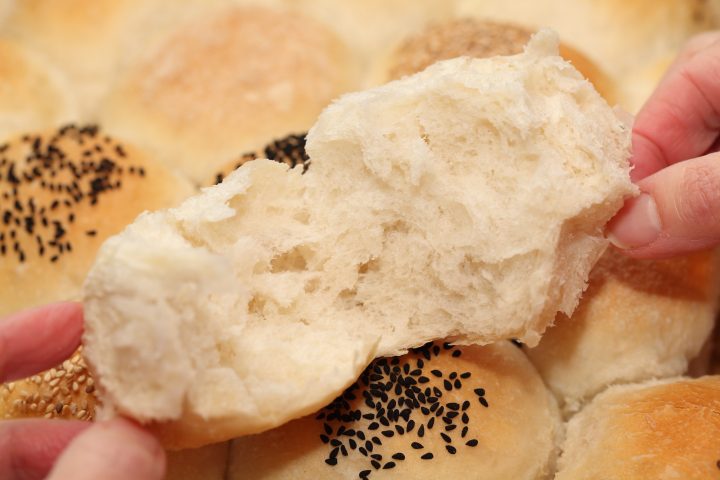
Knead the dough on medium speed for 9 minutes until you can pull a ‘windowpane’ from it (at least 15 minutes by hand). Ideally, it will come off the sides of your bowl but still stick to the bottom. Another indication to look out for is that the dough will start to shine nicely at the end of the kneading time. When you’re done, the dough should still feel a little sticky.
- Cover the bowl and leave to rest for 60 minutes
- With a dough cutter, divide the dough into 19 equal pieces of approximately 46 grams each. Use a scale to get equal pieces of dough. Form into balls.
You can very lightly dust your work surface with flour if necessary, but don’t use too much or it will be very difficult to form the balls properly. We don’t use flour at all when forming these rolls. - Let rest for 10 minutes (time starts when the first ball is formed).
- Carefully flatten the balls with your hand and form them into smooth balls again.
- Moisten the top of the first ball with some milk or water and dip it in a topping of your choice (nigella, sesame, semolina). Place this ball in the middle of the baking tray lined with baking paper.
- Continue with the next balls. Place 6 balls in a circle around the middle bun and place 12 balls around the ring of 6. Take a different topping for every 6 buns and make the pattern you want with it.
- Leave to rest for approximately 2 hours at a temperature of 25 tot 27 ºC / 77 to 80 ºF.
In a bake at home situation we use our minimally preheated and switched off oven for proofing. We measure the temperature of the inside of the oven and the dough with an infrared thermometer and aim for a temperature of 25 to 27 ºC (77 to 80 ºF). Make sure it doesn’t get too warm, because above 35 ºC / 95 ºF the yeast is effectively dormant or dead.
 When you think the dough has risen enough, use your finger to carefully make a small dent in a bun. If the dent remains, the bread is ready to bake, if the indentation disappears, the dough needs more time. Give it another 10 minutes, then check again
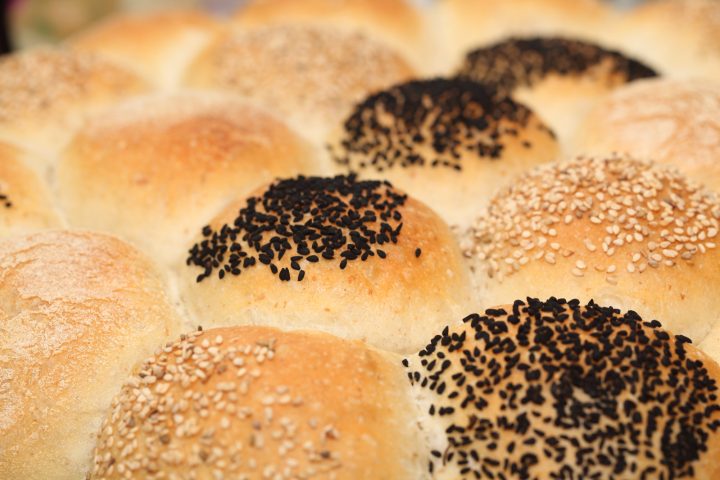
- Preheat the oven to 195 ºC / 385 ºF conventional oven setting in the final stage of the rising process. At what point exactly depends on the heating time of your oven. If you used your oven as a proofing cabinet, you should of course take the rolls out of the oven first.
- Bake the buns for about 18 minutes until lightly golden brown. If they have the desired color, around 2/3 of the baking process, you can temper the oven to 165 ºC / 330 ºF until the end of the baking process.
- Remove from the oven and let cool. If you are not going to serve them yet, it is best to put them in a bag while they are still a bit lukewarm to prevent them from drying out.
- Freezing the bread or leftover buns also works very well. And even after a round in the microwave, it is as good as fresh again, so making it in advance is no problem at all!
The explanation was excellent. I learned a lot! Thanks for sharing this.