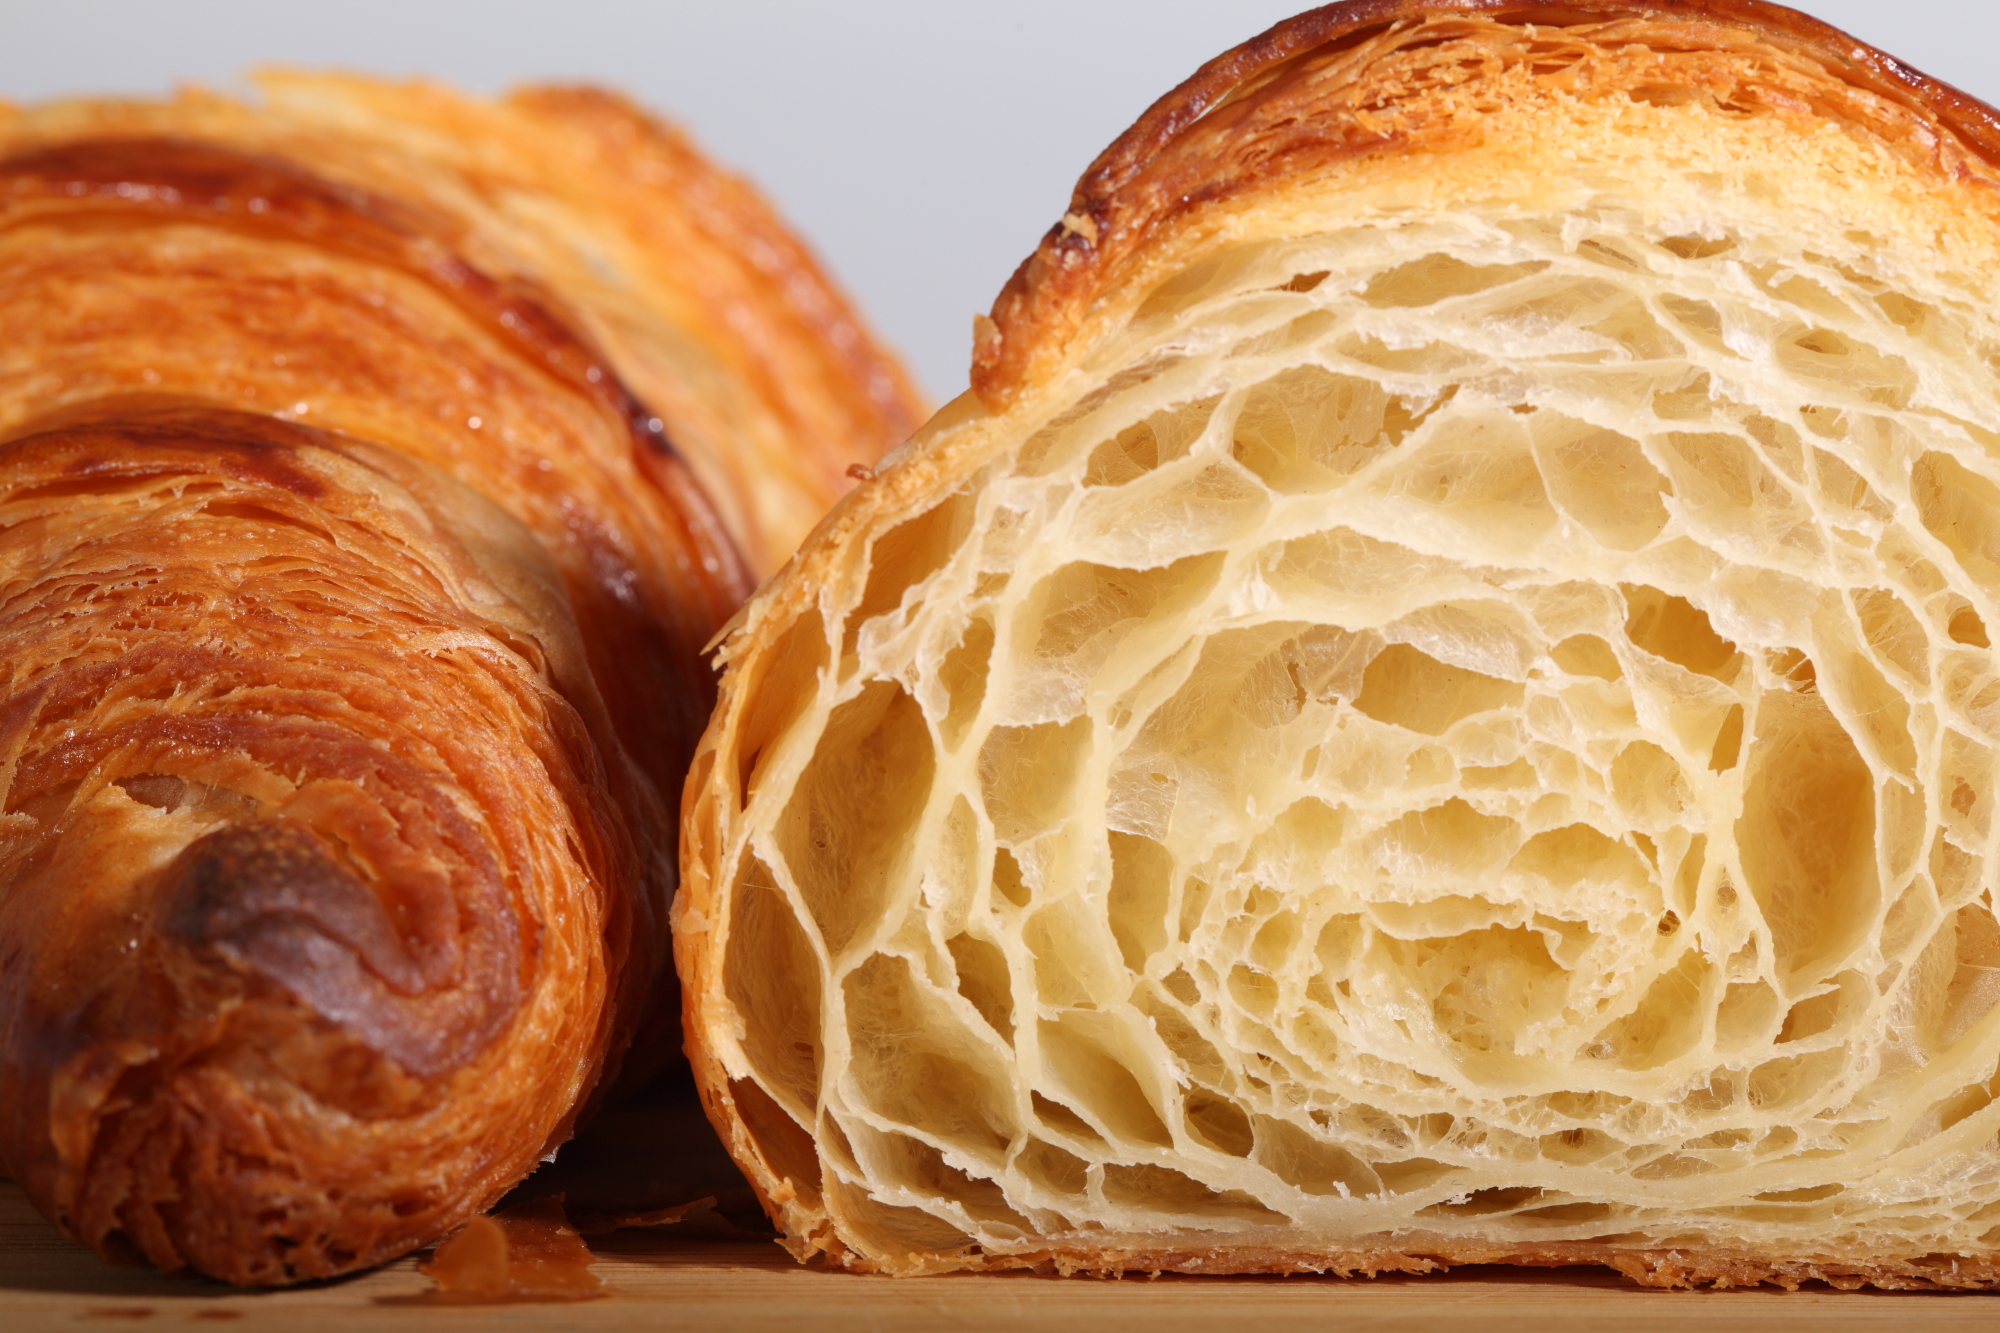
It’s all about the layers…
Klik hier voor Nederlandse versie
With this recipe we want to give you the exact directions on how we go about making classic French croissants. The recipe is an adaptation from the recipe for Classic Croissants by Jeffrey Hamelman. We started out largely following the instructions for his recipe, changed everything to our beloved metric system and found out some worthwhile croissant knowledge of our own along the way. Hopefully enough to justify sharing it all with you and inspiring you to give croissant baking a shot yourself.
Before you start we can recommend watching our croissant making video to get a general feel for the recipe. You can also check out our croissant making log where we keep track of our own croissant baking adventures. For answers to your croissant questions you can check out the Frequently Asked Croissant Questions section.
This recipe will yield about 15 good croissants plus some leftover bits which you can use to make a few, slightly odd shaped ones, or other inventive croissant-like creations.
If at first you don’t succeed, maybe you can take comfort from the fact that our first efforts were not very ‘croissant worthy’. But as you can see we persevered and got better…But we have to admit it is and always will be a tricky process. You have to work precise and be focused to get good results. So away with screaming children, hyperactive animals and all other things distracting! Put on some appropriate croissant making music and lets get to it…
Please read the following tips;
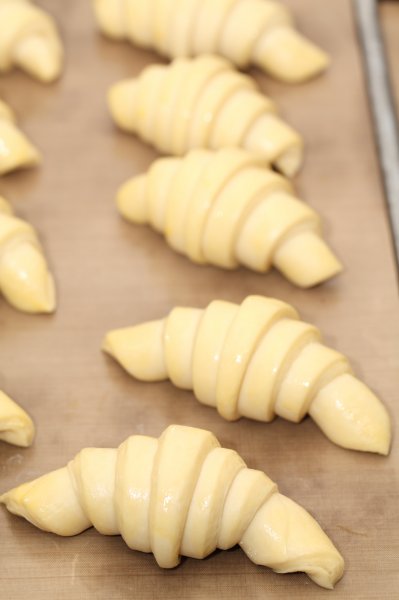


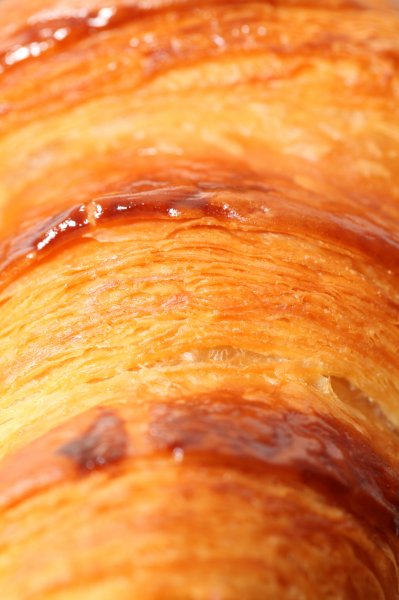
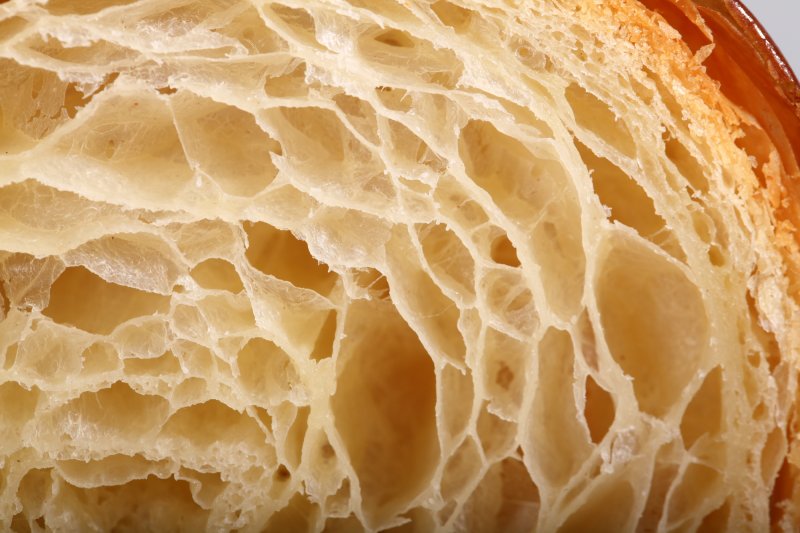
According to Raymond Calvel croissants laminated with margarine are formed into the crescent shape, while croissants laminated with butter are left in the straight form. We say, use whichever shape you like best, but do use butter!
The croissant recipe

Ingredients for the croissant dough
500 g French Type 55 flour or unbleached all-purpose flour / plain flour (extra for dusting)
140 g water
140 g whole milk (you can take it straight from the fridge)
55 g sugar
40 g soft unsalted butter
11 g instant yeast
12 g salt
Other ingredients
makes 15
280 g cold unsalted butter for laminating
1 egg + 1 tsp water for the egg wash
Day 1
Making the croissant dough
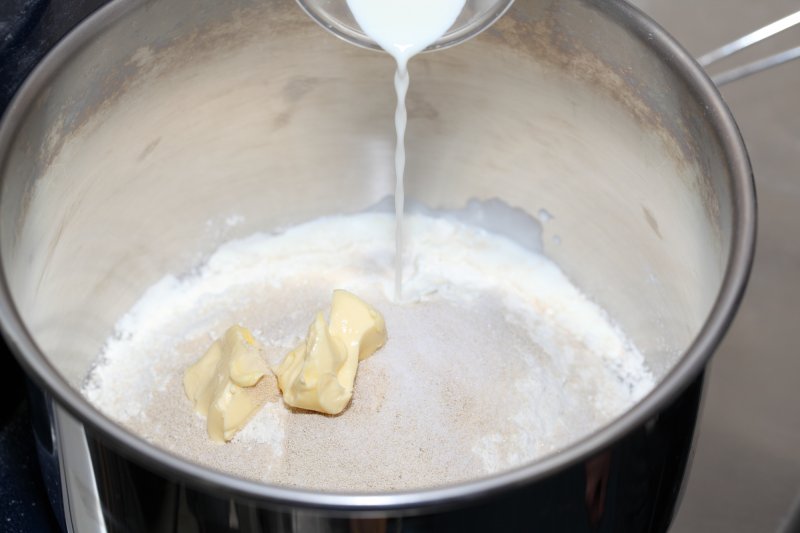
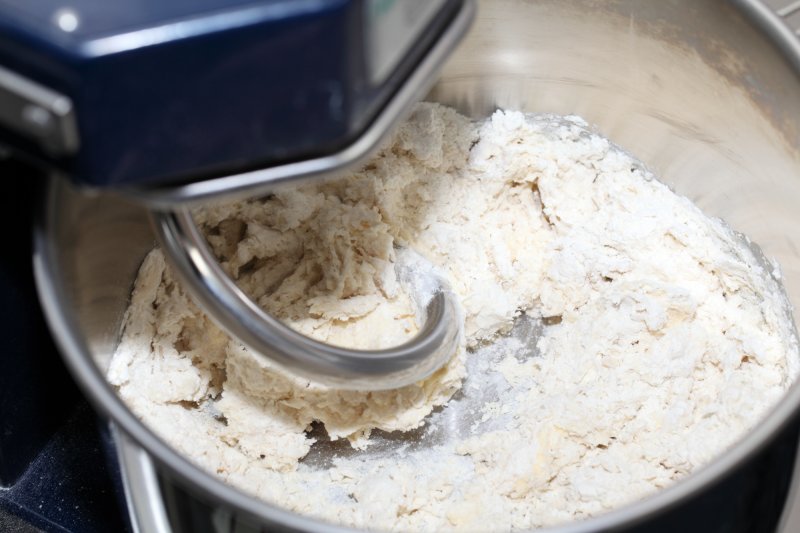
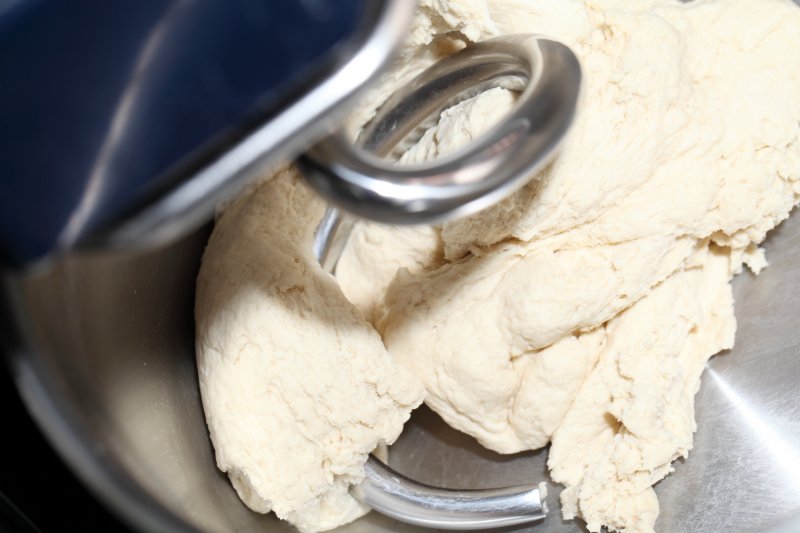
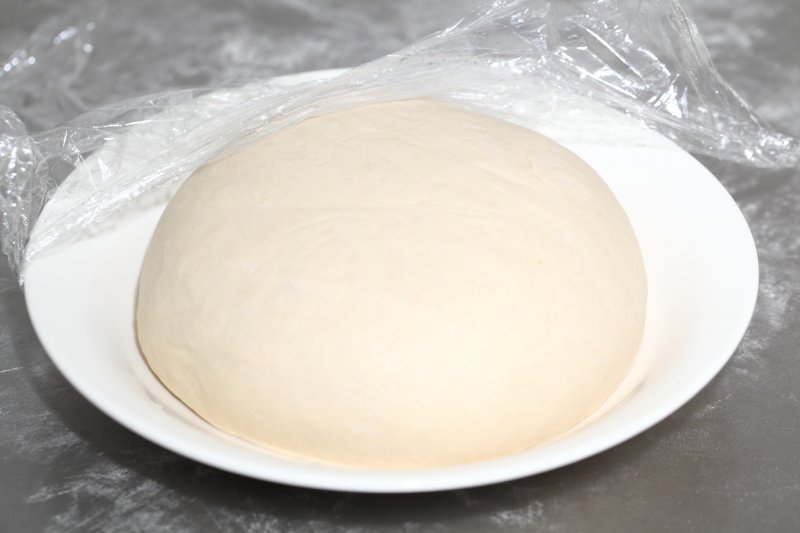
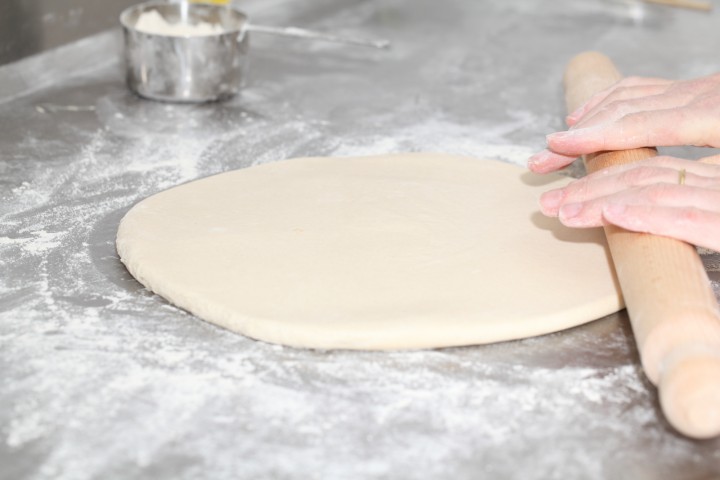
We usually do this part in the evening. Combine the dough ingredients and knead for 3 minutes, at low to medium speed, until the dough comes together and you’ve reached the stage of low to moderate gluten development. You do not want too much gluten development because you will struggle with the dough fighting back during laminating. Shape the dough like a disc, not a ball, before you refrigerate it, so it will be easier to roll it into a square shape the following day. Place the disc on a plate, cover with clingfilm and leave in the fridge overnight.
Day 2
Laminating the dough
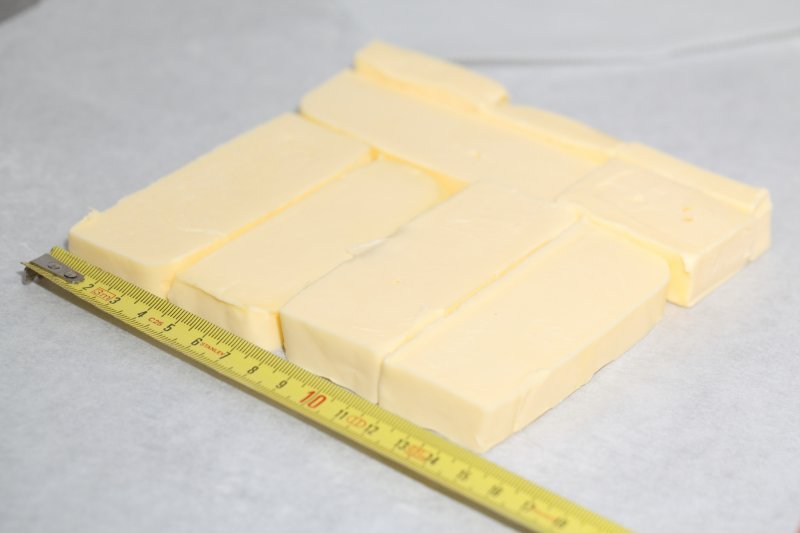
Cut the cold butter (directly from the fridge) lengthwise into 1,25 cm thick slabs. Arrange the pieces of butter on waxed paper to form a square of about 15 cm x 15 cm. Cover the butter with another layer of waxed paper and with a rolling pin pound butter until it’s about 19 cm x 19 cm. Trim / straighten the edges of the butter and put the trimmings on top of the square. Now pound lightly until you have a final square of 17 cm x 17 cm. Wrap in paper and refrigerate the butter slab until needed.

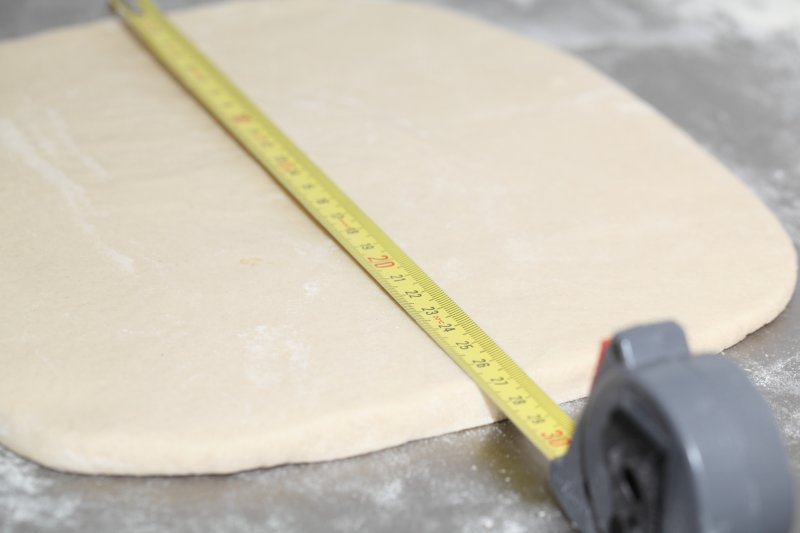
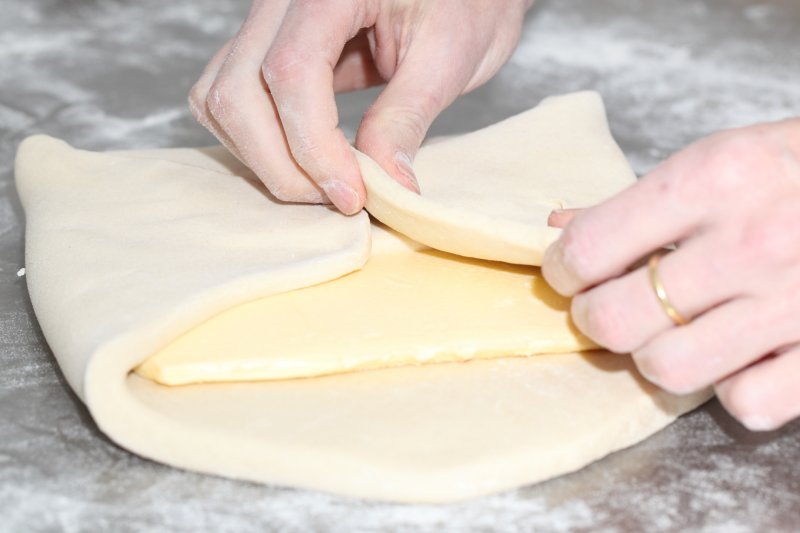
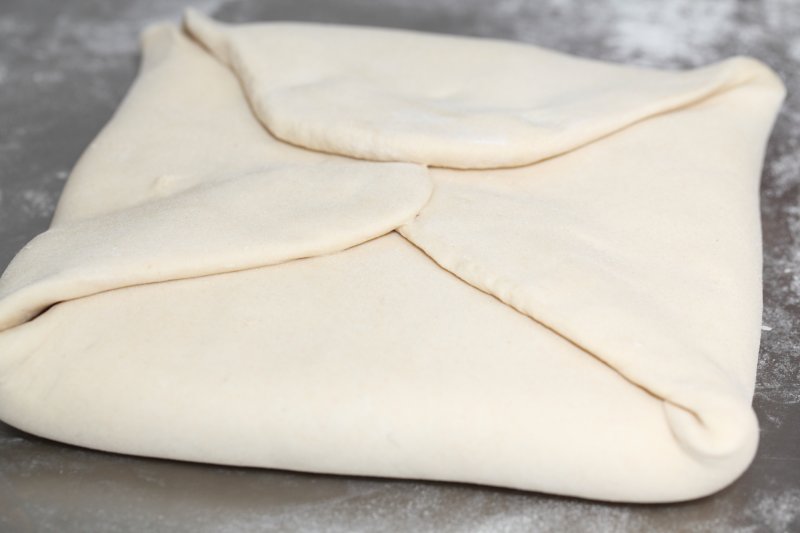
Take the dough out of the fridge. With a rolling pin roll out the dough disc into a 26 cm x 26 cm square. Try to get the square as perfect as possible and with an even thickness. Get the slab of butter from the fridge. Place the dough square so one of the sides of the square is facing you and place the butter slab on it with a 45 degree angle to the dough so a point of the butter square is facing you. Fold a flap of dough over the butter, so the point of the dough reaches the center of the butter. Do the same with the three other flaps. The edges of the dough flaps should slightly overlap to fully enclose the butter. With the palm of your hand lightly press the edges to seal the seams.
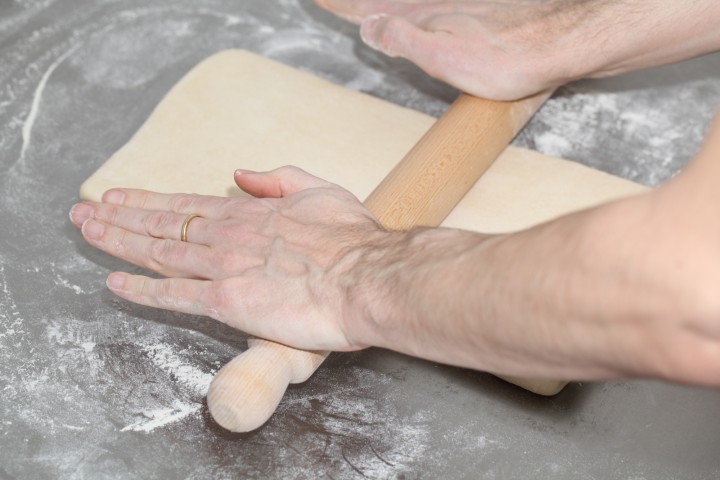
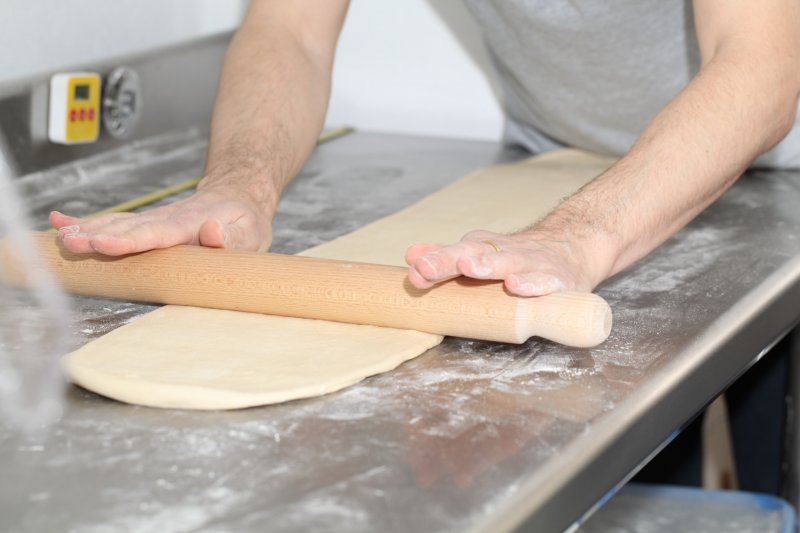
Now the dough with the sealed in butter needs to be rolled out. With a lightly floured rolling pin start rolling out, on a lightly flour dusted surface, the dough to a rectangle of 20 x 60 cm. Start rolling from the center of the dough towards the edges, and not from one side of the dough all the way to the other side. This technique helps you to keep the dough at an even thickness. You can also rotate your dough 180 degrees to keep it more even, because you tend to use more pressure when rolling away from you than towards yourself. You can use these techniques during all the rolling steps of this recipe. Aim at lengthening the dough instead of making it wider and try to keep all edges as straight as possible.
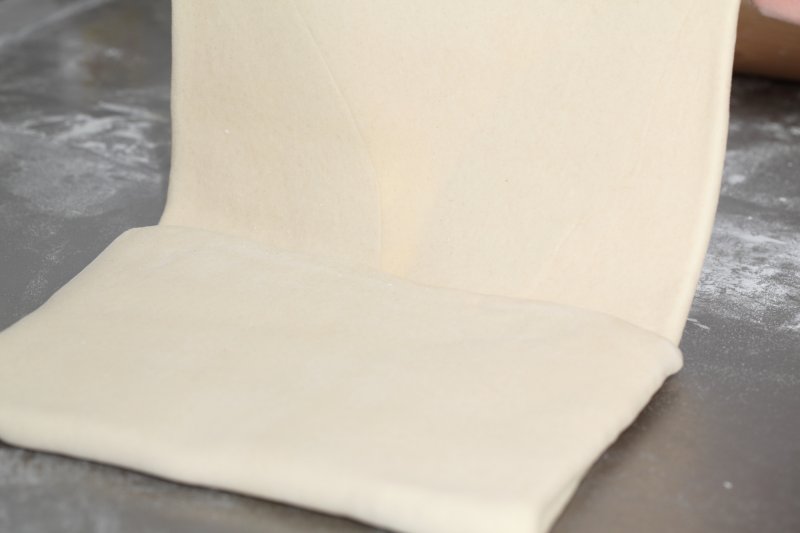
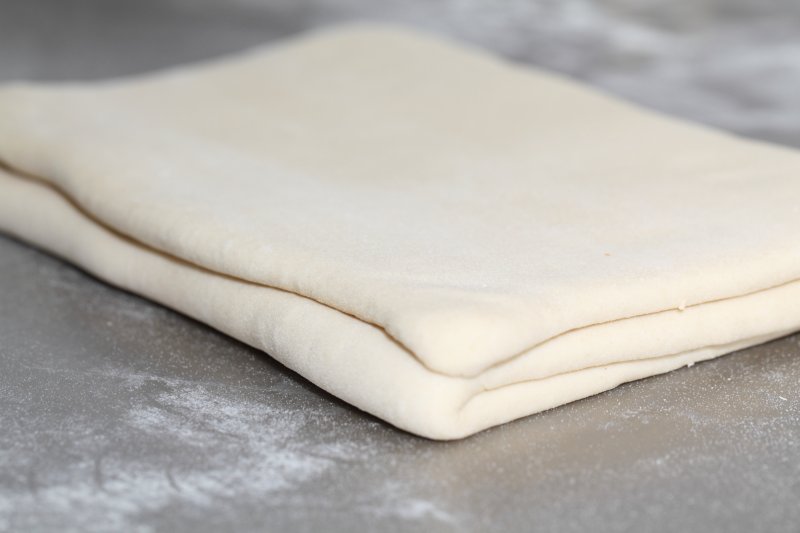
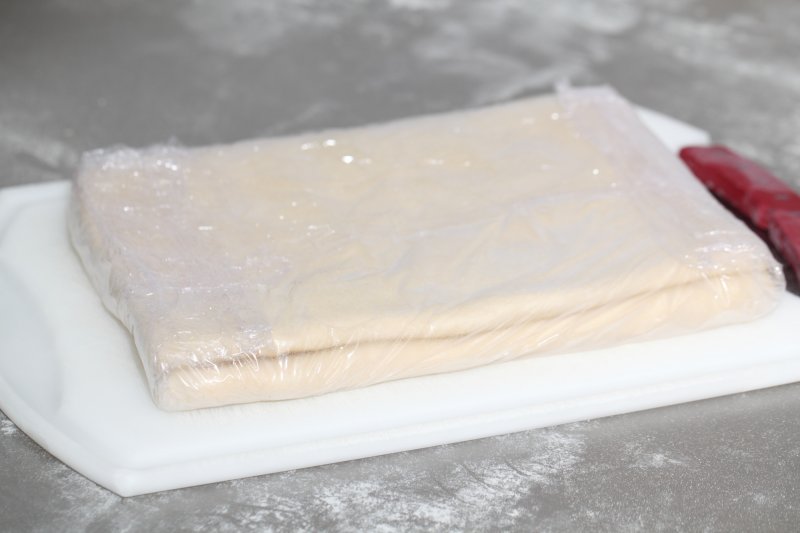
Fold the dough letter style, cover with clingfilm and refrigerate for 30 minutes (fold one third of the dough on top of itself and then fold the other side over it). Repeat the rolling and folding two more times (ending up with 27 layers of butter in total), each time rolling until the dough is about 20 cm x 60 cm. After each fold you should turn the dough 90 degrees before rolling again. The open ‘end’ of the dough should be towards you every time when rolling out the dough (you can see this in our croissant making video at around 3:40 minutes). After the second turn, again give it a 30 minute rest in the fridge. After the third turn you leave the dough in the fridge overnight until day 3, the actual croissant making day!
- Roll out to 20 cm x 60 cm
- Fold
- Refrigerate 30 minutes
- Rotate 90 degrees
- Roll out to 20 cm x 60 cm
- Fold
- Refrigerate 30 minutes
- Rotate 90 degrees
- Roll out to 20 cm x 60 cm
- Fold
- Refrigerate until day 3
- Rotate 90 degrees
- Roll out to 20 cm x 110 cm
Also see complete time table at bottom of page
Day 3
Dividing the dough
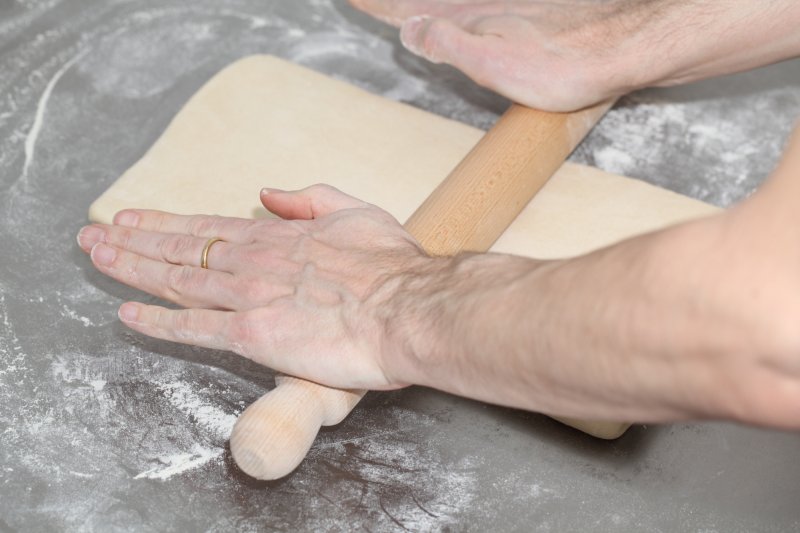
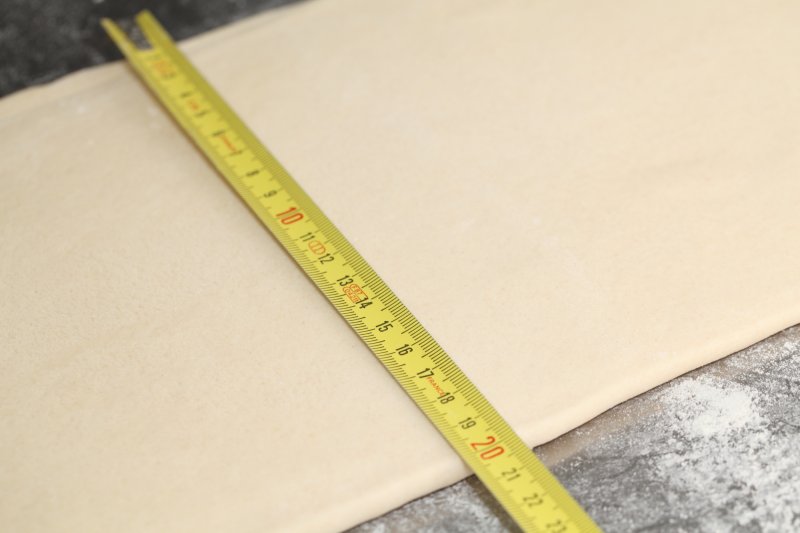
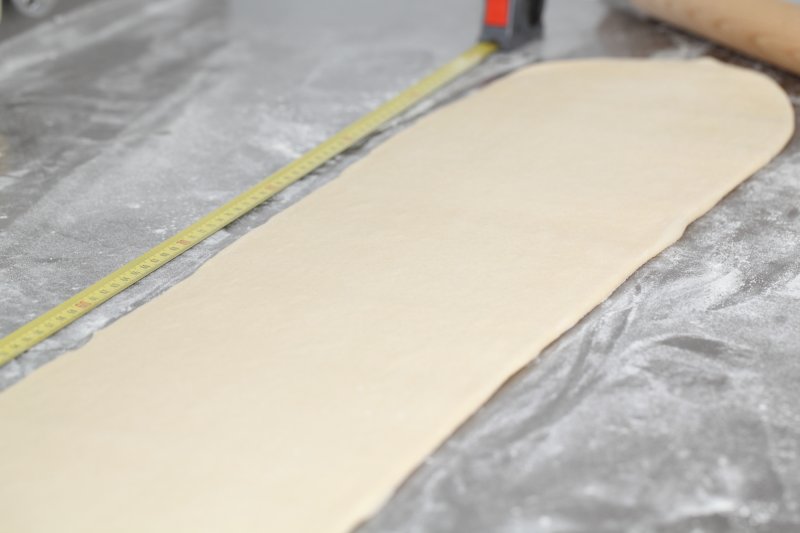
Take the dough from the fridge. Lightly flour your work surface. Now very gently roll the dough into a long and narrow strip of 20 cm x 110 cm. If the dough starts to resist too much or shrink back during this process you can fold it in thirds and give it a rest in the fridge for 10 to 20 minutes before continuing. Do not fight the dough, when the dough refuses to get any longer, rest it in the fridge! It is such a shame to ruin two days of work.
When your dough has reached its intended shape, carefully lift it a few centimeters to allow it to naturally shrink back from both sides. This way it will not shrink when you cut it. Your strip of dough should be long enough to allow you to trim the ends to make them straight and still be left with a length of about 100 cm.
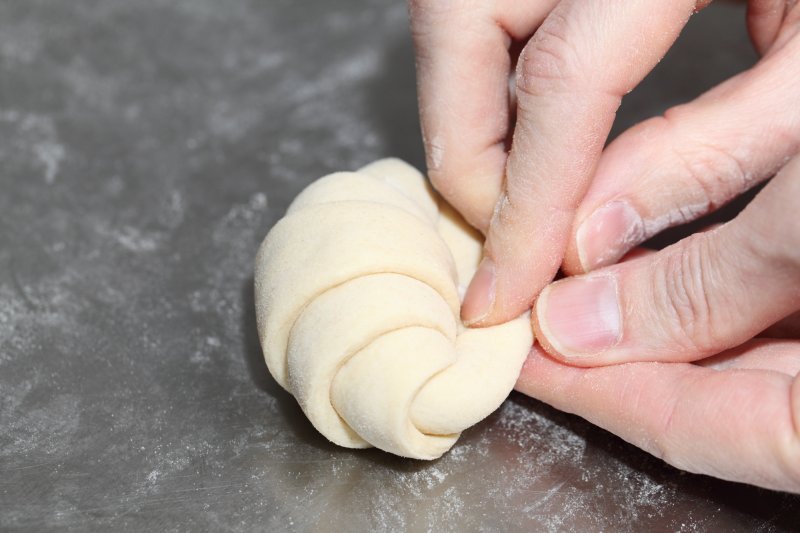
Shaping the croissants
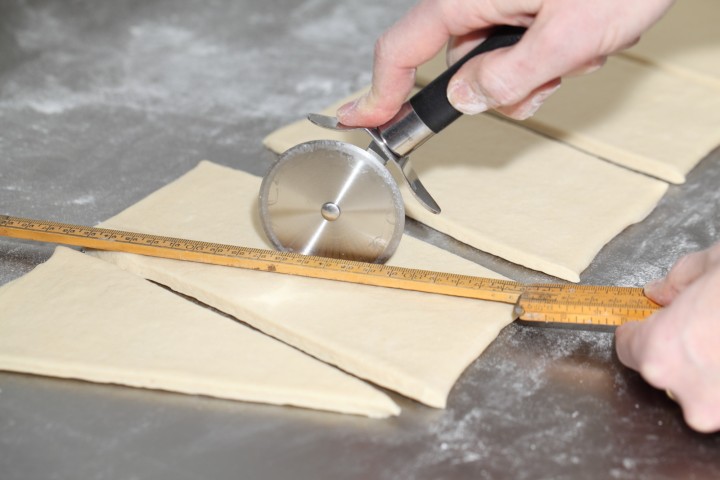
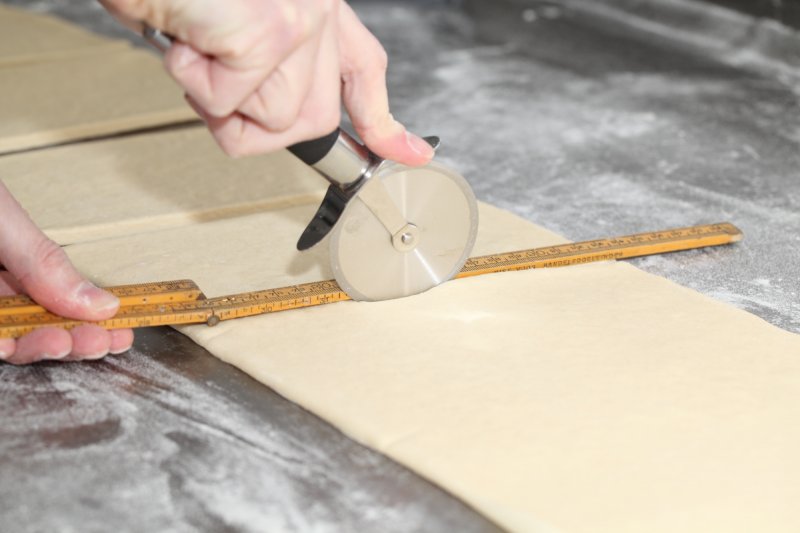
For the next stage you will need a tape measure and a pizza wheel. Lay a tape measure along the top of the dough. With the wheel you mark the top of the dough at 12,5 cm intervals along the length (7 marks total). Now lay the tape measure along the bottom of the dough and make a mark at 6,25 cm. Then continue to make marks at 12,5 cm intervals from this point (8 marks total). So the bottom and the top marks do not align with each other and form the basis for your triangles.
Now make diagonal cuts starting from the top corner cutting down to the first bottom mark. Make diagonal cuts along the entire length of the dough. Then change the angle and make cuts from the other top corner to the bottom mark to create triangles. Again repeat this along the length of the dough. This way you will end up with 15 triangles and a few end pieces of dough.
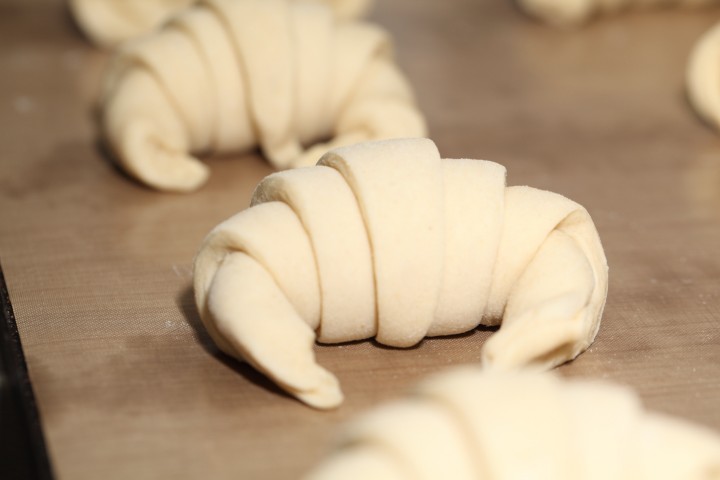
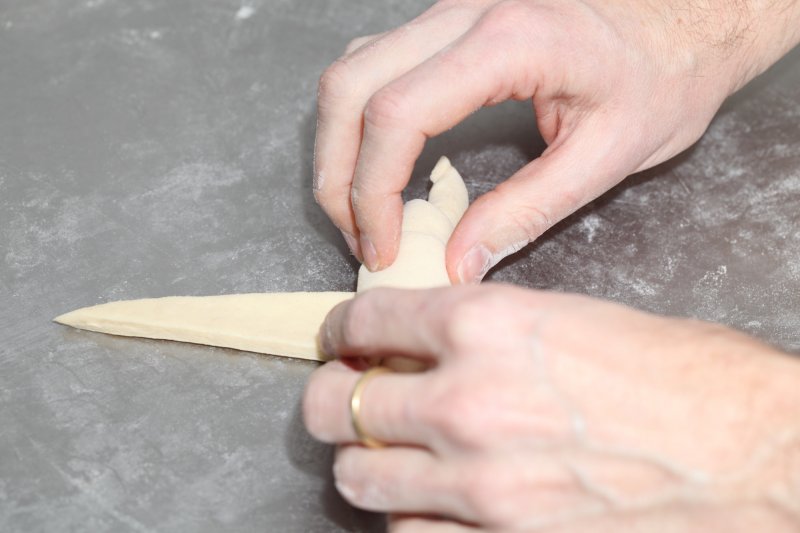
Using your pizza wheel, make 1.5 cm long notches in the center of the short side of each dough triangle.
Now very gently elongate each triangle to about 25 cm. This is often done by hand, but we have found that elongating with a rolling pin, very carefully, almost without putting pressure on the dough triangle, works better for us. You can try both methods and see what you think gives the best result.
After you cut a notch in the middle of the short end of the triangle, try and roll the two wings by moving your hands outwards from the center, creating the desired shape with a thinner, longer point. Also try and roll the dough very tightly at the beginning and put enough pressure on the dough to make the layers stick together (but not so much as to damage the layers of course).
Proofing and baking
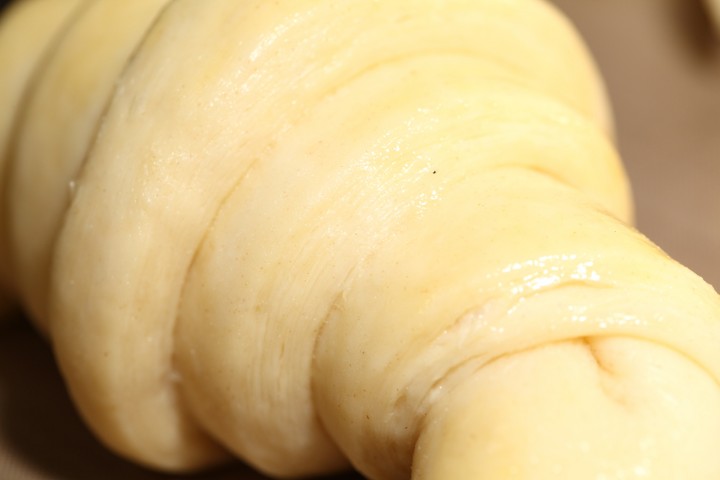
Arrange the shaped croissants on baking sheets, making sure to keep enough space between them so they will not touch when proofing and baking. Combine the egg with a teaspoon of water and whisk until smooth. Give the croissants their first thin coating of egg wash. You do not need to cover the croissants with anything, the egg wash will prevent the dough from drying out.
Proof the croissants draft-free at an ideal temperature of 24ºC to 26.5ºC / 76ºF to 79ºF (above that temperature there is a big chance butter will leak out!). We use our small Rofco B20 stone oven as a croissant proofing cabinet by preheating it for a minute to 25ºC / 77ºF. It retains this temperature for a long time because of the oven stones and isolation. The proofing should take about 2 hours. You should be able to tell if they are ready by carefully shaking the baking sheet and see if the croissants slightly wiggle. You should also be able to see the layers of dough when looking at your croissants from the side.
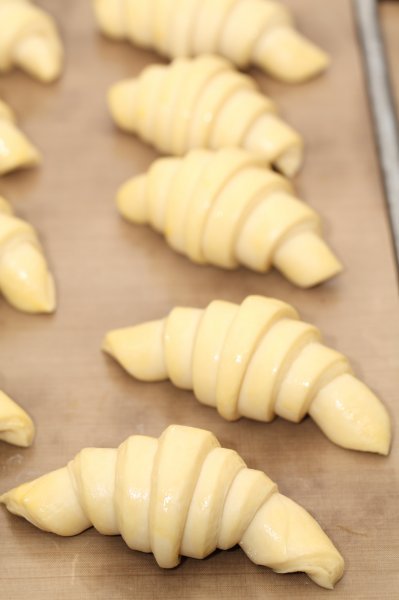



Preheat the oven at 200ºC / 390ºF convection or 220ºC / 430ºF conventional oven.

Right before baking, give the croissants their second thin coat of egg wash. We bake the croissants in our big convection oven for 6 minutes at 195ºC / 385ºF, then lowering the temperature to 165ºC / 330ºF, and bake them for another 9 minutes. Hamelman suggest baking the croissants for 18 to 20 minutes at 200ºC / 390ºF , turning your oven down a notch if you think the browning goes too quickly. But you really have to learn from experience and by baking several batches what the ideal time and temperature is for your own oven. Take out of the oven, leave for a few minutes on the baking sheet, then transfer to a cooling rack.
Latest way of baking; We heat up our double fan big convection oven at 200ºC, when heated up put the croissants in the oven and directly lower it to 175ºC. We bake them for 10 minutes at 175ºC, they will have a nice brown color by now, then lower the temperature to 150ºC, and bake them for another 6 minutes.
Best eaten while warm and fresh of course. Croissant we don’t eat or share within a day we freeze. We put them in the preheated oven (180ºC / 355ºF) for 8 minutes straight from the freezer. Nothing wrong with that, croissants eaten nice and warm, almost as good as the fresh ones…almost!
Croissant Time Table
Times are an indication and also depend on your experience with the recipe
Try to work swift but precise and take extra fridge time if needed!
Day 1 – Make initial dough
- 21.00 h – Knead for 3 minutes and store in fridge for 12 hours
Day 2 – Laminate the dough
- 09.00 h – Make butter slab and refrigerate till needed
- 09.05 h – Roll dough disc into square
- 09.10 h – Seal butter in dough
- 09.15 h – Roll out to 20 cm x 60 cm and fold
- Refrigerate 30 minutes
- 09.50 h – Rotate 90 degrees
- Roll out to 20 cm x 60 cm and fold
- Refrigerate 30 minutes
- 10.25 h – Rotate 90 degrees
- Roll out to 20 cm x 60 cm and fold
- 11.00 h – Refrigerate until day 3
Day 3 – Dividing, Shaping, proofing and baking
- 09.00 h – Roll out to 20 cm x 110 cm – part 1
- 09.05 h – Often needed! Take 20 min. fridge time if length not in one go
- 09.25 h – Roll out to 20 cm x 110 cm – part 2
- 09.30 h – Divide and shape the croissants
- 09.40 h – First coat of egg wash
- 09.45 h – Proof to perfection (indication 2 hours)
- 11.45 h – Second coat of egg wash
- 11.50 h – Bake for 15-18 minutes
- 12.10 h – Ready!
Hi
When we were at Mauritius we used to bought classic French croissant….. There was many French bakeries….. Here in India i couldn’t find classic one… Anyway i make croissant many times but here temperature always high…. So i fed up with making it… But your recipe specially your tips are too much useful….. Now again i ll try….normally temperature ranging between 45° to 34°…. In winter (now a days) 28° to 32°….within this temperature can i proof outside of oven? Please give me some special tips for this kind of temperature
Hello Anju,
We have gotten tips from people who have successfully baked croissants in the tropics. The top tips:
Cool ingredients and even utensils in the fridge before use, and use the fridge a lot to cool your dough and cool for longer if needed.
Roll the dough at night, when it is cooler. Check the weather reports and choose the coolest period possible.
Roll your dough on a cold surface like marble (which can also be cooled in the fridge before use).
For the proofing it is important to let the croissant dough not get any warmer than 26C, otherwise butter will leak out, so ideally you would need a food thermometer and keep an eye on the dough, use the coolest spot and maybe use the fridge for some time if needed.
Hope you find these tips useful and you will find an opportunity to bake them and get good results!
Hi,
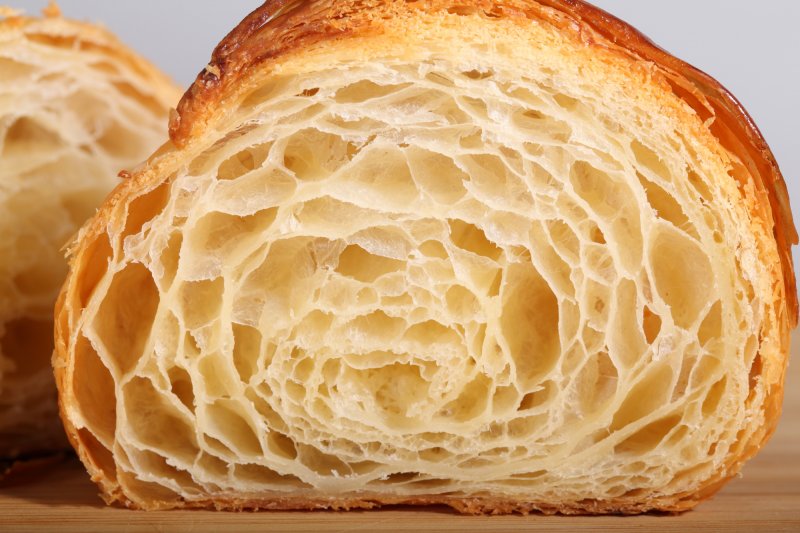
I was wondering if I could make use of the ‘beautiful’ picture of the croissant for a science article. It is to be published in a Physics magazine highlighting the structure and “spreading” properties of fats used for croissant. Let me know if this OK.
With best wishes,
Braulio
Hello Braulio,
Thank you for your message and for asking. We would be OK with the use of the picture, if you please could add us (Weekend Bakery) as the source.
Wishing you all the best with your magazine and greetings from Holland,
Ed & Marieke
This was the best written and organized recipe i have read and seen specially with the time table for newly chefs like me. Thanx
Hi Nikki,
Thank you so much for taking the time to let us know.
Wishing you many happy pastry baking moments!
Hi,
I am a big fan of your swebite, having even bought your products a couple of times. No doubt I learned a lot from you. Thank you so much!
My question: would it be possible to make croissants from a poolish?
Very best regards
Hello Caio,
Thank you so much for your kind words and sorry for the late reply.
Yes, you could use a poolish, but there really is no need, with our recipe the dough is already developing for two days in the fridge and because of this it already has all the qualities you get by using a poolish.
Happy pastry baking and greetings from Holland,
Ed & Marieke
Hello, I would like the recipe in french, with tradional like 500 g flour, how much is it in cup ( like 4 or 5 cups) and the other ingredients
Hello Lise,
Unfortunately we do not have a French version. If you want cup measurements use this link:
www.finecooking.com/recip...croissants
Why we do not use cups!
We very much recommend weighing your ingredients. Professional bakers use scales (also in the US) and in Europe home bakers do too. A scale will give you the exact same weight every time. Which is absolutely needed if you consistently want to make good bread and especially good pastry. You can get a scale for the same price as a few sacks of good flour and less than a lot of baking tools you already own!
Good luck with the baking.
I’ve made these twice. I like to tell myself I’m quite experienced in Baking I’ve made loads of French pastries from macarons to brioche, but this recipe has been my demise thus far. I can’t seem to get my croissants to be as “poofy” or airy as normal bakeries arp and me have. I noticed my croissants didn’t proof much if at all after about 2hrs and 20 minutes my home temperature being 71°F I still baked them, and for more of a pillsbury crescent result which is devastating after 3 days. I’m trying to sell them to a bakery I provide for. I’m going to try the 1 day recipe next so less time is wasted if they fail again. What can I do differently next time?
Hi there. I’m a pastry chef by trade. It’s incredibly difficult with a domestic oven to achieve a good honeycomb crumb. Professional ovens have a high temperature and steam function to ‘puff’ up the dough really quickly.
You can knock this recipe out in 1 day. Make the dough the night before, let it proof overnight and for the dough go really cold.
Use butter that’s just pliable. Laminate the dough, each turn rest for an hour. Single turns are enough.
It also sounds like your yeast wasn’t active. Make sure you use a reliable dried/fresh yeast, something that activates as soon as moisture is added. Warm your milk and water to blood temperature if this is the case.
Also you can prove your croissants in the oven, just make sure it doesn’t go over 26-27 degrees centigrade, otherwise the butter will melt and leak out, then it’s completely screwed.
I hope this helps!
Alex
Thank you Alex for sharing your experience!
I live in a climate where the norm temp is around 30 celcius……… 🙁 So what should I do?
Hi Katelynn,
There are other bakers with the same situation that have been succesful in making croissants, but it is more of a challenge. The top tips we got from these bakers:
The top tips:
Cool ingredients and even utensils in the fridge before use, and use the fridge a lot to cool your dough and cool for longer if needed.
Roll the dough at night, when it is cooler. Check the weather reports and choose the coolest period possible.
Roll your dough on a cold surface like marble (which can also be cooled in the fridge before use).
Hope this helps you to give it a try. Good luck with it!
Hello, how long can I keep the leftover dough in the fridge? I tried a different recipe before and after 3 days in the fridge the dough smelled sour. What can be the indication that I cannot use the dough anymore? Thanks!
Hi Daisalyn,
As you found out there is a limit to how long you can keep the dough in the fridge. the fermentation slowly continues in the fridge and you will develop a kind of sourdough. We do have some suggestions for you the first being to store the leftover dough in the freezer until you want to use it. For further suggestions on freezing at different stages of the croissant making process and retarding of the dough check out our one day recipe:
www.weekendbakery.com/posts...nt-recipe/
Good luck with it!
I’ve been having trouble with my lamination. When I form the butter block to fold in, I beat it until it is pliable but still cold. It folds in well. But after I take it out of the fridge for the second or third turns, the butter is hard and visibly cracks/breaks when I roll it. If I let it warm a bit, then it becomes too soft and will sometimes smear as I roll it and burst from the corners of the dough. I am not using high fat butter as no stores near me carry it. Any suggestions/pointers?
Thank you for the great guide! Although I’ve a long way to go, it has been an invaluable resource!
Hi Robert,
We want to ask what butter you are using? We use an organic butter with a low water content. A higher water content tends to make butter hard, which promotes tearing and breaking and ruins the layers. The butter we use has written on the package ‘at least 82%’ butterfat’. Hope this helps.
I learned in practice – after having lost many puff pastry! – that the butter has optimum malleability between 12 to 17 degrees. This elasticity is lost at very low temperatures (for instance 5 degree) which could cause the butter to crack inside the dough when you work it.
If use normal butter this operation tends to be more delicate.
Thank you Caio, for this very useful addition, we have not measured the temperature of the butter ourselves up til now, but this is a very good way to establish the needed consistency.
I followed your 3-day instructions exactly, except I gave up rolling at 110cm and put them in the car to proof as its cold here & I don’t have a special oven for that. Perfect. All my friends are very impressed. Is there anything else you can use this dough for?
Yes Suzy and great to read your comment! Here’s some examples that are very, very delicious and fun to make:
www.weekendbakery.com/posts...x-raisins/
www.weekendbakery.com/posts...y-caramel/
You can also try and make them with the one day version of our croissant dough recipe (because these pastries need less ‘precision’):
www.weekendbakery.com/posts...nt-recipe/
Happy pastry baking!
What is the reason to wait another day until baking?
Hi Michael,
It is done for the right planning of the whole process so you can make your croissants on the third day in the morning, but of course you can take less time if this fits your timing better. Take a look at our one day version of this recipe too for this: www.weekendbakery.com/posts...nt-recipe/
Hi, how to make your croissant fakery as shown in the picture?
Thanks,
Araf
Hello Araf,
There is not one simple answer to your question. You need to follow all the steps in the recipe carefully, use the right ingredients and practice many times to get a good flaky croissant. The proofing to the right point is also very important. We have a list of questions and answers to help you further: www.weekendbakery.com/posts...questions/
Happy baking
Thank you!
Dear WB,
This recipe is AMAZING!! It’s so detailed and precise that I got a pretty decent first time bake. Really, it was the first time I baked croissant and they turned out fluffy inside and crispy outside, with visible layers. Of course they weren’t perfect, but not due to this recipe. I think it was my inexperience and the fact that there are no days under 20º where I live, so I had to do everything under an air conditioner. Although it did get cooler, I had to pop the dough in the refrigerator several times during all rollings, because the butter would start melting.
I’m going to say it again. This recipe is absolutely AMAZING for beginner bakers (probably experienced ones too!). Thank you so much for taking your time to writing this post. I couldn’t be happier. I think I can bake anything now! LOL.
A very happy home baker,
Maria Angelica!
I agree.
This is the one recipie I come back to for croissants.
I have made them several times now following this site. I followed the instructions & watched the video.
Perfect.
Way better than the ones I would have brought.
Thanks Heaps.
Thank you Tristan, very much appreciated. Maybe, when pressed for time for example, you could also give our one day version a try:
www.weekendbakery.com/posts...nt-recipe/
Happy pastry baking!
Thank you Maria Angelica for your passionate comment! And if you are ready for anything we can also recommend trying other recipes with this croissant dough (they are not harder btw, but just very good and fun to make):
www.weekendbakery.com/posts...y-caramel/
or this one:
www.weekendbakery.com/posts...x-raisins/
And if you feel up for a different challenge (for Christmas) maybe give the Panettone a try (very much worth the effort):
www.weekendbakery.com/posts...e-project/
Enjoy the pastry baking!
Ed & Marieke
I tried the one day version. It worked out perfectly. I had trouble converting to the imperial system from metric but beside a slight measurement error everything worked out. The texture and taste are amazing. Thank you!
Hi Edward, so glad you had success already with the one day version. With the corrected measurement it will only get better!
Happy pastry baking!
Really appreciate you shared such a detail instruction … this was my second time making Croissant .. already quit successful … the one problem is the croissant did not rise as much … i ll keep on trying … again , thank you for sharing …
Sure it will improve further as you optimize the proofing times and temperature.
Happy croissant baking!
THANK YOU! I just made absolutely perfect croissants the first time. Followed all your instructions meticulously. Read the directions, watched the video, read and watched again. Three days later, hey presto CROISSANT PERFECTION at home! Thank you for all the effort you put into this site.
Hi Belinda,
Very happy with your comment. Thank you so much.
We always try and convince people to ‘carefully read the recipe’ and watch the video before starting to get a feel for the whole process. We are sure your excellent baking skills has something to do with your great first time result too 🙂
Wishing you many more enjoyable pastry baking moments!
I completely stuffed it up the 2nd time… used bleached flour and bled the butter… the shame… third attempt in progress to redeem former rock star status in household.
All part of the process Belinda. You already assessed what could be the matter and what could be improved. Lots to be learned from baking mistakes and we all make them. Be relaxed about it and on to the next bake!
Hi. I tried your recipe and they came out great. I’ve been a Baker for six years and went to school so I had an almost ready time following your directions.
The only thing I had trouble with was getting the dough to 120 cm. By the time it was at 70 it was so thin I had to stop. I’ve never had dough that thin before and unless I’m reading my ruler wrong, 120 is over 3 feet. But I got over a dozen out of it and was wondering if I read it wrong or if you really go that far and thin.
Thanks
Hi Brandon,
Yes, the measurements are correct. We go to 110 cm which is 3.6 feet or 1.2 yards. With all the right amounts and dimensions you should end up with a slab that has a thickness of somewhere around 5 mm / 0.2 inch. Just make sure the slab does not go wider than the 20 cm or around 8 inches. You can also judge the thickness hopefully from the pictures and the video.
Good luck with it and happy pastry baking!
Thank you for the blog and i am one of those people who cherish and love croissant,l have been trying to make some and your blog stand out to be the best however l found it hard to understand the first step as a beginner,you talk of the day but not what and what you mix,l have gone over the the procedure several times with no avail,when you write please do not restrict your mind to US and europe,l am from Africa and the internet is a small world,hope you will explain to me the first step
.
Hello Mike,
The first thing you must do is make the croissant dough. This means you take all these ingredients in the list below and make a dough with it. You knead it for three minutes, make a disc shape of the dough, cover it and leave it in the fridge until day 2.
500 g French Type 55 flour or unbleached all-purpose flour / plain flour (extra for dusting)
140 g water
140 g whole milk (you can take it straight from the fridge)
55 g sugar
40 g soft unsalted butter
11 g instant yeast
12 g salt
Good luck with it!
Hi,
How do you make the middle of the croissant airy like the one on your photo.
Thanks,
Joyce
Hi Jocelyn,
Two things are most important. First always carefully build up the layers, elongate the dough without putting too much pressure on it. Then the other important factor is the proofing to the right point, with a nice wobble. So really take your time for this and check the temperature of the dough. Follow all the steps carefully, make notes and practice several times to get a good feel for the recipe and all the steps. More tips on this page:
www.weekendbakery.com/posts...questions/
Happy baking,
Ed & Marieke
Good day Sir!
I’d tried 1 day version and it works! Oven it at 180 deg. C in 30 minutes and the result is perfect! The ingredients is perfect compare the other recipe which i tried about 8x but with this recipe… all first 3 tries are perfect! Thanks for the unconditional sharing of knowledge. God bless you…
Thank you so much Noli for your gracious comment . How excellent the one day version is turning out so well too.
Enjoy the pastry baking and maybe you can also give the pinwheels and pain aux raisins a try too with this same dough: www.weekendbakery.com/posts...x-raisins/
Greetings from Holland,
Ed & Marieke
I baked my croissants yesterday using your recipe and they turned out pretty good thanks to your detailed instructions. I really enjoyed the process and hope to bake many more!
Hi Nicole,
If you feel you got a hang of the process, you could also try our one day version some time:
www.weekendbakery.com/posts...nt-recipe/
Happy croissant baking!
This recipe is excellent! I think it allows for some margin of error as well, e.g. not fighting the dough on day 3. This was my second effort at croissants (the first time was an epic failure) and they turned out perfectly! as a note, I have a standard oven ( not convection) and preheated to 430F, reduced to 390F for 10 minutes and then to 350F for 8 minutes.
Thank you Nat, great you already have such excellent results with batch 2.
American English, posted for Americans to use, American browser, American isp, American measurement would be much appreciated.
As we are one of two nations that don!t use metric, it seems a bit wrong to demand standard measures. Most US measuring cups also have metric, and for 10 to 15 dollars US you can buy a scale to measue standard or metric.
Hear! Hear! Agreed!
We very much recommend weighing your ingredients. Professional bakers use scales (also in the US) and in Europe home bakers do too. A scale will give you the exact same weight every time. Which is absolutely needed if you consistently want to make good bread and especially good pastry.
And thank you Nat we agree, you can get a scale for the same price as a few sacks of good flour and less than a lot of baking tools you already own!
Hi,
I made your recipe and it’s so delightful. I used bread flour instead of all purpose flour i’m not sure if that’s ok?
There’s one problem after baking, my croissants’ layers look a bit sticking together, I can’t really see it. Is it because I underproof? Is there any chances I can send the pictures for you to describe my problem?
The winter in my place is really cold, around 4 degree now so i put a boiling water under my oven, turn on the light to create a humid environment for proofing, but after two hours, it’s indeed getting bigger but maybe not enough. Should I proof for another hour?
Regards,
Tris
Hello.
I also get the layers sticking together, but just on the inside. Lamination seems good on the exterior as I have many crispy, flaky layers, but the inside looks terrible!
My initial instinct was that the dough was under-proofed, but now I am wondering if I am using too much force when rolling as I always struggle with the final roll as the dough is very elastic. I am in the U.K. and have substituted strong white flour with protein around 13.5%.
Thanks!
Hello Simon,
You did your own analysis and we agree. We would suggest using a flour closer to the type 55 French flour with around 11% and / or making sure there is less gluten development, avoiding too much of a struggle with the dough. Keeping at this for a while means, next to the pressing on the dough, you are taking too long and the butter starts to get warm and is absorbed by the dough. So also make sure that you take a break when needed. Fold your dough letter style, cover it and refrigerate it for 20 minutes and continue the rolling process after this rest.
Happy pastry baking!
Hello Tris,
We have a few suggestions. First the bread flour alone could give a heavier result and because there could be more protein in it compared to the all purpose flour you could end up with a more elastic dough, fighting it more, pushing it to elongate and thus damaging the layers. The same as Simon is indicating in his reaction to your comment. If you want to send us pictures you can do so here: www.weekendbakery.com/send-...your-loaf/ and we can see your results.
We would also suggest, if you see the croissants need more time to proof to perfection and have that wobble, to take more time. At the same time it would be good to know the temperatures of your dough, oven and surroundings, to judge if you are in the right ballpark for the right proofing conditions. More tips on this subject here: www.weekendbakery.com/posts...mperature/
We also have a page with frequent asked questions about croissants that might be of help: www.weekendbakery.com/posts...questions/
Happy baking and just keep making them and the results will be better.
Dear WB team,
First of all thank you for this great recipe, it’s the best I found online after a long search.
I’ve been trying to follow this recipe but using sourdough, so far not so good.
Normally for this proportion of yeast I replace it with 40% sourdough (of flour) but the dough do not reach the consistency, it’s too soft and resists too much the roll out process.
Any suggestion would be very appreciated.
Thanks in advance and congratulations for this nice website!!!!
Hello Juan,
Thank you for sharing your experience. We would recommend finding a recipe that is already a worked out version for sourdough croissants. We are not really a fan of the sour taste in pastry and for that reason we do not have enough experience ourselves to guide you to a good enough result. We do want to suggest taking a look at the flour type you are using for this recipe (and for the culture), maybe you could try another one, it can make a big difference in the end result too.
Good luck with it!
Hello, just wantonto thank you again, I baked them yesteraday following the instruction to the letter. The result was amazing, all my family loved them, I still need to work, on the final part, because some of them loose their shape. But everything else was great. Than you for doing this and help everyone with all the pictures and steps we need to follow. You are awesome!!!
Thank you so much Caro, we are sure with every batch you will gain more experience and your results will be even better.
Enjoy the baking and sharing!
Ed & Marieke
Hi dear
Am Hussein kanbar from Lebanon and am bakery manager but this receipt is taken my attention and I would like to check it.hope the result to be nice
will keep in touch.
Let us know how it goes Hussein!
If you are an experiences baker you can also check out the one day version of this recipe:
www.weekendbakery.com/posts...nt-recipe/
Thank you, I have a cuestion about the yeast. In wich momento do you add it? I mean does it have a different process like combine it with the water, milk and sugar, leave it for some time and then mix it with the other ingredients, Or you just add everything at the same time? I ask this because there are several recepies in which the process with the yeast is different. Thak you again!
Hi Caro,
We use instant yeast (dry yeast) and this yeast you can always just add to the other ingredients, without dissolving or activating it first. So for the dough in this recipe you simply combine all the ingredients, including the yeast, and make the dough like we describe.
Happy pastry baking!
Weekend Bakers , Croissant is a pastry I love very much always believe I should learn how just thanking you’ll so kindly for putting selves on social media that many would be able to practise and become perfect challenges may come but its to make us like you’ll much thanks to Almighty God for blessings He bestowed upon weekend bakers may His blessings continue to reign throughout…. GreatnessCarla
Hello Carla,
Thank you for your kind words, much appreciated.
Wishing you many inspired baking hours and lovely pastries to share with your family and loved ones.
Greetings,
Marieke & Ed
very Good
Thanks so much for the immaculate instructions!
I just baked these, followed the recipe to a T. This was my second attempt at making croissants, previously I used a different recipe. This time I managed to really pull it off and I am so pleased with the results. Near perfection, even if I say so myself.
Hi Katariina,
Thank you and there is no shame in being a proud baker 🙂
Wishing you many more flaky pastries!
hi i have problem my crissont not layers it dens
i use 45 flour is it wright ?
Hello Mona,
Yes you can use type 45 flour with good results. We do not know how often you made the recipe but please keep in mind that most people need to make it 3 to 4 times to get the general feeling for the process. There is no substitute for practice and experience. There is no way to hide little mistakes in your technique when making croissants, so work very precise and follow the instructions to the letter. One small mistake is no problem but several small mistakes add up! Not getting layers can have many causes. We do have answers and suggestions for most of your questions here: www.weekendbakery.com/posts...questions/
l made it at my home
Hope it turned out great!
While proofing, my croissants started to kinda tear apart on the tops. There was also butter leaking out and the bottom rack had the problem less than the top one. Is this surely because of the proofing-temperature?
In the end they also didnt rise up, just got flat and had no layers after baking.
But up until that point I had the feeling, that things were going really nicely. So I really wanna know where the problem was.. So yeah, just asking if you think it was the proofing temperature or if you have other ideas
Hi Nicolai,
Were you able to measure the temperature while proofing? It really should never go over 26C. It sounds like it was really too warm!