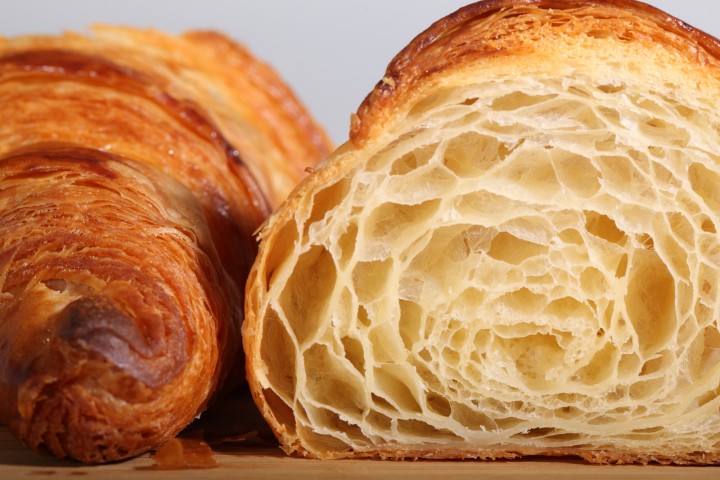
It’s all about the layers…
Klik hier voor Nederlandse versie
With this recipe we want to give you the exact directions on how we go about making classic French croissants. The recipe is an adaptation from the recipe for Classic Croissants by Jeffrey Hamelman. We started out largely following the instructions for his recipe, changed everything to our beloved metric system and found out some worthwhile croissant knowledge of our own along the way. Hopefully enough to justify sharing it all with you and inspiring you to give croissant baking a shot yourself.
Before you start we can recommend watching our croissant making video to get a general feel for the recipe. You can also check out our croissant making log where we keep track of our own croissant baking adventures. For answers to your croissant questions you can check out the Frequently Asked Croissant Questions section.
This recipe will yield about 15 good croissants plus some leftover bits which you can use to make a few, slightly odd shaped ones, or other inventive croissant-like creations.
If at first you don’t succeed, maybe you can take comfort from the fact that our first efforts were not very ‘croissant worthy’. But as you can see we persevered and got better…But we have to admit it is and always will be a tricky process. You have to work precise and be focused to get good results. So away with screaming children, hyperactive animals and all other things distracting! Put on some appropriate croissant making music and lets get to it…
Please read the following tips;
According to Raymond Calvel croissants laminated with margarine are formed into the crescent shape, while croissants laminated with butter are left in the straight form. We say, use whichever shape you like best, but do use butter!
The croissant recipe

Ingredients for the croissant dough
500 g French Type 55 flour or unbleached all-purpose flour / plain flour (extra for dusting)
140 g water
140 g whole milk (you can take it straight from the fridge)
55 g sugar
40 g soft unsalted butter
11 g instant yeast
12 g salt
Other ingredients
makes 15
280 g cold unsalted butter for laminating
1 egg + 1 tsp water for the egg wash
Day 1
Making the croissant dough
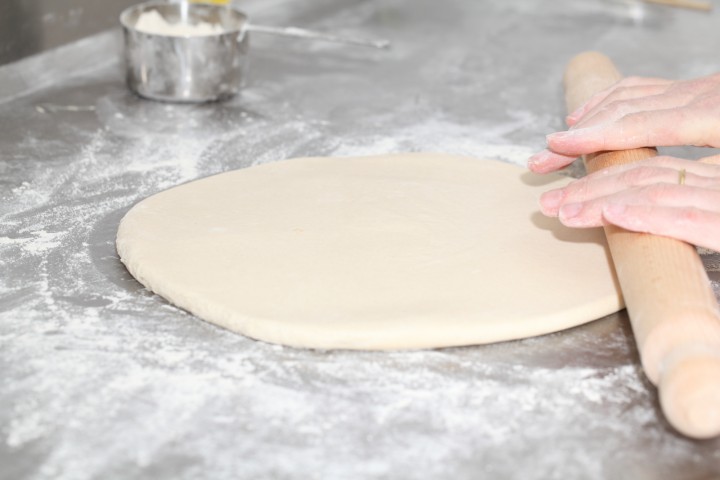
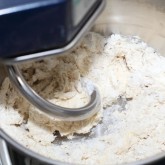
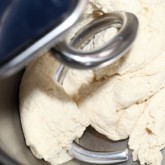
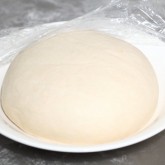
We usually do this part in the evening. Combine the dough ingredients and knead for 3 minutes, at low to medium speed, until the dough comes together and you’ve reached the stage of low to moderate gluten development. You do not want too much gluten development because you will struggle with the dough fighting back during laminating. Shape the dough like a disc, not a ball, before you refrigerate it, so it will be easier to roll it into a square shape the following day. Place the disc on a plate, cover with clingfilm and leave in the fridge overnight.
Day 2
Laminating the dough
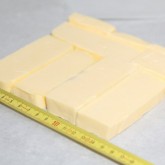
Cut the cold butter (directly from the fridge) lengthwise into 1,25 cm thick slabs. Arrange the pieces of butter on waxed paper to form a square of about 15 cm x 15 cm. Cover the butter with another layer of waxed paper and with a rolling pin pound butter until it’s about 19 cm x 19 cm. Trim / straighten the edges of the butter and put the trimmings on top of the square. Now pound lightly until you have a final square of 17 cm x 17 cm. Wrap in paper and refrigerate the butter slab until needed.
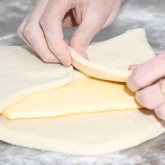
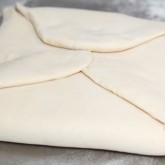
Take the dough out of the fridge. With a rolling pin roll out the dough disc into a 26 cm x 26 cm square. Try to get the square as perfect as possible and with an even thickness. Get the slab of butter from the fridge. Place the dough square so one of the sides of the square is facing you and place the butter slab on it with a 45 degree angle to the dough so a point of the butter square is facing you. Fold a flap of dough over the butter, so the point of the dough reaches the center of the butter. Do the same with the three other flaps. The edges of the dough flaps should slightly overlap to fully enclose the butter. With the palm of your hand lightly press the edges to seal the seams.
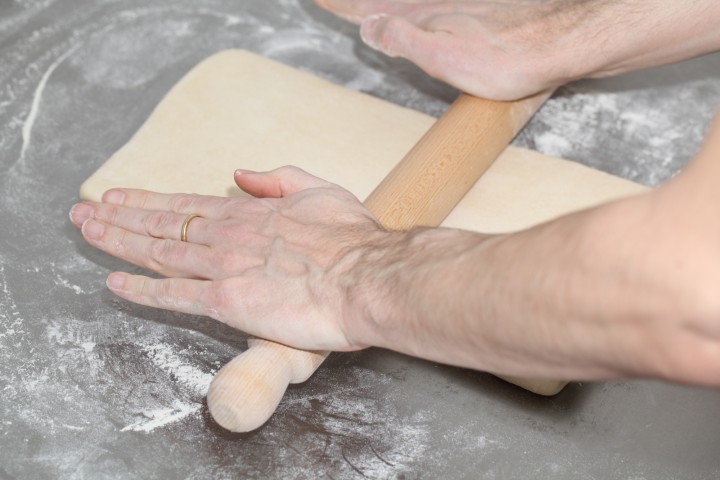
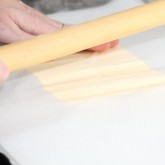
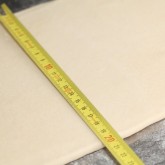
Now the dough with the sealed in butter needs to be rolled out. With a lightly floured rolling pin start rolling out, on a lightly flour dusted surface, the dough to a rectangle of 20 x 60 cm. Start rolling from the center of the dough towards the edges, and not from one side of the dough all the way to the other side. This technique helps you to keep the dough at an even thickness. You can also rotate your dough 180 degrees to keep it more even, because you tend to use more pressure when rolling away from you than towards yourself. You can use these techniques during all the rolling steps of this recipe. Aim at lengthening the dough instead of making it wider and try to keep all edges as straight as possible.
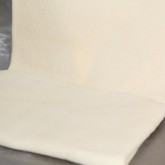
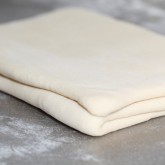
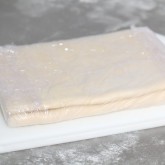
Fold the dough letter style, cover with clingfilm and refrigerate for 30 minutes (fold one third of the dough on top of itself and then fold the other side over it). Repeat the rolling and folding two more times (ending up with 27 layers of butter in total), each time rolling until the dough is about 20 cm x 60 cm. After each fold you should turn the dough 90 degrees before rolling again. The open ‘end’ of the dough should be towards you every time when rolling out the dough (you can see this in our croissant making video at around 3:40 minutes). After the second turn, again give it a 30 minute rest in the fridge. After the third turn you leave the dough in the fridge overnight until day 3, the actual croissant making day!
- Roll out to 20 cm x 60 cm
- Fold
- Refrigerate 30 minutes
- Rotate 90 degrees
- Roll out to 20 cm x 60 cm
- Fold
- Refrigerate 30 minutes
- Rotate 90 degrees
- Roll out to 20 cm x 60 cm
- Fold
- Refrigerate until day 3
- Rotate 90 degrees
- Roll out to 20 cm x 110 cm
Also see complete time table at bottom of page
Day 3
Dividing the dough
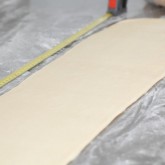
Take the dough from the fridge. Lightly flour your work surface. Now very gently roll the dough into a long and narrow strip of 20 cm x 110 cm. If the dough starts to resist too much or shrink back during this process you can fold it in thirds and give it a rest in the fridge for 10 to 20 minutes before continuing. Do not fight the dough, when the dough refuses to get any longer, rest it in the fridge! It is such a shame to ruin two days of work.
When your dough has reached its intended shape, carefully lift it a few centimeters to allow it to naturally shrink back from both sides. This way it will not shrink when you cut it. Your strip of dough should be long enough to allow you to trim the ends to make them straight and still be left with a length of about 100 cm.
Shaping the croissants
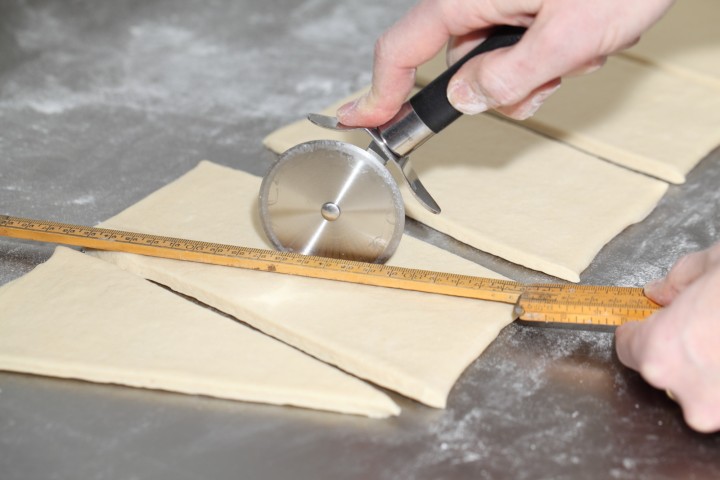
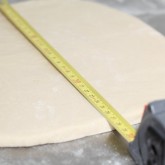
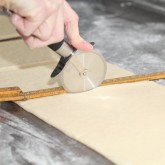
For the next stage you will need a tape measure and a pizza wheel. Lay a tape measure along the top of the dough. With the wheel you mark the top of the dough at 12,5 cm intervals along the length (7 marks total). Now lay the tape measure along the bottom of the dough and make a mark at 6,25 cm. Then continue to make marks at 12,5 cm intervals from this point (8 marks total). So the bottom and the top marks do not align with each other and form the basis for your triangles.
Now make diagonal cuts starting from the top corner cutting down to the first bottom mark. Make diagonal cuts along the entire length of the dough. Then change the angle and make cuts from the other top corner to the bottom mark to create triangles. Again repeat this along the length of the dough. This way you will end up with 15 triangles and a few end pieces of dough.
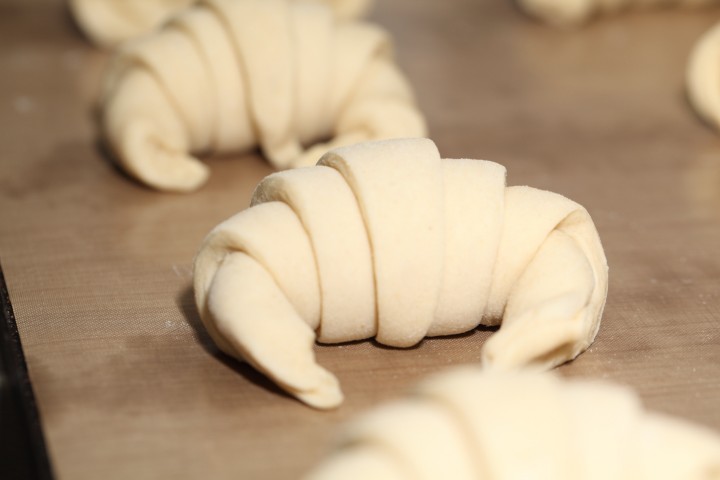
Using your pizza wheel, make 1.5 cm long notches in the center of the short side of each dough triangle.
Now very gently elongate each triangle to about 25 cm. This is often done by hand, but we have found that elongating with a rolling pin, very carefully, almost without putting pressure on the dough triangle, works better for us. You can try both methods and see what you think gives the best result.
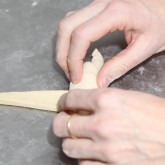
After you cut a notch in the middle of the short end of the triangle, try and roll the two wings by moving your hands outwards from the center, creating the desired shape with a thinner, longer point. Also try and roll the dough very tightly at the beginning and put enough pressure on the dough to make the layers stick together (but not so much as to damage the layers of course).
Proofing and baking
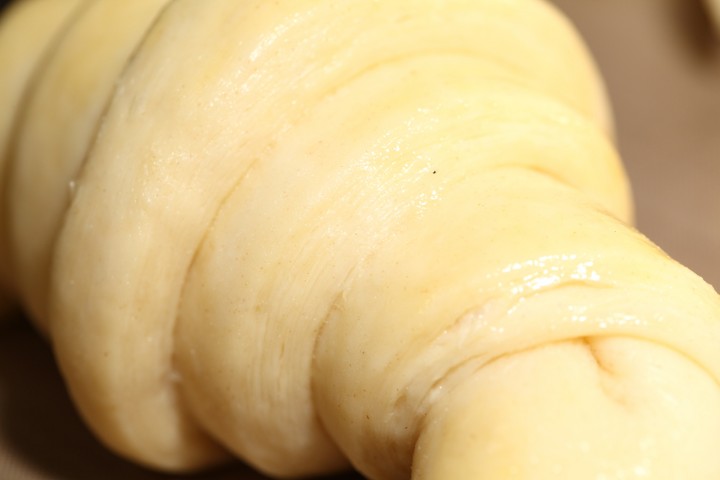
Arrange the shaped croissants on baking sheets, making sure to keep enough space between them so they will not touch when proofing and baking. Combine the egg with a teaspoon of water and whisk until smooth. Give the croissants their first thin coating of egg wash. You do not need to cover the croissants with anything, the egg wash will prevent the dough from drying out.
Proof the croissants draft-free at an ideal temperature of 24ºC to 26.5ºC / 76ºF to 79ºF (above that temperature there is a big chance butter will leak out!). We use our small Rofco B20 stone oven as a croissant proofing cabinet by preheating it for a minute to 25ºC / 77ºF. It retains this temperature for a long time because of the oven stones and isolation. The proofing should take about 2 hours. You should be able to tell if they are ready by carefully shaking the baking sheet and see if the croissants slightly wiggle. You should also be able to see the layers of dough when looking at your croissants from the side.
Preheat the oven at 200ºC / 390ºF convection or 220ºC / 430ºF conventional oven.

Right before baking, give the croissants their second thin coat of egg wash. We bake the croissants in our big convection oven for 6 minutes at 195ºC / 385ºF, then lowering the temperature to 165ºC / 330ºF, and bake them for another 9 minutes. Hamelman suggest baking the croissants for 18 to 20 minutes at 200ºC / 390ºF , turning your oven down a notch if you think the browning goes too quickly. But you really have to learn from experience and by baking several batches what the ideal time and temperature is for your own oven. Take out of the oven, leave for a few minutes on the baking sheet, then transfer to a cooling rack.
Latest way of baking; We heat up our double fan big convection oven at 200ºC, when heated up put the croissants in the oven and directly lower it to 175ºC. We bake them for 10 minutes at 175ºC, they will have a nice brown color by now, then lower the temperature to 150ºC, and bake them for another 6 minutes.
Best eaten while warm and fresh of course. Croissant we don’t eat or share within a day we freeze. We put them in the preheated oven (180ºC / 355ºF) for 8 minutes straight from the freezer. Nothing wrong with that, croissants eaten nice and warm, almost as good as the fresh ones…almost!
Croissant Time Table
Times are an indication and also depend on your experience with the recipe
Try to work swift but precise and take extra fridge time if needed!
Day 1 – Make initial dough
- 21.00 h – Knead for 3 minutes and store in fridge for 12 hours
Day 2 – Laminate the dough
- 09.00 h – Make butter slab and refrigerate till needed
- 09.05 h – Roll dough disc into square
- 09.10 h – Seal butter in dough
- 09.15 h – Roll out to 20 cm x 60 cm and fold
- Refrigerate 30 minutes
- 09.50 h – Rotate 90 degrees
- Roll out to 20 cm x 60 cm and fold
- Refrigerate 30 minutes
- 10.25 h – Rotate 90 degrees
- Roll out to 20 cm x 60 cm and fold
- 11.00 h – Refrigerate until day 3
Day 3 – Dividing, Shaping, proofing and baking
- 09.00 h – Roll out to 20 cm x 110 cm – part 1
- 09.05 h – Often needed! Take 20 min. fridge time if length not in one go
- 09.25 h – Roll out to 20 cm x 110 cm – part 2
- 09.30 h – Divide and shape the croissants
- 09.40 h – First coat of egg wash
- 09.45 h – Proof to perfection (indication 2 hours)
- 11.45 h – Second coat of egg wash
- 11.50 h – Bake for 15-18 minutes
- 12.10 h – Ready!













khaled says
Comment faire de la couleur glacis croissant le doré et brillant et beau ce propres œufs, du lait, du beurre ou de sel
Hilary Webb says
Ils on dit dans la recette, un oeuf battue’ avec un peu d’eau. Une fois avant l’epreuvage. The 2ieme fois juste avant la cuisson.
J’ai trouve’e de faire le cuisson vers l’etagiere superieure, les croissants ont plus marron, et c’est meilleur de faire cuire une plaque de cuisson a chaque fois pour couleur reguliere. Moi je fais la cuisson avec 2 plaques de cuissons dessus les uns des autres pour previnir brunissement trops les fonds.
(Translation: It says in the recipe, one egg beaten with a little water. One time before proofing. The 2nd time just before cooking. I have found that cooking near the top shelf of the oven, the croissants are browner, and it is better to cook one sheet at a time in order to get an even color. I also cook with 2 baking pans stacked one on top of another to prevent the bottoms from getting too brown.)
Kayla says
Thank you for this great recipe. I do not know how measure things in grams, so I was wondering if you had a recipe with a cups/tablespoons conversions. I attempted these croissants after converting to grams with the help of an online converter, but my dough was much to sticky and my croissants did not turn out as beautiful as those shown above (though the taste delicious).
Thanks!
Weekend Bakers says
Hi Kayla,
It can also be the case that the flour you use has a different absorption than ours, because each flour type/brand can behave different and you always have to give it some tries to adapt to your ingredients and conditions. Maybe you have read in the introduction that our recipe is an adaptation of this one by Hamelman: www.finecooking.com/recip…sants.aspx and we converted to metric from this recipe. So you can stick to that recipe, or you can take the ingredients list from that recipe and follow our instructions. Both will give good results, but croissants are one of the most challenging bakes and every baker faces challenges to get it right. But luckily they are still delicious even though they are not yet perfect!
Hope you will give it another try.
Happy Baking,
Ed & Marieke
Kayla says
Thank you for the help! I have tried the finecooking.com recipe before, but I was not able to achieve that perfect flakey texture. Perhaps next time I will use the converted ingredients from the last recipe and your instructions.I can’t wait to try again.
Weekend Bakers says
And you can also mop up some inspiration from our croissant making log (and laugh at the pictures of our very first croissant baking results 😉 www.weekendbakery.com/posts…aking-log/
Happy croissant baking!
Marieke
JW says
I have been using active dry yeast rather than instant and was wondering if I needed to use the same amount and if I need to use warm water in order to activate it. Thanks!
Weekend Bakers says
Hello JW,
You always need to use a little more active dry yeast than you would instant. For this you should multiply the amount of instant yeast by about 1.2. So for this recipe it would be 11 x 1.2 = 13.2 g active dry yeast. If you use instant yeast, there is no need to activate the yeast. You just mix it in with your dry ingredients. If you have active dry yeast, it helps to activate the yeast first with some lukewarm water and leave it to ‘wake up’ for about 10 minutes. Do not forget to subtract the amount of water you use for the yeast from the total amount used in the recipe, otherwise the balance of the ingredients will be disturbed of course and your dough will become too wet.
Good luck with it and happy baking!
Ed & Marieke
Bettina says
Hello and thank you for your awesome instructions and tips! I tried making croissants twice before with pretty good results for a first time croissant maker but the third time was a charm. With the practice and your recipe my third attempt got me kicked out of my moms house because the croissants were SOOOOOO good, shecouldn’t stop eating them 🙂
Of all the recipes and videos I looked at to prepare for making these treats yours was the best and most helpful.
Thanks so much,
Bettina
Weekend Bakers says
Hi Bettina,
Thank you so much for sharing this with us!
Funny, how being kicked out of the house in this case can be considered a compliment 🙂
Keep up the wonderful baking and sharing!
Ed & Marieke
Careen Koh says
Dear Ed & Marieke…
Thanks for your reply. I will try making this delicious treat follow your recipe.
Regards,
Careen
Careen Koh says
Dear Ed and Marieke,
I am glad and happy to found your blog today for croissants recipe. My son had been requesting me to made this delicious treat for him a few months ago. I like your recipe and details instruction but my family do not fancy butter. What can I substitute for the butter to make this croissant. I plan to try out this Saturday.
Weekend Bakers says
Hallo Careen,
To be honest we have never heard of nor seen a croissant that was not made with butter (or margarine which is considered the ‘cheaper version’). So we do not think there can really be a substitute that in any way can lead to something resembling the layering and flakiness of a buttery croissant.
And we also do not know any child (till now) that does not like them.
Sorry we cannot help you with an alternative but unless you are not allowed to eat butter, we would suggest trying this recipe with butter anyway, because to us the only real croissant is a buttery one.
Happy Baking,
Ed & Marieke
joseph torrres yap says
ived tried the recipe, but it comes out messy,, ived experienced butter leakage fom the dough. i tried to add flour, the result was no good.. I want to try again, can you tell me what causes the butter to leak? temperature and procedures are correct..
thanks
jojo yap
Weekend Bakers says
Hi Joseph,
There are so many things you have to do right to get a good croissant and many things that can go wrong. That is why it is one of the most challenging bakes in the book of course and it is normal it will take you a few rounds of baking to get it right for your circumstances. Do not be discouraged because it is the same for all of us.
Butter leakage can indicate a number of things: butter is too soft to begin with, you worked not fast enough and the butter got soft or a combination. Working with the dough in a cool room on a cool day so you have a bit more time for all your steps will surely help.
Also the right amount of pressure when rolling out the dough is important. If you press too hard and for too long butter can get out. Having to press hard to roll out the dough can also be an indication of the dough itself being developed too far (too much gluten) and the dough is starting to get too elastic. Reducing the mixing time a bit could be helpful.
Always hard to pinpoint without seeing the actual dough of course.
Hope you will give it another try.
Happy Baking,
Ed & Marieke
Karon B. says
As a professional baker and croissant maker I found your recipe and information to be excellent. I recently gave a hands-on cooking class and taught from ‘scratch’ the whole process to five brilliant ‘students’ who were almost all ‘newbies’ to baking in general. They had great success and I will share your website with them as I love your videos and information. Also, photographs of the students, smiles on their faces with their own croissants on the baking racks.
JP says
Amazing croissants. Would you have a recipe for “you beaut almond cream filling” for them?
Keep up the good work. Love your baguette recipe as well.
Cheers,
Foxtyg
Weekend Bakers says
Hi JP,
Thanks! But we do not no exactly what you are referring to regarding the cream filling??
Greetings and happy baking,
Marieke
dd says
“Cut the cold butter (directly from the fridge) lengthwise into 1,25 cm thick slabs. Arrange the pieces of butter on waxed paper to form a square of about 15 cm x 15 cm. Cover the butter with another layer of waxed paper and with a rolling pin pound butter until it’s about 19 cm x 19 cm.”
i understood up to this part. can someone help me with the rest please
“Trim / straighten the edges and put the trimmings on top of the square. Now pound lightly until you have a final square of 17 cm x 17 cm. Fold in the paper and refrigerate the butter slab until needed.”
what is this bit referring to? the dough or the butter. and put what trimmings on what square. very confused
thanks in advance
Weekend Bakers says
Hello dd,
This all concerns the butter. You trim the edges of the butter slab (thus making it smaller) and place the trimmings of the butter on the butter slab and pound lightly to incorporate again and make sure the final square measures 17 x 17 cm. Wrap the butter in paper and refrigerate. It might also be helpful for you to watch the mentioned video of us making the croissants where you can also see the butter trimming process. www.weekendbakery.com/posts…roissants/
Good luck with it and happy baking,
Ed & Marieke
Esther says
I had a go at making these at the weekend. They were delicious! Thank you so much for the recipe. Here is my attempt: estherprivett.wordpress.com/2013/…issants-2/
Chris says
Dear Ed and Marieke,
I want to try your croissant recipe, but would prefer to make half as many ie about 7, at a go, as we try to eat them only at w/ends! Would it be best to make the full mix, then halve the dough at the start of Day 3, prior to rolling and cutting out, and freeze one half for use the following week?
Also, you talk of using a ‘lighter’ flour to improve lightness, what exactly is this? In the UK we have Plain Flour, which is usually used for pastry, and Strong White Flour, which has a higher gluten content and is used for breadmaking. The Strong White is normally recommended in Croissant recipes, but the croissants do not come out particularly light. Would Plain Flour be better? We can also buy the Italian ‘oo double zero flour which I have not tried. Your comments would be much appreciated. Very many thanks. Best wishes, Chris
Weekend Bakers says
Hello Chris,
We understand. You would rather make more in one go than do the whole process again for ‘just’ 7 croissants. Although we have not tried it ourselves, the freezing of the croissant dough, we have heard from other bakers it works well. Till now we just froze the baked croissants and this works well too. But if you freeze the dough we would like to know from you how well you think it works and if the result is up to par with the fresh batch process.
As far as the flour goes we would recommend using the plain flour or maybe a combination of plain flour and Italian 00 flour. Strong bread flour is not the best option because of the (very probable) higher gluten content and amount of fibers still present in the flour, weighing it down as it were.
Good luck and happy croissant baking!
Ed & Marieke
Chris says
Hello Ed and Marieke
Many thanks for your reply – your comments regarding the flour were very interesting. I have tried freezing cooked croissants before, but I felt that they dried out a bit from their time in the freezer. Like your correspondent Esther, I have been quite impressed with the Waitrose bake from frozen croissants, and thought perhaps it would work well with home made. I guess the frozen dough would need to be brought up to temperature slowly, perhaps overnight in the fridge. I shall give it a go and let you know how I get on! Many thanks. Chris
Tasha says
Hi hi. I’ve been shopping around for a good croissant recipe and I am currently trying yours. I’m having problems with the dough unfortunately 🙁 It was really sticky after kneading and it keeps sticking to the counter so as you can imagine trying to do the turns is quite a mess. Should I add more flour next time I try to bake it?
Weekend Bakers says
Hi Tasha,
It is important to get the right dough consistency. The way you describe it your dough is definitely too sticky and this can be caused by the type of flour you use. Each flour type and brand has its own absorption and for you this probably means that you should use a little less liquid the next time to get the right consistency. Be sure to weigh everything carefully and right down what you do and how much you use. Making croissants is not easy and there is no way you can cut corners and still get a good result so work very precise and with care and attention. Take another look at our croissant video and you can see how much flour we use when working the dough. The trick is to use enough on the dough and the worktop to make it easy to handle but not so much that it will change the dough. So carefully brush with flour to get a very thin coating that is still good enough to help you to handle the dough. I am sure that the video can also help you with judging how it should look and how much flour to use.
Good luck with it and remember that we all have had many attempts and tweaks to get to that perfect croissant. It is one of the most challenging bakes.
Marieke
Jev says
Hello
The croissants were really good.I halved the amount of salt so they were not salty.The layers were fine but I did not get the honeycomb pattern. I will keep on trying and I will keep you updated 🙂
Thank you for a really good recipe.
Weekend Bakers says
Keep up the good baking work Jev! great to hear it worked out well with the salted butter and halving the amount in the dough.
Love to hear more as you progress 🙂
Happy Baking!
Ed & Marieke
Sam says
Hello I was experimenting and I went ahead and also tried your croissant recipe. Everything is great except my croissant wasn’t as light In weight and flaky enough. I had the layers but no flakiness. Please help!!
Weekend Bakers says
Hi Sam,
Please do not feel discouraged when your first attempt is not perfect. Croissant baking asks for many attempts and practice before you get a perfect result and even then it can still vary and go wrong when your attention slips a bit for example. It sounds like your attempt was already very successful and you need to build on that. The way you describe it we would suggest first of all looking at the flour you use, maybe you need to change something there (a lighter variety, if you used bread flour for example it could be that this causes the lack of lightness and flakiness). Next to that the most important thing is to work very precise and stick to the measurements when building up the layers. Like we said, with croissants you cannot afford to skip any stage or work not precise because it will show in the end result immediately. And be sure to give the croissants all the proofing time they need and at the right temperature for them to develop to the right stage for the layer build up.
You have to get to know the dough and learn as you do it more often. There are no tricks, just practice and practice some more.
Good luck and happy croissant baking!
Ed & Marieke
If you haven’t already you can also take a look at our lessons learned in our croissant log and see what horrible croissants we made when we started: www.weekendbakery.com/posts…aking-log/
Jev says
Hello
The amazing pictures above have convinced me to try out this recipe.
The dough is resting in the fridge but I have just realized that I have bought salted butter instead of unsalted butter.May I still use it?
Thank you for the help 🙂
Weekend Bakers says
Hello Jev,
Yes you can use the salted butter but we would suggest to lower the salt content in the dough because of it. How much depends on how salty the butter is. Maybe you already baked them by now? Love to hear how they turned out!
Happy Baking!
Ed & Marieke
Richard says
hi ,
i am from India and here we get either dry yeast or normal yeast. please suggest me the measurement for same.
as the flour quality is not good for bread so in this case we add gluten and bread improver in that.
what proportion of these ingredients required ?
Weekend Bakers says
Hi Richard,
There are two types of dry yeast, the instant and the active dry yeast. I do not know which type you use. The most common is the instant dry type. Their conversion from fresh yeast is as follows.
Converting from fresh yeast to active dry yeast you multiply the weight of the fresh yeast by 0.4
Converting from fresh yeast to instant dry yeast you multiply the weight of the fresh yeast by 0.33
If you want to use fresh yeast for this recipe multiply the amount given for the instant yeast by 3.
About the gluten:
Considering the differences in protein content among flours, you may need to experiment with the amount of gluten to flour until you achieve the texture and structure you like. I read that a rule of thumb is about 1 tbsp for every cup or 125g of flour if it is an ‘all purpose’ type of flour. Our bread flour has a gluten content of between 12 and 13%. We never add gluten or any bread improver o we do not have experience ourselves with these products. I would suggest trying to use only the added gluten first and see how that works out. Maybe you do not need the improver. Opinions about bread improver are very mixed.
You can read some more about it here:www.thefreshloaf.com/node/…d-improver
I presume there would also be some information on the package about what exactly it contains and how much you need to add. Our suggestion would be that if you can work with only the added gluten it would probably be better. But of course I do not know your flour and how much ‘help’ it needs to get a good loaf.
Good luck with the experimenting and baking!
Marieke
Richard says
hi ,
Thanks for reply.
please suggest me how to make all purpose flour.
i think that would be help me to make a good products.
Weekend Bakers says
hi Richard,
All purpose flour is just the same as plain flour. It is not something you make but it is the more or less standard flour you can use for just about anything you bake or make with flour. You can see it as the ‘supermarket flour’ or flour that is most readily available. I do not know your flour and do not know what is available to you so I took this ‘all purpose or plain flour as a starting point in the hope that it somewhat resembles your flour.
Marieke
Alice says
Hi,
I made croissants once few weeks ago, and it turned out like a disaster :)). Then I found this post and decided to give another try. However, since I am a newbie and it is much harder to handle such a big amount of dough, I decided to divide your recipe in a half. And it was not really a good decision because all the measurements when forming the shape have to change. I used all of my math ability and now I just finished the third fold of dough lamination stage. Tomorrow will be the day, and I am so nervous :)) Hope it turns out great, and I will update the result with you. Thank you for posting such a detailed recipe!!
Weekend Bakers says
Very curious to know how they turned out Alice!
Vera says
Hi,
I was searching for instructions on how to make croissants when I found your video on YouTube. I then went to your blog, studied the recipe, read all comments, read your logs, went back to the video, and finally this past Monday, we had a cool, 65F day, followed by a cool, 68F day so I decided to go ahead and try it. I followed your instructions/recipe exactly and made delicious, buttery, flaky and honeycombed croissants!
Thanks so much for sharing! For months I’ve been researching which recipe/method to try, and am glad I decided to try yours!
Best,
Vera
yorick says
Thank you so much. I try to make some croissants but they came out flat and dense. Any tips? Advices?
I don’t have a stand mixer. I kneaded by hand
Regards and thank you again
Weekend Bakers says
Hi Yorick,
Yes! The first thing you have got to look at is the temperature of your dough, especially during the final proofing on day three. This temperature has to be correct for the proofing times to correspond. If the dough is too cold proofing will take much longer and if the dough is under-proofed you will also not get the right texture. (see our tips on dough temperature: www.weekendbakery.com/posts…mperature/). And when kneading by hand it will take a bit more time compared to the 3 minutes with the mixer mentioned in the recipe.
Make sure to carefully build up the layers and work precise. With croissants you cannot afford to skip any stage or work not precise because it will show in the end result immediately.
Flat and dense can also mean your flour is the culprit. Maybe you can change something there too and try a different, lighter type or a combination with pastry flour.
Good luck with it and remember that it is really a question of baking and trying a lot and gaining experience to get it right. It is one of the hardest bakes to get right.
Happy Baking!
Marieke & Ed
felipe says
i think is a great recipe, but just wondering you can not make croissants the same day?? i mean 3 days for a croissant dough?
Weekend Bakers says
Hi Felipe,
This is also done for the timing. If you did it all in one day you will be eating croissants at ten o’clock in the evening!
Billy says
Hi, I found this very useful and detailed website in youtube, your instructions in making croissants are so detailed!!
Because I have tried making croissant a few times, but total failure, very bread-like, no honeycomb interior, and every time my butter leaking out while rolling, so frustrated.
Because I adopted another recipe that doesn’t mention the required dimensions.
May I ask what is the optimal thicknesses of the butter slab and the croissant dough needed for laminating?
After enclosing the butter into the dough and rolling, what should be the optimal thickness of the dough before folding?
I should have more questions, but can’t think about them right now. Thanks!!!
Rgds,
Billy
Weekend Bakers says
Hello Billy,
Thanks for your message. If you follow the measurements carefully and do the same for the weight of the ingredients it logically follows that the slab and dough also have the right thickness.
For the slab of butter (around 8 to 10 mm thick we guess) and for the dough it is important to work precise and stick to the measurements and roll it as even as possible.
So in short the right dimensions lead to the optimum thickness. We never measure the thickness, only the length and width.
Hope this helps you and you will bake many wonderful croissants in the very near future!
Greetings from Holland,
Ed & Marieke
pearlj says
I just tried your croissant recipe this past weekend. My croissants turned out perfectly. Thank you for sharing.
Weekend Bakers says
How Wonderful! Glad to share the baking joy!
Happy Baking,
Marieke
romcharea says
i will try the new one again.Thank you………
Jenny says
Hi,your croissants look beautiful.I tried your recipe yesterday,they came out very nice without any butter leak.Thank you for the recipe.I want to ask when I shape the croissants do I have to make thin triangles for the honeycomb texture?Thank you.
Reply
Weekend Bakers says
Hello Jenny,
It says in the recipe: Now very gently elongate each triangle to about 25 cm. This is often done by hand, but we have found that elongating with a rolling pin, very carefully, almost without putting pressure on the dough triangle, works better for us. You can try both methods and see what you think gives the best result. I hope this is clear for you.
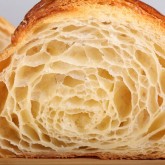
The honeycomb structure is only achieved when you work very precise when building up the layers when laminating.
You have to carefully follow the recipe and give it some time and practice to get it right and get to know your dough.
Good luck with it and Happy Croissant Baking!
ED & Marieke
Jenny says
Thank you!!!!!!
Alvin says
Hi,
Love your Blog!
Just trying to make croissants at the moment can you tell me do you use special butter for laminated dough or is it your ordinary supermarket butter. Cheers, Alvin
Weekend Bakers says
Hi Alvin,
We use butter that is organic and we make sure it is as fresh as possible (so always a freshly bought package, no oxidation). Our dairy butter has a fat content of 82%.
Happy croissant baking!
Sandy says
Hi-
I am curious – the recipe I have used for croissants has almost twice the amount of laminating butter (1 pound/454 grams) as yours, with the same amounts of flour, liquid, and yeast. Isn’t this a pretty big difference?
Weekend Bakers says
Hi Sandy,
We know there are recipes that use more butter but we cannot explain the almost twice amount you mention. It seems like a lot and we would not know how to work it into our dough and judging from our results we would maybe say it is not necessary…
Marieke & Ed
Sandy says
Ooops, I failed to included the flour in the sponge when comparing the butter amounts!
When I did my turns today, however, I noticed that the butter layer comopletely broke up; I could see it through the dough. Is this OK?
Weekend Bakers says
Hi Sandy,
No, I am afraid that is not so good. The butter layer should be exactly that: one layer that has the right consistency, so not too warm not too cold, to stay one layer that can be rolled out. If you get these islands of butter the end result will not include the layers and honeycomb structure that you would be aiming for.
Luis from Argentina says
Hi! and thanx for the recipe. I do have a question though. The croissants came out beautiful except for one detail. Mine seem to be a little too dry and not soft, not so “bready” and they didn´t have the honeycomb texture you pictured. (they have the honey comb but the cells were much smaller). They did rise a twice the size so I reckon the yeast was ok. After you let them cool down for a few minutes you can´t press them with your fingers. They stay hard. Thanks for any help! Luis
Sandy says
Luis, I think that a great croissant IS crisp (hard) on the outside. If they are soft when you poke them, you did it wrong!
Weekend Bakers says
Hi Luis and Sandy,
Yes, we also think a good croissant is crisp on the outside (but not hard as in rock hard of course). It must be crispy and flaky and when you take a bite it should be really easy to bite into it. It is also normal that they cannot be pressed with your finger after baking.
It is always hard to judge without actually seeing the final product. Croissant making is really a question of practicing a lot! And then practicing some more and still there are times it does not work out so well. It is one of the hardest bakes to get consistently right we think. Still, even when it does not work out perfectly, it is hopefully very edible 🙂
Happy Baking,
Marieke
Ronald says
Hey Luis,
don’t forget that the structure and taste of French croissants are completely different then the ‘medialunas’ that are common in Argentina.. No tienen nada que ver.
Weekend Bakers says
Very good to know Louis, thanks!
Jenny says
Hi,your croissants look beautiful.I tried your recipe yesterday,they came out very nice without any butter leak.Thank you for the recipe.I want to ask when I shape the croissants do I have to make thin triangles for the honeycomb texture?Thank you.
bao-kim says
Dear Ed and Marieke,
This is bao-kim again, we DID it, we made croissants following your instructions this weekend. We made the dough on Thursday, did the lamination on Friday and we woke up early Saturday morning to shape, proof the croissants for 2 hours and then we were rewarded with the yummiest croissants by 9AM with our coffee, yippee:). We wanted to report to you that we did get the honeycomb texture in our croissants, and the taste was buttery delicious! Thank you for your inspirations.
We do have a question for you both and hope that you can enlighten us so we can improve on our next batch. We cut our croissants with the base measuring 7.25cm with the height at 15.5 cm, and the thickness was 3 mm. As we let them proofed for 2 hours, they did puff up quite a bit, though not quite double. We were hoping that when we bake them they will increase in size a little more like yours did in your video. Ours were only slightly bigger than the proofed size, but not much more. My husband thinks that was due to my rolling the dough too thin??? Also the croissant seemed to only rise up vertically and not much horizontally, which made our croissants not as Fat as what I was hoping for. Please suggest what we should do differently to improve on our next batch, which is VERY soon:). We eagerly wait for your wisdom.
Again, thank you so much for all your help. Have a wonderful weekend!
bao-kim
Weekend Bakers says
Hello Bao-Kim,
Well it all sounds like you are on the right track. It is very hard to pinpoint what could be ‘the problem’ with the puffing up of the croissants, both when proofing and baking. The first suggestion for next time would be to stick exactly to the measurements given in the recipe. The next thing to maybe take a look at is the flour you use. You could try, if possible, a few different brands /types because there can be a difference in result (using regular bread flour for instance could mean your croissants stay flatter and ‘heavier’). The baking result also has a lot to do with your oven. We use a (professional) convection oven and it gives the croissants a real boost, this would be less so in our normal household oven, and the bake would also be less even. So you also have to play with settings, temperatures and times a bit to get to the best possible croissant for your particular ingredients and equipment and surroundings. The results will never be the same for anyone. Place ten people in a row and let them bake and all results will be different, even with the same ovens (see baking programs and you know what we mean).
But while trying to get to that perfect croissant…it is a road paved with lovely tasty croissants very much worth making and eating and a lot of times better than anything you can buy!
Happy croissant baking!
Marieke & Ed
Karin Anderson (Karin's Bäckerei) says
Very nice tutorial! And your croissants look beautiful. Yes, I convert every recipe to “our beloved metric system”, too. (Aren’t we in the 21st century? Or at the age of stage coaches and horseback mail couriers?) I once had croissants that were obviously made with margarine or shortening – gross!
Happy Baking,
Karin
Weekend Bakers says
Hi Karin,
You are preaching to the choir about metric and margarine!
Happy Baking!
Marieke
Yang says
Dear Ed and Marieke,
I tried to do your croissants as soon as I got back from England but didnt realize it was a lot warmer in my hometown and it was a total disaster. Luckily, I havent lost heart. I’ll just try when the season is right again. Your pics are just so attempting and I cant stopping staring at them. My husband loves croissants so I will try my best. Watching your video now and just wanna come over to say thank you and well done!
Weekend Bakers says
Hello Yang,
You are so right in your attitude to just give it another go. All this happened with is too and we also started out with too warm conditions, butter leaking out…the works! But on a nice cool day, just give it another try and make sure there are no distractions and work precise. I think there are very few people who make perfect croissants the first time they try….
Keep us posted!
Marieke
bao-kim says
Dear Ed and Marieke,
Wow, how lucky I am to have found your Blog with such detailed tips and instructions fr making French Croissant. Like you both, my husband and I love the French Croissant from France and have always wanted to make them since we cant find anything comparable here in America.
I have been researching on the web, baking books and just took a class on making croissant last week. The class is in America and the croissant did not taste anything like what we had in Paris, therefore I am determined to try to make them to see if can achieve this myself. I looked at lots of French recipes, and they tend to use Fresh Yeast instead of instant yeast, could you tell me if there is any difference of using one or the other? Have you used fresh yeast, if yes, how would you substitute it into your recipe??? Per your advice, I will have to wait a couple of days till the weather cools down a bit before rolling my sleeves up and try to make Croissant:). You really inspired me, thank you sooooo much. Will wait to hear from you then I will embark on my project.
Have a wonderful day,
bao-kim
Weekend Bakers says
Hello Bao-Kim,
Thank you very, very much for your kind words and sharing your enthusiasm for the real deal croissants. It will not be a problem of course, substituting the instant yeast with fresh yeast. If you go from instant to fresh you need to triple the amount, so you would need to use about 33 g for this recipe. Our experience is that it will not make a huge difference in the final result.
And yes, you are very wise to wait until the weather cools down. Making this recipe for the first time, the stages might take a bit longer because you are not that familiar with the process and when working in warm surroundings you really need to work fast. Low temps give you just that extra bit of time without having to worry about butter leaking out of the dough.
Hope you will get the croissants results you want really soon. Let us know how you get on.
Happy croissant baking!
Ed & Marieke
bao-kim says
Dear Ed and Marieke,
Thank you SO much for replying:). My husband and I will be making croissant this weekend, thanks to your wonderful instructional video and your encouraging words. We do have one more question to make sure we understand all your tips for success. Do we trim the top and bottom edges each time we do our folds, meaning we trim them 3 times total, or do we only trim the top and bottom edges at the very last fold before we cut and shape them into croissant?
We eagerly wait for your reply, have a great day,
bao-kim
bao-kim says
Dear Ed and Marieke,
Wow, you are our heros, thank you for such a quick reply! It is now 6:50AM on a Saturday morning in California (and the weather is cool), we will start making our croissant and will let you know the result:)
Have a wonderful day,
bao-kim
sara says
mi sono appena cimentata a farli…speriamo bene…grazieeeeeeeeeee mi avete ispirata