

Daring to keep it simple can also produce great results…
Klik hier voor de Nederlandse versie
We started this recipe as a one-off experiment, thinking the result would not be that interesting, compared to the other bread recipes we already know and love. But the end result really surprised us. As you might expect, knowing some of our other favorite recipes, the key factors for this one are the same: time, timing and really good flour!
This recipe is the first to have a ‘dough calculator’ (see ingredients list). Other recipes will follow soon!
Although there does not seem to be strict definitions about French bread terminology, we simply call this bread ‘Pain Naturel’ or abbreviated PN. We chose this name because it stands for a basic yet full flavored sourdough bread, made just from ‘white’ bread flour. Using our own sourdough culture we found the bread gets a pleasant hint of sourness, which combines very well with the sweet flavor of the flour we use.
And especially because this bread is made with ‘white flour’ only, it is important to get the best quality, organic, stone ground flour you can get your hands on. When you do, we truly believe you will be rewarded with amazing taste and depth of flavor, better crumb structure and the crustiest of crusts.
Enjoy the recipe and let us know what you think. Also check out our handy sourdough tips to get the most out of your sourdough baking!
Before you start

For this recipe we are going to make a starter named a poolish. A poolish is a type of wet sponge usually made with an equal weight of water and flour and a small amount of sourdough starter culture or yeast and NO salt. Making a poolish helps bring more taste and strength to your bread.
We use a sourdough culture which is made with 100% whole grain rye flour. A sourdough culture based on rye flour is easier to maintain, does not go into a slurry when you forget about it, is easier to stir because it has almost no gluten and smells very nice, a bit like fruit. It is also very forgiving in the amount you feed it, everything seems to be alright. Normally we only feed it once a week, after our weekend baking we give it a few table spoons of water and rye flour, stir, ready!

| Ingredients for the Poolish | ||||
|---|---|---|---|---|
| 115 | g | wheat (bread) flour | ||
| 115 | g | water (room temperature) | ||
| 15 | g | sourdough culture | ||
| Ingredients for the Pain Naturel | ||||
|---|---|---|---|---|
| makes 1 loaf | ||||
| the poolish from step 1 | ||||
| 340 | g | wheat (bread) flour | ||
| 180 | g | water | ||
| 7.5 | g | (sea) salt | ||
Making the Poolish
In a bowl stir together the 115 g flour, 115 g water at room temperature with the 15 g sourdough culture. Mix it well until you have a homogeneous slurry that looks like very thick batter. Cover the bowl with clingfilm and let the prefermenting begin. After 12 hours at room temperature it should be bubbly, light and ready for use. So if you want to begin your bread making in the morning, you should make your poolish at 9 in the evening.

Note: We use European flour which absorbs a few % less water than American type flour. People using American type of flour should add 5-15 ml water to the final dough.
Making the Pain Naturel
Put the poolish starter and flour in the mixing bowl of your standing mixer and add 2/3 of the water (do NOT add the salt yet). Now start mixing and gradually add the rest of the water and let the dough come together. Knead for only 1 minute, leave it in your mixing bowl, cover with clingfilm and rest for 20 minutes (this technique is also referred to as autolyse).
Now add the salt and knead for another 4 minutes. Transfer the dough to a greased bowl, cover and leave to rest for 50 minutes.

Ideally the temperature of your dough after mixing should be around 24-25 ºC / 75 ºF. You should adjust the temperature of the water you add, so the total dough reaches this temperature. For us this means in summer adding cold water to this recipe and in winter (when our little bakery gets much colder then the rest of our house) adding water up to 50 ºC /122 ºF. You can measure the temperature of water and dough with a food thermometer. These measurements are important because they correspond with the proving times in the recipe.
After the first 50 minutes rest take the dough out of the bowl and onto a floured work surface and do one stretch and fold (a full letter fold, left over right, right over left, bottom over top, top over bottom; watch our bread movie or our stretch and fold method video to observe this technique if you are not familiar with it). Transfer to the bowl, cover and again leave to rest for 50 minutes. Repeat the stretch and fold (full letter fold) one more time (so 2 times in total) and leave to rest for 50 minutes (so this is the third and last of your three 50 minutes resting periods). During each stretch and fold the dough should feel firmer and less wet.
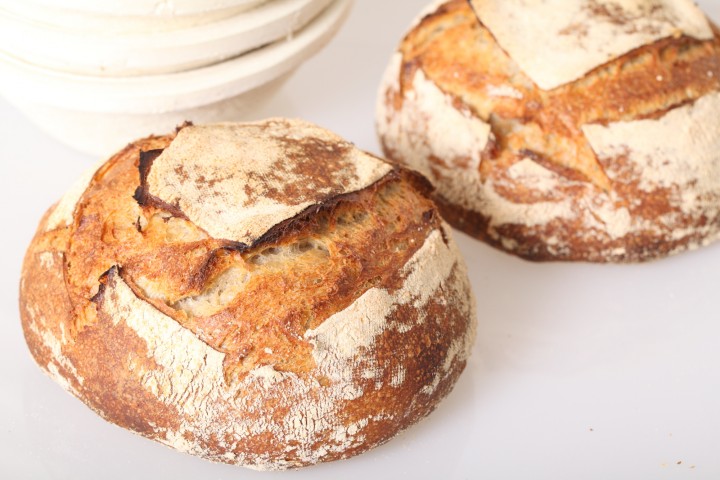
Now it’s time to shape. Shaping is a tricky subject. It’s something for which everybody develops his or her own favorite technique over time. You can make a batard or loaf shape or a boule (ball) shape like you see in the pictures. If necessary you can learn more on shaping from a good bread book, like the ones by Hamelman or Reinhart, or the Tartine Bread book. Or take a look at our boule shaping video.
Preheat your oven to 230 ºC / 445 ºF conventional setting (at what stage you preheat your oven depends on how long it takes for your oven to heat through, some take 30 minutes, some, like ours, with stone floors take a lot longer, up to two hours).


Transfer the shaped dough to a proofing basket / banneton, cover and leave to proof for 2 hours and 30 minutes (provided your dough has a temperature of around 24-25 ºC / 75 ºF, also check our tips on dough temperature). When you think it has risen enough, use your finger to carefully make a very small dent in the dough. If the dent remains, the bread is ready to bake, if the indentation totally disappears, the dough needs a little bit more time.

Now your loaf is ready for the oven. Slash the top of the loaf with a lame or bread scoring tool. To get a nice crust, try to create some steam in your oven by putting a small metal baking tray on your oven floor when you preheat the oven, and pour in half a cup of hot water immediately after putting the bread in the oven. Release some steam by setting your oven door ajar (perhaps with the help of a wooden spoon or oven mitt) 5 minutes before the bread is ready. If you are going to create steam with a baking tray, you may also want to turn your oven temperature a bit higher, because you are going to lose some heat in the process.
After 45 minutes of baking your loaf should be ready. Transfer onto a rack and leave to cool. This loaf also keeps very well in the freezer. But please make sure to eat at least some of it while fresh. This bread is great with just about anything, but also very tasty on its own.

Pain Naturel Time Table
Day 1 21.00 Make starter let ferment for 12 hours at room temperature
Day 2 0.900 Make final dough
- 09:00 – Add flour and water to starter, mix for 1 minute
- 20 minutes rest (autolyse)
- 09:20 – Add salt
- Knead for 4 minutes
- Rest for 50 minutes
- 10:14 – First stretch and fold
- Rest for 50 minutes
- 11:04 – Second stretch and fold
- Rest for 50 minutes
- 11:54 – Shape
- 12:00 Final proofing 150 minutes (2.5 hours)
- 14.30 – Bake for 45 minutes at 230ºC / 445ºF
- 15:15 – Your loaf is ready!


Luana says
I messed up with the imperial measurements when converting grams to cups. Can you provide the equivalent recipe in imperial measurements please?
CJ says
Hi There, I have two concerns. First, is that the poolish is suggested to be made at 9 at night. After I followed the directions to make the poolish, I didn’t know what to do with the starter. Since I already removed 15g, do I remove an additional 15g to make it 30g, and then refresh it? Or, since it’s 9pm do I do nothing and wait until the following morning, which is when I’ve always done the refreshing?
Also, on the rye starter page, the water is measured in ml. But for this recipe it calls out 15g of water. Do you mean ml’s? (Sorry, I’m still learning the metric system.) Love what you guys do. Any help would be greatly appreciated!
Weekend Bakers says
Hello CJ,
It is no problem to wait to the following morning and do the refreshing as usual.
And with water milliliters and grams are interchangeable. So one ml water weighs 1 gram. Sorry if this was confusing, but weighing water in grams and also your other ingredients is always more accurate than measuring them for your baking projects. But for the rye starter culture it is not that important if you add 37 or 41 grams of water for instance. After a while you will have your own preference on how stiff or liquid you want to keep it.
Also see our sourdough tips on this subject:
www.weekendbakery.com/posts…ough-tips/
Thank you for your comment and kind words and wishing you lots of lovely loaves!
Marieke & Ed
Mary says
Hi there, can I make this with 100% rye flour?
Weekend Bakers says
Hello Mary,
In principle you can bake a bread with 100% rye, but for this recipe we cannot recommend it. It will be a totally different and probably disappointing result. Rye has almost no gluten and so you need a recipe that takes this characteristic into account. We would advice you to look at our rye bread recipes for the best fit / use of your rye flour.
Carolien says
My first attempt this week went quite well, bit not very good yet.
The loaves (I made 2) were a bit dense/gummy bit also had large holes in the middle. The taste was great so we ate it anyway.
I dont really now where I went wrong. Things I could think of:
– immature starter (just 2 weeks old, rye starter)
– poolish not active enough
– under- or overproofed
– wrong type of flour (‘patentbloem’)
I baked them in a dutch oven, 20 mins pid on and 25 mins off, the crust was perfect
Do you have any sugesttions on what to do different next?
Weekend Bakers says
Hello Carolien,
It is a good thing you started baking using your starter culture. Just keep using and refreshing it and it will get better and better.
You already made a good assessment yourself of things that can be a part of the result you got. Some are hard for us to judge without seeing what you did. Plus the challenge of baking is to get all these things right.
The main factor we would encourage you to change is the flour. Patentbloem is best used for cakes and cookies, not so much for bread.
So if possible buy a good quality (organic) bread flour (tarwebloem met minimaal 12% eiwit / proteïne) and use this for this recipe. A good place to look for high quality flour is a windmill (www.weekendbakery.com/posts…r-je-meel/) or a store with organic produce.
Believe us, from experience, using the right flour really makes a big difference.
And keep on baking and practicing the same recipe. So you really get a feel for the dough and get comfortable with the stickiness, get better at shaping and scoring it and learn where the limits are when it comes to proofing.
As you have found out, in the meantime, you will already have very tasty bread that you can enjoy, even though it is not yet perfect.
Enjoy the baking journey!
Jasmine says
Can this loaf be baked in a Dutch oven? If so should it be preheated before placing the loaf inside-and do you cook with lid on?
Weekend Bakers says
Hello Jasmine,
Yes that would work very well with this recipe. You preheat the oven with the Dutch oven inside and when warm, you place the dough in the Dutch oven and then back in the oven. (always very careful and mindful of the very hot pan and lid when handle the Dutch oven!)The lid traps moisture rising from the dough and creates the steam that produces a crackly crust and a moist, tender interior. After 20 minutes you remove the lid and bake without it for another 25 minutes.
Enjoy your Dutch oven sourdough baking 🙂
Blaid says
Hello,
When it comes to adding the sourdough culture to the poolish…
Do you only add the culture once you have fed it and it is at its peak height?
Weekend Bakers says
Hello Blaid,
In general that is always a good idea / never wrong. It also depends on how often you bake. If you keep your culture in the fridge and have fed it less than a week ago, you could use it straight from the fridge.
Here’s how we do it:
We store our starter in the fridge. We bake (almost) every weekend so our starter is being refreshed at least each week. We keep about 120g of starter of which we use about 60g up to 100g each week. So after taking out the amount for baking, we just add water and rye flour and stir, so we have about 120g of starter again. We keep our starter quite stiff, almost like a thick paste. The reason for this is that it will develop a lot slower with less water, so it matures during the week and is ready for baking the next weekend.
After feeding we keep the starter on the kitchen table at room temperature (usually around 21C) for about 12 hours so it can develop and double or triple in size. When it has developed, we store it in the refrigerator until the next baking session. Always wait for your starter to at least double in size before storing it in the fridge, a starter should be fully developed before it can survive in the cold. A starter kept in the fridge should at least be refreshed every two weeks. A starter kept on your counter should be refreshed at least every three days.
If we want to bake, we take it out of our fridge and use it directly for a poolish or biga. Then refresh it, so it will be ready and active for our next baking session. That’s it!
Abigail says
I am having great success with your sourdough starter recipe, and am about to try making bread with it! I am sensitive to wheat, and am wondering if I can use very finely ground spelt flour in place of the wheat bread flour? Thank you so much for your help!
Weekend Bakers says
Hello Abigail, and thank you 🙂
Yes, that is possible, but be aware that spelt behaves different than wheat in terms of gluten and water retention / absorption. Spelt has more difficulty retaining water. We would suggest to use (at least) 5% less water than prescribed in this recipe and see how this works out for you.
Best of luck with it and enjoy your baking!
Elena says
Me again: first., thank you very much for your fast reply!
After shaping can we put the bread for final proofing in the fridge overnight? and make it in the morning?
Weekend Bakers says
Hi Elena,
Yes, that is possible, but make sure to check upon your dough so it will not over-proof. What period / how long in the fridge is optimal may need a bit of tweaking, so check ‘early in the morning’.
Elena says
hello
thank you for sharing your recipe
i have a question: should we put all the poolish (245 gr) to the mix ( flower -water) ?
thank you
Weekend Bakers says
Hello Elena,
Yes that is correct, the total amount of 245 grams goes in the final dough.
Enjoy your sourdough baking 🙂
Arlene Riley says
I have just made this recipe and it’s turned out very well so very pleased. Not made a sourdough for quite a while but will be doing so a lot more now! Also I love your ciabatta recipe which I do every week and the focaccia too.
Weekend Bakers says
Hello Arlene,
Thank you for making and loving our recipes. So happy they turn out well for you too.
Wishing you many lovely loaves!
Adrienne says
Excited to join
Weekend Bakers says
Always happy to hear how the baking goes!
Pip says
This is my first bake with San Francisco sourdough.
Very impressed
Weekend Bakers says
Hi Pip,
Thank you, so great when it works out well on the first try. Hope you can repeat it many times 🙂
Arvin Gardiola says
Hi. I am confused with poolish and sourdough starter. If I dont use a commercial yeast for my poolish and used a sourdough starter instead (like your ingredient above) will it just be a sourdough starter? or is it because the ratio of water-flour-sourdough starter is different that differentiate it from being poolish and a sourdough starter
Arvin Gardiola says
sorry, i meant poolish with sour doughstarter, isntead of poolish with yeast. isnt it just sourdough starter?
Weekend Bakers says
In general you call it a poolish because of the ratio ( 1 to 1 flour and water) whether using sourdough or yeast in the poolish. But people most often use the word poolish with commercial yeast and words like preferment with sourdough.
Scott Summers says
I want to try and make this during the week but the timing is just too difficult to balance while working full time!
if I make the poolish at night and let it sit for 12 hours could I put it in the fridge for 6 hours so I can then continue the recipe when I get home from work?
What would you recommend to break the process up so I can attempt weekday baking without needing to wake up at 3am to start the poolish
Weekend Bakers says
Hello Scott,
We want to suggest you put the poolish in the fridge straight after making it, and use it the following day when you come home. It might take a bit of tweaking to establish the optimum fridge time / amount of sourdough culture to add to the poolish. If it is very under-ripe when you want to use it, you can add some more, or you can add some hours of room temp fermenting, before you put it in the fridge. If it is still a bit under-ripe you can just use it in the recipe, you can always correct this in the final proofing. You just have to make sure it will not be over-ripe and turn to a soupy consistency, without the gluten structure needed to build a good dough.
Just give it a try, using the fridge to aid you and we hope it will be great!
Sonia says
Just took mine out of the oven. Looks and smells heavenly. I’m waiting a bit before I cut it. Also, I have a gas oven, no stone but baked it in my Dutch oven, which I bought especially for baking bread (even though I use it to cook meals in).
My starter is rye flour based so it has a beautiful aroma.
I’d love to share some pictures but can’t figure it out.
Weekend Bakers says
Thank you Sonia, and congrats on a great result. Very happy our recipe played a part in it.
If you like you can upload pictures of your result here:
www.weekendbakery.com/send-…your-loaf/
Happy sourdough baking!
Marieke
S Conger says
I used your recipe and the results were good but the loaf is quite small and never did rise much. I always put the bread in the oven with the light on for the rising periods. The crumb is nice, color good, I got a little ‘ear’ on the finished loaf so not bad. Next time I”ll double the ingredients and see if that helps get a more normal size loaf. I want at least 1-1.5 pound loaf out. Thanks for a good tasting bread that doesn’t take 3 days!
Weekend Bakers says
Thank you for your feedback on the recipe. One suggestion we have that you might try is (if possible) another type of flour. Make sure you use good strong bread flour with around 12.5 to 13% protein. Also make sure you have refreshed your sourdough culture the day before you are going to use it. Could be your culture is just a bit slower (they are all different) and you could benefit from using a bit more in the recipe and /or even longer proofing times. The combination with the right proofing temperature is important of course.
If the oven light does not seem to provide much warmth (it is best if you could measure the inside temp of the oven) you could also try to warm the oven for 20 seconds or so then turn it off and then put the dough in for proofing.
Find some more sourdough baking tips here: www.weekendbakery.com/posts…ough-tips/
Hope you keep on making the recipe because we are sure you will improve upon your first result. Our average for making a recipe our own with bread baking is between 5 to 10 times.
Enjoy your sourdough baking
rita says
I don’t have a banneton or proofing basket. Can I just use a bowl? Do you bake it in the banneton?
Weekend Bakers says
Hello Rita,
A banneton is for proofing and holding shape, NEVER for baking.
If you do not have a banneton / proofing basket, you can use a bowl as an alternative. The round baskets we use for this recipe have a diameter of around 20 cm / 7.9 inches.
Good luck with your sourdough baking.
Rita says
thanks SO much for your information! And recipies! I made this recipie a few days ago and it turned out AMAZING~!!! first time ever for me!
Weekend Bakers says
Wonderful Rita, congratulations on the result!
It will never stop being great to hear from other bakers about their success with our recipes 🙂
Enjoy your baking journey,
Ed & Marieke
Judy Corveleyn says
My husband Eric bought me the starter and I’m about ready to shape. I can’t find how many loaves this recipe makes. Thanks
Weekend Bakers says
Hello Judy,
This recipe makes one loaf with one batch of dough of 773 grams.
If you would want to make more loafs you can see that under the ingredients list you find the words ‘WKB Dough Calculator’.
When you click on it, it opens and you can very easily change the number of batches of dough to 2 or 4 or how many loafs you would want to make. The right weight of all the ingredients will show for the number of batches you choose.
We hope it will turn out great.
Enjoy your baking.
Cathy says
What size jar should I use?
Weekend Bakers says
Hello Cathy,
If you refer to the jar to keep your sourdough culture in, any (jam) jar between 250 and 400 ML will do (somewhere between a quart and a pint).
Cathy says
Thank you 😊
Margaret Wade Baunach says
What kind American of flour so I use? So I use bread flour or all purpose flour.
Weekend Bakers says
Hello Margaret,
We advice you to use bread flour for this recipe.
Note: We use European flour which absorbs a few % less water than American type flour. People using American type of flour should add 5-15 ml water to the final dough (between one teaspoon and one tablespoon of water extra).
Duncan says
I am wondering if after the final proofing I can store in the refrigerator to bake the next morning? and if so should I let the dough come to rom temp before baking?
Thank you!
Weekend Bakers says
Hello Duncan,
Yes, that is possible, but we cannot give you the exact details and times based on our own baking experience with this recipe. We would advice to make sure not to over-proof the shaped loaf of course. It is better to give it some more time outside of the fridge to get it to proofing perfection than to find a collapsed loaf in the fridge. So a bit of a trial and hopefully not error with this process. If it does look good and ready for the oven straight from the fridge it is possible to take it right to the oven. Longer, colder fermentation can ’cause’ blistering on the crust of the loaf, but for many bakers this is something they are aiming / looking for.
Hope it will be great! Let us know 🙂
Jessie says
Excited to try this tomorrow, I have my poolish made.
Quick question: Can i do this in a dutch oven? And how would I go about doing that. Do I have to change cook time? Bake it covered?
Weekend Bakers says
Hello Jessie,
The baking time will be about the same. You need to bake the first part with the lid on (about 20 minutes) and the second part with the lid of (20 to 25 minutes).
You can read more about it here:
www.theperfectloaf.com/how-t…utch-oven/
Hope it will be great!
Martin Blackwell says
Hi, a couple of questions. This overnight proof at ‘room temperature’ obviously varies by house and season. What is an ‘expected’ temp? I have just acquired a proofer and could use it for a more stable overnight proofing.
Secondly, the finger test. You say ‘press and the dent remains’. I have seen others advocate a Poke Test with 3 outcomes of the ‘bounce back’:-
1) Slowly (3 seconds?) – Ready
2) Quickly – More Time
3) None – Over-proofed
Any guess on what the method should be. I’ve seen ranges of second proofing from 1.5 to 4 hours, so you’ve got to stop it sometime!
Mark says
Hi there,can I use this recipe in a bread maker machine?
Weekend Bakers says
Hello Mark,
We cannot really advice you on this because we never use a bread machine. We do not know if bread machines have the capacity and ability to develop sourdough bread or if you have a fancy one with lots of options.
We found some useful info here:
www.sourdoughhome.com/can-i…d-machine/
Hope you will get a nice sourdough loaf with your machine.
Annette says
Ok this is my first time making it this way Totally confused If I’m using 4 cups of flour that is call for in the recipe how much starter do I use and do I follow the recipe and add the starter.
Weekend Bakers says
Depending on the flour type:
You use about 1 cup of flour in the poolish and a good tablespoon of your starter and about 8 tablespoons of water. For the final dough you use the developed poolish plus about 3 cups of flour plus 180 grams (about 12 tablespoons) of water plus the salt (slightly less than 1 and a halve teaspoon).
This also shows again why we use scales, because we can never be exact and consistent in our baking with the use of cups and spoons.
Ang says
I made this but it did not rise enough and the center bottom was still a little doughy. Delicious though! The starter was doubling too? I’m trying again and using more starter and water this time . I’ll proof longer as well.
Angelo says
I Made it. Crust was just too hard, but inside bread was fabulous. Maybe more water in dough and no steam next time.
Cheryl Joy Lipton says
My daughter likes soft crust, so I always brush the loaves with olive oil when I take them out of the oven.
Weekend Bakers says
That is a very good suggestion Cheryl, thank you for sharing.
A sourdough bread crust will in general always be thicker than a crust from a hybrid or regular yeast bread.
Will says
I think my dough is over fermenting. Is not holding the shape after proofing for 2.5 hours. The dough looks too wet.
Rob says
Try less water, or a higher protein flour. I use Caputo Tipo 00; available, reasonably, on Amazon. Best of luck.
Stephanie says
Today is my 3rd time making this recipe, it’s very straight forward and works like a charm every time! The bread turns out absolutely delicious! Thank you for sharing this wonderful recipe.