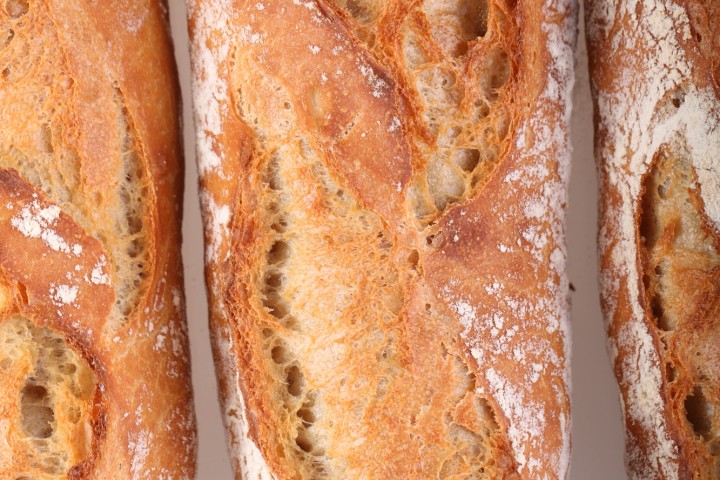
Even if the shaping is not perfect, this is the best baguette I have ever tasted!
I was very intrigued when I saw the baguette recipe that Akiko posted on the Fresh Loaf, both by her pictures of the baguettes and by the mentioning of the 80% hydration (Thank you Akiko, you are truly inventive and inspiring!). I liked it immediately and could not wait to try it. Several tries and tweakings further, with lots of sharing and baguette debating with Akiko, I can say from the heart that this recipe lives up to it’s expectations.
So give this recipe a try too and let me know what you think!
Do not forget to watch me take on the 80% baguette dough and see me stretch and fold on my video; Watch it here…
Take a look at our baguette log and follow our baguette baking progress and learn from our experiences and mistakes!
If you consider yourself a novice baguette baker our ‘easy’ baguette recipe might be a great place to start for you!
Before you start, you might also want to check our tips for bread scoring with confidence and handling wet dough.
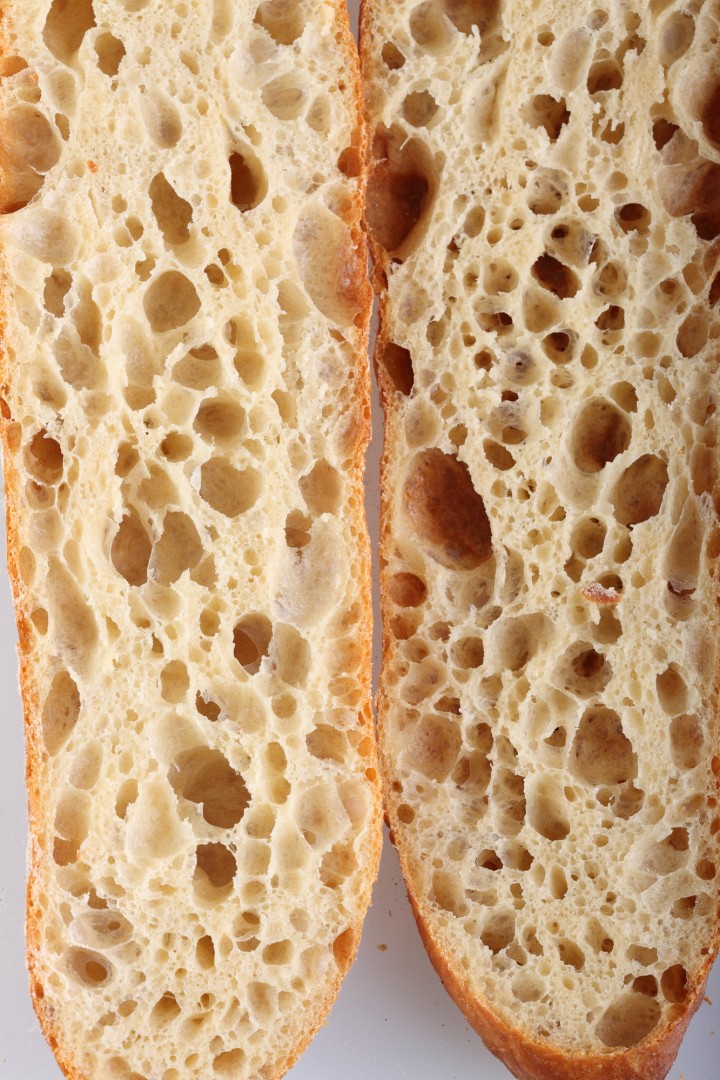
Making the ‘Poolish’
Normally a poolish has equal parts of water and flour, however this time we make a poolish of 80% water which will give you a preferment resembling something between a biga and a poolish. So it is less wet and much less slurry than an actual poolish. In a bowl stir together 380 grams of bread flour with 304 grams of cold water and 3 grams of instant dry yeast. Mix it until you have a consistency that looks like very thick dough-like batter. Cover the bowl and leave for one hour at room temperature. After this hour at room temperature you put the poolish in the fridge for 10 to 17 hours. So if you want to begin your bread making in the morning, you can make your poolish the evening before.
| Ingredients for the Poolish | ||||
|---|---|---|---|---|
| 380 | g | wheat (bread) flour | ||
| 304 | g | water (room temperature) | ||
| 3 | g | instant yeast | ||
| Ingredients for the Baguettes | ||||
|---|---|---|---|---|
| 1 batch makes 4 baguettes (346 g each) | ||||
| the poolish from step 1 | ||||
| 380 | g | wheat (bread) flour | ||
| 304 | g | water | ||
| 12 | g | (sea) salt | ||
| 1.5 | g | instant yeast | ||
Making the Baguettes
The times given in this recipe work best if your room temperature is between 19ºC / 66ºF and 23ºC / 73ºF. If your room is colder, use room temperature water instead of cold water (straight from tap) in the final dough.
Please note: There is no real mixing or kneading in this recipe. It’s all stretch and fold!
Now on with the final baguette dough making: Take the poolish directly from the fridge and first add the 304 g of water to dilute it. Then add the other ingredients (flour, salt and yeast) and combine until you have a shaggy mass. Cover and leave to rest for 10 minutes. Now turn out the mass onto your working surface and stretch and fold for 2 minutes. Keep on at it because it doesn’t look like it’s going anywhere but it will be OK. Put the dough in a greased bowl, cover and leave to rest for 45 minutes.
Stretch and fold a second time, doing two sets ( letter fold: right over left, left over right, bottom over top, top over bottom, repeat)
But back in your bowl, cover and again leave for 45 minutes.
Repeat the above stage another 3 times, but now each time doing only one set of stretch and fold.
Every stretch and fold is followed by a 45 minutes rest in a covered bowl except for the last one. After the last stretch and fold you leave the dough covered with some clingfilm (now looking nice and plump) on your bench for only a 10 minute rest (bench rest).
Preheat your oven to 240ºC / 465ºF (at what stage you preheat your oven depends on how long it takes for your oven to heat through, some take 30 minutes, some, like ours, with stone floors take a lot longer, up to two hours.)
Now divide the dough into 4 equal parts. You are going to pre-shape the dough parts one by one by carefully stretching the corners making a rectangle of each of the 4 pieces and rolling them up. Try to make your rectangle and roll as even as possible without fussing too much with the dough. Use enough flour to handle the dough, but try to keep it to a minimum because you don’t want too much extra flour in the carefully build up 80% hydration dough. Cover and leave to rest for 15 minutes.
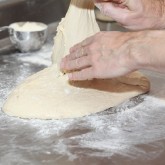
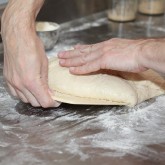
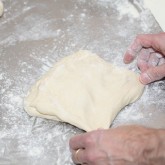
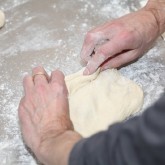
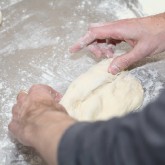
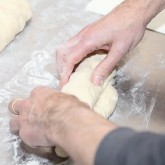
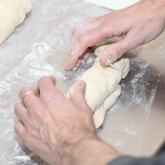
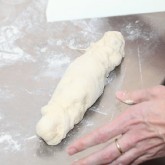
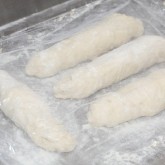
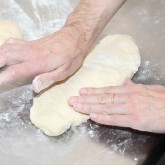
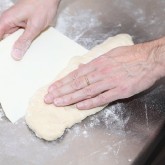
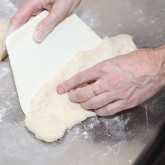
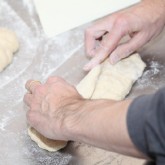
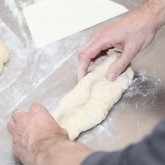
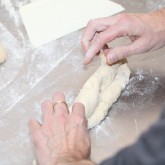
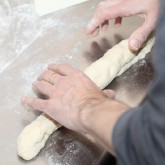
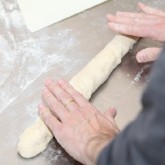
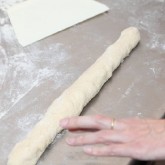
Take a roll of dough (which has flattened a little bit during the bench rest) and gently shape it into a baguette shape. My way of shaping this high hydration dough is to sprinkle it with a little flour and press it softly down into a rectangle with a short and a long side. The more even the rectangle the nicer the baguette will look in the end. With a plastic dough scraper you flip 1/3 of the long side onto itself and tuck it in to get some tension on the outside of the dough, now repeat it two more times until you have a roll shape. Make a rolling motion with your cupped hands from the center to the side with a soft touch to make the baguette a bit longer and to make nice pointy ends on both sides of the baguette. Practice makes perfect, do not be hard on yourself, it is not an easy job with a dough as sticky as this.
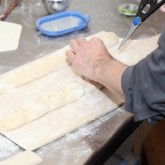
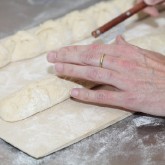
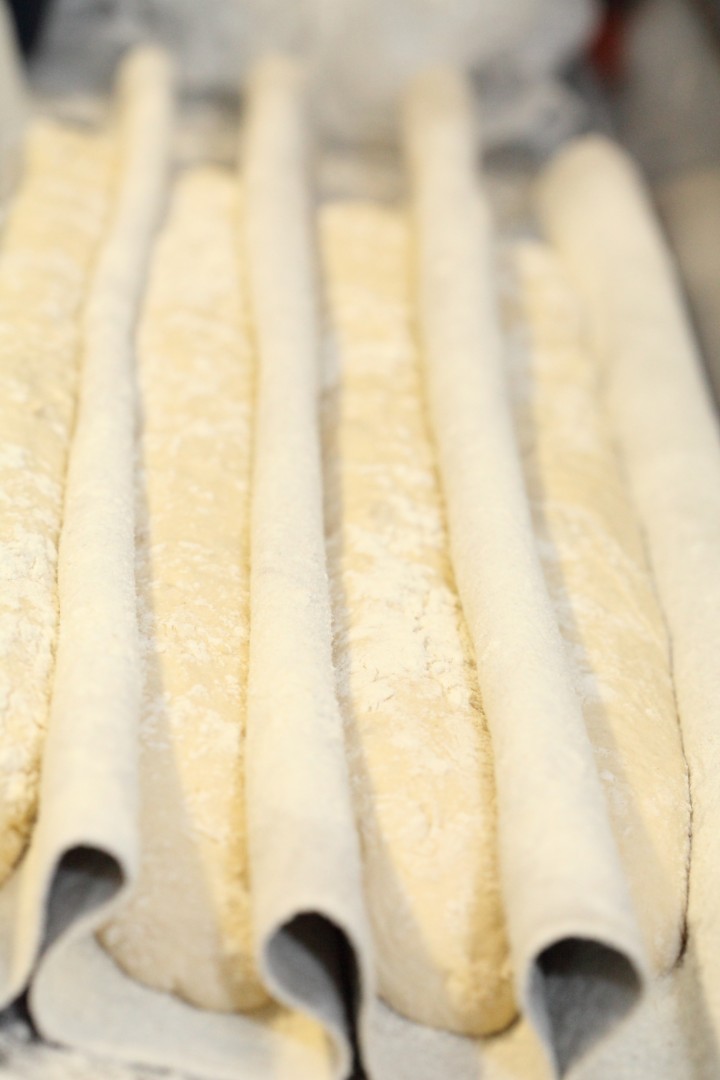 Place the baguettes in a couche made of proofing linen or in a baguette pan, or something of your own invention, but make sure the baguettes have enough side support to hold their shape. Cover them and leave to proof for 25 minutes.
To check if the baguettes are ready, dip your finger in some flour and gently poke in your dough.
If the hole disappears completely: under-proofed
If the hole dent pops half way back out: proofing is just right
If the hole stays entirely dented in: over-proofed
Score the top of the baguettes with a lame/bread scoring tool. Cut as straight along the long axis of the loaf as possible. Mentally divide the baguette into lengthwise thirds, and keep the cuts within the middle third. You can practice the scoring on a piece of paper or a kitchen paper roll first. Overlap the cuts by about one third of their length,while holding the knife at a 30 degree angle. Also check out this very useful video on proper baguette scoring.
Bake in the preheated oven for 25 minutes. Leave to cool on a wire rack.
To get a nice crust, try to create some steam in your oven by putting a small metal baking tray on your oven floor when you preheat the oven and pouring a half cup of hot water immediately after putting the bread in the oven. Release some steam by setting your oven door ajar (perhaps with the help of a wooden spoon or oven mitt) 5 minutes before the bread is ready. If you are going to create steam with a baking tray, you maybe also want to turn your oven temperature a bit higher, because you are going to lose some heat in the process.
Baguette Time Table
Day 1
Make ‘poolish’
Day 2
Mix ingredients until shaggy mass
00:00- 10 minutes rest
00:10 – 2 minutes stretch and fold
45 minute rest
00:57 – 2 letter folds
45 minute rest
01:42 – 1 letter fold
45 minute rest
02:27 – 1 letter fold
45 minute rest
03:12 – 1 letter fold + bench rest
03:22 – divide + pre-shape
03:37 – shape + proof
04:02 – into the oven
04:27 – take out and leave to cool
PS: If you are interested in linen couches / proofing cloths like we use ourselves, you can find them in our WKB webshop.






Besa says
Hello Marieke & Ed
I just found your website and I would like please to ask you a question regarding sourdough starter. I do not understand the process or better to ask why do we have to wait for sourdough starter for 7 days discarding half and adding same flour and water when just after the first 24 hours it is doubled in size and it smell pungent?
I do not bake a lot and I don’t have time to feed the starter and keep going for years!
My question is : after the initial process of sourdough starter being on the counter for 24 hours it doubled in size and is bubbling can I use right away without feeding for another 6 days? and each time when I need it to make new one again use after 24 hours?
is my short version a real sourdough starter ?
Thank you so much
Sea says
Hi Besa,
I was just passing by and saw your questions, I am not affiliated with the site but I can provide answers.
The 24 hours method is not a sourdough starter, but instead a pre-ferment (of which sourdough starter is a specific kind). There are two different ways the word “sourdough” is used: some people use it to mean the flavor and others the ability to make bread rise without adding yeast.
If you only care about the flavor of sourdough, then making pre-ferments for only 24 hours can be perfect. Many people even use part of their starter to make specific pre-ferments for different breads.
If you want to make bread without adding yeast (“naturally leavened bread”) then you will have to make a starter, as the 24 hours won’t be enough to build strength of the yeast to make the bread rise quickly. The first day it may take 24 hours for it to double, but mine only takes 3 hours (and triples after 6)! The yeast is quicker, but they need to work with the bacteria, which take longer to establish.
Don’t worry, though! You can buy existing starter if you’re worried about how long it takes to make (or maybe get some from a friend). You can also keep the starter in the fridge and feed it only once a week or a few hours before you bake once it’s established.
Hopefully this helps!
Weekend Bakers says
Thank you so much for your assistance and shared baking knowledge and experience.
Charles says
Why does my Baguettes have good oven spring with no open crumb?
H J STRATTON says
Handle the dough gently o as to not deflate.
Judit Fabian says
Thank you for this recipe. These are the crunchiest baguettes I have made. Previously I was using a 75% hydration recipe, but from now on I will use this one. Only problem was that they stuck to my baguette pan. Maybe use parchment paper the next time?
Harry says
Line the pan with parchment paper and after 20 minutes remove pan and return baguettes to oven (on parchment) to brown the bottoms. (use a peel)
Moz Bourne says
What temperature do you bake such high hydration doughs at? For how long?
Anh says
Im in Asia, the weather temperature in here about ~31 degree Celcius. Can i use this recipe for the short time to rest&fold???? Thanks
Nikki says
I’m confused. You mentioned making the poolish using 80% water but later say it will be drier than the standard poolish (which usually only uses 50% liquid).
Chris Whlitelonis says
A standard poolish is 1:1, the weight of the water is 100% of the weight of the flour, not 50%. This poolish is 5:4 , the weight of the water is 80% of the weight of the flour, hence drier.
Sanjiv Tambe says
I followed each step. Everything was fine except relatively small bubbles.
Could you please advice what’s needed to have big bubbles?
sanjiv
Christine Whitelonis says
I start the bread in the evening using this recipe but I follow the mixing stretching and folding described in the recipe for the Tartine style of bread on this site. So instead of 45 min between stretching I do 20 to 30 min. and I pull it right in the bowl. Over night in fridge. Then in the morning pre shape, rest one hour, form baguettes, rise 45 min bake. I live in Houston.
Christine Whitelonis says
Another note, I stretch and fold about four times
Tessa says
His would you recommend to alter this recipe if you make it in the tropics where the temperature is around 29 C and humidity is very high?
Christine Whitelonis says
I live in the subtropics, I don’t think you need to change the hydration. I usually put the dough in the fridge over night, in the morning pre shape the dough, rest 1 hour, form baguettes , rise 45 min. then bake.
florent says
you meant you follow this recipe and go almost straight to baking
are you in florida ?
Florence says
I will definately try your recipe. Appreciate the detail instruction !
Thank you!
C says
Hi!
thank you so much for your detailed recipes. it is a great help to home bakers like us 🙂
can i ask- why does the poolish for your 80% hydration baguette recipe call for refrigeration for 12 hours but the other recipe for “our other french baguette” calls for room temperature fermentation?
thank you and looking forward to your reply!
Weekend Bakers says
Hello C,
Thank you, glad you find it useful.
The recipes are different and so is the amount of yeast in the preferment. The other baguette recipe uses a very small amount of yeast at cool room temp. Both methods are valid, they are just slightly different. There’s always a certain balance in a recipe and with this 80% very wet dough the initial handling is a bit easier this way. But overall we also want to show that different methods can all yield good bread.
Enjoy your baguette baking!
Oxana Matthey says
Hi, would like to confirm my thinking with you please. I think I understood the key benefit of using the tiny bit of starter culture, if at all, in poolish – to maximize stretch of the dough, which means bubbles. A large amount of stiff starter in an 8 or 12 hour poolish would restrict the stretch. Is that right? But, if one keeps a lot of mature starter, one could use a chink of it in the dough making stage and just adjust the overall flour / water in the dough to account for what is in the starter (I weigh flour/water for feedings, so reasonably accurate proportion is maintained). Result – max stretch and max flavor. Is that a reasonable approach? Thank you.
Oxana Matthey says
Quick update (while I am very interested in your views on my analysis above). Followed the recipe, watched the video at least 3 times, may be more. Used 83% hydration and my flower could have taken more water yet. Stunning, delicious results. Thank you !!!! This can’t be good for the waist line, but it is soul food. My family loves it.
Weekend Bakers says
Thank you Oxana,
The tiny amount approach is also explained here:
www.weekendbakery.com/posts…ough-tips/
You are partly right, but there are many more factors at play, which makes it a complex subject. The type of flour and gluten and time are the most important ones.
You did so well, increasing the hydration like that. We loved seeing your result in the yourloaves section:
www.weekendbakery.com/your-loafs/
Thank you again for sharing!
kat bautista says
Hi! I’m planning to make this recipe using either King Arthur bread flour or all purpose flour. which do you think will work better? Thanks!
Christine A Whitelonis says
King Arthur bread flour works wonderfully as does their AP flour. Supermarket AP not so well.
Weekend Bakers says
Hello Kat,
Without having used this particular flour ourselves, but looking into it a bit, we would say the bread flour for this recipe comes closest to what we use.
Hope it will be good!
kat bautista says
thank you!
Karen Asbeck says
Thank you for this awesome recipe! One question though. I can only bake 3 baguettes at a time so I do two sets of 3. How can I keep the 2nd set from over-proofing since the 2nd set will have proofed for much longer than the first set? Also, if you do find your dog has over proofed, is there anything you can do to fix it?
Karen Asbeck says
Ummm I’m not proofing my dog haha iPhone corrected dough to dog, silly phones!
Weekend Bakers says
Hello Karen,
Thank you.
Try to keep the second batch in a cooler place while proofing, at least for the last part of the proofing, or use the fridge if needed. You need to test it a bit to find out the optimum for this. Often you will find that if you dare to take it a bit further, you see the slightly longer proofing time for the second batch turns out very much OK or even better. It all depend on the dough and room temperature. Being able to measure this makes life a lot easier. But, be careful and always keep an eye on your dough, because over-proofed dough cannot be salvaged. Once the gluten-structure is damaged, the dough will eventually sag and collapse.
Enjoy your baking!
Glen says
What would you think of taking clingfilm and wrapping the loaf in oiled clingfilm for final proofing and transferring to the baking tray? I didn’t do this, but I found the dough still far too sticky after preshape and rest. Maybe clingwrap will help the dough keep its form better? I’m a beginner, so maybe that’s it. I did get four very very nice-looking (and tasting) baguettes with which I am very happy.
Weekend Bakers says
Hi again Glen,
We would not know if this would work we have not tried it this way. I think we would stick to the method you also see in our video for the transferring. The best way to keep the form is with a thick linen couche or proofing cloth (www.weekendbakery.com/websh…60-cm.html) but you can also use a baguette shaped pan or tray.
But just give it a try with the oil, maybe with a light dusting of flour also, the only way to find out is to do it!
Enjoy your baking journey!
Bruce Hansel says
I put parchment paper in the folds of the couche. I use the paper to make the transfer. I roll the loafs onto PP on my pizza peel, then slide the PP with the loaves onto my oven stone. So, once I have them in the couche, I don’t handle the dough directly.
Weekend Bakers says
Thank you so much Bruce, this is an excellent tip!!
Glen says
Hi. So I’ve made the ‘poolish’. I followed your directions. I weighed everything. The only thing is that 304 grams water to 380 grams flour yielded, well, a biga (looked more like cookie dough). Double-checked the figures too. I had to hydrate a little more to achieve a wet, sticky mass which is, by your description, what you would like us to achieve. What gives? Did I miss something?
Weekend Bakers says
Hello Glen,
We have tried to describe that this poolish between brackets looks like something between a poolish and a biga. So it is quite stiff (80% water instead of the usual 100). Depending on the absorption of your flour yours might look a little different from ours. So you did probably good to add just a little bit of extra water to achieve the right consistency.
ksaieh says
Hi!
I am planning on making your baguette recipe but my oven stone is round and smaller. It will only fit a baguette 12 -14 inches in length. You mention that the recipe makes 4 loaves (346 grams each). How much dough should I weigh to make a smaller baguette?
Thank you so much in advance! I tried your croissant recipe and LOVED it. Excited to give baguettes a try, they are my husband’s favorite.
Weekend Bakers says
Hello Ksaieh,
Thank you for your kind words. We would suggest making 6 baguettes with this dough and roll them to the desired length. When making six baguettes each piece of dough will be around 230 grams.
Hope it will be great. If you are not so familiar with this very wet dough we want to suggest to you to try our other baguette recipe one or two times first or reduce the water content of this one by 5 %.
www.weekendbakery.com/posts…te-recipe/
Enjoy!
Marieke & Ed
ksaieh says
Marieke & Ed,
Thank you so much for another successful recipe. The baguettes turned out amazing!
I was wondering if it is possible to partially bake the baguettes and rapidly freeze them, then defrost and finish baking another day?
If so, how long should I bake them for and would it be at the same temperature?
Thanks again!
Kathy
Weekend Bakers says
Hello Ksaieh,
We only store our loaves in the freezer after baking and with these high hydration loaves you can still give them a quick ‘revival’ in the oven if needed.
But in general people par bake bread for about 2/3 or 3/4 of the original baking time.
Maybe you will find your own best way of doing it by reading some of the suggestions here:
www.thefreshloaf.com/node/…par-baking
Hope it will work out well!
Allen says
Hello WEBs,
While chatting with a friend recently he mentioned that he uses 20% AP flour and 80% bread flour for bread in general. This would reduce the structure at least a little I’m sure. But can you think of pros and cons of doing a mix like this? What would be an advantage or disadvantage of substituting some AP flour instead of using all bread flour?
Weekend Bakers says
Hello Allen,
This is very hard to answer for us, because there is so much difference between flour, even of the same type and brand anyway. We cannot see (in our case) improvement by using AP flour (with less gluten). All we can say is just give it a try and compare, based on the use of your specific type and brand of flour, this is the only way to know if it makes a big difference and gets you the result you want.
Enjoy your experimenting
Christine A Whitelonis says
This is definitely a good idea if you are using Gold Medal bread flour. It seems to be stronger than other brands.
Rose says
Hello Weekend Bakers,
This is my second recipe from your site and I just wanted to comment on how amazing these baguettes turned out! I was nervous about 80% hydration so I reduced the water to achieve 75% hydration. The dough was a bit sticky but not impossible. I have a marble surface where I do the dough folding and manipulation and that seems to work very well. My oven is too small to fit all 4 at once so I baked in batches of 2, so the second 2 actually had close to 1 hour proof which didn’t hurt them too badly.
Next time I’m going to be brave enough to try 80% hydration!
thanks and keep up the good baking 🙂
Weekend Bakers says
Hallo Rose,
Excellent! So happy to read you took this approach and the result was to your liking. This is a very good method to work your way up to the 80%, maybe even do one next time with 77, then 80. This way you get to grips with the whole process and the steps and you are not discouraged by dough that you maybe would find difficult to handle.
Thank you for sharing and wishing you many enjoyable baking days and crusty baguettes and loaves!
Ed & Marieke
WKB
Agnes Bitter says
Dear WEBs,
on which kind of surface do you work with the dough?
On the pictures it looks like stone or metal – I used my usual wooden board, and the dough kept sticking all the way through the four steps – less in the end, of course!
Thank you for the inspiring web side!
Agnes.
Weekend Bakers says
Hi Agnes,
We use a stainless steel work surface. We think it might work better with this dough. Glad you noticed the handling of the dough got better as it developed. We understand this dough is a higher level of sticky so if needed, adjust to 75% and work your way up to 80% with future bakes.
Thank you for your kind words and enjoy the process and the crusty baguettes!
Ed & Marieke
WKB
Krista says
Can I make this with fresh yeast as not dry/ instant yeast in the shops at the moment?
Weekend Bakers says
Hello Krista,
Yes of course, that is no problem. As a rule you multiply the amounts you find in the recipe x 3 for fresh yeast. Fresh yeast can be a bit more ‘enthusiastic’ so always keep an eye on the dough to see how quick it proofs and adjust times or amounts the next bake if needed.
Agnes Bitter says
Hello Krista & WEB,
funny to hear that the dry yeast is still not available, I do wonder why.
I tried the recepie for the first time and actually had trouble to weigh the 1,5 g on my digital scale! so I will try again with fresh yeast.
Anyway, the result was not perfect but still the closest to baguette that I ever reached.
Thanks for your exquisitly detailed advices.
Krista says
thanks hoping to make this soon, my sourdough starter is ready so planning to make my first sourdough first this weekend, then maybe these baguettes
Weekend Bakers says
Enjoy the weekend baking Krista and let us know how it goes!
Simon says
If I wanted to make this with a sourdough starter…. how much starter would I need in the initial poolish….?
Is there a yeast : sourdough starter calculator….?
Weekend Bakers says
Hello Simon,
If you want to make a hybrid version with sourdough to develop the poolish the suggestion would be to use 20 to 30 grams of your starter.
We do not have the experience with this recipe of turning it into a hybrid or sourdough version, so you have to experiment a bit.
The reason you do not see these calculators is that conversion is not straightforward and always depends on the steps of the recipe as each recipe is different and timing and times will be different. No matter what amount of sourdough you add, it will always take longer than the yeast recipe, so you have to adjust the timing and the steps. So you are basically making a new recipe.
So especially with 100% sourdough recipes we always advice to just find a good sourdough version that has already worked out amounts and timing for a good result.
Roger says
Thank you for this recipe. I used 10 g of my 50% hydration rye starter. Then, using King Arthur all purpose flour 11.7% protein, I tripled the mass three times. Each time I kept hydration at 80% .
The final dough mass- 780 g at 80% hydration made 3 baguettes. Health reasons keep my salt for bread at 0.7-1%.
I delivered a loaf to my two daughters homes and we all enjoyed it… Delicious.
If I learn how to send you pics, I will.
Weekend Bakers says
Thank you again Roger, also for sharing your results with us on www.weekendbakery.com/your-loafs/
We never make the sourdough version, only a hybrid sometimes with sourdough in the preferment and a bit of yeast in the final dough. So great to see it worked out well for you and the sharing part with your family is the best part of course!
Wishing you much more crusty baguettes and delicious loaves,
Ed & Marieke
WKB
Allen says
Can I extend the time that the poolish is in the refrigerator? Could I add a day or two days? I would like more time for the poolish to ferment. Hoping for additional flavor and better digestion after extended time in the refrigerator. I do this with pizza dough so perhaps it is possible with the poolish?
Weekend Bakers says
Hello Allen,
Yes you can do this to a certain extent, but there is a limit to it of course where the gluten are going to be damaged and the end result compromised. With pizza this is less of a problem. There is also no need for this because the poolish prefermenting time is already long enough for flavor and digestion purposes. We always advice to make a recipe as described before altering anything. For longer fermentation you can also reduce the amount of yeast in the poolish.
Allen says
Thank you for this additional information. I’ve been happy with the results for the original recipe, but I like to see what else I can do. I enjoy making the recipe “personal”.
Weekend Bakers says
Making the recipe your own is a big part of the pleasure of baking we agree!
George says
The dough remains very wet and sticky and fluid, even though I took exact measurements. Is that how it should be?
Weekend Bakers says
Hi George,
You can watch the video to see what our dough looks like. If you find it hard to handle the dough, you can also start with the slightly less sticky 75% hydration baguette:
www.weekendbakery.com/posts…te-recipe/
Or you can decrease the water in this recipe with a few % and see how that goes.
George says
Perhaps it has to do with the fact that I live in the tropics and the room temp is 28 or higher?
Weekend Bakers says
Yes indeed, this makes a big difference baking in a hot and humid climate. Maybe you even need to adjust the hydration to 70% or below. The baking time might be just a little bit longer too. Try and use your poolish after 8 to 10 hours maximum and skip the part where you leave it at room temp for an hour first. This might help with the handling of the dough too.
Good luck with the challenging baking conditions!
florent LEPVREAU says
this comment kept my attention .. for example today we have 94% humidity outside and at least 77% inside ( ac on ) I assume we have to adjust many factors ? your thoughts ?
thanks in advance
florent
Allen says
Sometimes I might want to cut this recipe in half. How would I do that? Would it be as simple as cutting the amount of each ingredient in half?
Weekend Bakers says
Hi Allen,
Yes exactly, that’s all there is to it!
Enjoy your baguette baking
Stephanie says
My dough stayed pretty sticky/moist and was a bit tough to shape due to that. Also, when I tried to score the loafs, the lame just pulled and dragged the dough not making a clean cut. I ended up with giant slug-like looking loafs. Although the taste and crumb of the bread was great.
Would using less water in the second part of the recipe help with that? Also not sure if I didn’t get clean scores due to the stickiness of the bread.
Weekend Bakers says
Hi Stephanie,
The scoring is quite a challenge with such with dough. 80% hydration is very high and if you are not acting swift and confident enough and with a sharp enough blade, you tend to drag across the dough.
Have you seen our tips on the subject? www.weekendbakery.com/posts…onfidence/
If you want to use less hydration we suggest you bring it back to 75% by adding less water to the final dough. Or try this alternative recipe for baguettes: www.weekendbakery.com/posts…te-recipe/
Hope you will continue to practice because you will get more confident with each try and as we always say and you already discovered, the bread you produce in the meantime is at least edible but more often already quite delicious 🙂
Stephanie says
I’m definitely not giving up! The Tartine I made from your site turned out fabulous and I’m looking forward to trying the San Francisco Style Sourdough (I’m in California). I will certainly try the 80% baguette again, the taste was so lovely.
Weekend Bakers says
Enjoy the process and baking journey Stephanie!
Maureen Gillard says
Hello
Your recipe calls for ‘wheat (bread) flour’.
Could you please advise the protein content of the flour you use for this recipe in order that I can use an appropriate equivalent flour here in the UK?
I would welcome any advice you can give.
Weekend Bakers says
Yes, Maureen, the one we use for this recipe has about 12.5% and is an organic quality wheat flour from Holland, stone milled.
Hope your result will be great. Enjoy your baking.
Wai Semeraro says
Try using T55 flour. It makes a difference.
Weekend Bakers says
Thank you Wai. We have also learned from other bakers they have good results with both T55 and T65 French flour or a combination.
Andrew Allbon says
Good morning,
I absolutely love this recipe and technique and truly believe it makes grade A baguettes. I am intrigued however how the I could change to fresh yeast to see alternative results. Do you have a recipe or suggestions for this change?
Weekend Bakers says
Hello Andrew,
You can use fresh yeast and just stick to the recipe. As a rule you need to use three times as much fresh yeast compared to instant dry yeast. It is our experience fresh yeast can be a bit more ‘enthusiastic’ when it comes to proofing, so could be it all goes a bit quicker or you can use a little less. Just give it a try and hope it will be great.
Joanne ciantar says
You don’t say how much in weight polish to use. I’m not a instinctive cook and I have poolish or Biga. Want to make your baguettes. Thank you.
Andrew says
All of the poolish should be used.
304 ml of water divided by 380 grams of flour = 80%, which is the recipe
Weekend Bakers says
Yes, thank you Andrew!
All of the poolish is added to the recipe.
Enjoy your baguette baking!
Noam Sherman says
Hi
I tried to follow the hydration and folding instructions. for the poolish.I used a tiny amount of 100% hydration rye sourdough (about 25 gr. and 1/4 spoon instant yeast. Due to time constraints once I completed all folds, I had to continue proofing in the fridge for 12 hours, then took the dough out for 2.5 hours and continued as instructed. The dough was good and quite easy to work with. I used 11.5% protein flour.
Baked at 240-250c (as much as my oven thermostat is accurate) using baguettes perforated pan in an oven with baking stones on the bottom and on both sides, a pan with 1/2 cup boiling water under the bottom stone. I came up with very nice looking baguettes, very good oven spring, very nice deep brown crust, very tasty, BUT ! the crumb, although full of holes, came up quite dense and not fluffy as I wanted it to be. Why is that ? over kneading ? over proofing ? wrong temperature ? wrong flour ?
Any idea what to look for while I do it again ? ( I envy those artisan French bakers that make crusty, yet airy light baguettes, even when they do whole wheat baguettes.
Thank you so much for your advice.
Noam Sherman
Weekend Bakers says
Hello Noam,
This is a very well balanced and thought about recipe, so we would love for you to give it another go and keep to the instructions without any constraints if possible and compare the results. It is hard for us to asses what factors played a roll in your result, it could be a combination of them, maybe also underproofing at the final stage. We do not think your flour is the problem, but if possible, try a few different ones and you will see they all get a different result and you will have a favorite no doubt!
Hope you will be able to continue to bake. Be safe and enjoy the process,
Ed & Marieke
WKB
Noam Sherman says
Thanks for the answer. I found a small boutique mill that sells German T65 flour. Will try again with this one and let you know.
May the weather warm up will also make a difference. Too many factors that can make a change in home baking. A
Noam.
Weekend Bakers says
Yes, it is never the same, you will always have to look at and know your dough, how it is supposed to look like and feel. With each batch of flour there can also be small differences in absorption of liquid or protein content.
bobby says
thanks for your recipe
what is poloish and why we make poolish?
I’ve never heard of it.
thanks for your respond
Weekend Bakers says
Hello Bobby,
The primary difference between making bread with a starter or preferment like a poolish and making bread with the direct or straight yeast method is that, although starter breads require more time to prepare, the flavor and texture of the bread is almost impossible to achieve with other leavening methods. Bread made with starters like poolish and biga also tends to keep better, compared to bread made from straight doughs.You can read more about poolish here:
www.weekendbakery.com/posts…lish-biga/
tea_n_biscuits says
Thanks for this! Could you please let us know the appropriate amount of starter to use vs using yeast?
Weekend Bakers says
Thank you very much. Your question is not as straightforward as it may seem. Using sourdough instead of commercial yeast is possible of course, but it means the recipe changes too and the end result will be different. Because we are not the biggest fans of sourdough baguette, we do not have the exact worked out sourdough 80% hydration baguette recipe for you.
We do have a hybrid version with the smaller baguettes called ficelles:
www.weekendbakery.com/posts…sourdough/
Otherwise you could try another sourdough baguette recipe that already has the right amounts and proofing times.
Sara says
I tried this recipe for the first time yesterday, after some experience with your other baguette recipe. Not for beginners indeed! At the first stretch and fold I was convinced that nothing good could come from that. But ‘stick’ to it and the result is absolutely worth while. The way you see the dough develop with every stretch is magical.
In these Corona days I have plenty of the most important ingredient: time!
Till the next loaf!
Sara
Weekend Bakers says
Hi Sara,
Thank you so much for your excellent comment. Very glad you persevered and got your reward and enjoyed the process too.
It’s the best skill and distraction these days plus we can even make other people happy with it.
Enjoy and stay safe!
Greetings
Marieke & Ed
Tome Trajkovski says
I’m writing my experience with my first attempt at this recipe, along with some suggestions that I want to adjust and try. Ed& Marieke, please comment and guide me where I may be misunderstanding the things I am writing about.
These comments are about my first attempt at this particular recipe. A few months ago I tried a “baguette” recipe, but the overall product didn’t have the baguetteness that I wanted. It was a good and fresh loaf of bread, however it didn’t have the crust I LOVE in a true and real baguette, and there were tiny proofing holes not the larger and very varied holes in a true baguette.
So this time I read about 6 different baguette recipes to understand the similarities and differences from different bakers. I decided to use the recipe on this sight. The recipe here is an overnight retarded proof of the poolish, and then the further process to create and bake the baguettes. The other method, which won a Paris contest for best baguette, uses a poolish and then adding all the rest of the water and flour and yeast to create the dough first and then do the retarded overnight cold proof.
The complete dough, overnight proof allows for the proofing and folding and baking process to be completed before typical lunch time. The partial dough poolish overnight proof method of this recipe requires getting up very early to complete the process before lunch.
On my next try I will try the complete dough overnight proof and bake method to note any texture and flavor differences. I actually prefer the idea of doing a complete dough that is then proofed overnight, as that allows the final baguette to be baked and fresh for lunch and dinner.
The partial overnight proof method, such as this one, means that the fresh baguette is fresher for later lunch and dinner. It’s a personal want call. I am more interest in any texture and flavor differences between the two main methods. The Paris best baguette winner does the complete dough and then overnight method.
My attempt:
Everything looked very good compared to what the dough looks like in the video. I used King Arthur All-Purpose (AP) flour.
As Ed & Marieke tell us, we will need to practice, practice, and practice some more before we get the full idea and experience of how to make a proper baguette. That is very true for pretty much everything in life that is worth the time and effort to get it right.
Here are some things that I need to work on, and over time I’ll likely need to refine other aspects as well.
I do not have a proper linen couche nor a lame, no a paddle to allow better transfer from couche to the baking stone. Also, I do not have a large proper baking stone for bread. Prior to giving this recipe my firs try, I ordered a linen couche, a lame, and stone.
For the couche I used a clean non-bleached white cotton kitchen towel.
Not having a very sharp knife, and no lame, I was not able to get the cuts as the video shows. Next time I’ll have that tool. Not having this tool nor a VERY sharp knife, my cuts were very shallow and short. That resulted in my loaves not having those wonderful dough bursts the give those added textures for the bread.
For baking the loaves I took one of the oven’s racks and lined it with two single pieces of aluminum foil. That was my baking base. For the loaves I used a single sheet of parchment paper laying on top of the foil. This method allowed a very good amount of heat to reach the bottom of the loaves, as the foil was a single sheet. I’m looking forward to using a proper baking stone to get even better and more even results.
Handling the wet dough, the instructions say and remind to not use too much flour in order to ensure that the dough remains “wet” and properly hydrated. However, for the last step where we shape the loaves and put them to the final proof in a couche, it seems there we can use more flour. In the suggested video, there is quite a bit of flour on those loaves after final shaping and proofing. I noticed that bit AFTER I had a more difficult time moving the wet loaves onto the cotton couche I am using. However, for me, I do not like a lot of dry flour on the outer crust of my breads. Practice will allow to get a better understanding of how to do this for my preferences.
For the steam in the oven I used an alternate method that I read on a different recipe. I read about 6 different recipes before choosing this recipe here. I wanted to get a good idea of the similarities along with any differences between the recipes. The steam method I used is to put a dry bread baking pan in the lower rack of my oven while the oven was heating up. And then, once I put the loaves into the oven I put about a cup and half of ice into that pan. The idea is to get immediate steam in the oven just a the loaves go on. I heated my oven at 500F. After the steam and loaves in the oven I kept the heat at 500F for about 5 minutes to ensure that the oven burner kept the heat level up due to any heat loss during the loaf insertion time.
My first results:
First the flavor is excellent. There is a nice sweet-like caramelized wheat flavor, like what toasting bread gives. I LOVE that. I used two teaspoons of salt, per the recipe, and that is perfect. The overall flavor is not salty, but I can taste the accented flavors of the yeast and wheat.
Appearance. The loaves are not what I wanted, and not what the recipe can do, and that it directly the result of not having the proper scoring tool, a lame or a VERY sharp knife. The color is a dark brown. Beautiful color.
Crust and texture. The loaves have that nice “crackle” when one lightly squeezes the finished and cooled baguette. The thickness of the crust is quite good for my first attempt. I always LOVE the end pieces as they are the most crust on the bread. For my next attempt I will try using two methods for the steam. I will use a small pan of hot water steaming as the oven heats to temperature, along with a dry pan to get the “instant” steam that putting ice in a hot pan will create. According to the recipes I’ve read the steam has a good impact on the crust thickness.
The texture is very good. There are many holes and a good amount of various sized holds. However, I would like to get even more and larger holes in my next loaves. The amount and type of holes in my first batch are still quite good, but I want to try for more. My result may be due to missing a step. When diluting the poolish and then adding the rest of the flour, water, salt, and yeast, that mix should be allowed to sit for 10 minutes before doing the first stretch and fold. After I mixed in the remaining ingredients and mixed them and then poured the dough out and did the 2 minute stretch and fold. Missing that step removed that additional 10 minutes of allowing the yeast to produce and release their aromatic gasses that also add volume/holes. Another aspect is that the kitchen ambient temp was about 69F. I covered the dough per the recipe and did the waiting in a cold oven with just the oven light on for a bit more warmth.
For my next attempt if the ambient temp is 69F, then I may add a bit more yeast, perhaps 2 grams instead of the 1.5g for the second yeast addition.
I handled the dough lightly in order to not overwork it and to not squash and burst out the air bubbles created by the yeast.
Overall, THANK YOU for this recipe! I had tried to do a baguette one time before, but that recipe was not like this one. Your recipe has resulted in me getting very close to the great baguettes I’ve eaten during my life. I am inspired to do this again and again, and understand the process and technique that turns the seemingly simple 4 ingredients into a wonderful crusty, chewy, and flavorful bread.
Weekend Bakers says
Hello Tome,
Thank you very much for your input and extensive descriptions of your experiences with the recipe. We are so busy now we do not have time to in dept read and answer all mail and comments we get. We love how you already had a great result with our recipe and are willing to keep going and improving, even if you are not in the possession of all the equipment needed.
If you have one or two specific questions for us, we might be able to answer them.
Keep baking and keep safe!
Ed & Marieke
Christine A Whitelonis says
Dear Tome,
I have made lots of baguettes lots of different ways including the Anis Boabsa method and I prefer Ed’s recipe which I have made in different ways too. I’ve used King Arthur bread flour and 00, both are very good, I have forgotten to put the pre ferment in the fridge and gotten very good results. I have pulled the dough and then left it in the fridge over night, in the morning pre form dough, let rest 1 hr. form baguette, let rise 45 min. bake, I think I like this way the best. Also I have kneaded it right in the bowl and pulled the dough in the bowl with good results. I use non stick baguette pans which are very convenient, no fooling around with a couch or peel. Scoring is a problem for me, I have a lame but the dough is so wet it does not seem to work well.
If you do not have a stone, use an upside down baking tray. You can use a tray as a peel also.
Chris Whitelonis
Weekend Bakers says
Thank you very much Chris, for sharing your tips and experience!
Naomi says
Hello! Thanks for this recipe: I am trying to interoperate a 2nd cold ferment into this recipe for additional flavour. Would you recommend doing the folding and resting a couple times and then letting it ferment in the fridge over night?
Thanks!
Weekend Bakers says
Hello Naomi,
Have you tried the recipe as described and did it lack in taste?
The process is very well balanced and we would not immediately recommend doing a second ferment. But of course we understand you want to try and experiment. We cannot advice you based on experience but we think it would be best to start with retarding after the folds. It could also be you need to use a little less yeast because of the prolonged process. Hope it will be great.
Enjoy your baguette baking and be safe!
Christine A Whitelonis says
Dear Naomi,
I have done exactly what you suggest, hold in fridge overnight without any adjustments to the recipe and gotten a wonderfully sweet baguette. In the morning I preform dough, rest 1hr. form baguettes, rise 45 min then bake.
Chris Whiltelonis
Weekend Bakers says
Thank you Chris, so good to know this!