Less stretching & folding, less wet, less steps, but you do need a mixer for this one…
This method is easier, the recipe has less steps, the dough is less wet than our 80% hydration baguette recipe, and yet this one also yields wonderful baguettes. If you were to compare the two recipes you could say this easy version has a little less depth of flavor and the holes in the crumb are less impressive, but it is also less laborious and less sticky (saves you 2 hours on baking day). The flavors are actually very much comparable and eaten in combination with other foods like cheese it will be hard to notice much difference in taste.
We think this recipe offers a great place to start for the novice baguette baker. Still, it is not at all the easiest of bread recipes to master, but it is one every home baker wants to have as part of his baking repertoire. And we are confident this recipe will also give you very satisfying results.


So lets start baking! But before we do, you may want to check out our baguette video Watch it here…
And our tips for bread scoring with confidence and handling wet dough may also come in handy.
Last but not least do not forget to stop by our baguette log and follow our baguette baking progress and learn from our experiences and mistakes!

This is what the active poolish looks like
| Ingredients for the poolish | ||||
|---|---|---|---|---|
| 380 | g | wheat (bread) flour | ||
| 380 | g | cold water (straight from the tap) | ||
| 0.7 | g | instant yeast* (we use twice the amount in winter when temps are low!) | ||
| Ingredients for the baguettes | ||||
|---|---|---|---|---|
| 1 batch makes 4 baguettes | ||||
| the poolish from step 1 | ||||
| 380 | g | wheat (bread) flour | ||
| 190 | g | water at room temperature | ||
| 12 | g | (sea) salt | ||
| 2 | g | instant yeast | ||
* In winter our bakery is between 16ºC / 61ºF and 18ºC / 65ºF, so we use more yeast to get the poolish going. In summer the average temperature is between 21ºC / 70ºF and 25ºC / 77 ºF so we can use less yeast to get the same result. So take the temperature of your surroundings into account to determine your amount of yeast.
Making the poolish
In a bowl stir together 380 grams of bread flour with 380 grams of cold water with the yeast (see above). Mix until you have a consistency that looks like dough-like batter. Cover the bowl and leave for 12 hours at room temperature. So if you want to begin your baguette baking in the morning, you can make your poolish the evening before.

Making the baguettes
In the bowl of your standing mixer, combine the poolish with the other ingredients and knead for 6 minutes. Cover and leave to rest for 40 minutes. Now turn out the mass onto your work surface and stretch and fold, doing two to three sets of letter folds (one set = right over left, left over right, bottom over top, top over bottom) depending on how well your dough cooperates. Stop if the dough is not willing to stretch anymore. Put the dough in a greased bowl, cover and again leave to rest for 40 minutes.


Turn out the dough and stretch and fold a second time, doing one to two sets of letter folds.
Directly after the stretch and fold, divide the dough in 4 equal parts. Now you are going to pre-shape the dough parts one by one by carefully stretching the corners, making a rectangle of each of the 4 pieces, and rolling them up. Try to make your rectangle and roll as even as possible without fussing too much with the dough. Use enough flour to handle the dough, but try to keep it to a minimum. Cover and leave to rest for 10 minutes so the gluten can relax.


Preheat your oven to 240ºC / 465ºF (at what stage you preheat your oven depends on how long it takes for your oven to heat through, some take 30 minutes, some, like ours, with stone floors take a lot longer, up to two hours.)
Take a roll of the pre-shaped dough and sprinkle it with a little flour and softly press it into a rectangle with a short and a long side. The more even the rectangle the nicer the baguette will look in the end. With a dough scraper make sure the dough is not stuck to your work surface with the help of a little bit of flour.


With a dough scraper, flip 1/3 of the long side onto itself and press down the seam, with the heel of your hand, to get some tension on the outside of the dough, now repeat it two more times until you have a roll shape. Make a rolling motion with your hands from the center to the sides with a soft touch to make the baguette longer and to try and make nice pointy ends on both sides of the baguette.
Practice makes perfect, do not be hard on yourself, it is not an easy job, even with this slightly less sticky dough, compared to the 80% hydration we use for our other baguette recipe.

Place the baguettes in a couche / proofing cloth made of linen or in a baguette pan, or something of your own invention, but make sure the baguettes have enough side support to hold their shape. Cover them and leave to proof for 35 minutes.
Baguettes resting in their couches (beds) made of thick proofing linen
To check if the baguettes are ready, dip your finger in some flour and gently poke your dough.
- If the hole disappears completely: under-proofed
- If the hole dent pops half way back out: proofing is just right
- If the hole stays entirely dented in: over-proofed


Score the top of the baguettes with a lame/bread scoring tool. Cut as straight along the long axis of the loaf as possible. Mentally divide the baguette into lengthwise thirds, and keep the cuts within the middle third. Overlap the cuts by about one third of their length, while holding the knife at a 30 degree angle. Also check out this very useful video on proper baguette scoring.

Do not use this steam generating method with your normal household oven! Check our oven tips first
Bake in the preheated oven for 27 minutes. Leave to cool on a wire rack.
To get a nice crust, try to create some steam in your oven by putting a small metal baking tray on your oven floor when you preheat the oven and pouring in half a cup of hot water immediately after putting the bread in the oven. Release some steam by setting your oven door ajar 5 minutes before the bread is ready. If you are going to create steam with a baking tray, you maybe also want to turn your oven temperature a bit higher, because you are going to lose some heat in the process.

Baguette time table
Day 1
Make poolish
Day 2
00:00 Mix ingredients 6 minutes
40 minute rest
00:46 – 2-3 letter folds
40 minute rest
01:26 – 1-2 letter fold + divide + pre-shape
10 minute rest
01:41 – shape + proof
35 minutes final proofing
02:20 – into the oven
Baking time 27 minutes
02:47 – take out and leave to cool
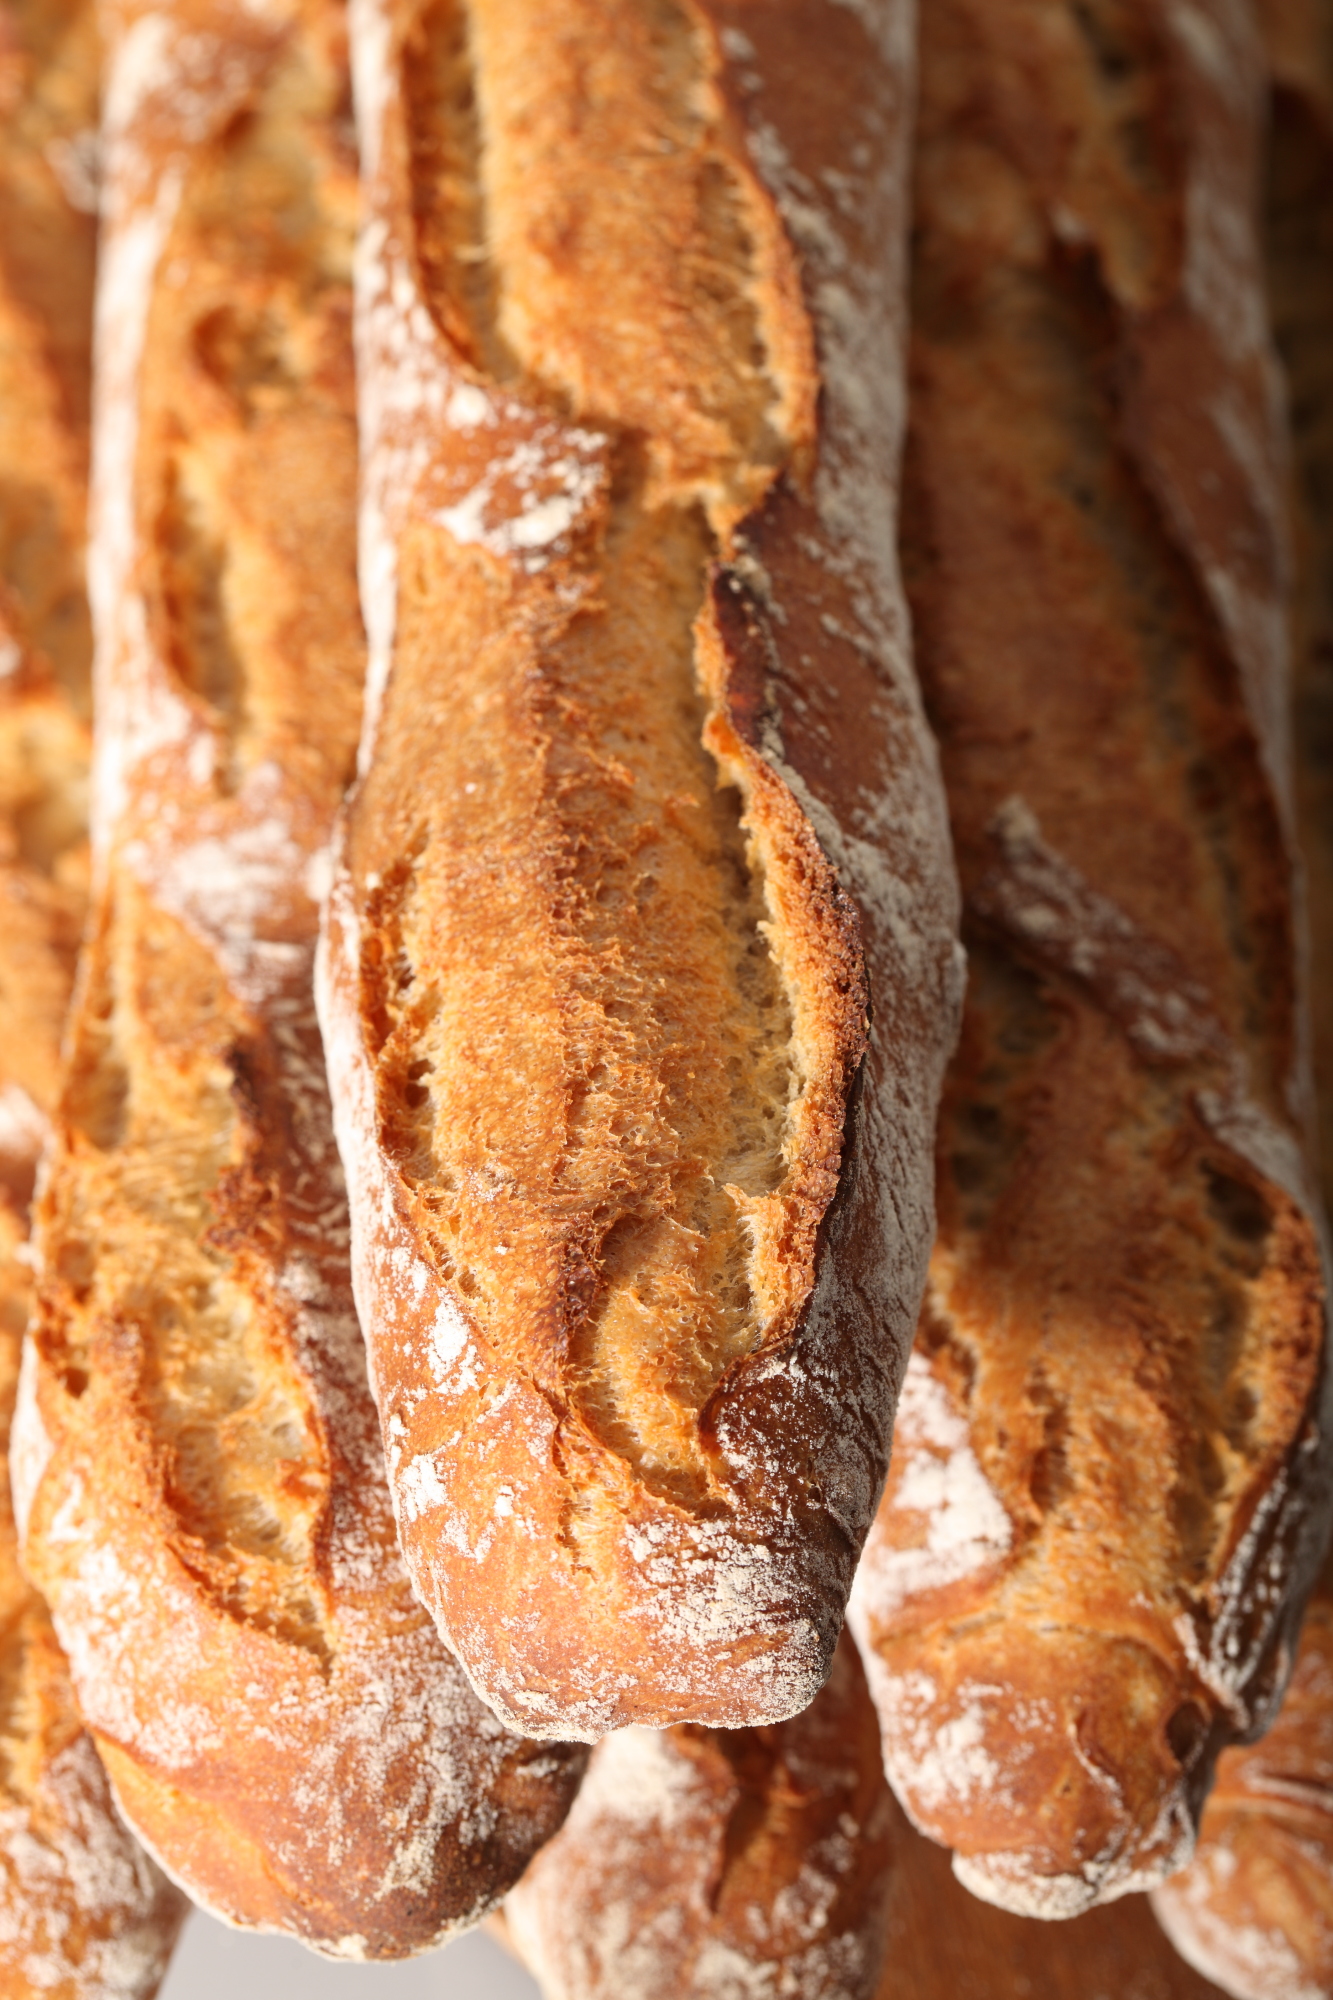
The crumb: the holes are slightly less impressive compared to the 80% hydration recipe, but still very nice texture and taste!
If you are looking for couches / proofing linen for baguettes, we have really good ones made from 100% French bakers linen in our Weekend Bakery web shop!
Brilliant recipe although I struggled with using wholewheat in the mix (50/50). Need to try harder!
My question relates to yeast. If I want to use fresh yeast what is the recommended scale vs dry yeast or shoul I stick with dry
Great web site. Thanks
Hi Tim,
Yes you can use fresh yeast. When substituting instant dry for fresh you multiply by 3, so 2 grams instant dry becomes 6 grams fresh yeast.
If you want to introduce wholewheat into the recipe we would suggest starting with a 80/20 combination and take it from there. There will be less gluten development and more water absorption but with such a wet dough it is really hard to judge what would be the right amounts. So go gradual and see how the dough behaves would we our advice.
Thank you for your kind words and happy baking!
Can I halve all the ingredients for 2 loaves , as I would like to test before making a bigger batch ?
Hi again Fong,
Yes that is no problem. The only thing that is a little bit more of a challenge is the Stretching and Folding with a small piece of dough. It just goes a bit better with more to hold on to.
Hope it will be a success too. Enjoy the baguette baking!
I made this recipe without the machine, but with slap ad fold handkneading, satisfied with the result, nice open crumb fantastic color, nice crust even in my parents electric oven. I added one step of ten minutes of hydrolyse. Handkneading took me about 11 minutes but this will certainly be faster when I will be more familiar with this technique (which can be found on youtube when you search “French kneading”, “slap and fold” or “Bertinet making bread” ). Initial mixing was done with a small Doughscraper. Instead of putting more yeast in the poolish to compensate for the lower temperature at night I prepared the poolish earlier so it had 16 hours of proofing plus another 4 hours outside outside at temperatures around freezing.
The waiting time outside was becouse on baking day I decided to go out in the morning, so I could bake in the afternoon.
-“But you do need a mixer for this one”
-“Dat zullen we dan nog wel even zien!!” ( ;
(We shall see…)
I take this one as a challenge, I have recently found some ways to handle sticky dough with my bare hands, and the aid of some pieces of plastic, so as soon as I have replenished my amount of stronger flour and an occasion to make baguesttes I will give it a try!
Keep us posted….
These six minutes in the standing mixer, what should it feel look like when kneading by hand? I guess it should not be too developed because in that case it will fight back too much doing the stretch and folds. Or should I make it strong becouse somewhere you have written that It was very unlikely by handkneading?
I have two types of flour, 11% biological and 14% protein nonbiological. What percentage of proteins would be good for these baguettes, since I can make any percentage between 11 and 14% or would it be the best to make it entirely with the strong (but not durum) flour? Thanks in advance
Greetings!
Matthijs.
Our suggestion would be to aim for a flour mix of around 12.5% and aim for moderate gluten development, which, depending on your technique, should be reached in about 10 to 12 minutes. Maybe by enlarging the pics, you can also judge by the way our dough looks.
Happy baguette baking!
Great feedback Matthijs! We never use this technique but we know it is loved by many bakers.
Good morning. Well, here its morning here in Brazil. Ive shopped around a lot for a good recipe and process to learn baguettes. Im an experienced baker and I teach bread making here. I tried a wet process recipe and it was OK, but I need to simplify this for teaching to beginners.
I make sourdough using my own culture I developed here. It works great and I keep a lot for students. Making a poolish for this process is where my question lay. Can I make a poolish for this that I can use straight away? Since my starter is already active, can I make the mix and be able to start the process sooner than overnight?
Sadly, it is very difficult to get proper equipment for many things and improvising is survival. Im from California btw. Ordering and having things delivered is out of the question since it will triple the cost. I am slowly developing a small baking/teaching business for myself here also.
If you could answer that question for me… using the sourdough starter, I would be grateful. Otherwise, I will just adhere to your process and wait till tomorrow.
Thank you
Robert Eller The Singing Chef in Rio De Janeiro
Hi Robert,
Great to read about your teaching. About your question: You need the whole quantity poolish to be developed to the right stage. So you cannot just add your active starter to the flour and water indicated in the recipe and use this straight away. You need 760 grams of active prefermented dough with the right fermentation / gluten development to use in your dough. If you have or keep a big quantity of active sourdough, that has recently been refreshed, you can take 760 grams from that and use it straight away. With this small amount of sourdough you create a fully active sourdough preferment overnight which you then use to build the final dough. This way you can keep a small starter and still have the full sourdough flavor. Big advantage for home and hobby bakers is you are wasting far less precious flour when refreshing your culture than you would maintaining a big one. Depending on your times you can also make a poolish on the day, use more yeast to get it active and ready quicker, but you should at least take 4 hours for development.
Good luck with your baking and teaching and lots of loaves and happy students!
greetings from Holland
Hi.
I made this recipe two days ago, and I have a few questions. I should explain a little bit first- I live in Colorado, at about 6,000 feet elevation. It is a very arid climate (about 20 % humidity), and the temperature was in the high 70’s. Sometimes I have a lot of difficulties determining fermentation and proofing times; very often my bread is over-proofed, or under proofed. With the high altitude and lack of humidity, it seems like so much can go wrong.
This week, I was very careful to watch the dough for over-proofing. It was in a baguette pan in my empty dishwasher to proof, where the humidity seems suitable. I spritzed them with water as well. I put a pan for ice in the oven, which I filled when I put the bread in, and I sprayed the dough again. I had scored the loaves as usual.
I was pleased with the oven spring, and the loaves looked great at first. But they continued to rise until the scoring no longer showed- the tops were almost smooth, and the bread was very round. The crust was thick and crunchy, but the crumb did not have as much variation in hole size like yours.
I would like to know what you think happened to the bread. Did I under proof it? Did I get it too wet so that the scoring disappeared??
It tasted fine but I would love to get a more traditional look.
Sometimes it seems the more I bake and learn, the more confused I become!
Thanks for all your great work, and for any suggestions you may have for me.
Elizabeth
Hi Elizabeth,
You challenge us with your questions, because there are so many factors to consider and we do not know from experience the effects of the high altitude (we live in the low countries).
We think, because of the oven spring and water spritzing you describe, under-proofing seems likely and the bread could have been too wet for too long.
At the bottom of this article you’ll find tips on how to determine if your loaf is proofed right: www.weekendbakery.com/posts...e-in-size/
Variation in holes is better achieved if you handle the dough with care and fumble and press as little as possible to keep them intact and also try and avoid using too much extra flour when handling and shaping your loaves on your work surface .
We can recommend our best baking tips for you to take a look at, incorporate them in your baking routine and you will certainly improve, we are sure!: www.weekendbakery.com/posts...king-tips/
Good luck with it.
Marieke & Ed
Hi there. Can you let the poolish sit for more than 12 hours?
Yes, you can, but as with all things baking there is an optimum. With a poolish there is an optimum ripeness and when you pass that point it will get less active and eventually collapse. If you want or have to take more time you can adjust the amount of yeast or sourdough or you can use the fridge or a very cool spot to aid you.
Hello,
First of all, congratulations for the website. I love the recipes, they are detailed, rich, well explained and the presentation is excellent too.
I’ve noticed that in your baguette recipes you don’t do autolyse. Why would that be? Is it only for convenience, or does it help to (or not to) autolyse?
Hi Antonio,
Thank you! With this ‘other’ baguette recipe we just ‘kept it simple’ , with the 80% hydration baguette recipe it has to do with how it came about and the large amount of poolish (50%) and no kneading!, the whole recipe is a ‘kind of’ autolyse (there is a short 10 minute autolyse period). We do not think adding an extra autolyse period for this particular recipe would make a huge difference to the end result. It would not lead to any problems if you did add it too this recipe though.
Hello,
As a novice bread baker I made many mistakes, for instance, I let my poolish sit for about 20 hours, my dough was so slack my pre-shape envelopes ended up a blob, my 4 baguettes were 4 different sizes and lastly the bottoms of each loaf burned terribly. However, I had excellent crumb, and they tasted awesome once the bottom was cut off. I will need to adjust the time and temperature the next time.
Hi KC,
You are learning a lot and adjusting along the way. Your journey will lead to excellent baguettes no doubt!
Hallo
Thanks for creating such an amazing website, I feel more inspired very time I read a new recipe. Can I use my rye starter in the poolish instead of the instant yeast for this recipe and the 80% hydration baguette.
Hello Geoff,
Thank you so much. And yes you can make the poolish with your rye starter. You need about 15 to 20 grams of sourdough in the poolish. But you really have to adapt the proofing times, because it will take much longer if you stick to adding just the small amount of yeast in the final dough. Of course you could also up the amount of yeast in the final dough, this way you will be able to stay close to the times given in the recipe.
Hope it works out great!
Hello ! I loved the video! Really helped me to understand the stretching and folding technique and witness the transformation such a wet sticky dough goes through! Very wonderful that you are willing to share your experience! Much gratitude!
I turned my home kitchen into a licensed Cottage Food Kitchen and have been baking sour dough boules to sell at our local Moab Farmer’s Market. I use individual Dutch ovens to hold in the steam since my oven is gas. I would love to learn how to make baguettes though, and your excellent tutorial has given me the confidence to try! Thank you! Here is a photo of my sour dough whole wheat boules: /Users/kakihunter/Desktop/IMG_3150.JPG (not sure if you can open it or not). Kaki
Thank you, we also very much enjoy the whole process of a complete mess turning into a silky soft dough by hand. Very therapeutic.
I tried this recipe several times, following the instructions very carefully, but ran into a big hurdle. When I finish the second stretching the dough is still a bit sticky and difficult to shape. The finished baguette almost never holds its shape. What could be causing this?
I suspect this might have something to do with the quality (or lack) of the all purpose flour I am using. If this is the case what can I do to improve the dough before shaping, reduce water by 5% or stretch and fold 1 more time for a total of 3 times?
Thanks
Hallo, each flour absorbs different amount of water and has different levels of gluten. So instead of a all purpose flour, please try a bread flour with more gluten or mixture of strong bread flour and all purpose flour. I suspect your flour is too ‘weak’ for baking bread. Happy baking!
Thank you for this recipe. Made it yesterday and have eaten it with friends and family: 4 baguettes and not a slice left!
Delicious and easy to make. Personally i think the taste of the 80%-one is a little bit better, but we do not agree about this in our family. B.t.w. the gevulde koeken were also delicious! And because of Christmastime I’m going to make the Christmasbread with homemade amandelspijs. Thank you for sharing recipes and experience!
Hi Hetty, thanks for your nice words. Happy baking!
Thanks for sharing this recipe. From what I understood, this recipe is easier to handle mainly because it contains 5% less water than the 80% recipe. But I also noticed that you are using a mixer in this recipe, while in the 80% recipe you are only using hand mixing, why is that? Why not use a mixer for both?
Hello Abdul, this recipe is easier for two reasons, 1) less water, 2) using the mixer. However using the mixer also reduces the size of holes, they become smaller and more regular. All the stretching and folding and lots of time of the original recipe develops more taste and more irregular holes. Having said this, this ‘simpler’ recipe also makes one fine baguette and the dough is easier to handle! Happy baking!
Ok, this makes sense because the mixer combines the dough ingredients more thoroughly. Thanks for the feedback.
Hello Ed and Marieke
Can I use French type 55 flour for my baguette or is it better to use stronger flour?
And for croissant should I use plain flour or strong flour to get the best result.( I am in the UK )
Thank you
Nicole
Hello Nicole,
Yes you can, no problem. We only use our organic wheat flour because we find it gives more and better taste for our baguettes. We do use type 55 for the croissants, after many bakes and different types of flour we find that this gives the best results. We would not advise stronger flour because you do not need it and it can even work against you.
Maybe experimenting with different types and brands of flour would be advisable to get the ultimate result in your case too.
Happy croissant baking!
Ed & Marieke
Hi
I didnt find in the recipe . the oven temperature ? I have done the baguette little differently and puting the oven up to
300degrees and bakeing only for 5minutes after I turn it to 200 degrees and change the oven to heat an area
I will try your resept of baguette too.
The floor you marked to be 380g as well the water 380g to make poolis? The poolis will not be too hard?
And in the dog you buting 380g floor and only 190g water? When I doing the baguette i trying to leave the dog very softy
and sticky. And use less floor than on your recipe . I try to find the recipe where I can make like it would have been purchased from bakery.
Hello Anne,
The temperature is mentioned in the recipe: “Preheat your oven to 240ºC / 465ºF (at what stage you preheat your oven depends on how long it takes for your oven to heat through, some take 30 minutes, some, like ours, with stone floors take a lot longer, up to two hours.)”
The hydration for this recipe is 75%,but you can always add more water if you wish. Yes the poolish is half water half flour and all the amounts mentioned are correct.
You can also try our 80% hydration baguette recipe which has more water but is also more complicated to make: www.weekendbakery.com/posts...-baguette/
Good luck and happy baking!
Hi!
Thanks so much for putting your detailed recipe online for us! I have tried other baguette recipes with varying degrees of success and am about to try yours. Do you think this recipe could be used to make batards instead of baguettes? If so, would you recommend any changes, such as baking time?
Leslie
Just take a look at this!! : www.weekendbakery.com/posts...he-recipe/
And you will see, the answer is..yes indeed!
Happy baking,
Marieke
Thanks so much, Marieke! I made your easy 75% recipe for novices yesterday. The baguettes are delicious but not pretty. The crust was very crusty and the interior soft and airy. With practice they will get prettier.
I have a question about the different poolish recipes. Why does the poolish for the 75% hydration baguette recipe sit at room temperature over night but the poolish for the 80% hydration baguette (and the boule/batard) recipe spend most of the night in the refrigerator, although for a longer time? How does the drop in temperature effect the poolish? Wouldn’t that make the yeast become dormant?
Leslie
Hi Leslie,
You are right, practice, practice and practice is the way forward…and in the meantime eat delicious baguettes 😉
The reason for the difference in recipes: To be able to do so much stretching and folding with the 80% dough it needs to be really cold to start with. For the 75% we simplified a lot of things, so no fridge, easier handling and so on. The fridge does slow the process down but it does not stop but that is also why the amounts of yeast are different between the two recipes.
Maybe you will give the 80% also a try after you are completely happy with this one…and then compare.
Happy baguette baking!
Marieke & Ed
Hello, is it possible to make baguettes using sourdough levain? If so, do you have a suggestion on how much of my levain I should use?
Thanks,
Yury
Hello Yury
Replacing yeast with sourdough is something you can do, but you would have to adjust the recipe and allow for much more time to give the dough the chance to develop properly. You cannot just replace and stick to this recipe, the result would be not so good. It is no problem wanting to change a recipe, but in order to know what you are doing and being able to compare on taste and texture, we would suggest (unless you have a problem with using yeast of course) to at least once make the recipe as it is presented to you. Then you could first make a hybrid version by adding sourdough to the poolish instead of the yeast. And finally altering it by using sourdough in the final dough. We cannot give you exact quantities and times for this recipe that we know would work because we never tried it (the main reason being we both love the sweetness of the yeast baguette and we also love making sourdough bread but we like the combination of sourdough and baguette a little less). But of course this is very personal.
Good luck with the baking,
Marieke & Ed
Hello. I have a question about the flour in this recipe. (I am in the U.S.) Am I supposed to use bread flour or whole wheat flour? In the flours that I buy there is a 1-2% difference in protein content in these flours (bread at 12% and whole wheat at 13-14%). I made the poolish with 100gr whole wheat flour and the rest white. Not sure if that was the right thing to do. Looking forward to hearing from you. Thanks!
Hello Katina,
If you want to stay close to the recipe the way we make it than using the 12% bread flour for both poolish and final dough.
Hope and expect the version with some whole wheat turned out good too.
Happy baking,
Marieke & Ed
So your flour for this baguette is a combination of 12% white bread flour and 88% white all purpose flour? I will try that next time. The bread with about 180 gr whole wheat flour turned out okay this time but I did not get a dark or golden crust or nice irregulars holes. My dough always looks more sticky/tacky than dough I see if shaping videos online. Does that mean I am not developing the gluten properly?
Thanks!
-Katina
No not exactly Katina,
We use just one type of flour which is the wheat flour (12 to 13% protein) from our local mill.
It is hard to answer your question without seeing the actual dough. Our dough is also extremely sticky but the more you work with it the more you can handle it and so it also may look as if it is less sticky. Remember that whole wheat always gives a different result, it is heavier and it is harder to get the result you with the bread flour like the one we use in this recipe.
When gluten are properly developed for this recipe it looks satiny and feels perky in the end.
Hope you will just keep practicing and get to know your dough!
Happy baking,
Ed & Marieke
I notice the scoring tool shown is different than the one available in Baking Tools section. Is this tool available for sale?
Hello John,
We’re sorry, not anymore. We went on to this second model you find in our shop, with the curved blade and we like it better than the old model. Also the production process allows us to keep up with the demand. If you want you can also get a straight version, you just have to mention it to us with a comment if you want to purchase one.
Greetings,
Ed
Thanks Ed. I ordered and just received the current curved blade and will try it for a while. The one in the photo interested me because it looks like you could make a deep slash without making contact between the dough and the handle.
Thank you for the quick reply.
I have baked the Tartine loaf using Chad Robertson’s starter and have just baked one with your rye starter and method and like it very much. I plan to try the other breads you feature. Great site! Keep up the great work
Best regards
John
Hi Ed & Marieke,
I was wondering if you know where I can buy french flour or similar flour which gives the typical french bread taste?
I live in Leiden (The Netherlands).
By the way this baguette recipe is great! Even with my oven the result is very tasty. 🙂
Regards,
Erik
Hi Erik,
We have found only one place till now and that is de Zuidmolen in Groesbeek. We buy it online and have it delivered.
You can find details here: www.weekendbakery.com/posts...n-holland/.
Thanks for liking the baguette recipe. We make the baguettes with the tarwebloem from De Zandhaas and that also works very well for us. We use the French Type 55 for the croissants and brioche and the French type 45 for other pastry.
Happy baking!
Ed & Marieke
Hello weekend bakery. I love your site. I made this recipe yesterday. They tasted great, chewy and crisp!! I need to work on my slashing, which is hard to do when I don’t have a proper tool. Works in progress…works in progress that’s the fun part. I wanted to ask you where did you find a scale with a readability to 0.1g? Mine only measures accurately to 1g. Thanks for the help and wish you guys continued success with this site.
Hi Renee,
I agree with you, every loaf is a new chance to enhance your skills. Have you checked out our tips for slashing /scoring? You can find them here: www.weekendbakery.com/posts...onfidence/
As for the scales you can find these fairly easily (at amazon for example or an electronics store, a good one will cost around 50-70 euro’s). We’ve had ours for a long, long time so cannot remember where we bought it exactly.
Good luck with it!
Happy Baking,
Marieke
Hallo Ed en Marieke,
Gisteren jullie 80% baquettes gemaakt: alle tijden goed plannen en best veel werk maar zeer de moeite waard ze waren weer heerlijk!
Deze week ga ik dit recept eens proberen.
Ik ben benieuwd.
Ook al een aantal keren het 41/5 dag durende
(inclusief de 12 uur die nodig is om t roggedesem te voeden) San Francisco Sourdough Bread van jullie gemaakt± heerlijk en ook zeer de moeite waard!
Wel moet ik mn oven temperatuur aanpassen want de korst gaat wat snel op deze hoge temperatuur (volgens jullie recept) dus probeer iedere keer 10 graden minder omdat t binnenste van t brood wat `plakkerig`is (heel klein beetje maar dus prima te eten) maar niet perfect.
groet van Petra
Hallo Petra,
Je bent weer heerlijk aan het bakken! Nog een suggestie: Misschien zit het verwarmingselement van je oven op vrij korte afstand van de bovenkant van je brood. Heb je al eens geprobeerd om wel op de aangegeven temperatuur te beginnen en dan, als de korst de juiste kleur heeft de oven wat te temperen (zorgen dat hij niet meer ‘aanslaat’). En dan toch proberen de hele baktijd af te maken, zodat het brood wel goed uitgebakken en gaar is.
Happy Baking en alvast een fantastische kersttijd en een goed begin van het nieuwe (bak :)) jaar!
Marieke
As I calculate it, the baker’s percentage for this recipe is 75%. Is that correct?
Hello Joe,
Yes you are correct, it is 75%. Of course, depending on the flour you use and the way it absorbs the water you might want to use a little more or less.
Greetings,
Marieke
Hey guys, still remember me? Always loved your website and the baguettes particularly!I have tried the 80% hydration one and am still practicing shaping them better. It’s not easy for me to buy French flour so I’ve been trying to make baguettes using all-purpose flour, more challenging(since the gluten is lower) but fun as well . I’m so grateful for all the tips and help you’ve shared on this website. I just cant wait to try all your recipes!
I dont have a mixer and I’m a die-hard hand-mixing supporter. So I’ve made some adjustment to the process and it works! Hum, I’m not 100% sure until you guys exmaine it for me. I will post some pics on the “Your loaf” section and please have a look. Let me kown what you think. It would mean a lot to me.
Thanks again for everything!
Yang
Hello Yang, hope you are doing great! Thank you for dropping us a line about your baking adventures. We would love to see some pictures and will surely add them to our website!
Happy baking weekend,
Ed & Marieke
Third attempt at making these and the results are fantastic.. Had to modify the recipe a bit. With the flour I’m using the original recipe was a bit like trying to make pancake batter stand up!
Made a sourdough poolish using 380/380 + 30g White sourdough culture and the reduced the water in the final stage from 190 to 160 g. Still need a couple of Scotch scrapers to handle it, but at least it is workable 🙂
Beautiful thin crisp crust and a wonderfully bouncy, chewy crumb..
Don’t have a suitable stone floor to bake on so prove and bake in the perforated metal formers.
Once again, thanks for running the site guys.. Always the first place to check when I want to try something new !
Hi Tony,
Thanks for the feed back, wonderful to hear. Tin crisp crust and bouncy crumb, that’s how we like it!
Keep up the good baking!
Ed & Marieke
Hello Ed & Marieke,
Thanks for the most helpful response and I did read the tips on dough temperature as well as the amount of yeast used as suggested. Yes, I did make a number of mistakes with timing in the dough preparation and therefore resulting in a poor baguette result. All my fault and I should have read more on the tips and suggestions in your wonderful website beforehand. The experience you guys put together and generously share them with everyone is priceless!
James
Hello James,
Thank you very much for your very kind words. You bake and learn! With every attempt you adapt, you tweak, you make it more and more your own recipe.
Keep on baking and we will keep on sharing too!
Ed & Marieke
I’ve tried the recipe 2 days ago and the baguette turned out to be a bit small in size considering the amount of flour used. It didn’t expand as much and was no where near the amount of holes as in your photo. I checked the recipe again and did notice a doubtful amount of yeast used. It only calls for 2.7g of instant yeast in total, a mere 0.35% Baker’s percentage. Is this really a correct?
Hello James,
Yes the amounts are certainly correct. We made this exact recipe just a last weekend. It was 24 C in our bakery and we stuck to the exact times given in the recipe and the result of the crumb was very nice. As you describe it, it seems that the right temperature could be the issue. Maybe you can check your dough temperature after mixing to make sure it is about 24 degrees Celsius. You can also read our tips on the subject here www.weekendbakery.com/posts...mperature/. A few degrees difference in dough temperature can change the duration of the bulk fermentation or the final proofing a lot. (also see the graph in the posting).
Hope this helps and you will give it another try!
Happy baking,
Ed & Marieke
Nou he he, dat maakt het “bakkers”-leven weer een stukje makkelijker! Superbedankt voor de uitleg!
Heel graag gedaan,
lots of loaf!
Marieke
Wellicht een hele domme vraag, maar ik moet het weten:
Dus “instant gist” (bijv. van Bruggeman) is exact hetzelfde als wat hier in de UK verkocht wordt als “fast action yeast” (de zakjes van 7 gr.), maar anders dan “dried active yeast”, die eerst opgelost moet worden in warm water/suiker?
Heb me hier suf gezocht naar “instant yeast” en reis altijd beladen met zakjes Bruggeman naar de UK, waarschijnlijk dus absoluut onnodig!! Is er kwaliteitsverschil tussen bv. de eigen supermarktmerken/Bruggeman/dr. Oetker/Hovis/Allinson/etc. Bij voorbaat dank! (En als ik het op jullie site had kunnen vinden … excuus)
Hoi Claartje,
Nou, een mens kan van minder in de war raken. Maar je kunt er vanuit gaan dat instant en fast action hetzelfde zijn. Het feit dat je het niet hoeft op te lossen en dat het in zakjes van 7 gram zit is ook een goede houvast dat we het over hetzelfde product hebben. De zakjes die je eerst moet oplossen, daarvan heb je in de regel iets meer nodig en die zakjes zul je denk ik ook veel minder tegenkomen (misschien wel een uitstervend ras). Dan heb je nog de biologische gist, in zakjes, daar zit 9 gram in ipv 7 omdat het substraat waarop gekweekt wordt maakt dat je iets meer massa overhoudt, dus die zakjes van 9 gram zijn ook bedoeld voor een standaard brood op basis van 500 g meel net als de Oetker en Bruggeman zakjes van 7 gram. Deze zijn meer een bewuste keuze voor als je echt een 100% biologisch brood wilt bakken . Wat betreft ‘kwaliteitsverschil’ tussen de Oetkers en Brruggemannen van deze wereld kun je er wel van uitgaan dat dat allemaal zo’n beetje hetzelfde is!
Denk dat je dus prima uit de voeten kunt met een zakje ‘fast action’ in de UK!
Very first try at baguettes, with the help of the good old hand mixer again (about 10 mins.) and the result is fantastic! Nice crust, soft crumb, beautiful holes and very tasty!!! And very rustic looks! The final shape needs working on, but I’m really happy with the result. The amount of dough gave me 8 35 cm long baguettes, all my oven (-stone) can handle …. Thanks again for a great recipe.
Haha, the trusty hand mixer strikes again! Wonderful you were able to adapt the recipe and get great results the first time already! Shaping is just fun to practice with each new bake. Taste, crust and crumb were already pretty much were you want them :). Thanks for the feed back because we cannot help but be happy when our recipe works for other bakers!
Marieke
hallo marike instant yeast is de poder zakjes,dank je jan
Hallo Jan,
Met instant yeast bedoelen we hetzelfde als de zakjes gedroogde gist die je ook normaal in de supermarkt in Nederland kunt kopen. Meestal zit er in een zakje 7 gram gist.
Marieke
gracias