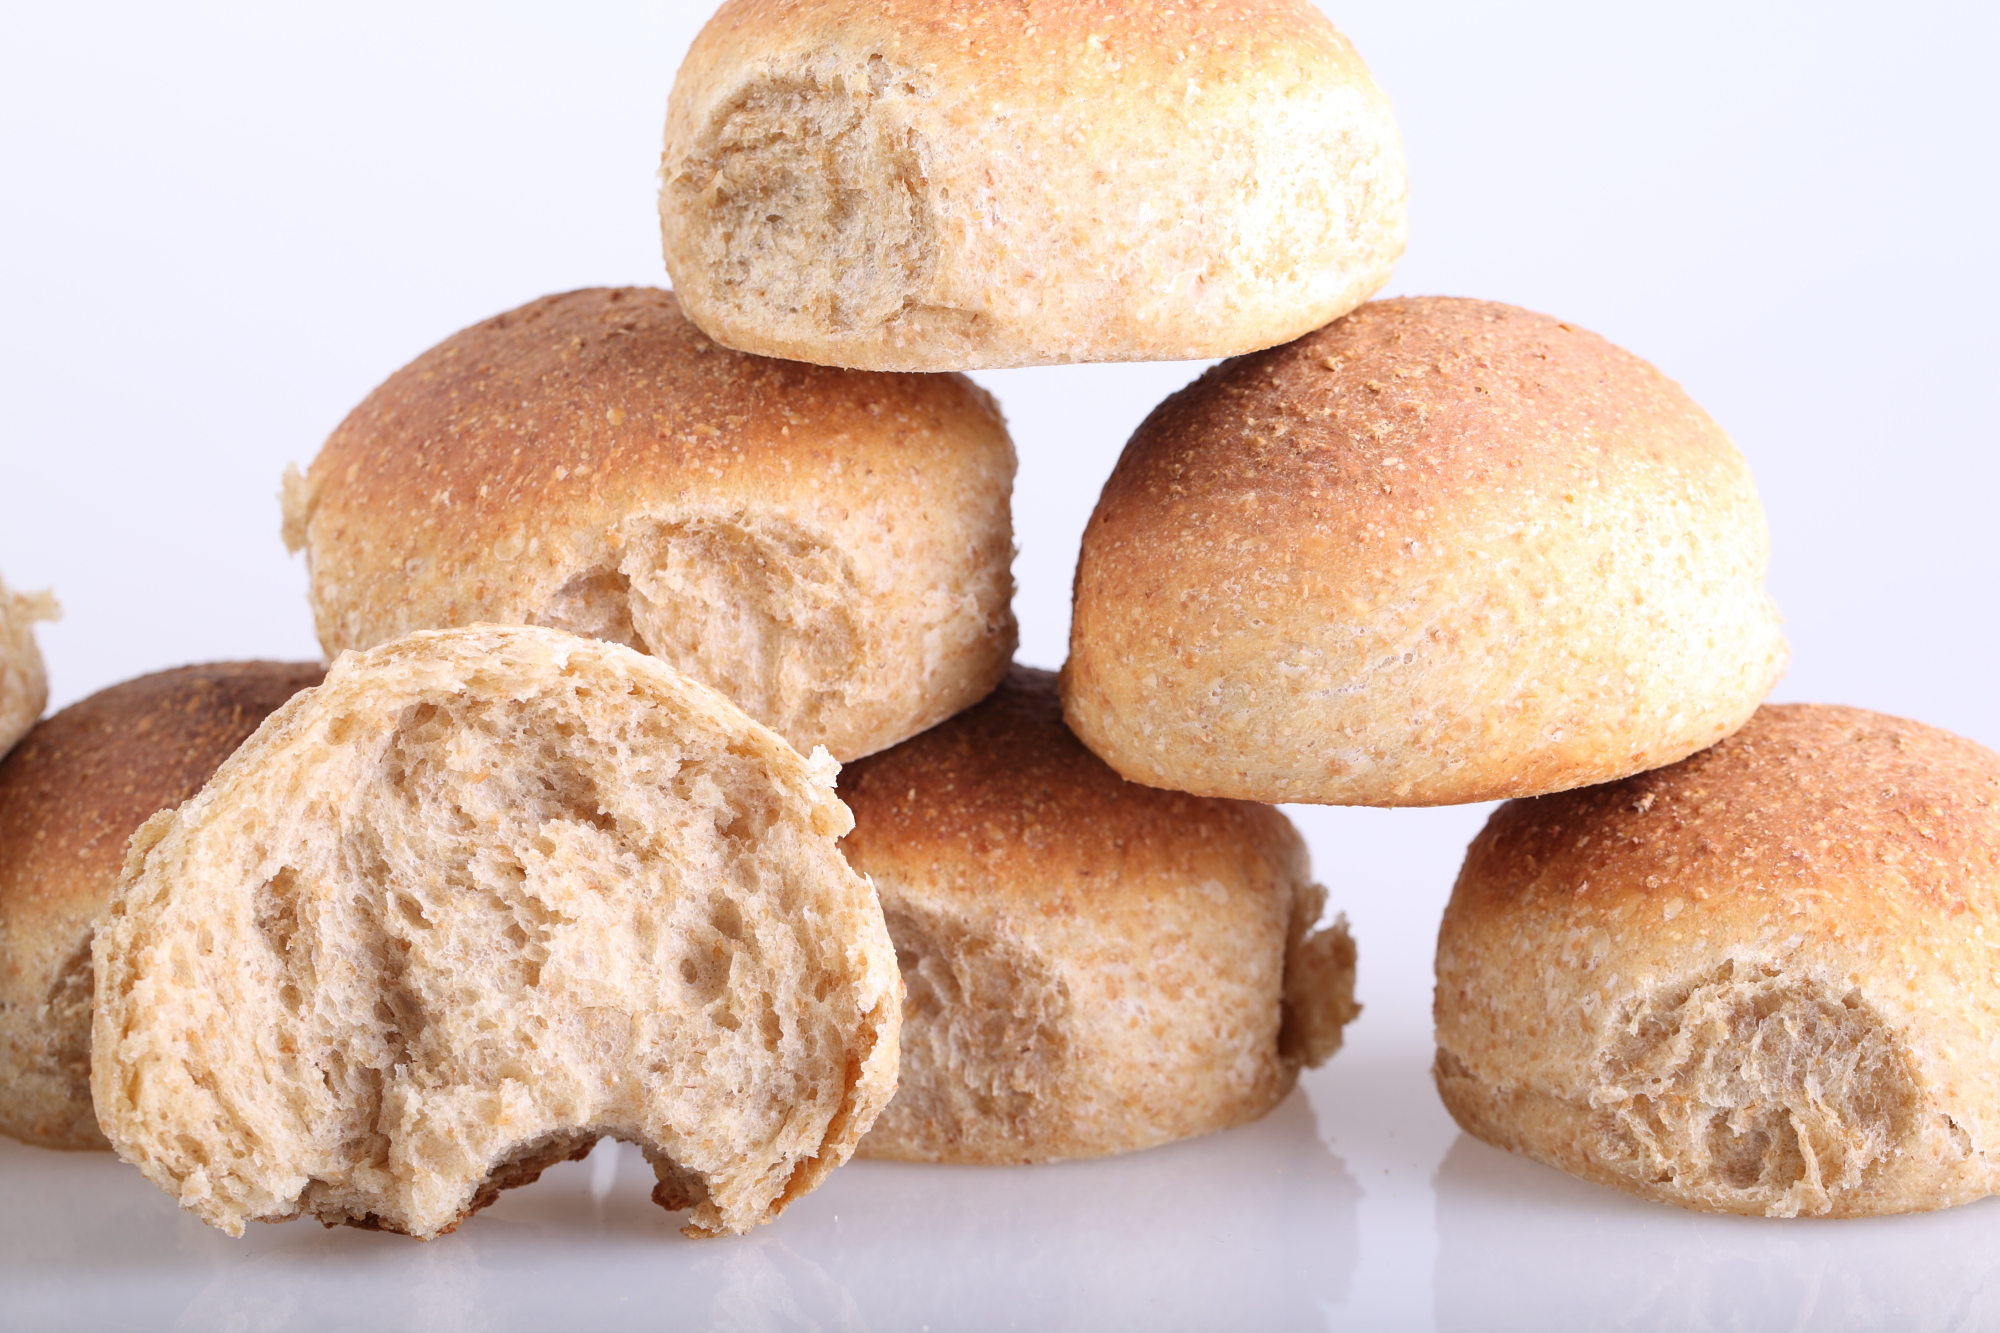
Soft and very resilient with notes of nutty sweetness and subtle sour, I like these rolls!
No kneading, only a bit of stirring and lots of time, and of course the best ingredients you can find, anyone with a bowl can make these rolls. You end up with heaps of taste and a terrific texture. In short, I love everything about these rolls. It’s a combination of recipes that got me inspired. I mixed and matched, added to and deleted from until I was totally satisfied with the result. The recipe is spread over two days. The starter is made in the evening, the rolls the following day.
Ingredients for the Starter
Making the Starter
In a bowl stir together 225 grams of whole wheat flour with 225 grams of water at room temperature with 30 grams of the (rye) sourdough culture. Stir it for about 1 minute until all the ingredients are combined. Cover the bowl with clingfilm and let it preferment at room temperature. After a minimum of 12 hours it is ready to be used in the final dough.
*For the starter in this recipe I use a sourdough culture which is made with 100% whole rye flour. A sourdough culture based on rye flour is easier to maintain, it does not transform into a slurry when you forget about it, it is easier to stir because it has almost no gluten and it smells very very nice, a bit like berries. It is also very forgiving in the amount you feed it. Normally I only feed it once a week, after our weekend baking. I just give it a few table spoons of water and rye flour, stir, and ready! Check out our posting about making your own rye sourdough starter.

Ingredients for the Rolls
makes 12 rolls
Starter (480 g total weight)
425 g wheat flour / bread flour
115 g water
75 g buttermilk (or combination of yogurt and water 2/1)
25 g honey
10 g sea salt
50 g very soft butter (alternatively use 40 grams of vegetable oil)
Making the Rolls
Put the starter in a large bowl, add the other ingredients and mix for about 1 minute (no kneading) until everything is combined and you have a very soft dough. You can do this by hand but if you do not want to get your hands dirty you can also combine the ingredients with the aid of your mixer. But keep the mixing to a minimum! Cover the bowl and leave the dough to rest for one hour.
Now do a stretch and fold (a full letter fold, left over right, right over left, bottom over top, top over bottom; see our bread movie to observe this technique if you are not familiar with it) and again leave to rest for one hour. Do a second stretch and fold and a rest for one hour and then a third one, again followed by a one hour rest (see time table at bottom of post).
Preheat your oven to 210ºC / 410ºF (at what stage you preheat your oven depends on how long it takes for your oven to heat through, some take 30 minutes, some, like ours, with stone floors take a lot longer, up to two hours).

Shaping time! Weigh the total amount of dough and divide into 12 equal pieces. Shape the pieces into rolls. Lay the rolls in an oiled dish or tray, leaving some space (2cm or 0.75″) between the individual rolls, so that they will just touch each other at the end of the final proofing. The tray I use is 30 cm x 40 cm / 12 inch x 16 inch. Spray the rolls lightly with oil and cover. The final proofing should take at least two hours, very probably more, depending on the temperature in your room and the temperature of the dough (see our tips on dough temperature).
When you think they have risen enough, you can test the rolls by using your finger to carefully make a very small dent in the dough. If the dent remains, the bread is ready to bake, if the indentation disappears within a few seconds, the dough needs a little bit more time. Please make sure the rolls are well risen, with these rolls my experience is there’s more chance of under- than over-proofing. If it is taking too long, you can put the tray on top of a warm surface. We sometimes put a tray on top of our Rofco oven or use our small Rofco oven as a proofing cabinet by preheating it for a few minutes to 25ºC / 77ºF. It retains this temperature for a long time because of the oven stones and isolation.
Now your rolls are ready for the oven. Try to create some steam in your oven by putting a small metal baking tray on your oven floor when you preheat the oven. Pour a quarter of a cup of hot water in the small baking tray immediately after putting the bread in the oven. If you are going to create steam with a baking tray, you also want preheat your oven a bit higher (10ºC / 20ºF), because you are going to lose some heat in the process. When you use this technique you have to turn down the oven to the original recipe setting after you put the bread in the oven.
You can also temper your oven to around 180ºC / 355ºF when you think the rolls have the desired color on top and stick to this temperature for the remainder of the baking time.
After about 20 minutes of baking, depending on your oven, your rolls should be ready. Transfer onto a rack and leave to cool. These rolls also keeps very well in the freezer. But please make sure to eat at least one roll while still warm with some fresh butter!
No Knead Sourdough Wheat Rolls Time Table

Day 1 22.00 h
Make starter let ferment for at least 12 hours at room temperature
Day 2 10.00 h
Make final dough
- approx. 10.00 h Starter + rest of ingredients – 1 minute stirring
- 1 hour rest
- 11.00 h Stretch and fold 1
- 1 hour rest
- 12.00 h Stretch and fold 2
- 1 hour rest
- 13.00 h Stretch and fold 3
- 1 hour rest
- 14.00 Shape into 12 rolls
- Final proofing indication 2 hours
- approx 16.00 baking 20 minutes
- approx 16.20 ready!

These buns are amazing! I followed the recipe except (using my whole wheat starter instead of rye starter). They did need 2 hours for the final rise – I stuck them in a warm oven for the last 15 minutes. Glad I was patient. Totally delicious! Lovely texture too.
Thank you for your lovely feedback Audrey. Patience in baking is almost always rewarded we find!
Enjoy your sourdough baking,
Ed & Marieke
Goedenavond,
Als ik dit recept wil gebruiken voor witte bolletjes, van spelt- of tarwe bloem, hoeveel water moet ik dan gebruiken? Ik ben een beginner, en heb jullie volkomen tarwebrood en pain nature gemaakt, heerlijk! Ik wil nu graag eens witte bolletjes maken.
Alvast bedankt!
Hallo Petra,
Wat leuk je bericht te lezen. Je kunt het recept eenvoudig aanpassen. We zouden aanraden om met alleen tarwebloem te beginnen, 100% spelt is wat lastiger om een mooi resultaat te krijgen, dus dan zouden we eerst een combinatie van spelt en tarwe aanraden.
Je kunt de starter gewoon hetzelfde aanhouden met gelijke delen water en bloem. Bij het einddeeg voeg je dan minder vocht toe, omdat je nu geen volkorenmeel in het deeg hebt, dat meer vocht opneemt door de vezels. Omdat elke zak bloem zich anders kan gedragen qua vochtopname, moet je altijd even kijken hoe het deeg samenkomt en wat vocht achterhouden. Een voorzichtige inschatting zou zijn om ongeveer 25 tot 30 gram minder vocht te gebruiken.
Veel plezier met het recept en hopelijk wordt het een succes!
Ed & Marieke
WKB
Dank jullie wel Ed en Marieke!
Ik ga het dan eerst met tarwe bloem proberen, en laat weten of het gelukt is.
Petra
We horen het graag. Veel bakplezier dit weekend!
Inmiddels zijn ze klaar, en ze zijn heerlijk!
Ik heb het voordeeg gemaakt met tarwebloem, gewichten zoals boven (mijn starter is van volkoren roggemeel, 100% hydratatie). Het hoofddeeg ook met tarwebloem, water 105gr, en ipv karnemelk een mix van 40gr lactosevrije yoghurt en 20gr lactosevrije melk. Totaal 25 gr minder vocht. Heb de honing vervangen voor ahornsiroop ivm geen honing in huis.
Jammer dat ik geen foto kan plaatsen!
Fijn Petra! Dankjewel voor het delen van je variatie op het recept. Heb zelf ook al goede resultaten gehad met gebruik van havermelk bijvoorbeeld. Ahornsiroop kan qua smaak ook net iets extra’s geven.
En we willen graag je foto’s delen op onze site. Dit kan niet bij een comment maar daarom hebben we een speciale sectie gemaakt waar het wel kan, met je eigen commentaar als je wilt:
www.weekendbakery.com/send-...your-loaf/
Geniet nog van het staartje van het weekend!
Marieke
Hi, If it’s not too much hassle it would be great to make your pages printable. Currently this lovely recipe will take several pages of paper and a lot of unnecessary coloured inks (boo – environmental waste).
Hello Kevin,
We do have a print option from your browser. If you print the recipe this way you will not get any pictures or unnecessary other stuff, just the recipe. We are looking for a way to incorporate a print button, but we see that more and more people use their browser print option as the go-to way to print.
I reside in Singapore where the climate is very hot and humid. shall I use the recipe in the same way Or there will be any variation .My starter becomes active in 3 hrs itself .
Hello Mrs Shah,
You definitely can shorten the times given. For instance the first step, you can either let the starter ferment shorter (maybe halve the time given is a good start) or you can let it ferment in the fridge. This way the process is easier to control. If you take it out of the fridge after 12 hours, you can then leave it for one or 2 hours extra at your warm room temperature if needed. We expect the other steps to go at double speed too, so either shorten or use the fridge again if needed. With the humidity you also might use a bit less liquid, an indication is 10 to 20% less.
Just start using the recipe and keep an eye on the dough and after a few runs we are sure you will make it your own.
Enjoy your baking!
Noted and thank you so much for the suggestions.
Hope it will be good!
I have been struggling with sourdough baking for a couple of months but these healthy dinner rolls that we call pav in india were a hit as a part of pav bhaji with my family. I am so so so happy today!! Thank you for this insanely amazing recipe of gold. I can’t wait to try out more things off your website now.
Hello Heena,
We are smiling as I read your comment out loud. We are happy we could be a small part of your baking joy this way and we hope other recipes will bring the same satisfying results!
Greetings from tiny Holland to your amazing and colorful country,
Ed & Marieke
WKB
Hi,
Is this dough suppose to also double in size after second rise?
Mine seem to not double in size when I follow the instruction.
Hi Chan,
Double in size is not a very good indication to judge if bread has risen enough. The way we check is the following:
With your finger gently poke in your dough. If you have a high hydration dough you can first dip your finger in a little bit of flour to prevent sticking.
If the hole disappears completely: under-proofed
If the hole dent pops half way back out: proofing is just right
If the hole stays entirely dented in: over-proofed
Also see our post on the subject if you want to learn more:
www.weekendbakery.com/posts...e-in-size/
Maybe your dough is very cold or your sourdough culture is a ‘bit of a slow type’ (they are all different). You can place your rolls in a ever so slightly preheated and turned off oven to warm them, aim for around 25 celsius, but make sure the temperature does not go above 27 to 30 Celsius, because the sourdough yeasts will not like this!
Good luck with it.
Hi,
Im not sure if it’s normal but my starter gets a lot of activity and bubbles on the top 3 ~ 4 hours after feeding it. When I mix all ingredients together, it usually doesnt show any sign until after 16 hours (put roughly 8 ~ 9 hours overnight) and 3 ~ 4 hours room temperature.
I’ve made the bread according to your recipe, and I love it very much! Im worried I’d gain weight from eating all this delish bread <3
They say sourdough cultures are like children, they are all different. You have to get to know them in order to give them what they need. There are slow starter and fast runners.
Glad the recipe worked and you are happy with it!
Deze waren geweldig! Bedankt voor alweer een heel geslaagd en mooi uitgeschreven recept.
Heel fijn Heidi, het is ook altijd een plezier om te maken, deze bolletjes.
Geniet van het bakken!
Ed & Marieke
Tried this last night and I loved it! the buns were soft and delicious! I added sesame seeds to the top and brushed with butter when they cam out of the oven.
Thank you Falen, so glad the recipe was a success for you. Love the sesame seeds on top. We also use the black cumin or nigella seeds a lot because it is such a great taste to combine with cheese for instance.
Wishing you all the best and enjoy your baking and sharing!
would it be possible to do a final proof in the fridge (~12hrs) then take them out and put them on the counter for an hour before baking?
This recipe looks amazing, thanks for all the work that went into writing it up
Hello Mathison,
Yes, that is very well possible. Just keep an eye on them, because you do not want them to over-proof of course, so we would check the fridge if possible at 6 to 8 hours and see how the rolls are doing.
Hope it will be great!
Great recipe, but I have one comment/adjustment. If your levain is all or almost all rye flour, you will need to knead the dough and know that it will not reach window-pane stage. Rye has a lot less gluten than plain or whole wheat flour, and it will just rip apart if you try to stretch and fold. It can be kneaded with a stand mixer.
The hydration level of this dough makes it really light and fluffy. I added fennel and caraway seeds to the dough and as toppings. Absolute perfection for Thanksgiving dinner.
Wonderful recipie thank you very much I did half the quantity and they turned out lovely! Now doing another full bacth.
Your site is a God send and cannot thank you enough for the detailed and precise recipies which work!!
Thank you so much Sandip, so glad we can be part of your baking success!
These are so tasty! Some of the most flavourful bread I’ve made to date. I made a half batch, using sour cream instead of buttermilk (had just the right amount languishing in the fridge!), did a bit of slapping and folding early on and adapted proofing times to my cold kitchen / added some fridge time. They’re perhaps not at light and floofy as your but really delicious!
Hi Kirstie,
Delicious is all that counts! Wonderful to read your comment and sour cream is a good substitute too of course.
Greetings from Holland,
Ed & Marieke
just wondering about the honey- is it to cut the sourness or for sweetness? has anyone left out the honey and how has it worked?
Hello Heather,
Yes, you are right, it is mainly used for balance, but you can leave it out and get a good result, no problem.
Enjoy your sourdough baking!
Hello, these look yummy! If I wanted to make mini versions would that work? I’m assuming I’d just cut the baking time but not confident to work out how much! Thanks in advance for your advice
Hello Kellie,
Yes that is correct. We can give you an estimation if you want to make 24 smaller rolls, you can bake them for somewhere close to the 15 minutes mark as a good starting point. Just give it a try and see if any adjustments need to be made (because every oven is different).
Good luck with it!
That crumb is beautiful! I need to try these … 🙂
Thank you, let us know how it goes…
I made the sourdough starter using whole wheat flour with the 5 day method (adding the same quantities each day). I used an abbreviated recipe – sunflower seed oil and also omitted the buttermilk. My goal is to make a more vegan friendly bread ( since I can’t have dairy). Rolls go in the oven in an hour – hoping they look as yummy as yours but also taste great.
Hello Rae,
Thank you for sharing. The oil will be a great substitute, olive oil will do very well too. If you omit the buttermilk you of course have to compensate for it with water for instance to keep up the hydration level.
Hope it will be great!
To make these vegan, I use vegan quark to replace the buttermilk, margarine in place of butter, and maple syrup instead of honey. They turn out beautifully every time 🙂
Thanks for a really easy to follow recipe, and reliably lovely rolls.
Hello Lauren,
And thank you for sharing and inspiring other vegan bakers!
Hi, just wondering how “ripe” the starter needs to be for the first steps? Is it best to use one that’s just had a feed?
Also, how stiff/thick should the first pre-ferment be?
Thank you!
Hello Claire,
Yes, it is best to use one that just had a feed (the day before).
The thickness of the first stage, we would describe it as a very thick slurry. It does not matter how thick it looks exactly, because you could make adjustments when you make the final dough, adding some more liquid if needed or leaving some out, depending on the absorption level of the flour you use.
Enjoy your baking!
Marieke & Ed
I used your recipe to make it animal friendly. I swopped out the butter for avocado oil, buttermilk for almond milk yogurt and I actually forgot to add a sugar substitute. I made them into 6 hotdog buns and a small loaf of bread. The hot dogs were really good. The loaf, I’ve just taken out now… Thank you.
Thank you for sharing Kirsten, we have never used avocado oil in baking (only olive oil or vegetable oil) nor almond milk. Glad it worked out with your alterations and we are sure other bakers will be inspired by the use of these ingredients too.
Enjoy your baking and sharing!
Marieke
Animal friendly with hot dogs?? That is just strange.
Maybe they where veggie hotdogs?!
How is honey not animal friendly?
We can guess Howard that there could be issues with the fact that bees make honey for other bees, not for humans, but we as humans steel their food and replace this with common sugar, which would be not so good for their health.
These are so delicious! I put them in the refrigerator for a longer rise and terrific sourdough flavor. Just wondering if this recipe could be made into a loaf. Thnx
Thank you Ronda, for sharing your experience with the recipe. Yes, you can make a loaf, no problem. You just need to adjust the baking time of course and maybe also the proofing time. If you make one loaf it would need 50 to 60 minutes in the oven we estimate. We have not done this ourselves but with one or two attempts you should hit the right mark.
Enjoy your baking!
Wonderful rolls. Finished them yesterday and had intended taking a photo! However half were eaten before cool. The other half disappeared with family. Will make next week when I’m at home alone !! 🤣
Hi Naomi,
Wonderful to read your comment 🙂
We do like to see and share pictures so if you like you can upload some of your next batch here:
www.weekendbakery.com/send-...your-loaf/
Happy roll baking!
I made these rolls with AP flour only yesterday and have to say that they were plain perfect! They were made for a burger supper with friends who all
were most complimentary indeed. I had never made burger rolls before and won’t be looking for another formula as the firstbome I tried, was perfect
Hi Isabel,
Thank you for your enthusiastic feedback. Great to know you had such good results with the AP flour. And with burger supper, that’s perfect!
Happy baking and sharing,
Marieke & Ed
A nice recipe, thank you. I’ve just started experimenting with it. First results are promising.
My default wheat starter is a firm one – keeps longer in the fridge. I worked from that, using my usual mix (approx 1.1:1:2 water:starter:flour) which produces the same consistency as the starter so can be used to replenish directly. This meant I had to add more water to achieve your “very soft dough”. Looking at the video of your stretch ‘n fold technique, I guess I was a tiny bit short on hydration.
Otherwise the receipe was excellent. Until I got to the baking. I usually bake loaves (wheat, rye, plaited, borodinsky) at 180’C in my fan oven. I thought rolls would require the 220’C you suggest. It was too hot. They were more than done in just under 20 minutes. So I think 180/190’C would be a better suggestion.
A question: apart from saving time and effort, what is the advantage of no kneading? I did find the crumb a little bit uniform, and wonder if a more robust early mix might have overcome that. My normal wheat loaf has various sized holes.
Thanks again. I really appreciate detailed websites like yours. They provide endless opportunities to experiment without losing confidence.
Hello Paul,
I think you did well with your adjustments. The 220 C is for conventional setting so your fan oven needs to be lower. Any recipe needs adjustments to make it your own, with your ingredients, equipment, climate and hands.
it was not the aim of this recipe to get a rolls with irregular holes (it is also harder to achieve this with small rolls than with a bigger loaf) , but your method could work, so we encourage you to give it a try.
No knead is mainly a way to enthuse people to start baking with not too much effort and still a good result, especially people who do not own a standing mixer and are not able to knead by hand. It also shows what time and other techniques can do to develop dough of course.
And thank you for your kind words and for trying this recipe. I think you might also like some of our other sourdough recipes like this one:
www.weekendbakery.com/posts...yle-bread/
It’s also ‘no knead’ but still some more serious effort and attention is needed to make this loaf and get a good result.
Happy baking!
My 3 week old sourdough starter needed feeding. My dominant arm is in a sling. Mr. Google found this recipe for me. I just finished the first envelope fold of the recipe, and have high hopes – it was very easy. I am wondering what an acceptable weight would be for hamburger buns when I get to that stage. I’ll ask Mr. Google again 🙂 Thanks for the recipe.
Hello Merrily, Hope it turned out well. We would make buns of around 125 grams each, but it also depends on your hamburger seize of course. Great to are not held back by not being able to use your dominant arm. But hopefully it will be back to proper functioning and ‘baking as usual’ soon!
All the best and enjoy your buns and burgers!
If I were to make one large loaf..what would you suggest as baking time?
I have made these rolls successfully two times and they were so delicious! And easy.
Hello Anna,
Thank you for your kind comment.
The total weight of the dough is over 1100 grams. A good indication for baking time would be between 50 and 55 minutes. We would advice to start baking at 22o C and temper the oven to around 180 C as soon as the crust has reached a nice golden color and bake at this lower temp for the remaining baking time.
Hope it works out!
Just made these rolls, took them out of the oven just in time as the top got too brown. When I did the folding, the dough rose so well but after the final shaping, it didn’t rise that much. I did the poke test and it dented so I bake them straight away. Any idea to make the final shaping rise nicely? My rolls are quite short though still soft and taste great. Thanks
Hello Irene,
Great to read you gave these rolls a try. When you notice the rolls have a good light brown color (and the heating element of your oven is somewhat close to your bread) you can take a lower tier if possible and/or turn down your oven thermostat to 180ºC / 350ºF for the remainder of the baking time.
As for the proofing first the temperature is key so make sure you proof in a warm room and make sure you know the temperature of the dough itself. Another aspect is the ‘enthusiasm’ and composition of your starter, which can differ from culture to culture and give different results.
It is also hard to judge by eye with rolls how much they grow during the final proofing (hence the poking test). Another way to somewhat judge is placing them a few cm apart and as they proof they come closer together and then touch. The best time to judge is always after the bake, when you see how the crumb looks and the ‘bite’ feels. So always make notes about times and temperatures for this bake and adjust your next bake. Lastly a different (brand) flour can also make a difference.
Good luck with it and happy baking!
I’ve just made this recipe and did lots of things wrong but they still turned out fine!
I started off with insufficent fed starter. I had 320g of fed starter so I added an extra 80g each of flour and water.
I used my stand mixer and thought I might have forgotten the 115g of water so by weighing the bowl I worked out I needed to add 150g of water to reach the total weight of the dough!
So I added the water after I’d finished mixing which meant I needed to run the mixer a lot longer to get rid of the lumps in the dough!
(I used kefir instead of buttermilk. I don’t include that as a problem.)
The dough was left on the counter all night instead of the fridge, by accident.
In the morning the dough had risen and was easy to form into rolls.
They baked up nicely but have quite a sour flavour.
Do you think the warmer bulk proof made the sour flavour stronger?
I shall try the recipe again, hopefully sticking more closely to it!
Hi Erica,
Wow, sounds like you had quite an adventure with this recipe. Great save with the weighing. We know from other bakers kefir works great too, so no problem there, as you also stated.
It is hard to say about the sour, because it is a combination of factors, although an unripe starter and room temperature should aid in a less sour version, but the kefir could also play a role in it. We do have some extra tips to help you with this: Look at this posting under ‘less sour please’ : www.weekendbakery.com/posts...ough-tips/
Hope you will give it a try again.
Happy sourdough baking!
Hi
Can you substitute white flour in this recipe and get the same results?
Thank you
I use white flour for these and they turn out amazing
Yes Jina, like Anne already commented, no problem to use white flour, maybe use a bit less liquid (water) in the final dough to compensate for the difference in absorption between the flours. You will see soon enough after a few rounds how the dough handles and feels and if you need / want to adjust a bit.
Happy baking
Can you give me the measurements for all the ingredients in U.S cups?
Hi Samantha,
We very much recommend weighing your ingredients. Professional bakers use scales (also in the US) and in Europe all home bakers do too. A scale will give you the exact same weight every time. Which is absolutely needed if you consistently want to make good bread and good pastry.
We do offer a comprehensive baking conversion page: www.weekendbakery.com/cooki...nversions/
Thanks
Hi
Just made the dough using spelt flour(1250).
Does anyone knows why is spelt flour so sticky?
Now I just put everything in the fridge and I’m gonna continue with the dough in the evening.
Hope this will do anything with stickiness…
Hi Alex,
Spelt flour acts different than wheat flour, the type and quantity (less than wheat) of gluten are different and more ‘vulnerable’ and the water absorption is different. So if a recipe calls for wheat flour, it will need adjusting if you are going to use spelt. It is quite a challenge to bake good bread with 100% spelt. So handle the dough with care during kneading and shaping and use less water (how much less also depends on your specific spelt flour, start with 5% less and see how that turns out or start with a combination of wheat and spelt).
Great recipe, thanks! I wasn’t very precise in following it as I’m usually a bit lazy when it comes to timing and folding steps, but they came out perfect. I prepared the dough on Friday evening, did some stretch and folds the next morning and some late in the afternoon. Saturday evening I put the dough in the fridge until Sunday afternoon. After shaping, I let them rise for about 1.5-2 hours. Also I didn’t use steam in the oven. The day after the texture was still really good, as well as the taste. Definitely a recipe to repeat 🙂
Thank you so much for sharing your baking experience Marit, sounds excellent!
Love my no knead sourdough loaves, therefore I was delighted to find this recipe for soft rolls. They turned out beautifully and were so nice and soft and Yummy too.
They were so good, I thought I’d try to modify the recipe slightly to try and make some sourdough British Hot Cross Buns.
I added 200g raisins, 50g sugar, 2 eggs and 2 teaspoons of mixed spice. The addition of eggs made the dough that much stickier. Realise I perhaps should have reduced the water to compensate.
Due to a busy afternoon and evening, I couldn’t bake the same day, so shaped buns and put in fridge to prove overnight, baked first thing next morning.
Resulting buns looked great when glazed with a sugar syrup, however they are denser and heavier in texture than your soft rolls and have a pronounced sour taste which doesn’t marry well with the sweet fruit. Possibly because I proved overnight, rather than cooked the same day.
Have you any suggestions on how to make sourdough sweet buns?
Hello Rosemary,
Thank you for your lovely comment. Yes, you are right, eggs are also part liquid and you should compensate for that. Because you put them in the fridge for a longer period, the sour notes got plenty of time to develop further. And yes, we also think this is not an ideal combination with the sweet fruit.
We are no experts on the British hot cross buns, but if you take this recipe as a base, we would suggest to substitute the buttermilk for milk (less sour) and use all white bread flour and no whole wheat to start with.
We also have some tips on what to do to get less sour in your sourdough bakes. See our tips in this posting: www.weekendbakery.com/posts...ough-tips/
It is a challenge to make a light and not too sour sourdough bun with the addition of the extra ingredients as a complicating / inhibiting factor for the proofing. Just a hint of yeast in the final dough ( a hybrid version) would really help with the texture and proofing, but that would not be your intention we think.
Hope we gave you some direction to give a different version a chance.
Happy Easter,
Marieke & Ed
Happy Easter to you both!
Thank you for your suggestions, which I am sure will help. I agree that using all white flour would probably be better and I hadn’t thought about substituting buttermilk for milk.
I hate being defeated, so will have another go with just sourdough, before I resort to adding yeast.
Love your website with so many tips and recipes to try. Thank you for sharing with us all!
Thank you Rosemary, hope you keep us posted on your results!
I have made this recipe once and found the sourdough taste quite strong. Since I am using a wheat starter, how do you suggest to adjust the recipe so they are no quite so sour? Less starter? If so do I need more water? Or add more honey?…
Hi Rossitza,
You can try different things. First of all you can replace the buttermilk by normal milk or a combination of milk and water. Next to that we have several tips for you (see under the header ‘ less sour please’) in this post: www.weekendbakery.com/posts...ough-tips/
Happy sourdough baking!
Hi – Really good site!
I want to serve these fresh and warm for breakfast. If I prove them overnight in the fridge in place of the 1 hour on top of the oven that you outline, they shouldn’t over prove, should they?
Hi John,
Yes, that should work well. As you can see a few comments below, Becky also did this and with great result. Like she says, proofing for one hour to get things started, before putting the dough in the fridge for the night would be a good idea too.
Good luck with it and happy baking!
I just made these and the buns were over done. I baked them at 430F for 20 minutes and the tops were black. Did I miss something?
Hello Lisa,
It is very important to know the workings of your oven. Also see our tips on the subject: www.weekendbakery.com/posts...your-oven/
From what you write in your comment we would guess the heating elements are very close to the top of the buns. What you can do is temper your oven as soon as the buns have reached the desired color and stick to this temperature for the rest of the baking time, but make sure to bake the full 25 minutes to ensure the buns are cooked. So temper to around 350F to start with. Also make sure to know the true temperature of your oven like we suggest in our tips, so maybe you should also start out a little lower for example. Every recipe needs fine tuning to your hands, ingredients, equipment and conditions to make it your own.
Hope this helps and happy bun baking!
I made these rolls once with great success! I have had my homemade sourdough starter going for 3 years now and managed to keep it alive (I once accidentally baked it in the oven because I had it there for warmth during the winter, totally baked it, and restarted it by pulling off a piece of the dough I had rising, feeding it, and crossing my fingers, it worked!!). So some other no kneed recipes allow you to put dough in the refrigerator to slow down fermentation. Would that be a possibility with these rolls? Example, could I get them started today, do a couple of stretch and rises, then put it in the fridge and get it out tomorrow for the final rise? Is it worth trying or don’t bother?
Hello Becky,
Thank you for your wonderful comment. That is something we have never tried..baking the starter :))
And yes, that would be very well possible, to retard with this recipe like you suggest. It always takes a few turns to figure out the optimal times, but that should not be too hard. We did not try it with this recipe ourselves, but we are sure the results will be fine, but keep in mind that due to this process, you will develop more sour in your bread, so you have to like that.
Happy sourdough baking!
They came out great! I made them exactly as your recipe reads, let the dough sit for 1 hour, folded, put in the fridge overnight, and started again where I left off this morning. This makes it a lot easier for me to continually make these! We eat them with breakfast with butter and jelly, make sandwiches with them, eat them with soup, so yummy!
Excellent! Thank you for the great feedback for us and other bakers certainly something to try too!
Enjoy the festive season baking and sharing 🙂
Marieke & Ed
Thank you so much for the lovely recipe, I live in uk and can’t get wholewheat flour, so i wasn’t sure what to use so in the end I used 2/3rds wholemeal bread flour and added a 1/3 of strong white flour but the rolls came out quite small, darker inside than the picture and dense.
I think UK wholemeal bread flour is a bit heavier than whole wheat – it as about 13g protein – I wonder if I should substitute a bit of light 00 flour in with it? I do think I need more proofing, it’s quite cold here – too cold 🙂 and as you say temperature has a big role to play too!
I found this recipe after I already had my fed starter sitting out for the night. As I generally do my starter in ratios of 2 parts flour to one part water, I wound up with under-hydrated flour :(. I’ve bumped up the water in the main recipe to try to make up for it, but the dough is still quite a bit stiffer than what I would expect for a no-knead recipe. I think when I get ready to fold I’ll sprinkle more on. Hoping these will make a special treat for our US Thanksgiving! Thanks for the recipe.
M.
Hi Michelle,
The starter as you can see is 100% hydration, and quite a big part of the recipe, so you need to make up for that of course. The flour you use can also make a big difference (absorption) and you need a few turns to get to the right ratio for you.
Hope it turned out OK this first time and you will give it another try with this knowledge.
Greetings from Holland,
M en E