
Conclusion: Making your own croissants, totally worth the effort!
Some years ago we bravely started our quest for the perfect croissant. But after two attempts we cowardly sneaked away again.
The first attempt was just a disaster. I believe we used a recipe by Michel Roux, so we probably cannot blame the recipe. But how foolish can you be to go and try to make your first croissant dough ever on a very hot and humid summers day?! Maybe if you are an expert and know what you are doing, but at that time we sure didn’t. So, big disappointment with butter dripping out from all sides.
Luckily for us, no pictures were taken (better not to touch the camera with butter fingers) so we just put this aside as a ‘now we know what NOT to do’ learning moment and moved on.
The second attempt happened months later, cooler in the bakery, check! But better conditions alone do not make a good croissant. In fact, you can bake something that vaguely looks like a croissant but in truth is just a buttery roll. So again, we where a bit discouraged to say the least…It took as over a year to get our courage up and give it another try. The cold weather also helped a lot.
And then things quickly got better…
So our most important advise would be to practice your first croissant making when the weather is nice and cool, or make sure your surroundings are around 20ºC = 68ºF, or even better, a bit lower. This way the butter will not get too soft or even melt and get absorbed by the dough, a thing that also happened with our second batch (look mummy no layers!). We also knew we needed a better recipe as a starting point.
But then we remembered our quest for the best baguette and how much time and effort went into that. So then it was on and we would not rest until we had truly mastered the wonderful art of croissant making!
Hope you will get stuck in there with us and please do not give up after one attempt…practice does make perfect!
OUR CROISSANT MAKING LOG
CHECK OUT OUR MAKING & BAKING CLASSIC FRENCH CROISSANTS VIDEO
CHECK OUT OUR MAKING & BAKING CLASSIC FRENCH CROISSANT RECIPE
Recipes used / Inspiration
Classic Croissants by Jeffrey Hamelman
Mr. Hamelman is a favorite for croissants and an inspiration for many other bread recipes!
TXfarmer on The Fresh Loaf
The book ‘Pastry, savory and sweet by Michel Roux (croissant recipe does not work, only 50% hydration resulting in very stiff, unmanageable dough, ‘hope’ it is a typo? more likely it was us!).
We use French type 55 flour for our croissant making.
November 2018
We were experimenting with our Roccbox making pizza. As pizza needs a dough which is easy stretchable and croissants also need a stretchable dough we thought perhaps this flour will also work great with croissants. So we made some croissants with Caputo Pizzeria Long fermentation 25kg and added about 300mg of vitamine C as a dough enhancer. It worked great, very nice layering and easy to work with. The croissants on the photo are a bit under proofed, so next time we will give them an extra 30 minutes to proof.


September / October 2014

Very much inspired by the pastry episode of the Great British Bake Off we could not help but have a go at the Kouign-amann. This interestingly named concoction is a regional specialty of the Bretagne region in France. It is a round ‘crusty cake’, made with bread dough containing layers of butter and sugar folded in resulting in puffed up layers with lovely caramel inside and out. The name derives from the Breton words for cake (“kouign”) and butter (“amann”).
We thought our croissant dough would be very well suited to make the version as shown in the BBC program, using a muffin tin to create the shape you see in the picture. The results of the first baking sessions are so delightfully good that it is quickly becoming a favorite with us and a wide circle of people around us.

February 2014
Next to croissant baking in the past months we also perfected our pinwheels and pain au raisins. You can find the instructions here. These pastries are all made with the same laminated dough as used for croissants and pain au chocolat. The fun is in the shaping and in ending up with a totally different pastry but equally delicious and worthwhile to make and bake. Another thing we love is making crème pâtissière / pastry cream, the stuff that plays an important role in the end results of both pinwheels and pain aux raisins. You can find our favorite pastry cream recipe here. It can be used for lots of other things too of course, like the famous vanilla slice or Dutch tompouce for example. Next to the pinwheels with cherries and apricot on top, we also made one with an apple, cinnamon and raisin compote, also very delicious. In the next months we hope to do some more experimenting with ‘pâtisserie viennoise’.

September 2013
We are experimenting with different flours at the moment. We tried the organic German type 550 but it proved too heavy and we ended up with a slightly flattened croissant with less then impressive honeycomb structure. The next step is to try some organic Manitoba flour which is very high in gluten and is traditionally used for Italian enriched breads. It originally come from the Canadian region of Manitoba. We already noticed it is a joy to roll out compared to the French Type 55 we normally use. But we need more experimenting to draw conclusions.
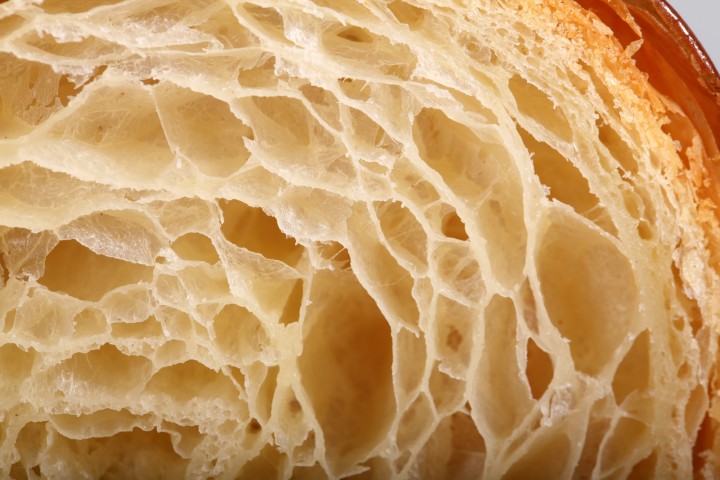
At the same time we are playing with the tightness with which to roll up the dough triangles. To get a good honeycomb structure that starts at the core of the croissant you have to roll the dough pretty tight at the beginning. We are establishing what the best techniques are to get this right.
Keep you posted!
December 2012
Moving on to other Viennoiserie / Danish Pastry
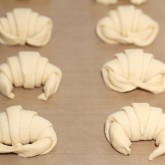
Inspired by our baking friend Luc Martin from Tilburg Sourdough and our new book ‘Advanced bread baking and pastry’ by Michel Suas, we are now enthusiastically experimenting with the laminated dough, trying out different kinds of Danish pastry. The shapes you see in the last three pictures are called pin wheels. They are filled with crème patissière made according to the recipe from the book of Mr. Suas. We will keep you posted on our Danish pastry results.
We also decided it is time to post the compleet version of the croissant recipe. We found a firm base in Jeffrey Hamelman’s recipe but over the months we made many small changes and we think it justified and more clear for other bakers to explain in a new recipe exactly how we make and bake our croissants at the moment. So we will post our version of the recipe in the near future.
March 2012
BATCH 6

Just baked another batch of croissants and also some ‘petit pain au chocolat’. Practiced with and altered a few things, like shaping, with good result.
Made some pics to go with it. Comparing this batch with the previous, we again made some progress, especially with the honeycomb structure and thinner inner layers (lighter mouth feel).

According to Raymond Calvel croissants laminated with margarine *ugh* are formed into the crescent shape, while croissants laminated with butter are left in the straight form.
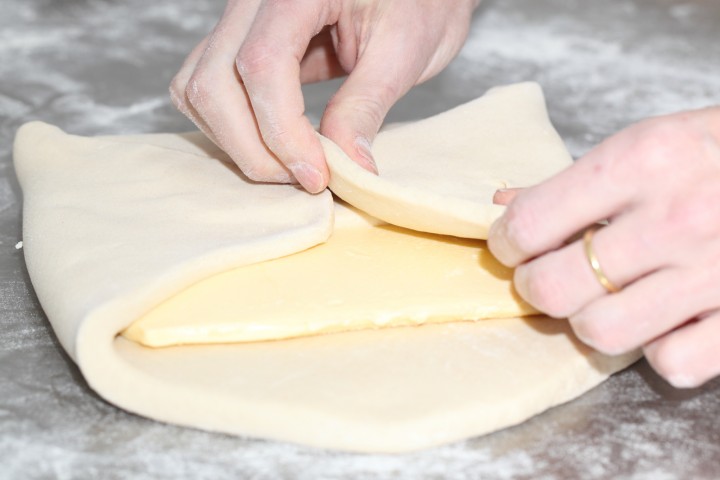
Next to the three fold method or letter fold there is also the ‘book’ method. Calvel also mentions that an experienced individual, using a dough sheeter, which we home bakers do not have but which makes life (by which we mean rolling the dough) so much easier, can accomplish two book folds with no rest period between, thus saving precious time.
Tips and lessons learned from batch 6
- Do not over-knead / develop the dough too much, too much gluten will not help during the lamination process. The lamination process itself is a kind of stretch and fold anyway and will strengthen the dough.
- Gently shape the dough into a flat ball by pressing it down before storing it in the fridge, this makes rolling during the first fase more easy. Making a tight ball will strengthen the gluten and you need an elastic dough.
We also made some ‘petit pain au chocolat’ and this time tried to make them a bit more authentic by using rectangles of the dough instead of leftover odd pieces and also shaping them better. We used our favorite Valrhona Caraïbe chocolate, it’s simply delicious, much better than the rather strange sticks you often see being used that sometimes taste a bit musty and sometimes even burned.
Februari 2012
BATCH 5
Our best batch of croissants to date! Very pleased with the result.
We got the honeycomb structure we wanted and this also resulted in the croissants going towards the structure and bite we are aiming for.
What are we aiming for you ask?
Well, there is this place in Normandy in France where we tasted the best croissants ever and it is our ultimate goal to match those. We like these croissants because they are buttery and flaky but still they have this center that has a light melt in the mouth sort of ‘custardy’ feeling. In our opinion a croissant would not be right if all you got were flakes in your mouth and on your plate.
Tips and lessons learned from batch 5
- Work precise and try to get all measurements right. Make sure your dough is shaped with straight lines and squarish corners.
- Do not pull the dough to stretch the individual triangles. Because of the squeezing and pulling with your warm hands you will damage the layers. Use a rolling pin to gently elongate the triangle.
- With this batch we have been really careful with the rolling out part of the dough triangles. We have not elongated/stretched the dough by hand like it says in the Hamelman recipe, just very gently worked with a rolling pin. Next time we want to try and elongate them just a little bit further, trying to create thinner dough layers, and see how it turns out.
Januari 2012
BATCH 4
After the encouraging results of batch 3, there was no way we were going to wait long before trying the next. So batch 4 was made the following weekend.
We did not improve much on the previous batch, but we were still happy we were able to duplicate our previous success. Batch 3 was not just a lucky shot! But probably because of too much pinching and stretching of the croissant dough triangles, we damaged the layers a bit, resulting in a, still tasty but, slightly heavier croissant.
We also fine tuned the oven temperatures and baking time, a few degrees lower, a minute or two less. We use a semi-professional convection oven for the croissant baking so we have to take that into account.
Tips and lessons learned from batch 4
- Too much fumbling, and squeezing the dough triangles does not make a light and beautifully layered croissant. Most important thing to improve on with the next batch.
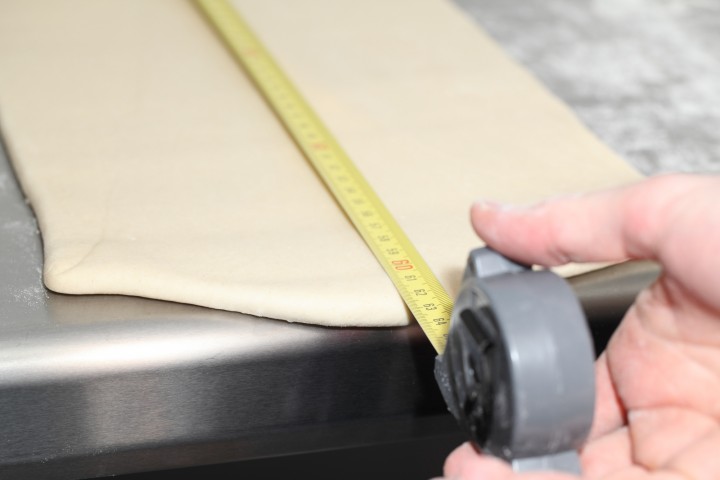
- On the third day, when you have to lengthen the dough to a formidable 112 cm / 44 inches, the dough at some point may resist and /or shrink back when rolling it out. Hamelman suggests folding it into thirds and giving it extra relax time in the fridge for about 10 minutes. We did this with this batch and it worked great.
- We used the excess dough we trimmed from the edges to make a bit odd shaped but still very delicious ‘pain au chocolat’ using our favorite Valrhona Caraïbe dark chocolate. The trimmed dough parts are still worth using, it would be a shame to throw them away.
- We tried freezing the croissants and putting them for 8 to 10 minutes in the preheated oven (180ºC / 355ºF) straight from the freezer. Nothing wrong with that, croissants eaten nice and warm, almost as good as fresh ones…almost
Januari 2012
BATCH 3
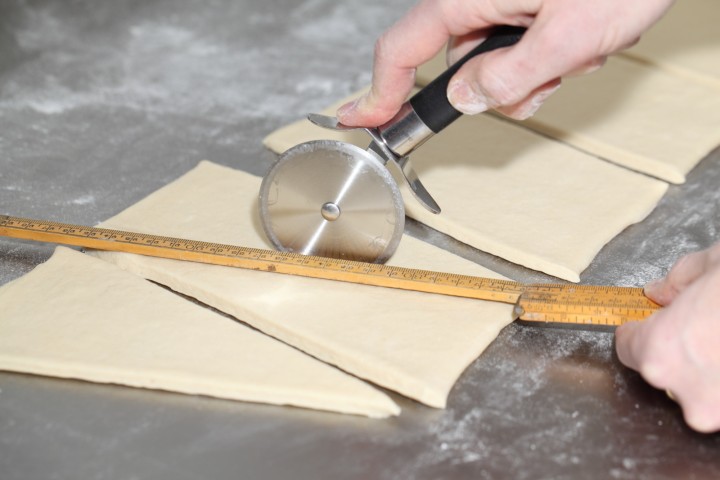
The first time we used the Hamelman recipe. Pleased with our ‘looks like a real croissant’ result. The taste is fantastic but the croissant is not as light and crisp as we’d want them to be. A little bit heavy when biting into it.
The center is hollow, but we want that honeycomb structure also in the middle of the croissant. Still work to be done!
Tips and lessons learned from batch 3
- After you have made the initial croissant dough, shape it like a disc, not a boule, before you refrigerate it, so it will be easier to roll it into a square shape the following day.
- After each rolling and folding I already gave the dough a quarter turn and gently rolled it out just a little bit (think a few cm) so the dough could relax in the shape I was to continue with. This seems to work well.
- If you have a pizza slicer, use it, it works a charm to cut the croissant dough.
- Next time pay extra attention to the begin part of the rolling of the triangle when shaping the croissants.
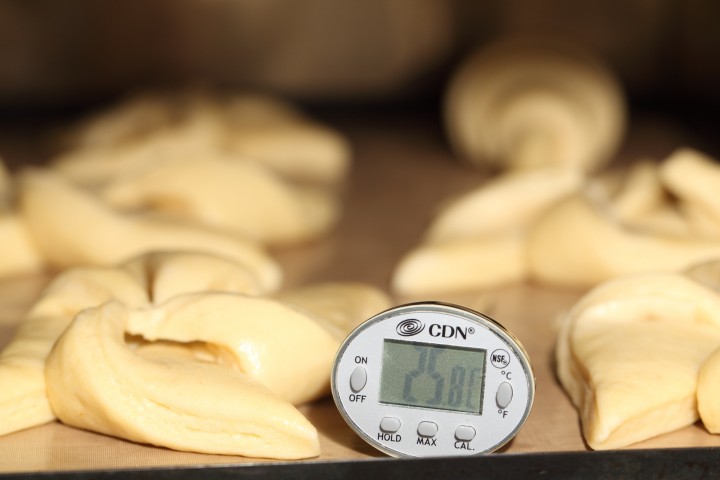
- We use our Rofco stone oven as a croissant proofing cabinet by preheating it for a few minutes to 25ºC / 77ºF. It retains this temperature for a long time because of the oven stones and isolation. We can do this because of the luxury of having more than one oven. But you can also try this with a smaller household oven and use a baking stone. You can check the oven temperature with a digital thermometer. If possible you can also put a baking tray on top of your oven to speed up the proofing process if necessary.
Croissant baking somewhere in 2010
BATCH 1 & 2
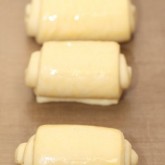
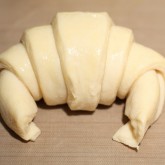
No pictures of our first attempt at croissant making, but as you can see looking at the pictures below, our second attempt left much to be desired. The recipe we used was a quick 1 day recipe we found on the Fresh Loaf site. We decided to use it mainly to practice the laminating part and with this one day version we could go straight to work.
Sorry excuse for croissants…need therapy first to get over it and dare to try again
So, what went wrong with this second batch?
- The room temperature was around 22ºC / 71.6ºF so still a bit too high.
- When you are inexperienced the process of laminating and rolling just takes too long.
- Because it was a one day dough it lacked in stretchability, so the dough was fighting back like crazy. You probably need a dough that has rested in the fridge for 24 hours to get the right gluten development to get a more stretchable dough.
Check out our version of the perfect croissant recipe here

















Moshe Barouk says
Hi!
I’ve had great results since our last correspondence. Thank you!
I have 2 questions for you.
1) What do you think about adding flour to the butter block? I’ve seen some recipes that do that — most not. But I’ve only seen benefits. Are you aware of any drawbacks?
2) I have found that putting my shaped croissants back in the fridge and leaving 12-24 hours in the fridge (4-day process) has resulted in my honeycomb texture being much more pronounced and the overall product is lighter and better. Why do you supposed that is? Do you think it’s due to the gluten strengthening in the fridge? Or perhaps it is because it begins to rise in the fridge and the butter stays colder during the final rise? Or could it be that my croissant butter was very close to being too warm and putting it back in the fridge helped solidify it back? Maybe all three?
Thanks again!
Moshe
Weekend Bakers says
Hi Moshe,
The answer to your first question is that it could be a good idea. We do not use or need to use this method because our organic butter is very pliable but if this is not the case with the butter you have, the flour could make it more pliable too.
We think the answer to your second question is that the butter stays colder during the final rise and is not absorb in the dough.
Good to hear the fridge time works so well for you. Our challenge is we never have enough fridge space….
Happy croissant baking!
Ed & Marieke
Moshe Barouk says
Thanks so much!!
Weekend Bakers says
You are very welcome!
Moshe says
Hi.
I’ve tried your recipe about 6 times now and no matter what I do, my croissant layers are thick and soft. I do live in Miami, Florida so I know temperature is an issue. However, I’ve put on the air conditioner to low temperatures and worked in the evening when temperatures are lower. Still, texture is always the same. My question is, if I can see the butter through the dough and I can see the layers, do I have to be concerned that *some* of the butter might have been absorbed by the dough making the layers thicker? The layers do look quite thin when I shape the croissants. Also, might applying too much pressure to the dough cause some of the butter to be absorbed as well? I find that a lot of pressure is needed to roll out the dough to the desired length.
And one more question, if you would be so kind:
When rolling out the dough during lamination, I often see that the layers get separated at the ends (i.e. you can see 1 layer then another layer and another about 2 centimeters apart at the ends). Is this something I should be concerned with and want to cut off?
Thank you very much. You’re Croissant Making Log and Video have been most helpful.
Moshe
Moshe says
P.S. I considered the possibility of the proofing time to be the issue, but I’ve proofed between 1 and a half to 3 hours with no difference in texture (and the croissants were visibly and obviously risen.) Thanks.
Weekend Bakers says
Hi Moshe,
When rolling and really fighting against your dough you are probably taking too long and pressing too hard. The first advise we would give you is doing an extra rest in the fridge during rolling out to relax the dough. Second: try a different (brand of) flour, maybe one with less gluten / protein content than the one you are using now.
About the layers: the best thing of course is to work really precise and if things really get too out of hand you could straiten the edges with a knife, but this is not the problem or main solution to getting a good end result.
So focus on the flour and rolling part and hopefully this will make a difference.
Good luck and happy baking weekend!
Ed & Marieke
Moshe says
Thanks so much for your reply.
I tried your advise to give it an extra rest in the fridge and it worked out much better. I also got a different, lighter rolling pin which put less pressure on the dough, rolled it much more softly and patiently and there was a big improvement in the layers. The texture is still not quite what I’d like it to be (less soft and more flaky), but I believe you are on to something with the flour. I’m using regular all purpose, but in every country it’s different and so I will experiment with mixing some all purpose flour with some less-protein pastry flour or cake flour and see how that changes the equation.
I cannot thank you enough for this blog. I have been baking croissants for years now and was never able to achieve my desired results. I searched on Google for tips and found your weekendbakery.com site. I learned so many tips and greatly improved my results. I learned things I never would have known or thought about. Thank you so much!
Moshe
Moshe says
Hi Again.
I tried different flours. I found that a higher protein flour creates firmer layers and a more chewy croissant. I’m working to find a flour that matches the type 55 flour you use so I’ll keep experimenting. But I’m still having some trouble with my layers and was wondering if you could point me in the right direction. First, I have a question: Why is it okay for the croissants to proof in 25c but rolling the dough in 21c is too much? I’m saying, if the butter won’t melt in 25 degrees, why will it melt in 21?
Second, if the butter does get absorbed a little bit into the dough (but not completely), does that create thicker layers or does it just cause the layers to merge (or both)?
Last, will over-proofing cause the layers to merge?
The outside always looks amazing, but the inside either has collapsed layers or layers stuck together or they’re not fully baked on the inside. My oven is really not great. It’s a conventional GE regular electric house oven.
If you would please be so kind as to look at my croissant images (5 photos) and maybe tell me if you know where the problem lies? Thanks so much.
www.flickr.com/photo…otostream/
Moshe in Miami
Moshe says
Update: I adjusted my baking temperatures to match yours that you use in your convection oven but in proportion to your conventional oven temperature. So, for example, the 195 degrees Celsius you initially bake with in your convection oven, the Fahrenheight equivalent for a conventional oven would be 420 F and so on your 165C convection would equal 360F in conventional. So I preheated to 430 degrees Fahrenheit and then as soon as I put in the croissants, lowered them to 420 F and baked for 10 minutes. Then lowered the temperature to 360F and baked for another 15 minutes and my croissants came out perfectly baked. The layers were much improved. Then, I tried a flour that was 10% protein and the layers were exactly what I was looking for! The honeycomb was in full effect, although not nearly as pretty as yours. I will keep working though. At least I know now that the aesthetics are the only thing I have to work on–and that can be improved with the rolling and careful handling of the dough. My biggest obstacles have been overcome. Your flour change suggestion was genius and I could not have done it without you. Thank you!
Here is my latest batch: www.flickr.com/photo…046793516/
Need to work a bit more on the beginning of the rolling (center)…I must be damaging the layers there.
Weekend Bakers says
Hello Moshe,
It looks like you are cracking the croissant code! Your bake looks really good and you make the right calls as to what to change and try until you get it exactly right.
As for the proofing and rolling and the temperature. The difference is that you do not touch and work the dough when it is proofing so the temp can be a bit higher without the butter leaking, but two degrees higher and it starts to go wrong again. Delicate balances with this recipe.
We applaud you for your perseverance and understanding that it just takes a lot of practice and adaptations to get it just right.
Keep up the excellent baking!
Ed & Marieke
Alice says
Hi There,
Thank you for such detailed descriptions and showing us that we can try and try again!
I was wondering if you have a recipe that does not require the use of a standing mixer?
Thanks!
Alice
Weekend Bakers says
Hello Alice,
Anything that is done with the mixer in this recipe can be done by hand. You just need to work the dough until moderate gluten development. This usually means kneading about double the amount of time given in the recipe when using the mixer.
Just a little bit more elbow grease but it should be no problem, especially with this amount of dough.
Good luck with it and happy baking!
Grace (in Tasmania) says
Hello Ed & Marieke
thanks so much for sharing your recipe – perfect croissants every time! Can you help with some advice on pain au chocolate? what dimensions should I cut the croissant dough for each pain au chocolate, and how much chocolate should I use? can I put too much chocolate in?!!
grace
Weekend Bakers says
hello there Grace,
You have several option here: you can make pain au chocolat shaped like the croissants, you can make them with the leftover bits from the croissant dough (which we also do most of the time), or you can do the following:
divide the 100 x 20 (40 x 8 inch) slab in 20 pieces of 10 x 10 cm (4 x 4 inch), thus ending up with 20 pain au chocolate (or do half croissant and half Pain). We can also recommend trying the pinwheels and/or pain aux raisins: www.weekendbakery.com/posts…x-raisins/
And yes, you can use too much chocolate, very little is needed actually per pain, 3 to 5 grams would already be enough (for us), it also comes done to personal taste of course but in the professional version there’s also just a small amount.
Happy laminating and croissant baking and happy Easter of course,
Marieke & Ed
roosevelt says
Thanks for the recipe. I’ll try it.
Weekend Bakers says
Let us know how it goes!
Ike says
Excited to try this recipe out with my wife this coming weekend. Perfect weather here in Seattle, WA. Will post pictures. In regards to your inspiration mentioned in your blog, you stated there was a place in Normandy France that had the perfect Croissants. We are both wondering what the name of the Bakery/Cafe was that gave you two such drive to create this great recipe and amazing instructional video.
Are there any instructions and tips you can give on inserting (when and how) the chocolate or ham/gruyere to make both pain au chocolat’ and ham/gruyere croissants? I love the pain butter croissants but my wife is one for the pain au chocolat’ croissant.
Excited to have just discovered your website. Thank You!
Also, an interesting article on the importance of supporting our local Bakeries that are also “home-made viennoiseries”. A little history trivia I found interesting as well. A lot of Bakeries are not “home-made viennoiseries”. I was surprised. Don’t be afraid to ask to find out.
Ike says
Website mentioned above: www.telegraph.co.uk/fooda…rance.html
Weekend Bakers says
Hello Ike,
Thanks for sharing your thoughts and the article! The bakery was called Boulangerie Charlotte Corday in Vimoutiers. The patisserie was baked on the premisses. This was some years ago and we hope it will still be the same now of course. We are still grateful for their inspiration. You never forget these little moments were you have to wait ten minutes for your fresh croissant straight from the oven, because it still has to cool a bit.
Adding something sweet or savoury to your croissant dough is done right before you shape them, place the items on the dough and then roll up and leave to proof. For the pain au chocolat use small rectangular pieces of dark chocolate, placed near where you start rolling. Normally there will be no more than about 5 grams of chocolate in a pain au chocolat, but of course if you make your own you can decide for yourself.
Good luck with it and lots of baking fun!
Marieke
Lesley Broadbent says
Hi Ed & Marieke
Just made your croissants for the first time. Started the dough on Thursday and rolled out and cooked them today. They were amazing! Very slightly heavy in the middle – maybe my fan oven is slightly different to yours but I used your cooking times and temperatures until the last few minutes when I turned the oven down because they were browning too well. We think that maybe we are used to reheating supermarket croissants and they are always drier. The layers are not as pronounced as yours but I’ll try to make them better next time. Husband is very pleased and has taken loads of photos which I will send via your other link.
Thanks for the wonderful recipe and putting in all the hard work so that we novices can make a decent croissant.
Lesley Broadbent
Weekend Bakers says
That sounds marvelous Lesley. Your first time result sounds a whole lot better than our first attempt I can tell you. Plus the added bonus of a pleased husband 😉 Love to see some pictures of the result!
Keep up the great baking!
Marieke
Sandra says
Thanks for this amazing post. I actually graduated pastry school and still experimenting! Really excited about ur tips!!
I want to have the croissants for sunday breakfast. I made the dough today thursday. Gonna laminate it tomorrow. Then the next day on saturday I would form them. So my question is: What then? Should I let them proof in the fridge overnight? Or should I just form them on sunday morning? Would really appreciate your advice!
Thank you so much!!!
Weekend Bakers says
Hi Sandra,
Both are valid options. The truth is we have never proofed our shaped croissants in the fridge, simply because we do not have the fridge space, but we have seen it in other recipes and it should work too. It is also no problem to leave the laminated dough till Sunday morning. One of the advantages of the first option is of course you would save time and work on Sunday morning.
Hope you’ll share with us what you are going to do and how it turns out.
Lots of luck and happy baking!
Ed & Marieke
Marius says
What is the baking time if we use a deck oven like this one (www.wiesheu.de/en/pr…s/ebo.html)? What tips can you give us for baking in this type of oven?
Roger says
I see. Thank you very much.
roger says
what does draft-free mean?
Weekend Bakers says
Hi Roger,
We mean that the room in which the dough is proofing is preferably closed with a constant temperature, so no cold streams of air coming in or passing through because somebody is opening and closing doors all the time.
Marieke
Mike says
That’s absolutely the most nice and delectable croissants i have ever seen.
I will surely make them. Only i have one question:
In your video which i repeatedly watched you mentioned to roll out the dough after (24 hours) into 112cm, so i’m assuming that the dough should be retarded in the fridge. But in the recipe you are not mentioning this, so i’m again i’m assuming that the correct thing is what you said in the video about retarding the dough for 24 hours, am i right or not?
Thanks guys,
Mike 🙂
Weekend Bakers says
Hi Mike,
Yes you are right. You make the initial dough and it rests in the fridge. Day two you laminate and again put the dough in the fridge. Day three you roll out and finally make the croissants :). In our croissant log we just stated the metric quantities for the croissant recipe by Jeffrey Hamelman. So it is best to print the Hamelman recipe (www.finecooking.com/recip…sants.aspx) and use that as a base, like we did and read the tips we give above to guide you in the process.
Good luck with it!
Ed
imad says
Hi!
on the internet I found many recipes of croissants, I’ve tried many but none came to me well. then I found your video and website, I followed what you did and the recipe, and I finally managed to bake the croissants delicious!
hours but I want to redo, and I want to be like you have made. so I ask you a question: when you say take the dough made the day before, that means 24 hours or 12 hours?
then when you make 3 layers and say the next day roll out dough … means 12 or 24 hours later? this is what confuses me.
thank you very much for the video and the recipe, without you I would never be able to make good croissants!
ps: I never tire of seeing your video, it’s great and nice to see
Weekend Bakers says
Hi there Imad,
So glad you like the recipe and the video and are getting good results. The answer to your questions is between 20 and 28 hours, so it will most likely also comfortably fit within your schedule.
Happy baking and many wonderful croissants!
Ed & Marieke
imad says
thanks for the reply! I did not understand.
so in total must rise, must be 40-60 hours in the fridge? or 20-28 in all?
thanks
Weekend Bakers says
Sorry for that. The answer to question one is 20 to 28 hours fridge time. The answer to question two (the 3 layers) is also 20 to 28 hours fridge time. So for both ‘the next day’ means anywhere between 20 and 28 hours later.
imad says
okay thanks! you are the best! 😀
arana says
Hi there, i have been trying to achieve the perfect croissant, and it has been a long way, cause i live in the México were is very hot almost always, and i dont own a air conditioner.
I really appreciate all your hard work, they look amazing, and im waiting for mine to be done (5 mins more to achieve gold crust), i think that the greatest advice that you gave me was about gluten, i had found a recipe before that said that is better to do croissants with all purpose flour and now i see why!
Thanks thanks thanks!
Weekend Bakers says
Hello Arana,
It is really brave of you to make croissants under such challenging conditions! It seems you are doing very well in adapting to your local conditions. Thank you for your kind words and keep up the good baking work.
Greetings from a very much colder and wetter Holland,
Ed & Marieke
arana says
This is an amazing recipe, i have done some adjustments for mexican flour (bread flour + wheat tortilla flour), and added a spoon of sourdough. Leaving the dough an overnight (12 to 24 hours) rest before working with butter is the key for a flawless croissant.
I have to cheat with some of the final steps, i cannot roll the dough all the way, because of the hot enviroment, so, i roll it until its posible at least 30cm or 50cm (in a good day) and cut stripes, then put it back to the fridge in a tea cloth, taking one stripe at a time, roll it and cut the triangles. They wont be as perfect as in cool environment , but they will still look beautiful.
Maybe this trick may help someone in hot weather like me 🙂
Thank you so much!
Weekend Bakers says
Hi again Arana,
It is so wonderful to read your words that can warm us a bit now it is so cold over here (last night was minus 9 Celsius). I am sure your tips will help other bakers in more tropical conditions to bake their croissants and eat them too!
Happy baking in Mexico!
Marieke
Hermione says
I also used the Michel Roux croissant recipe for my first attempt and they worked out very well, I also had some butter leakage but I just forgot about it and munched up the pastries anyway.
Maud says
Hello Ed &Marieke,
Compliments & thanks for what you put on this site. I use it quite a lot for bread recipes. Some succesfull, others less succesfull.
This weekend first croissant baking. Not a good result, but I’ll keep practising.
I have a qustion though. After watching the video again, just to make sure I didn’t miss anything, I noticed that it looks like you start from the folded dough on day 3. And I understood from Hamelmans recipe that I had to unfold the last fold of day 2 and then roll to 112 cm.
Could you please enlighten me? (Also because when unfolding it, I damaged my dough a bit. I wrapped it too tight in plastic I think, it got bigger in the fridge, and I forgot to put a bit flour on it to make unfolding easier).
Thanks,
Maud
Weekend Bakers says
Hoi Maud,
Yes, we can. Unfortunately it was not necessary to unfold your dough and it is very possible you damaged it and got a less result because of it. And because of the unfolding you will not get your 27 croissant dough layers.
So, you just have to roll it out as you take it out of the fridge all the way to 112cm.
Thanks for sharing and hope you will get wonderful croissants next time!
Marieke
Maud says
Thank you for your reply! I’ll try again without unfolding, someday….
Weekend Bakers says
Yes, you do have to plan it, also because of the three days of croissant activity in a row.
Memoria says
I have made croissants before, but I am always interested as to how others are successful at making them without keeping the butter cold at all times, specifically during the proofing period. When I make them, I proof them in the fridge overnight because I’m paranoid about baking them with soft, warm butter. So, if the cold butter is what helps create the layers, how does proofing them in a warm environment work for you instead of against you?
Thank you so much for your passion, videos, and photos. I just subscribed to your blog.
Weekend Bakers says
Hello Memoria,
We think there is nothing wrong with your current method. We have not tried it ourselves yet we have to add.
The way we go about it is by really controlling the environment we proof the croissants in and keeping them at 25 degrees and certainly not higher otherwise you would get problems with your butter getting absorbed. If you live in a warmer climate your method is a safe option, often used by bakers too. Longer proofing times will probably add to the depth of flavor. The main reason we use our method is timing and fridge space, plus it adds another day to the recipe. We do want to try your method too and will compare the results and report about it in our log.
Happy baking,
Marieke & Ed
Lester says
Thanks for this post and especially the video. You have transformed my croissant making abilities. I now get much better lamination by replicating your method. Great work, guys.
Weekend Bakers says
That sounds wonderful Lester. Very glad we could be of help!
Have a nice (baking) weekend,
Ed & Marieke
Ryan says
Thats cool! Thanks for that. Do you get alot of fermentation during the 12 hours? What flour are you using? Love the site
Weekend Bakers says
You can see the dough on the plate in the croissant video, yes it has developed quite a bit during the night, but it is hard to tell you exactly how much. We use French type 55 flour. It has a protein content of around 11%. All purpose flour usually is a good substitute, as French flour is usually harder to get your hands on.
Good luck with the baking!
Ryan says
What mixing and fermentation do you do for this dough? Mix to combine? Half develop? Full develop? ! hour initial fermentation? They look really good
Weekend Bakers says
Hi Ryan,
Thanks!
5 minutes of mixing for medium gluten development, then directly 12 hours in fridge. We use a German spiral mixer, brand Hauessler which does 110 rpm. We follow the Hamelman croissant recipe very closely, but the initial mixing we tuned down a little bit otherwise there was too much ‘fighting’ with the gluten during laminating.
Ed
Adrian says
I have tried Michel Roux’s recipe in ‘Pastry’ twice now and as you pointed out the amount of liquid stated in his recipe is just way too little to produce any form of manageable dough, to the point I felt like I was folding a block of stale bread! My third batch’s detrempe is now chilling in the fridge and it’s made using Hamelman’s recipe. I accidentally added perhaps a tsp more milk to my dough but I hope it’s OK. I’m not sure if wrapping the detrempe with cling film and leaving it in the fridge overnight would dry it out. How do you normally keep your detrempe in the fridge?
Also, not sure if it’s due to the dry detrempe in my previous attempts, I noticed that the folds that I made in the past never really amalgate well to the point I had to almost squash the dough to fuse the folds. Furthermore the dough was so stiff I had to roll it real hard and ended up with a sore neck. Ouch. Needless to say that resulted in torn layers.
Now let’s just hope it’s third time lucky tomorrow for me. If not I can imagine myself making 3 batches of detrempe every single day in the next week for some serious croissant experimentation. It’s summer holiday already after all. 🙂 That said, my poor neck…
Weekend Bakers says
Hi Adrian,
Yes we put it on a plate and cover it with clingfilm. It does not dry out. We are sure with the Hamelman recipe you will not have to work the dough to the point of neck injury! Rolling out by hand still asks for some muscle but we hope and expect that with your current batch it will be a different experience.
Let us know how it turns out. Maybe you are willing to share some of your proudest result pics with us : www.weekendbakery.com/your-loafs/
Hope it works out great and you can relax your neck, eating a lovely flaky croissant!
Ed & Marieke
Adrian says
Hi Ed and Marieke!
It turned out to be quite a success today!!! (sorry for using three exclamation marks I’m just too excited) They puffed up really nicely when in the oven but when I cut them in half my heart sank because I didn’t see the honeycomb effect. Fortunately my flatmate mentioned the effect may be apparent only after cooling it down for a bit as the starch strands would contract and form holes. And he was right! I left them to cool for about 15 minutes and voila! I was over the moon. It’s not perfect yet but I think I’m on the right track. Thank you so very much for your lovely article on making croissants and for introducing me to Hamelman’s recipe. I’ll send you the pictures I took in a bit!
Regards
A very happy Adrian. 🙂
Weekend Bakers says
Never apologize for being exited about a good bake!!!
You are definitely on the right track, this is just the first time with this recipe and look at your result! Really glad for you and thank for sharing the pics in our your loafs section (see: www.weekendbakery.com/your-loafs/)
Happy croissant baking indeed!
Ed & Marieke
PS: Next time try some pain au chocolate too maybe?! Great with the ‘leftover’ pieces of dough..
Adrian says
Yes I have actually made some pain au chocolat with the leftover dough. After all I just couldn’t bear chucking them in the bin knowing I’d spent hours rolling and folding them. I’ve yet to bake them though. Perhaps I should do that tomorrow. Do I bake them for the same amount of time as the croissants?
Weekend Bakers says
Yes, you can allow for the same amount of time, provided they are equally in size to your croissants. Always a good idea to keep a close eye on them during baking. Baking time is not that long and croissants baking in the oven is also a fascinating sight!
Hope they turn out great!
Shelvia says
I have been baking quite a bit lately and would like to try out making croissant at home.. Really, really well done video. Thanks so much! I can’t wait to try this out. 🙂
Weekend Bakers says
Let us know how it works out for you,
Happy croissant baking!
Marieke
Fredrik Olsson says
Hey, I was on a similar quest about 2 years ago. My idea was to use sourdough as levening after I got the tip to use a poolish from “Best Croissant of the Year” winner in Spain, Badia Roca. During my quest I stumbled upon a french innovative baker in Stockholm who did sourdough croissants(!). After 30 mins of talking with him I got offered a job and started working there. So this is the way we made croissant there.
2500gr flour (about 13-14% protein level)
1000gr milk
240gr sugar
50gr salt
5gr yeast
2 egg
200gr liquid 100% hydrated sourdough.
in addition MAX 10% of dough from previous batch. This way you dont need to add butter and you got all the flavours from the precious dough.
for the lamination:
4000g dough + 1250gr unsalted butter
1. Mix dough, divide in pieces of 4kg and let rest at least 18hrs in cold 1-3 degrees celcius.
2. First fold. Make sure that the butter is really cold when you beat it.
3. After 2hrs in cold 1-3 degrees make 2nd fold wich will be a double fold.
4. About 4hrs in cold 1-3 degrees you take the dough down to 3-4mm. And when you rolled them all we put them directly in the freeezer. That way you always start from zero and you wont have some croissants fermenting faster than the others.
5. about 1pm we took out the croissants from the freezer and activated them by stroking a layer with egg-wash (egg, water, salt)
6. Let them ferment in roomtemperature (16-20 degrees) covered with plastic 16-18hrs.
7. Go over them with eggwash again and bake in stone oven at 210-220 degrees celcius until desired color.
(if your croissants are fermenting very slow when u check on them in the morning you can give them a little boost by warming a cup of water and putting it below the croissants so the get some steam on them.
Feel free to write with any doubts!
Cheers!
Fredrik Olsson says
forgot to add that you mix the dough at slow speed 15 mins.
Weekend Bakers says
Hi Fredrik,
Thank you so much for this wonderful addition. we cannot wait to try it ourselves (we will start with a smaller batch) and are very curious what result we will get. We also pointed it out to a baker friend who is opening a small sourdough bakery of his own this summer.
Have to make room in the fridge, it is not as cold as 1-3 degrees but with some addaptations I hope we can make it work.
Are you still baking as a hobby or profession?
Thanks again, very cool!
Ed & Marieke
Bill in UK says
Tried these again at the weekend. Disaster. I warmed the bread oven for the final rise but got it too warm. The croissants inflated like baloons but were lieing in a pool of melted butter. They deflated as soon as I moved them! Somewhat annoyingly my wife had some frozen unbaked croissants from Waitrose (a high-end supermarket chain in the UK) so I put them in the oven instead. They were fantastic. Much better than normal bought croissants, with flakey buttery outside and beautifully textured inside. I was really surprised just how good they were and will now struggle to put the effort in to make croissants from scratch like I know I should!
Weekend Bakers says
Hi Bill,
Sorry it did not work out this time. But you seem to have a pretty good idea what went wrong so that is about half the success for next time in the pocket 😉 Hope you will give it another try. We visited Waitrose last time we were in the UK. Always a nice outing for us to visit foreign supermarkets. We figured out rather quickly Waitrose was the one where we had to go to find better and more unusual stuff.
Lots of luck with the baking and sticking a thermometer in your oven so you will not go above melting temp might be a good idea. Feeling with your hands, it’s difficult to get it right.
Marieke & Ed
Bianca says
Beste Ed en Marieke,
ik heb jullie recept uitgeprobeerd maar ergens iets fout gedaan helaas. Tijdens het bakken zakken ze in en worden het platte croissants. Wat kan er fout gegaan zijn?
Hartelijke groeten, Bianca
Weekend Bakers says
Hallo Bianca,
Wij denken aan twee dingen. Ten eerste zou je deeg ‘overrezen’ kunnen zijn en daarom in de oven in elkaar zijn gezakt, ervan uitgaande dat ze, voor ze de oven ingingen er zeer bol en gerezen uitzagen . Ten tweede zou het kunnen liggen aan het niet strak genoeg oprollen van het deeg bij het vormen van de croissants waardoor ze tijdens het bakken de ruimte krijgen om ook zijwaarts te gaan in plaats van meer de hoogte in.
Hoop dat je het nog een keertje gaat proberen. Wij leren ook bij iedere poging weer iets nieuws.
Succes ermee!
Ed en Marieke
Bianca says
Dankjewel, niet strak genoeg oprollen zou inderdaad kunnen. Ik ga het zeker nog eens proberen! De smaak is het al waard.
Weekend Bakers says
Helemaal mee eens!
Iman says
Hi!!!
You’re croissants look AMAZING!!! I too am trying to recreate the perfect croissant and would like to give your recipe a try. One questions though, Should I just use Hamelman’s recipe off of fine cooking or do you have a tweaked recipe available on your website somewhere (I know you used Hamelman’s recipe with modifications/inspirations from txfarmer)??? Thanks again for all your hard work!!!
Weekend Bakers says
Thanks very much! Yes, it is Hamelman’s recipe and the things we changed along the way you can find reading the tips above from batch 3 to 6. From txfarmer we got the useful extra tips and pointers on what to look out for during the whole process of making and baking, so also good to read through before starting with the Hamelman recipe.
Hope your croissants will be excellent!
Marieke & Ed
Bill in UK says
Great stuff ! Your croissants look fantastic. Tried these for the first time this weekend with some success, certainly better than my one previous attempt (see below). I didn’t seem to get much rise after shaping – maybe the yeast had run out of steam, maybe I flattened them too much when stretching. I also think I undercooked slightly as they were too soft and doughy in the middle. However the flavour was good and they were all eaten at one sitting! I will definately try again. Have you ever tried with a pre-ferment? Chad Robertson in Tartine Bread uses a combination of a sourdough levain and a yeasted poolish but he does seem to like to do everything the hard way. I tried once and the flavour was awesome though I think I let the butter melt too much during lamination.
Weekend Bakers says
Hi Bill,
Great you gave it a try too. I think you could have a point with the stretching. Make sure to be careful with the delicate build up layers, that’s why we gently roll and not press the dough. About the proofing: it is important to really know the ambient temperature to establish how long the croissants need to proof. We got the help of one of our ovens which we preheated to about 25 C, then turned off and proofed the croissants this way to really get them going (see tips and lessons Batch 3). So make sure the temp is high enough, but not too high!! otherwise the butter will leak out.
But like us, I am sure you will improve each time you make them again.
To answer your question, we have never tried them with a pre-ferment, not yet. With levain and poolish I a sure there will be new challenges and a different result. But with some recipes it is also not bad to be ‘traditional’ for a while, to get the hang of it.
Happy baking,
Ed and Marieke
Rob says
Hi Marieke & Ed,
What a great post!! And the video is perfect and so very informative! Thanks a lot for sharing it. For sure I will try your method for making croissants and bake them in my AGA. If I succeed, I will publish it (if not, I won’t)… 🙂
Best regards!!
Weekend Bakers says
Thanks Rob,
Please do share with us if and when you ae baking croissants in your wonderful Aga!
And like us, don’t give up if the first attempt is not what you hoped for…
Happy baking,
Marieke & Ed
Weekend Bakers says
Hi HD,
Very interesting to hear about your croissant making, it seems we all need a few attempts to ‘get going’ . Can we ask how many double folds you use in total, so how many layers do you create?
Thanks for the recommendations, much appreciated!
Marieke & Ed
HappyDace says
Wonderful Video guys…
The way I was shown definitely required the dough to be started a day in advance. Use dried yeast and pop it in the fridge overnight ready for the morning.. Laminating was slightly different, starting with the butter almost in a cube and actually bashing it with the rolling pin one encased in the dough to get it started.. Apart from that the only difference is a personal one in that I prefer to use double or ‘book’ folds..
My first two attempts on my own were a complete shambles, slight shambles respectively.. Third attempt was pretty good !
Keep up the good work, have recommended your site to many budding bakers..
H.D.
paolo says
This is passion…….have not read all the post, just looked the pics………wonderful job! keep on like this! Cheers from Quito, Ecuador!
Paolo
Weekend Bakers says
Thank you so much Paolo,
Greetings from Holland!
Ed & Marieke
Menno says
You have just given me a good excuse to visit De Zuidmolen. It’s only half an hour from where I live, and using the right ingredients is soooooo important! 🙂
Thanks for sharing your tips, is it too early to ask you to share the recipe you’re currently using? Just to get a good start…
Weekend Bakers says
Good idea Menno!
The ones we mentioned: Classic Croissants by Jeffrey Hamelman
TXfarmer on The Fresh Loaf (see links above).
Hamelman has been the main source up till now and all we did was conversions to our metric system and some adjustments to oven times and temperatures.
Our croissant movie is almost ready so that way you can also see the process of the making and the baking.
We do not bake the croissants in the Rofco. We also have an Euromax convection oven with two big fans. Next to cookies (biscotti) and cakes we use that one for brioche and panetonne also.
have a great (baking) weekend!
Ed & Marieke
Menno says
Thanks for your response!
We (my 3 1/2 yr old son and I) had a great time visiting De Zuidmolen, but was I ever glad I only brought a certain amount of cash and not the card… (something between a candy store and heaven 🙂 )
I’ll be trying the Hamelman recipe one of these days, I’ll let you know how it turned out.
Weekend Bakers says
Hi Menno,
You are quick! How great! we are very curious to hear about your results with the flour. About the croissants. We have written down all the conversions from the Hamelman recipe so we will try and put them in this posting this week so you will not have to do it again yourself.
Loafely Sunday,
Marieke