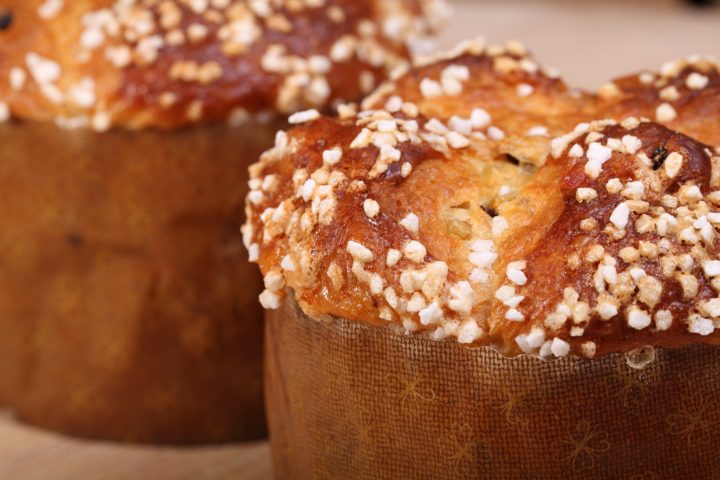
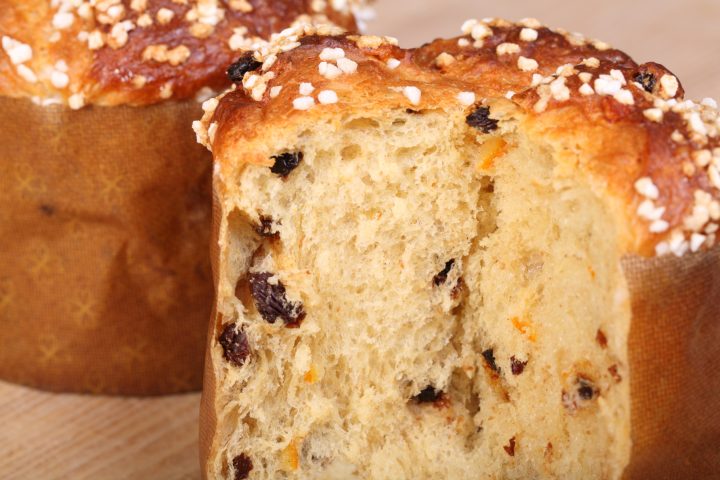
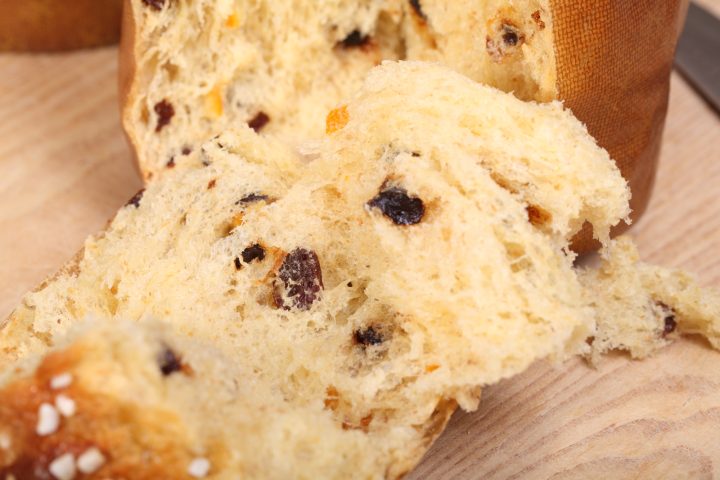
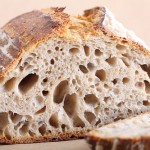
This Italian festive bread is the fluffiest we ever baked!
Dutch version coming soon…
This is a journey to find the ultimate panettone recipe, like the road we traveled to get to the best croissants.
We always take our time and go through several attempts to learn and adapt and modify until we are satisfied with our (version of) a recipe.
So we started the panettone adventure one Christmas and had our favorite version somewhere before Easter the following year.
Baking a good traditional panettone was always on our list. We baked panettone-like breads in the past, but never the original version with sourdough and long mixing and fermentation times.
We think this recipe is good enough to share with you and will give great baking fun! And of course we will keep adding more detail, tips and tricks as we gain more experience with future bakes and answer any questions you might have in the comment section below.
Update 1
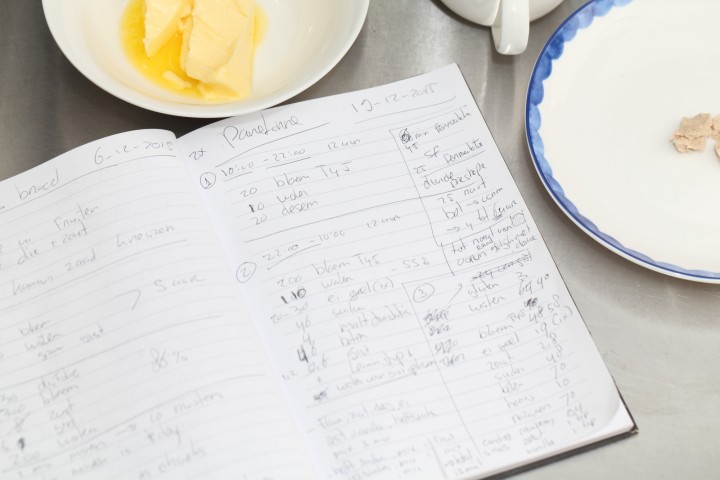
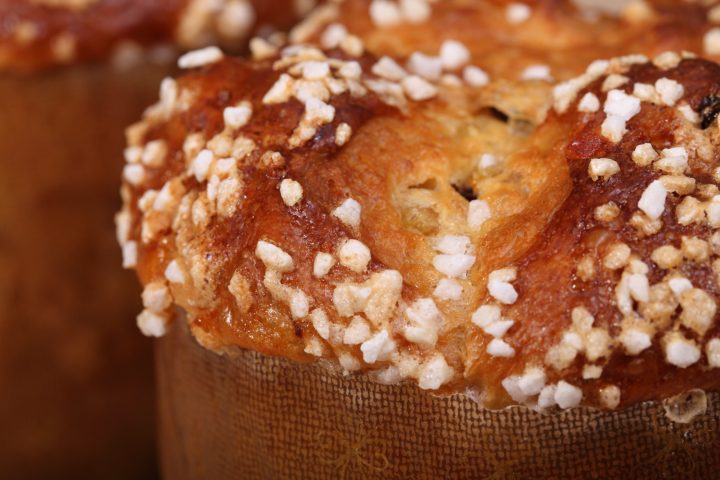
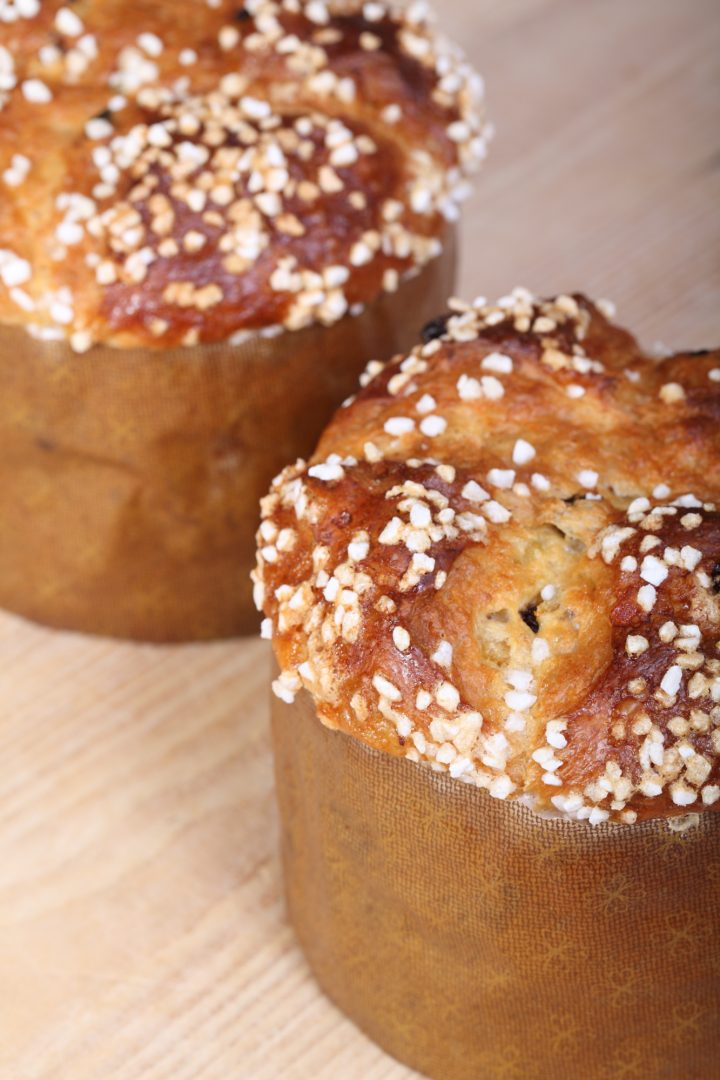
We baked the panettone several times and each time with great result and very much to our satisfaction. Because we liked it so much we did not change much. We did add the pearl sugar after the first try, which we like a lot because of that extra crunch to accompany the fluffiness. We made a version with candied peel, but have to say we still do not mind leaving it out and adding some cranberries for example, because the peel needs to be of great quality and not too overpowering to make it work.
We are also not a fan of the addition of essences or (artificial) panettone aromas, as they tend to overpower and coat the inside of your mouth a bit too intensely.
Update 2
We made a video of the panettone making process, so you can see the quality of the dough, the stretching process, the filling of the molds et cetera, before you start your own baking. The panettone were baked in our normal household oven. Hope it helps you get a great result!
We also made a version, using the Italian Caputo blue flour with 12.5% protein and it did the job very well, giving the dough lots of strength and a lovely fluffy and airy crumb in the end.
Pandoro
We also made the cousin of the panettone, the pandoro. It contains much more sugar and butter than the panettone, has no filling in the shape of raisins or peel and is also lots of fun to make. The smell of the fermenting dough of both breads is amazing. If we have to choose at this moment we like the panettone best of the two, it is just a little bit more exiting and it also tastes better when not completely fresh from the oven or after some time in the freezer.
Finding a good recipe to start with
The first thing we do when tackling a new recipe is finding a good basic and above all trustworthy source to start with. We browsed our baking bookcase and decided to use the ‘panettone with natural starter’ recipe from the, excellent but sometimes hard to read for a home baker, book ‘Advanced bread and pastry’ by Michel Suas. Because this book is aimed at professional bakers it takes some advanced thinking and calculating to get to a recipe that is doable and fun for a more experienced home baker. Also his instructions are sparse and scattered. Hopefully you will not say this about our recipe but you have to allow us some time to still improve on the version you’ll find below.
Other sources we consulted for our recipe are:
- The Wild Yeast blog
- ‘The fundamental techniques of classic bread baking’ by the French Culinary Institute
- ‘The Italian baker’ by Carol Field
- Our own sensible baking heads
We want to share with you our own attempts to get to a recipe that we are totally content with and that will work for all slightly experienced home bakers. Maybe these attempts will give you the inspiration to give it a try too or to give us some advice based on your own experience.
The basic recipe
We started by recalculating the amounts of Suas formula. The first attempt we stayed really close to the recipe steps, which are spread over three days. The first day of the process works well if you make large amounts of dough, but for home bakers we found it is no problem to skip this step and still get a great result. That is why our basic recipe version is a two day process, where the steps of day one and two are merged.
This recipe yields two panettones of around 460 grams each. The dough is extremely wet which can make you doubt if your amounts are right, but have faith!
Day 1
This step of making the initial dough is ideally done in the evening. This way you can continue with the recipe on day 2 in the morning, because you must take into account the long proofing times of the final dough (up to 6 hours for the final proofing alone).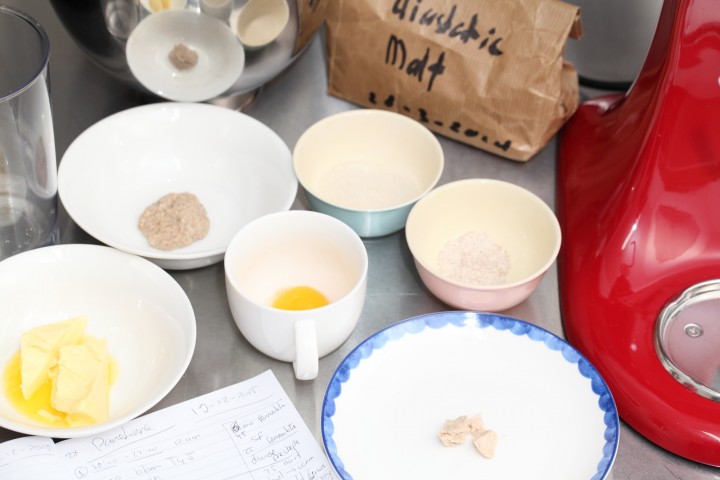
Ingredients for panettone dough nr 1
220 g strong white bread flour (13-14% protein)
120 g water
1.5 g instant yeast or 4.5 g fresh yeast
20 g sourdough starter (100% hydration)
one egg yolk (20 g)
45 g sugar
4 g diastatic malt (optional, gives great color)
45 g butter, softened
Making dough nr 1
All ingredients
In the bowl of your standing mixer add all the ingredients from the list above.
- Flour
- Water
- Yeast
- Sourdough
- Egg yolk
- Sugar
- Butter
Combine
Mix on a low speed for no more than one minute, until all ingredients are combined. You could call this a ‘shaggy mass’.
Rest
Cover the bowl and leave to rest overnight (for 12 hours) at room temperature.
Day 2
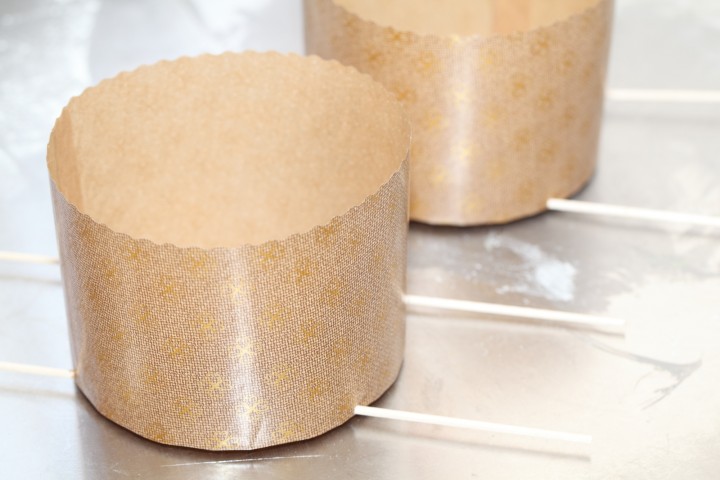
Panettone is usually made in classic panettone molds you can also find in our baking shop. You can also use a well greased baking tin. The dimensions should be around 13,5 cm / 5.3 inch diameter and a height of 9.5 cm / 3.7 inch.
Panetonne needs to cool upside down after baking, because the delicate and fluffy bread would collapse if you leave it standing up after baking. You can, rather ingeniously, prepare the molds for this by sticking bamboo skewers into them like you see in the picture. Directly after baking you hang the panettones upside down between for example two chairs. Alternatively you can also lay the panettones on their sides on a pillow after baking, so we have read but not (yet) tried.
The dried fruit does not have to be soaked before adding, because it will spend many hours in a very wet dough.
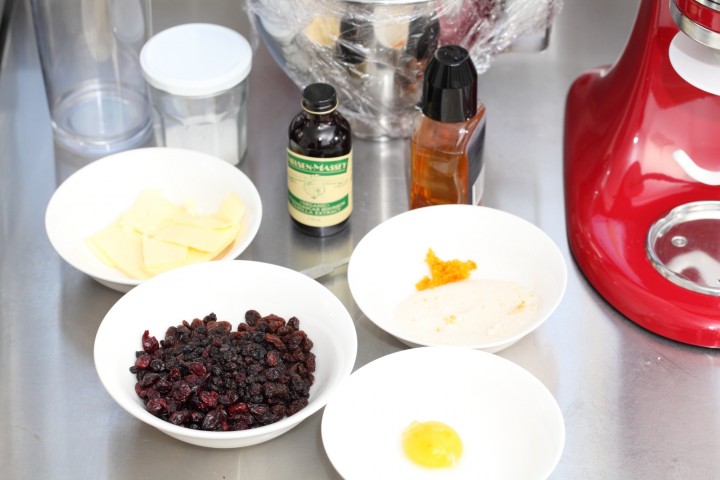
Ingredients for the final panettone dough
The dough you made on day one
60 g strong white bread flour* (13-14% protein)
30 g water (part 1)
one egg yolk (20g)
2.8 g salt
1 tsp vanilla extract
1 tsp orange zest
50 g sugar
70 g butter, softened
30 g water (part 2)
10 g honey
70 g raisins
70 g candied orange peel**
25 g candied lemon peel**
some egg white for brushing the tops
pearl sugar for decorating (optional)
*We used French type 45 in both the first and final dough and added 3 grams gluten powder to the final dough for more strength. But note that this French flour we used already had 12% protein.
**Due to lack of homemade candied orange and lemon peel we used 95 grams of dried cranberries for these test batches.
Making the final dough
Kneading start
Start by combining dough nr. 1 with the flour, water part 1, egg yolk, salt, vanilla and orange zest.
Knead for 4 minutes (stand mixer on speed 2) to develop the dough. The dough should be well developed before adding sugar or butter, as both sugar and butter prohibited development of the gluten.
- Flour
- Water part 1
- Egg yolk
- Salt
- Vanilla
- Orange zest
Kneading add sugar
Then add half the sugar and knead for 2 minutes. Then add the second half of the sugar and again knead for 2 minutes.
- Sugar
Kneading add butter
Now gradually add the butter in stages during the next 4 minutes of kneading.
- Butter
Kneading add water
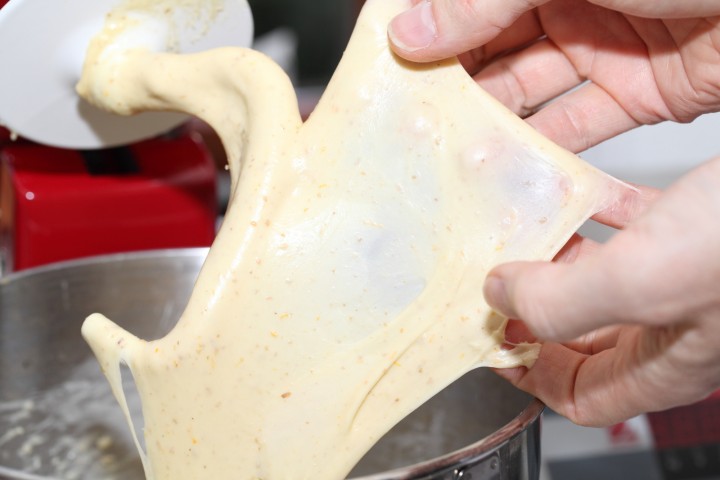
Next add the water part 2 and the honey and slowly knead (lowest possible speed so the water will not slosh out of the bowl) for 2 minutes until the water is completely absorbed by the dough. You should should now have a smooth yet very sticky dough. You should be able to pull a window pane from the dough like you see in the picture.
- Water part 2
Kneading add filling
When you have reached window pane stage you can add the raisins and candied peel and incorporate them into the dough. Knead/mix for 1 minute at a low speed and all the fruit should be distributed through the dough.
- Raisins
- Candied peel
Rest
Cover the bowl and leave to rest for 45 minutes.
Stretch & Fold
After the rest, perform two complete sets (so one set directly after the other without rest in between) of stretch and folds and see the dough develop from very slack into a plumper shape that somewhat resembles a ball. Use a dough scraper and use some flour on your bench and dough to make this task easier and less sticky.
Rest
Cover the dough and let rest for 25 minutes.
Preshape
Now divide the dough into two equal parts and pre-shape them into a flat ball resembling shape.
Rest
Again cover the dough and let rest for 25 minutes.
Shape
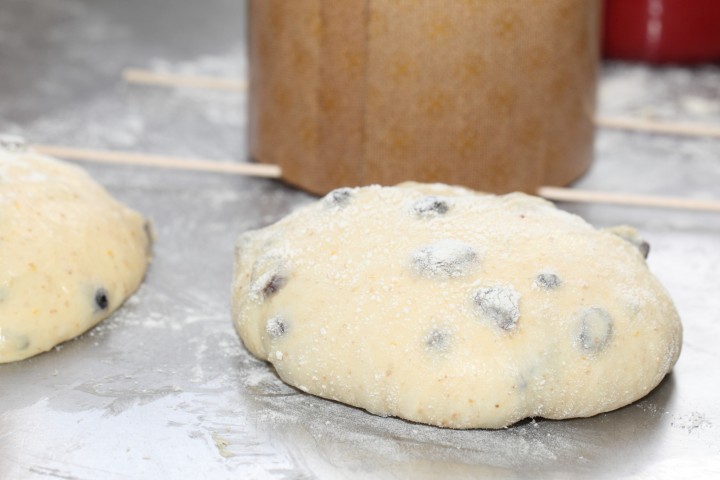
Shape the two pre-shaped pieces of dough into still sort of flat balls as well as you can, use some flour and a dough scraper to tuck the dough under. Make sure the shapes will fit into the panettone molds. Quickly with one swoop of your dough scraper lift each dough ball and put them inside the panetonne molds. Cover the molds with floured cling film.
Proof
You are now at the final proofing stage which will take, depending on your room and dough temperature, between 4 and 6 hours.
Baking the panettone
When the top of the dough is starting to reach the rim of the paper mold, preheat your oven to 175 °C / 345 °F, conventional setting. Make sure you have something prepared to hang the panettones upside down as soon as you take them out of the oven. We used two chairs for this.
The panettones are ready for baking when the top of the dough is slightly above the rim of the paper molds. Just before you take the breads to the oven you can cross cut with scissors and/or glaze your panettones and sprinkle them with pearl sugar (use egg white to make the sugar stick). Take the molds to the oven. You can try and add some steam during the first stages of baking.
Bake for 40 minutes, keep an eye on the color of your panetonne. We had to turn the oven down to 160 °C / 320 °F after 15 minutes to stop the browning process. Take them out of the oven and immediately hang them upside down so they will not collapse and be careful as the panetonnes are very fragile at this stage. Leave them hanging for at least two hours, so the crumb can stabilize.
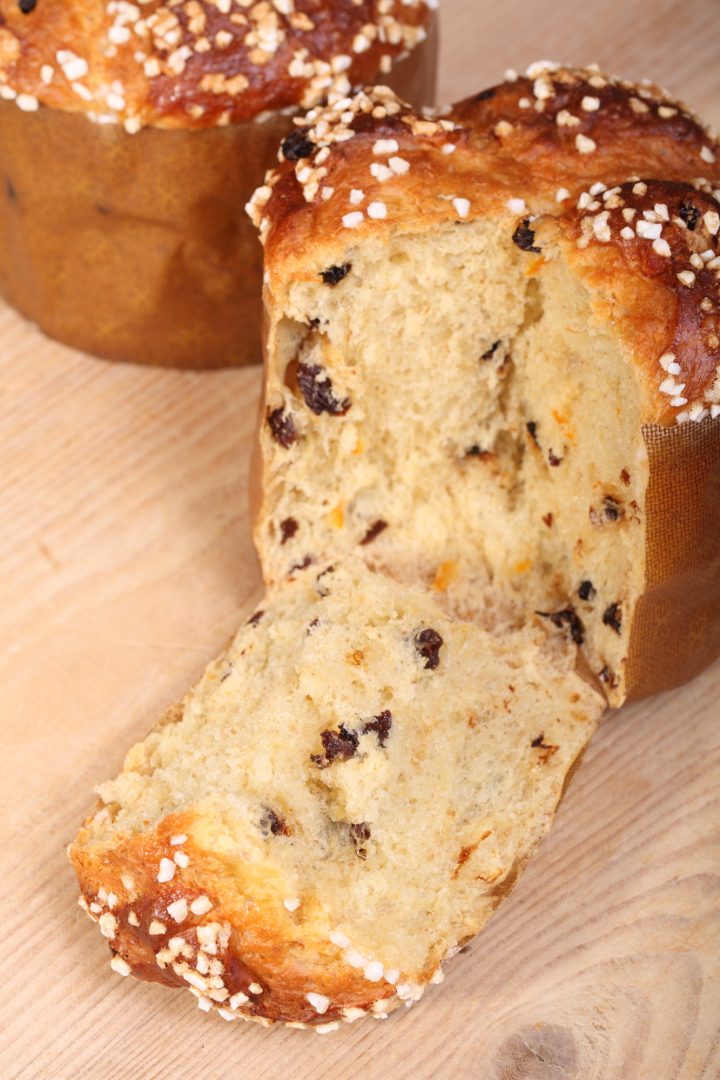
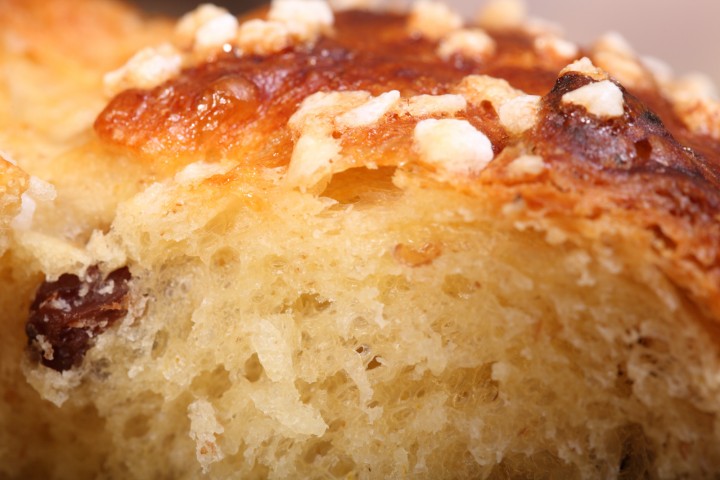
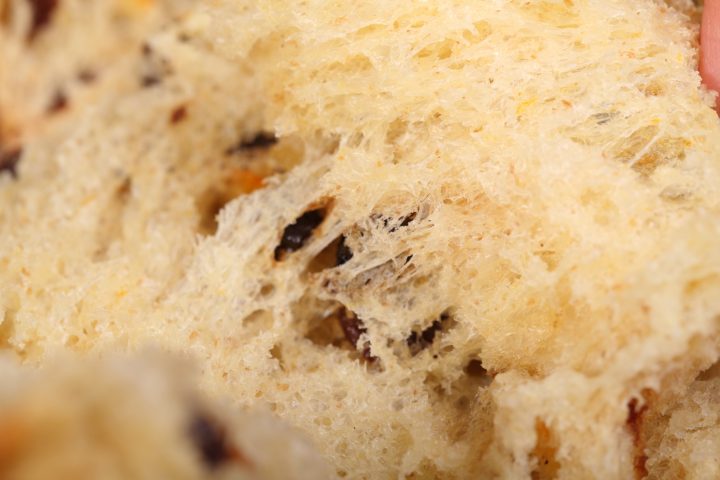
Enjoy the fluffiness while they are still a bit warm!



Douglas G. Zylberkan says
Hi.
I was reading your post and found very interesting, as a professional baker, and this is the time of the year that we start baking our panetones.
I have develop a formula that works real good, they all basically the same.
I think you should work with baker percentage it makes your life a lot easier and also its simple to expand the quantity you desire.
It looks very good, the crumb the structure, I’ll try it as a test since we have our own formula.
Weekend Bakers says
Thank you Douglas, for your kind words and advice. We do have dough calculators for a lot of our recipes, with bakers percentages, and we will try to incorporate it with this recipe too.
Hope you will let us know what you think after you hopefully get a chance to test the recipe.
Wishing you an excellent Holiday baking season!
Phil Stowell says
Hi,
Just a quick question on the sourdough starter (100% hydration). Do I just add the dry starter? If not can you advise what to do as i’ve never used this before.
Thanks,
Phil
Weekend Bakers says
Hello Phil,
If you use a dry form of sourdough starter you need to compensate the moisture. So the 20 grams we add consists of 10 g water and 10 g flour (100% hydration). In this case you can add 10 g water to the recipe as compensation.
Also check out how we make the sourdough starter culture we use:
www.weekendbakery.com/posts…asy-steps/
Just to be sure we are understanding each other about the subject.
Hope you like the recipe,
Marieke
Gianna says
Good morning! I had saved the wild yeast blog panettone recipe on pinterest, however the website is no longer active. I was wondering if you could (if you have the recipe saved) email me a copy of their recipe? I had hoped to compare it against yours an another, and I was upset to find it was no longer there!
Wanted to use a rainy day to bake up a storm!
Weekend Bakers says
Hello Gianna,
You are right it all seems to be gone. Such a shame! We too did not save this recipe I’m afraid. There might be some more info on the Fresh Loaf: www.thefreshloaf.com/searc…/panettone wild yeast
Hope you can still make the most of your rainy baking day!
Charles Saliba says
I am going nuts for the recipe of this panettone also. I have all the ingredients write down but do not have the steps to make it work.
I am trying all over the internet someone that have it to send me by email too.
Weekend Bakers says
Hello Charles and Gianna,
Good news, the site is online again: www.wildyeastblog.com/panettone-recipe/
My husband made a good guess and suggested it could be a temporary server problem or something and to give it another try…maybe a coincidence but voila!
gloria miller says
I do nit see where to print the recipe.
Weekend Bakers says
Hello Gloria,
You can print all our recipes by using the print option in your browser. This way you will be able to print the recipe without the pictures and things like menus and headers.
Hope this helps!
Hilary says
Have you baked in the Rofco?
Weekend Bakers says
Hello Hilary,
No we never bake our pastry and brioche and panettone in the Rofco. We are a bit spoiled and have a dedicated other oven for that. So we cannot give you the best tips and settings for this one in the Rofco.
Ermine says
Hi,
Does one have to also cool the mini panettone upside down?
Looking forward to your response
Weekend Bakers says
Hello Ermine,
We have found ourselves it is not needed with the smaller versions / less mass. But if, for various reasons, it is really important you get a perfect result and you do not want to take any chance, it will not hurt to cool them upside down of course. Just a bit more work…
Good luck with it and happy panettone baking!
dan kumler says
Concerning your panettone project, several people asked what is the protein in of the flour you use. Your reply has been that you use French 45 flour but no where did you mention the protein content. French 45 flour is similar to our cake flour in the US and has a protein content from 8 to 9 %. This may explain why so many people {myself included} were having their panettone collapse. Most recipes I have worked with call out for a high protean {13-14%} flour. KA’s Sir Lancelot is a good example. I am sure many bakers as well as myself wonder what you are doing differently to achieve such a beautiful panettone.
Please advise,
D
Weekend Bakers says
Hello Dan,
Yes, we do use the type 45 flour which has a protein content of around 10%. But as you can read in the remark under the ingredients list we do add extra gluten to this flour to give it more strength and indicate to use strong flour for this recipe in the ingredients list. So you can either use our type of flour with extra gluten added to get to the 13% to 14% or you can use the high protein flour like you suggested (Manitoba for instance). Both should give a good result.
Sorry if it was not clear enough. Hope it will work out well. Enjoy your baking!
Eshel says
Thank you for this lovely recipe.
I am trying this recipe now and it’s looks like there is a problem- it just don’t rise. Even after 10 hours at average temp. of 23 celsius. Well, my only adaptation was to convert the commercial yeast with overall 3 times more very ripe sourdough starter (of course adjusting the water and flour).
Weekend Bakers says
Hello Eshel,
We think it will very probably not have been able to cope with the fat and sugar in this recipe. Sugar withdraws water from the cells of the yeast and we think the membrane in your yeast cells in your sourdough (yes there is yeast in sourdough as you probably know) cannot handle rich and sugary dough, the same way commercial yeast can.
Sue Harris says
Hi,
Great website!
Am hoping to start this recipe this weekend. Quick question though: I have a child with egg allergies. Is it possible to leave out the egg altogether or could you advise a substitute instead?
Kind regards,
Sue
Weekend Bakers says
Hello Sue,
In this recipe the yolk is used for color, moisture and emulsification an stabilization. It is a challenge to get a good replacement for these different functions. We do not have hands on experience with this, but one of the advised options would be a vegan egg replacer / vegan egg yolk. To keep it simple the alternative would be to use part extra butter and part moisture (either water or milk or yogurt) (around 2/3 of the weight of the yolk in total, so 14 grams in part one and 14 grams in part two of the recipe). You can also add (soy) lecitine for the emulsification (this is an ingredient often used in bigger bakeries, but again no experience with this ourselves).
Good luck with it and hope you will get a satisfying result.
Greetings Ed & Marieke
Annelies says
Hi,
4 pannetones are hanging upside down right now to cool.
They feel so soft and smell so good!
Thanks for the recipe and also for the panettone molds I ordered from you this week.
such a nice project to do 🙂
Groet van Annelies
Weekend Bakers says
Hi Annelies,
Thank you so much for the enthusiastic feedback. Yes, the smell is amazing, one of the best we think! Hope you enjoy the eating and sharing and have a very happy holiday, baking some more!
Groetjes,
Ed & Marieke
Emily says
Thank you so much for such a wonderful recipe. The instructions and photos were easy to follow and we have had very successful results. We are enjoying the still-warm fluffiness right now! Just one question please…do you use salted or unsalted butter? I followed your directions exactly but used unsalted butter. We feel that the overall taste could have been even better if it had a bit more saltiness but I’m concerned that if I had used salted butter that the rise would not have been as successful. What is your advice? Thank you again for taking the time and effort to explain how to bake such a successful Panettone.
Kind regards Emily
Weekend Bakers says
Hi Emily,
Thank you so much and so glad it worked out well. Yes we use unsalted butter and we would advice to do so too, and just add a bit more salt to perfect the amount for your personal taste.
Happy Holiday baking!
Greetings from Holland,
Marieke & Ed
Lesley Hofmann says
Is there any chance you could publish your Pandoro recipe? The Panettone was SO lovely, I would love to try this as well!
Weekend Bakers says
Hi Lesley,
We only made the pan d’oro once or twice but somehow it was a disappointment. First of all more butter goes into the recipe, but somehow the taste was a bit dry and the structure of the crumb not so good as with the panettone. Second because of the lack of filling, it was not that interesting to eat, again compared to the panettone. This recipe was also based on the Suas recipe. Maybe we missed something for the moment, but we would rather make a panettone without filling than the pan d’oro, based on our first experiences.
At the moment we do not have the time to dive into other recipes, but we hope you can give it a try with another recipe. If you do have a great result, we would love to hear about it of course!
Lesley Hofmann says
Thanks for the feedback – I’ll abide by your wisdom, as I have found some very high butter stollens not very nice, so it could well be the same with the pan d’oro. Your Pannettone is just so GORGEOUS – You probably can’t improve on it!
Weekend Bakers says
Thanks Lesley and happy Holiday baking from Holland 🙂
Lesley Hofmann says
Man, but this is GOOD – Thanks so much for your wonderful instructions. I will definitely be making it again!
David says
I’ve just used this recipe as my first venture into Panettone and while it wasn’t too successful it’s something I can learn from.
I’ve used a Canadian White Bread flour (in UK) and I had the impression that the 2nd Dough was way too sloppy. I don’t know why I was surprised as with this flour I almost always reduce the water content by ~10% compared to published recipes (when making bread). Even though I know this I needed to try it with your recommendations first.
My mixing times were longer because I mixed by hand but all the liquids were absorbed. The moulds were near enough the same as recommended (14cm dia by 100cm deep) and after 4.5 hours the dough had risen almost to the top.
Initially in the oven at 175C they browned AND sank very quickly, I reduced the temperature to 160C and baked for 35 minutes.
Now they are hanging upside down and cooling. They don’t look so good at the moment but once they are cut …….. 🙂
Next time I’ll reduce the overall water content and maybe reduce the proof by 30 minutes.
Thanks for the recipe,
David
David says
Well the top was burnt and they did sink badly but when they were cut they didn’t disappoint. Inside they were just as they wer supposed to be, light, fluffy and with the fruit equally dispersed. It looks like the dough wasn’t too wet despite looking wetter than the photo above.
Just need to focus on the sinking issue now 🙂
Gill Flesher says
Same issue as me, although mine only sank a little. It is just over-proving. I’m definitely not giving up as the crumb and flavour was amazing -even with the over proving.
Gill Flesher says
FYI I also used Canadian white flour.
Weekend Bakers says
Just curious what the protein percentage is of this flour (if this info is on the label of the bag)…
Weekend Bakers says
Hi David,
We love it when people already make their own assessments and know what they are going to change for the next round. The question we have is how strong this Canadian white flour is / what protein content it has and if it would be an option to try another flour (maybe like we do, the French type 45 flour with added gluten powder).
Most important: Keep an eye on the temperature in combination with the development of the dough and check more often toward the end of the proofing time. Another thing, because the mixing is so intense and you did it by hand, it could be the dough was not as developed as done with our kneading. With this wet dough it is a challenge and using a hand mixer with dough hooks would also be an option.
Great you are going to give it a second run!
Gill Flesher says
Update to below. It was a bit over-proofed and did sink slightly in the oven, but still absolutely delicious. I will be baking it again and will just cut back the final proofing time – even it it hasn’t reached the very top of the case.
I may also try adding a pinch of dried yeast at day two rather than my sourdough culture to see if this reduces proofing time – without impairing flavour. I don’t always have the luxury of time, so it would be good to see if it is possible to speed things up.
Thanks for the great recipes. Keep up the good work!
Weekend Bakers says
Hi Gill,
Great to hear! We think, with your own ideas for improvement / alteration and a few more turns it will be absolutely perfect 🙂
Happy Holiday baking!
Gill says
My panetonnes are currently on the final proof . Seem to be taking longer than the 4-6 hours which is worrying! My molds are exactly the right size and they are in a warm place. I have been reading the comments and a few people seem to have had over proofing issues. Can i use the simple gentle push of a finger on this dough as you can with standard bread doughs? I think it could be another 3 hours before they reach the top. They have already had 5 hours. Any advice gladly welcomed. The dough was so fabulous and silky I’ll be gutted if they collapse in the oven.
Weekend Bakers says
Hi Gill,
A bit of a challenge to judge, but next to the room temp it is really important to also know the temperature of the actual dough (don’t know if you can measure this). If it is still a bit on the cool side (say around 22 C) then your dough could get a slight boost by putting it in a ever so slightly warmed up and turned off again oven.
Next to this it is important what flour you have used, if it is a good strong one, like we suggest in the ingredients list, your dough will be able to grow and be strong enough to hold its own during the longer proofing process. And yes you can check the dough very carefully. After this, and with the tips above, hopefully you can judge. And maybe stay on the safe side and bake, when it is close enough to the rim, (better than a collapsed version of course).
Good luck with it!
Greetings,
Ed & Marieke
Cate says
The detailed steps will be extremely helpful in making panettone.
I have a couple of questions.
1. Sourdough starter: does the type of flour in the starter matter? I just started a 50/50 organic unbleached all purpose flour and rye flour starter.
2. The bakery supply company where I purchase my flours offers both malted and unmalted flour. I usually purchase flour that is already malted. Unfortunately I do not know the percentage of malt added to these flours. The mill produces flour for bread bakeries and many of the Neapolitan style pizza restaurants. Would a flour malted for those applications contain too much malt for a panettone? Would it be better to use an unmalted flour and add diastatic malt separately to control the amount of malt in this application?
3. If I wanted to hand knead, would a slap and fold work? Since I do not own a spiral mixer, I often knead bread by hand. My KitchenAid mixer leaves a lot to be desired when it comes to kneading.
Thank you for your thoughts and insight.
Weekend Bakers says
Hello Cate,
1.You can use any sourdough you want, we use rye. It is a small amount compared to the total dough and you will not really distinguish what flour you used for it.
2. We use unmalted flour, but you need to use a strong flour with enough protein. We use French type 45 in both the first and final dough and added 3 grams gluten powder to the final dough for more strength. If you want to add diastatic malt we would suggest adding it separately.
3.We do not use this slap and fold technique ourselves, but it is possible. Maybe it would be an idea to do the initial work with the KitchenAid and then by hand, because as you can judge it is a quite intensive process, and the dough is very sticky, so maybe follow up by hand after all the ingredients are incorporated and if you see the dough needs more development.
Good luck with it!
D. Zazzi says
I noticed on the day 1 dough, you call for 100% hydration in the starter. I am not sure what you mean by that. I have two starters, one is a rye starter which is quite stiff, the second is a white whole wheat starter which is more liquid. How do I know the hydration % of my starters?
Thank you
Weekend Bakers says
Hello again Zazzi,
100% hydration means equal parts water and flour so in this case it means the culture has 10 g water and 10 g flour. But because the amount is so small, if you are not sure which one to use, it will probably not make a very big difference.
Mimi says
1.5 g yeast seemed like very little amount considering other recipe say for Hot cross buns use 7gms yeast gor 455gm flour
Weekend Bakers says
Hi Mimi,
1.5 g is the correct amount for this recipe. Because the dough rests overnight it is developed over a long period of time and the yeast has time to multiply, so less is needed to start with.
Hope you give the recipe a try and happy baking!
Helena says
Hi,
Is it possible to make this formula without yeast?
Thanks
Weekend Bakers says
Hello Helena,
What would you want to use as an alternative?
Frederica Huxley says
I do all my baking with sourdough starter alone; I would imagine that a substitution of around 100g 100% starter would work as well as added yeast.
Weekend Bakers says
Hello Frederica,
In this formula the yeast does most of the development / rising of the dough and the sourdough is added for taste more than actual development. We have not made this recipe solely with sourdough, so we cannot advice you based on experience with this, but your suggestion sounds like a good starting point. Just always make sure the total hydration in the recipe is correct and the flour you use is strong enough to cope with the long(er) proofing times.
Vlad says
It is unlikely that this exact formula can be made without the store-bought yeast. Nevertheless, panettone can be made completely with a specific type of natural starter, called “lievito madre.” It is much less sour, and has more natural yeast and less bacteria than the typical sourdough. Those properties are achieved by very low hydration (50%), and special storage conditions. More info here: staffoflife.wordpress.com/natur…-naturale/
Lievito madre can also be used for other breads where acidity is undesirable, e.g., brioche.
Weekend Bakers says
Thank you so much for sharing this useful information with us bakers Vlad!
Jon says
Made exactly to the recipe, dough was very wet would not hold a ball even after a few stretch and folds. proofed at 80F and still was not up to the top of the mold after 6 hours. Baked anyway, rose nicely then partially collapsed after 30 minutes, continued to bake until interior was 185F. Tried to hang one upside down, first one just fell apart, it had a huge hole in the middle. Second one a cooled upside down on the baking tray, after it was cool it looked OK apart from the flat top. When I looked at it this morning it was the same as the other, cooked around the outside, top and bottom, however a huge hole in the middle.
I am thinking they were way over proofed, next time I will add more flour.
When the dough is first put in the mold how far should it come up, how much do you expect it to have increased in size when proofed correctly? I know if I let 75% hydration sourdough bread increase in size more than double it is over proofed. It did taste fantastic though!
Weekend Bakers says
Hello Jon,
How big were the molds you used? The dimensions should be around 13,5 cm / 5.3 inch diameter and a height of 9.5 cm / 3.7 inch. As you can maybe judge from the pictures as the dough goes into the molds it is more a disc than a ball and it fill around a quarter or a third of the mold.
When proofed it is just below the rim of the mold (see fourth picture in first row of pics above).
Glad it tasted good and hope you will give it another try. Lots of recipes we start with need at least a few turns to make them our own and get a satisfying result.
Happy baking in the New Year!
alec says
I credit you for being original and creative. Michel Suas formulae and experience is outstanding. He has spent years of scientific research to correct his formulars’. Why do you alter something that is perfect just to fit onto your blog?
Weekend Bakers says
Hello Alec,
Thank you for your comment. We understand where you are coming from, but we can tell you from the hearth that this is not our motivation. As you can hopefully judge from the recipe and explanations and pictures above and also our other recipes, we put in a lot of time and effort, to make recipes that really work for us and hopefully other home bakers.
Happy baking and a lovely festive season for you and your family!
Karen Aslett says
Hi Ed &Marieke you’ve done it again another fantastic and do-able recipe,thank you. No sooner had they been made and cooled down they were gone,hardly had time to admire them! Like you I wasn’t fussed on peel so used a mixture of sultanas,cranberries and apricot soaked in a tablespoon or two of Cointreau,I also had to mix a bit longer to get a good dough and mine for some reason took about ten hours to rise,but the end result was perfect. Have you seen this site before-signorbiscotti.wordpress.com ,I have made both versions both ok but so long winded and to much wear and tear on your mixer and not as light and fluffy as yours! Thanks for sharing have a Good Christmas.
Weekend Bakers says
Hi Karen,
Thank you so much for sharing your experience with the recipe. That sounds more than excellent. And you were right to be patient to get the perfect result. We recognize the swiftness with which they disappear, same here!
Happy Holiday baking and a very merry Christmas to you too!
Sherri says
Thank you so much for the recipe! I have been wanting to try making panettone for a while. It turned out great. I made one big one because I only had the large size papers. I needed to develop the dough a little longer than you did. It took longer to get a window pane. But otherwise, I followed the instructions very closely. Will make again for sure as this one will disappear quickly!
Weekend Bakers says
Hi Sherri,
Wonderful, again a message of success. Great to hear you had good results with the bigger version.
Happy Holiday baking and sharing!
Magdalena says
Thank you for sharing this recipe. I am just making my very first panettone but I have a bigger mold so will be making 1 panettone instead of 2. Do you have any suggestions regarding adjusting the baking time?
Weekend Bakers says
Hi Magdalena,
Our estimation would be between 50 and 55 minutes, depending on the shape and your oven. Keep an eye on it to see how it goes!
Sara Perry says
I follow your steps. It is wonderful that you can guide us and inspire us.
Weekend Bakers says
Hi Sara,
Thank you very much and happy holiday baking!
Maja says
Hello. Following a couple of failed attempts using different recipes, I’ve just followed your recipe to the letter & made panettone. I was very happy with the dough, & proved it for about 6 hours until it was close to the tops of the molds. Sadly, in the oven they both collapsed on themselves very quickly & the tops were completely concavely the end of baking. I’m very disappointed as you can imagine. I want to understand what went wrong: they did not look overproofed & were nicely domed, so I am wandering if it may be the oven? My oven is gas & only has a ventilated function- could that be it?
With thanks
Weekend Bakers says
May we ask what flour you used and what was the protein content?
Magdalena says
Actually the same happened to me, the panettone have risen nicely during proofing but collapsed in the oven. I used very strong Manitoba flour.
Weekend Bakers says
Hi again Magdalena,
Over-proofing would be the obvious answer. Don’t know if you made a bigger version that you mentioned and / or you used a mold that is different from ours and you tried for the dough to reach the top of the mold, but the volume is actually even bigger (so could be with your mold it should not reach the top and is still well proofed). Another thing is to be careful, because after proofing the panettone is delicate and if you bump it or close your oven with a bang or your baking tray bends from the heat shock, it could also collapse. Or if you use a fan (convection) it could be to ‘fierce’ maybe and cause the collapse.
Hope this info is useful and we always advice if possible to make the recipe as described by us the first few times, before changing anything.
Happy Holiday baking!
Magdalena says
Thank you for your reply. I did intend to stick to your recipe to the letter but accidently bought large paper miles instead of the medium size. When I realised it was already too late, my panettone was in progress, so had to use the bigger size. I baked it for 45 minutes. The taste and structure of the panettone still turned out fantastic. I’m giving it another try, this time without waiting for the dough to reach the rim. Fingers crossed it will not collapse this time 🙂
Weekend Bakers says
Keeping our fingers crossed with you!
Happy panettone baking
Julia de Ruig says
Hello wonderful bakers,
I m having a go at your panettone recipe and I m stuck at the point where after combining all of the ingredients I leave it to rest for 45 minutes and then “perform two complete sets of stretch and folds”. Do you mean stretch and fold, rest for 50 minutes, stretch and fold rest for 25 minutes…? Help!
Weekend Bakers says
Hi Julia,
Great that your baking too! You perform two sets, one after the other directly. So no rest in between, just two full sets in one go to strengthen the dough. Hope this is clear!
Good luck with it and happy Easter baking,
Marieke & Ed
Julia de Ruig says
Marieke & Ed, thank you so much for your quick reply! Very grateful!!!! Just on time! 😀
Have a lovely sunny Saturday.
Lucienne Bronkhorst says
Vorige week ben ik ook aan de slag gegaan met het recept uit dit boek, had het wel omgerekend naar een lager gewicht, maar geen goede vorm. Heb het maar in een tulbandvorm gedaan, 1kg deeg in een keer. Dat was helemaal geen goed plan 🤔, het zakte vreselijk in na het bakken, veel te zwaar. Het was echter wel gaar, ik heb wat geproefd en het was eigenlijk heerlijk! Maar komende week ga ik het weer proberen, heb net panettone-vormen bij jullie besteld. Het valt me op dat in het boek een Italian levain wordt gebruikt, dit is een vrij stugge levain die je om de vier uur moet verversen om hem goed actief te maken, maar ook om hem zo min mogelijk zuur te maken. Ik zag dat jullie gebruik maken van een 100% hydratatie levain, wat is daar de reden van? En zou het een goed idee zijn om T-55 te gebruiken?ik ben benieuwd naar jullie reactie, die neem ik zeker mee bij mijn volgende poging! En nog een vraagje: kunnen jullie aan papieren duifvormen komen voor Italiaans paasbrood? Groetjes, Lucienne
Weekend Bakers says
Hoi Luciene, het inzakken komt inderdaad door de grote hoeveelheid deeg in combinatie met het niet omdraaien. Over de levain, de recepten in het boek zijn eigenlijk bedoeld voor professionele bakkers, vandaar de korte cryptische instructies en de grote hoeveelheden. Als je bijvoorbeeld 1 kilogram levain nodig hebt voor stevige productie panettone’s, dan is het over 4 uur verversen een goed idee. Echter een levain van 4 gram over een periode van 4 uur 4 keer met 2 gram water en 2 gram bloem te voeden lijkt ons een vrij nutteloze bezigheid. Vandaar de pragmatische aanpak om in 1 keer 20 gram toe te voegen. Met ons desem heeft deze aanpak wel tot complexiteit van de smaak geleid maar niet tot zure smaak. Het bakken met T55 lijkt ons geen probleem. De bakvormen kunnen wij op het moment niet leveren, maar we zullen er naar gaan kijken. Happy baking!
Lieven De Bruyn says
Avé bakgoden!
Heb jullie panettone – recept uitgeprobeerd… een ware triomftocht! Men vrouw is Italiaanse (met een hoofdletter ‘i’ ja…😊) en dus wat dergelijke baksels betreft een eerder stug publiek… maar ; geweldig! Haar 83 jarige moeder kreeg er de tranen van in de ogen het lieve mens. Enfin, ik heb een kudde goede punten op men rekening, waarvoor dank! Ps. Het systeem met de stokjes en het omgekeerd hangen is ‘inspired’…top!
Groetjes,
Lieven
Weekend Bakers says
Gegroet Lieven,
Bakken kan bijna niet meer voldoening geven dan hetgeen u beschrijft! Wij hebben veel blije gezichten gezien naar aanleiding van onze baksels, maar het ontroeren is van een volgend niveau. Hulde en wat fijn dat ons recept dit effect teweeg heeft mogen brengen.
Dank voor het delen en nog veel meer van deze mooie bak-momenten!
Ed & Marieke
Lieven De Bruyn says
Ja… Ze had er al wel lekkere gegeten sinds ze in België verblijft (nu zo’n 10 jaar), maar nooit in combinatie met de juiste textuur zoals bij haar bakker in Monteverde… Afin, ik weet wat klutsen volgende Kerst! Er gaan hier nu wel ‘vragende’ (lichtjes naar het ‘eisend’ neigende…) stemmen op om ook die andere Italiaanse Kerstklassieker uit men oven te prutsen, namelijk de Pandoro. Ehm…jaja, jaja…heheheh… Help ??! 😁
Weekend Bakers says
We zijn bezig Lieven, want de Pandoro mag natuurlijk niet ontbreken! De eerste resultaten zijn veelbelovend en smaken naar meer. De Pandoro heeft overigens van alles meer dan de Panettone, meer suiker, meer boter, meer eieren, alleen geen vulling. De geur tijdens de lange rijs is fantastico!
Wordt vervolgd…
Bas van Gestel says
Hi Marieke and Ed,
You should check out www.instagram.com/thisisfromroy/ . He claims to have perfected the pannetone (and sells ’em at $50 a piece ;-)). They look good though. He uses a stiff starter (pasta madre).
Will try out your recipe soon (easter?).
Kind regards,
Bas
Weekend Bakers says
Hi Bas,
Wow these panettones look amazing, but he must have some rather special clientele to be able to sell them at such a price. Thank you so much for sharing, this looks very inspirational indeed.
We will be baking more panettones towards Easter too of course.
Hope you will have as much fun with it as we have.
Ed & Marieke
chris says
I used a different recipe for quantity but used your recipe for method, turned out very well. I like to soak the raisins in orange juice whether they need it or not and I used grapefruit peel. Looking forward to trying the final version.
Weekend Bakers says
Hi Chris,
Very good! Like your variation with the orange juice. We will keep on baking these and try different things and small variations too.
Order Cakes Online says
I have learned a lot about Panettone.. Thanks for sharing…
elena says
Hello!! i was waiting for this recipe! thanks for sharing! one question thou: what if i don’t have a sourdough starter?
Weekend Bakers says
Hello Elena,
You can leave out the sourdough. There will be a slight change in flavor profile and we expect the proofing times to be more or less the same, maybe a little bit longer.
Let us know how your version turns out!?
Happy baking in the New Year,
Marieke & Ed
elena says
Dears, i did it! Without a sourdough starter and it turned out to be great! I extended the proofing time to 18 hours and I am very satisfied with the result. The panettone vanished immediately and I don’t have any picture to share, but I will come back with some. Many thanks and congrats for your beautiful work!
Weekend Bakers says
Hi Elena,
18 hours! We presume your dough proofed some place very cool? Very good to know your result was so great.
elena says
yes, it proofed in the refrigerator.
Hanaa says
That looks really good and fluffy. I’m glad you decided to share the recipe with us early 🙂
Weekend Bakers says
Hope you will give it a try Hanaa, it has already been a big hit with our friends and family and our third attempt turned out even fluffier so we are very pleased.