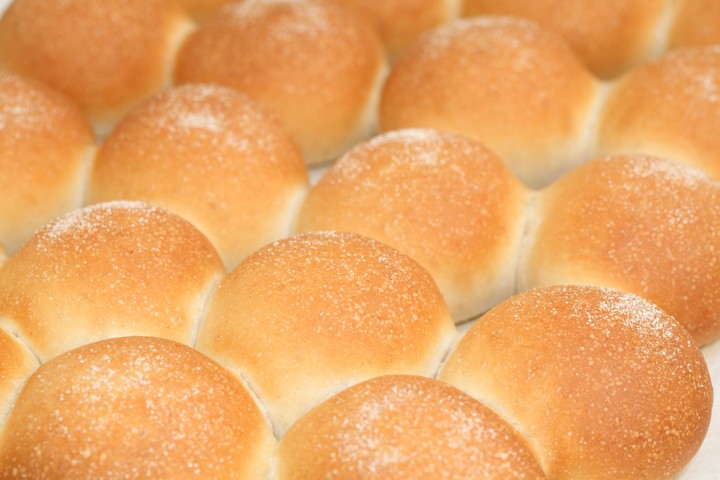
Using high gluten flour with homemade malt, combined with long kneading, means you can proof these buns to ultimate fluffiness
Making and eating fluffy buns has always been a joy, but with the recent addition of our homemade diastatic malt, in our eyes, they reached perfection.
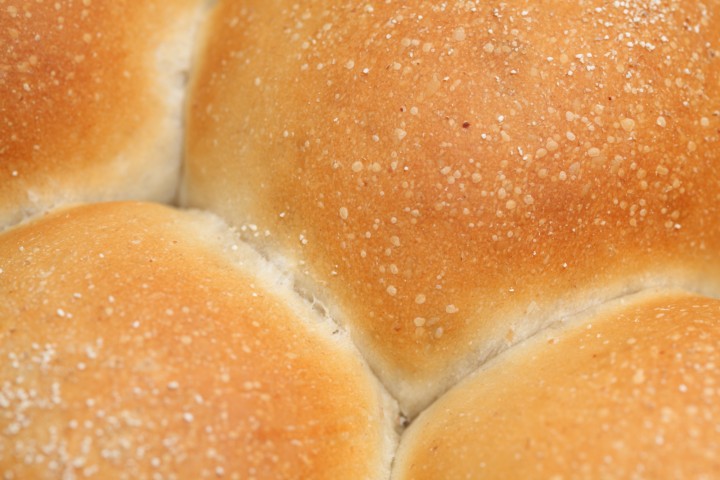
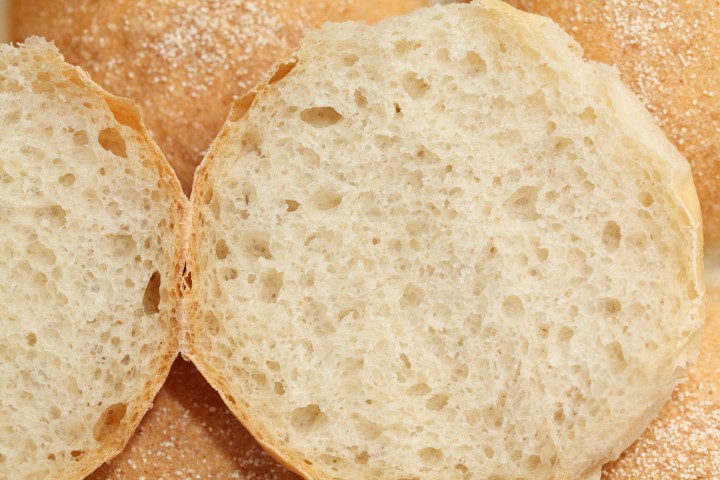
So with this recipe we want to show you what a difference a small quantity of malt can make in terms of proofing, texture, color and crust. It allows for longer proofing to get to a light and airy texture. The enzymes in the malt break down starch into sugars which in turn promotes a beautiful golden crust color. The use of strong flour combined with longer kneading also builds strong gluten structure. This again enables you to have a long final proof without risk of collapsing so you can aim for ultimate fluffiness!
Happy bun baking!
Ingredients for Fluffy White Buns
makes about 12 buns
500 g strong bread flour / Manitoba flour*
5 g diastatic malt (see how to make your own)
24 g fresh yeast / 8 g instant yeast
10 g honey
8 g salt (I would use 7 which works for me but 8 is more standard)
300 g (same as 300 ml) water
20 g fresh dairy butter – softened
Tip*: You can use regular bread flour / all purpose flour / plain flour for this recipe and add 20 grams gluten powder to get a similar result.
Making the Fluffy White Buns
In a mixing bowl combine flour, diastatic malt, salt, yeast and honey and 200 g of the water. Gradually add the rest of the water while mixing and when the dough starts to come together, add the butter. If you use a standing mixer, knead for 10 minutes, longer by hand, and aim for very good gluten development. Make sure the dough is not too sticky or too dry. It can feel a bit tacky, which means that when you poke the dough with your dry finger it should stick for a second but then peel of as you remove your finger. So if you need a bit more water to achieve this, just add a few grams more. Leave to relax for 15 minutes.
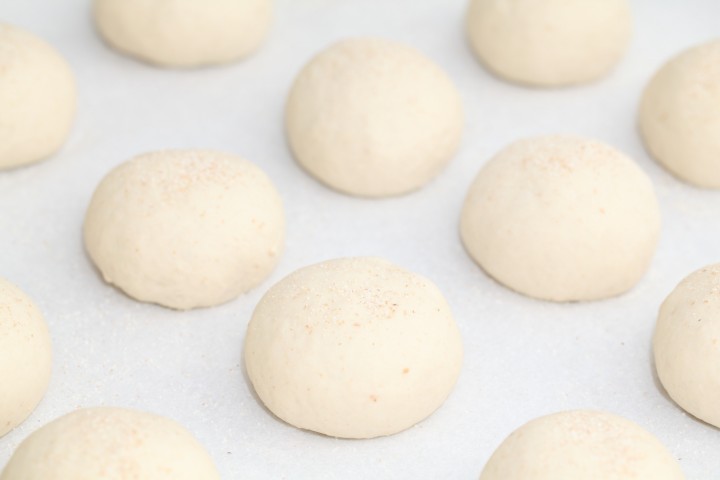
Now divide the dough into 12 equal parts and preshape into balls. Again leave to rest for 15 minutes. Gently press the balls with your hand until slightly flat and round again into smooth balls. You can lightly dust your work surface with flour but do not use too much or it will be very hard to shape them because the ball will slide around on the flour.
Place the buns on a baking tray lined with a baking mat or baking paper and make sure to leave some space (3-5 cm / 1-2 inches) between the buns so they can expand freely. It is no problem if they touch each other after proofing.
Now the rolls are ready for their final proofing. Loosely cover them with floured clingfilm or a proofing cloth. You can also sprinkle some semolina or rice flour on on top to further avoid stickiness and give the crust a slightly different texture.
Depending on your dough temperature and room temperature the final proof should take 1.5 to 2 hours. Just be patient and check regularly. When you think the dough has risen enough, use your finger to carefully make a small dent in the bun. If the dent partly remains (pops sort of half way back out) proofing is just right, the buns are ready to bake, if the indentation disappears, the dough needs more time. Give it another 15 minutes, then check again.
During the final proof, preheat your oven to 230 ºC /454 ºF conventional setting or 200 ºC /390 ºF convection.
When ready dust the buns again lightly with some (rice) flour or semolina and place the buns in the oven and bake for 20 minutes, depending on your oven. Leave to cool on a wire rack.
Of course these buns are best eaten while fresh. You can put them in a bag while slightly warm, this way they will keep soft. They also keep well in your freezer for up to one month.


Lisa says
Should the butter be added to my stand mixer melted or just cubed and softened please?
Janice says
Would you please supply the conversions for your recipes to Imperial measurements? Thanks very much.
Marc says
buy a scale
coni says
Ounces please
Marc says
buy a scale
Marc says
or google it, you’ll need a scale anyway because cups don’t convert to weight. It’s critical to weigh out flour since every bag you buy will weight a different amount. Use a flour mill too.
cj says
Marc says the quiet part that everyone is thinking, out loud. 🙂
lawson baron says
I am going to bake these in my outdoor BBQ gas grill. I will have to keep a close eye on temperature control. I’ll let you know how they turn out.
After posting I will no excuse if I don’t bake them. I believe this is known as setting goals.
Weekend Bakers says
Hello Lawson,
Curious to know how it turns out!
lawson baron says
Correcting my first post: The Fleishman’s Quick rise label states 10 minutes for first rise. I too allow 15 minutes for first rise. It also states it will not show rising during this stage. I guess that is what makes an instant yeast different from Active Dry yeast.
Lawson…
Weekend Bakers says
Thank you Lawson, we understand. We would always advice to take these 15 minutes to allow the processes to get going, also when using instant yeast. After 15 minutes you will already see transformation in the dough, the gluten have relaxed and you will be able to do a good stretch and fold to further develop the dough.
lawson baron says
Regarding the rising time after mixing and letting dough rest for 15 minutes, then forming into balls. We have Fleishman’s Quick Rise or Instant yeast here in Canada and it states on the package ” First rising time is 5 Minutes. ” Therefore A full first time is not required using instant yeast. It would be fine with Active Dry yeast.
Lawson… Ontario Region, Ontario.
Katanahamon says
Wouldn’t these have more flavor if there was an initial bulk proofing before the shaping? Or does the diastatic malt limit the amount of rise time by converting the starches to available food for the yeast to consume quicker than if the diastatic malt were not present? (In beer brewing, diastatic potential refers to a grain’s enzymatic potential to convert not only its own but other grains’ starches to fermentable sugars. Without these enzymes, the sugars would stay locked up and unusable. The “mash” is pouring hot water of a certain temperature over the malted barley, which activates these diastatic enzymes to start unlocking the sugars. By manipulating rising temperatures and times, the brewer can alter the flavor profile of a “wort,” or sugary liquid, because certain temperatures favor certain enzymes which in turn unlock certain sugars. Lower temperatures favor the formation of more easily fermentable sugars, for a more highly attenuated or drier beer, higher temperatures produce more sugars that resist the fermentation process which leaves them in the final beer, a sweeter tasting beer. Thats your crash course in brewing..no different really than bread baking..!) That gives you an idea of what “diastatic” means..
Weekend Bakers says
Thanks for your tips and explanations. With buns we either make a preferment or use this method, not both. Cannot explain the exact science behind it taking everything into account, but the buns are better without an initial bulk not only for taste but also structure and fluffiness.
We also use vitamin C as a bread enhancer and show and explain the workings a bit in this recipe:
www.weekendbakery.com/posts…wich-loaf/
Thank you again for your knowledge and enthusiasm.
Katanahamon says
I have a tip..for buns I want soft, I put the flour in the mixer with the softened butter, or even olive oil, cover with a towel, and let the mixer really beat the oil into the flour thoroughly. Increase the speed and let the towel keep the dust down. I think the oil having a chance to bind with the flour first interrupts gluten formation and makes a softer final product. I’ve also started adding a half teaspoon or full teaspoon of vitamin c powder, ascorbic acid to certain doughs, it seems to give a fuller, more consistent rise.
Chris says
My god. I split this into a small loaf and 6 rolls. Best bread I have ever made. Thanks for sharing. Spent time on the details to get dough just right, but brilliant. Worth the effort.
Weekend Bakers says
Hi Chris,
Thank you so much for your thoughts on the recipe. Very happy to read it was such a success. Baking is in the details and making it your own always takes some effort to get it just right, but the rewards are great!
Enjoy your loaf and roll baking!
Nick says
I have found that adding a teaspoon of non-fat or full fat powdered milk to this recipe makes them nice and soft.
Nick (again) says
I do the same with krentenbollen. . .
Weekend Bakers says
Thank you Nick for letting us know and sharing your experience. Milk powder can indeed work as a bread enhancer / tenderizer and the milk sugars can also enhance browning (caramelization).
Oliver says
What’s the difference between baking sheet and baking tray? And what do you mean by covering it with a baking sheet?
Weekend Bakers says
Hi Oliver,
Thanks for your comment. With a baking sheet we mean a baking mat or a form of baking paper. I realize the term line with baking mat or paper would be more correct and more clear so I will change that. So in short you have a baking tray that you line with something (paper or other form of mat) and then place the buns on this.
OTIM AARON ISAAC says
This is the best bun recipe i have ever met
Weekend Bakers says
Thank you so much OTIM! Happy bun baking 🙂
Lana says
Can I make this softer by using egg? also, how do i make this crustier?
Weekend Bakers says
Hello Lana,
Eggs in bread are like a leavening agent, they make it rise more and the protein in the egg will make the bread more tender.
Eggs also add richness, flavor and color.
These rolls are not mend to have a crusty crust so this recipe is not ideal if you are aiming for crusty rolls, because it only develops a very thin crust. We would recommend our mini boules: www.weekendbakery.com/posts…i-boulles/ which are very crusty or make smaller versions of the pain rustique for example: www.weekendbakery.com/posts…-rustique/ or make the baguette boules and make 12 small ones instead of two big boules as the recipe states. Bake for around 20 minutes. www.weekendbakery.com/posts…he-recipe/
Happy bun baking!
Liz says
In South Africa, particularly where I live, we don’t have easy access to your speciality flours. I used a stoneground white bread flour and 5 g liquid diastatic malt extract which I bought from a craft beer shop. The rolls were ready after only 14 minutes. Had I left them longer they would have burnt on the top. I even turned the temp down to 190C as they seemed to be browning too quickly. They are certainly delicious though.
Weekend Bakers says
Hello Liz,
A very good find to get the malt from the beer shop! If the browning goes to quickly we would suggest to turn down to oven even sooner (as soon as light golden brown) and bake for a little bit longer to make sure the buns are cooked. Maybe you can give that a try and compare.
Happy baking!
Marieke
Irene says
Hi,
Thanks for the recipes. I just made these fluffy soft buns and they are amazing. I’ve been making Tangzhong bread for last couple of years with my bread machine and they are great. This recipe is so easy to make and doesn’t take long as I live in Hong Kong and the weather is quite warm here. I used a japanese flour with 13% protein and they were super!
I’m also making the rye sourdough starter and the jar is finally full of active culture. Will share my results later.
Weekend Bakers says
Hi Irene,
Thank you so much for your comment. We love the Tangzhong bread too and have been experimenting with it for some time.
Hopefully we will be able to try some Japanese flour some time, that would be interesting too.
Best of luck with the culture and keep us posted on the results. Always love to hear about them!
Happy baking and growing!
Greetings from Holland,
Ed & Marieke
Lilian says
What is Manitoba flour? What is the protein content? Is it hard red winter wheat?
Weekend Bakers says
Manitoba is a flour with a high gluten content starting at around 13.5%, often 15% or over. It is a strong, refined white bread flour. It is a variety of hard wheat originally grown in the province of Manitoba in Canada . Also used to add to other flours for strength.
Robin says
Hi,
I was wondering why you haven’t simply added the diastatic malt to your no kneed sourdough soft rolls recipe as an evolution of the existing recipe, rather than creating a new non sourdough recipe? Would adding the malt to the sourdough recipe not give you the best of both world; lighter and fluffier but with the sour undertone of flavour?
I have been making the soft roll recipe for a while but with IDY. I now have an active sourdough starter and some diastaic malt so was planning on combing both to create a sourdough soft roll but with added diastatic malt, so it has concerned me slightly that you haven’t gone this same route and am presuming you think it will be less than ideal.
Thanks
Robin
Robin says
p.s. – I made these today following your recipe using the strongest flour I could find in the local supermarket which was Canadian bread flour (protein 14.9%) and they turned out brilliantly. Thanks.
Weekend Bakers says
Great to hear Robin,
The reason we started out with these fluffy white buns was because of a request within our family. We have not yet gotten around to trying it out on the sourdough buns but definitely want to do that too. In fact we just made a fresh batch of diastatic malt so we are good to go.
Thank you very much for the suggestion and for letting us know about your excellent results.
Happy baking weekend!
Ed & Marieke
Ray Butarbutar says
YES! I love diastatic malt. I notice that my yeasts love them too. Great job, guys!! These look beautiful.
Weekend Bakers says
Thanks for the positive note Ray.
Happy baking!
Marc says
Hi,
Nice to see you are still improving the recipe.
In my search on the web for fluffy white buns I came accross the Tangzhong method.
(1 part flour + 5 parts water heat while stirring until thick or 65 degrees and than cool)
Adding this Tangzhong mix (what a name!) to the dough should create a good rise and structure of the buns.
Ever tried or heard about this ??
Will have a go with it in the weekend.
Greets,
Marc
Weekend Bakers says
Hi Marc,
Yes we tried the tangzhong method recently and were very pleased with the result. We did use milk instead of cream in the recipe and a little less sugar, but we liked the structure and taste of the bread very much. The method was fun and different.
Did you already give it a go?
Greetings,
Marieke & Ed
Marc says
Hi,
Gave it a try in the weekend, changed 10% in the recipe with the tangzhong.
But it seems this restricts the gluten development, the rise of the buns was not as good.
The taste was OK. Perhaps the kneeding time should increase or use stronger flour ?
Greetings
Marc
Weekend Bakers says
Hi Mark,
There is indeed some intense mixing in the traditional Japanse version. We based our recipe on this one: en.christinesrecipes.com/2010/…style.html (as a starting point). We did not yet add tangzhong to other recipes. We used German type 550 flour for our second attempt, which is not so strong. We were pleased with the result.
Greetings,
Marieke & Ed