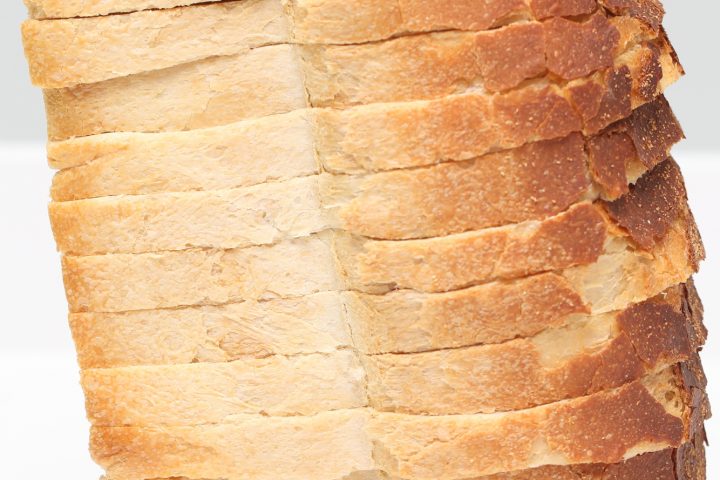
Super taste and texture without added sugar or butter!
Klik hier voor de Nederlandse versie
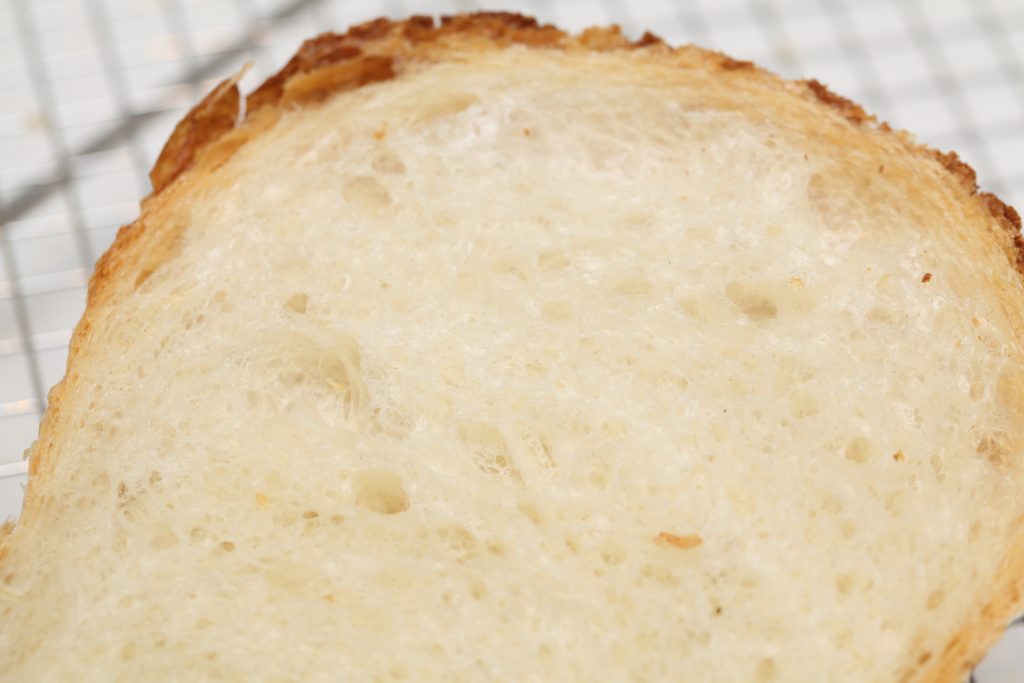
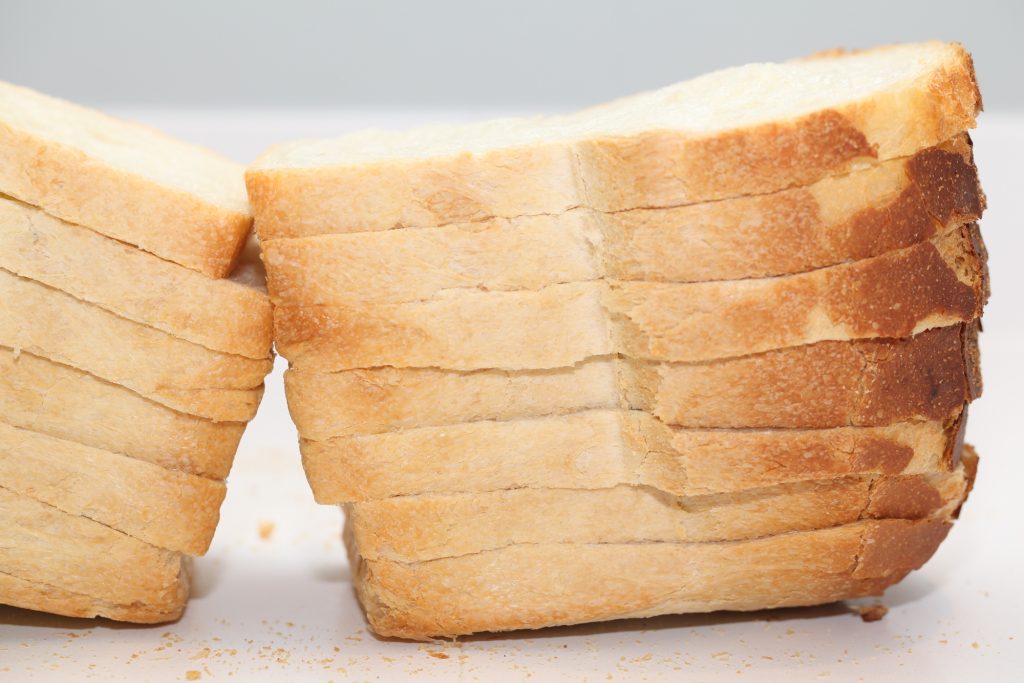
A simple method with great result for this one day sandwich loaf. All you need is good quality ingredients. We love to cut our own sandwiches a bit thicker as you can see. Gives you something to really bite into. Follow the directions carefully and choose the right ingredients and you end up with a loaf that is full of flavor and has the right bouncy texture, producing very spreadable slices with a thin crunchy crust. You can hear it ‘sing’ when it comes out of the oven!
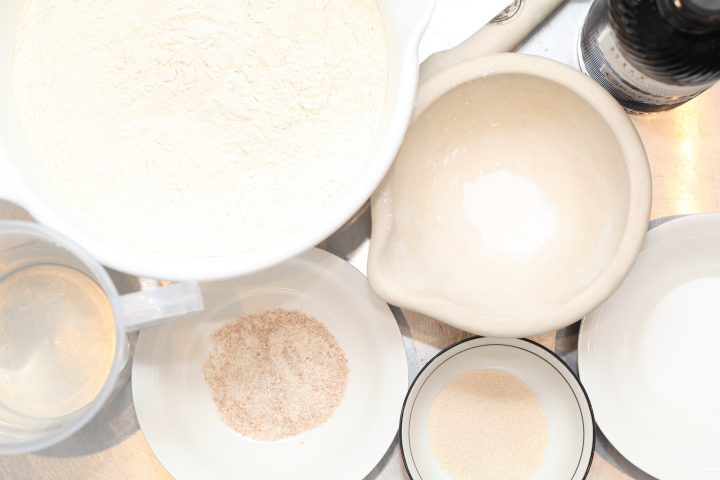
| Ingredients for the sandwich loaf dough | ||||
|---|---|---|---|---|
| makes 1 loaf | ||||
| 250 | g | bread (wheat) flour | ||
| 250 | g | Manitoba flour* | ||
| 300 | g | water | ||
| 7.5 | g | (sea) salt | ||
| 8 | g | instant yeast | ||
| 30 | g | olive oil | ||
| 0.03 | g | ground vitamine C* | ||
Bread baking tools: Standing mixer (or knead by hand), scraper, spatula, bowl, digital thermometer, bread tin of approximately 24 x 10,5 x 8,5 cm / 9.4 x 4.1 x 3.3 inch.
Carefully weigh all ingredients for best result!
Manitoba* is a Canadian high protein content wheat flour, so very high in gluten. If it is not available you can also use other high protein flour (around 14% is great). Otherwise you can also use only bread flour. Because you want to get a good rise out of this bread and make it nice and airy, a high protein flour gives the dough the strength to do so.
Vitamin C in bread baking*
Next to being a well know food supplement, vitamin C, also known as ‘ascorbic acid’ can also used in baking as a bread enhancer. So, What does it do?
Due to the properties of vitamin C, it can be used as a dough (gluten) strengthener during fermentation, helping to improve the structure of the dough.
Some flour types are sold with added vitamin C. The regular wheat and bread flour we use does not contain any vitamin C. So adding a tiny pinch to your dough can help improve your baking result. Professional bakers can buy ‘commercial grade’ ascorbic acid, but home bakers can also use crushed vitamin C tablets (it’s effectively the same stuff). The recommended amount is 0.07%. So this means that for this recipe, with 500 g of flour, you can use a vitamin C tablet and grind it to a powder. Take a pinch of the powder and it will probably be close to the amount of 30 to 40 mg needed. Weighing will not be an option for most bakers, with these small amounts.
Making the sandwich loaf dough
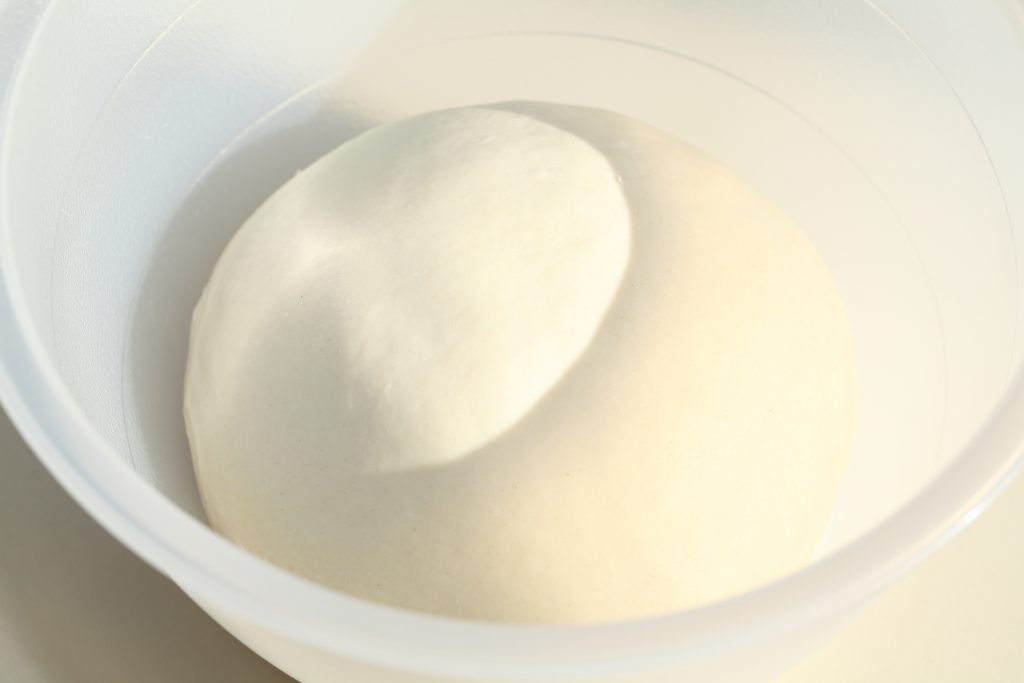
In the bowl of your standing mixer, combine the two types of flour with the salt, the vitamin C and then add the instant yeast and olive oil. Now add most of the water (slightly warm around 30ºC), but hold back around 40 grams. Start mixing at low speed and when the dough comes together, slowly add the rest of the water. This way the flour at the bottom will be picked up and your bowl will be nice and clean. Knead for 8 minutes in total, 6 minutes on low speed and 2 minutes on medium speed. If you knead by hand it takes about 15 to 20 minutes, depending on your technique. Aim for a dough that sticks slightly at the bottom of your bowl, but not to the sides. It should be silky and smooth, where you can stretch the dough almost to a window pane stage before it tears a bit. Cover and leave to rest for 30 minutes.
Now turn out the dough onto your work surface and give it a stretch and fold. Do one full letter fold set (one set = right over left, left over right, bottom over top, top over bottom). If you are not familiar with it, check out how this technique works in this video first.
Stretching and folding helps you get a feel for the dough and together with some rest it is great for its development. If your dough is still very cooperative, give it a few more stretches until it truly starts to resist. After the stretching and folding shape the dough into a ball, cover and leave to rest for another 30 minutes.
Preheat your oven to 220ºC / 430ºF at the final stages of the proofing. At what point depends on how long it takes for your oven to heat up. Make sure it is well heated and stable before you put in the loaf. You can check out our tips on how to make the most of your oven for the best baking results here.
Shaping the sandwich loaf
This shaping technique is simple to master and your loaf will fit perfect into your loaf pan. Just take a look at the pictures and follow the steps.
If necessary or preferred you can use a rolling pin, but if your dough cooperates enough, you can gently shape by hand.
Turn the dough out onto your work surface. Flatten the dough with your hands and gently press it into a rectangle.
Lift the dough with both hands and gently elongate it to about twice the width of your bread tin.
Bring the right side of the dough in to just over the middle. Then bring the left side in, also to just over the middle.
Make sure the dough slap is not wider than the width of your bread tin, because it has to fit in.
You can now gently elongate the dough from top to bottom by pressing it (with hands or a rolling pin).
Then roll up the dough, starting at the top, bringing it in while pressing it with your fingers.
Carefully close the seem of the dough with the heel of your hand (or by pinching with your fingers) and place the dough in the greased tin, seam side down.
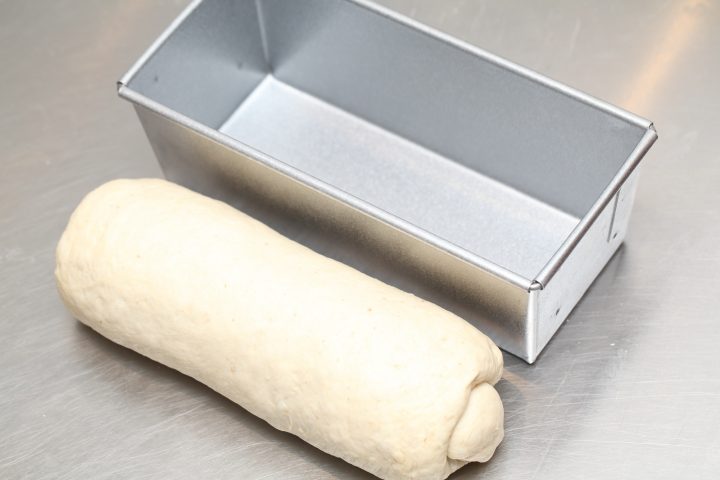
Cover with well floured or greased clingfilm and leave to proof. Depending on your dough temperature and room temperature the final proof should take about 1.5 to 2 hours. Just be patient and check regularly. When you think the dough has risen enough, use your finger to carefully make a small dent in the loaf. If the dent remains, the loaf is ready to bake, if the indentation disappears, the dough needs more time. Give it another 15 minutes, then check again.
Baking the sandwich loaf
Place the sandwich loaf in the to 220ºC / 430ºF preheated oven and bake for approximately 40 minutes. Check regularly to see how fast the loaf is browning. If you think the loaf crust has the desired color, you can temper your oven to 180ºC / 355ºF. After 20 minutes you can also take your loaf out of the tin and bake it without tin for the remainder of the time (it will already be firm enough). This will promote some more coloration on the bottom sides. Leave to cool on a wire rack.
To get a nice crust, color and shine, try to create some steam in your oven by putting a small metal baking tray on your oven floor when you preheat the oven. Pour in half a cup of hot water immediately after putting the bread in the oven. If you are going to create steam with a baking tray, you maybe also want to turn your oven temperature a bit higher, because you are going to lose some heat in the process.
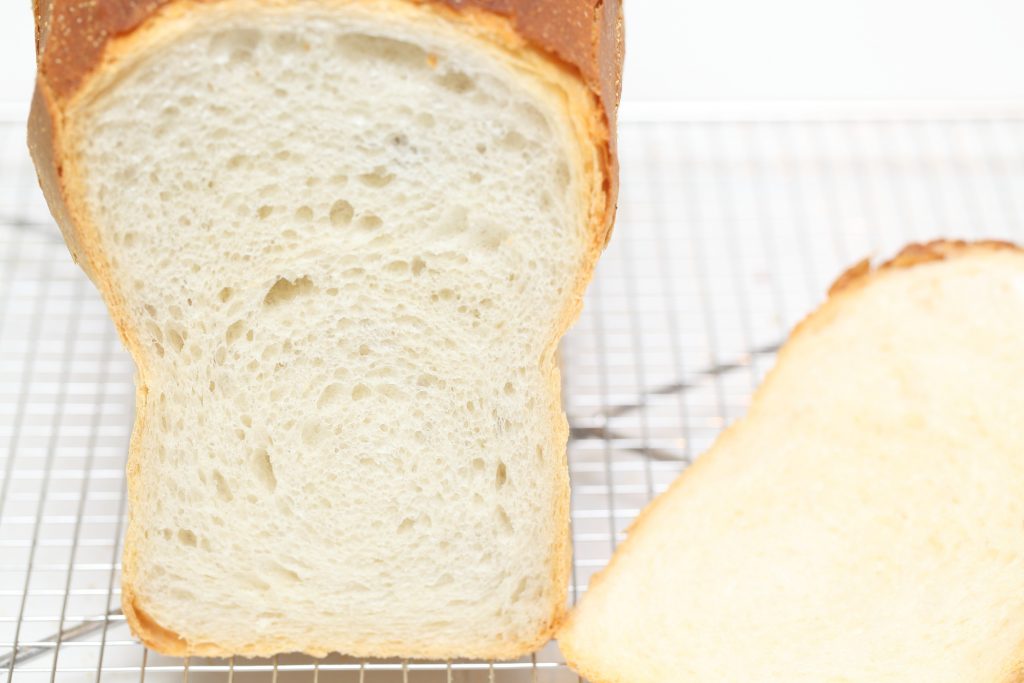
Best eaten while fresh of course. You can brush the top of the loaf with water after baking, to give the crust extra gloss. You can also store the (sliced) loaf in the freezer and give the slices a quick pick me up in a toaster or defrost at room temperature or use the microwave (best very short at high wattage).
Sandwich loaf time table
This table gives you an indication of the total duration for this recipe.
00:00 Knead ingredients 8 minutes total
+30 minutes rest
00:37 – Stretch & fold
+30 minutes rest
01:07 – Shape the dough and place in tin (3 minutes)
+120 minutes final proof
03:10 – into the oven
Baking time 40 minutes
03:50 – take out and leave to cool





Andre says
Hello! Very nice recipe! Good taste and everbody loves it! Thank you!
Weekend Bakers says
Thank you Andre, for giving it a try and great it works for you too!
Kara says
Hallo,
Ik gebruik sinds kort een rijskast. Klopt het dat de rijstijden veel korter worden? Ik gebruik water op kamertemperatuur en zet de rijskast op 27 graden.
Weekend Bakers says
Hallo Kara,
Ja, met 27 graden gaat het inderdaad sneller. Er is natuurlijk een correlatie tussen gist activiteit (en hoeveelheid) en temperatuur. Afhankelijk van het type gist (commercieel versus ‘wild’ desem) is er een optimum en een grens waarna de gist zelfs sterft. Je kunt hier natuurlijk mee spelen, van het ontwikkelen van deeg in de koelkast, tot een snellere en enthousiastere rijs in de rijskast bij 27 C. H
Belangrijk bij gebruik van de rijskast is natuurlijk het niet laten over-rijzen van het deeg, omdat het nu eenmaal sneller gaat bij 27C dan waar men gemiddeld bij een recept vanuit gaat. Bij ons is dat ongeveer 23-24 C. Je kunt er hier meer over lezen : www.weekendbakery.com/posts…mperature/
Succes met het recept want het is echt de ‘moeite’ waard zulk lekker wit brood te proeven!
Heidi Pequinot says
Hi
Will this bread stay soft in the refrigerator. In the past my bread get very dry the next day. The commercial one stays soft for a week or two. Please advise your thought
Thank
Weekend Bakers says
Hello Heidi,
Do not store your bread in the fridge, it will get stale the quickest that way. Eat your bread while fresh and slice up and store anything that is left in the freezer and only take out what you need. This way you can enjoy the bread for many weeks. It works very well with this loaf too.
Ben says
This is the best recipe I have found for making bread and has been a great success every time. That is until I tied making it ahead of time and keeping the dough in the fridge to make the next day. Lost a lot of the rise unfortunatley.
Penny Miller says
Absolutely my go-to weekday bread! Delicious and easy to work into my busy schedule.
Awesome!
Weekend Bakers says
Thank you Penny, so happy the recipe works so well for you too!
BNau says
Can you freeze this dough before its final rise, then take it out of the freezer, place in pan, and do the final rise later?
Weekend Bakers says
Hello BNau,
We know that some people do this and it is possible to freeze most dough, but we cannot comment on it based on our own experience with this recipe, because we never do this.
Just give it a try and make sure to give the dough the time it needs to thaw and proof very well.
Good luck with it!
Aminta says
Hi, it says 7.5grms of salt! Is this accurate?
Weekend Bakers says
Hello Aminta,
Yes it is! We keep close to the new UK standard amount of salt in bread, which might seem low. We like it this way and it is better for you. But if you want you can use more of course.
Moose says
Tried it and it turned out great! But my crumb is not as even as yours and some holes are too big. Is it because I didn’t degas it enough when shaping? Also, I found it difficult to flatten it out into a rectangle with just my fingers as the dough felt stiff/elastic (I normally make breads with at least 70% hydration).. is that correct for this dough?
Weekend Bakers says
Hello Moose,
Thank you for using the recipe. Yes, we think this could very well be the case, it is necessary for an even and finer crumb, but also the kneading place a key role, so longer mixing gives a tighter and more even crumb too. Make sure the dough is kneaded well. If you think the dough is too stiff, you can use some more liquid, it should feel slightly sticky (it has 66% hydration already, so not that low). It could be your flour absorbs more moisture. Experimenting with different (brands of) flour will also show you get different results. If your dough gets too elastic, a different flour can help, but also a few minutes rest and gluten relaxation, then continue.
Enjoy the process!
Marieke & Ed
WKB
GingerChef says
Hi WKB,
Done a lot of searching on the internet for the perfect Sandwich Loaf, now I have got it.
I use a standard SWF which already has the Vitamin C in it.
Perfect results every time.
Have to make 2 a day because 1 isn’t enough.
Many Thanks,
Ginge
Weekend Bakers says
Excellent, that is just the way we like it.
Enjoy your baking and sinking your teeth in lovely sandwiches!
Ed & Marieke
TLHensman says
Dottie’s kitchen kindly sourced some bread flour and yeast for us. My 11 year old has made some fantastic loaves using this method, worth starting early during lock down so that it is ready fresh and hot for lunch.
I might even use bread making for fine motor skills with my Reception Class in September!
Weekend Bakers says
Hello TL,
Thank you, that is so great to read. Positive things, discovering skills, new ideas that can be used to inspire and help others.
Glad we can play a small roll in your baking success en creating of new ideas!
Greetings / Groetjes uit Holland,
Marieke & Ed
WKB
Alana says
Hello from Alberta Canada!
Just baked this bread and it turned out perfectly. The kids helped with operating the stand mixer and the stretch-and-folds. So simple to put together.
I used 500g Canadian all-purpose flour.. and it worked great.
Thank you, WKB, for sharing your joy of baking with the world!
Weekend Bakers says
Hello Alana,
So happy to read your enthusiastic comment. Is there anything better than baking? Yes, baking with your children and getting a great result too!
Wonderful to be a small part of your baking joy this way 🙂
Greetings from the tiny kingdom of the Netherlands,
Ed & Marieke
WKB
Shirley says
Dear WKB team,
Just baked this and it smells gorgeous. Thank you for sharing your recipes. Your website has been my go-to for breadbaking.. easy to follow recipes & very informative.
Once again, thank you.
-Shirley.
Weekend Bakers says
Thank you so much Shirley, great to be a part of your baking joy in this way.
Hope your baking gives you lots of contentment and distraction in these troubled times for many people around the world.
Greetings from Holland,
Ed & Marieke
Cecilia says
I love this bread will try it
Weekend Bakers says
Hope it will be great, just follow the recipe!
Anna Gerard says
Have you experimented adding any whole grains into this loaf? Anyone?
Thank you!
Weekend Bakers says
Hello Anna,
We sometimes add just a touch of whole grain rye to this recipe, to mix it up, which results in a slightly light grey crumb and different in taste. We would always advice to use just a small percentage (5 to 10 percent maximum) if you still want to maintain the sandwich loaf type of bread, otherwise it will be another bread, more compact and dense of course because of the weight and lack of gluten et cetera.
But it is a good base to experiment with so hope you will enjoy doing just that!
Ash says
I use 60g of a fine grain mix and it work beautifully. Anything more than that and the loaf loses its lightness.
Weekend Bakers says
Thank you Ash, your feedback corresponds with our experience too.
Enjoy the fluffy baking!
Mark says
I baked this loaf today and it turned out superbly. I didn’t have any Manitoba flour but substituted it with some other strong canadian flour (Sainsbury’s Very Strong Canadian Flour, to be specific). In the past I have always been a bit disappointed with my efforts at making ‘standard’ white loaves, but I’ll definitely be making this one again (and regularly!).
As usual, a big thank you for the website and regular recipe postings, it really is much appreciated.
Weekend Bakers says
Hello Mark,
Thank you so much for your reaction and comment on the recipe. We have gone down the same path and have made many white loaves that were less successful and not what we were aiming for. We are not the biggest white bread consumers, but to us this one eats like a special treat with memories attached to how a fresh white loaf tasted in our childhood (and luckily can taste when you make your own :))
Wishing you lots of loaves and enjoyable baking moments!
Jackie says
Is it extra virgin olive oil or just pure olive oil?
Also, can it be replaced with melted butter or other oil?
Weekend Bakers says
Hi Jackie,
We made loaves with good quality organic virgin olive oil and also with ‘mild’ olive oil (sort of basic quality oil) and it is really hard to taste the difference after baking. So it would be absolutely fine to use basic olive oil and maybe a shame to use the too expensive stuff and the mild oil will also not affect the taste in a negative way.
And yes, you can also use butter or other oil. When using butter you usually use around 20% more compared to the oil amount, but with this quantity it will not matter that much if you use 30 or 35 grams of butter.
Richard says
I made this using all bread flour and no vitamin C (didn’t have any) and it had a great rise and good result.
I don’t generally make sandwich bread, but this is one I’d do again.
Weekend Bakers says
Thanks Richard, great to read about your experience.
Enjoy your baking weekend and lots of loaves!
Hila says
Do you know how to convert instant yeast bread to sourdough bread?
Weekend Bakers says
There is a reason why you probably cannot find recipes that say use 7g yeast or just replace by a cup of sourdough (btw sourdough is also yeast, just a different ‘strain’).
They are not exactly interchangeable. If you would take a yeast based recipe and want to make that into a sourdough based, you must change more than just the rising agent. For the loaf to come out good, you would also have to make some resting and proofing time adjustments for example. Sourdough based recipe are usually made in two (or more) stages, using a preferment like a poolish or biga, and these stages and longer times also have other advantages compared to the (more quickly made) yeast breads.
So if you have a yeast bread recipe you will make it into another recipe to make it a sourdough.
We would suggest to just take one of the many proven sourdough recipes already available on our site and the internet.
Our pain naturel is also a great type of sandwich loaf:
www.weekendbakery.com/posts…n-naturel/
Petra Robinson says
Hi,
I use 200g of sourdough to replace 7g of dried yeast. but you have to adjust the flour and water content of the recipe too.
Let’s say the recipe calls for 500g flour and 230g water,
In the 200g of Sourdough starter are 100g water and 100g flour, so you have to take away 100g water and 100 flour from the recipe.
So you will us 400g flour and 130 g water.
This works fine for me.
Weekend Bakers says
Hello Petra,
Thank you for your help on the subject. Maybe ‘superfluous’ but for other bakers: of course the sourdough needs to be active when you use it / add it to the final dough. Also the crust and crumb and of course the taste will be different from the original straight dough recipe.
Marco says
A great recipe – simple, and the dough is soft and smooth as a baby’s bottom. Looking forward to the Dutch version. Last year, my father (86 years old) got inspired by my home-made bread and started baking too. Now he can’t wait to finish a loaf, because he’s eager to bake another one. This is the type of loaf he really likes, so I can’t wait to forward him this recipe, but that will have to be the Dutch version. I’m sure he’ll laugh and be intrigued by use of the vitamin C! Thanks, weekend bakers!
Weekend Bakers says
Hello Marco,
Such a joy to read your comment and maybe it is a cliché but your father is proof of the ‘never to old to bake’ adagium!
we can promise you and your father that the Dutch version will be available this Wednesday night at the latest!
Enjoy your baking, maybe also together!
Marieke & Ed
Weekend Bakers
Weekend Bakers says
Finished! You can find the Dutch version here: www.weekendbakery.com/posts…wichbrood/
Henk says
Die Manitoba bloem lijkt mij best wel een dure bloem. Niet erg duurzaam als deze uit Canada moet komen.
Alternatieven?:
– een Europese harde bloem
– gewone bloem met extra glutenpoeder
Nogal logisch is glutenpoedervariant erg verleidelijk. Zou je het verschil echt proeven?
Weekend Bakers says
Hallo Henk,
Klopt, het is een dure bloem en je alternatief is zeker gerechtvaardigd. Goede Europese harde bloem (door het klimaat is het in Europa wel lastiger) is ook zeker een goed alternatief. De uitdaging is om te weten waar de bloem die je koopt vandaan komt. Vanwege de wereldhandel en de zeer beperkte informatie op producten is het best moeilijk het juiste product te vinden. Ook andere eigenschappen van bloem en het samenspel van eiwitten, enzymen en zetmeel, bepalen het resultaat. Kopen bij een molen en het aan de molenaar vragen is een goed idee. Zoals in Santpoort bij de Zandhaas, waar molenaar Jos je kan vertellen dat de bio tarwebloem uit de Flevopolder komt. En waar komt dat glutenpoeder dan weer vandaan, wie maakt dat en van welke bloem? Ook weer interessant.
Amy says
Thank you for sharing. I love your website, helpful videos and recipes.. Is there an easier way to print them?
Amy says
Oh I see when I go to print there are no pictures. Thanks
Weekend Bakers says
Thanks. Yes, that’s right Amy, if you print from your browser all the unnecessary items like pictures are left out when you print the recipe.
Hope you’ll like the loaf!
Marieke
James Kirk says
Amy, try using the Print Friendly extension when you print out this recipe. It gives you the options to leave the photos (or delete photos/text) you don’t want to print. A few more clicks before you get the print out, but I find it invaluable because sometimes I want to see the pretty picture of how the food “should” look versus how I make it 😉
James Kirk says
Apologies. I meant to add the link here:
www.printfriendly.com/
Weekend Bakers says
Thanks for sharing James!
Susie says
Such great teaching. I’ve got to try this. Looks great.
Susie
Off grid in northern NY in the woods.
🙂
Weekend Bakers says
Hi Susie,
That sounds wonderful. Enjoy your baking in the woods and let us know how it goes!
Marieke
Ingrid van Arnhem says
I am definitely making this – this weekend. I will report the results.
Weekend Bakers says
Hi Ingrid,
Thanks! We love to get your feedback.
Enjoy your weekend baking 🙂