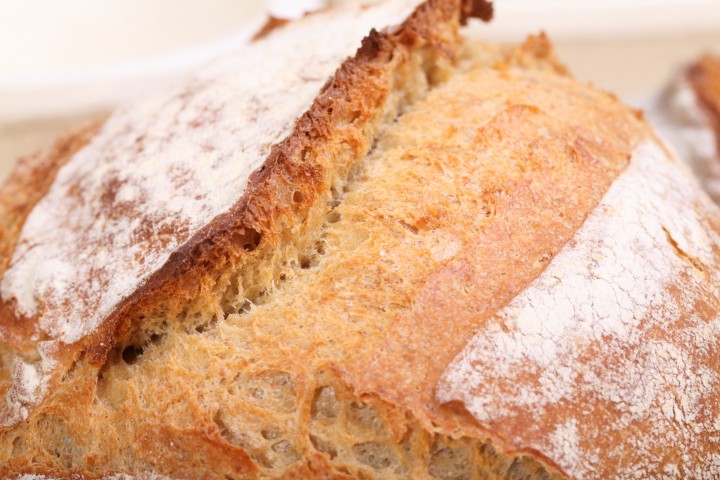
You will not be going anywhere for a while! Tell your family you will be stretching and folding for the next 3.5 hours…
The last few months we have been making quite a lot of these loaves. We made them with tiny variations and alterations, experimenting with flour, water, times and temperature and above all quantities. We even developed a hybrid version for the baker in a bit of a hurry. We are now pleased enough with the results to share them with you.
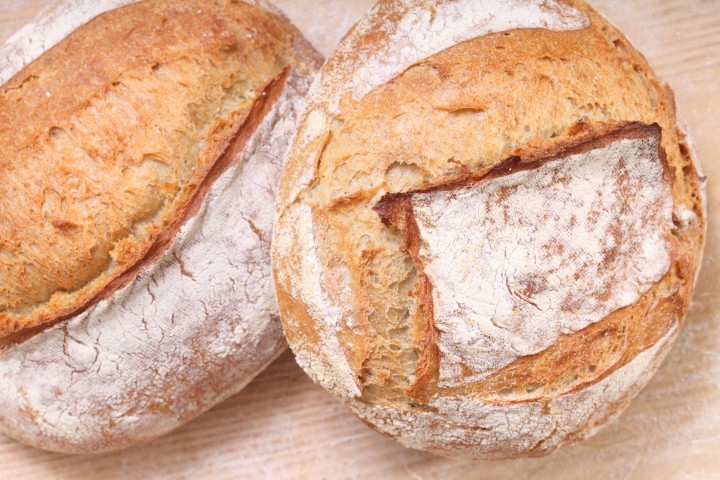
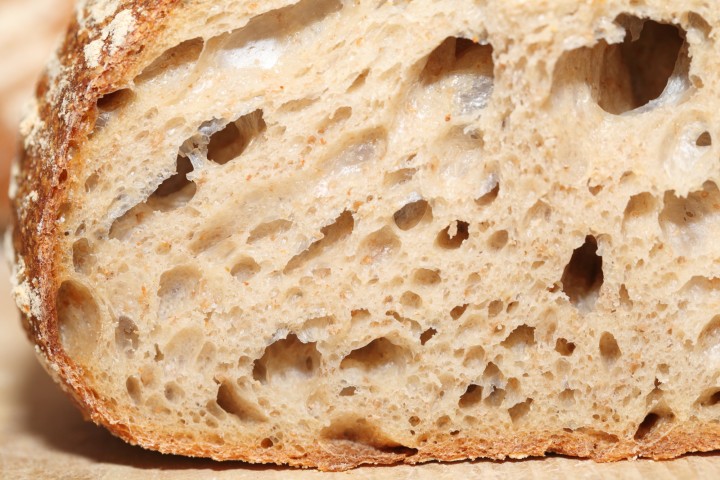
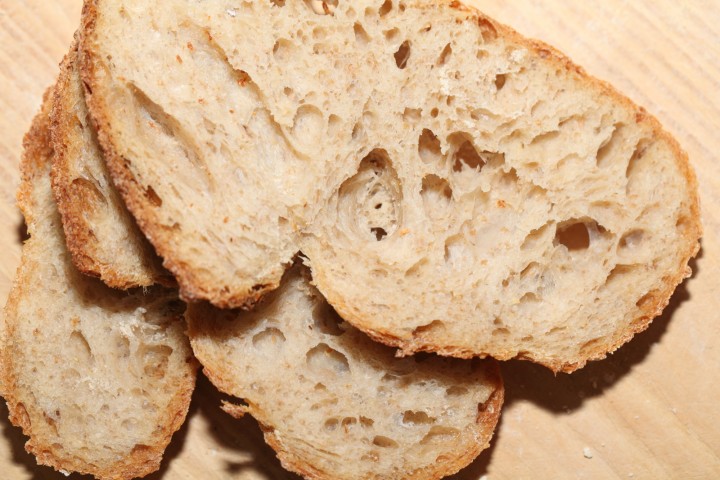
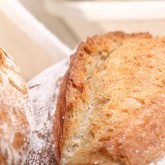
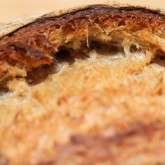
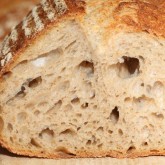
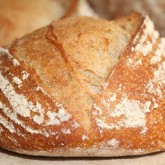
To most bakers the name Tartine does not need further introduction. A lot of home bakers will know the book, the bakery in San Francisco or even the bread. When you look at the pictures in the book, you just want to make that bread too! It’s attractive and impressive. Just one tiny remark about the recipes. We found that some of the essential information was pretty well hidden in a lot of text and it needs careful reading to avoid mistakes and there seems to be some errors in the bakers percentages. We tried to be clear and unambiguous with our version of this recipe and for that we made a few changes. The result to us is an outstanding bread with a very pleasant crumb structure and ‘bite’ and complex taste.
We make these loaves in both cane and wood-fibre proofing baskets and shape as boules or batard. Whatever your personal preference, the wonderful taste stays the same!
What’s different from the original?
The most important change we made is one that all home bakers should be pleased with. We scaled the amount of sourdough culture back to manageable proportions, avoiding unnecessary waste of flour. Instead of maintaining a 400 grams culture all the time, we changed it by building a poolish the night before with a small amount of sourdough culture.
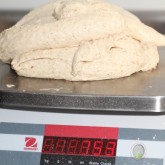
We recalculated the ingredients to a smaller loaf of about 770 grams. In the recipe below you will also find the percentage of whole wheat flour a bit higher than the original.
Also we recalculated and adjusted the hydration level to be 70% as our European flour absorbs less water than American and the original Tartine recipe does some strange bakers percentage calculations.
No need to knead, but….
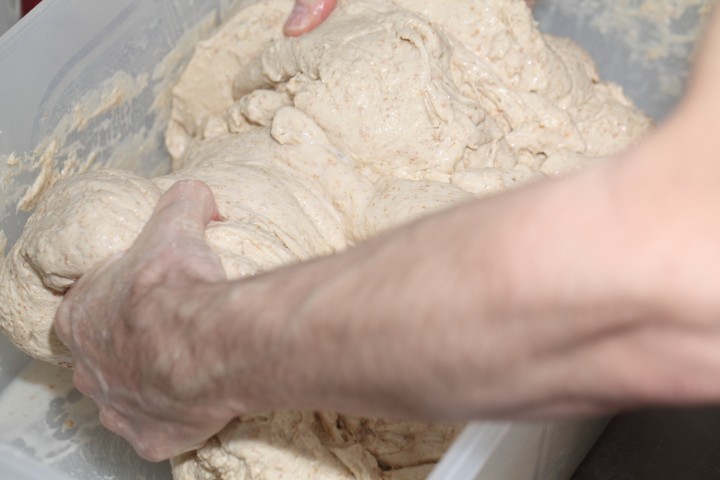
There is some serious stretching and folding to be done. It is also the beauty of this recipe that all the dough is developed without the aid of a mixer. So even if you want to make 12 loaves, no worries about mixer capacity with this recipe. Everything is done by hand. You feel the dough changing under your hands. We use a big rectangle food grade plastic container to make batches of 12 breads.
Use our Dough Calculator
Below the ingredients lists you will see a ‘dough calculator’ button. Click on the button to open. Now it is very easy to change the total amount of loaves and amounts of flour to make smaller or larger breads. You can also change the bakers percentages to adjust the ratio between the ingredients like water or salt. And last but not at all least you can calculate the exact temperature of the dough!
Before you start
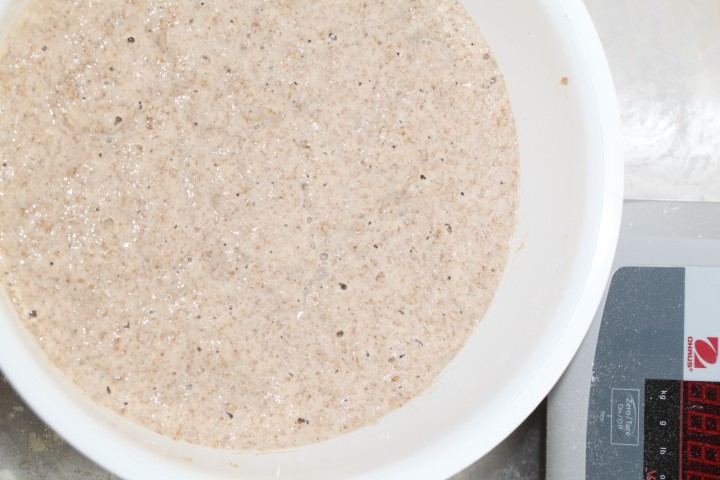
For this recipe we are going to make a starter named a poolish. A poolish is a type of wet sponge usually made with an equal weight of water and flour and a small amount of sourdough starter culture or yeast and NO salt. Making a poolish helps bring more taste and strength to your bread.
We use a sourdough culture which is made with 100% whole grain rye flour. A sourdough culture based on rye flour is easier to maintain, does not go into a slurry when you forget about it, is easier to stir because it has almost no gluten and smells very nice, a bit like fruit. It is also very forgiving in the amount you feed it, everything seems to be alright. Normally we only feed it once a week, after our weekend baking we give it a few table spoons of water and rye flour, stir, ready!
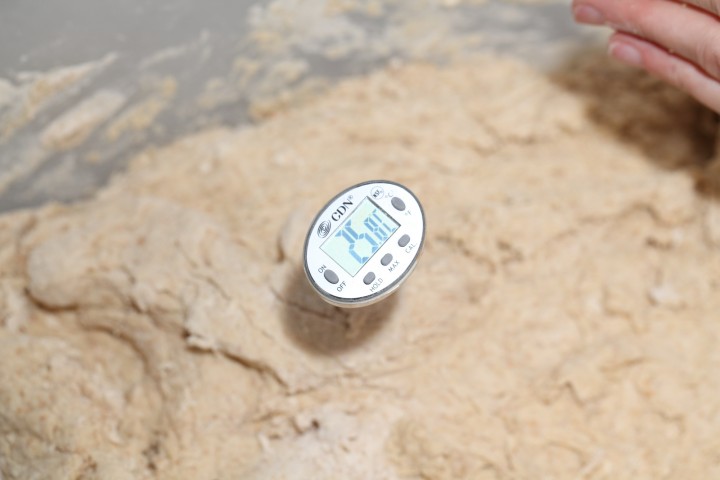
Ideally the temperature of your dough after mixing should be around 24-25 ºC / 75 ºF. You should adjust the temperature of the water you add, so the total dough reaches this temperature. For us this means in summer adding cold water to this recipe and in winter (when our little bakery gets much colder then the rest of our house) adding warmer water. You can measure the temperature of water and dough with a food thermometer. These measurements are important because they correspond with the proving times in the recipe.
| Ingredients for the Poolish | ||||
|---|---|---|---|---|
| 25 | g | wheat (bread) flour | ||
| 25 | g | whole wheat flour | ||
| 10 | g | sourdough culture | ||
| 45 | g | water (room temperature) | ||
| Ingredients for the Tartine Style Bread | ||||
|---|---|---|---|---|
| makes 1 loaf | ||||
| the poolish from step 1 | ||||
| 350 | g | wheat (bread) flour | ||
| 40 | g | whole wheat flour | ||
| 240 | g | water part 1 | ||
| 20 | g | water part 2 | ||
| 6.5 | g | (sea) salt | ||
| 2 | g | instant yeast (optional hybrid version, see text at bottom recipe!) | ||
Making the Poolish
When we make this recipe we make 12 loaves at a time and that is why we do not make the poolish in the big box we use for the final dough (it would spread too thin). But if you make less loaves it totally makes sense to make the poolish and your dough in the same bowl. A good method for making this bread and keeping your worktop clean!
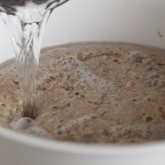
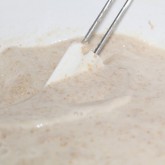
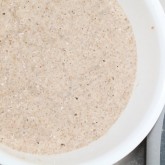
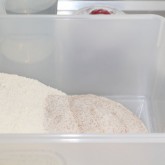
Now in your bowl stir together the bread flour, whole wheat flour and the water at room temperature with the sourdough culture. Mix it well until you have a homogeneous slurry that looks like very thick batter. Cover the bowl with clingfilm and let the prefermenting begin. After 12 hours at room temperature it should be bubbly, light and ready for use. So if you want to begin your bread making in the morning, you should make your poolish at 9 in the evening.
Making the Tartine Style Bread
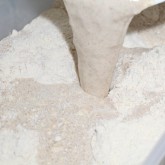
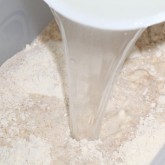
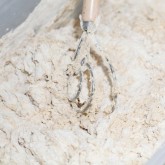
Take your bowl with the poolish and add water part one (around 32ºC) plus all of the flour but NO SALT. Combine with your hands or a dough whisk until all the water is incorporated.
Leave the dough in your mixing bowl, cover and let rest for 20 minutes (this technique is also referred to as autolyse).
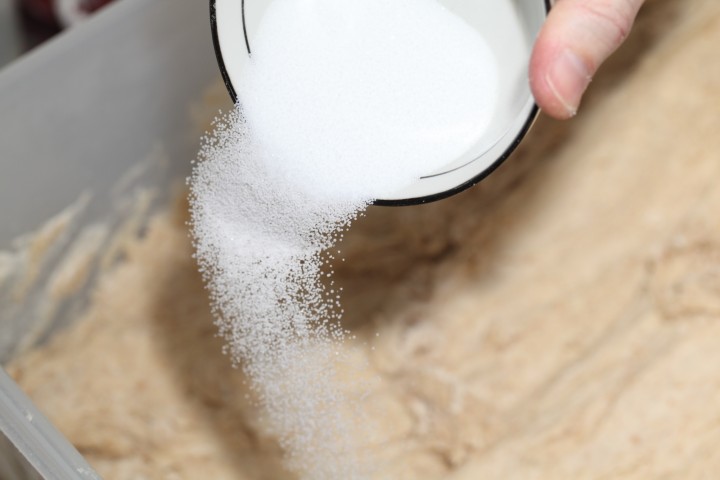
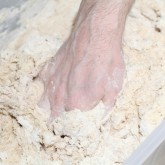
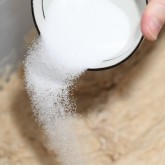
Now add the salt on top of the dough and then add water part two, making sure the salt gets wet. Squeeze the dough with your hands to combine water and dough until smooth and all water has been absorbed. This should take only 1 or 2 minutes.
Again leave the dough in your bowl, cover and let rest for 30 minutes.
Stretching and Folding Stage
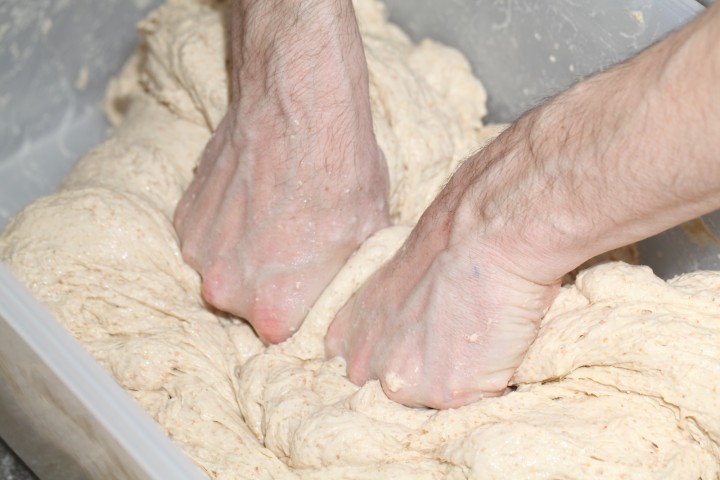
Wet your hands a bit before you start to stretch and fold, this will make it easier to handle the dough. Now do your first stretch and fold while leaving your dough in the bowl. Do a full letter fold, left over right, right over left, bottom over top, top over bottom. Watch our bread movie or our stretch and fold method video to observe this technique if you are not familiar with it.
Cover and again leave to rest for 30 minutes. Repeat the stretch and fold (full letter fold) five more time (so six times in total) each time leaving the dough to rest for 30 minutes. The whole process takes 3,5 hours.
Shaping and Proofing Time
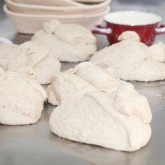
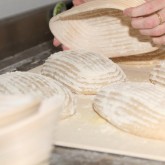
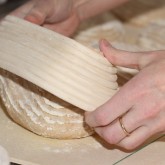
After the last 30 minutes rest it is time to shape your dough. You can make oblong (batard) or round (boule) loaves of bread, whichever you prefer. For instructions on how to shape a boule, take a look at our boule shaping video.
Because this is a true sourdough bread, the final proof will take quite a long time. Please take that time and make sure your dough is really ready for the oven.
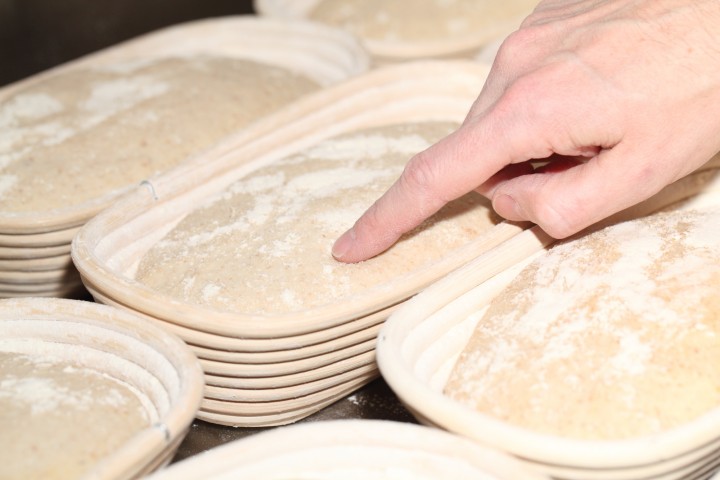
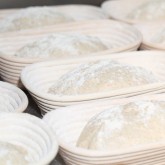
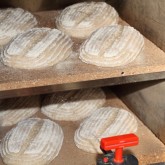
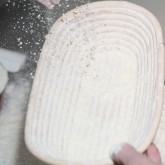
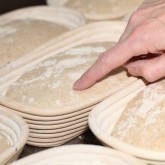
Transfer the shaped dough to a proofing basket / banneton, cover and leave to proof for 2 hours and 30 minutes. When you think it has risen enough, use your finger to carefully make a very small dent in the dough. If the dent remains, the bread is ready, if the indentation totally disappears, the dough needs a little bit more time.
Baking
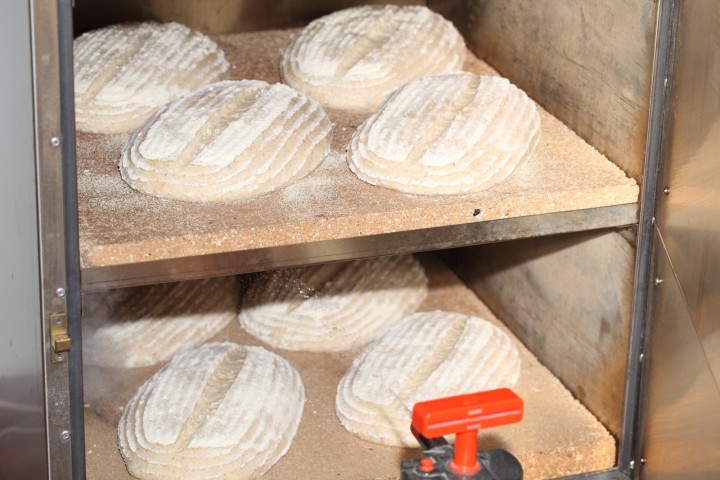
Preheat your oven to 230 ºC / 445 ºF (at what stage you preheat your oven depends on how long it takes for your oven to heat through, some take 30 minutes, some, like ours, with stone floors take a lot longer, up to two hours.
Now your loaf is ready for the oven. Slash the top of the loaf with a lame or bread scoring knife.
To get a nice crust, try to create some steam in your oven by putting a small metal baking tray on your oven floor when you preheat the oven, and pour in half a cup of hot water immediately after putting the bread in the oven. Release some steam by setting your oven door ajar (perhaps with the help of a wooden spoon or oven mitt) 5 minutes before the bread is ready. If you are going to create steam with a baking tray, you may also want to turn your oven temperature a bit higher, because you are going to lose some heat in the process.
After 45 minutes of baking your loaf should be ready. Transfer onto a rack and leave to cool. This loaf also keeps very well in the freezer.
Tartine Style Bread Time Table
Day 1 – 21.00 h Make poolish let ferment for 12 hours at room temperature
Day 2 – 0.900 h Make final dough
- 09:00 – Add flour and water part 1 to starter, combine
- 20 minutes rest (autolyse)
- 09:20 – Add water part 2 and salt, combine
- Rest for 30 minutes
- 09:50 – Stretch and fold 1
- Rest for 30 minutes
- 10:20 – Stretch and fold 2
- Rest for 30 minutes
- 10:50 – Stretch and fold 3
- Rest for 30 minutes
- 11:20 – Stretch and fold 4
- Rest for 30 minutes
- 11:50 – Stretch and fold 5
- Rest for 30 minutes
- 12:20 – Stretch and fold 6
- Rest for 30 minutes
- 12:50 – Shape
- 12:55 – Final proofing 150 minutes
- 15.35 – Bake for 45 minutes at 230ºC / 445ºF
- 16:20 – Your bread is ready!
Making the Quicker Hybrid Version
If you want to make a quicker version of this recipe you can opt for the hybrid version. With hybrid we mean a bread that uses both sourdough culture plus a small amount of yeast to speed up the proofing of the final dough.
For this version you must use 2 grams of instant yeast per loaf in the final dough. You add the yeast together with the salt on top of the dough after the autolyse fase.
You can limit the stretching and folding to 2 hours but do two sets of complete stretch and folds every 30 minutes, 3 x 2 sets in total. The final proofing will be around 1 hour.




Nicole says
Hello
I am making your tartine bread at the moment when I do the stretching the dough tear, is it ok? I have the same problem when I make your baguette recipe. The result Is always good, but on your video your dough is much smooth. What I am doing wrong? And is it ok for the dough to tear.
Thank you for all your help in the past and your wonderful site. I have never had any failure with your recipes. Thank you.
Nicole
Weekend Bakers says
Hello Nicole,
We would suggest looking at the flour you use. Maybe there’s not enough gluten in it to be developed. It should be between 12 and 13% protein for this recipe and for the baguettes too. You should stretch the dough not so far that it tears, but the dough should become elastic and extensible enough so you can handle it like you see in the video. So maybe the flour could be a factor in this. Also check out our tips on high hydration dough: www.weekendbakery.com/posts…ion-dough/ .
Hope this helps you.
Lots of loaves!
Bill says
Have been playing with the original tartine recipe and your variant for a while now with generally good results. One thing. Chad Robertson places a lot of emphasis on both in his story and in the recipes is the use of a “young” i.e. only just ripe levain. But he never really explains why! Having tried, in a not very scientific way, overnight levain rises and a shorter rise when I am going through the whole process in one day I THINK the answer is that the just risen levain is what produces the exceptional creamy lightness to the interior of the loaves you buy in his shop. Most sourdough has some “chew” to it but when I use the levain as soon as it is ripe I seem to get this beautiful crumb. I am going to test this a bit more methodically but would welcome your thoughts. Incidentally the same seems to hold through for your hybrid Pain Rustique recipe..
Weekend Bakers says
Hi Bill, we always use a just ripe levain. For our pain rustique, we mix the poolish at 22:00 in the evening and use it the next day at 09:00. This way it has a nice bubble but no foam and all the gluten are still strong within the poolish. Love to hear about the results! Happy baking!
Irene Schwab says
I would like to know what bread ovens you use we are having a hard time finding a repair person to work on our ovens
the brand we use is called Bassanina it is from Italy.
if you could Email back either way it would be great
Thank you
Irene Schwab
Good Earth Natural Foods in Fairfax
Bruno says
Hello again!
I made the bread again, this time using bread flour. As with my last 2 attempts, the boule bursts at one the slash points during the oven spring, causing the boule to become malformed. Do you have any other ideas as to what may be causing this to happen? Solutions?
Thanks for your help!
Bruno
Weekend Bakers says
Hi Bruno, you probably have a) under risen your bread, so let it proof a bit longer, or b) do not use (enough) steam to keep the loafs flexible during the oven spring. Give it another go, practice makes perfect!
Bruno says
Thanks for the suggestions! Funny, I was just thinking yesterday that I was underproofing due to the cooler temperature in my kitchen.
Bruno says
Hello,
I’ve made this bread twice and love the finished product, however the boule loses its shape during the oven spring. What am I doing wrong? I did all the stretch and folds in the bowl and used your boule shaping method. I placed it in a flour lined ceramic bowl for the final rise, then transferred to a pizza peel and baked at 500 degrees on a pizza stone for 28 minutes. I used all-purpose flour instead of wheat bread flour, otherwise I followed the recipe instructions as written.
I tried to include photos so you could see the exterior and interior couldn’t figure out how.
I would really appreciate any advise from you. Thanks! – – Bruno
P.S. – I find your website very informative. The recipes are well written and the videos are very helpful.
Weekend Bakers says
Hello Bruno, I think you answered your own question. You used all-purpose flour, which probably is aimed at making cakes and cookies and not bread. All purpose flour has a lot less gluten and gives not enough strength to your dough for bread. Give it another try with the right flour! Happy baking!
Bruno says
Thanks! I’ll get some bread flour and give it another try…
Lioe J. says
Dag Marieke,
kan ik dit recept ook maken met zuurdesem gemaakt met tarwebloem en ananassap volgens de methode van Peter Reinhart?? Deze zuurdesem gemaakt met ongezoete aaanassap is gelukt. Eerder heb ik zuurdesem gemaakt met tarwebloem en water maar op de een of andere manier lukte dat nooit. Ik weet niet waarom.
Ik bak niet zo vaak maar vind het wel ontzetend leuk. Is het dan verstandig om jouw zuurdesem met roggebloem te maken en het dan standaard te gebruiken om zuurdesem brood te bakken?
vriendelijke gtoet,
Lioe
Weekend Bakers says
Hallo Lioe, het is geen enkel probleem om een tarwebloem starter te gebruiken met onze recepten. Wij gebruiken een roggemeel starter omdat deze makkelijker in het onderhoud is, maar een tarwebloem of speltbloem starter werkt ook goed! Happy baking!
joe weber says
1. How much starter should be used if one were to forego employing the overnight poolish?
2. When is the optimum time to use the starter? On the rise after feeding, the pinnacle, or the fall?
Weekend Bakers says
Hello Joe, the quality of the bread will suffer greatly from omitting the poolish. The poolish using a light sourdough starter is what gives the bread is character. You can of course omit the poolish and make a dough from all the ingredients at once. You need to add yeast to get it moving or at least double all times. Happy baking!
joe weber says
I decided to do all the folding and use the formula without additional yeast. I don’t have the proofing basket and decided to shape a round loaf and place it on a corn meal dusted peel. In so doing I put a little heat on one of my ovens and placed boiling water in a pan to make a jury rigged proof box. The dough didn’t seem ready to be shaped after 4 hours and volume was on the small side. I went ahead and used .5 tsp of dry yeast and the dough was much livelier and the loaf was beautiful. I baked it in my oven with ice cubes on a cast iron skillet to create steam. From mix to finished bake was 5.5 hours. Question: If I make a 4 hour bulk ferment straight dough with 10 % of flour weight starter and .25 tsp dry yeast and do all the folds, will I still get a very porous loaf internally?
Joe
Weekend Bakers says
Hi Joe, nice to hear all went well. It will be no problem to add some yeast, we do this all the time when we want to speed the process up a little bit. You will get best of both worlds, taste from sourdough and speed and consistency of the yeast. All sourdough cultures are different some and fast, some are slow. You must indeed add a small amount of yeast, the bulk fermentation must take some time to develop a nice taste within the dough. With this small amount of yeast and the folds the crumb will not change a lot. Happy Baking!
joe weber says
Thanks for the help. I’ve never been able to make a successful loaf of bread with a poolish and I think I couldn’t get the yeast level low enough to not have it over ferment overnight. I hadn’t thought of using my levain and will try it tonight at 9 PM. I’m going to try and make the tartine loaf using an 8 quart globe mixer in first speed without all the folding. I imagine the loaf will suffer some but still might make a very tasty loaf with a reasonably open texture. I’ve been maintaining a rye and white levain for about 4 weeks now and left both of them in the fridge when I took a 6 day trip. Both recovered nicely when I returned. Your websit is excellent.
Weekend Bakers says
Hello Joe, the amount of yeast for one loaf in a poolish is indeed a small bit, you almost can count the grains of yeast. With such a small amount we first pour the water in a bowl, add the yeast, wait a minute for it too dissolve than add the flour and stir. This way all the yeast is nicely distributed among the poolish. You can indeed use a mixer too make Tartine bread, however try not too shorten the bulk fermentation times as the taste is in this being build up in this time period. Probably your crumb structure will ‘suffer’ a bit but you will still get a great bread! Happy baking!
Rodri says
He hecho varias veces este pan y siempre ha salido delicioso, pero hace unos días utilicé una harina francesa “Mix meule BIO crema de Moulin de Colagne” que en España podemos comprar on line en El Amasadero y harina de trigo integral, y el resultado es espectacular. He puesto un 0,4% de malta encimática (diastásica). He precalentado el horno a 270ºC (con una sartén de hierro fundido con piedras volcánicas para generar vapor) y cinco minutos antes de meter en el horno bajo a 230ºC calor sólo abajo, meto el pan y vierto agua hirviendo en la sartén. A los 10 minutos saco la sartén con las piedra y bajo a 210ºC calor arriba y abajo durante 25 minutos. Bajo a 190ºC otros 10 minutos más.
Corto en rebanadas que congelo de dos en dos envueltas en papel de aluminio, y para desayunar, tostadas con mantequilla o con aceite de oliva virgen extra y un buen jamón ibérico de bellota…… manjar de dioses.
Si alguien está interesado en este harina:
www.elamasadero.com/harin…5-kgs.html
Foto del pan, (no se si saldrá):
lh6.googleusercontent.com/-bbBg…130214.jpg
Traducción con google translate:
I have done several times this bread and have always come delicious, but a few days ago I used a French meal “Mix meule BIO cream Moulin Colagne” in Spain can buy on line in the bakery and whole wheat flour, and the result is dramatic. I put 0.4% enzymatic malt (diastatic). I preheated the oven to 270 ° C (with a cast iron skillet with volcanic stones to generate steam) five minutes before putting in the oven at low heat just below 230, I put the pan and pour boiling water into the pan. After 10 minutes take out the pan with the stone and under heat at 210 ° C up and down for 25 minutes. Under another 10 to 190 minutes.
Short freeze slices in pairs wrapped in aluminum foil, and for breakfast, toast with butter or extra virgin olive oil and a good Iberian ham …… food of the gods.
If anyone is interested in this meal:
www.elamasadero.com/harin…5-kgs.html
Photo of bread (if not will):
lh6.googleusercontent.com/-bbBg…130214.jpg
Nils says
Hi
Great recipe! I followed it meticulously, only prolonging the final proofing time to 4.5 hrs. It turned out perfect from one minor detail. I can see that you guys get a nice lip on your bread. Mine is just flat. I scored at a 45 degree angle, about 2 cm deep and get a good oven rise, but with no lip. Also I notice that you get a secondary break of the crust (in the scored part) where the oven rise makes the newly formed crust break apart. I don’t have any of this.
Do you have any idea how I could get the same lip, and break of the new crust (within the scored part) that you get. I know that pictures would help, but I don’t see how I can get them on here 😉
Thanks for a fantastic website! I am learning a lot from you!
Met vriendelijke groeten
Nils
Weekend Bakers says
Hi Nils,
First of all thanks for your compliments! When it seems you are doing everything right and still do not get the ‘ear’ you are looking for, the first thing to look at is the flour you are using and try maybe another brand and quality. See our flour experiment to understand what we mean:
www.weekendbakery.com/posts…nt-part-1/
The second thing is the oven and using that to full effect and maybe try and bake on a stone if possible.
www.weekendbakery.com/posts…your-oven/
Also, when scoring try to keep it simple at first by just doing one big score from end to end, making sure to really go the the edges of the bread to have the best change at a nice ‘grigne’.
Good luck with it!
Ed & Marieke
Petra Robinson says
Hi,
I have a Sourdough starter made with bread flour and water, can I use that instead of a rye starter to make the poolish for the bread?
Weekend Bakers says
Hi Petra,
Yes, no problem at all, you can stick to the recipe and use your wheat starter instead of the rye.
Happy baking,
Marieke
Petra Robinson says
Oh wonderful, I do have a Rye Starter also but I had the wheat one already out of the fridge so I wanted to use this as I was going to bake today.
Next time I take the Rye starter out.
Petra
Siew-Eng Koh says
Dear Ed and Marieke,
I just want to say what a wonderful website you have. Your recipes are clearly written and your baking tips and videos are great. I have tried a few of your recipes and have had pretty good success for a beginner baker. My favourite of course is your version of Tartine Style Bread. I live in Bangkok where room temperature is a lot higher than where you are so I have made some adjustments with regards to timing for fermentation and proofing. Thank you for sharing your knowledge and experience!
Weekend Bakers says
Siew-Eng Koh,
How wonderful to hear and thank you very much! Sounds like you really made it your own and adapted to your challenging conditions. We admire you for it. At the moment it is also very hot and humid in our country and we are doing some adjusted baking ourselves, which can also be fun when it turns out like you planned of course. But we are baking a little bit less than normal under these conditions we have to say.
Again, thanks for sharing and wishing you many beautiful and delicious loaves.
Greetings from Holland,
Marieke & Ed
Emile says
Dankjewel voor jullie website en jullie recepten. Sinds een paar weken maak ik elk weekend dit brood en het is geweldig, ik wilde al heel lang graag brood maken dat net zo lekker is als van een goede bakker, maar met dit recept maak ik brood dat nog veel lekkerder is!
Ik wil graag vier broden bakken, omdat ik dan de hele week vooruit kan, maar heb het probleem dat er maar twee tegelijk in mijn over passen. De eerste twee komen er perfect uit (mooi gerezen in de oven met geweldige oren), maar de volgende twee hebben 46 minuten langer gerezen, in een keuken die ondertussen aardig warm is door de oven. Dat brood is nog altijd lekker, maar de structuur is veel minder luchtig en de korst is ook niet gerezen in de oven (helemaal geen oren).
Wat zou ik hieraan kunnen doen? Misschien de mandjes met brood een tijdje in de koelkast zetten om het rijsproces te vertragen? Hebben jullie tips hiervoor? Zou ik bijvoorbeeld beter het deeg in het begin van de 2,5 uur rijzen in de koelkast kunnen zetten zodat het daarna nog even op temperatuur kan komen, of zou het beter zijn om het in de koelkast te zetten als het klaar is met rijzen en dan direct van de koelkast naar de oven?
Groeten,
Emile
Weekend Bakers says
Beste Emile,
Allereerst dank voor je aardige woorden en fijn dat dit recept voor jou ook zo fantastisch uitpakt! Je geeft zelf al een methode aan die heel goed zou kunnen werken, dat is een kwestie van eens uitproberen. Vooral de methode om na het vormen het brood in de koelkast te laten rijzen en dan van de koelkast naar de oven. De vraag is hoeveel de koelkast de werking van het gist remt, dat is even een paar keer uitproberen. Onze eigen methode zou die zijn welke profi bakkers ook gebruiken: batches na elkaar opstarten, gewoon 2 x 2 broden maken dus, waarbij je een uur tussen de twee batches laat zitten. Dan heb je zeker 4 broden van gelijke kwaliteit en gebruik je je oventijd ook optimaal (met de eerste methode kom je misschien niet zo goed uit qua timing en moet je oven toch wat langer aan bv).
Veel succes ermee en vooral veel mooie broden!
Ed en Marieke
Marc - Belgium says
Hello,
In the weekend baked the Tartine Style Bread, it turned out great.
Great crust and “perfect” crum.
Changed only one thing: baked the bread in the oven in a cast iron pot, 15 minutes with the lid on and 30 minutes without the lid.
Thanks for the great recipe and keep up the good work.
Grts
Marc
Weekend Bakers says
Hi Marc,
Thanks for sharing! We almost always get reports of great baking results with the Dutch oven, it is such a perfect method to get a good artisan loaf. Wonderful to hear that the Tartine is also working out very well this way!
Happy baking,
Marieke & Ed
Alamar says
So you did not need to use the Dutch oven to bake your breads?
I can’t wait to try your version! Thanks for posting it!!
Weekend Bakers says
As you can see in the pictures, we bake more than one bread and we use a special stone oven to bake.
If you make just one bread than the Dutch oven would be a great choice.
Happy baking,
Marieke & Ed
Alamar says
Hi Marieke, Ed –
So I tried this receipe yesterday and I failed. I’m hoping you can take some time to give me a few pointers so I can improve! I followed the recipe, except I made a few changes:
1. My hydration is 75%. I made the poolish exactly the same, but I increased the water when mixing the poolish with the rest of the flour, water, salt, yeast on the day I made the bread.
2. The dough was risen beautifully, but it collapsed a little when I tried to shape it into a boule.
3. After the final S&F, and resting, I pre-shaped the dough into a round form. Let it rest for 30 minutes.
4. After the resting, I shaped the dough again for a few minutes, then let it rest for another 30 minutes.
5. After the additional 30 minutes of resting, I shaped the dough again, then into the mixing bowl for proofing.
6. The dough was in the mixing bowl and proof for 1.5 hours
7. The oven was pre-heated, with the Dutch oven to 500 F for an hour
8. I baked the boule at 500F for the first 15 minutes, then lower the oven temperature to 475F and baked the boule for 20 more minutes. After 20 minutes, the lid was removed, the dough didn’t look promising already. I continued baking the dough for another 12 minutes, at 460F.
The dough had poor oven spring, and very little “ears” developed. The crumbs were dense, but everything was cooked thoroughly. The crust was very hard – it was almost like biting into a brick!
Your feedback is greatly appreciated!!!
p.s. I love your scoring tool!
Weekend Bakers says
Thank you Alamar,
May we ask you, as it was the first time you tried the recipe, why you decided to change so many things? Why did you decide to go for 75% hydration? We do not understand why you did the pre-shaping and then you say you shaped for several minutes and then you shaped again? Why did you do so much shaping and for so long (this also could explain the denseness)?
We always want to suggest when making a recipe for the first time to try to follow it very closely and after that change one thing at the time to be able to explain the changes that occur.
Hope you will give it another try with our instructions.
Ed & Marieke
Alamar says
Thanks Ed, Marieke –
I decided to do the 75% hydration as you mentioned where you live, your flour doesn’t absorb as much water as the flour we have here, in the State. Also, I was thinking to go with Chad Robertson’s hydration, which is 75%. The only reason why I did two extra shaping was because I thought my dough wasn’t “ready” to be in the proofing basket. It felt a little slugglish, and it was a challenge for me to easily and quickly, shape it into a boule. Hence, I thought I should give it another “letter” folding, then let it rest for 30 minutes. After the 30 minutes of resting, my dough was still slightly sluggish, flat, “dripping” off the edge, so I decided to give it another “letter” folding, let it rest. After this, it wasn’t appeared much of a round shape, so I decided to put it into the proofing basket and let it rest at room temperature for another 1.5 hours, before baking.
Thanks for your feedback and much appreciated!
Weekend Bakers says
Hi again Alamar,
Thanks for your explanation. Based on what you tell us we think the first thing to look at is the flour you use. Tartine uses very strong bread flour that also has still some bran left in it (not so white) which probably absorbs more water. Check out the protein content of your flour. Try to use the strongest kind you can find and maybe at the same time turn down the hydration a notch to make the handling and shaping a bit easier for you.
Hope this helps you.
Happy (weekend) baking!
Ed & Marieke
Viv says
Can I just say I love your website! I’ve tried some of your bread recipes and loved them, especially the baguettes which are a bit hit with the family (still working on my shaping though!). With this tartine recipe and some others you use a sourdough culture instead of yeast. If I don’t have a sourdough culture, can I just substitute active dry yeast? If so, how much yeast would I use to be equivalent to a certain amount of sourdough culture? Thanks.
Weekend Bakers says
Hello Viv,
Yes, you could turn this into a yeast based recipe. You see in the recipe that we already suggested a hybrid version with sourdough and yeast. To make a complete yeast version you would need to add yeast to the poolish and to the final dough. We have never made this version and cannot give you exact quantities that work but we would suggest starting with a quarter teaspoon (0.5 grams) of instant yeast to add to the poolish and stick to the instructions for the hybrid loaf you find at the bottom of the recipe.
Good luck with it!
Marieke & Ed
John Vaughan says
A colleague sent this link to me. It is a brilliant site. I tried this loaf over the weekend. The first time I added some yeast but the second time went entirely off the starter. It worked perfectly and I was very happy with the results. From start to finish takes a long time (for me) but the actual time employed isn’t excessive and if you get the timing right fits in with your day. I look forward to trying the croissants some time soon. The next time I make this I will do a bigger batch and keep some dough in the fridge for a day or so and see how that works. There is some element of unpredictability in my baking since we use an Aga and the temperature is not exact. It just adds to the fun.
Thanks
John
Weekend Bakers says
Hi John,
Thanks very much. Couldn’t agree more with what you are saying and jealous in a good way of your Aga!!
Sure it will work out great too with the retarded fridge version.
Let us know how the croissants turn out…
Have a great (baking) weekend!
Marieke & Ed
Pim says
Baked this bread yesterday and it is just YUMMIE! What a great bread. Great texture, great taste. Thanks!
Gingi says
Another quick question: the original recipe calls for placing the final shaped loaf in refrigeration overnight… you obviously didn’t include that in your post here… any major changes once might expect when ding the cold rising overnight?
Weekend Bakers says
Yes, you can do that, no problem. Depending on how it looks when you get it out of the fridge you can even put it straight in the oven. We do not use this method ourselves because of lack of fridge space, so the exact timing is something you need to get right by just giving it a go…
Good luck with it,
Marieke
Gingi says
Hi there.
I tried it today. The end result is not impressive at all. The loafs ended up very dense and only one loaf really rise.
Any suggestion as for what to change during my second attempt to get a nicer result?
Weekend Bakers says
Maybe it was under-proofed. You have to look at the dough when it comes out of the fridge and see how far it has risen and then decide if it is ready for the oven or if it maybe needs 1 or 2 hours extra outside of the fridge until truly ready for the oven. It also depends on what the temperatures are of the dough going into the fridge, the fridge itself and your surroundings. If you think the dough is not ready, just give it more time. It is perfectly normal to not get it right the first time you try something like this. You need to adapt everything to your conditions.
Good luck with it,
Ed & Marieke
Gingi says
I have a question: instead of using 10 g sourdough culture, can I use a regular poolish starter? one with simple 1:1 ration of water and flour?
Weekend Bakers says
Hello Gingi,
The 10 g sourdough culture in this recipe is made to make a poolish. So, you do not start with a poolish but you make one following the recipe. Your sourdough culture (which you call a poolish) has the right ratio of water to flour so you can use 10 g of that and then follow the recipe and make the poolish. And because of the tiny amount of 10 g compared to the total of the recipe it would not really matter if it was a bit wetter for instance.
Have fun with the recipe and lots of loaves,
Marieke & Ed
Gingi says
Thanks. So basically the 10g culture in your outline 10g from my poolish.
Weekend Bakers says
In general a sourdough culture is something you maintain all the time and a poolish is something you make about a day in advance. So if you maintain your poolish all the time it is in fact your culture and you can indeed use that.
Peter says
My own version of this bread has been my favorite ever since I started making it. A couple f weeks ago my oven broke down and had to replace it. It took a while before I got to know the right temperatures to be able to bake this bread properly again.
Last week I bought flour at the Zandhaas where you also buy yours. I took the ‘eko tarwebloem’ knowing the protein is lower than the flour I have used before. Now I am finding that my loafs don’t get the oven spring as before. They actually look rather flat. I shape my loafs as boules and put them in oblong baskets for rising. Before loading them in the oven I slash them along the full length, which used to give me the best result. Not anymore. And I am a little puzzled by it.
The dough feels strong enough and I can clearly see the air pockets when the dough is rising in its transparent plastic container. When I remove the dough from their rising baskets it holds it shape so it clearly is strong enough.
Any ideas what could be wrong? Could it be the initial oven temperature? If too low (225C) will it not spring as much as a high 250C+) setting?
One interesting observation is that when I used two slashes rather then one the oven spring and grignes were much better but the final loaf was still somewhat flat.
I more or less follow the same steps as in your variation of the Tartine recipe but with a 7-8 minute low speed machine mix followed by 4 stretch and folds at 30 minute intervals.
Weekend Bakers says
Hi Peter,
Can you tel us which flour you normally use and what the protein % is?
Peter says
I normally use “tarwebloem van harde tarwe” from De Windotter in IJsselstein, which, I believe, is from Meneba. The protein content is/close to 13,4%.
Weekend Bakers says
Hi Peter,
Based on this we would suggest first to check what your real oven temp is at the moment (because you have a new oven you need to check if 225 is really 225). See our tips too: www.weekendbakery.com/posts…your-oven/.
Next to that it is no wonder the meneba flour gets you easier oven spring with the slightly higher protein content and maybe (but not sure about this) it could also be the case that this flour is ‘enhanced’ with some enzymes, because it very often is the case (broodverbeteraars). Maybe it is indicated on the package.
Of course it is more of a challenge to bake a good loaf without these enhancers and slightly lower protein. But from what we read you are doing a fine job already and with both a new oven and new flour it is also a question of practice and finding the perfect setting for this new combination. We would suggest starting at a slightly higher oven temp (provided you know the oven temp to be correct at 225) at 235 and maybe lowering it slightly when the desired color is achieved.
Good luck with it!
Ed & Marieke
Peter says
Hi Ed & Marieke,
The oven temperature is stable but I did raise it to 235 and this seems to work better.
I am using a Le Creuset cast iron pan for baking breads and I let it preheat for a good 45 minutes before loading the dough.
Last Sunday I baked this bread again and decided to up the hydration to 68-69% and in addition only mix by hand followed by 6 stretch & folds. The result was a much better bread with better crust, oven spring and therefore better crumb.
I would conclude that the root of my oven spring issues had more to do with hydration than oven temperature after all.
Weekend Bakers says
Good you found the culprit and got a great result.
We must say we only hear good things about the use of cast iron pans in ovens. This oven in oven principle works great for many people. The only ‘drawback’ is the fact that you can only produce one loaf at a time.
Keep up the wonderful baking!
Marieke
Robert Pieters says
Hoi Marieke en Ed,
Geweldige site, met name de filmpjes. Een vraag die hopelijk niet al veel te vaak is gesteld:
als het recept aangeeft “wheat (bread) flour” neem ik aan dat hier tarwebloem mee wordt bedoeld (en dus niet de Amerikaanse patentbloem of tarwemeel)?
Weekend Bakers says
Hallo Robert,
Jazeker dat klopt, al is er wel verschil in kwaliteit en loont het de moeite om op zoek te gaan naar goede kwaliteit tarwebloem met het juiste eiwitgehalte. Welk verschil dat kan maken en hoe dat in je brood tot uiting komt kun je zien in onze ‘flour expriments’ waar we verschillende kwaliteiten en ook bloem van verschillende molens met elkaar vergeleken hebben: www.weekendbakery.com/posts…nt-part-1/
en www.weekendbakery.com/posts…ent-mills/.
Happy Baking!
Ed en Marieke
petra woods says
Hoi Marieke en Ed,
Bedankt voor t antwoord daar heb ik wat aan!
t Is dus eigenlijk heel makkelijk: als je een recept hebt met zuurdesem dan kun je t idd met een poolish maken (dezelfde hoeveelheid als de zuurdesemstarter in t betreffende recept)
Maar wat nu als t recept al een poolish heeft zoals de recepten van Peter Reinhart?
Hij gebruikt een “barm” wat naar mijn idee gewoon een poolish is die hij bewaard in de koelkast en die je iedere 3 dagen moet verversen (zonde als je niet zoveel bakt)
En die gebruikt hij in zn recepten plus ook nog eens een zuurdesemstarter van een grote hoeveelheid.(die in die “barm”zit) en daarna een voordeeg en de dag daarna pas t uiteindelijke deeg….pff. (bv bij t zuurdesembrood uit The bread baker’s apprentice” blz 233)
Geen idee hoe ik dat kan verlagen naar 20 gram roggedesem.
as Vrijdag heb ik een workshop bij Levine (“Uit de keuken van Levine”) en ik zal het ook aan haar vragen..
groetjes van Petra
Weekend Bakers says
Hoi Petra,
Fijn! Eerlijk gezegd zijn wij wat minder fan van de recepten van Reinhart. We hebben zijn boek ook uitgeleend aan een vriend haha. Ben benieuwd wat Levine ervan vindt. Barm is eigenlijk een oud Engelse term die dacht ik gebruikt werd om schuim op bier (ale) aan te geven. Vaak zie je recepten met barm die gebaseerd zijn op bier of zo, dus een voordeeg met alcohol zeg maar.
Heel veel plezier en succes bij de workshop!
Marieke
Bill in UK says
Just made two of these (pix on twitter @hopebake). Had to do a retarded fermentation but it worked really well. If anyone else wants to try, follow the schedule till you have the bread in the baskets. Then leave at room temp for 90minutes before putting in the fridge (mine is 8 degrees) overnight. Then bake straight out of the fridge before the bread has time to wake up and follow its instinct to collapse.
Bill in UK says
By the way was using v strong Canadian flour so stuck with 75% hydration. Otherwise followed you exactly.
Weekend Bakers says
Very useful information there Bill and wonderful loaves. Thanks for sharing and hope! we can bake together one day!
Ed & Marieke
petra woods says
Hoi Marieke en Ed,
Ik heb t boek ook en verloor idd door de hoeveelheid tekst t essentiele bijna uit t oog, moest me behoorlijk concentreren om te zien wat er nu eigenlijk staat.
Daarna weggelegd en er nog niets uit gemaakt omdat ik niet wist (weet) hoe die enorme hoeveelheden van de starter ed om te rekenen naar een normale hanteerbare hoeveelheid zoals jullie nu gedaan hebben: bedankt daarvoor ik ga gelijk vanavond beginnen met de poolish;-)
Ik heb me al vaker afgevraagd hoe al die starters (zuurdesem dus) in al die boeken die allemaal verschillende hoeveelheden hanteren, terug te brengen naar de roggezuurdesem starter die ik van jullie heb (ja hij leeft nog steeds;-) naar een normale hoeveelheid als pakweg 10 of 15 gram per brood.
Hebben jullie een algemeen idee hierover om met mij (en anderen) te delen?
Ik heb ook t boek van Peter Reinhart (bread bakers apprentice en artisan breads every day en de volkoren broden bevallen heel erg goed maar de volkoren zuurdesem broden niet gemaakt ivm al die verschillende starters die ik dan in mn koelkast moet hebben staan.
t Lijkt erop dat je voor ieder boek (en ik heb er inmiddels een groot aantal) een andere zuurdesem starter moet hebben staan! pff Niet te doen dus, vandaar mijn vraag.
Ga zo door met jullie bakperikelen en ze te delen met ons,fijn!
groet van Petra
Weekend Bakers says
Hoi Petra,
Leuk weer van je te horen. We krijgen veel positieve reacties over het gebruik van een klein beetje desem en mensen vinden het een prettige manier van werken. We zijn toevallig bezig met een stukje over het converteren van ‘straight dough’ recepten naar recepten met een poolish met wat meer uitleg over dit onderwerp erbij.
Wat betreft je vraag alvast het volgende: Het eerste wat je moet doen is kijken naar het hydratatiepercentage van de starter in het recept. Daarna moet je uitzoeken hoeveel je van deze starter nodig hebt. Als je bijvoorbeeld 300 gram starter hebt met bijvoorbeeld een hydratatie van 100% (heel vaak het geval) dan zit hier 150 g bloem en 150 g water in. Dus als je nu de avond van tevoren (12 uur ongeveer) 150 g bloem en 150 g water en een schepje van ongeveer 15 gram actief desem door elkaar roert, dan kun je dat na die 12 uur als starter gebruiken in het recept. Je maakt dus in feite gewoon een poolish voor het recept.
Voorbeeld als de starter in een recept niet op 100% hydratatie wordt gehouden maar bv op 75%: Je hebt 350 g starter en een hydratatie van 75%. Dit betekent dat 350 gram starter bestaat uit 100% bloem en 75% water: bij elkaar 175%. Door 350 g te delen door 175 weet je hoeveel gram 1% is (namelijk 2g). Nu kun je simpelweg die 2 g met 100 vermenigvuldigen voor de bloem en met 75 voor het water. Uitkomst 350 g starter bestaat dus uit 200 g bloem en 150 g water. Stop hier weer 15 tot 20 gram actief desem bij (dat komt niet zo heel precies) en laat het 12 uur staan en gebruik het de volgende dag voor je recept.
Hoop dat je er wat aan hebt.
Happy Baking en veel mooie broden!
Marieke & Ed
Bill in UK says
Great that you guys have applied the famous weekend bakery scientific approach to Tartine. I have been using the book on and off for a few years with mixed results. When it works it is by far the best bread I ever made but I have produced my fair share of both bricks and pancakes. Because hydration is so key I would be interested to know what flour you have been using for this. I currently have some very strong Canadian flour but just ordered some European bread flour which will be different.
By the way: for anyone thinking of buying the book: it is worth it both for Chad Robertson’s passion for his bread and for the entire second half which is given over to left over bread recipes which are great. Also look out for his wife’s patisserie book (also called Tartine) which is awesome.
Weekend Bakers says
Hi Bill,
Thanks for sharing your experience and ideas! We use organic bread and whole wheat flour from our local mill. The bread (wheat flour) has a protein content that varies between 12 and 13% depending on the batch. maybe you have also seen the flour experiments we have done in the recent past: www.weekendbakery.com/posts…nt-part-1/
Very difficult to pinpoint what makes a flour great but we do know that good quality (organic) stone ground flour is very different from the stuff the supermarket sells over here.
Will check out the Tartine patisserie book because it sounds awesome and ‘must have’ :O
Keep up the baking and the sharing!
Ed & Marieke
Bill in UK says
By the way: totally agree with what you stay on starter quantity. It is my observation, having done several course and read untold books, that when professional bakers teach amateurs they advise making way too much starter. Amateurs don’t want to be throwing away kilo after kilo of starter. I only ever feed mine with 50gms water and 50gms flour then, like you, build the ‘production starter’ from there.
Weekend Bakers says
Great! Only so many pancakes you can bake with ‘leftover’ starter…
Peter says
I have also been baking Tartine bread for the past couple of weeks. The first time I followed the recipe too closely, even though I knew the hydration for US flour was much higher than our Dutch flour. Logically my first attempt failed miserably as the dough was much too wet and sticky. Also I found the stretch and folds in the container too impractical and (seemingly) somewhat ineffective.
The second time around I changed the hydration to 65% (leaven not counting, so more close to 68%) and I switched to the so-called slap and folds (Bertinet style). Followed by 2 stretch and folds after 1 and 2 hours. Though the slap and folds work fine for 1 big loaf of about 900-1000 grams of dough it is quite a workout, so next time I am going to try a short machine mix followed by a bunch of stretch and folds.
This is the first time I bake with strictly sourdough and I prefer it over everything I ever baked with yeast or sourdough and yeast combined. As far as I am concerned this is the best bread I have ever baked.
Weekend Bakers says
hi Peter,
So good to hear about your methods and results. Seems like we reached some of the same conclusions. It would be nice if you also tried the method without any mixing but maybe doing it on a worktop instead of in a container and see how you like that result. It sure is less hard work than the slap and fold method.
Thanks for sharing and love to see and hear more of course!
Marieke & Ed
Jan - Chiang Rai - Thailand says
Hello,
Boy was I happy to find this recipe on your website, I’ve been waiting to try this ‘Tartine Bread’ for a while but found the recipes from the book to complicated at the time. So very excited with your explanations on how to get good results in only a few very clear/easy steps. Everything went great until it was time to put the 2 loaves in the oven, I should have put some more flour in my bannetons so they kinda got stuck a little, but for a first time it wasn’t too bad. Into the oven onto the preheated oven stone, some hot water in a small steel cup on the bottom of the oven and close the door, the waiting begins. Halfway I have to turn the breads to get an ‘almost’ even bake and I noticed that they did rise, but not as much as I hoped. Anyway there is nothing you can do about that at this moment so just finish the bake. Total time 2×30 min because my oven doesn’t go over 210-215c (if I’m lucky) End result allot better than expected. Very crisp crust and great structure inside, great taste. And will try and make this bread again tomorow, since the first loaf is almost completely finished by now haha.
Thanks again, keep up the good work and will let you know how I get along with this bread in the future 😉
Weekend Bakers says
Hello Jan,
Wow, you are very quick off the mark Jan! We love to hear about your baking because it is always encased in lovely stories. We are impressed at what you are able to achieve with your ‘challenging’ oven conditions.
Always love to hear more and thank you very much for sharing the pictures with us through our ‘your loaves’ pin board 🙂
Happy Baking!
Ed & Marieke