• Skip to primary navigation
  • Skip to main content
  • Skip to primary sidebar
  • Skip to footer

www.WeekendBakery.com

Weekend Bakery

The place for the ambitious home baker

  • Home
  • Webshop
    • Rijsmandjes
    • Brood bakken
      • Mixen & Mengen
      • Snijden, rollen, schrapen
      • Rijzen
      • Bakken
      • Presenteren
    • Broodbak sets
    • Uitstekers
      • Uitsteker sets
      • Speciale XL uitstekers
      • Dieren
      • Bloemen en planten
      • Transport
      • Vormen
      • Lente & zomer
      • Kerst & winter
      • Halloween
      • Overig
    • Zoet bakken
      • Bakgereedschap
      • Papieren bakvormen
      • Overige bakvormen
      • Speculaasvormen en koekstempels
      • Houten lepels, spatels, schepjes…
      • Kerst & feest
  • Recipes
    • Best bread recipes
    • Sweet baking
    • Nederlandse recepten
    • Bread baking tips
    • Bread movies
    • WKB projects
    • Article index
  • Info
    • Contact Us
    • Baking Conversion Tools
    • Why Home Baking
    • Baking Glossary
    • Article Index
    • Bread Scoring with the Lame / Brood insnijden met de Lame
    • Send Us Your Loaf
    • Your Loaves!
  • About us
  • Show Search
Hide Search
You are here: Home / WKB projects / Homemade Cookie Cutter Ornaments

Homemade Cookie Cutter Ornaments

Leave a Comment WKB projects

Great idea for some people…cookies you cannot eat! And great family fun!

Click here for Dutch version
Last year before Christmas, we had lots of fun making these ornaments. We started with a basic recipe and after a few trial runs developed our own method to get the best result.

Most bakers will have the ingredients already in their pantry and it’s a fun and low budget way to personalize a gift or add decorations to your Christmas tree. The leaf shapes are also great for autumn decorations.

Anyway, endless possibilities limited only by your own creativity!

Homemade cookie cutter ornaments

Ingredients for the Cookie Cutter Dough

275 g baking soda

65 g cornstarch

180 g water

Making the Ornaments
Start by sifting the baking soda and the cornstarch. Add the water and stir until you have a smooth milky paste. Gently warm it over low heat, all the while stirring with a spatula. You will see the paste thicken fairly quickly. Keep stirring and churning so all the liquid is absorbed and the paste is now very thick, the consistency resembling potato mash. At this stage it will automatically form into a ball of very white ‘dough’. Transfer the ball to a bowl, cover with clingfilm so no moisture can escape and leave to cool completely.

Making cookie cutter ornaments


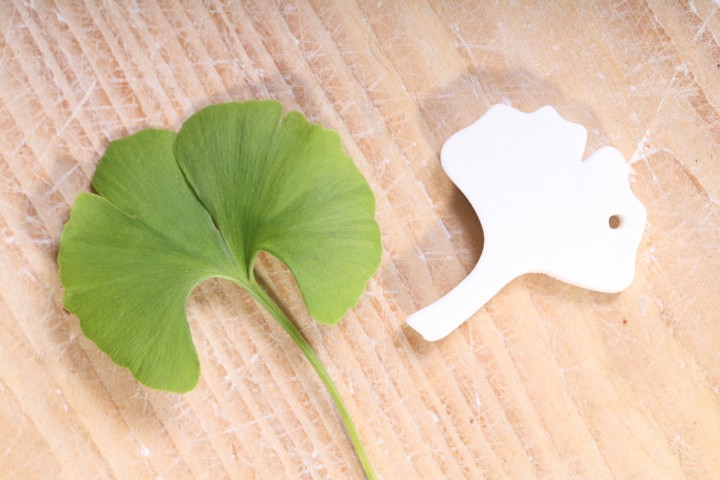
With a rolling pin, roll out the dough to a thickness of about 3 mm / 0.12 inches. Take your favorite cookie cutters and press them in the dough. Now very carefully wiggle them ever so slightly, then lift the cutter out of the dough. At this point you can also make a perforation in the ornament so you can hang them on a piece of string or baker’s twine when ready. This is also the time to stamp the ornaments with a cookie stamp or make patterns any other creative way you want to.

Now for the important part!: Leave the cut out shapes in the dough, do not try and remove them at this point. The idea is you leave the shapes to dry out for 1 to 2 days. They will shrink and are easily removed that way, without damage. You just have to be patient.

IMG_3615

After you have removed and freed the shapes you have to allow them to dry further. The total drying process can take up to around 4 days, depending on your internal climate and moisture levels. You also have to turn them occasionally so they will dry evenly on both sides. You can place them on a rack, but be careful to do this when they are firm enough to prevent any imprint of the rack on the shapes.

Alternatively you can dry the cookie cutter shapes in an oven set at a very low temperature of around 50ºC / 120ºF. The drying will of course go a lot quicker but there is a good chance they will become off-white in color instead of the perfect pristine white you see in these pics. Be sure to flip the shapes a few times to prevent them from warping.

Some of them might warp or crack a bit anyway, but if you are careful and give them time to dry completely, they end up quite hard and not that easy to break.

When dry you can also paint them or coat them with a clear varnish. We like them snow white and plain (as artisan bread bakers we are not the ultimate decorating types we have to confess). No doubt kids will have fun decorating them of course. Use non-toxic watercolor paint for example.

In our Weekend Bakery Shop you can also find our own favorite and original cookie cutters, all made from high quality stainless steel.

WKB projects

Reader Interactions

Share Your Comments & Feedback Cancel reply

Your email address will not be published. Required fields are marked *

Please read our comment policy below before submitting your comment:

  • Only comment or ask a question about a recipe as shown on our website
  • Only comment or ask a question when you have sticked to the recipe
  • We love to help you, but please do not make the questions feel like school homework

The coming months we will take a break from answering comments on our Weekend Bakery site.

Due to recent events our priorities have shifted and we need to focus on what matters most and give attention to our family and people who need us.

Primary Sidebar

Search

Categories

  • Best bread recipes
  • Bread baking tips
  • Bread movies
  • Highlight
  • Nederlandse recepten & tips
  • Seasonal Suggestions
  • Sweet baking
  • WKB projects

Info

  • About Us
  • Article Index
  • Baking Conversion Tools
  • Baking Glossary
  • Bread Scoring with the Lame / Brood insnijden met de Lame
  • Contact Us
  • Send Us Your Loaf
  • Why Home Baking
  • Your loaves 22
  • Your Loaves More 1 !
  • Your Loaves More 2 !
  • Your Loaves More 3 !
  • Your Loaves More 4 !
  • Your Loaves!

Seasonal Suggestions

Video: Baking pizza in our outdoor oven – short clips to inspire you

Our favorite simple sandwich loaf

Ficelle with sourdough

The perfect chocolate chip cookies

A fun & fast fougasse

Pinwheels & pain aux raisins

Footer

Recent Articles

  • Old friends raisin bread – A new favorite!
  • Taking a break…but not from baking!
  • Pumpkin buns with salted maple butter
  • Favorite flatbreads: The Turkish lahmacun – our style
  • Guest posting: Wouter Groeneveld – Save the sourdough
  • Buns with spelt & oat poolish
  • Guest posting: Wouter Groeneveld – Red Zuurdesem
  • Stefano shares: Baking in Italy during times of lock down
  • 10 year Weekend Bakery: Our 10 best loved recipes!
  • Video: Baking pizza in our outdoor oven – short clips to inspire you

Tags

apples boule Bread bread baking tips bread oven bread tips brioche butter buttermilk cakes cheese chocolate christmas cinnamon Coffee Cookies cranberries Croissants Dutch flatbread Holiday baking honey hybrid method Laminated dough muesli muffins no knead pain rustique Patisserie pies & tarts pizza poolish preferment rofco bread oven rye rye bread scones sourdough spelt stretch&fold vanilla Viennoiserie walnuts whole wheat yeast

WKB on Social Media

  • Pinterest
  • Twitter
  • YouTube

Favorites

  • De Zandhaas – Our local flour mill
  • Real Bread Campaign
  • The Fresh Loaf
  • The Perfect Loaf

All photos and text Copyright 2005-2020 by weekendbakery.com