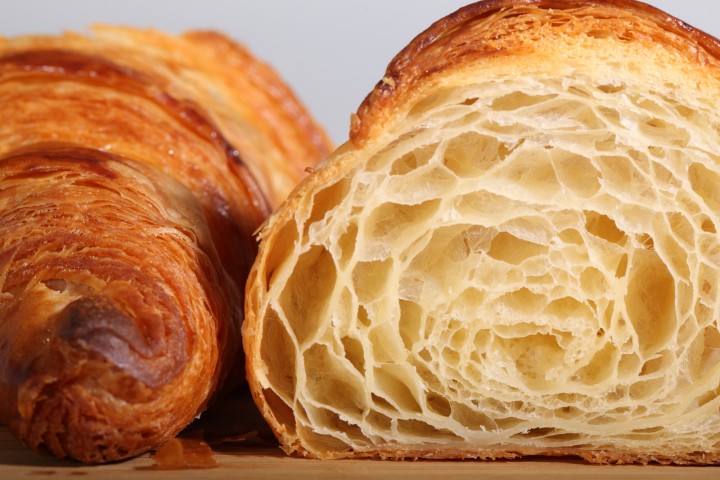
It’s all about the layers…
Klik hier voor Nederlandse versie
With this recipe we want to give you the exact directions on how we go about making classic French croissants. The recipe is an adaptation from the recipe for Classic Croissants by Jeffrey Hamelman. We started out largely following the instructions for his recipe, changed everything to our beloved metric system and found out some worthwhile croissant knowledge of our own along the way. Hopefully enough to justify sharing it all with you and inspiring you to give croissant baking a shot yourself.
Before you start we can recommend watching our croissant making video to get a general feel for the recipe. You can also check out our croissant making log where we keep track of our own croissant baking adventures. For answers to your croissant questions you can check out the Frequently Asked Croissant Questions section.
This recipe will yield about 15 good croissants plus some leftover bits which you can use to make a few, slightly odd shaped ones, or other inventive croissant-like creations.
If at first you don’t succeed, maybe you can take comfort from the fact that our first efforts were not very ‘croissant worthy’. But as you can see we persevered and got better…But we have to admit it is and always will be a tricky process. You have to work precise and be focused to get good results. So away with screaming children, hyperactive animals and all other things distracting! Put on some appropriate croissant making music and lets get to it…
Please read the following tips;
According to Raymond Calvel croissants laminated with margarine are formed into the crescent shape, while croissants laminated with butter are left in the straight form. We say, use whichever shape you like best, but do use butter!
The croissant recipe

Ingredients for the croissant dough
500 g French Type 55 flour or unbleached all-purpose flour / plain flour (extra for dusting)
140 g water
140 g whole milk (you can take it straight from the fridge)
55 g sugar
40 g soft unsalted butter
11 g instant yeast
12 g salt
Other ingredients
makes 15
280 g cold unsalted butter for laminating
1 egg + 1 tsp water for the egg wash
Day 1
Making the croissant dough
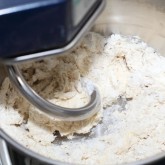
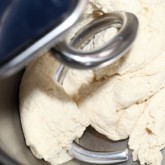
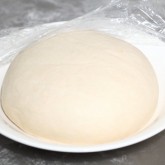
We usually do this part in the evening. Combine the dough ingredients and knead for 3 minutes, at low to medium speed, until the dough comes together and you’ve reached the stage of low to moderate gluten development. You do not want too much gluten development because you will struggle with the dough fighting back during laminating. Shape the dough like a disc, not a ball, before you refrigerate it, so it will be easier to roll it into a square shape the following day. Place the disc on a plate, cover with clingfilm and leave in the fridge overnight.
Day 2
Laminating the dough
Cut the cold butter (directly from the fridge) lengthwise into 1,25 cm thick slabs. Arrange the pieces of butter on waxed paper to form a square of about 15 cm x 15 cm. Cover the butter with another layer of waxed paper and with a rolling pin pound butter until it’s about 19 cm x 19 cm. Trim / straighten the edges of the butter and put the trimmings on top of the square. Now pound lightly until you have a final square of 17 cm x 17 cm. Wrap in paper and refrigerate the butter slab until needed.
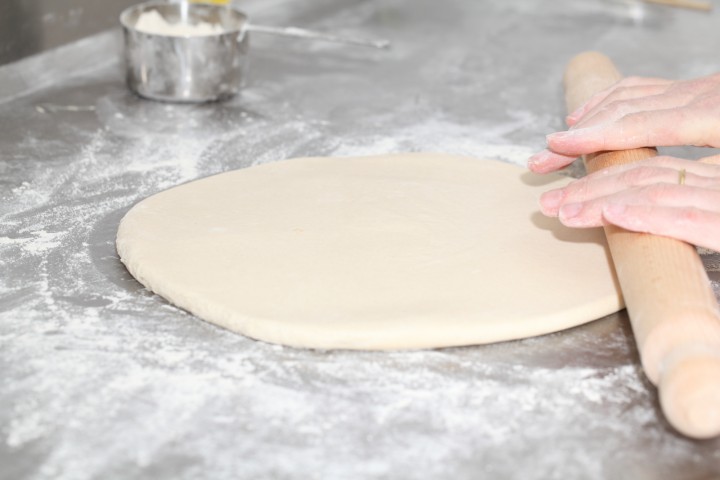
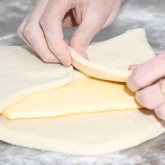
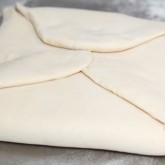
Take the dough out of the fridge. With a rolling pin roll out the dough disc into a 26 cm x 26 cm square. Try to get the square as perfect as possible and with an even thickness. Get the slab of butter from the fridge. Place the dough square so one of the sides of the square is facing you and place the butter slab on it with a 45 degree angle to the dough so a point of the butter square is facing you. Fold a flap of dough over the butter, so the point of the dough reaches the center of the butter. Do the same with the three other flaps. The edges of the dough flaps should slightly overlap to fully enclose the butter. With the palm of your hand lightly press the edges to seal the seams.
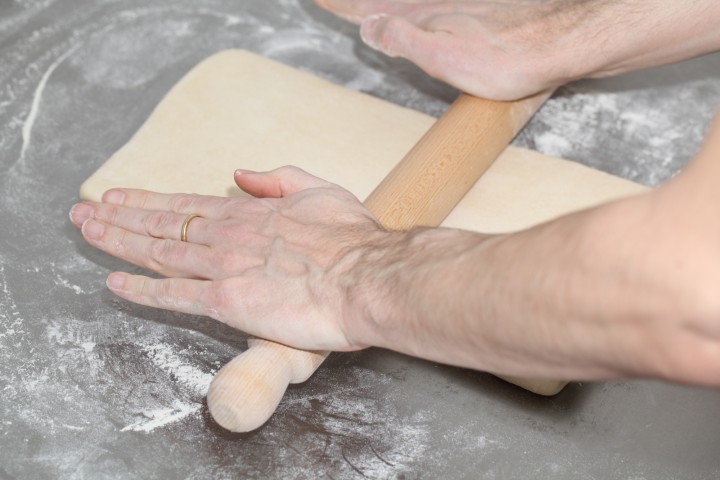
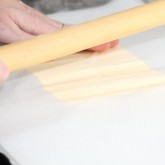
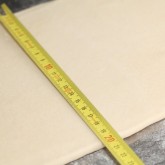
Now the dough with the sealed in butter needs to be rolled out. With a lightly floured rolling pin start rolling out, on a lightly flour dusted surface, the dough to a rectangle of 20 x 60 cm. Start rolling from the center of the dough towards the edges, and not from one side of the dough all the way to the other side. This technique helps you to keep the dough at an even thickness. You can also rotate your dough 180 degrees to keep it more even, because you tend to use more pressure when rolling away from you than towards yourself. You can use these techniques during all the rolling steps of this recipe. Aim at lengthening the dough instead of making it wider and try to keep all edges as straight as possible.
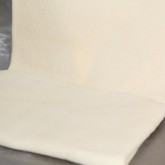
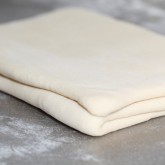
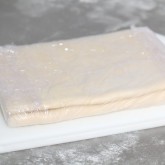
Fold the dough letter style, cover with clingfilm and refrigerate for 30 minutes (fold one third of the dough on top of itself and then fold the other side over it). Repeat the rolling and folding two more times (ending up with 27 layers of butter in total), each time rolling until the dough is about 20 cm x 60 cm. After each fold you should turn the dough 90 degrees before rolling again. The open ‘end’ of the dough should be towards you every time when rolling out the dough (you can see this in our croissant making video at around 3:40 minutes). After the second turn, again give it a 30 minute rest in the fridge. After the third turn you leave the dough in the fridge overnight until day 3, the actual croissant making day!
- Roll out to 20 cm x 60 cm
- Fold
- Refrigerate 30 minutes
- Rotate 90 degrees
- Roll out to 20 cm x 60 cm
- Fold
- Refrigerate 30 minutes
- Rotate 90 degrees
- Roll out to 20 cm x 60 cm
- Fold
- Refrigerate until day 3
- Rotate 90 degrees
- Roll out to 20 cm x 110 cm
Also see complete time table at bottom of page
Day 3
Dividing the dough
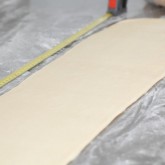
Take the dough from the fridge. Lightly flour your work surface. Now very gently roll the dough into a long and narrow strip of 20 cm x 110 cm. If the dough starts to resist too much or shrink back during this process you can fold it in thirds and give it a rest in the fridge for 10 to 20 minutes before continuing. Do not fight the dough, when the dough refuses to get any longer, rest it in the fridge! It is such a shame to ruin two days of work.
When your dough has reached its intended shape, carefully lift it a few centimeters to allow it to naturally shrink back from both sides. This way it will not shrink when you cut it. Your strip of dough should be long enough to allow you to trim the ends to make them straight and still be left with a length of about 100 cm.
Shaping the croissants
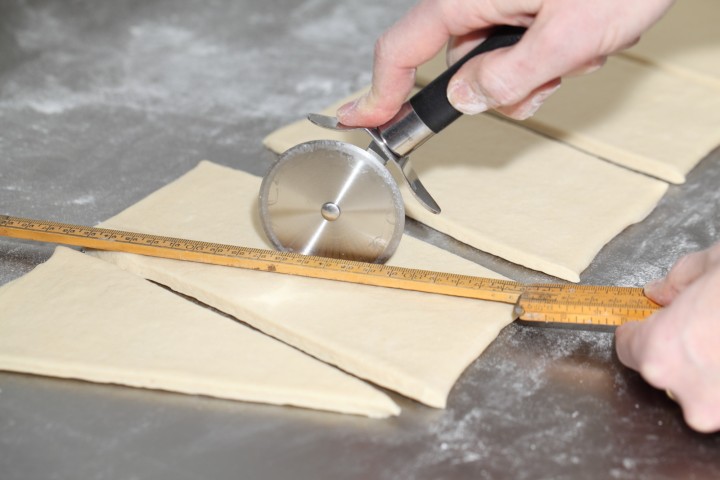
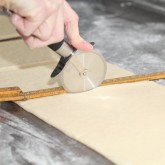
For the next stage you will need a tape measure and a pizza wheel. Lay a tape measure along the top of the dough. With the wheel you mark the top of the dough at 12,5 cm intervals along the length (7 marks total). Now lay the tape measure along the bottom of the dough and make a mark at 6,25 cm. Then continue to make marks at 12,5 cm intervals from this point (8 marks total). So the bottom and the top marks do not align with each other and form the basis for your triangles.
Now make diagonal cuts starting from the top corner cutting down to the first bottom mark. Make diagonal cuts along the entire length of the dough. Then change the angle and make cuts from the other top corner to the bottom mark to create triangles. Again repeat this along the length of the dough. This way you will end up with 15 triangles and a few end pieces of dough.
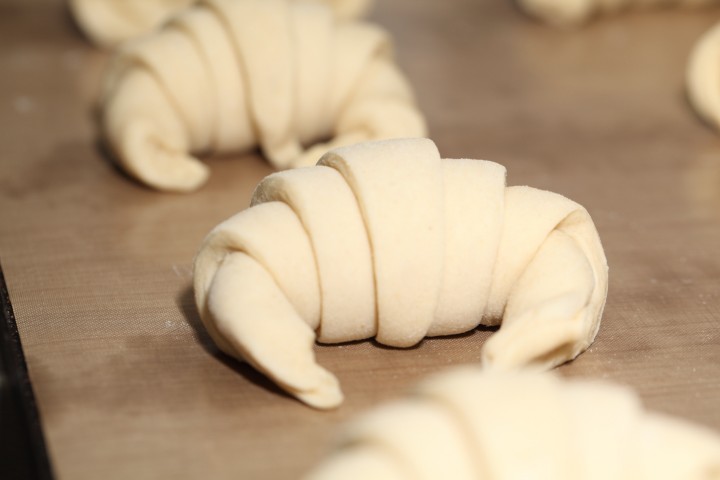
Using your pizza wheel, make 1.5 cm long notches in the center of the short side of each dough triangle.
Now very gently elongate each triangle to about 25 cm. This is often done by hand, but we have found that elongating with a rolling pin, very carefully, almost without putting pressure on the dough triangle, works better for us. You can try both methods and see what you think gives the best result.
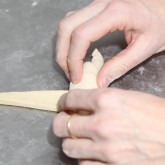
After you cut a notch in the middle of the short end of the triangle, try and roll the two wings by moving your hands outwards from the center, creating the desired shape with a thinner, longer point. Also try and roll the dough very tightly at the beginning and put enough pressure on the dough to make the layers stick together (but not so much as to damage the layers of course).
Proofing and baking
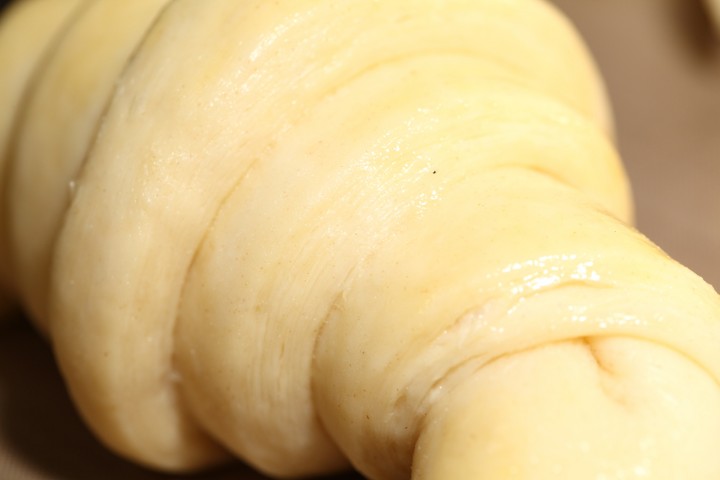
Arrange the shaped croissants on baking sheets, making sure to keep enough space between them so they will not touch when proofing and baking. Combine the egg with a teaspoon of water and whisk until smooth. Give the croissants their first thin coating of egg wash. You do not need to cover the croissants with anything, the egg wash will prevent the dough from drying out.
Proof the croissants draft-free at an ideal temperature of 24ºC to 26.5ºC / 76ºF to 79ºF (above that temperature there is a big chance butter will leak out!). We use our small Rofco B20 stone oven as a croissant proofing cabinet by preheating it for a minute to 25ºC / 77ºF. It retains this temperature for a long time because of the oven stones and isolation. The proofing should take about 2 hours. You should be able to tell if they are ready by carefully shaking the baking sheet and see if the croissants slightly wiggle. You should also be able to see the layers of dough when looking at your croissants from the side.
Preheat the oven at 200ºC / 390ºF convection or 220ºC / 430ºF conventional oven.

Right before baking, give the croissants their second thin coat of egg wash. We bake the croissants in our big convection oven for 6 minutes at 195ºC / 385ºF, then lowering the temperature to 165ºC / 330ºF, and bake them for another 9 minutes. Hamelman suggest baking the croissants for 18 to 20 minutes at 200ºC / 390ºF , turning your oven down a notch if you think the browning goes too quickly. But you really have to learn from experience and by baking several batches what the ideal time and temperature is for your own oven. Take out of the oven, leave for a few minutes on the baking sheet, then transfer to a cooling rack.
Latest way of baking; We heat up our double fan big convection oven at 200ºC, when heated up put the croissants in the oven and directly lower it to 175ºC. We bake them for 10 minutes at 175ºC, they will have a nice brown color by now, then lower the temperature to 150ºC, and bake them for another 6 minutes.
Best eaten while warm and fresh of course. Croissant we don’t eat or share within a day we freeze. We put them in the preheated oven (180ºC / 355ºF) for 8 minutes straight from the freezer. Nothing wrong with that, croissants eaten nice and warm, almost as good as the fresh ones…almost!
Croissant Time Table
Times are an indication and also depend on your experience with the recipe
Try to work swift but precise and take extra fridge time if needed!
Day 1 – Make initial dough
- 21.00 h – Knead for 3 minutes and store in fridge for 12 hours
Day 2 – Laminate the dough
- 09.00 h – Make butter slab and refrigerate till needed
- 09.05 h – Roll dough disc into square
- 09.10 h – Seal butter in dough
- 09.15 h – Roll out to 20 cm x 60 cm and fold
- Refrigerate 30 minutes
- 09.50 h – Rotate 90 degrees
- Roll out to 20 cm x 60 cm and fold
- Refrigerate 30 minutes
- 10.25 h – Rotate 90 degrees
- Roll out to 20 cm x 60 cm and fold
- 11.00 h – Refrigerate until day 3
Day 3 – Dividing, Shaping, proofing and baking
- 09.00 h – Roll out to 20 cm x 110 cm – part 1
- 09.05 h – Often needed! Take 20 min. fridge time if length not in one go
- 09.25 h – Roll out to 20 cm x 110 cm – part 2
- 09.30 h – Divide and shape the croissants
- 09.40 h – First coat of egg wash
- 09.45 h – Proof to perfection (indication 2 hours)
- 11.45 h – Second coat of egg wash
- 11.50 h – Bake for 15-18 minutes
- 12.10 h – Ready!











H.Shahid says
Hi,
I’ve tried making croissants a few weeks ago, using a different recipe and guided notes, but wasn’t aware that he butter had to stay cold throughout the whole process. The butter did start to melt, but I did get great results never the less.
All of my family Love croissants, myself included, and I’ve always wanted to make them. After the first attempt, I was so surprised, that I was curious to see what they’d be like if demo correctly. I shall be making the croissants tomorrow for out family trip to the zoo, and I am planning to make the croissants the today, allowing them to “Proof” over night and baking the next day. However is this possible, or will I see butter puddles in the morning?
I’ll see what happens leaving them for a few hours, and then put them into the fridge over night. I’m trying to make it easier ans shorter for me tomorrow as we will be out really early.
I’ll post after I’ve made and tasted them too!
Thanks a lot!
H.Shahid
Weekend Bakers says
Hello H. Shahid,
Sounds like you had a good plan with leaving them to get up to speed and then use the fridge for the remaining period and bake early in the morning. As long as the temperature is right there will be no butter leakage. Hope it all worked out for you!
Greetings,
Marieke & Ed
Matt says
Hi guys,
Thanks so much for your post. I’m a Huge fan of the french croissant and see them as the holy grail of all pastry!
I’m on my second go round following your recipe and am already a legend! – having had a pretty good result on the first. But exploring different flour and butter (Australian this time) and trying to get the proofing right.
So many variables… but you guys have narrowed them to a manageable equation for the home baker.
great job..
Cheers
Matt
Weekend Bakers says
Thank you for the wonderful feedback Matt and it sounds like with each bake you are going to improve and really make this recipe your own!
Happy croissant baking!
Ed & Marieke
Vanesha says
Dear Ed and Marieke ,
I think your recipe is amazing and I would really love to try it soon!
I’d like to know whether its okay to actually prepare the dough (before laminating) on Sunday afternoon/night and then use it(laminate it) not on Monday but on Tuesday morning instead? Will that affect the whole process of making the croissant?
And is it really crucial for the dough to rest one night before shaping it and bake it?
Thankyou so much Ed and Marieke for sharing this recipe..
Sincerely yours, Vanesha
Weekend Bakers says
Hi Vanesha,
The answer is yes, it will make a difference. The problem is, when you make a recipe for the first time, you will probably not be able to judge if your dough is doing alright or not compared to the way it is usually made. So we would always advice you to make the first batch to our specifications and stick to the times given and work from there. If you stretch times your dough can start to over-develop, also depending on fridge temp. For the last stage it is not crucial to wait until the next day, but you do need to give the dough a few hours to relax so you can work it better. The reason we made this an overnight thing has to do with when you want to eat fresh croissants, (you want to eat your croissants in the morning and not later in the day or the evening for example).
Hope you can work out your own schedule that will still give great result!
Greetings from Holland,
Ed & Marieke
Cathy says
After my first failure at croissants, I took your excellent advice re: temperature, type of flour and different butter. This batch I just made is 75% better!! Thank you so much….You really know you’re baking!!
Weekend Bakers says
Thank you for the excellent feedback Cathy, really happy to hear this!
Lots of loaves (and great croissants),
Marieke
Yang says
ABSOLUTELY AMAZED! If there is a rating for your recipe/instruction, I’d give it 5 out of 5! I’ve tried other recipes – instructions – adaptations and have been left wanting. You’ve provided insights and tips that nailed it. At first, I was skeptical because I thought too much reading and who’s got 3-days to make and bake croissants; it’s quicker to just go get it ready made and enjoy. But I do enjoy baking from time to time for the simple pleasure of it so decided to give it a try. It really tastes just like the store bought croissants (if not better) with only 2 differences: this is FRESH and contains no preservatives! This is definitely a keeper. Thank you for making this recipe available!
Weekend Bakers says
Hello Yang,
Thank you so much for your excellent feedback, really much appreciated and very glad you decided to give it a try.
Hope you are inspired to bake more croissants and may we also suggest maybe some other pastries with the croissant dough:
www.weekendbakery.com/posts…x-raisins/
Happy baking!
Ed & Marieke
Marla says
I love to make croissants and tried this recipe. The flavor is excellent, they rolled out great. However, when I cooked the first pan in our conventional oven at 430 f, and the centers did not cook through and the outsides were brown and yummy. I cooked the second pan at 400 f and the center was a little more cooked but not like the outside. Not alot of butter leaked out like with some other recipes. My pan were almost dry after cooking. Any suggestions to get the centers to cook? Thank you sharing your wonderful recipe.
Weekend Bakers says
Hi Marla,
Our suggestion would be, if you have a fan / hot air setting, to try and use that. It could also be that the real temperature of your oven is not exactly the same as indicated by the thermostat so it could be that you need to start at 450 ten lowering the settings during the second half of the baking process. Try to keep the heat in the oven, especially at the beginning of the process. Some people open the oven door to take a quick peek several times, but you will loose a lot of heat that way. Please also note that the inside (cooked but with a certain softness) of a good croissant is different from the flaky outside. The fact that there’s no butter leakage is also a very good sign.
Maybe some of our oven tips are also helpful for you: www.weekendbakery.com/posts…your-oven/
Good luck with it and happy baking!
Tamara says
Thank you for this recipe, it is the most accurate I have seen online and I have tried my first croissants yesterday! They were delicious, I just have to work better on keeping the butter cold!
I am looking forward to trying other recipes from your blog!
Weekend Bakers says
Hi Tamara,
Thanks for your feedback! As you make them more often and work quicker, your butter also has less chance of getting warmer. In the meantime using the fridge a bit more or longer is a good idea.
Happy croissant baking!
Ed & Marieke
Laura says
Thank you so much for your detailed croissant making instructions! I am a first time croissant-maker and if I had not stumbled upon your blog, I would probably not have even attempted to make these. The first batch just came out of the oven and they are beautifully crisp and flaky on the outside and soft on the inside. I did not achieve the perfect honeycomb structure that I would have liked, probably because my butter got too warm while I was laminating, but I am so excited to make these later this winter when it is cooler and hopefully get a better structure. Either way they are delicious! Thank you!
Weekend Bakers says
Thank you for sharing your excellent results with us Laura, and wishing you the perfect honeycomb when winter baking!
Greetings from Holland,
Marieke & Ed
Wynn says
Dear Ed and Marieke, Thank you for the wonderful tips and instruction. The croissant fresh out of oven is like a dream comes true, crispy outer layer and cloud-like on the inside. I am in Singapore where it is hot all year round so I have to make these in a 21 celcius airconed room ( wrap in myself in blanket while the dough chill out in the fridge) but it was so worth it. I did not wash the croissant with egg though as I feel the egg might cause layers to stick and hinder oven spring, so I switch to milk, the rest I follow the recipe religously.
Thank you again for your dedication to help us follow bakers re-create this magnificent pastry in our humble home kitchen.
Weekend Bakers says
Hi Wynn,
Sounds like you mastered the recipe perfectly, which is quite a challenge under your conditions! So keeping the room chilled and yourself warm is the way to go :). You are right about the egg wash, if and when you use it you should brush it on top but be careful not to coat the layers on the side, so they can expand freely.
Hope you will bake many more beautiful and delicious croissants. Maybe give the other pastries a try too with the same dough: www.weekendbakery.com/posts…x-raisins/
Happy baking!
Ed & Marieke
Fortino Guzman says
I like crossants
Cathy Stone says
I’ve tried 3 different times and got 3 different results. my biggest problem is they come out rock hard and more like brioche. They taste delicious but are too hard to eat and not layered !?!? How many things am I doing wrong? also I live in Hawaii so my kitchen is always about 78 degrees. I don’t have air-conditioning. Thank you.
Weekend Bakers says
Hello Cathy,
It is very likely all your butter got absorbed by the dough. This happens when you are probably working a bit too slow and the temperature of your surroundings is too high. We suggest keeping the dough in the fridge for a little bit longer (60 minutes) . Also using a different brand of butter or type of flour will help. You really need a ‘light’ flour for this. Croissants are ‘choosy’ some types of flour (or brands of flour) simply do not give a good croissant. The only way to find out is the try, and try and try again. You can see in our croissant log that you are not alone, we went through a lot of the same experiences: www.weekendbakery.com/posts…aking-log/
Croissants are a very challenging bake to master so the only way to reach perfection is practice and practice some more…
Good luck and happy baking!
Aubrey says
Hi Ed and Marieke,
This recipe looks to be one of the best I can find and I absolutely cannot wait to try it out starting tomorrow. However, I do have a few questions. How long can croissant dough be left in the refrigerator both prior to and after laminating? I was also wondering if it is possible to refrigerate or even freeze the croissants after they have been formed and proved.
Thank You
Aubrey
Weekend Bakers says
Hello Aubrey,
We want to advise to if possible stick to the times given in the recipe, especially if you have never made this recipe before. The periods before and after laminating can be stretched by a few hours (it also depends on your fridge temperature).
We cannot advice you on the second question because we never freeze or cool croissants before baking (we only freeze after baking). We can only tell you that this has been done by some bakers, but we don’t know the effect on the quality of the bake. Keep in mind that it can effect the layers and baking times might also have to be adjusted.
We would suggest, for a first bake, to go through the whole process without the extra freezing or fridge time and make notes if and when at any time you depart from the recipe. Remember croissants are one of the most challenging bakes and it is very normal to need several practice rounds to get to grips with the process and get a perfect result.
Happy croissant baking,
Marieke & Ed
Megan says
Hello,
I made your recipe over the 3 days as suggested and put the dough in the refrigerator for 30 minutes after each time I rolled it out. They ended up too dense as you can see in the pictures I have put links too. Do you have any suggestions why this has occurred? They are flaky on the top, taste yummy but are not the right texture!
Thanks a lot,
Megan
megansoric.wordpress.com/?atta…ent_id=311
Weekend Bakers says
Hello Megan,
Yes we do! It looks like all your butter got absorbed by the dough. This happens when you are probably working a bit too slow and the temperature of your surroundings is too high. We suggest keeping the dough in the fridge for a little bit longer (60 minutes) or try again on a cooler day. Also using a different brand of butter or type of flour will help. You really need a ‘light’ flour for this. Croissants are ‘choosy’ some types of flour (or brands of flour) simply do not give a good croissant. The only way to find out is the try, and try and try again. You can see in our croissant log that you are not alone, we went through a lot of the same experiences: www.weekendbakery.com/posts…aking-log/
It is really not possible to make a perfect croissant the first time you try. It is a very challenging bake to master.
Good luck and happy baking!
Aneesa says
Hi there. .. I baked a batch if croissants, they took long to bake. They actually didn’t brown at all and I left them longer. When I took them out of the oven. They were hard and not crispy at all..The texture inside the croissant is like bread dough. .plz tell me what went wrong. . I didn’t bake all the rolled croissants. I still have a few left over unbaked. Plz plz help
Weekend Bakers says
Hello Aneesa,
Trying to judge without seeing your description would indicate that there is something going on with your oven.
(also check out our tips on this subject: www.weekendbakery.com/posts…your-oven/) The first tip is: How accurate does it indicate the temperature? First of all it is wise to find out what the real temperature of your oven is compared to the temperature indicated on the settings.
It could very well be that your oven setting needs to be higher. Baking longer at an actual lower temperature can possibly be blamed for the not crispy result. The bread dough result can also be caused by damaging the layers. You need more practice to get it right, which is perfectly normal with something so challenging as making croissants. Check our log for some very good tips: www.weekendbakery.com/posts…aking-log/
Happy baking!
Yan says
Salutations from Africa!
This will be my first time attempting to make croissants. I’ve been researching for the past week now and judging by the pictures and reviews, I’ve decided that this recipe is THE ONE.
I have one question and that would be if:
I can substitute AP flour with Bread flour and still get a decent result?
Weekend Bakers says
Hello, when you use bread flour please make sure it is not strong bread flour. The stronger the flour, the more gluten, the more gluten the harder it is to roll out the dough. We have tried at least 4 different flours before we found our winning flour which will stretch easy without tearing up the dough structure. Happy baking.
Kevin says
Hey Guys,
Thank you for this great recipe! I made some delicious croissants last weekend and will make more this weekend, starting with the dough tonight 🙂 Here is how mine turned out imgur.com/a/2PeAJ
I would like to improve my next batch, and aim for that perfect honeycomb texture 🙂 One thing I would like to improve is in the consistency of the layers. On the very last rollout I could see islands of butter, through the layers. How can one reduce such a a thing? I did notice airpockets during the first and second rollout – I suspect this is the cause..
What is the best way to remove those airpockets at the butter stage?
Also you were right about the baking being dependent on the oven. I have a gas-oven and ~15 mins on 200C did not cut it, I found it was close to 30 mins for me 🙂
Another thing, my wife makes this delicious chestnut paste from scratch and I’m planning to use that as a filling. I made a small one last week and it was delicious 🙂 So I’m making bigger ones this week! Do you have any tips/suggestions on the size of the pastry for fillings? specifically how big were the rectangles for your pain au chocolats?
Cheers!
Kevin.
Weekend Bakers says
First of all, your croissants look amazing already, something to be proud of!
A lot has been said about butter islands in the comments above, it seems that more people have these issues and we think it can have several causes:
We think it could be a combination of first of all not having pounded /slapped the butter into one solid piece enough and also the fact that the butter could be a bit too cold straight from your fridge. The quality of butter can differ too of course but it would be very hard for us to judge this without seeing it. Our butter has a fat content of 82% and we always use a fresh packet. The butter has to be pliable and not too cold, not too warm. It is a question of experience, but also maybe trying another brand could help.
As for the filled pastry and measurements: with pain au chocolat we usually use leftover bits from the croissant dough.
A good size for them would be 10 x 10 cm / 4 x 4 inches. Maybe the paste also works very well when making pinwheels or pain au raisins. You can find the info and how to divide the slap of dough for this here: www.weekendbakery.com/posts…x-raisins/
Happy croissant and pastry baking!
Marieke & Ed
Stenly says
Dear Weekend Bakery,
i have some questions for you.
First, when 1st mixing of the dough. Do i need to mix it until i could do a window development test ? ( fully developed)
What happen for the final results of the croissants if i mix the dough untill full developed ?
Also when laminating the dough, i find that when i rest the dough at chiller ( 6 degree C ) for 30 mins, the dough was proofing, and the butter become hard. ( So when i rolled the dough for the 2nd single turn, the butter broke inside the dough, resulting the surface of the dough become wrinkled) . What should i do ?
Thank you,
Stenly
Weekend Bakers says
Hello Stenly, You only need to mix to moderate gluten development. All the laminating with the rolling and stretching will develop the dough even more. We have found out that the dough will be very hard to laminate by hand in the later stages when you fully develop the dough, it will fight back alot…
zulkifli says
I need help with the rolling. Whenever i try to flatten the dough, only the dough layers stretches thin while the butter layer stays the same thickness. Once the difference in thickness reaches a certain point, the butter “penetrates” the dough layer; there will be like patches were the dough layer just tear apart. Another problem is that the rolling doesnt “press” the butter layer, it just pushes it around. Any tip is greatly appreciated.
Weekend Bakers says
Hello, the best thing to try is another brand of butter. Different brands have different hardness, water content etc. We use an organic soft butter. Even from the fridge it is not a solid brick but is a bit pliable. Success!
Jackie Tearle says
Hi, thanks for your recipe, I’m keen to give it a try but a few questions:
I’ve never measured liquid in grams – am I weighing the milk and water??
With regards to kneading the dough; I don’t have an electric mixer so knead by hand-for bread I knead for about 15 mins so the dough is elastic and not sticky. What point should I stop for this recipe
Thank you 🙂
Weekend Bakers says
Hello Jackie,
Yes, you also weigh the water and milk, this is the most accurate way to do it. Kneading by hand, it depends a bit on your kneading of course, but we would suggest kneading for around 7 minutes. You are aiming for low to medium gluten development, it does not need to reach the stage you normally aim for, you want to avoid it becoming too elastic.
Good luck with it and happy baking!
kosta says
hi i’m wondering if u can give me the nutritional value chart for ur recipe pless email me back kostarobertson@gmail.com
Weekend Bakers says
We do not have this information for you Kosta, other than that the butter used has a fat content of 82%. There are probably apps for this, but we have never looked into it I’m afraid.
Chang says
Hey! I’ve used this recipe a few times with success and I want to try something new. I want to put chocolate chips onto the triangles before rolling them into form so the chocolate melts into the croissants while baking. Any tips on doing this? What will I have to change if anything? Thanks!
Weekend Bakers says
Hi Chang,
This is very well possible. It is very simple to do, just place the chocolate at the beginning and roll up. You only need a very small amount of chocolate (normally they use a small chocolate stick, so make sure your pieces of chocolate resemble that a bit to get even distribution) around 4 grams would already be enough. So, you do not need to change anything.
Good luck with it and happy croissant baking and eating!
cookandbaker says
Hey Ed and Marieke, hope all’s well with you. Thanks for this amazing recipe and the detailed guidelines. The photos are great and so is the video. I’ve just popped mine in the oven to bake and shall be posting on my blog my recipe if they turn out well as I’ve departed from yours by using my own sourdough starter in my dough. Quick question: you refer to the ‘first’ thin coating of egg so I was wondering, is there a second one at some point. Sorry if I missed it but don’t seem to find that in your account.
All the best, and happy baking!
Andrew
Weekend Bakers says
Hello Andrew,
You are very right, we already corrected it. The second layer of egg wash is applied right before baking. Thank you for noticing and hope your croissants will be great.
Happy croissant baking,
Marieke & Ed
cookandbaker says
Hey, thanks for letting me know! My sourdough croissants went very well! I am beside myself as a previous attempt (albeit with a different starter) wasn’t at all successful. This one worked great and the sourness and buttery taste was a great combo. Do have a look at the photos and my recipe on my blog for ‘sourdough croissant recipe’ when you have a minute!
Thanks! Andrew
Weekend Bakers says
Wonderful and delighted this sourdough version turned out so well for you. We will take a look of course!
cookandbaker says
Hey,
was wondering whether you had any thoughts on freezing spare unbaked croissants. You say 8 minutes straight from the freezer for baked ones but was wondering whether unbaked ones can be baked straight from the freezer or whether they need to thaw first.
I’d be very grateful for your insights! Andrew
Weekend Bakers says
First of all we never do this ourselves, so our advise is not based on our own actual baking experience but if we did this ourselves we would thaw first and get it up to a perfect proofed stage and then bake them.
Hope you will let us know how it works out for you.
Happy croissant baking!
sue-chan says
Wow – great instructions, pictures and video. You’ve inspired me. I’ll let you know how it goes.
Weekend Bakers says
Thank you Sue-Chan, it takes some time, but it is totally worth it!
Angharad Norris says
Hiya! I’ve used a James Martin recipe that’s on the BBC website for my first time baking croissants and it had 20g of dried yeast in. Annoying I had to use half the amount of butter specified (250g instead of 500g). I left it to rest overnight and formed my croissants around lunchtime. I was slightly worried because the dough smelled quite strongly of fermented alcohol (which I hoped would go once baked!). However, once baked the inside of the croissants still smelt like this. It was quite unpleasant though not as unpleasant to taste. I’m going to try the recipe on this website next time but I’m just wondering if this bake would have been improved by using the right amount of butter or if this would have made little difference? I’ve probably been a right muppet haha! Thanks! 🙂
Weekend Bakers says
Hello Angharad,
That does sound a bit worrying. We would always recommend to not use or eat something that has such a strong and off putting smell. It is rather unusual having this smell working with instant yeast, but something got in your dough and caused the production of alcohol.
Of course the recipe uses this amount of butter for good reason, using only half will make a big difference in texture and taste.
Good luck with it!
Christina says
Hi there!
I just completed the second attempt at your croissant recipe with the only difference being the use of RapidRise Highly Active Yeast in the first attempt and Dry Active Rise yeast in the second (I did activate the yeast myself). The second attempt with the active rise yeast did yield doughier croissants. I did notice that the dough rose quite quickly in the refrigerator. Do you think this could have been my yeast being a bit too ‘happy’ and the refrigerator temperature not being cold enough, therefore causing accidental proofing? How much should my dough rise? Also, could you tell me what brand yeast you used? Is instant yeast the same as RapidRise highly active yeast or breadmachine yeast?
So far they have not been complete failures. I am continually working to improve my skills so I can yield that same flaky layers as you have shown to have been possible in making!
Thank you!
Weekend Bakers says
Hi Christina,
Both could be the case. If you use these other types of yeast you should adjust a bit. Usually you use a bit more of active dry than instant yeast (see below), but the types you mention we do not know and have no experience with. We almost always use instant yeast (sometimes fresh), the type that needs no activating and can be added directly to the flour. Yours seems a special version that is extra active or maybe mend for enriched doughs, which can be perfect, but you need to find the right amount to use. Maybe there’s some info on the package to help you. A bit of rise in the fridge is normal, and with a few tweaks we are sure you are going to find the optimum for your conditions and ingredients.
Converting from fresh yeast to active dry yeast you multiply the weight of the fresh yeast by 0.4
Converting from fresh yeast to instant dry yeast you multiply the weight of the fresh yeast by 0.33
Happy baking!
Marieke & Ed
Eva says
Hello from Greece
In which stage can freeze them and then bake them?
Need to thaw and then to bake?
Weekend Bakers says
Hello Eva,
We would suggest freezing them after shaping then taking them out on time to first get them up to the right temperature (around 25 C) and then proof them till they are perfect and ready for the oven. Putting them in the freezer already proofed might ‘proof’ to be more of a challenge on the result.
Our own preferred method that works really well is to freeze the croissants already baked. Take them straight from the freezer to the preheated oven and warm for around 8 minutes at 175C.
Best of luck with it.
Bee says
Dear Weekend Bakery,
thank you very much for sharing your detailed tips and recipe. Hopefully I can try this soon. Just one question, I saw recently some pictures of pain au chocolate with very defined layers on the edges which I think looks very nice, such as this picture www.foodreporter.fr/dish/…/id/75640#. To achieve this, do you think it’s a matter of adjusting the number of turns (fewer layers)? or maybe not wrapping too tight when shaping? thank you very much.
Bee
Weekend Bakers says
Hello Bee,
Frankly we have no idea, because to us the pastry looks a bit strange (almost a type of filo) and the layers look ‘shifted’ and compact somehow, so to us it looks like it was wrapped very tight already. It also almost looks deep-fried. There is mentioning of using banana in the recipe but not sure what kind of role that would play in the dough.
Just experiment maybe with a small batch and see what comes out.
Happy baking!
Bock says
Dear Weekend Bakers,
Hi good day, very impressed by your beehive croissant. Is it possible to let me know which type or brand of butter to use? Cause back home in Malaysia the temperature is quite hot and the butter tends to melt easily before I could cut and roll it.
Hope to get some feedback from you
Sew Yang
Weekend Bakers says
Hello,
We cannot give you a brand that would also be available in your country. All we can tell you is that we use fresh dairy butter that has 82% fat solids. Maybe the fridge and the freezer can help you with keeping everything (including tools) cool.
Good luck with it and happy baking!
Anne Ruslan says
Dear Weekend Bakery,
Thank you a million for your French Croissant Recipe, I adore it so much! I feel so satisfied for every bites and really make my weekend’s breakfast so special with! I shared your croissant recipe and your website through my humble blog.
Greeting from Perth and Wishing You a lovely day!
Anne
Weekend Bakers says
Thank you so much Anne, that sounds absolutely wonderful.
Wishing you many more delicious croissants!
Marieke & Ed
Jasmine says
Wow! Love the detailed step by step instructions! I’m on day 2 of the Croissant making adventure! I do have a question though.
How hard and fast are the rules regarding the measurements of the rolled out dough? I rolled my dough out to 20×60 the first time but the second time I started rolling it came out to closer to 30×60. Is this a problem and if so, can it be salvaged or am doomed to have no croissants tomm! 🙁
xx Hopeful Croissant eater
Weekend Bakers says
Hi Jasmine,
Too late to tell you that it really helps to stick to the measurements, because then the whole thing works perfectly…but all is not lost 🙂 :
In this case, just fold the 60 cm side letter style, you end up with a piece of 30 x 20 and then roll it out again to 60 x 20 and take it from there. So hopefully no doom but tasty croissants!
Good luck with it,
Ed & Marieke
Jasmine says
Thanks for the reply Ed & Marieke. I ended up working with the measurements I had and got 11 Croissants instead of 15, which was OK.
A few things obviously went wrong:
1. My slab of butter had broken up into islands of butter during the laminating process – is there a specific trick to ensuring it stays whole? Perhaps a slab of butter that is a little bit warmer than right out of the fridge? This way it might be easier to roll out without breaking up?
2. The croissants did not proof well. They did not rise much during the two hr proofing process. I left them inside my oven, which is the warmest place in my apartment. I pre heated the oven at 170 Fahrenheit, about 30 mins prior to putting the croissants in there for proofing, so the oven was still a little warm.
3. As a result of the proofing…or lack thereof, they didn’t rise much during baking either. So they were not all puffy and gorgeous…they were good, but not as light. I could def see all the layers when I bit into it, and it was delicious…but I know it would have been even more light and fluffy had the dough proofed well.
4. The croissants tasted too salty to me, i used the measurements you provided in your recipe (converted them to tsp, tbsp and cups). I wonder if that was a result of the islands of butter when laminating?
All in all, they were good. We’re eating them the next day as well, with some Nutella spread! Yum!
I’ll def be giving these another try, coz i just cannot accept that I didn’t achieve perfect croissants! 🙂
Weekend Bakers says
Hi Jasmine,
-A few comments above this you can read about peopel who have the same butter issues and the answer we (and they) have given. If your butter just needs to be a bit warmer to get pliable we suggest next time you just get it out 10 minutes or so in advance and take it from there. It should not break up when you pound on it, it should def. stay in one piece.
_You seem to be doing everything right so we would suggest looking at the quality and quantity of the yeast here, maybe your current yeast is not active enough for some reason.
– The yeast has to work hard because of all the butter in this dough. If possible you can try a different brand or maybe fresh yeast and see if this helps.
-Converted I would take 2 teaspoons of salt, but based on personal preference (the butter needs to be unsalted of course) you can take it down a bit, no problem.
It sounds like you are still enjoying this batch and rightly so because you got very good results with a first attempt with one of the hardest to master bakes. So thumbs up to you and hope you will give it another round soon.
Happy croissant baking,
Marieke & Ed
Jasmine says
Good suggestion on the yeast! I’ll try and different one next time.
Thank you!
elena says
hello! thanks for sharing your receipe with the others 🙂 i recently discovered your site and i’m very very excited about your infos, videos, tips. I made my very first croissants after your receipe and this is what i got:
fbcdn-sphotos-e-a.akamaihd.net/hphot…2224_o.jpg
scontent-a-fra.xx.fbcdn.net/hphot…9197_o.jpg
i want to add that i don’t posses a modern oven, i’m using a gas oven and despite of this fact i’m quite happy about my results.
thanks again for sharing.
Weekend Bakers says
Hi Elena,
You should be because they look really great! Almost cannot believe this was a first attempt. Very impressed.
Happy croissant baking!
Ed & Marieke
elena says
yes 🙂 it was my first attempt. my second went just as good. on the third thou 😀 i changed the type of the flour and it didn’t go well. back to innocence now 🙂
all the best!
Weekend Bakers says
You bake and learn 🙂