
It’s all about the layers…
Klik hier voor Nederlandse versie
With this recipe we want to give you the exact directions on how we go about making classic French croissants. The recipe is an adaptation from the recipe for Classic Croissants by Jeffrey Hamelman. We started out largely following the instructions for his recipe, changed everything to our beloved metric system and found out some worthwhile croissant knowledge of our own along the way. Hopefully enough to justify sharing it all with you and inspiring you to give croissant baking a shot yourself.
Before you start we can recommend watching our croissant making video to get a general feel for the recipe. You can also check out our croissant making log where we keep track of our own croissant baking adventures. For answers to your croissant questions you can check out the Frequently Asked Croissant Questions section.
This recipe will yield about 15 good croissants plus some leftover bits which you can use to make a few, slightly odd shaped ones, or other inventive croissant-like creations.
If at first you don’t succeed, maybe you can take comfort from the fact that our first efforts were not very ‘croissant worthy’. But as you can see we persevered and got better…But we have to admit it is and always will be a tricky process. You have to work precise and be focused to get good results. So away with screaming children, hyperactive animals and all other things distracting! Put on some appropriate croissant making music and lets get to it…
Please read the following tips;
According to Raymond Calvel croissants laminated with margarine are formed into the crescent shape, while croissants laminated with butter are left in the straight form. We say, use whichever shape you like best, but do use butter!
The croissant recipe

Ingredients for the croissant dough
500 g French Type 55 flour or unbleached all-purpose flour / plain flour (extra for dusting)
140 g water
140 g whole milk (you can take it straight from the fridge)
55 g sugar
40 g soft unsalted butter
11 g instant yeast
12 g salt
Other ingredients
makes 15
280 g cold unsalted butter for laminating
1 egg + 1 tsp water for the egg wash
Day 1
Making the croissant dough
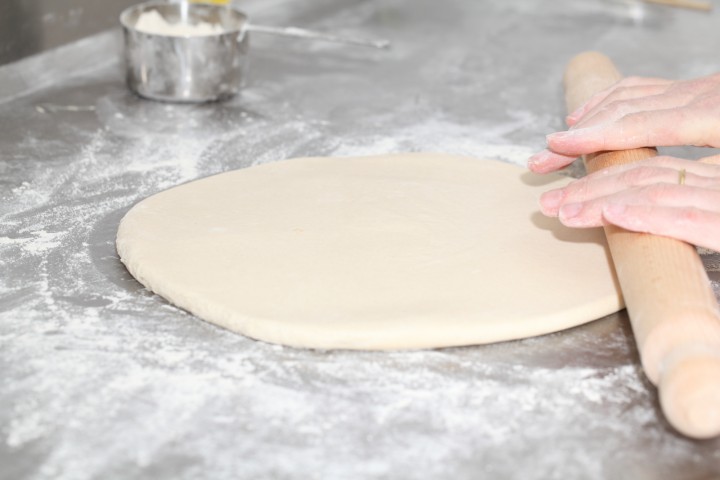
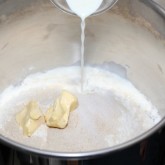
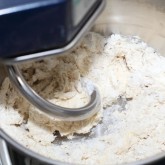
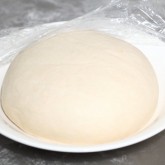
We usually do this part in the evening. Combine the dough ingredients and knead for 3 minutes, at low to medium speed, until the dough comes together and you’ve reached the stage of low to moderate gluten development. You do not want too much gluten development because you will struggle with the dough fighting back during laminating. Shape the dough like a disc, not a ball, before you refrigerate it, so it will be easier to roll it into a square shape the following day. Place the disc on a plate, cover with clingfilm and leave in the fridge overnight.
Day 2
Laminating the dough
Cut the cold butter (directly from the fridge) lengthwise into 1,25 cm thick slabs. Arrange the pieces of butter on waxed paper to form a square of about 15 cm x 15 cm. Cover the butter with another layer of waxed paper and with a rolling pin pound butter until it’s about 19 cm x 19 cm. Trim / straighten the edges of the butter and put the trimmings on top of the square. Now pound lightly until you have a final square of 17 cm x 17 cm. Wrap in paper and refrigerate the butter slab until needed.
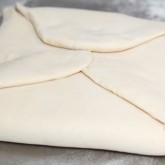
Take the dough out of the fridge. With a rolling pin roll out the dough disc into a 26 cm x 26 cm square. Try to get the square as perfect as possible and with an even thickness. Get the slab of butter from the fridge. Place the dough square so one of the sides of the square is facing you and place the butter slab on it with a 45 degree angle to the dough so a point of the butter square is facing you. Fold a flap of dough over the butter, so the point of the dough reaches the center of the butter. Do the same with the three other flaps. The edges of the dough flaps should slightly overlap to fully enclose the butter. With the palm of your hand lightly press the edges to seal the seams.
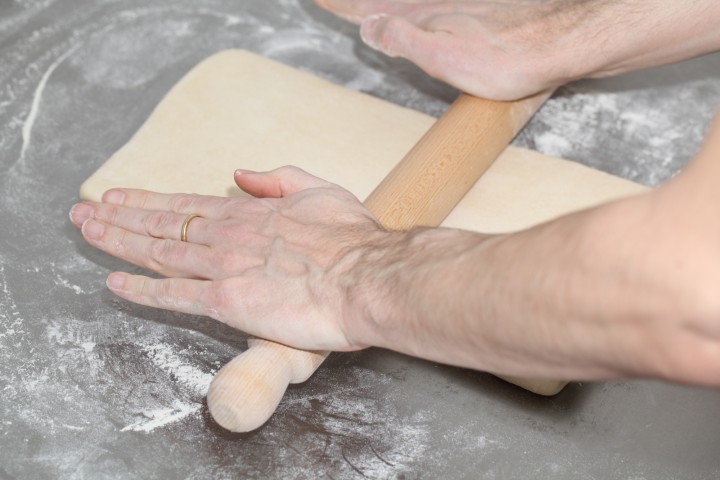
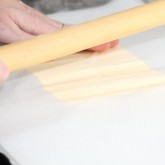
Now the dough with the sealed in butter needs to be rolled out. With a lightly floured rolling pin start rolling out, on a lightly flour dusted surface, the dough to a rectangle of 20 x 60 cm. Start rolling from the center of the dough towards the edges, and not from one side of the dough all the way to the other side. This technique helps you to keep the dough at an even thickness. You can also rotate your dough 180 degrees to keep it more even, because you tend to use more pressure when rolling away from you than towards yourself. You can use these techniques during all the rolling steps of this recipe. Aim at lengthening the dough instead of making it wider and try to keep all edges as straight as possible.
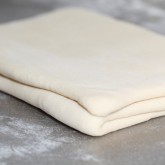
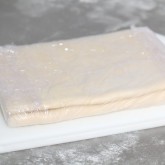
Fold the dough letter style, cover with clingfilm and refrigerate for 30 minutes (fold one third of the dough on top of itself and then fold the other side over it). Repeat the rolling and folding two more times (ending up with 27 layers of butter in total), each time rolling until the dough is about 20 cm x 60 cm. After each fold you should turn the dough 90 degrees before rolling again. The open ‘end’ of the dough should be towards you every time when rolling out the dough (you can see this in our croissant making video at around 3:40 minutes). After the second turn, again give it a 30 minute rest in the fridge. After the third turn you leave the dough in the fridge overnight until day 3, the actual croissant making day!
- Roll out to 20 cm x 60 cm
- Fold
- Refrigerate 30 minutes
- Rotate 90 degrees
- Roll out to 20 cm x 60 cm
- Fold
- Refrigerate 30 minutes
- Rotate 90 degrees
- Roll out to 20 cm x 60 cm
- Fold
- Refrigerate until day 3
- Rotate 90 degrees
- Roll out to 20 cm x 110 cm
Also see complete time table at bottom of page
Day 3
Dividing the dough
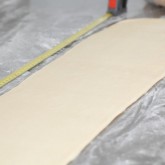
Take the dough from the fridge. Lightly flour your work surface. Now very gently roll the dough into a long and narrow strip of 20 cm x 110 cm. If the dough starts to resist too much or shrink back during this process you can fold it in thirds and give it a rest in the fridge for 10 to 20 minutes before continuing. Do not fight the dough, when the dough refuses to get any longer, rest it in the fridge! It is such a shame to ruin two days of work.
When your dough has reached its intended shape, carefully lift it a few centimeters to allow it to naturally shrink back from both sides. This way it will not shrink when you cut it. Your strip of dough should be long enough to allow you to trim the ends to make them straight and still be left with a length of about 100 cm.
Shaping the croissants
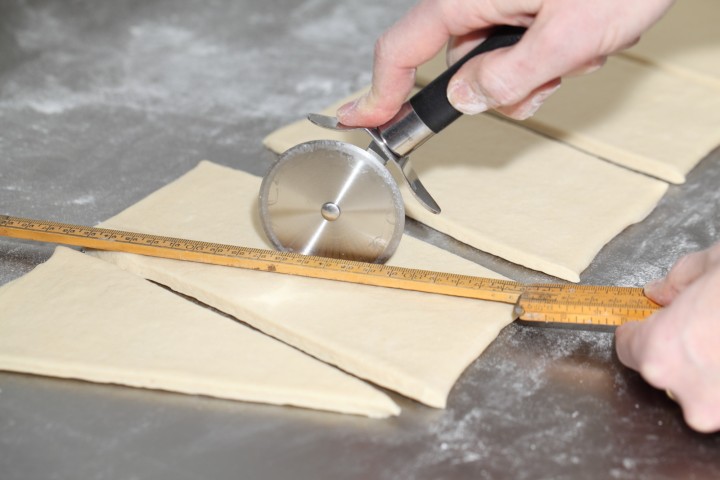
For the next stage you will need a tape measure and a pizza wheel. Lay a tape measure along the top of the dough. With the wheel you mark the top of the dough at 12,5 cm intervals along the length (7 marks total). Now lay the tape measure along the bottom of the dough and make a mark at 6,25 cm. Then continue to make marks at 12,5 cm intervals from this point (8 marks total). So the bottom and the top marks do not align with each other and form the basis for your triangles.
Now make diagonal cuts starting from the top corner cutting down to the first bottom mark. Make diagonal cuts along the entire length of the dough. Then change the angle and make cuts from the other top corner to the bottom mark to create triangles. Again repeat this along the length of the dough. This way you will end up with 15 triangles and a few end pieces of dough.
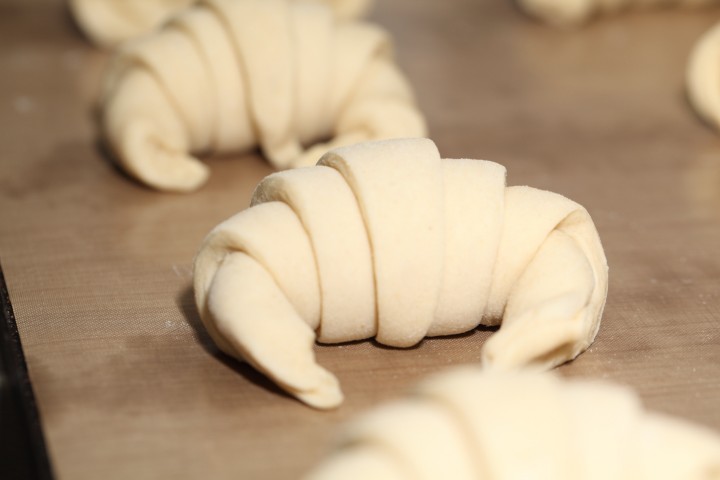
Using your pizza wheel, make 1.5 cm long notches in the center of the short side of each dough triangle.
Now very gently elongate each triangle to about 25 cm. This is often done by hand, but we have found that elongating with a rolling pin, very carefully, almost without putting pressure on the dough triangle, works better for us. You can try both methods and see what you think gives the best result.
After you cut a notch in the middle of the short end of the triangle, try and roll the two wings by moving your hands outwards from the center, creating the desired shape with a thinner, longer point. Also try and roll the dough very tightly at the beginning and put enough pressure on the dough to make the layers stick together (but not so much as to damage the layers of course).

Proofing and baking
Arrange the shaped croissants on baking sheets, making sure to keep enough space between them so they will not touch when proofing and baking. Combine the egg with a teaspoon of water and whisk until smooth. Give the croissants their first thin coating of egg wash. You do not need to cover the croissants with anything, the egg wash will prevent the dough from drying out.
Proof the croissants draft-free at an ideal temperature of 24ºC to 26.5ºC / 76ºF to 79ºF (above that temperature there is a big chance butter will leak out!). We use our small Rofco B20 stone oven as a croissant proofing cabinet by preheating it for a minute to 25ºC / 77ºF. It retains this temperature for a long time because of the oven stones and isolation. The proofing should take about 2 hours. You should be able to tell if they are ready by carefully shaking the baking sheet and see if the croissants slightly wiggle. You should also be able to see the layers of dough when looking at your croissants from the side.
Preheat the oven at 200ºC / 390ºF convection or 220ºC / 430ºF conventional oven.

Right before baking, give the croissants their second thin coat of egg wash. We bake the croissants in our big convection oven for 6 minutes at 195ºC / 385ºF, then lowering the temperature to 165ºC / 330ºF, and bake them for another 9 minutes. Hamelman suggest baking the croissants for 18 to 20 minutes at 200ºC / 390ºF , turning your oven down a notch if you think the browning goes too quickly. But you really have to learn from experience and by baking several batches what the ideal time and temperature is for your own oven. Take out of the oven, leave for a few minutes on the baking sheet, then transfer to a cooling rack.
Latest way of baking; We heat up our double fan big convection oven at 200ºC, when heated up put the croissants in the oven and directly lower it to 175ºC. We bake them for 10 minutes at 175ºC, they will have a nice brown color by now, then lower the temperature to 150ºC, and bake them for another 6 minutes.
Best eaten while warm and fresh of course. Croissant we don’t eat or share within a day we freeze. We put them in the preheated oven (180ºC / 355ºF) for 8 minutes straight from the freezer. Nothing wrong with that, croissants eaten nice and warm, almost as good as the fresh ones…almost!
Croissant Time Table
Times are an indication and also depend on your experience with the recipe
Try to work swift but precise and take extra fridge time if needed!
Day 1 – Make initial dough
- 21.00 h – Knead for 3 minutes and store in fridge for 12 hours
Day 2 – Laminate the dough
- 09.00 h – Make butter slab and refrigerate till needed
- 09.05 h – Roll dough disc into square
- 09.10 h – Seal butter in dough
- 09.15 h – Roll out to 20 cm x 60 cm and fold
- Refrigerate 30 minutes
- 09.50 h – Rotate 90 degrees
- Roll out to 20 cm x 60 cm and fold
- Refrigerate 30 minutes
- 10.25 h – Rotate 90 degrees
- Roll out to 20 cm x 60 cm and fold
- 11.00 h – Refrigerate until day 3
Day 3 – Dividing, Shaping, proofing and baking
- 09.00 h – Roll out to 20 cm x 110 cm – part 1
- 09.05 h – Often needed! Take 20 min. fridge time if length not in one go
- 09.25 h – Roll out to 20 cm x 110 cm – part 2
- 09.30 h – Divide and shape the croissants
- 09.40 h – First coat of egg wash
- 09.45 h – Proof to perfection (indication 2 hours)
- 11.45 h – Second coat of egg wash
- 11.50 h – Bake for 15-18 minutes
- 12.10 h – Ready!











Andrea says
Well I’ve really enjoyed your website, especially your croissant instruction, so much so, that I’ve decided to give it another go (having previously tried other recipes and websites, not so successfully). Unfortunately the weather has decided to get just that little bit warmer, so have been a bit challenged in the butter department. Anyway, they are currently on their last 2 hour proof, having been rolled into their little croissant shape, so will let you know how they turn out, otherwise they’ll have to be binned (unless you have any suggestions on what I could do with them) and will have to try again on a slightly colder day. My kitchen temp at the moment is 60 degrees! but outside is 74 degrees so I’m sure you can appreciate how difficult it’s been. But I’m getting ahead of myself, fingers crossed. I have a question though, on your video you say to put the dough in the freezer for 20 minutes before laminating but your recipe says 30 minutes, is there a great difference? Many thanks and will let you know the results later.
Andrea says
Ok, so they weren’t great. They looked the part before they went in, but once in the oven I noticed that there was butter melting everywhere. I had to cook them a little bit longer, because they weren’t cooked inside. Any thoughts? I did notice when I was rolling out the dough that the butter seems to have broken up a bit, so maybe I rolled to hard in the initial lamination? If you have any ideas I would greatly appreciate it, just to help point me in the right direction next time. Thanks in advance.
Weekend Bakers says
Hi again,
If you look at the comments just a little bit above yours you can read up on the butter challenge and what maybe can be done about it.
It is possible that several tiny things need to be tweaked to get the recipe right for your oven, ingredients, environment et cetera. By baking a lot (esp. with croissants) and getting to know the recipe really well so you can also get a good work tempo, your results will improve.
Check out some more tips in our croissant making log: www.weekendbakery.com/posts…aking-log/
Good luck and happy baking!
Ed & Marieke
Weekend Bakers says
Hi Andrea,
It depends a bit on the temperature of the freezer, so both could be right or somewhere in between. Experience will learn what works best for you.
hassan says
hi there
i did croissant but i got dry from outside if u eat like you eat cookies and also inside not that much light still have like dough
so do you have any advise to avoid that
thanks
hassan
Weekend Bakers says
Hi Hassan,
It seems your croissants are not properly cooked / baked. The first thing to do is to look at your oven (accuracy / temperature) and the baking time. You can find handy tips to help you here: www.weekendbakery.com/posts…your-oven/
It is very normal that you need to adjust to get the perfect croissants. Also you need to make the recipe several times to develop the right speed and technique to make them better and better.
Good luck with it,
Ed & Marieke
Edna Kaveza says
Hi weekend bakery,
Your croissant look delicious I tried it out but it was not good as yours.i think I didn’t do the mixing well.
Kindly give me the measurement of ingredients in other way apart from grams because I don’t have the the things to measure in grams maybe ml and table spoons will give me more highlight
Weekend Bakers says
Hello Edna,
They are:
For the dough
1 lb. 2 oz. (4 cups) unbleached all-purpose flour; more for rolling
5 oz. (1/2cup plus 2 Tbs.) cold water
5 oz. (1/2 cup plus 2 Tbs.) cold whole milk
2 oz. (1/4 cup plus 2 Tbs.) granulated sugar
1-1/2 oz. (3 Tbs.) soft unsalted butter
1 Tbs. plus scant 1/2 tsp. instant yeast
2-1/4 tsp. table salt
For the butter layer
10 oz. (1-1/4 cups) cold unsalted butter
For the egg wash
1 large egg
But we have to point out that results will be better (and all the good bakers agree) if you measure your ingredients. Baking is regarded an ‘exact science’ .
Good luck with the recipe and happy baking,
Marieke & Ed
Edna Kaveza says
Ooh you can’t believe it I did it again.This time I conquered it was very tasty.Atleast my son didn’t laugh at me
Thanks weekend bakery.
Weekend Bakers says
Haha, he was too busy eating delicious croissants of course! Very good.
Dr swapna sonar says
I made croissant as per your recipe.they were awesome.my husband and my kids really enjoyed. Perfect honeycomb appearance.i made with homemade white butter.in Mumbai ,india temperature was the only problem,but solved by making in air conditioned room.thank you so much.,for teaching recipe in steps as well as very methodically.
Weekend Bakers says
How wonderful to hear and thank you so much for the feedback! We wish you many more delicious croissants and maybe you could also try these www.weekendbakery.com/posts…x-raisins/ with the same dough. It is great fun to make them too.
Happy baking and greetings from Holland,
Marieke
Andy Wright (@rightee) says
hi there,
Found these instructions really useful for making croissants, pain aux raisins and pain au chocolat! I was just wondering how you would go about bulking up the recipe, ie. if I wanted to make twice the dough would I have to make the lamination size 120 x 40cm each time for the folds? (rather than 60×20?).
I’m currently making 3 times this quantity weekly and will probably increase again!
Andy
Weekend Bakers says
Hi Andy,
Thank you for that!
Doubling the size means 60 x 40 cm (so you could end up with two pieces of 60 x 20) With your size it would be 4 x as big.
Good luck with the increased croissant production 🙂
Marieke
Ann King says
I have read your recipe and your responses to your classic French croissant recipe and while I am impressed with your enthusiasm regarding your method and find your product to be beautiful, I don’t feel that it is necessary to make classic French croissants over a three day period. I am a French trained pastry chef and of all of the recipes that I have used and shared with other French trained pastry chefs have found that generally two days is all that is required to make a perfect French croissant. I simply make my laminated dough with 3 single turns the day before I want to bake the croissants. This gives the dough plenty of time to rest before rolling, cutting, and proofing, which can be done the morning of baking. I never roll my dough any less than 1.2 cm thick, and if your refrigerator cannot maintain a consistent temperature below 4 degree C, then you should rest it in the freezer, or the dough will begin to proof in the refrigerator during the resting period, decreasing the quality of your finished product and potentially causing your croissants to taste sour. Hope this helps. p.s. If you have left over croissants there are many recipes available on the web that will show you how to turn these into tasty breakfast treats to be eaten the following morning.
Weekend Bakers says
Thank you so much for your additions and advice Ann. Much appreciated. We also tried two day versions but for us this three day Hamelman method gives the best result. The first ‘day’ is of course just 10 minutes work in the evening, so we do think this three stage method works very well for the home baker who can easily incorporate it in a busy schedule. You are right about the fridge, it could cause unwanted proof if it is not cold enough of course. We can understand that that there will be many bakers who would prefer the two day method for several reasons.
Thank you again and happy baking!
Marieke & Ed
Leslie says
Dear Ed and Marieke,
Wonderful site! This information is so helpful. When I make croissants at home they never quite have the perfect honeycomb structure that make croissants so wonderful. The crumb isn’t quite open enough, and also at times has rings of “wet” or “undercooked” dough. The dough usually does fight back a bit during lamination, which I’ve never thought before to be from the over mixing in step one, and possibly also leading to damaged layers. Any other thoughts?
Is there any other indicators other than time to tell when you have reached a moderate gluten development? I’ll be mixing by hand, so any tangible difference you’ve noticed would be very helpful.
thanks so much!
-leslie
Weekend Bakers says
Other than the windowpane test (moderate means dough should still be (partly) opaque and not see through) and experience we would not know. To be honest we do not do this test, it is more that you develop an eye for how the dough should look and feel and also how it ‘behaves’ in the bowl…
pankaj says
croisant is very nice
Weekend Bakers says
Thank you Pankaj!
Enjoy your baking,
Marieke
Madleen says
Hi
Im making this batch of croissants for my family who’s coming to visit… I already done the dough and the layers and was going tp shape the croissants and freeze them unbaked. And get them out on sunday morning and put then straight in oven . would that be ok? Won’t it compromise the taste and flakiness?
Weekend Bakers says
Hi Madleen,
May we ask when you are planning on doing the proofing of the croissants? Because this can take quite some time. We would suggest taking them out on time to first get them up to the right temperature (around 25 C) and then proof them until ready for the oven. Putting them in the freezer already proofed might ‘proof’ to be more of a challenge on the result.
So…get up early to make sure your croissants are ready for the oven in time.
Our preferred method that works really well for us is to freeze the croissants already baked. Take them straight from the freezer to the preheated oven and warm for around 8 minutes at 175C.
Best of luck with it.
Marieke & Ed
maysa says
at the moment i do not have an oven but my grill is working can i still make these …
Weekend Bakers says
Hello Maysa,
We would definitely not recommend this. For baking, and especially something so challenging as croissants, you really need an oven. Maybe a friend can help out so you can bake them there.
Good luck with it,
Marieke
Hashemi says
Dear Ed & Marieke,
When you’re saying that we need to put the dough in the fridge for example after each rolling & folding, or for a whole day after the third time fold, what should the temperature of the fridge be? Around 4-5 degrees Centigrade or something way below like -18?
Thank you
Weekend Bakers says
Hello Hashemi,
The fridge temperature should be around 5 degrees Centigrade, that would be ideal. Minus 18 is the temperature of your freezer and is (for us) a good place to store leftover croissants and bread to keep it as fresh as possible.
Greetings,
Marieke
Hashemi says
Do you keep the croissant dough or the baked croissants in freezer, and how long can we keep them freezed?
How should we unfreeze, proof and bake them when we bring them out of the freezer?
Regards
Weekend Bakers says
We keep the baked croissants in the freezer, get them out straight into the at 175C preheated oven for 8 minutes, then they are perfect for us.
Good luck with it!
Marieke
Abino says
Tried these ,never made them before they were out of this world.
Weekend Bakers says
Thank you Abino and very glad to hear the recipe worked so well for you too!
We can recommend trying some viennoise pastry with the croissant dough too: www.weekendbakery.com/posts…x-raisins/
Happy croissant baking!
Marieke & Ed
Hashemi says
Hi everyone,
First of all I wanted to thank you for your very informative and complete walkthrough explanations.
I am a semi industrial producer of croissant with high quantity daily production.
My problem is that we are using bread flour to produce our croissants and as you know bread flours are strong and not intended to be used in layered dough products, and therefore as the result our products are a bit heavy and dense, but the taste & freshness is very good.
I wonder if you could kindly help me with how to use baking enzymes in order to enlighten the flour and get a better result in weight and internal structure.
I have heard that some enzymes like Xylanase, Gluco Oxidase & even Transglutaminse are very helpful for industrial producers.
Many thanks in advance.
Weekend Bakers says
Hello Hashemi,
We are sorry but as we are all artisan micro and home bakers meeting here, we are all about baking with (the right) flour, water and salt (and butter for croissants) and would not want to or need to use any enhancers like enzymes to aid our baking.
So this is not really our area of expertise.
Good luck with your baking,
Ed & Marieke
Hashemi says
Alright then, thanks anyway 🙂
Keep up the good baking…
Abino says
Revisiting your site the viennoise turned out beautiful and all gone. Love working with your dough.
Farhan alfin says
Dear sirs,
I would like to ask you about the long shelf life Croissant Recipe.
best regards
Weekend Bakers says
We’re sorry we do not fully understand your exact question…
Tracey Kinney says
I was hoping to get the ingredient measuserments from before you converted it to the metric system so I could try this recipe.
Weekend Bakers says
Hi Tracey,
You can find what you are looking for by clicking on the Jeffrey Hamelman link in the introduction of the recipe.
Good luck with it.
Margherita says
Sorry, one more question. I’ve just rolled out the dough (first laminating rolling) and The problem is, that the butter was very hard from the fridge. In your video, it seems all soft and “rollable”. My butter was breaking inside the dough, at some points visibly. So it looks like it broke to big pieces and the dough rolled out around it ( more or less). I don’t know if it’s normal, or if it was my mistake and I should have left the butter at the room temperature for a bit before closing in in the dough?:( is it too bad? Or the next rollings will make it better? Thank you, I really want those nice croissants:)))
Weekend Bakers says
Please check the answers to these same questions from other bakers right above your question!
Margherita says
I apologize for not reading through the forum, just did a quick search and obviously bothered you with something already discussed. I’ve tried to do a better job when looking for this other trouble I encountered. I don’t know why, but the dough in the fridge rises so much! From the first disk I made, it doubled in size overnight. Then after laminating, it became a giant over the other rest in the fridge. It even opened the well sealed cling foil I wrapped it in. Don’t know if it’s the fridge temperature or the yeast I’m using. Should I leave it resting for a shorter time or it just doesn’t matter and I should work with it as normal? Thank you for helping me with this last one:)
Margherita says
And again:( nevermind, found it above. The discussion is so long now, that it’s hard. Can I suggest to cut out some FAQs from the forum?;)
Weekend Bakers says
Good idea, thank you for that 🙂
Margherita says
Hi guys:) firstly, thank you for sharing a wonderful recipe:) will try tomorrow for the first time. But I wanted to ask one thing. Since we are only two in the house, the consumption is not that big and the work is a lot. Is there according to you a way of storing the made dough? Meaning that for example I make the whole batch and then leave it in the fridge and bake croissants just from a half of the dough? Having them freshly baked from the rest the next day or the day after you know? I understand it’s better to make them all fresh but they would go waste nevertheless. Can’t eat more than 2 a day. Thank you very mch for your opinion on this.
Weekend Bakers says
The best thing we can advise and what we do is bake them all and then store the left over ones in the freezer. When you want to eat one put them in the oven for around 7 minutes at 175C. If you want to keep the dough, don’t do it in the fridge, keep the slap of dough (not shaped croissants) also in the freezer, otherwise it will keep on developing. Maybe your method will work if you keep the shaped croissants in the fridge overnight, but there will be a limit before they deteriorate. We have not tried this ourselves because the first method works very well for us.
Margherita says
Thank you very much for your response. The freezer option looks good, once I have one:(..:), will try.
Maureen says
Dear Ed and Marieke,
I did not wait for your reply and was to scared to spoil all my hard work so I got up at the crack of dawn on Sunday to roll out and prove my croissants. By 10am we were sitting down to coffee and croissants ……heaven.
They were delicious, thank you for all your instructions and for sharing them with us.
I would still like to know if I could roll them out the evening before and then prove and bake on the third day? Has anyone tried it?
Once again thank you
Maureen
Weekend Bakers says
Hi Maureen,
Wonderful…good you tried it (very brave getting up so early!) like this and it worked out so well. And yes, you can do this the evening before, proof overnight in the fridge. We know people do this and get great results too (we usually do not have the fridge space). Just make sure the next day they are proofed to perfection before taking them to the oven.
Happy baking!
Ed & Marieke
tobias says
thx so much for this recipe sir ! you are really very honest , i tried it ! this is my first time to make croissant and the result is very very good ! u can chek mine here ! i www.facebook.com/photo…38;theater
thoby from indonesia
Weekend Bakers says
Great to see Tobias, thank you for sharing your results and wonderful you are so happy. Very good first time!
Greetings from Holland,
Marieke & Ed
Blex says
Hi, thank you for the recipe!
I’m experimentig croissants by 4 years. i’ve tried many many recipes and made my personal modification to find the final recipe. In the last experiment i’ve tried your recipe as i ever really wanted that marvelous honeycomb i dreamed for years and never reached. In the last few experiments i’ve started using Margarine for lamination instead of the butter because in hot weather it is more usable compared to the butter as margarine have an high melting-point temperature.
The problems:
Also this time, your honeycomb hasn’t came out… no way… but i had a great improvement in flakiness and in internal empty space (i finally have a big empty spiral inside the croissant). The main problem of my experiment has been the rising. Simply the croissants hadn’t rised during proofing… neither of 1mm. just not rised.
I don’t know why. For the experience gained in previous experiments i think fats in the dough inhibit yeast activation because in all experiment i added melted butter in the dough, then the dough had problem in rising during proof (yes, for sure it maybe that the culprit is the instant yeast of my country).
The croissants rised a bit in the oven where each free external layer expanded gained flakiness, but after 20 minutes of oven they were brown and flaky externally but half-uncooked internally (i could see white dough layers)
What might have happened?
Also, i noticed my oven reached 190°C before putting in the croissants, but once in, the oven can’t sustain 190°C and remained to 155°C for 8-9 minutes before rising again to 190°C (i have a portable oven-thermometer). Activating the internal oven fan haven’t sorted out any effect. (PS. do you suggest the activation of the fan in the oven?)
The question:
In my country, instant yeast is sold in little bags containing 8 grams of light-brown grains (some brand 10g). On the bag they write this quantity is the best for 500g of flour and that it is pair to 25g of fresh yeast.
In your recipe i see 11g of yeast. Do you suggest me to use the advised quantity of yeast printed on my bags (8g) or to use just 11g as for your recipe also if my yeast come from a different country/brand ?
(I don’t think this could be the problem of my last experiment as the lacking of 3g of yeast couldn’t explaing the no-at-all rising).
Thanks again.
Weekend Bakers says
Hello Blex,
Your problems are quite a challenge..for us too we must say. First of all we never use margarine and cannot really advise you there based on experience. Your oven is a challenge all by itself and the temperature drop may account for a big part of your problem. We would advice using the fan oven especially in the beginning to generate more heat.
You need to stick to the quantities of yeast we give, because on your package they give you advice for an average loaf of bread but croissant dough (enriched dough) is very different and as a rule needs more or even a different type of yeast.
We also would suggest taking a look at the date on the package and making sure you use a fresh, not yet opened package with a far enough in the future ‘sell by’ date, next time you make croissants.
Good luck with it,
Marieke & Ed
Blex says
Thank you very much. Yesterday i’ve made another dough and used a yeast sold in bags of just 11g with indication of correspondance to 25g of fresh (hydrated) yeast. I think this is the most comparable to your.
In some minute i will do the lamination and i will use pure fresh butter with 80%+ of fats.
Keep finger crossed for me!
Thanks again for your help!
Weekend Bakers says
Sounds good and will do!
Happy croissant baking,
Ed & Marieke
Maureen van der Kroft says
Dear Ed and Marieke,
Firstly I want to say I love your blog and I have read all the comments and answers and have loved every minute.
I am making the croissants for the first time and tomorrow I will be on day 3. My question is if I shape my croissants this evening and leave them in the fridge covered overnight and then prove them tomorrow morning for 2 hours………..will it make a big difference???????
Looking forward to your answer
Maureen
Weekend Bakers says
Hi Maureen,
Have you tried this method already? It should be no problem to do it like this as long as you make sure they are perfectly proofed when they go to the oven.
Happy croissant baking!
Marieke & Ed
Izabela says
Hello again,
I made the croissants for the second time. Baked them this morning. First time I had problem with butter separating inside the dough. This time I purchased better butter with 82 % fat content, 250g one piece. I did not cut the butter to form a square, I just simply pounded and rolled it the way it was in one piece, then trimmed etc. this time the butter didn’t separate and the dough came our beautiful! And my croissants were simply perfect! I knew your recipe was bulletproof, I just needed to keep trying.
Oh, did I mention I live in France? I have had croissants in many different bakeries and the homemade beat them all.
Thanks again for your tips!
Weekend Bakers says
Wow Izabela, that sounds exactly like it should be..you must be one happy croissant baker 🙂
Good to know that different butter did help.
Hooray for homemade!
Happy baking in France,
Marieke & Ed
Izabela says
Yes, I am a very happy croissant baker thanks to you! I think I’m getting addicted haha
Greetings!
Izabela
Weekend Bakers says
If you had to pick an addiction…this would be one of the better ones 😉
Greetings from Holland!
Marieke
Izabela says
I so agree. Greetings!
Ps. Making croissants again. Looks like my family is now addicted as well 🙂
Elaine says
I just made this recipe, it was amazing. I love a good croissant recipe. but I think i’m having an issue with the butter, but maybe not as there were perfect layers and you could see them. Anyway, when I start to laminate the dough i see the butter break into smaller pieces within the dough, it looks almost marble-like, if that makes sense. Am i rolling the dough and butter while it’s too cold? Do i let the butter be a little soft so it doesn’t break? I made sure the butter and dough are the same firmness, but it always seems like the butter is hard and the dough is softer even when i just take the dough out of the refrigerator.
Again, you can see the layers in the croissants i made but while rolling them I didn’t know if it was going to turn out or not, and 3 days of waiting would have been a big bummer. Thanks!
Elaine says
oh well, i just saw the above comment. oops
Weekend Bakers says
Yes, it seems more people have this same challenge with their butter. We cannot really say without comparing it live but it could be that some butter might be more brittle than other. But it is a good idea to let it get a little warmer and more pliable.
Good luck with it!
Marieke & Ed
Izabela says
Hello, i am in the process of making the croissants (day 2). While laminating the dough during second rolling out I noticed that the butter was separating into pieces in the dough. What can be the problem? Butter was too cold? I used it straight form the fridge. Or maybe the butter wasn’t a good quality butter?
Thank you
Weekend Bakers says
Hi there,
We think it could be a combination of first of all not having pounded /slapped the butter into one solid piece enough and also indeed the fact that it could be a bit too cold straight from your fridge. The quality of butter can differ too of course but it would be very hard for us to judge without seeing it. Our butter has a fat content of 82% and we always use a fresh packet.
Good luck with it!
Ed & Marieke
Izabela says
Thank you for a fast answer. I think it’s possible the butter didn’t become one piece. I will find out tomorrow how the croissants are. If not good I will keep trying. I looked through a lot of recipes and yours seemed to be the easiest and the best. Beautiful photos and great instructions
Weekend Bakers says
Thanks Izabela!
Izabela says
Despite butter issue the croissants came out great. Crunchy and flaky on outside and soft and chewy on the inside. The inside was a bit too moist which I think had to do with butter separating and not being even. I did achieve nice layers though. They tasted great! My son and husband ate them up like there was no tomorrow.
I will keep making them until I get them as good as on your pictures.
Thank you.
tiago says
Hello,
Thanks for the recipe and detailed steps.
Can you tell me if the overnight rest before the final shaping is needed?
Would I still get a good result if instead of the overnight rest I just leave
them on the fridge or freezer a couple of hours?
Thank you!
Weekend Bakers says
Hi Tiago,
The recipe works the way it is described and if you change things the result might be different of course. It is always hard to judge what will or would be the difference with the original version if you have not tried that before. We would always recommend making the recipe as is the first time. But if you cannot wait or are pressed for time you can try it the way you suggest. The only thing is that with this timing you would probably have fresh croissants in the middle of the night so you might want to take a look at when to start the whole process and when you are aiming for having the croissants ready.
Good luck with it!
Ed & Marieke
essam says
Nice foto
LD says
Hi from Southern California,
I saw your wonderful blog on your Classic Croissant. It is gorgeous. I tried the recipe to the T. It turned out really good just like in your picture. The only problem I had was rolling out the dough. I cannot roll it out up to 60 cm it is about 10 to 15 short no matter what. I rested the the dough did all what you recommended. What do you think was the problem? The honey comb texture is there, the taste is so so good even on room temp, it does not flake off when you bite. Overall it was a success I must say. I made two batches and the other batch I will make Croissant Au Chocolate today.
Thank you so much.
Weekend Bakers says
Hi LD,
Thanks for your kind words. Sounds like you did everything more than OK. The only thing we can think of is the limit of the extensibility of your dough, ’caused’ by the flour you use. It is not really a problem of course, the croissants having turned out perfectly, but you could try and play around with a few different types / brands of flour and see how that turns out. We get the best croissants with our French Type 55 flour with around 11% protein. We also used Manitoba flour and dough made with this flour is very elastic and extensible but for us the results for croissants were slightly less. But any sack / batch of flour can act different, it is just a matter of testing and baking (and eating!).
Good luck with it!
Ed & Marieke
Mia says
Great, thank you. Can’t wait to try again!
Mia says
Hi,
Thank you for this amazing recipe! I baked croissants for the first time and (amazingly) they turned out looking and tasting like croissants thanks to your recipe. I will be aiming for a more open crumb next time, as I think I allowed the butter to get too warm at one point and started to enter brioche territory.
I do have one question though – my croissants smelled a little of yeast in the very centre. Is this a sign that they were undercooked? Or overproofed?
Thanks,
Mia
Weekend Bakers says
Hi Mia,
We are not really sure. The thing is, due to the long fermentation of the dough, it naturally smells slightly of yeast, but we cannot judge of course if your croissants had that same smell or maybe a little bit more.
Based on what you are saying we would suggest you bake them a few minutes more next time and compare the results.
Good luck with it,
Ed & Marieke
Sara says
Hello there! Thank you for this fantastically detailed recipe. I am on Day 1 of 3 and am currently psyching myself up for the laminating process tomorrow.
I have a question for you that I’m hoping you can help with. How long does the dough actually have to sit in the fridge when you say “overnight”? Is the suggestion that it will sit from one morning through to the next morning, or that you would make the dough the night before and roll it out the next morning? Or does it matter? Just wondering as I made the dough early this afternoon and wondered if I could laminate it at midnight, about 10 hours later.
Thank you,
Sara
Weekend Bakers says
Hello Sarah,
Overnight in this case can be stretched a bit from anywhere between 12 and 20 hours (based on our own baking with good result). We also think that your plan with about 10 hours in between should work out fine.
Most important thing is you give the croissants enough time to proof after shaping, at the right temperature (like it says in the recipe).
Good luck with it and hopefully there will be fresh croissants to be enjoyed soon!
Marieke & Ed
Sara says
Wow – thank you for your prompt reply! You’re like a crisis line for croissant makers.
I just rolled out my first laminating layer and ran into a problem – my butter, although it appeared to be one solid layer, split along the original “seams”, and is distributed unevenly throughout the dough. Is it possible to have the butter TOO cold? I thought that would be the last of my problems based on all recipes I’ve read, but it seemed to me that the butter was too cold to roll out smoothly. I’m assuming that when you put the butter layer into the dough, it is supposed to be “right out of the fridge” cold, but I don’t know how it could be rolled out at that temperature.
Thanks!
Sara
Weekend Bakers says
That is not always the case…we have to say, but glad to be of help when online…
Take a look at our croissant video: www.weekendbakery.com/posts…roissants/
Yes the butter comes out of the fridge but you have to pound on the butter first and then it becomes the right consistency /thickness to role out later.
If your butter is a bit too hard and cold from the fridge, just wait a little bit and it will soon be a bit warmer and easier to roll. It should always be ‘pliable’ enough so it will not break.
Good luck again!
Marieke
Sara says
Thanks so much! My croissants turned out beautifully! Thank you again for these great instructions, and the video was very helpful to get a feel for the speed and method of rolling the dough. Very helpful!
Sara 🙂
Weekend Bakers says
Great news Sarah! Keep up the wonderful baking!
Philip says
Started making the croissant dough on monday, baked them this morning expecting them to be a flop and they turned out awesome, thanks so much for the recipe, Not quite 100 percent but for a first try a huge success, thanks again 🙂
Weekend Bakers says
Great Philip,
Thanks for sharing and many more wonderful croissants for you in 2014!
Greetings,
Ed & Marieke