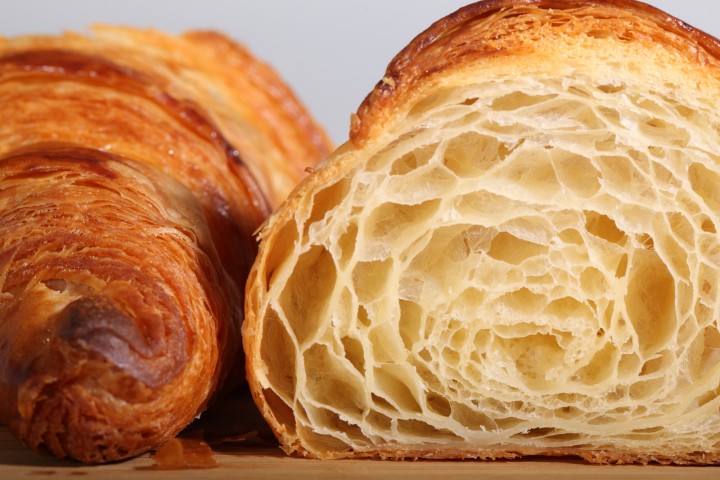
It’s all about the layers…
Klik hier voor Nederlandse versie
With this recipe we want to give you the exact directions on how we go about making classic French croissants. The recipe is an adaptation from the recipe for Classic Croissants by Jeffrey Hamelman. We started out largely following the instructions for his recipe, changed everything to our beloved metric system and found out some worthwhile croissant knowledge of our own along the way. Hopefully enough to justify sharing it all with you and inspiring you to give croissant baking a shot yourself.
Before you start we can recommend watching our croissant making video to get a general feel for the recipe. You can also check out our croissant making log where we keep track of our own croissant baking adventures. For answers to your croissant questions you can check out the Frequently Asked Croissant Questions section.
This recipe will yield about 15 good croissants plus some leftover bits which you can use to make a few, slightly odd shaped ones, or other inventive croissant-like creations.
If at first you don’t succeed, maybe you can take comfort from the fact that our first efforts were not very ‘croissant worthy’. But as you can see we persevered and got better…But we have to admit it is and always will be a tricky process. You have to work precise and be focused to get good results. So away with screaming children, hyperactive animals and all other things distracting! Put on some appropriate croissant making music and lets get to it…
Please read the following tips;
According to Raymond Calvel croissants laminated with margarine are formed into the crescent shape, while croissants laminated with butter are left in the straight form. We say, use whichever shape you like best, but do use butter!
The croissant recipe

Ingredients for the croissant dough
500 g French Type 55 flour or unbleached all-purpose flour / plain flour (extra for dusting)
140 g water
140 g whole milk (you can take it straight from the fridge)
55 g sugar
40 g soft unsalted butter
11 g instant yeast
12 g salt
Other ingredients
makes 15
280 g cold unsalted butter for laminating
1 egg + 1 tsp water for the egg wash
Day 1
Making the croissant dough
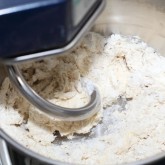
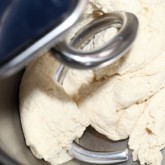
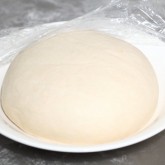
We usually do this part in the evening. Combine the dough ingredients and knead for 3 minutes, at low to medium speed, until the dough comes together and you’ve reached the stage of low to moderate gluten development. You do not want too much gluten development because you will struggle with the dough fighting back during laminating. Shape the dough like a disc, not a ball, before you refrigerate it, so it will be easier to roll it into a square shape the following day. Place the disc on a plate, cover with clingfilm and leave in the fridge overnight.
Day 2
Laminating the dough
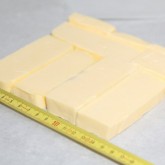
Cut the cold butter (directly from the fridge) lengthwise into 1,25 cm thick slabs. Arrange the pieces of butter on waxed paper to form a square of about 15 cm x 15 cm. Cover the butter with another layer of waxed paper and with a rolling pin pound butter until it’s about 19 cm x 19 cm. Trim / straighten the edges of the butter and put the trimmings on top of the square. Now pound lightly until you have a final square of 17 cm x 17 cm. Wrap in paper and refrigerate the butter slab until needed.
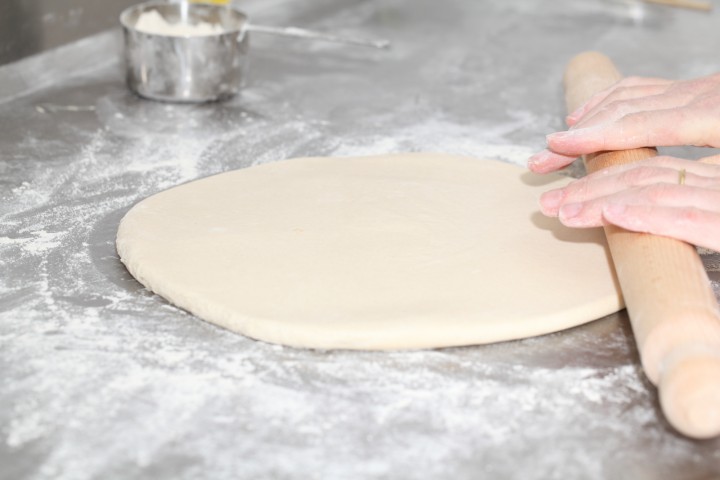
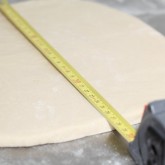
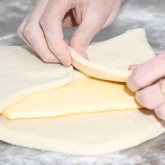
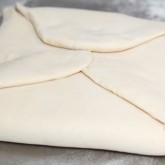
Take the dough out of the fridge. With a rolling pin roll out the dough disc into a 26 cm x 26 cm square. Try to get the square as perfect as possible and with an even thickness. Get the slab of butter from the fridge. Place the dough square so one of the sides of the square is facing you and place the butter slab on it with a 45 degree angle to the dough so a point of the butter square is facing you. Fold a flap of dough over the butter, so the point of the dough reaches the center of the butter. Do the same with the three other flaps. The edges of the dough flaps should slightly overlap to fully enclose the butter. With the palm of your hand lightly press the edges to seal the seams.
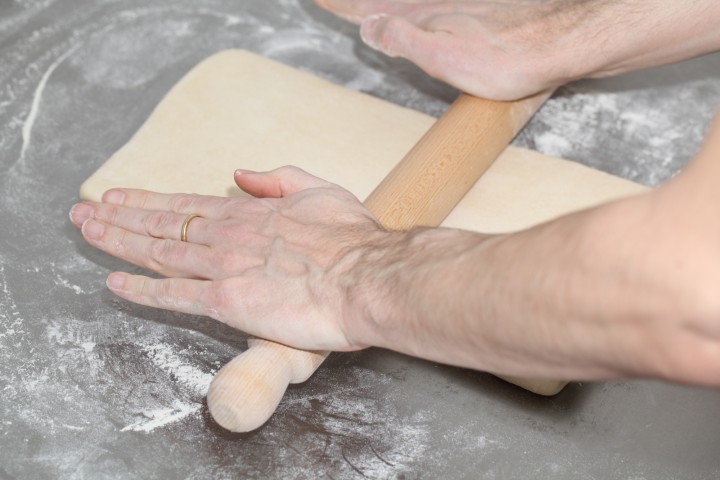
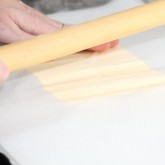
Now the dough with the sealed in butter needs to be rolled out. With a lightly floured rolling pin start rolling out, on a lightly flour dusted surface, the dough to a rectangle of 20 x 60 cm. Start rolling from the center of the dough towards the edges, and not from one side of the dough all the way to the other side. This technique helps you to keep the dough at an even thickness. You can also rotate your dough 180 degrees to keep it more even, because you tend to use more pressure when rolling away from you than towards yourself. You can use these techniques during all the rolling steps of this recipe. Aim at lengthening the dough instead of making it wider and try to keep all edges as straight as possible.
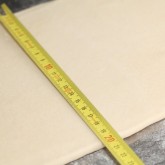
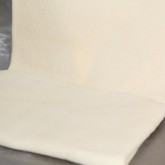
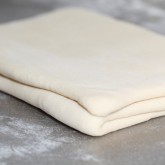
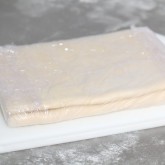
Fold the dough letter style, cover with clingfilm and refrigerate for 30 minutes (fold one third of the dough on top of itself and then fold the other side over it). Repeat the rolling and folding two more times (ending up with 27 layers of butter in total), each time rolling until the dough is about 20 cm x 60 cm. After each fold you should turn the dough 90 degrees before rolling again. The open ‘end’ of the dough should be towards you every time when rolling out the dough (you can see this in our croissant making video at around 3:40 minutes). After the second turn, again give it a 30 minute rest in the fridge. After the third turn you leave the dough in the fridge overnight until day 3, the actual croissant making day!
- Roll out to 20 cm x 60 cm
- Fold
- Refrigerate 30 minutes
- Rotate 90 degrees
- Roll out to 20 cm x 60 cm
- Fold
- Refrigerate 30 minutes
- Rotate 90 degrees
- Roll out to 20 cm x 60 cm
- Fold
- Refrigerate until day 3
- Rotate 90 degrees
- Roll out to 20 cm x 110 cm
Also see complete time table at bottom of page
Day 3
Dividing the dough
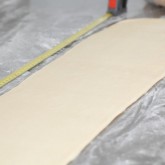
Take the dough from the fridge. Lightly flour your work surface. Now very gently roll the dough into a long and narrow strip of 20 cm x 110 cm. If the dough starts to resist too much or shrink back during this process you can fold it in thirds and give it a rest in the fridge for 10 to 20 minutes before continuing. Do not fight the dough, when the dough refuses to get any longer, rest it in the fridge! It is such a shame to ruin two days of work.
When your dough has reached its intended shape, carefully lift it a few centimeters to allow it to naturally shrink back from both sides. This way it will not shrink when you cut it. Your strip of dough should be long enough to allow you to trim the ends to make them straight and still be left with a length of about 100 cm.
Shaping the croissants
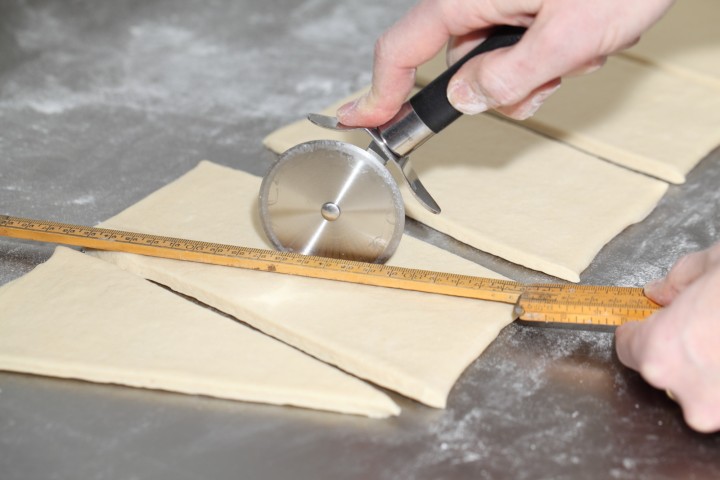
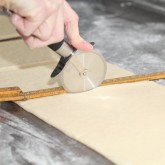
For the next stage you will need a tape measure and a pizza wheel. Lay a tape measure along the top of the dough. With the wheel you mark the top of the dough at 12,5 cm intervals along the length (7 marks total). Now lay the tape measure along the bottom of the dough and make a mark at 6,25 cm. Then continue to make marks at 12,5 cm intervals from this point (8 marks total). So the bottom and the top marks do not align with each other and form the basis for your triangles.
Now make diagonal cuts starting from the top corner cutting down to the first bottom mark. Make diagonal cuts along the entire length of the dough. Then change the angle and make cuts from the other top corner to the bottom mark to create triangles. Again repeat this along the length of the dough. This way you will end up with 15 triangles and a few end pieces of dough.
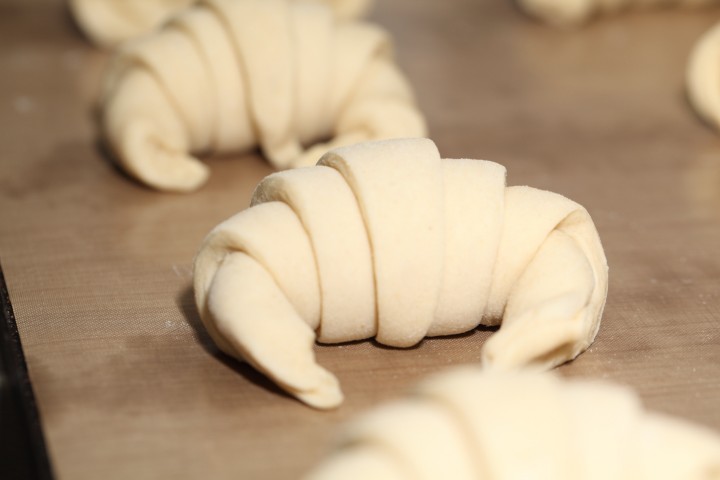
Using your pizza wheel, make 1.5 cm long notches in the center of the short side of each dough triangle.
Now very gently elongate each triangle to about 25 cm. This is often done by hand, but we have found that elongating with a rolling pin, very carefully, almost without putting pressure on the dough triangle, works better for us. You can try both methods and see what you think gives the best result.
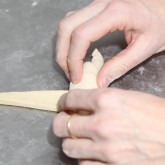
After you cut a notch in the middle of the short end of the triangle, try and roll the two wings by moving your hands outwards from the center, creating the desired shape with a thinner, longer point. Also try and roll the dough very tightly at the beginning and put enough pressure on the dough to make the layers stick together (but not so much as to damage the layers of course).
Proofing and baking
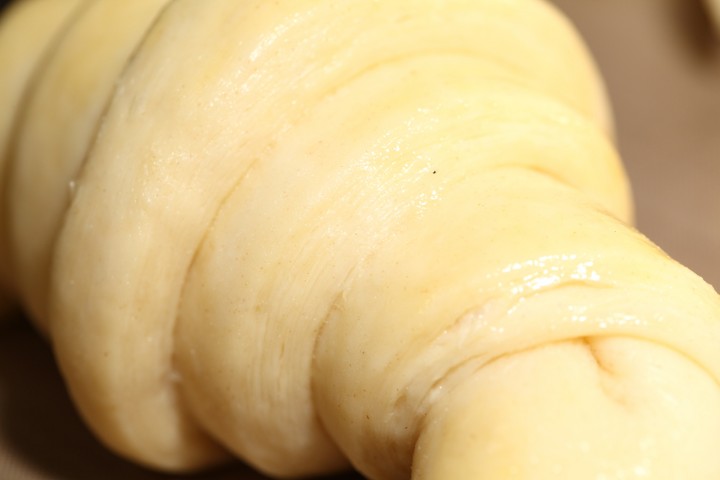
Arrange the shaped croissants on baking sheets, making sure to keep enough space between them so they will not touch when proofing and baking. Combine the egg with a teaspoon of water and whisk until smooth. Give the croissants their first thin coating of egg wash. You do not need to cover the croissants with anything, the egg wash will prevent the dough from drying out.
Proof the croissants draft-free at an ideal temperature of 24ºC to 26.5ºC / 76ºF to 79ºF (above that temperature there is a big chance butter will leak out!). We use our small Rofco B20 stone oven as a croissant proofing cabinet by preheating it for a minute to 25ºC / 77ºF. It retains this temperature for a long time because of the oven stones and isolation. The proofing should take about 2 hours. You should be able to tell if they are ready by carefully shaking the baking sheet and see if the croissants slightly wiggle. You should also be able to see the layers of dough when looking at your croissants from the side.
Preheat the oven at 200ºC / 390ºF convection or 220ºC / 430ºF conventional oven.

Right before baking, give the croissants their second thin coat of egg wash. We bake the croissants in our big convection oven for 6 minutes at 195ºC / 385ºF, then lowering the temperature to 165ºC / 330ºF, and bake them for another 9 minutes. Hamelman suggest baking the croissants for 18 to 20 minutes at 200ºC / 390ºF , turning your oven down a notch if you think the browning goes too quickly. But you really have to learn from experience and by baking several batches what the ideal time and temperature is for your own oven. Take out of the oven, leave for a few minutes on the baking sheet, then transfer to a cooling rack.
Latest way of baking; We heat up our double fan big convection oven at 200ºC, when heated up put the croissants in the oven and directly lower it to 175ºC. We bake them for 10 minutes at 175ºC, they will have a nice brown color by now, then lower the temperature to 150ºC, and bake them for another 6 minutes.
Best eaten while warm and fresh of course. Croissant we don’t eat or share within a day we freeze. We put them in the preheated oven (180ºC / 355ºF) for 8 minutes straight from the freezer. Nothing wrong with that, croissants eaten nice and warm, almost as good as the fresh ones…almost!
Croissant Time Table
Times are an indication and also depend on your experience with the recipe
Try to work swift but precise and take extra fridge time if needed!
Day 1 – Make initial dough
- 21.00 h – Knead for 3 minutes and store in fridge for 12 hours
Day 2 – Laminate the dough
- 09.00 h – Make butter slab and refrigerate till needed
- 09.05 h – Roll dough disc into square
- 09.10 h – Seal butter in dough
- 09.15 h – Roll out to 20 cm x 60 cm and fold
- Refrigerate 30 minutes
- 09.50 h – Rotate 90 degrees
- Roll out to 20 cm x 60 cm and fold
- Refrigerate 30 minutes
- 10.25 h – Rotate 90 degrees
- Roll out to 20 cm x 60 cm and fold
- 11.00 h – Refrigerate until day 3
Day 3 – Dividing, Shaping, proofing and baking
- 09.00 h – Roll out to 20 cm x 110 cm – part 1
- 09.05 h – Often needed! Take 20 min. fridge time if length not in one go
- 09.25 h – Roll out to 20 cm x 110 cm – part 2
- 09.30 h – Divide and shape the croissants
- 09.40 h – First coat of egg wash
- 09.45 h – Proof to perfection (indication 2 hours)
- 11.45 h – Second coat of egg wash
- 11.50 h – Bake for 15-18 minutes
- 12.10 h – Ready!









Gina says
Hello,
Thank you for the awesome recipe and steps! The last time I made croissants was 26 years ago and memory wasn’t serving me, your recipe and tips were great! I used plain ‘ol unbleached flour and Kerry Gold Butter. My family said they were awesome and asked when I could make more of them! My friends swooned and ate the whole platter of mini croissants I brought to “Tea and Pastries.” Unfortunately, I cannot eat them due to a gluten allergy but I did HAVE to have a teny-tiny bite just to taste and I agree they were amazing!
The changes I made were: I did 4 turns total 1 of which was the “french way” (2/3 fold, 1/3 fold, and then fold in half and rotate and roll.)
My gas convection oven runs hot so I started my croissants at convection 375 Farenheit for 6 min. Then lowered my temperature to convection 340 Farenheit 6 min, and finished them at 330 Fahrenheit for another 4 min.
I made many small croissants (I got 20) using 2/3 of my dough. I saved 1/3 for tomorrow’s dinner! Each Croissant was about 2.5 inches long.
Weekend Bakers says
Hello Gina,
Sounds amazing! You are such a baking expert you can immediately adapt to your circumstances and get this great result. Sorry you are not able to enjoy more of it yourself, a gluten-free version will always be very different. But lots of satisfaction from the enthusiastic reactions of family and friends we hope.
Elly says
We’re home and baking this weekend. I love this recipe and have made it several times with ham and cheese as well as pain au chocolate. My question is what do most people do who don’t have a silicon mat or a clean (enough) workspace to roll it out 110cm? I have an extra large mat and on third day before rolling it out, i’ve cut it in half so i roll it to 20cm x 60cm but curious what other people do. Thanks!
Weekend Bakers says
Hello Elly,
Thank you for your comment. We hear people are baking more and more now so many of them around the world have to stay at home. It is the most wonderful hobby to have during these times we find.
You are doing the exact thing we would suggest and have not heard of anybody doing something very different. It is the best way to go about it, you can do the whole process as described and keep it ‘simple’ and manageable this way.
We can also recommend these pastries with the same dough (if you have not seen them yet): www.weekendbakery.com/posts…x-raisins/
Wishing you and your family all the best and happy baking!
Ed & Marieke
Weekend Bakers
Katanahamon says
I’ve simply modified the rolling to fit my large pastry board. Instead of one long single row, I roll out halfway east west then roll north south to double the size up and down. I have experimented rolling them out every which way and not noticed any diminishment in quality, layers, lightness, etc.
Jackie says
Just made croissants for the first time using your recipe and they turned out beautifully! Not perfect but very good – honeycomb structure and everything. I’m thrilled that the recipe was actually really straight-forward and so good!
Weekend Bakers says
Great Jackie, so glad your first try was already a great success. Hope you will have many more excellent bakes. If you have your belly full of croissants and other people are starting to object (oh no, not croissants again 😉 you can also try these variations with the same dough, which we love:
www.weekendbakery.com/posts…x-raisins/
www.weekendbakery.com/posts…y-caramel/
Stay safe and all the best,
Ed & Marieke
Weekend Bakers
Roberta says
My croissants turn out fairly well as far as flavor. However, in the final proofing step, coissants don’t wiggle as indicated.
Katanahamon says
If you make smaller ones, they won’t move as much given their smaller surface area. Or, you could try longer proofing times. I’ve let mine go as long as 3’15” on a cool day, there doesn’t seem to be a limit.
Weekend Bakers says
Yes we agree, try to take a longer proofing time, depending on temp of dough and surroundings. We much more often see under-than over-proofing with croissants.
Felix Ngombo says
This is what I was looking for thanks so much for the recipe.
Weekend Bakers says
Hope it will be great Felix!
anderson1 says
Hi! My croissants are turning out great, but the honeycomb structure is a little tighter than I would hope. How do I get it as open as the ones in your photo? Thanks!
Katanahamon says
Longer proofing time would be the first guess. Longer time means more CO2 produced, equals larger holes. You can also determine if you are making too many folds or turns..there is a point at which trying for more layers simply mashes the butter into the flour and the layers lose their definition. More complex reasons could be flour protein levels, butterfat content, kneading times and techniques, too warm proofing, too cold proofing, etc etc, simplest tip is still..be patient, longer final proofing time.
Weekend Bakers says
We agree. Stick to the recipe and especially take care to handle the dough with care, not pressing too hard on the dough when elongating, taking some extra fridge time of needed. Your oven temp and setting is also important. Make sure it is preheated well in advance and do not open the door during baking. Also check out our tips on the subject here: www.weekendbakery.com/posts…questions/
Swaraj says
Could you please let me know the no of croissants produced by this recipe?
Thank you
Katanahamon says
Depends on how you roll out the dough, and how large you make the individual croissants. I’ve rolled out in one long sheet left right, and I’ve also rolled out into a half long sheet, then rolled out up and down to make a more squarish shape, eight above and eight below. I usually get 16 croissants, eight for each baking tray. I haven’t noticed any quality difference between rolling it out all in one direction vs expanding it both left right and then up down. I’ve figured out I can roll it to fit my wooden pastry board which is a bit larger than a standard cutting board, divide across the horizontal, make eight above and eight below. I’ve also cut notches larger, smaller, eliminated them, rolled the cut croissants longer before rolling or hand stretched them, not elongated at all, there’s not much difference at all. They all turn out great!
Swaraj says
Your technique is really great, so in short you are able to produce 16 croissants from the above recipe. Thank you so much once again.
Weekend Bakers says
Thank you Mr K., and hope you will get wonderful croissants Swaraj.
ksaieh says
Hi! I’m getting ready to try this recipe. Do you have a preferred brand of butter sold in the United States that has proven to work well? In my last croissant attempt (with another recipe), I used Plugra butter, but was not in love with it.
Weekend Bakers says
Hello Ksaieh,
We are no experts on US butter but some have mentioned using Kerry gold butter (from Ireland but available to you in the US) which seems to be very close to what we use.
Hope it will be great!
ksaieh says
Thank you!
Katanahamon says
Whole Foods sells Straus Organic Euro style, 85% butterfat. I’ve used it many times, it’s made in the US, is organic, and it seems to work very well.
Mike B says
Hi guys, I always use this dough receipt for all my puff pastry baking. I’m currently using this for Cruffins and it’s amazing.
Weekend Bakers says
Great Mike! Are you using any particular recipe for the cruffins?
Have you seen the Breton pastry that seems to be a variation on the theme? www.weekendbakery.com/posts…y-caramel/
Katanahamon says
Hi, I’ve recently gotten several new books on French pastry and baking, and been experimenting with doughs. You might want to try Inverted Puff Pastry, where you enclose the water dough with a butter dough made more pliable with a bit of flour. I’m currently trying this recipe from Pate de Dom that so far has been beautiful. Their site has a very detailed vid, but here’s the breakdown..
Butter dough, or Beurre Manie
375 g butter
150 g T45 flour (equivalent American cake flour, It00, EU450 (it’s interesting that recipes are all over the place on this..sometimes bread flour, other times cake..)
Water dough, or Detrempe
350 g T55 (US all purpose) flour
150 g water
15 g salt
115 g melted butter
1 tablespoon white vinegar
Parchment packets for shaping..20 by 36 cm for butter dough, 15 by 18 cm for water dough. Making these parchment packets really does ease the process. For butter dough, soften butter in mixer w paddle, mix in the cake flour until uniform, plop onto the larger packet, roll around until uniform. One trick is to roll 45 degrees from center to corner, this gives better corners. Refrigerate.
Same basic process for the water dough, plop it into the smaller packet and shape, then refrigerate.
The most difficult part is the assembly and first turn. It’s obvious how they fit, just fold the butter dough over the water dough and seal it up. You have to be a bit more generous with flour the first turn than with other types of puff pastry because the butter dough is on the outside. Just be a bit more generous, keep things cool, move the dough frequently as you press to roll it checking for flour and not sticking and it really shouldn’t present you with too many problems. Refrigerate immediately if it starts to feel like it’s melting on your hands.
Weekend Bakers says
We have heard of this method on various occasions but never tried it ourselves. It would have to be better than the other method to convert to this one, otherwise it seems a bit more ‘hassle’ for possibly the same result. But your enthusiasm for the method and sharing of tips makes us put it on the list of things to try.
Did you find ‘big’ differences, comparing methods?
Katanahamon says
I honestly haven’t had time yet, there’s only so much pastry I can eat! I haven’t made them side by side. But..the inverted I’ve made I test baked and it blew up very high and crispy..the only remotely tricky part is the first turn, and if you can chill the work surface, use extra flour on the first turn, it’s really not difficult. There’s just enough flour in the beurre manie so it helps keep it solid, but if you hold it too long, it will melt. Bruno Albouze says on his vid that inverted holds up better against things like apple turnovers where the dough is exposed to steam, which makes sense given the butter layer is the exposed surface. Oddly, once you’ve made the first turn, the dough seems easier to roll out than regular puff pastry. You just have to be sure that every roll you move the dough to be sure it’s not sticking to the surface, dusting with flour more than with regular puff. (I guess I’m obsessive about thinking that extra effort or going the extra mile will produce “better” results.)
Weekend Bakers says
Much appreciated! At the moment baking more bread and buns to sustain family and friends, using healthy ingredients. Agree, oddly enough there’s a limit to the amount of pastry one should eat 😉
All the best in these unusual and challenging times!
Edric says
Hi weekendbakery and greetings from the Philippines.
I have been baking my own bread for quite a while but I really felt croissant making is quite a challenge, aside from the layering technique plus the typical warm weather in the country which terrifies me on working with butter until I found your site and your croissant recipe was really very detailed and helpful for first time croissant makers.
My first attempt last Feb 20-22 was not so bad. I followed your step-by-step procedure and given me nice flaky croissant but a bit on the dense side. Far from perfect (and still a lot of room for improvement) but definitely palatable. The flakiness and flavor are there, just need it to puff up some more, maybe a bit more yeast and extend proofing time I guess. This definitely wouldn’t be my last attempt, but would love to improve it (I’ll keep you posted).
I would like to thank you for having this amazing detailed recipe available online for us home bakers who would want to improve our baking skills mostly for personal gain and to feed our family and loved ones with good food.
Katanahamon says
Before moving out west, I grew up in Houston..I can relate to heat and humidity. Congrats on successful croissants! I used to take ice packs or even cookie sheets with ice and place them over my work surface to cool it down. (Refrigerated my rolling pin too..) Between that and not hesitating to refrigerate while working with the dough, you can keep the dough cool. I’m betting longer proofing time will help. Good luck!
Weekend Bakers says
Thank you so much for sharing this Edric. Next to the already shared excellent tips by Mr. K. we also learned from other tropical climate bakers they roll out the dough at night when it is (possibly) cooler and they keep a close eye on the weather report to check which days are the best for baking.
We are very much impressed by you and any baker who is not phased by the challenge of making pastry in such conditions.
If yo ever want to share pictures with all of us, you can do so here:
www.weekendbakery.com/send-…your-loaf/
Enjoy your baking journey and all the best from the low countries to your own tropical part of the world.
Ed & Marieke
WKB
lennyk says
i also live in the tropics, i use one of those plastic folding tables as my bench, the plastic does not transfer heat as much as a counter.
Weekend Bakers says
Thanks Lennyk for your tip and enjoy your pastry baking!
Katanahamon says
If I refrigerate more than five or ten minutes between turns, the butter begins to separate. I’ve found the dough to cooperate quite well with only a few minutes rest in between turns. Also, if you’re curious how egg affects the dough, it’s not a super dramatic effect. Seems to be a bit..less definition of layers to the tooth. Visually the same, but starting to feel more cakey than bready. The effect is less noticeable as they age in a bag. So, I’ll stick with the original recipe. Make brioche feuilletee if I want eggs! I like all stages..crispy from the oven, but also two or three days later. They hold up very well. Also, don’t be afraid to freeze them right after thorough cooling..thaw in the bag and they are just as crispy as when you put them in.
Weekend Bakers says
Yes we agree!
Nikolina says
Hello, I’m really looking forward to making these in the next couple of days but I was wondering if we need to use the same mixer shown in the photos above or can we use any?
Katanahamon says
Any decent sized mixer will do, or no mixer at all. You don’t need any kneading past just getting the dough smooth and into a ball. Gluten forms all by itself overnight, and think of all the rolling out..it will get plenty of exercise, so three to four minutes should be all it takes. I tripled the amount last night, and my Kitchenaid briefly sounded like it struggled, but exactly four minutes from putting the wet ingredients in, the dough was perfect. Less would probably be done in three. Don’t stress..just a smooth ball is all you’re looking for initially.
Katanahamon says
Also..I do suggest you weigh accurately your ingredients, including the liquids. (I even got a tiny, super accurate scale for salt and yeast.breads that have long fermentations often have tiny amounts of yeast.) This recipe works so perfectly when you weigh out your stuff, it’d be a shame not to see how easily it all comes together. The most you might have to do is add a couple extra drops of milk or water if your flour is super dry and the dough isn’t coming together. Just get an accurate kitchen scale, your future recipes will thank you!
Weekend Bakers says
Thank you mister K. for your elaborate answer. We do not have much to add, except that we hope your croissants will be excellent Nikolina.
Enjoy the process and take your time and make sure there are no distractions when trying the recipe.
Ed & Marieke
Weekend Bakery
Shruti Kapre says
Hello….your blog has helped me tremendously in getting my croissants close to being croissants! Cannot thank you enough!
The only problem that I am facing right now, is that the croissant remain a tad underbaked in the center. When I say underbaked, they are not exactly underbaked, but the crumb has a wettish look to it. If I bake them for too long at lower temperatures then the outside becomes more crispy. I have checked my oven temperatures with at least 3 new oven thermometers. I pre heat the oven to 200 C and lower to 170 c as soon as the croissants go in, bake for 10 mins, then lower to 150 and bake for another 8 to 10 mins…still the problem persists. Any help would be appreciated.
Weekend Bakers says
Hello Shruti,
Really hard to answer your question because you are already doing so much right and we do not know if this wettish means you could maybe proof a bit longer or something to do with the laminating or shaping or something that could be fixed with just the right oven settings. Our first suggestion would be to try the next batch with the oven slightly higher especially for the first part, so 180 maybe, and never open the oven door during baking because with most ovens you will lose too much heath.
Good luck with it!
Katanahamon says
Also, try cutting a larger slit in the bottom or small end of the triangle..this helps the geometry so there is a bit of space in the center when you roll it up.
Katanahamon says
Oh, also..whenever they very first come out of the oven, yes, they seem a bit steamy on the inside. If several hours of cooling go by and they seem dry and well cooked, then they’re fine. They just don’t come out completely dry the second you remove them..when you slice them right out of the oven, they tend to compress, best to cool a bit if you’re slicing them up..at least that’s been my experience.
Stas says
*Laughs* Okay, so how badly did I mess up?
I mixed the dough for my croissants today and followed instructions to a T , put my dough disc into the fridge and commenced with clean up. Lo and behold I realized I forgot to add the 40g of butter into the dough – I had cut it up into small cubes and put it in my microwave to soften (without turning it on) while I prepped the other ingredients but completely forgot about it when it came time to combine. I took the dough back out of the fridge ( it was in the fridge for 3 or 4 mins max) and tried incorporating the butter and kneading it again. Anyways I got it incorporated into the dough the best I could and put it back in the fridge. I’m just wondering how badly this will affect my dough. I don’t want to throw my dough away and waste it but at the same time going through all of the trouble of making croissants and having them turn out subpar because of this initial mistake is not enticing. What do you think? Should I start over?
Thanks in advance for the response.
Weekend Bakers says
Is it too late too ask what happened? The answer to the question would depend on how long the second kneading part went on and how far developed your dough was. When in doubt start over and just make rolls of a loaf of bread with the other dough.
Katanahamon says
Better than yeast..I forgot the yeast in one batch!
Weekend Bakers says
Everybody forgets salt or yeast at one point, it is inevitable because we are all human :))
Syeda says
My crossant texture is bready not flaky why plz tell me what mistake i have done
Weekend Bakers says
Hello Syeda,
Several factors can be the cause of this. Most likely it is an accumulation of things going sideways. It starts with pressing too hard on the dough to try and lengthen it while it is already fighting back. Keeping at this for a while means, next to the pressing on the dough, you are taking too long and the butter starts to get warm and is absorbed by the dough. So in this case, while still learning and getting better and faster, until you do make sure you build in extra fridge time to cool the dough and then continue. Handle the dough with care, gently elongate without pressing too much or putting your weight into it.
For more answers and explanations regarding your croissant baking you can check our questions and answers page here!
www.weekendbakery.com/posts…questions/
Good luck with it!
Katanahamon says
I recently ordered some organic, French T55 flour (Francine) to try against King Arthur Unbleached Organic All Purpose flour which I normally use. The Francine flour seemed to mix up a bit quicker and wetter, I usually have to add a few drops of milk or water to my King Arthur, I live in a very extremely dry area, perhaps my flour is drier. The Francine dough was lovely, the croissants baked excellently, maybe a tiny bit crispier on the outside. However, if you don’t want the added expense of ordering from Amazon, (should have said I’m in the US) King Arthur flour that’s organic is every bit as good. The differences could have just been “on the day” variability of oven temps, humidity, measurements, etc. I’ve made many more batches from King Arthur, and have to say it’s my go to flour. I was curious to see if the differences warranted using the French flour, but, it’s not worth the added expense, really. They’re both great flours..so, if you’re thinking you’re missing out by not using authentic T55 organic French flour, you’re really not. I can also recommend Straus Organic European Style, 85% butterfat butter, found at Whole Foods. I’ve used it exclusively for my batches, it’s wonderful butter. It’s actually the only organic, Euro style butter I can find. There are some others labeled “cultured,” but I read somewhere those aren’t ideal for laminating. The Straus works great. If I wanted to be more scientific about it, I should do a side by side, same day two batch test with only the flours being different, but, this at least gives you an idea that you aren’t at a disadvantage if you can’t get French flour for croissants. I found that Organic All Purpose KA flour is very similar.
Katanahamon says
Wish I could edit my post..I was trying to remember why or where I got the idea that cultured butter wasn’t ideal, now I can’t find any corroboration on that, in fact, I’ve seen it recommended. Maybe it was in reference to the expense, or moisture content of a particular butter, but, many French butters are cultured, so, any info appreciated. As long as you have a high butterfat, and low moisture, it’s fair game.
Katanahamon says
I think I read an article about a baker that recommended an expensive, cultured butter as a finishing, or “spread on fresh” for the taste butter, rather than as a baked in butter where the taste would be lost. I guess that colored my fact base when I went shopping..
Weekend Bakers says
This butter is so tasty, it is never a problem to spread it on, but also no problem to use it in baking..indeed fair game as you say. The challenge for most bakers would be where to buy it.
And thank you again for sharing your wealth of information on butter and flour!
Samira says
Hi there! I have made this recipe a few times and always wonderful!!! However I am having trouble with butter. My butter doesn’t seem to be very pliable and breaks up into chunks during lamination. I’ve used used 78% fat, and recently 86% fat (tillamook extra creamy) and still having the same problem. Is there a specific brand you recommend? Thank so much.
Katanahamon says
Read below where I talk about this..it’s important to beat all of the butter, get it all “moving,” and check your temps. Maybe a warmer butter temp will help. If it’s any consolation, I’ve done identical batches and one half of it seems perfect, the other half the butter chunks up a bit. Doesn’t seem to matter all that much in the final croissants though. Also, check your measurements in rolling.. I have a feeling though that it’s all in the malleability of the butter. You really have to beat every bit of it..then roll it, trim it, stack, and re roll so you know for sure that every bit is malleable.
Brandon Ollerenshaw says
you can make your own butter by over whipping the cream and then letting it split then get rid off the liquid and bet with a paddle and then put in an ice bath and roll it out and let it sit in the fridge for long as you want
Weekend Bakers says
Thanking Katanahamon and Brandon for their excellent suggestions we also want to point you to our instructions for home made butter:
www.weekendbakery.com/posts…r-project/
And malleability is indeed the keyword here! Look at the video for this stage of the recipe too.
Katanahamon says
I’ve made many more batches and have more experience now. Some other solutions..you can make a bigger, thinner butter rectangle or square depending on your sealing in method. (Thinner starting butter means likely it’s warmer and easier to roll out, plus a thinner sheet is obviously easier to roll out than a thick one) Also, don’t refrigerate the butter before rolling out the dough..beat it into its shape, trim, beat again, once you’re sure every molecule of butter is moving, roll out your dough and fold in the butter and do your first turn. I’ve also found that unless your turns are doubles, or four folds, you can get away with just a short rest, 5-10 minutes in between turns. Four folds you do need to get max relaxation of the dough to roll it out. It’s possible, I’m sure, if you’re stronger than me or have a sheeting machine to shorten the time..but I have several sets of hardware in my neck, I try to make things as easy as I can!
Weekend Bakers says
We are sure your advice will be valuable to many bakers. We know that there are many butter qualities and butter that is ‘drier’ and breaks up in pieces ‘just by looking at it’. So trying to find the right smooth and pliable butter with good fat content of (for us at least here in Holland) around 82% fat content will help no end toward an easier laminating process.
Katanahamon says
In the book “Paris, Recipes From Thirteen Outstanding French Bakeries,” Linda Dannenberg, there is a recipe for croissants from Boulangerie Haupois. It’s a one to two day recipe, similar technique employed. I thought I’d relay it here as a variant, along with a question to whoever would like to reply..are there any studies or articles comparing croissant recipes as to flour types, butter present in the water dough portion, sugar amounts etc etc and these effects on texture and taste?
2 tblsps plus 1Teaspoon dry yeast (about 2 1/2 pkgs dry)(just says dry, not instant or fresh)
1/3 c 70 ml water, room temp
4 cup 568g cake flour
1/4c 50g sugar
1 tablespoon salt (yes..it says tablespoon, no metric given!)
1 cup 250ml milk, room temp
1 cup two sticks 250g butter, cool but malleable
1 egg beaten (for same egg wash, twice brushed)
Recipe calls for mixing dough, no butter in dough, letting rise an hour at room temp, then 30 min in fridge. Roll 9 by 15 inches or 23 by 38cm 3/8in or 1cm thick. Butter rolled to 5 x 7in, 12 x 8cm. Calls for folding in thirds, and four “turns.” May refrigerate two hours and roll and shape, rise and bake or refrigerate for 24 hours first. Roll out 12 x 30in 30 x 76 cm, triangles with 5in 13cm bases. Says to dampen sturdy baking sheets w pastry brush and water, place two inches apart, bend edges to center and press to anchor gently without thinning, brush with egg, let rise uncovered two hours, refrigerate uncovered second tray if not baking together while first tray bakes. Preheat 425F, 220C. Bake in center, reduce temperature 400F, 200C 15-20min. 14-16 croissants.
That’s the extremely condensed version for your reference or amusement. (Since this is a condensation and not verbatim, a discussion about recipe parameters, I don’t think there are any copyright issues, but if this post is removed, I understand..!)
Weekend Bakers says
We do not know of any such studies, but that does not mean they do not exist of course. Also never seen cake flour used and our question would be why would you use it for croissants or pastry, unless you are aiming for a cake-like structure?
Also the salt content cannot be right, it is more than 17 grams, that is over 3 % for that amount of flour!
Katanahamon says
I’ve triple checked, that’s the printed recipe. Perhaps it’s a misprint. I can’t imagine it’s deliberate, why agree to submit recipes with twelve other famous bakeries in France if you’re going to obscure a recipe? I’m not eager to try this. I may try using less butter to see if there’s a minimum, and bread flour as I’ve seen that in several recipes just to see how the texture changes, but, your recipe certainly seems like a winner on all fronts. Fresh, they’re crispy and light, they freeze excellently either after baking or before as dough, and I like them equally the next several days as they lose their crispiness but gain a pillowy softness throughout. The three day recipe makes for minimal work time and maximal dough quality..truly a classic in every sense.
Katanahamon says
I’ve also tried to find an editor’s errata sheet, to see if they’ve published corrections, but, no luck.
Weekend Bakers says
Maybe it is just as they liked it ‘back then’?
Bea says
If you watched some of the old Julia shows on PBS Julia Child has a French pastry chef who also used cake flour. I have used it & must say the layers are quite beautiful & it’s so much easier to roll etc than bread flour. I love your recipes but these do work.
Weekend Bakers says
Thak you Bea,
The cake flour used in the US seems to be different from ours, with a different composition and possible additives. But is would be interesting to try it some time and compare the two.
Katanahamon says
Bakers with dough that the butter breaks up into bits, or is uneven..I’ve solved my own question. It’s important to beat the butter as a whole unit, getting all of it, well, “mobile.” At first, I cut thin slabs, put them together as a square, briefly beat them together, and thought that was proper. However, after beating the entire square out farther, trimming, stacking, then beating it again and rolling it even thinner and larger, my dough has a more even butter layer that stays as a coherent and consistent mass, not separating into hard lumps that poke through the dough. You can help the process by putting a heavy towel (or two) underneath your pastry board to minimize the vibration to your countertop, or find a table that doesn’t mind the pounding. I looked online to see if there are any dough sheeters for home use, but, there seems to be a lack of a market for a home device of reasonable price. Pasta machines are too small, and countertop dough sheeters are either sloppily constructed (eBay, plastic gears) or of a professional size and price. I’m disabled due to my neck, I’d love a reasonably priced countertop dough sheeter..maybe I could convert an old laundry wringer..!
Weekend Bakers says
Thank you K, for all your wonderful advice and for sharing your experience. A whole unit, that is a good way of describing it!
Katanahamon says
Thanks..I’ve gotten so much joy from this recipe and your site, returning to croissant baking has been a blast! It’s so interesting how each batch, using identical weights, can still turn out so differently. As a former symphony musician, I can reiterate that it always comes down to correct, mindful repetition and practice!
Weekend Bakers says
Thank you too, you have a wonderful way with words, no doubt also related to the workings of your musical mind!
Chris says
I’m planning to try your recipe this weekend 😊. My last 3 batches of croissant look beautiful until they bake…all the butter pours out and it looks like many layers of pull apart bread on the inside. Do you know what I can be doing wrong? (Figured I’d ask before I waste ingredients again)
I’m thinking it might be the dough mix time. Your recipe says mix the dough no more than 3 minutes whereas the recipes I’ve done all have a mix time of 10-15 minutes…thoughts?
Chris Van says
Well, mixing your croissant dough for too long produces a ton of gluten, so evidently it toughens the dough and creates a bread like texture, but if so- just let the dough chill in the fridge for 24 hrs or overnight. However, another alternative could be rolling the dough out super thin so then you’ll have thinner layers. Make sure the butter is cold, cold, cold! The colder the better. Kneading the dough and then immediately placing in the fridge for 24 hours to let the gluten relax, or (I’m not to sure what flour you used) but as the recipe says using ap flour, and plain flour work best. Ultimately, I would knead the dough for 10-15 after letting it chill in the fridge for 24 hours or overnight, then I would prepare the butter square for lamination after kneading setting that in the fridge as well (overnight) or 24 hrs.
Katanahamon says
Chris Van..this recipe you do not re knead the dough after refrigeration, it’s not necessary and contraindicated. You only need to follow the instructions and knead three minutes, then refrigerate overnight. The dough is actually “kneaded” in the subsequent rolling out and folding, then relaxed again in the second overnight refrigeration. The only time the dough is kneaded is during the initial preparation, then never again as a separate step.
Katanahamon says
I’ve used this recipe now many times. If you set your timer for four minutes, and start it while first adding the raw dry ingredients and wet into the mixer, it’s almost together in one minute and has time to knead together as a ball for three minutes. It literally is that easy in the mixer if your moisture content is just right, it has about a minute to form the ball and start to come away from the sides, Kitchenaid speed two or three, and then briefly knead for three minutes. Be careful using a spatula to help the flour into the dough while the mixer is running, you can get a good pinch or possibly worse injury, or stop the mixer and your timer to be safe and incorporate the dough together then let it continue. A couple times I’ve added a pinch of water/milk to help it come together if the flour was dry, but, if the weights are absolutely accurate, in my efforts it hasn’t taken more than four minutes from raw ingredients to fully kneaded ball of dough ready for the fridge. Think of all the “no knead” recipes..kneading forms gluten, but so does time. Time and other elements like refrigeration also relaxes gluten that’s already formed, so it’s a balance. There’s no need to knead excessively as this first of all is pastry, and it will both form more gluten as time passes, yet being refrigerated slows and mellows this process while also relaxing it. The reason I set four minutes on my timer from dry ingredients to finished ball is that my area is tremendously dry, and trying to get from dry ingredients to finished in under three minutes is impossible. Four minutes gives me time to add a pinch of water, or stop the mixer to incorporate a recalcitrant bit of flour, but I’ve been able in every batch to get to finished in under four minutes. (I’ve taken too many words to say that once I’ve gotten the dough together, it’s never mixed or kneaded longer than three minutes. Trust the recipe..you don’t need to knead it longer than three minutes!)
Katanahamon says
As to butter leaking from your previous batches..some butter does boil out, it’s inevitable, and when I take them from the sheet to the cooling rack I wipe them off on paper towel to remove any excess. Maybe your previous recipe contained too much butter per flour, or you are rising the croissants too warm and the butter leaks out prematurely. This recipe here you can trust, I’ve made it many times. Yes, you’ll see a little butter leaking during baking, but surely not all if you follow instructions. My rising temps are on the cool side, so I give them extra time. Also, did your previous recipe have an egg wash? It seems the egg wash helps seal the exterior while also not interfering with the layers or rising.
Weekend Bakers says
Thank you Katanahamon, for sharing all your valuable pastry baking experience. Much appreciated!
Weekend Bakers says
Thank you Chris V and K for your kind advice.
We would suggest trying our method with the short kneading, you only need very moderate gluten development initially.
Also make sure your croissants are properly proofed at the right temperature / time.
Anna says
Hello! Thank you so much for this detailed recipe and video.
I have a question about first time baking temperature and times. I only have a conventional oven and am therefore unsure of how long to bake the croissants and at what temp (and does the temp need to be adjusted/lowered during baking as with the convection oven)? I understand that I may need to make adjustments based on my oven, how quickly they brown, etc., But I’m not sure what time/temp to start with, aside from preheating at 220ºC / 430ºF. Any advice you could provide would be greatly appreciated!
Thank you,
Anna
Katanahamon says
Hi..there are so many variables like your altitude, your indoor rising temps, your oven temp, the shelves in your oven height and distance etc. You can try cooking one tray at a time, an extra twenty or thirty minute rise on the second tray won’t hurt them. Things cook very differently when there’s more than one tray in my oven. It’s really a matter of practice. I keep my pizza stone on the very bottom shelf as a heat sink, preheating at least thirty minutes after the final temperature is achieved. I set my convection at 405 degreesF which then reads 380, I use the third to top shelf. (But see, our ovens may not have the same number or height of shelves..) I check at ten minutes, briefly opening the door. Another ten to twelve minutes and they’re done. I’ve tried rotating, and also moving it down a shelf or two for the last ten minutes, or additional two or three minutes for extra doneness. Really, there’s just no substitute for practice. 430 in my oven would be too hot, so, again, you just have to test. If your top element is exposed or too hot, some people put a spare cookie sheet on the very top shelf to deflect direct heat, there’s all sorts of little tricks to get the best out of your own oven.
Weekend Bakers says
Hello Anna,
Just start baking at 220C, making sure your oven is preheated very well. Absolutely resist the urge to open your oven door, during baking, because you will loose too much heat! Keep an eye on the croissants and only temper your oven (to around 175C) if you think the the croissants have the right browning already and you want to continue the cooking process but stop further browning. Also use the middle tier or with a small oven the bottom tier of your oven, so not too close to the top heating element.
Indication of baking time will be around 20 minutes.
Make notes, write down what works and where you want to adjust for your next batch.
Hope it will be great!
Katanahamon says
I only suggest opening the door after the bloom is finished to check, or at the end to achieve more interior/bottom doneness, as is common to macaron baking. I agree that opening the door while baking should not be encouraged, especially during the initial period when pastry depends on a good blast of heat to generate the steam necessary for development. I only do it to release upper heat in the oven for an extra two to three minutes of doneness in the bottom and center of the croissants. Yes, it’s an advanced and experiential technique. Excellent site and advice!
Anna says
Thank you so much for your help!! 🙂
Katanahamon says
Hi, additional question..!
When rolling out for cutting, is it imperative to finish rolling out in one long direction? I’ve found that at a certain point, it’s easier to double the width rather than forcing it to stretch one way. I’ve sent pictures, you can see how wonderfully they turn out, I’m just curious if this is something you’ve experimented with. Thanks! I have another batch of dough I froze at the final rise before the final rolling out for cutting, I’ll see how they turn out today!
Katanahamon says
The result for me was that the frozen dough produced even lighter, more airy, and crisper on the outside croissants! Don’t fear freezing your finished dough..after the last roll out and rest before the final roll and cut, simply bag the dough and freeze. Remove from freezer the evening before, let thaw in the refrigerator. The dough will be perfect for your final roll out and cut.
Weekend Bakers says
And thank you for your excellent feed back!
Weekend Bakers says
Hello K,
Yes of course you can alter things, depending on the workspace you have you can also make two pieces for instance. But the thing is that you do not force the dough, you gently elongate it and this is the best way to not damage the layers and does work with the right use of ingredients (flour type, pliable butter) environment and method of course.
It is only right you are doing things the way you think works best for your conditions and in the end it is the result that counts. So we always show what works for us and encourage others to make a recipe their own.
Katanahamon says
Hi, lovely recipe! I’ve made several batches, they’ve all turned out well. Well, fantastically. I’d be happy to send pics. Does your dough have bits of butter all over, or does it always look “smooth”? Mine turns out fine, but, there are lots of bits of butter breaking through, even when I really tried to warm up the butter sheet. I suppose it doesn’t matter, I just noticed that the pictures of your dough are different, unless that’s the first rolling before it’s been rolled out. The other question is, have you tried using less butter? Will the recipe work with half? I think I’ll try it just to see..my self control falters at the giant pile of fresh, buttery croissants..!
Weekend Bakers says
Using less butter will yield a very different result, the butter is needed for the layers. So if you want to try less butter because of the calories, we would rather eat halve a delicious croissant than a whole one that is halve as delicious.
It was good to see your picture of the dough and butter. Still, again a very good result you can be proud of!
Claudia says
Hi there! I have always wanted to learn how to make croissants and this recipe worked perfectly. Thank you for taking the time and explaining every step, it was extremely helpful and easy to follow.
For the next batch my boyfriend – who loves blueberries – gave me the idea to add them to the butter, not the inside of the croissants, in order to give a blue/purple colour. I did find one recipe online but it is different and as yours works perfectly already, I would like to know if it would be possible to add the blueberries to your indicated 280g of butter. This would mean mixing them up when the butter is a bit soft, recreate the butter square and continue with the recipe normally. Do you think this would work or would I have to amend anything else?
Thanks!
Weekend Bakers says
Hello Claudia,
Thanks, that sounds marvelous!
Your question is a bit of a challenge, but it sounds very inventive and interesting. Based on experience we cannot give you a definitive answer, but we think the water content in the fruit could proof a bit too much for the layers to properly form but this would be a concession. Maybe use a more concentrated form of blueberry and not fresh ones. Look at this one and you see what we mean (blueberry jam was used here : www.supermoonbakehouse.com/9-bars). Personally we think, a good filling of intense blueberry jam with a hint of lemon, inserted after baking would make for a delicious end result, with the croissant in good shape and the soft filling as a surprise inside (but less exiting of course). So we understand your enthusiasm for the color to be visible on the croissant itself.
Only one way to find out, we always say and we would be curious as to your result, especially how the inside of the pastry is holding up.
Enjoy the process!
Bowama Smith says
Hi , great post! Can you tell me how much fresh yeast would be used this recipe ?
Thanks
Weekend Bakers says
Hello Bowama,
When converting from instant yeast to fresh yeast you can in general multiply the amount by 3. So that would mean 33 grams of fresh yeast. It is our experience that fresh yeast can act a bit more enthusiastic than instant yeast, also depending on the age and quality of both, so if we use the fresh yeast we buy, we find that around 25 g is working well for this recipe. It is something you find out with practice and experience.
Peggy says
Hi,
You mentioned in the FAQ that for half of the recipe, the dough should be rolled out to 20cm X 30cm. After folding in letter style it will be 20cm X 10cm. When I rotate it 90 degrees, the short edge is only 10cm. Does it mean I should roll it out to 60cm? If I roll it to 60cm, letter fold, rotate, then roll again to 20X30cm, the final dough, before rolling out for cutting, will be 10cm in width. So I’m a little unsure how to roll it out if using only half of the recipe.
Thanks,
Peggy
Weekend Bakers says
Hello Peggy,
We have tried to make it more clear on the FACQ page
www.weekendbakery.com/posts…questions/:
Roll the dough into a 20 cm x 30 cm rectangle.
Fold letter style to a 20 cm x 10 cm rectangle.
Turn dough 90 degrees.
Roll from the short 10cm side to a 20cm x 30cm rectangle (the short 10cm side will get 30cm).
Turn dough 90 degrees.
Roll from the short 10cm side to a 20cm x 30cm rectangle (the short 10cm side will get 30cm).
Turn dough 90 degrees.
Roll from the short 10cm side to a 20cm a 55cm rectangle (the short 10cm side will get 55cm).
The size of the final dough, right before cutting, should be 20 x 55 cm.
We have also added: Although it is possible to use halve the dough we advise to make the full recipe as described in the recipe as the geometry of the shapes are much easier to work with.
You can always use halve and freeze the other halve.
We hope this helps you and your pastry will be great.
Enjoy your Holiday baking!
Heba says
Hello, thanks for the great post. I have one question, do you add in the yeast after letting it sit with the warm water for a few minutes ? Or just add it in its dry form?
Weekend Bakers says
Hello Heba,
Thank you. When we use instant dry yeast we add it to the flour in its dry form.
Enjoy your pastry baking!
Amy says
Just made my first croissants using your recipe, tips, and tricks. It worked great!! Thank you!
Weekend Bakers says
Thank you Amy, another happy baker with delicious home baked croissants. Very pleased it all worked out for you and you can be proud of your results!
Enjoy your Holiday baking too!
Marieke & Ed
Weekend Bakers
Ronda says
This is very much worth the time and effort. It was a lot of work but the end result was delicious, buttery crossaints! I will make it again, for sure!
Weekend Bakers says
Thank you so much Ronda, very happy the recipe worked well for you too. Enjoy your Holiday baking!
Marieke & Ed
Weekend Bakers
david says
Hello weekend baker
I have one question:after kneading the dough ingredients, do you not let the dough rise say until say double in size and then punch down before forming the disk and storing in fridge overnight?
Weekend Bakers says
Hello David,
No we do not, you can best stick to the instructions exactly as we have written them down.
Robyn Gibson says
I value your thorough & honest instruction, thank you! I have done my own croissant project over many years. I have gained inspiration from many sources, but it gives me much gratification and a sense of pride that your recipe & procedure is nearly identical to mine. My family is also very grateful! 🙂
Weekend Bakers says
Thank you Robyn, for your comment and enthusiasm, we seem to have ‘like minds’. Wishing you many more excellent pastry projects and a wonderful December!
Robyn says
I just baked pastries for a Christmas party. I made windmills with cream cheese filling & blueberries, pinwheels with your almond paste & homemade fruit mince, almond paste with cinnamon & sugar, pains au chocolat and squares with creme patissiere & raspberries.
A new step: on Day 2, I did the 3rd turn, rested the dough, then divided the dough into 2 halves, and rolled each half into a 10×35cm rectangle, covered with cling film & rested overnight. Day 3 was shaping, proving & baking. They turned out perfectly!
Merry Christmas to you both. 🙂
Weekend Bakers says
Wow Robyn, that is truly impressive and inspirational. Your guests are so lucky. Thank you for sharing your method too.
Wishing you Merry Christmas and a wonderful 2020 with lots of baking and sharing!
Marieke & Ed
Hany Hassan says
Hallo,
I have a one question that can I replace the first egg wash before proofing with water using water spritzer
thanks
Hany Hassan says
Hallo,
I have a one question that can I replace the first egg wash before proofing with water using water spritzer
And I saw a lot of recipes adding an egg to the dough ingredients. . should I add it
thanks
Weekend Bakers says
Hello Hany,
We would recommend to use egg to protect the dough from drying out, it seals better than water. We never add an egg to the recipe, we would not think it will improve the structure or ‘bite’ of the pastry, but if you do so, you have to make sure to compensate for the liquid added to the dough.
Robyn says
Hany, the recipes with egg added to the dough are most likely a ‘Danish’ pastry dough (wienbrot) and while they have a similar method, they are more bread-like in texture and don’t get the same sort of shatter as when biting into a cooked croissant dough.
Rhonda says
This is the BEST crossiant tutorial I have tried and the ONLY one I will ever use from now on. I have tried many. I am a home-baker, crossiants usually come out “decent” I stumbled on this recipe and technique and decided to try it in my home kitchen. I followed instructions exactly. By my 3rd batch I was pulling out crossiants that were PERFECT. I recently made 2 batches for a brunch for a bible study and the ladies were wanting to know who found an artisan bakery that does such amazing authentic crossiants in our small town lol. My very first batch didn’t have the perfect airy center and I had some butter leakage. After reading the tips I discovered that the problem was likely an issue when rolling and folding my dough. I decided to be more patient and when the dough started to resist I just stopped and popped it back in the fridge and let the gluten relax. A simple 10 to 15 min rest later it rolled with no resistance to the proper length. I also knew the butter leakage meant I should let them proof a bit longer and be patient for the perfect wobble. Once those 2 issues were fixed they come out perfectly with no butter leakage the layers are perfection with the perfect melt in your mouth flaky exterior and texture inside airy and beautiful. I used King Arthur all purpose flour and a really good pliable high quality butter from a locally owned nearby dairy (I think they feed their cows liquid gold) it does have a high fat butter content and low water ratio. The only thing not exact that I adjusted was the flour. I discovered that 450 grams of flour is best and I use the dough hook for about 2 to 3 mins (closer to 2) in my kitchen aide mixer at about a 3. That method has given me perfect croissants. Thank you! Thank you!
Weekend Bakers says
Hello Rhonda,
You are our dream home baker. You just did everything absolutely spot on right and discovered all by yourself the importance of perfect lamination and proofing. We are so glad you got the results (and praise) you were looking for and that our recipe guided you to your perfect croissants.
We hope other bakers will read this comment too, because we keep telling the exact same thing over and over to many people, but it will be even better coming form you!
Thank you so much for sharing your experience and taking the time to do so. And great to read about the butter too 🙂
We hope you will have many more excellent bakes and moments to share them with family and friends.
Enjoy the Holiday season.
Greetings from the Low Countries,
Marieke & Ed
Lennyk says
the batch I made with 2min mix worked really great, got very nice honeycomb interior.
I would like to suggest that you emphasize this part of the recipe about minimal dough mixing.
I would also like to suggest that for new croissant bakers to simply try the folds without using the butter block so they can develop the feel and workflow to do this quickly before attempting with a butter block and wasting it.
more importantly they will get the experience of knowing the feel of dough “fighting back”
Weekend Bakers says
Thank you Lennyk, for sharing your excellent tips and experience with the recipe and process.
Dan says
Lennyk, that’s great news at your end. I tried 3 minutes which is about when it came together, but I tried a mix of 2/3 unbleached flour and 1/3 pastry flour vs all unbleached flour — both Robin Hood brand, which should be 11% protein since the unbleached is 12% and the pastry flour 9%. I also switched to SAF gold yeast. No luck on getting the dough to extend. What brand of flour are you using?
Lenny says
I live in trinidad so I use a locally obtained flour which is about 11% also.
Try raising the hydration a little,
The recipe is 280g liquid for 500g flour.
Maybe try 300 or 310g.
Lennyk says
Ok, yesterday I did a batch with 2 min mix on lowest kitchenaid.
It actually came together around 1 min.
Laminated early this morning and was very very extensible.
Might do the final rollout and cut tonight.
Weekend Bakers says
Let us know how the turn out Lennyk!