
It’s all about the layers…
Klik hier voor Nederlandse versie
With this recipe we want to give you the exact directions on how we go about making classic French croissants. The recipe is an adaptation from the recipe for Classic Croissants by Jeffrey Hamelman. We started out largely following the instructions for his recipe, changed everything to our beloved metric system and found out some worthwhile croissant knowledge of our own along the way. Hopefully enough to justify sharing it all with you and inspiring you to give croissant baking a shot yourself.
Before you start we can recommend watching our croissant making video to get a general feel for the recipe. You can also check out our croissant making log where we keep track of our own croissant baking adventures. For answers to your croissant questions you can check out the Frequently Asked Croissant Questions section.
This recipe will yield about 15 good croissants plus some leftover bits which you can use to make a few, slightly odd shaped ones, or other inventive croissant-like creations.
If at first you don’t succeed, maybe you can take comfort from the fact that our first efforts were not very ‘croissant worthy’. But as you can see we persevered and got better…But we have to admit it is and always will be a tricky process. You have to work precise and be focused to get good results. So away with screaming children, hyperactive animals and all other things distracting! Put on some appropriate croissant making music and lets get to it…
Please read the following tips;
According to Raymond Calvel croissants laminated with margarine are formed into the crescent shape, while croissants laminated with butter are left in the straight form. We say, use whichever shape you like best, but do use butter!
The croissant recipe

Ingredients for the croissant dough
500 g French Type 55 flour or unbleached all-purpose flour / plain flour (extra for dusting)
140 g water
140 g whole milk (you can take it straight from the fridge)
55 g sugar
40 g soft unsalted butter
11 g instant yeast
12 g salt
Other ingredients
makes 15
280 g cold unsalted butter for laminating
1 egg + 1 tsp water for the egg wash
Day 1
Making the croissant dough
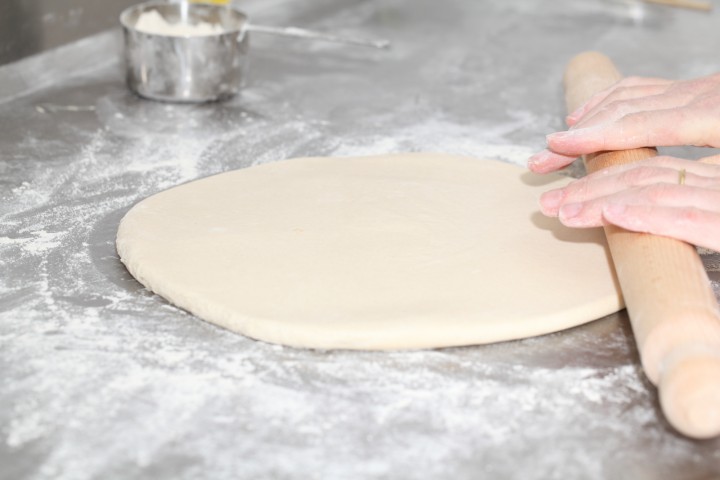
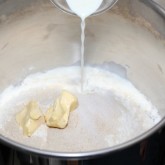
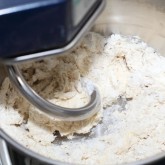
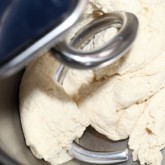
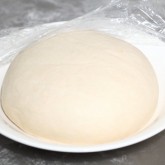
We usually do this part in the evening. Combine the dough ingredients and knead for 3 minutes, at low to medium speed, until the dough comes together and you’ve reached the stage of low to moderate gluten development. You do not want too much gluten development because you will struggle with the dough fighting back during laminating. Shape the dough like a disc, not a ball, before you refrigerate it, so it will be easier to roll it into a square shape the following day. Place the disc on a plate, cover with clingfilm and leave in the fridge overnight.
Day 2
Laminating the dough
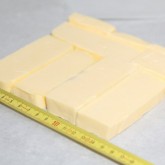
Cut the cold butter (directly from the fridge) lengthwise into 1,25 cm thick slabs. Arrange the pieces of butter on waxed paper to form a square of about 15 cm x 15 cm. Cover the butter with another layer of waxed paper and with a rolling pin pound butter until it’s about 19 cm x 19 cm. Trim / straighten the edges of the butter and put the trimmings on top of the square. Now pound lightly until you have a final square of 17 cm x 17 cm. Wrap in paper and refrigerate the butter slab until needed.
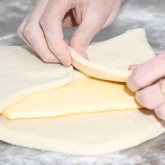
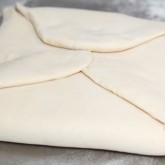
Take the dough out of the fridge. With a rolling pin roll out the dough disc into a 26 cm x 26 cm square. Try to get the square as perfect as possible and with an even thickness. Get the slab of butter from the fridge. Place the dough square so one of the sides of the square is facing you and place the butter slab on it with a 45 degree angle to the dough so a point of the butter square is facing you. Fold a flap of dough over the butter, so the point of the dough reaches the center of the butter. Do the same with the three other flaps. The edges of the dough flaps should slightly overlap to fully enclose the butter. With the palm of your hand lightly press the edges to seal the seams.
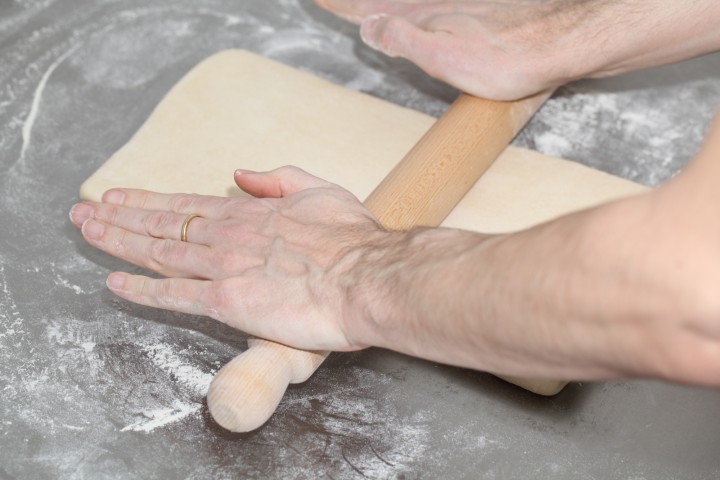
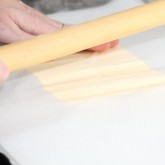
Now the dough with the sealed in butter needs to be rolled out. With a lightly floured rolling pin start rolling out, on a lightly flour dusted surface, the dough to a rectangle of 20 x 60 cm. Start rolling from the center of the dough towards the edges, and not from one side of the dough all the way to the other side. This technique helps you to keep the dough at an even thickness. You can also rotate your dough 180 degrees to keep it more even, because you tend to use more pressure when rolling away from you than towards yourself. You can use these techniques during all the rolling steps of this recipe. Aim at lengthening the dough instead of making it wider and try to keep all edges as straight as possible.
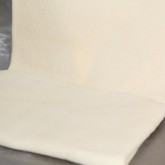
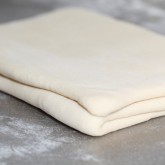
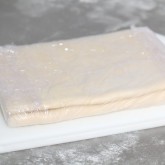
Fold the dough letter style, cover with clingfilm and refrigerate for 30 minutes (fold one third of the dough on top of itself and then fold the other side over it). Repeat the rolling and folding two more times (ending up with 27 layers of butter in total), each time rolling until the dough is about 20 cm x 60 cm. After each fold you should turn the dough 90 degrees before rolling again. The open ‘end’ of the dough should be towards you every time when rolling out the dough (you can see this in our croissant making video at around 3:40 minutes). After the second turn, again give it a 30 minute rest in the fridge. After the third turn you leave the dough in the fridge overnight until day 3, the actual croissant making day!
- Roll out to 20 cm x 60 cm
- Fold
- Refrigerate 30 minutes
- Rotate 90 degrees
- Roll out to 20 cm x 60 cm
- Fold
- Refrigerate 30 minutes
- Rotate 90 degrees
- Roll out to 20 cm x 60 cm
- Fold
- Refrigerate until day 3
- Rotate 90 degrees
- Roll out to 20 cm x 110 cm
Also see complete time table at bottom of page
Day 3
Dividing the dough
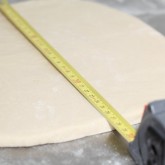
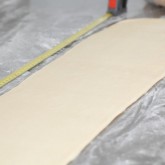
Take the dough from the fridge. Lightly flour your work surface. Now very gently roll the dough into a long and narrow strip of 20 cm x 110 cm. If the dough starts to resist too much or shrink back during this process you can fold it in thirds and give it a rest in the fridge for 10 to 20 minutes before continuing. Do not fight the dough, when the dough refuses to get any longer, rest it in the fridge! It is such a shame to ruin two days of work.
When your dough has reached its intended shape, carefully lift it a few centimeters to allow it to naturally shrink back from both sides. This way it will not shrink when you cut it. Your strip of dough should be long enough to allow you to trim the ends to make them straight and still be left with a length of about 100 cm.
Shaping the croissants
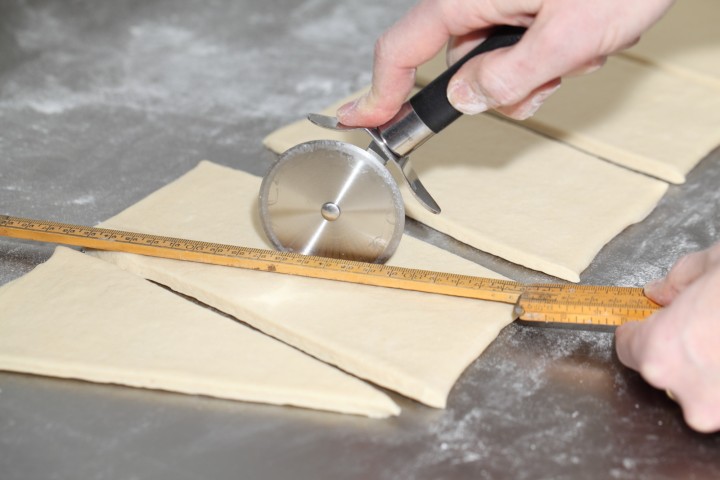
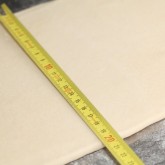
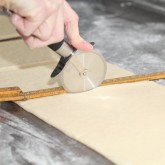
For the next stage you will need a tape measure and a pizza wheel. Lay a tape measure along the top of the dough. With the wheel you mark the top of the dough at 12,5 cm intervals along the length (7 marks total). Now lay the tape measure along the bottom of the dough and make a mark at 6,25 cm. Then continue to make marks at 12,5 cm intervals from this point (8 marks total). So the bottom and the top marks do not align with each other and form the basis for your triangles.
Now make diagonal cuts starting from the top corner cutting down to the first bottom mark. Make diagonal cuts along the entire length of the dough. Then change the angle and make cuts from the other top corner to the bottom mark to create triangles. Again repeat this along the length of the dough. This way you will end up with 15 triangles and a few end pieces of dough.
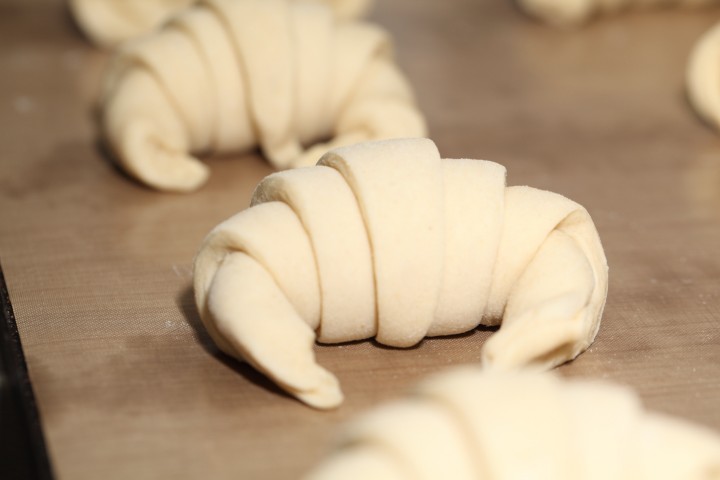
Using your pizza wheel, make 1.5 cm long notches in the center of the short side of each dough triangle.
Now very gently elongate each triangle to about 25 cm. This is often done by hand, but we have found that elongating with a rolling pin, very carefully, almost without putting pressure on the dough triangle, works better for us. You can try both methods and see what you think gives the best result.
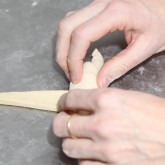
After you cut a notch in the middle of the short end of the triangle, try and roll the two wings by moving your hands outwards from the center, creating the desired shape with a thinner, longer point. Also try and roll the dough very tightly at the beginning and put enough pressure on the dough to make the layers stick together (but not so much as to damage the layers of course).

Proofing and baking
Arrange the shaped croissants on baking sheets, making sure to keep enough space between them so they will not touch when proofing and baking. Combine the egg with a teaspoon of water and whisk until smooth. Give the croissants their first thin coating of egg wash. You do not need to cover the croissants with anything, the egg wash will prevent the dough from drying out.
Proof the croissants draft-free at an ideal temperature of 24ºC to 26.5ºC / 76ºF to 79ºF (above that temperature there is a big chance butter will leak out!). We use our small Rofco B20 stone oven as a croissant proofing cabinet by preheating it for a minute to 25ºC / 77ºF. It retains this temperature for a long time because of the oven stones and isolation. The proofing should take about 2 hours. You should be able to tell if they are ready by carefully shaking the baking sheet and see if the croissants slightly wiggle. You should also be able to see the layers of dough when looking at your croissants from the side.
Preheat the oven at 200ºC / 390ºF convection or 220ºC / 430ºF conventional oven.

Right before baking, give the croissants their second thin coat of egg wash. We bake the croissants in our big convection oven for 6 minutes at 195ºC / 385ºF, then lowering the temperature to 165ºC / 330ºF, and bake them for another 9 minutes. Hamelman suggest baking the croissants for 18 to 20 minutes at 200ºC / 390ºF , turning your oven down a notch if you think the browning goes too quickly. But you really have to learn from experience and by baking several batches what the ideal time and temperature is for your own oven. Take out of the oven, leave for a few minutes on the baking sheet, then transfer to a cooling rack.
Latest way of baking; We heat up our double fan big convection oven at 200ºC, when heated up put the croissants in the oven and directly lower it to 175ºC. We bake them for 10 minutes at 175ºC, they will have a nice brown color by now, then lower the temperature to 150ºC, and bake them for another 6 minutes.
Best eaten while warm and fresh of course. Croissant we don’t eat or share within a day we freeze. We put them in the preheated oven (180ºC / 355ºF) for 8 minutes straight from the freezer. Nothing wrong with that, croissants eaten nice and warm, almost as good as the fresh ones…almost!
Croissant Time Table
Times are an indication and also depend on your experience with the recipe
Try to work swift but precise and take extra fridge time if needed!
Day 1 – Make initial dough
- 21.00 h – Knead for 3 minutes and store in fridge for 12 hours
Day 2 – Laminate the dough
- 09.00 h – Make butter slab and refrigerate till needed
- 09.05 h – Roll dough disc into square
- 09.10 h – Seal butter in dough
- 09.15 h – Roll out to 20 cm x 60 cm and fold
- Refrigerate 30 minutes
- 09.50 h – Rotate 90 degrees
- Roll out to 20 cm x 60 cm and fold
- Refrigerate 30 minutes
- 10.25 h – Rotate 90 degrees
- Roll out to 20 cm x 60 cm and fold
- 11.00 h – Refrigerate until day 3
Day 3 – Dividing, Shaping, proofing and baking
- 09.00 h – Roll out to 20 cm x 110 cm – part 1
- 09.05 h – Often needed! Take 20 min. fridge time if length not in one go
- 09.25 h – Roll out to 20 cm x 110 cm – part 2
- 09.30 h – Divide and shape the croissants
- 09.40 h – First coat of egg wash
- 09.45 h – Proof to perfection (indication 2 hours)
- 11.45 h – Second coat of egg wash
- 11.50 h – Bake for 15-18 minutes
- 12.10 h – Ready!









Chioma says
Hello, this recipe was so detailed, thank you so much. I tried it out and though I didn’t get perfect looking ones like yours, they were quite tasty. I will try and try again till I am able to get perfect looking ones.
Weekend Bakers says
Thank you Chioma,
This is exactly the right road to travel to perfect croissants.
Enjoy the pastry baking!
Susan says
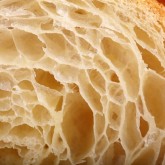
Hi there thank you for the great recipe. I followed the recipe and my croissants turned out good, smells great, good color and taste good, but they are all very flat and dont have nice crumb like your photo. I used plain flour and (cheap) supermarket butter could this be the reason? Im not sure of the fat content of the butter. As this is my first time i supposed my laminating might not be perfect? If you could give me some suggestions it would be great. Thank you again for the recipe.
Weekend Bakers says
Hello Susan,
That sounds already pretty good for a first time try. We think first of all you just need more practice. Most people need to make them 3 to 4 times to get the general feeling for the process. There is no substitute for practice and experience. There is no way to hide little mistakes in your technique when making croissants, so work very precise and follow the instructions to the letter. One small mistake is no problem but several small mistakes add up and can result in a flat croissant for instance. But also the quality of flour and butter are important for the end result. So try to get good quality butter and also try different flours if possible but most of all gain experience. Common ‘mistakes’ are pressing on the dough, and taking too long so the butter starts to get warm and is absorbed by the dough. Try to keep this in mind too.
Happy croissant baking!
Susan says
Thank you for your kind words. I will let you know the result next time I try 😀
Patrick says
Hello,
I wanted to know how to possibly use an active sourdough starter in place of commercial yeast. I know from my professional baking experience that working with an active starter increases the bulk ferment and proofing times but I have never used them with enriched doughs. Any advice?
Best,
Patrick
Weekend Bakers says
Hi Patrick,
Yes you are right it does take more time for both bulk ferment and proofing times. We would recommend finding a recipe that is already a worked out version for sourdough croissants. We are not really a fan of the sour taste in pastry and for that reason we do not have enough experience to guide you to a good enough result.
Good luck with it!
Ed & Marieke
Janet says
good recipe
Weekend Bakers says
Thank you Janet
Ramya + Karthik says
Good day!
Thank you for such clear instructions. Can’t wait to give it a try…
We are vegans (not super strict about cheese, butter though) – is there anyway to avoid the egg wash? Please let us know.
Kind regards, K & R
Weekend Bakers says
There are several options, but we cannot tell you form our own experience what works best. You can just leave the croissants plain, without the wash (make sure to cover them well so they do not dry out during proofing) and give them a (vegan) butter brush after baking. You can use (soy or almond) milk. We have also found suggestions for a mixture of milk and agave syrup or maple syrup (before baking but this will add sweetness) or coconut oil (after baking). Another method we have read about is flaxseed powder mixed with warm water.
Hope one or more options will proof useful to you. Let us know if something works out well. Always good to share of course!
Greetings,
Marieke
Annabell says
Hello! Great recipe with precise instructions. I completed my first croissant bake and posted photo of. Cross section of one croissant. I doesn’t have light and open airy holes. Also, I felt the croissant was heavy,not light and crunchy. Would you suggest it is my flour or butter choices? Thank you!
Weekend Bakers says
Hi Annabell,
Our general advice is this: Do not expect to get perfect croissants the very first time you try to make croissants, most people need to make them 3 to 4 times to get the general feeling for the process. There is no substitute for practice and experience. There is no way to hide little mistakes in your technique when making croissants, so work very precise and follow the instructions to the letter. One small mistake is no problem but several small mistakes add up!
Use the right butter if possible, like we say in the introduction and if you think your flour does not give a good result, try another type or brand, because it can make a difference too. If you use bread flour for example, the result will be heavier and denser.
For more information on flour types from different countries check: www.weekendbakery.com/posts…our-types/
Happy pastry baking!
Lester Brooks says
Wow, how to please your partner in the morning – especially when she is French!
I make them a week in advance and freeze them, taking out two the night before and letting them thaw out. Croissants and coffee in bed does wonders.
I have sprinkled Parmesan in the folds of a few and get an amazing cheesy flavour.
Difficult recipe at first but playing with oven temperatures (dropped it to 175 instead of 200) and time Just look at them and you know when they are ready they are great.
Patience is needed to work dough, refrigerate as soon as it starts to resist.
Love them and your recipe
Les
Weekend Bakers says
Hi Lester,
Sounds more than excellent and we could not agree more! So glad the recipe works for you in this way too and thank you for sharing your method that will inspire other people too we are sure.
Glowbug says
Can I add a little bit of flour to the butter before I work it into a slab, so that it’s more pliable when rolling and if I can add flour how much flour should I use?
Weekend Bakers says
Hello Glowbug,
Yes you can, we know about this technique, also applied because the butter combined with the flour is less likely to be absorbed by the dough and indeed more pliable.
We cannot tell you what the right amount would be but we think it will not be much, maybe 20 grams should do the trick. We use a butter with 82% fat content that at under the right conditions is pliable enough to work with, making added flour unnecessary. maybe this is also an option for you.
Good luck with it and happy baking!
Roger says
I made a couple of batches of croissants on the weekend using the exact same ingredient quantities, a slightly different process but think I made some simple mistakes it seems.
Day 1: was the same, making the dough, needing for 3 min and refrigerating overnight. Day 2: I rolled and folded the butter into the dough. Day 3: I rolled, cut, proved and baked. My croissants looked OK, smelt great and tasted good but were a little dense.
Possible mistakes:
– I fought the dough. On at least one of the rollings and on the last rolling before shaping the dough kept springing back but I persisted. I should have refrigerated again.
– Too much flour for dusting. Fighting the dough meant that it started to get a little tacky so I introduced more flour.
– The house was too warm. Winter in our part of the world and a wife that hates the cold means the house is a toasty 21-22 degrees. Could this have contributed to the issues above?
– Proving all wrong. I proved on an open bench for about an hour but got very little rise (most rise came from the baking). I also didn’t do the 2 brushes of egg wash.
– Using a fan-force oven I baked for just a little over 20min at 180. Should I try one of the other temperature settings in the article?
On a couple of positives, rolling the off cuts around some cheese and prosciutto was very nice, and having read this article and identified some errors I am really excited to have another go!!
Weekend Bakers says
Hi Roger,
So great to read your comment, with your own analyses already incorporated. The two first points indeed make a big difference to the end result. Easily fixed next time!
We do not think the house was too warm for making croissants, but do use the fridge if necessary, especially if the butter gets too soft. This also happens when you work the dough too much and take too long because you persist like you say.
The egg wash is important to keep the dough from drying out. Plus your proofing time was way to short, especially if the temperature you proofed at was 21-22 C. Try to get as close to the times and temps we mention and you will see big improvements we are sure!
Happy pastry baking,
Ed & Marieke
Mona Gazaly says
if i don’t have t55 flour can i mix 45 +bread flour
Weekend Bakers says
Hello Mona,
Yes you can. The mix depends on the protein content of your bread flour, if it is around 12% we would suggest starting with equal parts of both flours, if you use very strong bread flour we would suggest to start with 70% T45 and 30% bread flour.
Ellie says
Hello!! I was just wondering, how many does this recipe make because I’m making them for my mum for her birthday in the morning and I didn’t want to make way to many and waste any mixture! It might already say somewhere but I couldn’t find it. This recipe looks really good though!! Thanks so much!! ❤️🍴
Weekend Bakers says
Hi Ellie,
You will end up with 15 triangles and a few end pieces of dough that you can also use if you want. The ones you do not eat can also be frozen. With the one day version of this recipe we also give tips on retarding and freezing croissant dough. See: www.weekendbakery.com/posts…nt-recipe/
Good luck with it and happy birthday baking!
Leo says
Well I’ve made croissants loads of times many many recipes and mixed results, I am trying to find the best recipe and flavour, this is the first I’ve done where the outside cooked perfect but the inside was hollow and raw, but the flavour on the cooked parts is great, I am trying these one at a time with different oven temperatures to see if it was the temperature that was wrong .
Weekend Bakers says
Hello Leo,
We assume all your layers stuck together on the outer shell, leaving the inside hollow and because of the thickness of this layer the croissant did not get cooked. Somehow the layers have been damaged and somewhere in the process things went wrong. Try to work very precise, every step of the process and also when shaping and try and roll the dough very tightly at the beginning and put enough pressure on the dough to make the layers stick together but not so much as to damage the layers of course! With a bit more practice you should get good results we are sure!
Mona Gazaly says
i have steam proffer is it good for crssont
Weekend Bakers says
Hello Mona,
We guess you mean steam ‘oven’ and yes you can use it for baking croissants. We do not use a steam oven ourselves but other bakers do and if used correctly you can get a great result.
Good luck with it!
Nathan says
Is it bad if the square of butter breaks apart when I roll out the dough initially? I made these croissants earlier, and they were divine, but they seemed a bit smaller than the ones you made. Is this related to the butter breaking apart or otherwise?
Weekend Bakers says
Hello Nathan,
We use organic butter with a high fat content and low water content (about 82% fat). A higher water content tends to make butter hard, which promotes tearing and breaking and ruins the layers. Your butter needs to be pliable and at the same time not too soft at the moment of usage. Next to this it could also be your measurements where not exact enough or you could take your proofing a bit further. But these are guesses and just something to consider because you state the croissants were divine so for the most part you must have done really good!
Enjoy the process and the eating,
Marieke
Kenny Kankiza says
i like it
Marie says
Hi:
Day 1, I followed your recipe exactly. I bought a mixer with a dough hook but not sure if this mixer was my downfall.
The dough was sticky and basically fell apart and the butter in the dough was chunky the next morning. It was impossible to go further with the recipe. The liquid measures were difficult to convert to US measurements. For the water and milk you stated g measurements, should it be cl, measurements for liquid? I want to try it again but I think I need to get a better mixer or knead by hand. But as far as the liquid, I may have used too much.
Weekend Bakers says
Hi Marie,
Make sure your butter is soft when you incorporate it i the initial dough, so it gets absorbed. As for the measurements, the only way to be exact every time, also with liquids is the weigh ingredients and that is why we state these in grams. If you want to measure your liquids you should aim for 140 ml water and 140 ml milk. You should always be careful when adding liquid as the absorption of the flour you use can be different and it could be in your case you need just a bit less to get to the same dough consistency. Experience with the recipe and this dough will teach you how much exactly you need to use in your case. If you use a mixer with a dough hook, that is working well, then this should not be the problem.
Hope it will work out. Good luck with everything.
Anna says
Thank you! Making them second time. Don’t need to go to France to have a good croissant for breakfast.
Weekend Bakers says
Thank you Anna, for making and liking our recipe.
Many more happy baking moments to you!
Evelien says
Dear Ed en Marijke,
Thanks to this recipe I have made perfect croissants every time I try. I’m wondering if I could replace the milk in the recipe for buttermilk. I myself don’t drink milk so with the leftovers I usually make vanillevla, from your recipe. Using buttermilk instead of normal milk would however sometimes be easier. What do you think?
All my best,
Evelien
Evelien says
*update*
I used the buttermilk instead of normal milk, again perfect croissants!
Weekend Bakers says
Hi Evelien,
Thank you fro letting us know this works well. We have never tried but we do love buttermilk so very good to know!
Enjoy the pastry baking,
Marieke & Ed
Nikita says
Can this be converted to a one day recipe?
Weekend Bakers says
Yes, you can find the one day version of this recipe here:
www.weekendbakery.com/posts…nt-recipe/
patrick mwabilu says
Hello,i did try the croissant recipy and follow all steps and instruction ..it came out wow fantastic. Thanks
Weekend Bakers says
Hello Patrick,
‘Wow’ sounds like the best possible result you could wish for.
Thank you for sharing it with us and happy pastry baking!
Riah says
Hi! Thank you for this recipe. I just have a question regarding the initial kneading. You guys use a machine dough kneader, I sadly can’t afford one of those right now. Would hand kneading still work?
Thanks
Weekend Bakers says
Hello Riah,
Yes, you can also knead by hand. We would suggest kneading for 6 to 8 minutes and keep in mind you want to reach the stage of low to moderate gluten development so with this dough it is not necessary / desirable to knead until the ‘window pane’ stage.
Good luck with it and happy croissant baking!
ben says
Hello; a home baker with the experience of about 2k croissant units “under my belt” according to miscellaneous recipes, yours seems being the Ace of Croissant Recipes. It works like this: I follow all your instructions, you deliver all your promises. I’ll gladly take any fresh advice or update on Baking, in particular regarding Temperature and Time. Thanks.
Weekend Bakers says
That’s impressive Ben and thank you. Have you also seen our more recent one day version of this recipe? Maybe something for you too: www.weekendbakery.com/posts…nt-recipe/
If you would want to check out some tips and theory on times and temperature in general we can recommend this post: www.weekendbakery.com/posts…mperature/
Happy (pastry) baking!
Vero says
Hello. First I would like to thank you for this receipe ! I just became my croissant adventure. I have tried 4 different receipes and yours was the best ! I have had some problems. My croissants were very nice after proofing but in the oven during backing they are diminued and finally they were almost any layers. I followed your backing receipe: oven 200C lowering immediatelly to 175C backing 14 min. The second where backed in 200C during 6 min and then in 160C 9min. For the both there were only few layers ? Do you have any idea why ?
Weekend Bakers says
Hi Vero,
Sounds like, although your dough did puff up during proofing, your layers where actually damaged. Butter was absorbed by the dough and if this happens you end up with a more bread like / brioche like croissant. Try when rolling out the dough to gently elongate it and do not press on the dough and put weight on it.
Make sure the dough is not too elastic (that is the reason for the moderate gluten development during kneading also) so rolling out does not take so much effort you feel you have to push the dough with force to elongate it. Also maybe try different flour to see if this makes a difference.
Hope you will give it another try and you will have your layers soon!
Mona Gazaly says
i follow all this steps but i don’t sea the layer may i prove more than 3 houres
Weekend Bakers says
Hello Mona,
The answer is yes, but make sure above all that your yeast is working properly and your dough is the right temperature and is also proofing at the right temperature like we say in the recipe.
Good luck with it!
Renu Chandra says
Very nice
Doug says
You must be kidding. I love croissants, but three days is a lot of time when you can just buy them at the bakery. I wanted to try this so i can either make 15 croissants or in the same amout of time re- roof my home.
Angela says
It’s not really three days, it’s a little bit of time out of your three days, usually just a few minutes. But funny, how about I make the croissants and you re-roof my house 🙂
Weekend Bakers says
Thank you Angela, your words are very true.
And Dough, if you look at the time schedule you can see how much time and attention is needed. Day 1 is just minutes in the evening.
And if you finish your re-roofing faster than expected, you can also give our one day version a try: www.weekendbakery.com/posts…nt-recipe/
Happy pastry baking!
Paul says
Can you make the butter block (days) ahead of time and keep refrigerated? Perhaps then you could tap the butter and make it more pliable when you are ready to roll and laminate. What do you think?
Weekend Bakers says
Hi Paul,
Yes that is very well possible. Especially if you are new to croissant baking, making it in advance would maybe give some more room / time to focus on the block making and having it ready when needed is also very good.
Enjoy the process!
Thuy Nguyen says
Dear WB team,
Thank you for your recipe with full instructions. Your croissants look so great!
Could I please ask for your advice about the followings:
1/ As I am living in the hot weather, I think it will be easier to handle the first try of your recipe with half ingredients. In that case, the laminated dough should be rolled out at 20cm x 30cm. The folding therefore should be 20cm x 15cm (bi-fold, not tri-fold). Is my understanding right? It should be 3 times of roll outs? or increase 1 more turn? Please advise.
2/ I am using instant dry yeast, how much I should use for half of your recipe? Do I need to resolve it in water first and give it a rise before I pour it in the mixed flour?
Thank you so much in advance for your help and guidance.
All the best,
Thuy Nguyen
Weekend Bakers says
Hello Thuy,
If you want to make half the recipe, first of all the dough square should be 18.4 x 18.4 cm and the butter slab 12 x 12 cm. The same for the laminated dough, you must shorten only one side (otherwise you get a quarter of the original), so you end up with a 20 x 30 rectangle. The size of the final dough, right before cutting, should be 20 x 55 cm.
The laminating process stays the same, so just follow the steps.
If you make half you use half of all ingredients, so also half of the yeast. Instant dry yeast can be added to the flour without dissolving it in water first.
Good luck with it and hope it will be great!
Marieke & Ed
Thuy Nguyen says
Hi Marieke et Ed,
Thanks so much for your prompt response! Much appreciated.
Will try again and look forward to same result you have!
All the best.
Thuy
Ai Ling says
Great instructions. Have you tried using sourdough starter for the croissant? I am experimenting and would love your ideas. Thanks.
Weekend Bakers says
Hi Ai Ling,
We would recommend finding a recipe that is already a worked out version for sourdough croissants. To be honest we are not really a fan of the sour taste in pastry and for that reason we do not have enough experience to guide you to a good enough result.
Best of luck with it and happy pastry baking!
Mahnaz says
Your site very good
Weekend Bakers says
Thank you Mahnaz,
Hope you like the croissant recipe.
KC says
ONG this looks amazing!!! I’m in the U.K., what brand of unsalted butter do you recommend? I’ve tried the majority of them and haven’t been satisfied. Or is there a particular French butter that I should use?
Weekend Bakers says
Hi KC,
We are not familiar with butter brands in the UK. Somebody mentioned the brands Lactantia and President in a comment. We can tell you that it is important to look out for the high fat content of at least 82%. We use an organic butter. Maybe you can find something like this in a delicatessen shop, organic store or farmers market.
Good luck with it!
Dawna says
Fabulous recipe! This was my first time making croissants and they came out perfectly. The only issue I had was that there weren’t exact instructions on how to mix the dough. I referred to the other recipe mentioned for tips and non metric measurements. I am truly a home baker and just decided I would try it.
Weekend Bakers says
Thank you Dawna and you are making a point regarding the kneading instructions. We will see if we can add something useful to that.
Dominique says
Have made these several times, love them. I make 2 batches at a time and once shaped into croissants, I freeze them. Once frozen, I drop them in a ziplock bag on which I have written the baking instructions. Then at night I take 2 to 4 out, put on a baking sheet and cover with plastic wrap. In the morning, they are fully defrosted and proofed to perfection. I then brush the egg wash on, preheat my oven, then put another layer of egg wash on right before putting them in and voilà! Fresh croissants with café au lait every morning!!!
Weekend Bakers says
Thank you Dominique, for sharing your excellent method!
Happy croissant baking and eating,
Ed & Marieke
Dominique says
My whole family thanks you!! We are all enjoying these so much!
Weekend Bakers says
The rewards of baking for a grateful family – The best feeling!
Dorothy Ferrigno says
This sounds like a wonderful experience in baking. However, I need to change the measurements into pounds and inches. Is there a conversion chart that I could use?
Dominique says
140 g of water is a touch over 9Tbs, so 1/4 cup plus 3 Tbs and then just a smudge more, milk is heavier than water so stick with the 9 Tbs.
280g of butter is 3 and 1/2 sticks. I don’t even weigh it anymore, 3.5 works every time.
500g of flour is tougher because volumes and weights really don’t agree with flour and sugar. I have found that 3 cups of flour is about 450g, but the way I measure flour may be totally different from the way you do it.
1Tbs of sugar is 16g, so 3Tbs and 2tsp should bring you close to 55g.
2tsp of salt will give you 12g.
1Tbs yeast is 11 g.
40g of butter is 2 and 3/4 Tbs.
Honestly, my recommendation is you go get yourself a scale. They’re not that expensive and really worth it if you fall in love with this recipe.
Weekend Bakers says
We do also have a handy baking conversion page for you:
www.weekendbakery.com/cooki…nversions/
To get from centimeters to inches you divide everything by 2.54
Bob says
Thanks Weekendbakery for an amazing step by step instructions. Our 1st try was awesome and our second try blew us and our brunch guests away. We made ham and cheese, pain o’chocolat, and butter. We got a better hang of rolling out the dough and also used European butter.
I know we can make some raisin wheels with the same dough, is there a definitive recipe you’d recommend?
Weekend Bakers says
Hi Bob,
Great to read about your excellent results.
Have you seen this already?
www.weekendbakery.com/posts…x-raisins/
And after that you must give these a try too!
www.weekendbakery.com/posts…y-caramel/
Happy pastry baking and enjoy the Easter weekend with friends and family