
It’s all about the layers…
Klik hier voor Nederlandse versie
With this recipe we want to give you the exact directions on how we go about making classic French croissants. The recipe is an adaptation from the recipe for Classic Croissants by Jeffrey Hamelman. We started out largely following the instructions for his recipe, changed everything to our beloved metric system and found out some worthwhile croissant knowledge of our own along the way. Hopefully enough to justify sharing it all with you and inspiring you to give croissant baking a shot yourself.
Before you start we can recommend watching our croissant making video to get a general feel for the recipe. You can also check out our croissant making log where we keep track of our own croissant baking adventures. For answers to your croissant questions you can check out the Frequently Asked Croissant Questions section.
This recipe will yield about 15 good croissants plus some leftover bits which you can use to make a few, slightly odd shaped ones, or other inventive croissant-like creations.
If at first you don’t succeed, maybe you can take comfort from the fact that our first efforts were not very ‘croissant worthy’. But as you can see we persevered and got better…But we have to admit it is and always will be a tricky process. You have to work precise and be focused to get good results. So away with screaming children, hyperactive animals and all other things distracting! Put on some appropriate croissant making music and lets get to it…
Please read the following tips;
According to Raymond Calvel croissants laminated with margarine are formed into the crescent shape, while croissants laminated with butter are left in the straight form. We say, use whichever shape you like best, but do use butter!
The croissant recipe

Ingredients for the croissant dough
500 g French Type 55 flour or unbleached all-purpose flour / plain flour (extra for dusting)
140 g water
140 g whole milk (you can take it straight from the fridge)
55 g sugar
40 g soft unsalted butter
11 g instant yeast
12 g salt
Other ingredients
makes 15
280 g cold unsalted butter for laminating
1 egg + 1 tsp water for the egg wash
Day 1
Making the croissant dough
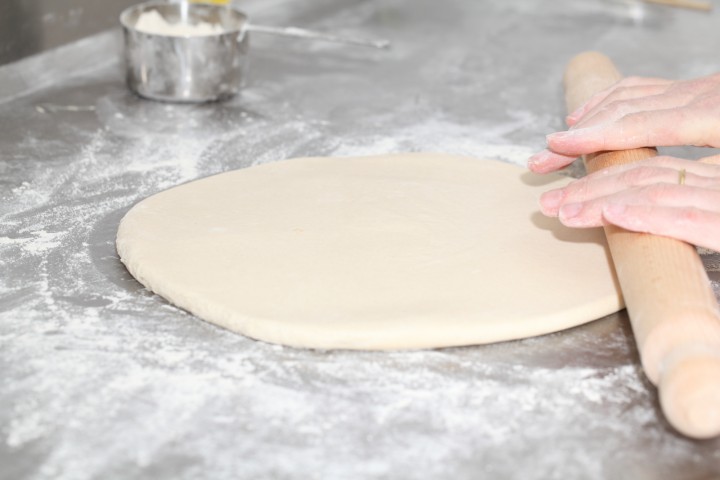
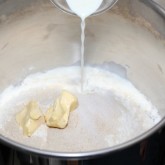
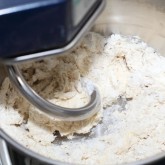
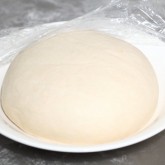
We usually do this part in the evening. Combine the dough ingredients and knead for 3 minutes, at low to medium speed, until the dough comes together and you’ve reached the stage of low to moderate gluten development. You do not want too much gluten development because you will struggle with the dough fighting back during laminating. Shape the dough like a disc, not a ball, before you refrigerate it, so it will be easier to roll it into a square shape the following day. Place the disc on a plate, cover with clingfilm and leave in the fridge overnight.
Day 2
Laminating the dough
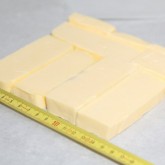
Cut the cold butter (directly from the fridge) lengthwise into 1,25 cm thick slabs. Arrange the pieces of butter on waxed paper to form a square of about 15 cm x 15 cm. Cover the butter with another layer of waxed paper and with a rolling pin pound butter until it’s about 19 cm x 19 cm. Trim / straighten the edges of the butter and put the trimmings on top of the square. Now pound lightly until you have a final square of 17 cm x 17 cm. Wrap in paper and refrigerate the butter slab until needed.
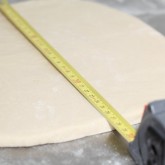
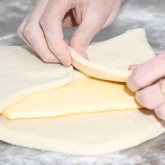
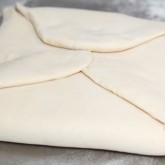
Take the dough out of the fridge. With a rolling pin roll out the dough disc into a 26 cm x 26 cm square. Try to get the square as perfect as possible and with an even thickness. Get the slab of butter from the fridge. Place the dough square so one of the sides of the square is facing you and place the butter slab on it with a 45 degree angle to the dough so a point of the butter square is facing you. Fold a flap of dough over the butter, so the point of the dough reaches the center of the butter. Do the same with the three other flaps. The edges of the dough flaps should slightly overlap to fully enclose the butter. With the palm of your hand lightly press the edges to seal the seams.
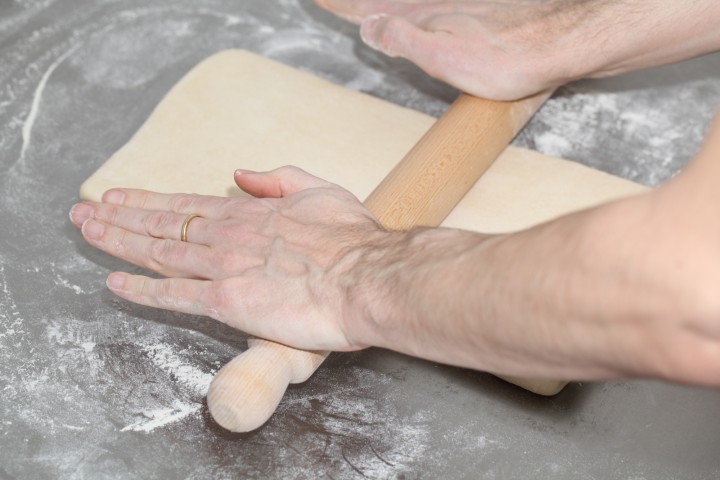
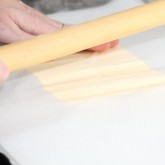
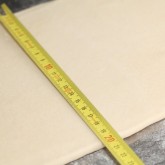
Now the dough with the sealed in butter needs to be rolled out. With a lightly floured rolling pin start rolling out, on a lightly flour dusted surface, the dough to a rectangle of 20 x 60 cm. Start rolling from the center of the dough towards the edges, and not from one side of the dough all the way to the other side. This technique helps you to keep the dough at an even thickness. You can also rotate your dough 180 degrees to keep it more even, because you tend to use more pressure when rolling away from you than towards yourself. You can use these techniques during all the rolling steps of this recipe. Aim at lengthening the dough instead of making it wider and try to keep all edges as straight as possible.
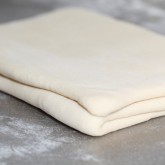
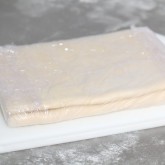
Fold the dough letter style, cover with clingfilm and refrigerate for 30 minutes (fold one third of the dough on top of itself and then fold the other side over it). Repeat the rolling and folding two more times (ending up with 27 layers of butter in total), each time rolling until the dough is about 20 cm x 60 cm. After each fold you should turn the dough 90 degrees before rolling again. The open ‘end’ of the dough should be towards you every time when rolling out the dough (you can see this in our croissant making video at around 3:40 minutes). After the second turn, again give it a 30 minute rest in the fridge. After the third turn you leave the dough in the fridge overnight until day 3, the actual croissant making day!
- Roll out to 20 cm x 60 cm
- Fold
- Refrigerate 30 minutes
- Rotate 90 degrees
- Roll out to 20 cm x 60 cm
- Fold
- Refrigerate 30 minutes
- Rotate 90 degrees
- Roll out to 20 cm x 60 cm
- Fold
- Refrigerate until day 3
- Rotate 90 degrees
- Roll out to 20 cm x 110 cm
Also see complete time table at bottom of page
Day 3
Dividing the dough
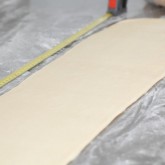
Take the dough from the fridge. Lightly flour your work surface. Now very gently roll the dough into a long and narrow strip of 20 cm x 110 cm. If the dough starts to resist too much or shrink back during this process you can fold it in thirds and give it a rest in the fridge for 10 to 20 minutes before continuing. Do not fight the dough, when the dough refuses to get any longer, rest it in the fridge! It is such a shame to ruin two days of work.
When your dough has reached its intended shape, carefully lift it a few centimeters to allow it to naturally shrink back from both sides. This way it will not shrink when you cut it. Your strip of dough should be long enough to allow you to trim the ends to make them straight and still be left with a length of about 100 cm.
Shaping the croissants
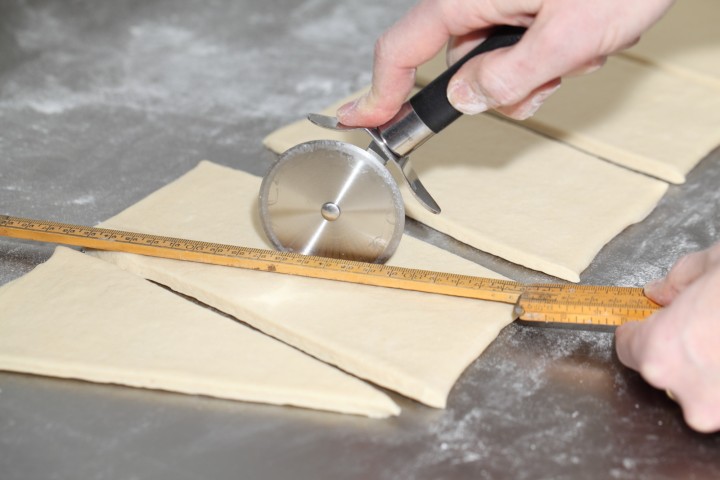
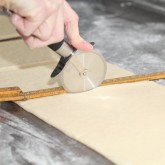
For the next stage you will need a tape measure and a pizza wheel. Lay a tape measure along the top of the dough. With the wheel you mark the top of the dough at 12,5 cm intervals along the length (7 marks total). Now lay the tape measure along the bottom of the dough and make a mark at 6,25 cm. Then continue to make marks at 12,5 cm intervals from this point (8 marks total). So the bottom and the top marks do not align with each other and form the basis for your triangles.
Now make diagonal cuts starting from the top corner cutting down to the first bottom mark. Make diagonal cuts along the entire length of the dough. Then change the angle and make cuts from the other top corner to the bottom mark to create triangles. Again repeat this along the length of the dough. This way you will end up with 15 triangles and a few end pieces of dough.
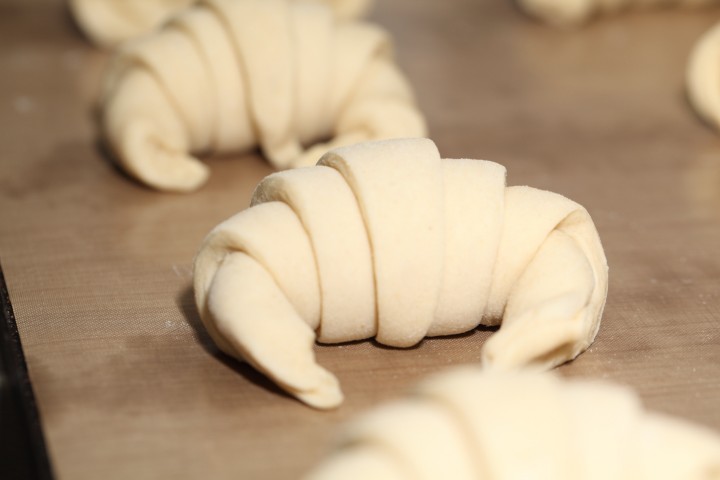
Using your pizza wheel, make 1.5 cm long notches in the center of the short side of each dough triangle.
Now very gently elongate each triangle to about 25 cm. This is often done by hand, but we have found that elongating with a rolling pin, very carefully, almost without putting pressure on the dough triangle, works better for us. You can try both methods and see what you think gives the best result.
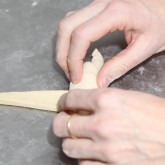
After you cut a notch in the middle of the short end of the triangle, try and roll the two wings by moving your hands outwards from the center, creating the desired shape with a thinner, longer point. Also try and roll the dough very tightly at the beginning and put enough pressure on the dough to make the layers stick together (but not so much as to damage the layers of course).

Proofing and baking
Arrange the shaped croissants on baking sheets, making sure to keep enough space between them so they will not touch when proofing and baking. Combine the egg with a teaspoon of water and whisk until smooth. Give the croissants their first thin coating of egg wash. You do not need to cover the croissants with anything, the egg wash will prevent the dough from drying out.
Proof the croissants draft-free at an ideal temperature of 24ºC to 26.5ºC / 76ºF to 79ºF (above that temperature there is a big chance butter will leak out!). We use our small Rofco B20 stone oven as a croissant proofing cabinet by preheating it for a minute to 25ºC / 77ºF. It retains this temperature for a long time because of the oven stones and isolation. The proofing should take about 2 hours. You should be able to tell if they are ready by carefully shaking the baking sheet and see if the croissants slightly wiggle. You should also be able to see the layers of dough when looking at your croissants from the side.
Preheat the oven at 200ºC / 390ºF convection or 220ºC / 430ºF conventional oven.

Right before baking, give the croissants their second thin coat of egg wash. We bake the croissants in our big convection oven for 6 minutes at 195ºC / 385ºF, then lowering the temperature to 165ºC / 330ºF, and bake them for another 9 minutes. Hamelman suggest baking the croissants for 18 to 20 minutes at 200ºC / 390ºF , turning your oven down a notch if you think the browning goes too quickly. But you really have to learn from experience and by baking several batches what the ideal time and temperature is for your own oven. Take out of the oven, leave for a few minutes on the baking sheet, then transfer to a cooling rack.
Latest way of baking; We heat up our double fan big convection oven at 200ºC, when heated up put the croissants in the oven and directly lower it to 175ºC. We bake them for 10 minutes at 175ºC, they will have a nice brown color by now, then lower the temperature to 150ºC, and bake them for another 6 minutes.
Best eaten while warm and fresh of course. Croissant we don’t eat or share within a day we freeze. We put them in the preheated oven (180ºC / 355ºF) for 8 minutes straight from the freezer. Nothing wrong with that, croissants eaten nice and warm, almost as good as the fresh ones…almost!
Croissant Time Table
Times are an indication and also depend on your experience with the recipe
Try to work swift but precise and take extra fridge time if needed!
Day 1 – Make initial dough
- 21.00 h – Knead for 3 minutes and store in fridge for 12 hours
Day 2 – Laminate the dough
- 09.00 h – Make butter slab and refrigerate till needed
- 09.05 h – Roll dough disc into square
- 09.10 h – Seal butter in dough
- 09.15 h – Roll out to 20 cm x 60 cm and fold
- Refrigerate 30 minutes
- 09.50 h – Rotate 90 degrees
- Roll out to 20 cm x 60 cm and fold
- Refrigerate 30 minutes
- 10.25 h – Rotate 90 degrees
- Roll out to 20 cm x 60 cm and fold
- 11.00 h – Refrigerate until day 3
Day 3 – Dividing, Shaping, proofing and baking
- 09.00 h – Roll out to 20 cm x 110 cm – part 1
- 09.05 h – Often needed! Take 20 min. fridge time if length not in one go
- 09.25 h – Roll out to 20 cm x 110 cm – part 2
- 09.30 h – Divide and shape the croissants
- 09.40 h – First coat of egg wash
- 09.45 h – Proof to perfection (indication 2 hours)
- 11.45 h – Second coat of egg wash
- 11.50 h – Bake for 15-18 minutes
- 12.10 h – Ready!









desiree says
Dear weekend bakery, your work is amazing! May I also hear from your side of advice, let’s say if I have already done all the steps (including shaping and final proofing) is it fine that I could freeze the dough until I bake em, a few days after?
Will they taste as fresh?
Weekend Bakers says
Hello Desiree,
Yes, you can (see comments of other bakers below), some freeze them after shaping and put them in the fridge a day before baking for example. We do not have personal experience with this, as we generally do not have enough space in our freezer to store the croissants. Good luck with it and please let us know your experiences with this method.
zawlatthan says
thanks alot
Ana says
Hi Weekend Bakery,
I love your recipe with step by step technique.
I am curios that the dough keep refreigerated means we keep the dough in the chiller or freezer.
Please let me know the exact temperature for keeping the dough.
Merci Beaucoup.
Regards,
Ana
Weekend Bakers says
Hello Ana,
We mean in the fridge (chiller), so at a temperature of around 5 degrees Celsius.
Lily says
I’ve added about 7 grams too much butter. Will this ruin the recipe, and should I start over?
Lily says
By butter, I mean salt…
Weekend Bakers says
Hello Lilly,
Butter would not be a problem, salt will very probably be, it is over 50% extra salt which is a lot and you will for sure taste it. If you do not want to throw away the dough, you could just go ahead with it and see it as a good croissant making exercise maybe, see how they taste and maybe use them for bread and butter pudding, adding extra ingredients to make the total dish less salty.
Good luck with it!
margarita says
it turns out someone used your pics directly from your website, and translated into Chinese not-complete version. I happen to try this recipe long long time ago. Even the Chinese version is not complete, with salt amount missing, i successed the first time. i uesed the salted butter for laminating, so the croissant was tasty. It was little bit salty for my taste, but my husband loves it. Today i tried to make some again by the Chinese version recipe, but failed really bad! The taste is really not nice! The shape is really a disaster. Then i try to find out the reasons why i failed this time, i found out you guys. Then i see the pics, read the words. wow exeactly the same meaning, except missing some really nice details and tips which turns out quite important. Anyway, what i want to say is THANK YOU! your recipe is what i am looking for, which is really written by heart, so detail ans so thoughtful. I love the “making log” idea! You make home-baking self-learning so easy. Thanks again!
Weekend Bakers says
Hello Margarita,
Thank you so much. So glad you found ‘the source of the recipe’. I guess you saw that we do not use salted butter for our recipe, you could, but have to adjust a bit with the salt amount in the dough, unless you like it quite salty of course. Hope you will enjoy some of our other recipes too. Maybe you will also appreciate the ones that use the croissant dough to make Breton pastry, pinwheels and pain aux raisins (see sweet recipes: www.weekendbakery.com/posts…et-baking/).
Happy baking!
Marieke & Ed
margarita says
Marieke & Ed,
thanks for sharing. they all look so nice. i definitely will try.
Sarah says
Wow! This looks amazing! I’ve tried different croissant recipes in the past, but they were all very crusty and dry on the outside, and the consistency of the inside was thick and chewy. Needless to say, they were not a success. However, this recipe looks fantastic- perfect honeycomb like texture and plenty of flaky layers. I have just one question- can these croissants be shaped and chilled (fridge or freezer?) on the third day, rather than baking straightaway? I’d like to bake them early in the morning on the fourth day, as we’ll be having a guest over for early breakfast. Thank you very much in advance!
Michael Beligiannis says
Yes they can. Just take them out of the freezer the night before baking and put them in the fridge. 1 1/2 hours before baking let them rise on the kitchen table.
Weekend Bakers says
Thanks for bringing in your expertise on the subjest Michael, much appreciated!
Sarah says
Thank you! I’ll do that.
Saeeda says
Thank you for sharing, will definitely try
stephen Hewitt says
One of the nicest croissants around beautiful …so easy to make …The only thing you can make the in a couple of hours instead of 3 days but really beautiful ////))))☆☆☆☆☆
Weekend Bakers says
If they took less time we would probably make them more often, with ‘heavy consequences’ maybe 😉
But always worth the effort for us to make them!
Julie says
Wow this website has got me hooked.
I’m working my way through your recipes and just made the croissants. I am so happy how they turned out. It took me 5 days because I ended up resting dough in fridge for 2 days! Also a heat wave caught me here in Melbourne (Aust) so I strung things along for a cooler time of day. Still, they rose well at proofing time. I made Pain au Chocolate with my dough odd and ends of which I had many due to my very wonky rectangle and I may have accidently left some aside for this purpose too 🙂 ; but once I got cutting triangles the croissants looked great. I would not have attempted this recipe except for your very detailed instructions. I am truly thankful to you for making such a great website and sharing your hours of hard work and baking experiments and no doubt many batches of dough, to give us; in the end a very tried and tested and clear format to work from. If I can do it anyone can. Best regards.
Andres says
Hello weekendbakery people!! I follow you in every post you have but actually I am doing kind of research abut the following.
There is this website, “http://bakeup.com/”, that assures they have flattened croissants and I want to do the same at home so I can freeze them and bake my own croissants whenever i feel so. How do you think the manage to have this frozen flattened croissant and when you bake it it has a perfect puff paste inside??? I tried to do the same somehow but all inside gets to1gether in one single dough…. I am so disappointed 🙁
What do you think?? Do you get the idea??
Help me please!! It will be my weekend happiness
Cheers!!
Continue with your great site
Weekend Bakers says
Thank you Andres,
We are sorry we have no idea what this is and no experience with it. These products are clearly aimed at the industry and there will be something or other in them to make the magic happen. We home bakers do not use workarounds or additives, that is the beauty of doing it yourself. I would forget about flat croissants in the freezer and this method. If you want to freeze croissants make sure to have enough space in your freezer for them.
Meena says
Hi, I’m a novice baker and just starting to bake croissants. The first time I made them, the croissant had more of a bread or doughy texture that flaky croissant texture. Why exactly does this happen? What did I do wrong? Is it ingredients or technique? The second time I made the croissants, the dough was very resistant when I rolled it out. Why does this happen? Again, ingredients or technique? I see in your advice to put the dough back int he fridge for 20 minutes. Does this fix the problem completely? Or is there something I did wrong in the first place? Thank you.
Weekend Bakers says
Hello Meena,
When you get a breadlike consistency the butter has been absorbed by the dough. It’s a question of experience, getting to grips with the technique and speed needed to get it right. Make sure your surroundings are cool or use the fridge in between to cool the dough so the butter will not get too warm. Resistance has to do with kneading time (maybe you kneaded longer the second time) and also the type of flour used (percentage of gluten in the flour is important too). Try to use flour with a protein content of around 11%.
Good luck with it!
abdi says
Lovely recipe and easy to follow.
Making it for the second time now coz the whole family just love them fresh from the oven. Trying chocolate and cheese filled ones and hoping for the best.
For anyone in tropical climates I would highly suggest get mixing and rolling as early as possible to get the best results.
Thanks again for this recipe, can’t wait to try new ones in the future.
Weekend Bakers says
Thank you so much Abdi! Hope they turn out great too!
Eric says
hi can you shape and freeze the croissants and thaw if u need them? thanks
Weekend Bakers says
Hi Eric,
Yes, it is possible, but we cannot give you pointers based on our own experience. Just make sure that the dough is well risen when you bring it to the oven.
Dido says
Hi, 11 grams of instant yeast is not too much for this recipe ?
Weekend Bakers says
Hi Dido,
For us and many other people that have tried this recipe it seems to be exactly right 🙂
Please just try it and find out.
Jenny says
Hi,
This recipe and the steps are so clearly written, I love it! However I have a couple questions that came up when I was making the croissants.
– How thick does the dough and butter have to be rolled out? (I halved the recipe and so the size of the dough didn’t directly apply in my case, so I want to know roughly how thick the dough should be in order to have a good laminate)
– Does it work the same way with All purpose flour vs. Bread flour? I want to hear what you think about bread flour. I have been suggested to use bread flour without too much kneading because bread flour holds moisture better
– Also, I can see little lumps of butter when I laminate, I think is because that I can’t get a completely flat slab of butter without little gaps in between, is there tricks to get a smooth slab of butter to fold in?
– Does it necessarily take 3 days to make croissants? is the intention to rest the dough very well? But it just gets hard in the fridge and hard to roll out.
I would really appreciate some of your insight. I love croissants. I really want to make them perfect every time.
Thank you so much
Weekend Bakers says
Hi Jenny,
If you halve the recipe you should recalculate all the measurements. Everything will be really small to work with, so we would recommend making the whole batch of dough, which will, sticking to the measurements, give you the exact thickness you need. Also see our video for a good indication of the thickness.
When we use bread flour ourselves we find the croissants get a bit ‘heavy’ so we would recommend using all purpose or something similar like the French type55. Bread flour can give a good croissant in terms of taste though.
Use the right type of butter (see comments on the issue below) which contains enough fat (82%) and is pliable.
The 3 days are also chosen because of planning, but you can do it in two days too. Your dough should not get hard in the fridge, cover it well and maybe let the dough become slightly less cold before rolling it out.
Good luck with it and happy baking!
Giorgia says
Hello! I really appreciated your recipe and I’d like to try it. The only question is: I read that you used 11 grams of instant yeast, that is about 33 grams of fresh yeast. Isn’t it a little too much for that amount of dough and three days of work? Or am I wrong? Thank you!!! Giorgia
Giorgia says
I am wrong, I apologize!
Rommel Mayers says
Thank you for the recipe I will sure try it out
OMK says
Hi,
Thank you for sharing your croissant journey. I have tried making them twice in the past 3 days. Second time is better in laminating but I still struggle to keep the butter in the dough without tearing in during the last 120cm.
Also must I proof it for 2 hours before baking? Is that the reason why I don’t have the honeycomb texture inside?
How can I send you pic of the inside croissant for you to see? Thank you again.
Weekend Bakers says
Hi, we need to proof for 2 hours go get to a stage where the croissant is nice and wobbly before going into the oven. The honeycomb is made during laminating, you need to work fast, precise and gentle at the same time. Happy baking!
Ginger says
Dankjewel voor het delen van dit mooie en duidelijke recept! Ze komen net uit de oven en ik ben er trots op! Voor een eerste keer croissants maken in mijn eigen keukentje zijn ze goed gelukt. Ze zijn wel iets platter geworden, waardoor zou dat komen?
Groetjes uit Maastricht,
Ginger
David says
Excellent recipe.
I have tried a few times with other recipes in the past but never was totally satisfied. This time, however, your recipe turned out perfect on the first try; both the recipe itself and the instructions made the difference.
I used King Arthur all purpose unbleached flour and it handled very well although I gave it extra frig time between laminations and did the final roll out in two steps with a rest in the middle because of relatively high temps, about 26-27 at my house. Baked at 200 for 18 min with convection. Probably a minute too long but it was OK.
I am recommending your site to everyone I know who is interested in baking. Once again, great work.
Thanks
holly says
I just want to say how great this recipe is!
Now i have a question. I had my husband make me a form for the square of butter that needs made. I have used it, and it works great. Now i wonder, softening the butter and then spreading it in the form should be okay right? Instead of pounding it out. As long as softening the butter doesnt change anything with its composition.
What do you think?
I like to mass produce my butter squares and freeze them, because that is my least favorite part of the process.
Thanks.
holly says
And obviously i would refrigerate the butter squares before i used them for laminating.
Thanks
Weekend Bakers says
No problem at all, please make sure the butter is a bit pliable at freezing it, before laminating, or your dough will tear up. Happy baking!
yesurajan says
Wat cheese will use for croissant, and which cheese is best, and taste, plz let me know urgent…
Regards
Chef yesurajan
Weekend Bakers says
We use a good quality real cheddar or Dutch Gouda cheese. Happy baking!
yesurajan says
Thxs chef
Marvin G says
Hello,
This recipe has always been my savior. All of my problems when it comes to mixing the dough up to the laminating process have been solved, though, my usual challenge has always been the weather since I live in a tropical country where the temperature plays around 28 up to 34 degrees++. That is why I’ve found it nice to do the lamination process at night so that the temperature won’t be that humid enough for the beurrage. I’ve got the nice texture of the authentic French croissant that commercial bakers can’t achieve. And so there is no need to use bread improvers at all. Thanks for the recipe.
Weekend Bakers says
Thanks for your nice comment, hot weather is always a challenge!
Marvin G says
Another thing, I’d like to know what could be the possible problem when the croissant turns to be a bit dense and soggy in the center?
Weekend Bakers says
Underproofed? Loss of layers, because the has been absorbed in the dough?
Fifi says
Hi there,
My croissants are weird. When I use Australian flour (Lighthouse for Biscuit, Cake and Pastry or White Wing’s general purpose flour), I was able to make flaky croissants with honey comb structure and buttery interior (no butter leakage at all on my 5th batch).
However, when I use French T55 (Moul Bie), the dough either turned out too wet, sticky and fight back during rolling out, or dry and cracked. In either case the dough won’t proof at all, even after 2.5 hours of proofing.
So far I’ve wasted 4 batches using French T55 flour:
(1) Jean Michel Raynaud’s original recipe of 500 grams of flour and 300 ml of milk (no butter in the dough pre-laminating) and 10 grams of instant dry yeast. Mixing only until dough came together and kneading briefly. I only rested the dough in the fridge for 9 hours (no bulk fermentation at room temperature) – too wet.
(2) Same as above but I reduced the milk to 200 ml plus 35 ml of cold water, using fresh yeast (about 24 grams after I read 1 gram instant yeast equals about 2.25 grams of fresh yeast) – one side of the dough cracked after I took it out of the fridge and let it rest for 10 minutes before trying to roll it out.
(3) Gontran Cherrier’s recipe of 500 grams of flour, 250 ml of water and 20 grams of butter, 5 grams of instant dry yeast (plus using 50 grams fermented dough). Mixing for 7 minutes (‘stir’) and kneading for 3 minutes (speed 2). No bulk fermentation at room temperature and no overnight resting in the fridge – dough sticking a bit on the work bench but was smooth until the last roll/shaping out when it sticking on the bench caused the dough to tear.
(4) Same as (3) but reduced water to 200 ml and 20 grams of butter – dough came out dry and unworkable. Cracks on both upper and bottom sides of the dough.
Can you tell me what do you think went wrong? Adding liquid only as needed doesn’t seem to help. The feel of the dough is also a bit like a blue tag, unlike the light/fluffiness I got from using Australian flour. There is also a bit of smell that’s unique to the flour.
I live in Brisbane and current weather is perfect for making croissant.
Thank you for your reply.
Henry says
Have you tried using cold water, milk, yeast, flour and all containers holding these things? It made a massive difference for myself
Fifi says
Hi Henry
Yes I’ve tried that too. Nothing worked so far with the T55. Whenever I go back to using Australian Lighthouse flour, it worked. It seems that the T55 also doesn’t like a 10-minute kneading time, or the short kneading time that this blog suggested.
Weekend Bakers says
Hi, some flours just do not work. We tried several brands/mills french type T55 flours and some work with croissants and some do not. Just try another brand and perhaps this brand will work, no exact science but the only way to find out. Happy baking!
Smita says
Is there an alternate to eggs for proofing the croissants? We do not eat eggs..
Weekend Bakers says
Hi Smita, you can use milk to coat the croissants or simply do not coat them. However you will loose a little bit of crispiness and the shiny deeper color of the croissants.
Danette Smith says
What a gem of a website! I feel so lucky to have ‘discovered’ it! I was thrilled to view the croissant video, even though I saw it a day too late! I had already made my first batch of Jeffery H’s classic croissants from the Fine Cooking Breads magazine and even tried Robert Jorin’s recipe using a pre-ferment (www.finecooking.com/recipes/master-class-croissants.aspx) a few weeks ago. Alas, I am still striving to perfect that little morsel of heaven. My question to you is: What should I be looking for during the last turn? What I noticed is a definite thinning of the layers of dough and I can see fragments of butter underneath the topmost layers. Is this what I should expect? FYI LOVE The Great British Bakeoff
Weekend Bakers says
Hi, you should indeed see separate layers and still see distinct layers of butter. The most perceived problem is the butter melting and being absorbed by the dough. When this happens you loose the flakiness and the croissant turns out brioche like.
Lynn Merry says
This is a fabulous recipe! It works well when the weather is cooler (in Tanzania) and the butter stays relatively firm.
So, can I freeze the dough before the final roll; then defrost and continue?
I want to get a stock made while the weather is cool. I’m guessing they should keep for 3 months frozen?
many thanks
Lynn
Anna H. says
Can u provide the measurements as ml, tsp, cups, instead of grams for all the ingredients?? I live in the US and we don’t measure it that way. Pls convert the info so I can work on ur recipe?
Thanks!
Oracle says
Why don’t you just google the conversion yourself?
eric says
I live in the US and i use grams because im not an ignorant ‘merkin. You should too.
Anna H. says
Can u provide the measurements as ml, tsp, cups, instead of grams for all the ingredients?? I live in the US and we don’t measure it that way. Pls convert the info so I can work on ur recipe?
Thanks!
Johnny says
Actually the professional bakery use the recipe with weight.The weight is the best measurements for baking.U should try that.
Weekend Bakers says
Amen 🙂
Bea says
I live in the USA also, please ladies and gents buy a scale. It is not all that expensive and you just cannot bake breads or cakes that will be the same without them. Cups, spoons even eggs all weigh different but a scale will give you the exact weight every time. The results are fantastic!
Weekend Bakers says
So happy to hear we are of one baking mind Bea.
Happy baking!
Audrey says
Hi! So I’ve tried another croissant recipe before looking at yours, and it didn’t work so well. When I mixed all the ingredients with the dough hook, there were excess flour in the bottom and the dough was hard (not like what i’ve seen in cooking vids). After that, I noticed that my butter was melting a little bit faster than expected (I live in a tropical-climate place so the temperature is between 24-27 degrees Celsius. The recipe before didn’t give any tips too…). What kind of butter are you using? Can I use wijsman butter? Can i still make the croissants in my house without air conditioner? Thanks 🙂
Leta says
Hello,
I live in the tropics too. I make my croissants in my kitchen without air conditioning so it is possible. However, I would suggest you roll the dough when its cooler, preferably at night. The use of refrigerator of course is a must. I also rest the dough for longer than the recommended 30mins.
I use butter that has at least 82% butter fat. You don’t have to do this next suggestion – I use less butter than most of the recipes I’ve seen, about 25% butter to flour. This will result in a dough that is still very tasty but not as rich – gotta watch that middle. It also makes laminating easier since your butter block wont be as large.
Adding flour to the butter block also lowers its melting point so you can work for longer without worrying about getting your butter all over the place. If you notice that the butter is too soft and you haven’t finished laminating, just wrap up your dough and place in the fridge for about 15-20mins then continue.
I haven’t tried the recipe on this site (mine is modified from Peter Reinhart’s) but I think these tips should work with any good croissant recipe.
There is one thing I intend try the next time I make croissants, and that is too roll out the detrempe and freeze it so that its the same hardness as butter block before I start laminating. I think this will result in even better croissants.
I hope you find this useful. Happy Baking!
carmine says
Hi All
very nice recipe indeed, has anyone tried to freeze the shaped dough, and bake the croissants afterwords?
znj says
Helllo,
Thank you so much for the recipe and the video. I have been making it for the past two days and today I finally baked them. They turned out amazing everyone loved them , especially that it was my first time making croissants.
I did however face one problem, even though the croissant had a perfect outside shell the inside was a little doughy, I also realized that my dough was thicker than the dough I saw in the video, even though I used the same quantity of ingredients and had the same measurements of the dough.
Yanmei says
Hi,
I love how your recipe is so precise with the details and instructions!!! I can’t wait to try this out. I am curious though, how important is it that the ambient temperature be around the 20-24 degrees range? Cos I am from Asia, and we never get such temperatures, unless I work in an aircon room…
Weekend Bakers says
Hi, it is very hard to make croissants around 30C when you are inexperienced, the butter melts to quickly and you end up with brioche instead of croissants.
sophia says
Hello Ed & Marieke,
The honeycomb texture looks so attractive. I am gonna try this recipe soon. But as I cannot find French 55 flour here, can you tell me what is the protein level of this flour? And when you say “instant yeast”, is it dry active yeast? This is the only yeast I can find around home. Thank you!
p.s. I tried a different recipe last time, it asked for 12g yeast for 500g flour, and my dough rise almost three times in just 3 hour in the fridge at 4 Celsius degrees when resting before laminating. I also rested overnight after laminating, but the ending result was very sour, almost alcohol like. I see your recipe calls for the same, should I adjust something? the temperature of the fridge or the amount of the yeast?
Weekend Bakers says
Hi Sophia, for us this amount of yeast works perfectly. Normally you use 7g for 500g, however with all the butter and sugar you need a little bit more to compensate. We use something as instant yeast (written on the package), but they are all the same; Instant Active Dry Yeast is I think the full name. You do not need to dissolve it in water. For a regular bread we use about 7g for 500g of flour.
yesurajan says
Hello,
Did u add any improover plz , let me know that
Weekend Bakers says
Hi, we do not use any improvers in any of our recipes. Just the ingredients listed in the recipe.