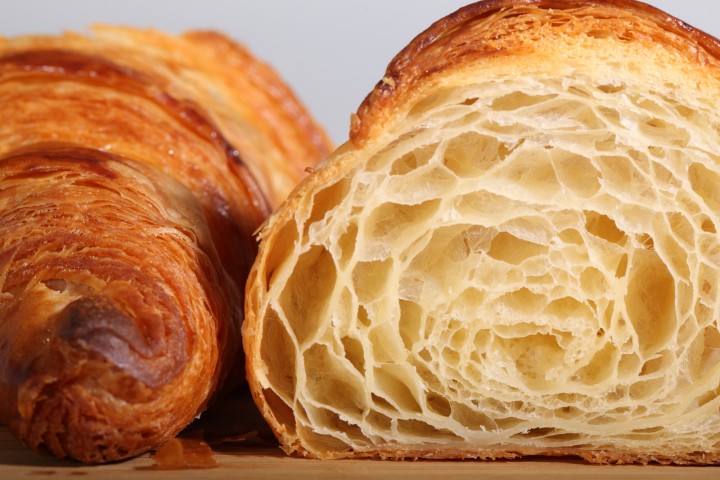
It’s all about the layers…
Klik hier voor Nederlandse versie
With this recipe we want to give you the exact directions on how we go about making classic French croissants. The recipe is an adaptation from the recipe for Classic Croissants by Jeffrey Hamelman. We started out largely following the instructions for his recipe, changed everything to our beloved metric system and found out some worthwhile croissant knowledge of our own along the way. Hopefully enough to justify sharing it all with you and inspiring you to give croissant baking a shot yourself.
Before you start we can recommend watching our croissant making video to get a general feel for the recipe. You can also check out our croissant making log where we keep track of our own croissant baking adventures. For answers to your croissant questions you can check out the Frequently Asked Croissant Questions section.
This recipe will yield about 15 good croissants plus some leftover bits which you can use to make a few, slightly odd shaped ones, or other inventive croissant-like creations.
If at first you don’t succeed, maybe you can take comfort from the fact that our first efforts were not very ‘croissant worthy’. But as you can see we persevered and got better…But we have to admit it is and always will be a tricky process. You have to work precise and be focused to get good results. So away with screaming children, hyperactive animals and all other things distracting! Put on some appropriate croissant making music and lets get to it…
Please read the following tips;
According to Raymond Calvel croissants laminated with margarine are formed into the crescent shape, while croissants laminated with butter are left in the straight form. We say, use whichever shape you like best, but do use butter!
The croissant recipe

Ingredients for the croissant dough
500 g French Type 55 flour or unbleached all-purpose flour / plain flour (extra for dusting)
140 g water
140 g whole milk (you can take it straight from the fridge)
55 g sugar
40 g soft unsalted butter
11 g instant yeast
12 g salt
Other ingredients
makes 15
280 g cold unsalted butter for laminating
1 egg + 1 tsp water for the egg wash
Day 1
Making the croissant dough
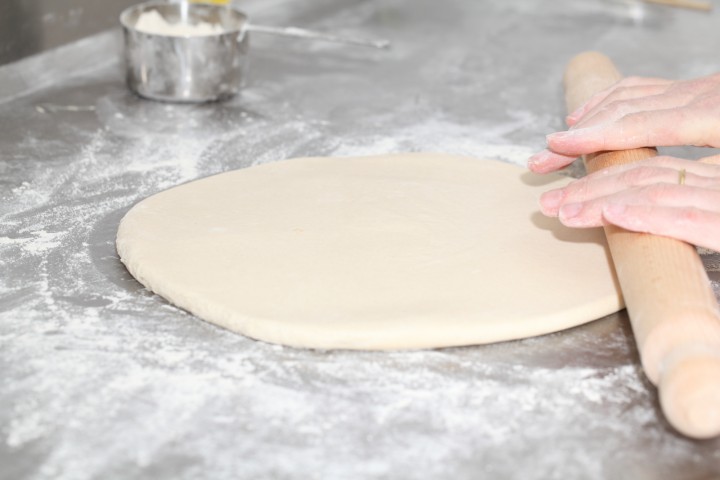
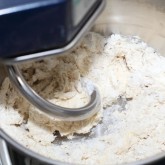
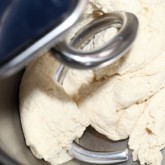
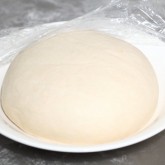
We usually do this part in the evening. Combine the dough ingredients and knead for 3 minutes, at low to medium speed, until the dough comes together and you’ve reached the stage of low to moderate gluten development. You do not want too much gluten development because you will struggle with the dough fighting back during laminating. Shape the dough like a disc, not a ball, before you refrigerate it, so it will be easier to roll it into a square shape the following day. Place the disc on a plate, cover with clingfilm and leave in the fridge overnight.
Day 2
Laminating the dough
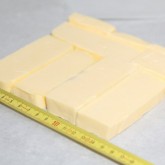
Cut the cold butter (directly from the fridge) lengthwise into 1,25 cm thick slabs. Arrange the pieces of butter on waxed paper to form a square of about 15 cm x 15 cm. Cover the butter with another layer of waxed paper and with a rolling pin pound butter until it’s about 19 cm x 19 cm. Trim / straighten the edges of the butter and put the trimmings on top of the square. Now pound lightly until you have a final square of 17 cm x 17 cm. Wrap in paper and refrigerate the butter slab until needed.
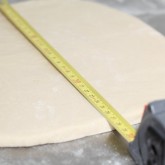
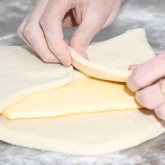
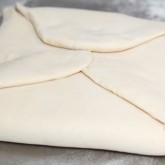
Take the dough out of the fridge. With a rolling pin roll out the dough disc into a 26 cm x 26 cm square. Try to get the square as perfect as possible and with an even thickness. Get the slab of butter from the fridge. Place the dough square so one of the sides of the square is facing you and place the butter slab on it with a 45 degree angle to the dough so a point of the butter square is facing you. Fold a flap of dough over the butter, so the point of the dough reaches the center of the butter. Do the same with the three other flaps. The edges of the dough flaps should slightly overlap to fully enclose the butter. With the palm of your hand lightly press the edges to seal the seams.
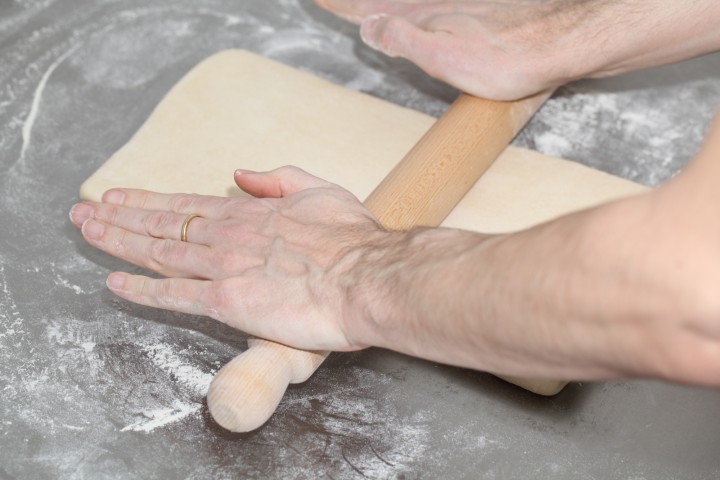
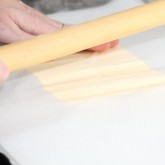
Now the dough with the sealed in butter needs to be rolled out. With a lightly floured rolling pin start rolling out, on a lightly flour dusted surface, the dough to a rectangle of 20 x 60 cm. Start rolling from the center of the dough towards the edges, and not from one side of the dough all the way to the other side. This technique helps you to keep the dough at an even thickness. You can also rotate your dough 180 degrees to keep it more even, because you tend to use more pressure when rolling away from you than towards yourself. You can use these techniques during all the rolling steps of this recipe. Aim at lengthening the dough instead of making it wider and try to keep all edges as straight as possible.
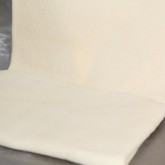
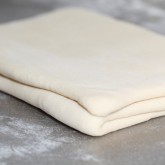
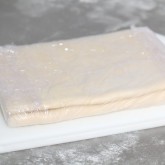
Fold the dough letter style, cover with clingfilm and refrigerate for 30 minutes (fold one third of the dough on top of itself and then fold the other side over it). Repeat the rolling and folding two more times (ending up with 27 layers of butter in total), each time rolling until the dough is about 20 cm x 60 cm. After each fold you should turn the dough 90 degrees before rolling again. The open ‘end’ of the dough should be towards you every time when rolling out the dough (you can see this in our croissant making video at around 3:40 minutes). After the second turn, again give it a 30 minute rest in the fridge. After the third turn you leave the dough in the fridge overnight until day 3, the actual croissant making day!
- Roll out to 20 cm x 60 cm
- Fold
- Refrigerate 30 minutes
- Rotate 90 degrees
- Roll out to 20 cm x 60 cm
- Fold
- Refrigerate 30 minutes
- Rotate 90 degrees
- Roll out to 20 cm x 60 cm
- Fold
- Refrigerate until day 3
- Rotate 90 degrees
- Roll out to 20 cm x 110 cm
Also see complete time table at bottom of page
Day 3
Dividing the dough
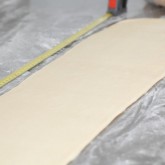
Take the dough from the fridge. Lightly flour your work surface. Now very gently roll the dough into a long and narrow strip of 20 cm x 110 cm. If the dough starts to resist too much or shrink back during this process you can fold it in thirds and give it a rest in the fridge for 10 to 20 minutes before continuing. Do not fight the dough, when the dough refuses to get any longer, rest it in the fridge! It is such a shame to ruin two days of work.
When your dough has reached its intended shape, carefully lift it a few centimeters to allow it to naturally shrink back from both sides. This way it will not shrink when you cut it. Your strip of dough should be long enough to allow you to trim the ends to make them straight and still be left with a length of about 100 cm.
Shaping the croissants
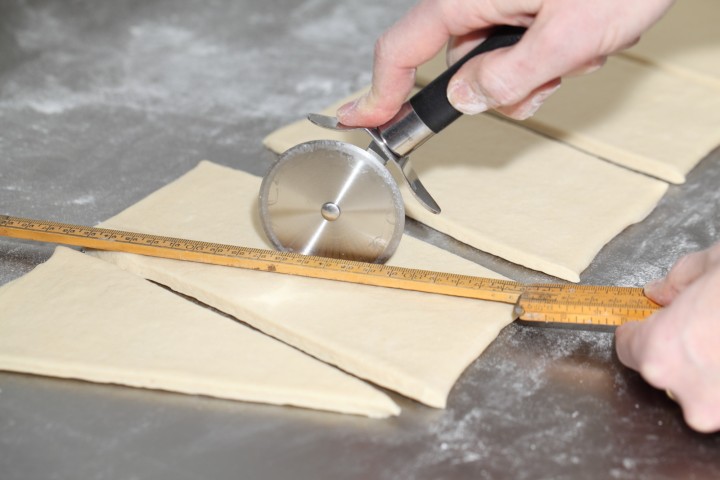
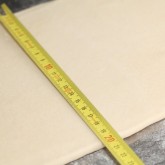
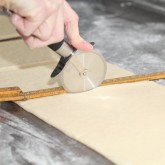
For the next stage you will need a tape measure and a pizza wheel. Lay a tape measure along the top of the dough. With the wheel you mark the top of the dough at 12,5 cm intervals along the length (7 marks total). Now lay the tape measure along the bottom of the dough and make a mark at 6,25 cm. Then continue to make marks at 12,5 cm intervals from this point (8 marks total). So the bottom and the top marks do not align with each other and form the basis for your triangles.
Now make diagonal cuts starting from the top corner cutting down to the first bottom mark. Make diagonal cuts along the entire length of the dough. Then change the angle and make cuts from the other top corner to the bottom mark to create triangles. Again repeat this along the length of the dough. This way you will end up with 15 triangles and a few end pieces of dough.
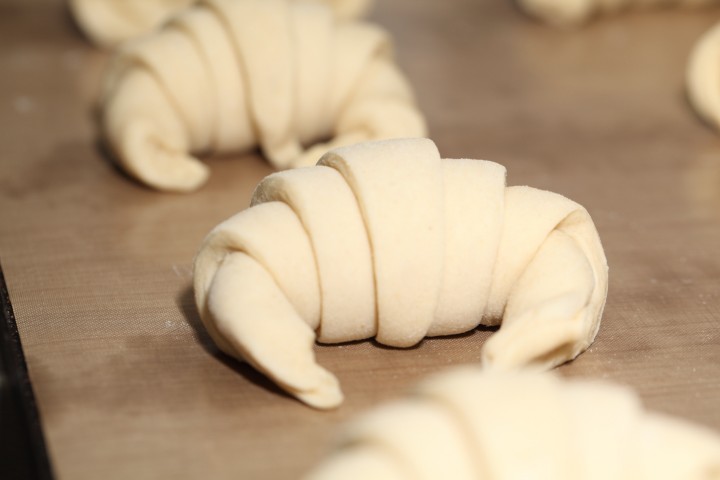
Using your pizza wheel, make 1.5 cm long notches in the center of the short side of each dough triangle.
Now very gently elongate each triangle to about 25 cm. This is often done by hand, but we have found that elongating with a rolling pin, very carefully, almost without putting pressure on the dough triangle, works better for us. You can try both methods and see what you think gives the best result.
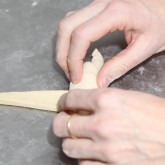
After you cut a notch in the middle of the short end of the triangle, try and roll the two wings by moving your hands outwards from the center, creating the desired shape with a thinner, longer point. Also try and roll the dough very tightly at the beginning and put enough pressure on the dough to make the layers stick together (but not so much as to damage the layers of course).
Proofing and baking
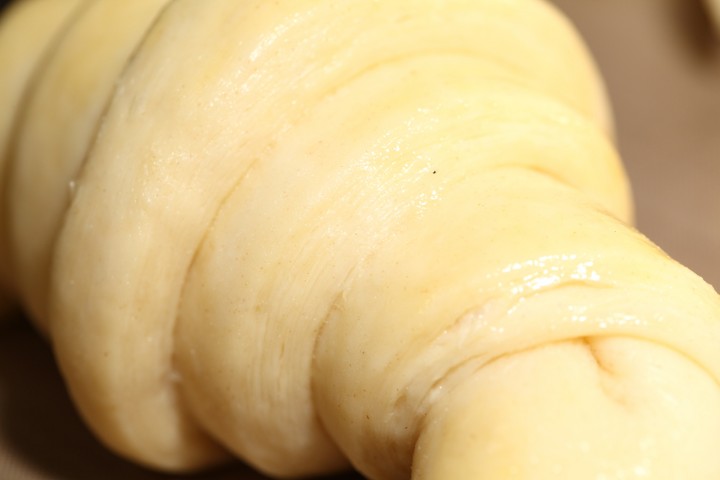
Arrange the shaped croissants on baking sheets, making sure to keep enough space between them so they will not touch when proofing and baking. Combine the egg with a teaspoon of water and whisk until smooth. Give the croissants their first thin coating of egg wash. You do not need to cover the croissants with anything, the egg wash will prevent the dough from drying out.
Proof the croissants draft-free at an ideal temperature of 24ºC to 26.5ºC / 76ºF to 79ºF (above that temperature there is a big chance butter will leak out!). We use our small Rofco B20 stone oven as a croissant proofing cabinet by preheating it for a minute to 25ºC / 77ºF. It retains this temperature for a long time because of the oven stones and isolation. The proofing should take about 2 hours. You should be able to tell if they are ready by carefully shaking the baking sheet and see if the croissants slightly wiggle. You should also be able to see the layers of dough when looking at your croissants from the side.
Preheat the oven at 200ºC / 390ºF convection or 220ºC / 430ºF conventional oven.

Right before baking, give the croissants their second thin coat of egg wash. We bake the croissants in our big convection oven for 6 minutes at 195ºC / 385ºF, then lowering the temperature to 165ºC / 330ºF, and bake them for another 9 minutes. Hamelman suggest baking the croissants for 18 to 20 minutes at 200ºC / 390ºF , turning your oven down a notch if you think the browning goes too quickly. But you really have to learn from experience and by baking several batches what the ideal time and temperature is for your own oven. Take out of the oven, leave for a few minutes on the baking sheet, then transfer to a cooling rack.
Latest way of baking; We heat up our double fan big convection oven at 200ºC, when heated up put the croissants in the oven and directly lower it to 175ºC. We bake them for 10 minutes at 175ºC, they will have a nice brown color by now, then lower the temperature to 150ºC, and bake them for another 6 minutes.
Best eaten while warm and fresh of course. Croissant we don’t eat or share within a day we freeze. We put them in the preheated oven (180ºC / 355ºF) for 8 minutes straight from the freezer. Nothing wrong with that, croissants eaten nice and warm, almost as good as the fresh ones…almost!
Croissant Time Table
Times are an indication and also depend on your experience with the recipe
Try to work swift but precise and take extra fridge time if needed!
Day 1 – Make initial dough
- 21.00 h – Knead for 3 minutes and store in fridge for 12 hours
Day 2 – Laminate the dough
- 09.00 h – Make butter slab and refrigerate till needed
- 09.05 h – Roll dough disc into square
- 09.10 h – Seal butter in dough
- 09.15 h – Roll out to 20 cm x 60 cm and fold
- Refrigerate 30 minutes
- 09.50 h – Rotate 90 degrees
- Roll out to 20 cm x 60 cm and fold
- Refrigerate 30 minutes
- 10.25 h – Rotate 90 degrees
- Roll out to 20 cm x 60 cm and fold
- 11.00 h – Refrigerate until day 3
Day 3 – Dividing, Shaping, proofing and baking
- 09.00 h – Roll out to 20 cm x 110 cm – part 1
- 09.05 h – Often needed! Take 20 min. fridge time if length not in one go
- 09.25 h – Roll out to 20 cm x 110 cm – part 2
- 09.30 h – Divide and shape the croissants
- 09.40 h – First coat of egg wash
- 09.45 h – Proof to perfection (indication 2 hours)
- 11.45 h – Second coat of egg wash
- 11.50 h – Bake for 15-18 minutes
- 12.10 h – Ready!









Anthony says
Hi there, I’m planning to try out your recipe this weekend but due to plans would like to be able to time it so that I finish the shaping Friday night and instead of final proving at 24-26 Celsius, I cold probe in the fridge overnight and bake in the morning. Do you think this would work for say.. 10 hours at 3 degrees Celsius? I’m not sure on the equation of stretching prove times in conjunction with reduced temperatures… Any thoughts from anyone would be most appreciated!!
Teresa H. says
WOW! This recipe work out really well. Flakey, buttery and moist. I bake bread quite a lot and this was simple, straightforward directions. Patience is needed though. You just can’t rush this.
Weekend Bakers says
Thank you Teresa,
Time is our friend, with artisan bread and pastry, that’s why we always emphasize this point plus doing away with any kind of distraction to get the best result.
Happy baking!
Abdulrahman says
I think the first step (mixing) can use some more details. For example I understand you are mixing for 3 minutes but what is the speed you are mixing at? How many times your mixer turns at that particular speed (RPM)?
I think from your description of the dough coming together this will take 6-7 minutes in my Kenwood mixer @ 1st speed. I think it is a good idea to update the main article with few details to make it more clear.
Thanks
marc says
Hi and thanks for your helpful website. My first attempt at croissants was today and I give myself about a 50% mark at my results. The croissants looked excitingly good right up until about half way through the baking. Then they all collapsed and flattened out to about half their original (proofed) height. What I saw after cutting some open of the better ones was the expanded “pores” were present but compressed and a concentration of butter at the base. I guess I have a few issues to diagnose, any suggestions would be appreciated. On the positive side, the taste is a match for anything I’ve bought from the local patisserie. Thanks again.
Weekend Bakers says
Hi Marc, It looks like (from a distance!) that your croissants were perhaps over-proofed or you used a flour type with not enough strength. Happy baking!
jose f.avilez says
Your recipe it’s relly good,I a pastry cook,I made same croissants, allredy and this recipe is wonderful,I had been baking for over 28 year with many pastry chefs.Thanks for your ideas.the classic recipes are the best.
Weekend Bakers says
Hi Jose,
We agree 🙂
Thank you for your kind comment and it means something extra of course coming from someone with your experience!
Happy classic baking,
Ed & Marieke
Sofwa says
Thanks for a great detailed recipe. Followed step but step. However, all the butter cooked out when I baked it. So disappointing as all the lovely butter ran out of the croissants. What did I do wrong? Any help would be greatly appreciated.
Weekend Bakers says
Hi Sofwa, your croissants were probably under proofed. After the final proof you should end up with really puffed up croissants, shaking a little bit like jell-o pudding. Happy baking!
Keef says
I made this recipe (reduced quantities). They turned out wonderfully! www.youtube.com/watch…Iqhdxxo2yY. Thanks for the recipe!
Weekend Bakers says
Good first try, however with croissants you need the practice to make them perfect. So give it another go and they should be even better!
kevin duggan says
Hello
I followed your recipe and took the full 3 days of preparing,my croissants looked perfect the taste was excellent but they were more bread than pastry obviously I did something wrong …can you over laminate I think my layers are in the 100 Mark not 27 !!
Kevin
Weekend Bakers says
Hi Kevin, when you fold and roll three times you get 27 layers. With one more fold you get 81 layers, and the layers will be too thin and fragile to roll by hand and get full honeycomb inner structure. You butter probably got the warm during laminating and the dough absorbed the butter. This way you get a more brioche bread structure instead of a croissant. You have to work quick and precise, the environment should not be to hot during your first try. Practice makes perfect!
Carlos Roberto Cordeiro de Almeida says
Fantastic! Very easy.
patricia says
Hello,can you tell me please is it best to use Tradition heat,chaleur tournante,or combination chaleur for the croissants,and where is the best place to place them in the oven.
Thanking you so very much
Patricia
Henry Martin says
Hi Weekend Bakery,
Thank you for your excellent recipe adaption. It is very precise and informative.
My croissants have been very tiny and not much flavour.
What does your dough weigh?
What weight should each croissant weigh?
I am finding my croissants are not growing/rising much when proofing or baking. Do you know what I could be doing wrong? I am on my 4th batch now and have used 31g of fresh yeast to see if that makes a difference. I have also read in other recipes during the first fermenting stage to leave for around 3hrs or until dough has tripled at 24 degrees.
When I cut the laminated dough into triangles or even when folding I can’t see any layers in the dough. Am I supposed to?
Could I make more layers when laminating?
I live near Brisbane, Australia so lately the proofing and laminating temperature has been around 24-27 degrees and the humidity varying between 70%-80%. My first attempt it was over 32 degrees, things got messy!
The centre of the dough after kneading is around 30 degrees.
The bench temperature varies from 23-25 degrees. I will attempt cooling the working bench down as you have suggested in previous comments this time around.
Water and milk when mixing have been 10 degrees.
I am now using an organic butter with 83% fat. Is there an ideal water percentage? I mix when it is about 22 degrees.
The best flour I can find is an organic wheat flour which has been stone ground. The germ and bran are removed before being ground. It’s desription says it is ideal for baking and bread making. I cannot find any French type 55 flour.
My previous attempt I used a conventional oven where the heat was distributed from underneath the croissants. Some of the butter came out of the croissants.
I see I haven’t paid close attention to your baking description. However it has been a coventional oven setting at 200 degrees for 20-25mins.
Weekend Bakers says
Hi Henry, one batch of croissant dough weighs about 1180 grams and yields between 15 and 17 croissants. So each croissant is about 73 grams each. You do not need more layers, as 27 layers is enough for croissants, with more layers the risk of damaging the layers it not worth it. Our croissants have lots of flavour, the 3 days process, using good flour and organic butter certainly helps. Proofing at 24 to 27 degrees should be perfect for the yeast to really grow the croissants. Without seeing your croissants, and you making them, I think because of the heat and perhaps your rolling technique the dough absorbs the butter and you end up with a brioche instead of a croissant. Do you get any flakiness? Also your wheat flour can be too ‘heavy’, you need a flour which is on the white and light end of the scale. Happy baking!
Aditya Dhawan says
Actually using thistechnique you will end up with 81 layers and not 27:- Initially you have 2 layers of dough and 1 layer of butter. Then you do 1 tri-fold- ending up with 3*3=9 layers. Further doing 2 more tri-folds you will end up with 9*3*3=81 layers, which is MORE than enough 🙂
Weekend Bakers says
Hi Aditya, when you count the layers of croissant dough, you ‘only’ count the butter layers. So when you encase the butter with dough, you have ‘three layers’; dough, butter, dough. However this only counts as 1 layer of butter. When you fold in ‘three’ the first time, you have 3 layers of butter, sandwiched between 4 layers of dough. When you repeat this, you get 3 * 3 = 9 layers of butter sandwiched between 10 layers of dough. And the final laminating gives 9 * 3 = 27 layers of butter in between 28 layers of dough. Happy baking!
Aditya Dhawan says
Ahhh! So only butter layers are taken into consideration. Thanks for the information! 😀
By the way i have tried you recipe a couple of times now and they came out perfect 🙂
Bea says
Thank goodness! I have found your site. I am so excited. I love making breads. Do you by chance have a recipe for phyllo dough? Also do you always use plain all purpose flour? Again many thanks and I look forward to sharing recipes, tweets and all your social media sites. I want to keep up with all your doing. I have not been able to blog for a while or do much bread baking but in about two weeks I will be up and ready to take care of me again. Have a great weekend!
ma. pamela Relampagos says
I just discovered your website and I am very excited to learn so much more from you. I am a former pastry chef and presently teaching pastry arts in 2 schools and I want to hone my skills further and gaining endless lessons from you would greatly help me. Thank you very much. Yours sincerely, Pam
Nora Moore says
Croissants are so delicious! I would love to try making them, so this recipe will be helpful. I hadn’t realized that the temperature outside had any effect on how the bread turned out. I’ll have to pay attention to that when I try this recipe for the first time.
A.V. says
Hi. Thank you for the detailed recipe. I wanted to ask about the yeast and salt amounts. I weighed them out and they both seem like a lot to me for the amount of flour. Eleven grams of yeast is over a tablespoon! Thank you for your help.
Ralph says
A tablespoon of yeast is about right. Julia Child’s classic croissant recipe called for 1 tsp (5g) of yeast and 1tbsp of salt for 2 cups of flour. This recipe has twice as much flour.
Weekend Bakers says
Hi AV, you need more yeast because it is a sweet dough made with butter and sugar. There are special yeast types (like Bruggeman brown label) for sweet doughs, however using a little bit more yeast to compensate also works. Happy baking!
james says
Hi,
thanks for your recipe. Did you try a 2 day croissant cycle at all with your recipe?
The two day recipes ive seen online would replace either the overnight dough rest, or the overnight final laminate rest, with 3 hours or so in the fridge.
I was wondering if you had explored this in your controlled environment. Im at attempt no 3, and dont have enough consistency between batches yet to test this.
thanks
Weekend Bakers says
Hello James,
With croissants, we always use the 3 day cycle. When making other pastry, like pain au raisins and kouign-amann, we also use pastry made with a two day cycle and it worked very well. We still work as precise as with the 3 day process, but of course in the result it is less visible if you have perfect structure and layers like you aim for with a croissant. We do not have enough experience with two day croissants making to answer your question properly, but we think it is very well possible to make a good croissant this way.
Love to hear more about your results as you explore further. Good luck with it,
Ed & Marieke
May says
Hi,
first thank you or merci pour cette recette. Thank you for this recipe. I am French and have lived in America for now 11 years, I could never find a good croissant. I tried your recipe twice already, sadly as I couldn’t find T55 flour, I mixed Arthur’s bread flour with unbleached all purpose flour. Each time, I ran into a problem. No problem up to after I rolled them into croissants and let them rest after proof, seems that butter seeks out then while baking they don’t rise instead they become flat. Though I admit, they taste pretty much like amazing croissant like I grew up with. Could you advise me on what I could do differently or any idea as why my croissants don’t rise while baking? Thank you. P.S. : I love your website.
Weekend Bakers says
First of all make sure your temperatures are right. We say these following tips a lot because they apply to most problems when making and baking croissants: There is no way to hide little mistakes in your technique when making croissants. Do not expect to get perfect croissants the very first time you try our recipe, most people need to make them 3 to 4 times to get the general feeling for the process. There is no substitute for practice and experience. Every type / brand of flour and butter type also makes a difference. Try a few flours to find the one in your area which hits the balance between strength and flexibility. The same with butter, the butter needs to be pliable but not too soft. We use an organic butter with a low water content, a higher water content tends to make butter hard, which promotes tearing and breaking and ruins the layers. But best of all and most important, enjoy the process!
Martin says
It is hard to know what precisely went wrong, but if you follow Ed and Marieke’s excellent advice you will be fine. Having tried to make croissants in the USA I can understand some of the problems you face. . You have already found some of the solutions already. KAF AP flour is absolutely fine for croissant
Finding the correct ingredients is the most important factor, especially the butter. What you’ve described is the same result I got making croissants for the first time. That’s because my butter water content was too high (see E&M’s tips). You need a minimum of 82% butterfat – it is listed on the side of the butter packet – in fact, we all need 82% fat butter to make good croissants. It’s not a problem in Europe but it is much harder to find in North America. However, there are several dairies (especially on the East Coast) who will supply what you need. Keller’s European and the Vermont Butter & Cheese Company are two brands to look for (but there are many more), but you might need to look in speciality food marts for them. If you’re in the mid-West, you might need to look even harder. 82% butterfat is vital because it maintains the lamination you’ve created with all that time-consuming folding. Too much water releases steam which break down the layers and creates flat, stodgy croissants.
Finally, the butter escaping during baking might be because either your dough or butter (or both) were too warm during lamination. If the butter melts partially it is no longer trapped between the dough layers but over-saturates the dough. The way to avoid this is to make sure your butter and dough start cold and remain cold during lamination (again see E&M’s tips). In summer, I even chill my work surface (bags of frozen peas are perfect for this) between each turn. On really hot days, my rolling pin goes in the freezer an hour before lamination and between each turn. Oh, and it is vital to brush excess flour off the dough during folding.
Good luck, the day you make your first perfect croissants is truly a day to be proud of as a baker.
Weekend Bakers says
Hello Martin, thank you very much for your great additions about butter. I have added the 82% butter fat to our tip. On our butter label ‘at least 82%’ butter fat is mentioned indeed. I can still remember the glow I felt when I got near perfect croissants. Happy baking!
May Affre says
Hi,
Last weekend, I succeeded on my third trial. I used Kerrygold butter as fat and European butter made from grass fed cows. Another butter I tried to make croissants with is Président though I don’t find it as good as Kerrygold butter. Today, I made once again more fresh croissants. Thank you for your support!
Fiona says
Départ Ed and Marieke,
First of all, many thanks for your generosity by providing this recipe, especially for all the details that never been mentioned in most recipes. I have been failed at least 10 trials based on almost same recipes such as Pierre herme and Christophe felder.
I followed your instruction to restart my croissant challenge, my first batch came out just like your 2nd Bach, which was a one day dough, my 2nd trial came out hallow just like your batch 3, my 3rd attémpt still camé out thé same résultat a hole in thé middle, here are my concerns :
A: did I not roll tightly enough so that it résulted in a hole in thé middle?
B: My croissant crashed when removing from thé oven while i was delighting seeing the croissant were growing in thé oven, does this result from thé chute de température when rémove thé croissant out of oven?
C: How should i do egg wash to reach same uniform brillance like yourself or just like les croissant in thé store as i am in France. I egg wash twice by avoiding thé layers, when croissants grow in thé oven, thé layers expand, si that thé parts which were expanding were not egg washed, i tried to do 3rd egg wash for thé expanding parts, but thé result just like egg was cooked, thé color did not correspond thé other parts which were egg washed Before baking….
Looking forward to your précious suggestions
Many Many many tanks
Weekend Bakers says
There is no way to hide little mistakes in your technique when making croissants. Do not expect to get perfect croissants the very first time you try our recipe, most people need to make them 3 to 4 times to get the general feeling for the process. There is no substitute for practice and experience. Every type / brand of flour and butter type also makes a difference. Try a few flours to find the one in your area which hits the balance between strength and flexibility. The same with butter, the butter needs to be pliable but not too soft. We use an organic butter with a low water content, a higher water content tends to make butter hard, which promotes tearing and breaking and ruins the layers. But best of all and most important, enjoy the process!
Happy croissant baking,
Ed & Marieke
Asha says
Dear Ed and Marieke,
My 3rd attempt at your recipe just came out of the oven and it turned out almost perfect! I’m so glad I stuck with it and, inspired by your croissant making log, I took detailed notes of each attempt. Keeping track of my actions, prevented me from repeating the same mistakes. Everyone should do this. I’m already looking forward to making my 4th batch. Need to open up the honeycomb a bit more.
Thank you so very much for your precise recipe and clear instructions. The video is indispensable for a visual learner like me. I’ll keep you posted. In the meantime, I need to hit the gym if I am to continue this quest! 🙂 Most grateful for all the tips.
bjs, A
Weekend Bakers says
Hello Asha, I am glad you perseverance paid off. Sounds like you did everything right to get a perfect result!
Dee says
Is it okay if I knead the dough by hand as I do not have a stand mixer? Also, on day 3 after I shape the dough, could I layer the dough strips between wax paper and refrigerate for future use? If so, for how long?
Much appreciated!
Weekend Bakers says
Hello Dee, you can of course knead it by hand, however it is a dry dough so kneading will take some elbow sweat. The upside is you do not have to knead very long. We never kept the final laminated dough in the fridge or have frozen it. We do freeze the baked croissants and that works perfectly. Just 8 minutes directly from the freezer in a oven on 180C to defrost them and make them perfect.
Jacob says
Hi, I’ve just finished baking croissants, but I encountered one problem: the final product was sort of slack-baked:
Photo1. What could I do wrong? Is the dough strongly dependant on the butter and flour used (used all-purpose)?
I tried to make cinnamon swirls from the second half of the portion and I ended up with: Photo1. There are some layers visible, but the effect is not what I wanted. Definitely there is a problem with separation of the layers: they are rather too short and too frequent. Any ideas?
(open the links in new window)
Weekend Bakers says
Hello Jacob, to learn how to bake croissants you have to practice and experiment a lot. Please try different flour and butter types, every flour and butter will give a different result. There is no real magic trick, it is just the right flour, butter and experience! Also your croissants look under baked, try to bake them next time a few minutes longer.
Tom Windsor says
OMG! These are bloomin’ delicious! I absolutely adore them. I now know the true meaning of “all butter” that the packs never live up to. IT honestly melted in my mouth.
I made some regular croissants, some filled with Nutella, some pain au chocolat, pain au raisin and my own creation pain au flapjack (WHICH IS DELICIOUS)
Amazing recipe, thanks for making my French cooking dreams come true!
nana says
I would like to know how to bake crossant as I have passion for baking
Weekend Bakers says
Hello Nana, this recipe works great for us, so have a go at it. However remember, making perfect croissants is hard and you will need some practice to get it right.
Brittany says
Loved the video! This recipe looks amazing. Can I have the recipe amounts converted to American measurements, please? Thanks!!
Weekend Bakers says
Nope, you can’t 😉 American measurements with cups and spoons are very inaccurate, so we advice to invest in a good simple digital scale. All your baking and consistency with baking will improve this way! Happy baking!
Brittany says
I was afraid of that! But it makes perfect sense. Thanks for the response!
Szilvia says
Dear Weekend Bakery,
I made the reciepe, it was great. One thing when I baked butter ran out of the dough, where did I go wrong? It was very good, but too buttery, I think I made a mistake, but I don’t know in which step of the recipe?
Thank you for your answer in advance!
Szilvia
Weekend Bakers says
Hello Szilvia, your croissants were probably under-proofed. Just let them proof a little bit longer so they get wobbly and at least have increased visually in size. When under-proofed the butter tends to leak from in between the layers and makes a butter puddle. Happy baking!
michal says
Can I use a strong flour t55?
Weekend Bakers says
Hello Michal, every flour behaves differently. I have tried more than 5 types of flour with croissants and they all gave a different result. Just one way to find out, just try it!
michal says
Hi. Can you Tell me how much compresed fresh yeast i should use insted of instant yeast
Weekend Bakers says
Hi Michal, you need about 3 times more in weight compared to instant yeast. So for the croissants about 30 grams should be enough. Happy baking!
Michael says
Hello Weekend Bakery,
Do you know any good places to buy French Type 55 flour online? If not what brand of unbleached AP flour do you recommend?
Weekend Bakers says
Hi Michael,
We can only recommend places in Holland, we only buy flour form mills and one or two of them also sell online.
You can find information here: www.weekendbakery.com/posts…n-holland/
So we do not really have a brand to recommend other than the name of the mill we buy it from. Our favorite is De Zandhaas in Santpoort near Haarlem.
Fiona says
Hi,
The ingredients list says 40g of butter. Is this correct? It seems like so little and in your photo there is much more than 40g!
Thanks
Weekend Bakers says
Hello Fiona, there is 40g of butter in the dough. However… you also need a block of 280 grams of butter during lamination. So we use a total of 320 grams of butter in this croissant recipe! Happy baking!
Michael says
First time I have tried croissants, and following your instructions to the letter it turned out really great. I was a bit concerned about the proofing, but i just give it extra time ( 4 hours) which made the difference. I used water in the oven during the preheat and also
a cup of very hot water on the baking tray during baking, which i find helps the dough to rise. Many thanks for the recipe and the tips.
Weekend Bakers says
Hello Michael, the times printed in this recipe are times we use within our environment, so your miles may vary. So a good call to adjust the final proofing, they should have a nice wobble when you shake the baking tray lightly and visually be grown in size during proofing. Practice makes perfect!
Mokgadi says
Hi, can I use gluten free all purpose flour?
Weekend Bakers says
Hello, it is sadly not possible to use gluten-free flour within the recipe. It is very hard, next to impossible to make good croissants using gluten-free flour. You need the strength of the gluten during all the lamination.
khaled zien Elabdeen says
I’m from Egypt working chef baker Sheraton Hotel, and I am doing croissants Crispy like the picture that I see you have
Is this recipe will be given a good result as I see a picture wonderful croissants
Does not Add bread improvers, or better no additions
Weekend Bakers says
We do not fully understand what your question is, but we can tell you that we do not use any form of bread improver or any additions in our croissants or other bread.
We use good quality butter and the right flour (French type 55) and work very precise and carefully and this way we get the croissants you see in the pictures.
If we have not answered your question please let us know.
Siobhan says
Hi, thanks for the recipe. I made the dough and it’s resting in the fridge. I have made bread before and the dough was much softer, I am wondering if I added enough liquid? Is this dough supposed to be a denser or should I start again?
Thanks
Carmelo Bonanno says
Hi Guys I am making the most epic incredible layered croissants – The layering is some of the best I have seen ever. I know its a big claim yet it’s true as it’s taken me a couple of years to get to this stage.
I can forward an image if you like I just need the correct email address. However sometimes I get centres that have huge holes and it looks like some of the center is under baked.
I am certain it’s not under proofing, all my layering is correct.
again the layering and flake is beyond perfection. Just sometimes my centres are raw.
I start my baking at 220c and immediately turn the oven down to 165c – fan forced convection.
any hotter and they burn.
I have extended the baking time to maximum amount possible
any tips ?
hope you can help ?
Weekend Bakers says
Hello Carmelo, when everything is perfect, the croissant should be perfect… When rolling the croissant make sure you roll the first 5 cm of the dough tight and without a gap. Fold over the first 1 cm carefully and then continue rolling tightly without pressing on the dough. When this first few centimeters are not rolled correctly you will end up with a hole, because there is no dough in the center. We bake our croissants in a commercial dual fan forced oven preheated on 195C and after 5 minutes we turn down the oven to 150C. The total baking time is around 17 minutes. Hope this helps, Happy baking!
Inês says
I started making croissants over a year ago and your recipe is the one I always go back to because I trust it. However, my last batch did not turn out so well. I did the final turn on day two at 2:30 pm and then let the dough in the fridge until next day, day 3, at 1:30pm. So, it stayed there for more than 12 h. When I took the dough out it looked dried out in places and my croissants didn’t rise even after 3.5h. could this long stay in the fridge have killed the yeast? Any ideas on what’s happened? Thank you.
Weekend Bakers says
Hello Ines, it looks like you did not wrap the dough good enough. A few hours more or less in the fridge do not make a difference to the yeast. They can survive in the fridge much longer, they just go into hibernation and wake up when it temperature goes up. So take more care about wrapping the dough in clingfilm so it is a tight fit and complete enclosed. Happy baking!