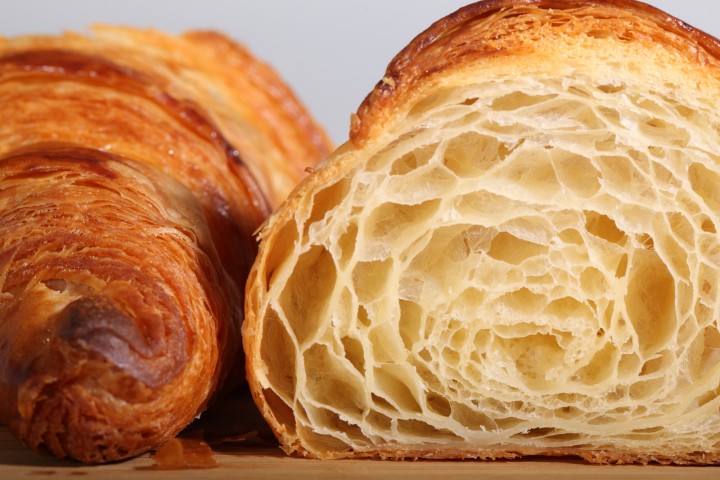
It’s all about the layers…
Klik hier voor Nederlandse versie
With this recipe we want to give you the exact directions on how we go about making classic French croissants. The recipe is an adaptation from the recipe for Classic Croissants by Jeffrey Hamelman. We started out largely following the instructions for his recipe, changed everything to our beloved metric system and found out some worthwhile croissant knowledge of our own along the way. Hopefully enough to justify sharing it all with you and inspiring you to give croissant baking a shot yourself.
Before you start we can recommend watching our croissant making video to get a general feel for the recipe. You can also check out our croissant making log where we keep track of our own croissant baking adventures. For answers to your croissant questions you can check out the Frequently Asked Croissant Questions section.
This recipe will yield about 15 good croissants plus some leftover bits which you can use to make a few, slightly odd shaped ones, or other inventive croissant-like creations.
If at first you don’t succeed, maybe you can take comfort from the fact that our first efforts were not very ‘croissant worthy’. But as you can see we persevered and got better…But we have to admit it is and always will be a tricky process. You have to work precise and be focused to get good results. So away with screaming children, hyperactive animals and all other things distracting! Put on some appropriate croissant making music and lets get to it…
Please read the following tips;
According to Raymond Calvel croissants laminated with margarine are formed into the crescent shape, while croissants laminated with butter are left in the straight form. We say, use whichever shape you like best, but do use butter!
The croissant recipe

Ingredients for the croissant dough
500 g French Type 55 flour or unbleached all-purpose flour / plain flour (extra for dusting)
140 g water
140 g whole milk (you can take it straight from the fridge)
55 g sugar
40 g soft unsalted butter
11 g instant yeast
12 g salt
Other ingredients
makes 15
280 g cold unsalted butter for laminating
1 egg + 1 tsp water for the egg wash
Day 1
Making the croissant dough
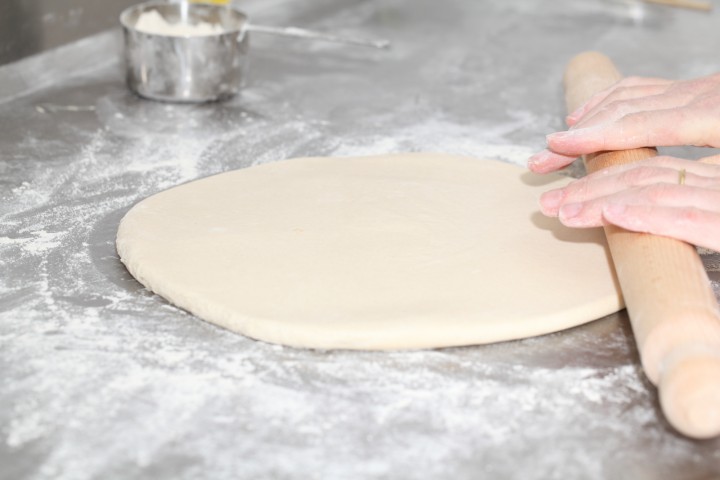
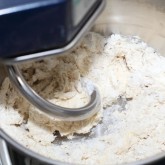
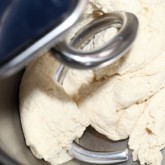
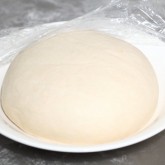
We usually do this part in the evening. Combine the dough ingredients and knead for 3 minutes, at low to medium speed, until the dough comes together and you’ve reached the stage of low to moderate gluten development. You do not want too much gluten development because you will struggle with the dough fighting back during laminating. Shape the dough like a disc, not a ball, before you refrigerate it, so it will be easier to roll it into a square shape the following day. Place the disc on a plate, cover with clingfilm and leave in the fridge overnight.
Day 2
Laminating the dough
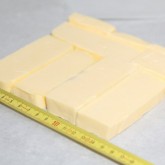
Cut the cold butter (directly from the fridge) lengthwise into 1,25 cm thick slabs. Arrange the pieces of butter on waxed paper to form a square of about 15 cm x 15 cm. Cover the butter with another layer of waxed paper and with a rolling pin pound butter until it’s about 19 cm x 19 cm. Trim / straighten the edges of the butter and put the trimmings on top of the square. Now pound lightly until you have a final square of 17 cm x 17 cm. Wrap in paper and refrigerate the butter slab until needed.
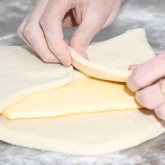
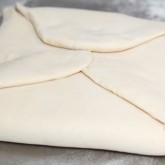
Take the dough out of the fridge. With a rolling pin roll out the dough disc into a 26 cm x 26 cm square. Try to get the square as perfect as possible and with an even thickness. Get the slab of butter from the fridge. Place the dough square so one of the sides of the square is facing you and place the butter slab on it with a 45 degree angle to the dough so a point of the butter square is facing you. Fold a flap of dough over the butter, so the point of the dough reaches the center of the butter. Do the same with the three other flaps. The edges of the dough flaps should slightly overlap to fully enclose the butter. With the palm of your hand lightly press the edges to seal the seams.
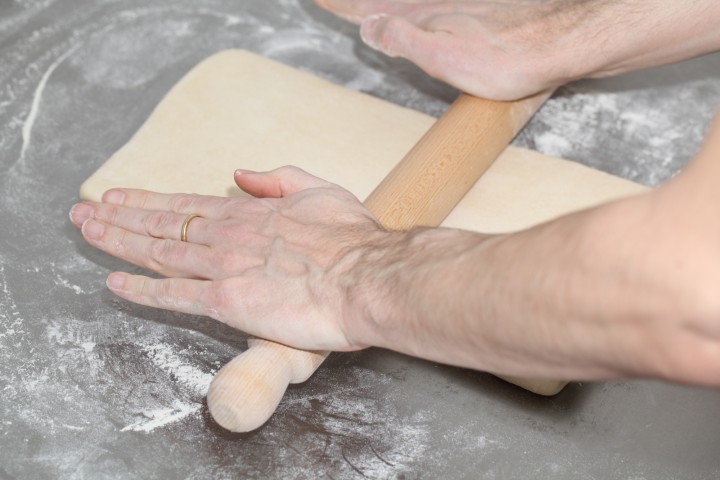
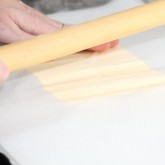
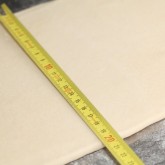
Now the dough with the sealed in butter needs to be rolled out. With a lightly floured rolling pin start rolling out, on a lightly flour dusted surface, the dough to a rectangle of 20 x 60 cm. Start rolling from the center of the dough towards the edges, and not from one side of the dough all the way to the other side. This technique helps you to keep the dough at an even thickness. You can also rotate your dough 180 degrees to keep it more even, because you tend to use more pressure when rolling away from you than towards yourself. You can use these techniques during all the rolling steps of this recipe. Aim at lengthening the dough instead of making it wider and try to keep all edges as straight as possible.
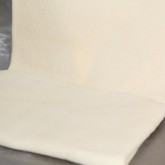
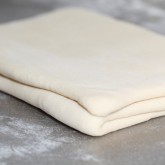
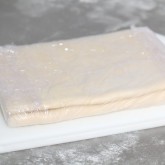
Fold the dough letter style, cover with clingfilm and refrigerate for 30 minutes (fold one third of the dough on top of itself and then fold the other side over it). Repeat the rolling and folding two more times (ending up with 27 layers of butter in total), each time rolling until the dough is about 20 cm x 60 cm. After each fold you should turn the dough 90 degrees before rolling again. The open ‘end’ of the dough should be towards you every time when rolling out the dough (you can see this in our croissant making video at around 3:40 minutes). After the second turn, again give it a 30 minute rest in the fridge. After the third turn you leave the dough in the fridge overnight until day 3, the actual croissant making day!
- Roll out to 20 cm x 60 cm
- Fold
- Refrigerate 30 minutes
- Rotate 90 degrees
- Roll out to 20 cm x 60 cm
- Fold
- Refrigerate 30 minutes
- Rotate 90 degrees
- Roll out to 20 cm x 60 cm
- Fold
- Refrigerate until day 3
- Rotate 90 degrees
- Roll out to 20 cm x 110 cm
Also see complete time table at bottom of page
Day 3
Dividing the dough
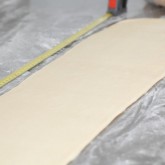
Take the dough from the fridge. Lightly flour your work surface. Now very gently roll the dough into a long and narrow strip of 20 cm x 110 cm. If the dough starts to resist too much or shrink back during this process you can fold it in thirds and give it a rest in the fridge for 10 to 20 minutes before continuing. Do not fight the dough, when the dough refuses to get any longer, rest it in the fridge! It is such a shame to ruin two days of work.
When your dough has reached its intended shape, carefully lift it a few centimeters to allow it to naturally shrink back from both sides. This way it will not shrink when you cut it. Your strip of dough should be long enough to allow you to trim the ends to make them straight and still be left with a length of about 100 cm.
Shaping the croissants
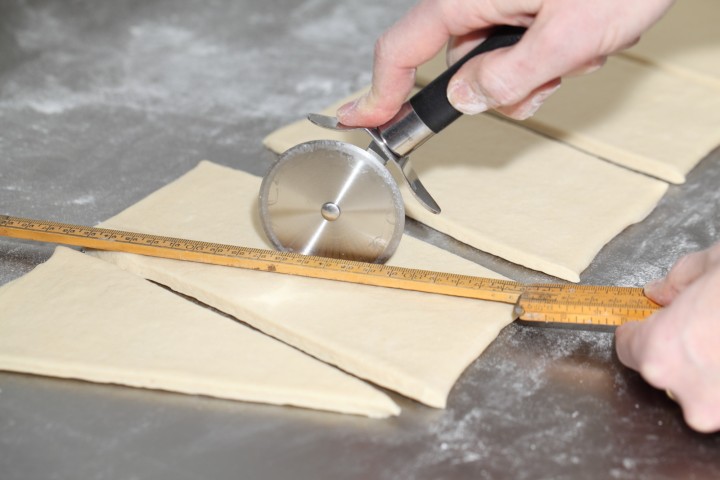
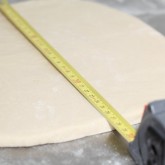
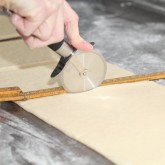
For the next stage you will need a tape measure and a pizza wheel. Lay a tape measure along the top of the dough. With the wheel you mark the top of the dough at 12,5 cm intervals along the length (7 marks total). Now lay the tape measure along the bottom of the dough and make a mark at 6,25 cm. Then continue to make marks at 12,5 cm intervals from this point (8 marks total). So the bottom and the top marks do not align with each other and form the basis for your triangles.
Now make diagonal cuts starting from the top corner cutting down to the first bottom mark. Make diagonal cuts along the entire length of the dough. Then change the angle and make cuts from the other top corner to the bottom mark to create triangles. Again repeat this along the length of the dough. This way you will end up with 15 triangles and a few end pieces of dough.
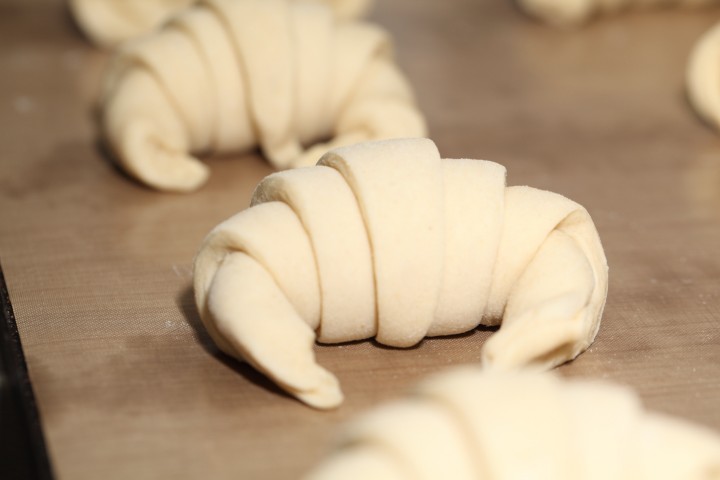
Using your pizza wheel, make 1.5 cm long notches in the center of the short side of each dough triangle.
Now very gently elongate each triangle to about 25 cm. This is often done by hand, but we have found that elongating with a rolling pin, very carefully, almost without putting pressure on the dough triangle, works better for us. You can try both methods and see what you think gives the best result.
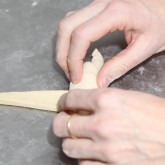
After you cut a notch in the middle of the short end of the triangle, try and roll the two wings by moving your hands outwards from the center, creating the desired shape with a thinner, longer point. Also try and roll the dough very tightly at the beginning and put enough pressure on the dough to make the layers stick together (but not so much as to damage the layers of course).
Proofing and baking
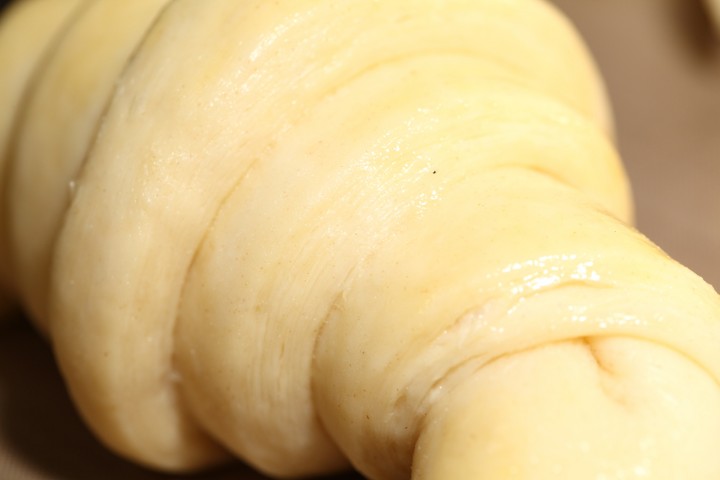
Arrange the shaped croissants on baking sheets, making sure to keep enough space between them so they will not touch when proofing and baking. Combine the egg with a teaspoon of water and whisk until smooth. Give the croissants their first thin coating of egg wash. You do not need to cover the croissants with anything, the egg wash will prevent the dough from drying out.
Proof the croissants draft-free at an ideal temperature of 24ºC to 26.5ºC / 76ºF to 79ºF (above that temperature there is a big chance butter will leak out!). We use our small Rofco B20 stone oven as a croissant proofing cabinet by preheating it for a minute to 25ºC / 77ºF. It retains this temperature for a long time because of the oven stones and isolation. The proofing should take about 2 hours. You should be able to tell if they are ready by carefully shaking the baking sheet and see if the croissants slightly wiggle. You should also be able to see the layers of dough when looking at your croissants from the side.
Preheat the oven at 200ºC / 390ºF convection or 220ºC / 430ºF conventional oven.

Right before baking, give the croissants their second thin coat of egg wash. We bake the croissants in our big convection oven for 6 minutes at 195ºC / 385ºF, then lowering the temperature to 165ºC / 330ºF, and bake them for another 9 minutes. Hamelman suggest baking the croissants for 18 to 20 minutes at 200ºC / 390ºF , turning your oven down a notch if you think the browning goes too quickly. But you really have to learn from experience and by baking several batches what the ideal time and temperature is for your own oven. Take out of the oven, leave for a few minutes on the baking sheet, then transfer to a cooling rack.
Latest way of baking; We heat up our double fan big convection oven at 200ºC, when heated up put the croissants in the oven and directly lower it to 175ºC. We bake them for 10 minutes at 175ºC, they will have a nice brown color by now, then lower the temperature to 150ºC, and bake them for another 6 minutes.
Best eaten while warm and fresh of course. Croissant we don’t eat or share within a day we freeze. We put them in the preheated oven (180ºC / 355ºF) for 8 minutes straight from the freezer. Nothing wrong with that, croissants eaten nice and warm, almost as good as the fresh ones…almost!
Croissant Time Table
Times are an indication and also depend on your experience with the recipe
Try to work swift but precise and take extra fridge time if needed!
Day 1 – Make initial dough
- 21.00 h – Knead for 3 minutes and store in fridge for 12 hours
Day 2 – Laminate the dough
- 09.00 h – Make butter slab and refrigerate till needed
- 09.05 h – Roll dough disc into square
- 09.10 h – Seal butter in dough
- 09.15 h – Roll out to 20 cm x 60 cm and fold
- Refrigerate 30 minutes
- 09.50 h – Rotate 90 degrees
- Roll out to 20 cm x 60 cm and fold
- Refrigerate 30 minutes
- 10.25 h – Rotate 90 degrees
- Roll out to 20 cm x 60 cm and fold
- 11.00 h – Refrigerate until day 3
Day 3 – Dividing, Shaping, proofing and baking
- 09.00 h – Roll out to 20 cm x 110 cm – part 1
- 09.05 h – Often needed! Take 20 min. fridge time if length not in one go
- 09.25 h – Roll out to 20 cm x 110 cm – part 2
- 09.30 h – Divide and shape the croissants
- 09.40 h – First coat of egg wash
- 09.45 h – Proof to perfection (indication 2 hours)
- 11.45 h – Second coat of egg wash
- 11.50 h – Bake for 15-18 minutes
- 12.10 h – Ready!






Dilfu says
Hi there,
Thank you very much for the recipe. It looks great!
I have a question: can I use a cake flour? We moved to Africa for next 2 years and it’s a bit complicated to find all purpose flour over here 🙁
I’ve tried to make croissants with bread flour using other recipe but as you mentioned before it was not good idea, though they tasted good but were not fluffy/puffy.
Thanks again!
Weekend Bakers says
Hello Dilfu, croissants are a bit picky with the flour. We use a French type T55 flour which has the right balance for croissants. Bread flour is often too strong or is too heavy. You sure give cake flour a go, however would try a 50/50 mix of cake flour and bread flour. This way you have the lightness of cake flour and the gluten of the bread flour. Please make sure the cake flour does not contain any rising agent, when it does contain a rising agent you can not use it for croissaints! Happy baking!
Adam Everett says
Well, here goes nothing!
Just completed the rolling of my very first batch of croissants..! Exciting!! They are currently proofing. Quite tricky making them in summer (Sydney). Had to continually place back in fridge/freezer. I believe I was taking too long in the laminating process. That with the generally warm summer temps made it an interesting process. Well, I have 10 croissant looking pastries proofing! Will let you know how I go. Thanks for the clear instructions & process. Regards,
Ashfaq says
Hello there, can I use strong bread flour instead of French type 55 flour ?
Weekend Bakers says
Hi, sadly no, this flour does contain too much gluten and make it hard to laminate the dough. It will probably ‘fight back’ a lot when you try to get the right length. You can try mixing the strong bread flour with some weak ‘cake kind’ flour ?! Happy baking!
Lisa Marie says
Hi. I am about to attempt this recipe, but I have a question. Why re all of your ingredients, including the liquid ingredients. in grams vs ml? How many ml of milk? g do not really convert to ml, as they are different measurements.
Confused.
Weekend Bakers says
Hello Lisa, we always use grams with a good digital scale as it is much more precise, easier and faster than using volumetric measurements. With milk, 1 ml of milk weighs about 1 gram as it is very close to water. Happy baking!
Ginny says
My significant other’s mom is 89 years old and from France. He was there with her just once when he was about 6. Of all his memories, the strongest are those of the tastes and aromas! We are always on the hunt for a really good croissant and have found a few that he and his mom say are good, but not quite the same.
I just finished making croissants using your recipe and he loved them! He said it was just what he remembered. He just got back from his mom’s; he took two to her and didn’t tell her that I made them. He said that when she smelled them she told him to get away! And, in between bites, asked him if he remembered the bakery on the first floor of her sister’s condo and said the croissants were just like the ones they got there! This not quite 100 lb, 89 yr old woman woofed down both croissants!!
I made some chocolat chaud and he loved it, too! It was a great evening.
Thanks!!
Weekend Bakers says
Hello Ginny, thank you for your lovely story. We remember for example holidays by ‘food’. Do you know when we were ‘there’ and ate…? is a favorite question to remember remarkable moments of a holiday. Oh boy, home made chocolat chaud, milk, Valrohna chocolat, a bit of cream and a slug of almond liquor….
Jean Sutens says
Beste
Ik heb vandaag jullie versie van croissants gebakken, gevonden via het forum van broodbakforum.nl
De smaak was heel goed.
Na het bakken lag er op de bakplaat gesmolten boter, zodat de bodem van de croissants vettig was.
Er waren vele laagjes, maar ze plakten een beetje aan elkaar.
Wat kan hier voor de reden zijn?
Met vriendelijke groeten
Jean.
Weekend Bakers says
Hallo Jean, het is natuurlijk onmogelijk om een croissant te bakken die niet iets vettig is, er zit namelijk best wel wat boter in. Waarschijnlijk waren je croissants niet helemaal volledig gerezen (under-proofed). Hierdoor lekt de boter tussen de laagjes uit. Wij rijzen onze croissants in een soort van rijskast rond de 25 C graden. Omdat het deeg uit de koelkast koud is duurt het rijzen best lang. Als je geen rijskast gebruikt kan het best nog wel eens een uurtje langer duren. Pas op dat je omgevingstemperatuur of je rijskast niet warmer is dan 25 graden, anders wordt de boter te zacht en wordt deze opgenomen door het deeg en krijg je een brioche ipv een croissant. De croissants moeten tijdens het rijzen echt een heel stuk groter worden en een beetje wobbelig aanvoelen als je er zachtjes tegen aandrukt.
Wat betreft de laagjes, tja, dat is vooral snel en nauwkeurig werken, en dat lukt alleen door ervaring. Ook geven verschillende soorten meel een andere croissant, met sommige meel soorten lukt het gewoon weg niet. Dat is een kwestie van proberen.
Happy baking!
janudin jaya says
I love to eat french croissant. How can i enroll to make this pastry. mercy!
Weekend Bakers says
Hello Janudin, sorry we do not give workshops. All info on how to make croissants you can find on our website. Happy baking!
Olly says
Great looking recipe. I have tried Croissants a good few times and only got them right once, so eager to try this over the Christmas period!
Can I ask what sort of butter is best? I have tried President, Lurpak but these have not resulted in successful Croissants.. Maybe a creamier butter??
Also getting butter temperature I find is critical! I either get it too warm or can see the butter crack under the layers… So again I need to determine where I am going wrong here… I think all the problems I am getting revolve around the butter!
Anyway you have got some good tips, so thanks again!
Weekend Bakers says
Hello Olly, we use an organic butter which is indeed a bit creamy and is not as hard as some butters. The upside is it won’t crack. The downside is you have to work quick and the room temperature should not to be high or else the butter will be absorbed by the dough. Give an organic butter a try!
Ngoc says
Thank you so much for very detailed instructions! Your blog really inspires me! Last week I tried to make this for the very first time and it turned out disaster butter croissants. It was actually just like soft bread with layers due to hot weather in Asian country. Luckily I found your blog today. I must try this again. Just want to send you my big thanks 🙂 Hope you have a wonderful week ahead!
Ngoc
Gila Hever says
Looking good . I will make it today fir next weeks, for Chanukah .
Fat Tony says
I thought croissants were an Austrian invention.Just like the “French” bread and most of the “French”pastries.
Weekend Bakers says
You are absolutely right, somehow however the French seem to have claimed the fame… In English a croissant is a member of viennoiserie or Vienna-style pastry family. So it is all in the name! Happy baking!
An says
Hi! yours croissants look so beautiful. I wish i could make these. I have tried 6 times, and my croissant still looks terrible. My dough is not sticky, but the dough always tear, and shows a lot of butter when laminated. Please, can you give me some advice?
Weekend Bakers says
Sorry to hear, but croissants are indeed a difficult beast to master. Perhaps you could try different brand of flour, we have found out the types / brands of flour do make a big difference to your end result. Do you use a scale to measure your ingredients, because scales are much more precise than using cups and spoons!? When after the first lamination your dough has a look of ‘dry skin’ you should perhaps increase the water content a little bit. Hope this helps!
Hai Yen says
Hi,
I love croissants and Im so happy to find out your blog. Will be a big fan from now on
Hai Yen says
I posted a question but it didnt appear 🙁
I would like to ask you for an advice. Im living in Italy, where I can find only type “00” or “0” flour, the better one is “American” flour to do pizza. Which one of them is the best to make croissant do you have any idea please? And can I mix some of them together?
I would love to try your receipe asap!!!
Thanks a lot!
Hai Yen
Weekend Bakers says
Hallo Hai, we use French T55 flour which has about 10.2% protein as written on the package. So it is not a real bread flour but a flour in between pastry and bread flour. The American flour has too much protein / gluten for croissant. So look at the package for something between 10 and 11% protein. Happy baking!
Aniso says
They are delicious.Fantastic.I would like to know if it is possible to freeze a portion of the dough as i want to do quite a lot and don,t want to eat all at the same time .When will it be the moment for it.After the dough has slept one night or after they have been overnight until day 3.
Thanks for your advice and your good recipes
Weekend Bakers says
We have never frozen the dough, we have only frozen the completely baked croissants. Which still do taste fantastic when you heat them directly from the freezer in a 180C oven for 8 minutes, almost like new! If you give freezing the dough a go we love to hear about the results. Happy baking!
Michael kaswaga says
i like that procedures of croissants
its help me make good & quality croissants
some of things i did understand through dat procedures now i understand.
Weekend Bakers says
Love to hear the recipe works for you!
Traian Ianes says
Congratulations! This is the best recipe of croissant which ever I saw.
And I saw many ! The final result, are awesome ! For this reason I’m going to share to all my friends .
All the best.
Weekend Bakers says
Hello Traian,
Thank you very much, that sounds wonderful!
Happy baking,
Ed & Marieke
Lavine Douglas says
Earlier this year I took a pastry class in Paris and was determined to make croissants when I returned home. Unfortunately I lost the recipe and had to scour the internet for a replacement. Lucky for me, I came across this one and decided to give it a go. The best decision I’ve made in a very long time. Thank You, Thank You, Thank You. I could not have asked for a better recipe. The croissants were amazing. I even tackled Pan Aux Raisins and they were just as amazing. My next project is your Sunday morning cinnamon buns…deluxe
Weekend Bakers says
Hello Lavine,
You make us very happy with your comment! Wishing you many more wonderful pastries and croissants!
Marieke & Ed
Elvira says
Hoi Ed en Marieke,
Does it make a big differance if i use half full milk?
Thanks,
Elvira
Weekend Bakers says
Hoi Elvira,
Do not worry, you can just use the halfvolle melk. We always use full fat milk and are used to it. For this recipe, with all the butter, it will not make much difference. We found that the flour you use makes much more of a difference for the end result.
The type 55 gives the best result for us, the ‘tarwebloem’ can be a bit too heavy and result in a flatter croissant. It’s worth experimenting.
Happy weekend baking!
Ed & Marieke
Elvira says
Hoi Ed en Marieke,
Thanks for the quick reply. Have you ever used steam in baking the croissants?
Thanks, Elvira
Weekend Bakers says
We do never use steam baking our croissants, it is not necessary.
Elvira says
Hoi Ed en Marieke,
Croissants turned out wonderful, almost as beautiful as yours…. any ways, im inspired to make them every weekend now. With one change, i would like to make them with less sugar. From your experience, does it have an affect on the end product?
Thanks, Elvira
Weekend Bakers says
Hi Elvira,
Congratulations on your results. Happy baker! You can use less sugar, it will have limited effect, mostly on taste, depending how much you are going to leave out. The butter is the most important ingredient here 🙂
Alison Furniss says
Hi, I was so excited about making real French croissants. All was good until proving when the butter leaked out in the last half hour of prooving! I think theclayeyers may have been squashed in rolling and prooving was too warm but I don’t know for sure. They turned out more like croisscones! They tasted good just not flaky. Can you tell me why?
Weekend Bakers says
Hi Alison,
We think you already answered your own question. Shame it seems it was a bit too warm and we think that is the biggest part of why the croissants probably looked more like brioche than croissants. Happy you could still eat and enjoy them.
Next time keep an eye on temperature and roll carefully and we are sure you will get good results. Keep practicing.
Happy weekend baking,
Ed & Marieke
hfhgjfjjfjf says
Hi, I made this recipe yesterday at night and today I am going to do the laminating. I was wondering if there were any fillings I could give the croissants while rolling them. I don’t know if/ maybe putting like jam omething inside them would affect their proof or their bake. Also I wanted to know if I could shape the croissants, proof them for the 2 hours and then put them in the fridge until tommorrow morning when id bake them? Thank you so much and this recipe is great!
Weekend Bakers says
Hello,
Is this your first attempt at making croissants? If so, we would advice you to start with the plain version, or make at least several plain ones, because putting filling in will indeed affect the end result.
Yes, you can put the croissants in the fridge, just make sure to cover them well and they are perfectly proofed before baking!
Good luck with it,
Ed & Marieke
Marianna says
Hi Ed and Marieke,
I am just trying to follow your recepie and did all the steps and the croissants will be baked tomorrow but my problem might be the oven.
We have a gas oven and I do know its temperatures but I am never sure on which level to bake since you can adjust the temperature on top to be 195 as well as in the middle but that means you need to use mark 6 if baking inthe top of the oven or 9 if you are baking in the middle of the oven.
Any suggestions?
Many thanks
Marianna
Weekend Bakers says
Hello Marianna,
We do not have any experience with a gas oven. However, in our oven we bake in the middle and our suggestion would be for you to start there too. It would be the spot to best get an even bake for all croissants.
Good luck with it and happy croissant baking!
Ed & Marieke
Marianna says
Many thanks for the reply.
I decided to use the upper part of the oven and bake them in 3 batches. Also noticed that I need to increase the baking time on each temperature for 1/3.
They did not have the honey comb structure yet but they were very airy inside. Also I only used 10g of fresh yeast how silly of me so I’m already planning next batch.
Made a home made Nutella too so we had a proper morning feast.
One question how tight they should be rolled when rolling I watched a video but still not sure – i assume they will grow more in height if rolled tight?
Thanks for a recepie.
Regards
Marianna
Weekend Bakers says
Hi Marianna,
The idea is to be very precise when rolling to get a good and even honeycomb structure, it needs to be tight, but without damaging the layers, (this is even more important).
Just keep baking (with right amounts 😉 and they will get better and better I’m sure.
Happy croissant baking!
julia Starbuck says
Question does the recipe have a preference of sifted flour?
Weekend Bakers says
Hello Julia,
We have never found this necessary, especially when you take into consideration how the dough is handled, kneaded and rolled, it will not make any difference we think to the end result.
Andre Schneider says
Hi guys
Thanks for sharing Your Recipe, Cant wait to try it out. Im
looking for a long Time for a real good Croissant recipe and this looks like one.
I like the Time frame as we say over here good things take time
Good bless you and your Buisness
Andre
Weekend Bakers says
Thank you very much Andre, we totally agree. Hope you’ll get the chance to try it out soon.
Greetings from Holland,
Marieke & Ed
Irene says
hello
Thank you for your wonderfully explained, detailed recipe. I am using a sourdough starter for the yeast and wanted to know if I could use spelt flour instead of plain flour?
thank you
Weekend Bakers says
Hello Irene,
Using sourdough and spelt is changing two very important things in this recipe which will make it very challenging to get good results. We would suggest finding a recipe that is already aimed at making sourdough spelt croissants because times, temperatures, hydration…possibly everything will be different from the recipe we present here and we have no experience of our own to help you.
Good luck with it and happy baking!
Tolga Gursen says
Greetings from Turkey. This is Tolga.
First of all I would like to congratulate and thank you for such a great website.
While I was working on Holland America cruise lines, I used to enjoy croissant anytime we went to a french port. I also had a great french patisserie near by my house at Ft. Lauderdale, Florida however, since I came back to Istanbul, Turkey, I was never able to find or eat a good quality french style croissant.
last week when I found your internet site, I have decided to try at home. İnstructions and describtions are so detailed and step by step easy to follow. It is nearly impossible to make a mistake.
And just now, I just took out my first batch of croissants. They smell so good and they taste awesome. Just because the small kitchen oven I used, it took about 35 minutes to cook; but the texture and taste truly unbelieveably delicious.
Thank you very much sharing great recipes as such.
Have a lovely day.
Best Regards
Tolga Gursen
Weekend Bakers says
Hello Tolga,
What a wonderful thing to hear, you are a true world traveler, how exciting! And thank you for the compliment. We are always very happy when people get such good results, especially the first time. It is not easy, especially under different conditions and with different and more challenging equipment.
Wishing you many delicious croissants from your own kitchen.
Happy baking and greetings from Holland,
Ed & Marieke
Jiaying Li says
Hi, I am very happy that I have found this lovely recipet.
However, I do not make this croissant yet.
I wanna ask a question, If I do not have a mixer to make my dough.
How long should I knead the dough by my hand before put it in the freezer?
Hope you can give me a reply as soon as possible.
Thank you!
J Li
Weekend Bakers says
Hello J Li,
Yes you can knead by hand of course. It should take about 7 to 10 minutes to get to the stage of low to moderate gluten development, depending on your experience and technique.
Happy croissant baking!
Mabrouk says
Kindly help me to find the recepie for Croissant but industriel level.
Thank you
NERO says
Hello I have a big problem ! I did exactly as you did in the video, but my croissants won’t rise 🙁 I just baked 6 croissants. I fallowed the recipe as precise as I could, I arranged the butter in a 17 x 17 square, I sealed it in a 26 x 26 square of dough, placed it in the fridge for 30 minutes and everything was going on perfectly till that moment. I took it out of the fridge, rolled it out 3 times at 26 x 20, and after each rolling I placed it back in the fridge for 30 – 60 minutes,without covering it or packing it in plastic like you did, I put it in the fridge just like that. After the 3rd rolling I placed it back in the fridge for one more night and the fallowing day, when I took it out it was so dry and hard, and when I took it and tried to roll it, it resisted, it was tough like a bread, and even broken up in some parts, but still I managed to roll it 110 x 20 with some effort, cause while rolling it, it wasn’t just the length that was growing but also the width. And I had to fight with it, breaking it again in some small points, and after all I did it pretty well for the first time. Fortunately I could ‘ ve seen the butter-dough layers. I shaped the croissants, gave them a 1st coat of egg wash and put them into the fridge, without covering them in plastic or anything else for 2 hours while I preheated my oven( wich is not a convection oven ) at 195 C. I took them out,but, gave them a second layer of egg wash and placed them in the oven at 200 C and kept them like that for 6 minutes, then I dropped the temperature at 165 C, just like you said. During the baking process I could’ ve seen that they didn’t rise, so after 12 – 20 minutes I raised the temperature again at 200, then dropping it back at 195 C after 5-10 minutes. When I took them out they were crispy just like an old bread or a biscuit and very soft and dense inside. Now I can see all the dough that didn’t raised gathered in their center in a very dense core, I see the empty-dough layers wich used to carry butter it them so I know that I’ ve done it right at some point, but besides they are very crispy outside, they didn’t even browned, not even little bit, they’ re just as white as they was when I shaped them. Please I want some answers. I don’t know what gone wrong, I think there was a problem when putting the dough in the fridge, cause it was hard like a stone when I took it out, but I’m not sure.
Weekend Bakers says
Hello NERO,
We must say we are a bit sad and surprised too that you did follow our directions except for the covering of the dough! From that point on the dough was pretty much ruined and you would not be able to make good croissants with it. Working this rock of dough would damage the layers and it is no wonder the croissants did not rise properly.
If you do give it another try please cover the dough carefully and also handle it with care. Next to that there could be something the matter with your oven maybe, because you see no browning. Maybe you can check these tips to help you find out: www.weekendbakery.com/posts…your-oven/
Good luck with it!
NERO says
Hello Weekend Bakery! Encouraged by the next 2 batches which were each better than the previous, I tried it the 4th time and it was a complete success ! I improved the working conditions, also perfected my lamination technique and proofed them cause the first 2 batches were either under-proofed or non-proofed at all, as I am 16, and the first thing I tried to bake in my life were Croissants, of course not knowing anything about baking at all. Since the second try I work in my house’s balcony were the temperature in very low during autumn,sometimes around 0 degrees Celsius and especially right now in the first half of the romanian winter season. I did get an oven thermometer(since I had no trust in my oven) and a silicon baking brush for the 3rd try at the end of wich i got my first acceptable batch of croissants, really puffy inside and crispy outside,very well proofed but still a bit to dense, not too much but still enough for leaving something to desire, perhaps because I didn’t rested the dough between folds.Now at my 4th try I got pleasing results. I followed all your directions,except I let the just-kneaded dough rise for 1 and 1/2 – 2 hours at room temperature before refrigerating over night for a total of 16-17 hours and made them in 2 days instead of 3. I rested it 25-30 minutes between each fold and 13/16 fresh rolled croissants and leftover pain au chocolat went all to the proofing chamber(a room were I can get the proper 19 – 21 degrees celsius temperature ) the same day, also I saved 3 unrolled dough triangles in the freezer for later use.The first 13 were gorgeous far better even than those found at the local bakeries and those in the freezer just the same, after being thawed in the fridge for 1 hour, rolled out, egg-washed, then proofed and baked, voilla! The same result as the fresh ones. I am very happy and pleased with the result 😀 ! The next they, I waked up and just couldn’t believe I’ve done it, finally my croissants were perfect(or at least almost), buttery, flaky and delicious and I made them with my own hands, I outclassed my parents and both my grannies too, and now I won’t eat an ordinary junkie Croissant from shops or cheap bakeries again. The next thing I wanna do is a whole wheat or somehow multigrain croissant, but I am a bit worried about the possible outcome, as the whole grain products tend to be denser than those made with ‘refined’ flour like type 55. I would really appreciate any advice. Have you ever tried to make a whole wheat croissant ? Or if not, what do you think it will be ? Also thank you a lot for the Croissant recipe and the video 🙂
NERO says
Also gonna continue, I really want to achieve that perfect honeycomb structure 🙂
Weekend Bakers says
Hello Nero, lovely to hear about your progress. Practice makes perfect! The link to your facebook page does not work for us, can you give the correct link? We never baked a whole wheat croissant, we do not see the point of it. 😉 Why waste a croissant with whole wheat flour. We either eat a perfect lovely flaky type T55 croissant or eat a nice slice of a whole wheat loaf. Happy baking!
NERO says
Thank you 🙂 and I must thank you for the detailed baguette recipe too. I’m sorry the link doesn’t work.
Try this one and just in case it doesn’t works, I found that others have given you links to this site :
” imgur.com/a/REWC3#0 “. About the flour, I thought I could do some variation of the original croissant, cause I don’t usually eat bread, unless I have time bake it or at least I know it’s of a good, likely organic type like the one they do at the village with stone ground whole wheat flour and sourdough starter, but besides this the one thing I really like is fine pastry. That’s the reason I started baking. I thought I could make a healthier variant of croissant. I’ m not troubled by the nutty taste, but I’m not willing to sacrifice the flakiness for anything, I don’t eat them because they’ re healthy, but cause their awesome, even so it would’ ve been nice to make them whole wheat without sacrificing their soft mouth-melting inner texture. But how about sourdough starter ? I made some after your rye sourdough recipe, using 1/2 whole wheat flour and other 1/2 organic whole oat flour. Do you think is a good idea to make Croissants with starter instead of yeast ? Does it alters the rising process or anything ?
Weekend Bakers says
Hello Nero, we do not like the sour note of the sourdough with a sweet buttery croissant. It is possible to make a sourdough croissant of course, you need perhaps to double the final proofing time to get to a full proof.
Eva says
Hallo,
Ik heb drie keer geprobeerd om de croissants te maken, maar ik loop telkens tegen het zelfde probleem aan.
Alles gaat goed met het maken van de croissants en tijdens het bakken rijzen ze goed. Maar wanneer ik de oven open zakken de croissants helemaal plat in. Wat kan ik hier aan doen? Ze smaken verder heerlijk maar ik krijg ze maar niet goed gerezen
Groetjes eva
M Morales says
Hello,
I tried this recipe for the first time this past week. The results were amazing and delicious. The pictures and the video are so helpful and thorough. Watch the video if you’re a newbie! I had the video playing while I was laminating and dividing the dough. If I use this same recipe to make pain au chocolat, what measurements do you recommend for cutting the dough and how do you shape the dough?
Thank you for having such a great website!
Weekend Bakers says
Hello,
We can just picture you busy laminating while watching the video. Excellent!
For the pain au chocolat we would recommend dividing the dough into 10 x 10 cm squares, add small pieces of chocolate at the beginning and roll up (not much more than 3 to 4 g of chocolate is needed). If you choose to make only pain au chocolat you can divide the 100 x 20 (40 x 8 inch) slab in 20 pieces of 10 x 10 cm (4 x 4 inch), thus ending up with 20 pains.
We can also recommend making pinwheels and pain au raisin with this dough. See: www.weekendbakery.com/posts…x-raisins/
Happy weekend baking!
Marieke & Ed