
It’s all about the layers…
Klik hier voor Nederlandse versie
With this recipe we want to give you the exact directions on how we go about making classic French croissants. The recipe is an adaptation from the recipe for Classic Croissants by Jeffrey Hamelman. We started out largely following the instructions for his recipe, changed everything to our beloved metric system and found out some worthwhile croissant knowledge of our own along the way. Hopefully enough to justify sharing it all with you and inspiring you to give croissant baking a shot yourself.
Before you start we can recommend watching our croissant making video to get a general feel for the recipe. You can also check out our croissant making log where we keep track of our own croissant baking adventures. For answers to your croissant questions you can check out the Frequently Asked Croissant Questions section.
This recipe will yield about 15 good croissants plus some leftover bits which you can use to make a few, slightly odd shaped ones, or other inventive croissant-like creations.
If at first you don’t succeed, maybe you can take comfort from the fact that our first efforts were not very ‘croissant worthy’. But as you can see we persevered and got better…But we have to admit it is and always will be a tricky process. You have to work precise and be focused to get good results. So away with screaming children, hyperactive animals and all other things distracting! Put on some appropriate croissant making music and lets get to it…
Please read the following tips;
According to Raymond Calvel croissants laminated with margarine are formed into the crescent shape, while croissants laminated with butter are left in the straight form. We say, use whichever shape you like best, but do use butter!
The croissant recipe

Ingredients for the croissant dough
500 g French Type 55 flour or unbleached all-purpose flour / plain flour (extra for dusting)
140 g water
140 g whole milk (you can take it straight from the fridge)
55 g sugar
40 g soft unsalted butter
11 g instant yeast
12 g salt
Other ingredients
makes 15
280 g cold unsalted butter for laminating
1 egg + 1 tsp water for the egg wash
Day 1
Making the croissant dough
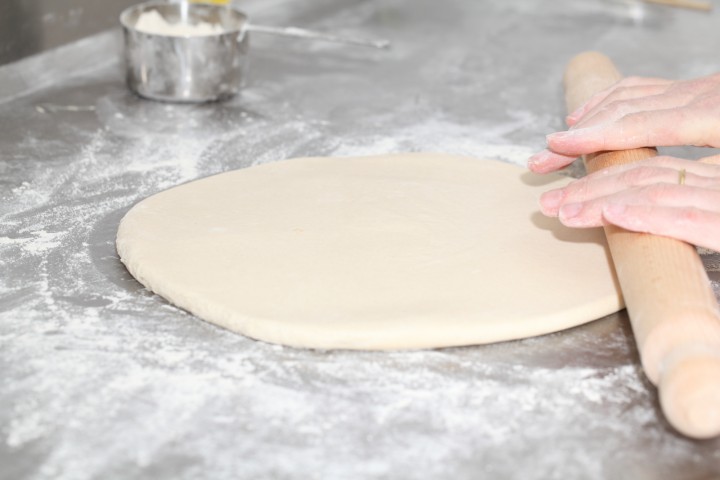
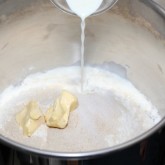
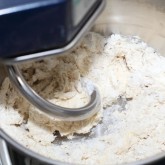
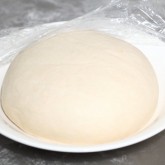
We usually do this part in the evening. Combine the dough ingredients and knead for 3 minutes, at low to medium speed, until the dough comes together and you’ve reached the stage of low to moderate gluten development. You do not want too much gluten development because you will struggle with the dough fighting back during laminating. Shape the dough like a disc, not a ball, before you refrigerate it, so it will be easier to roll it into a square shape the following day. Place the disc on a plate, cover with clingfilm and leave in the fridge overnight.
Day 2
Laminating the dough
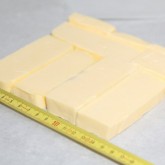
Cut the cold butter (directly from the fridge) lengthwise into 1,25 cm thick slabs. Arrange the pieces of butter on waxed paper to form a square of about 15 cm x 15 cm. Cover the butter with another layer of waxed paper and with a rolling pin pound butter until it’s about 19 cm x 19 cm. Trim / straighten the edges of the butter and put the trimmings on top of the square. Now pound lightly until you have a final square of 17 cm x 17 cm. Wrap in paper and refrigerate the butter slab until needed.
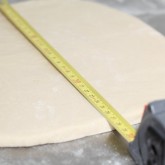
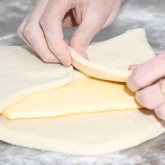
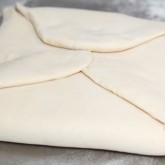
Take the dough out of the fridge. With a rolling pin roll out the dough disc into a 26 cm x 26 cm square. Try to get the square as perfect as possible and with an even thickness. Get the slab of butter from the fridge. Place the dough square so one of the sides of the square is facing you and place the butter slab on it with a 45 degree angle to the dough so a point of the butter square is facing you. Fold a flap of dough over the butter, so the point of the dough reaches the center of the butter. Do the same with the three other flaps. The edges of the dough flaps should slightly overlap to fully enclose the butter. With the palm of your hand lightly press the edges to seal the seams.
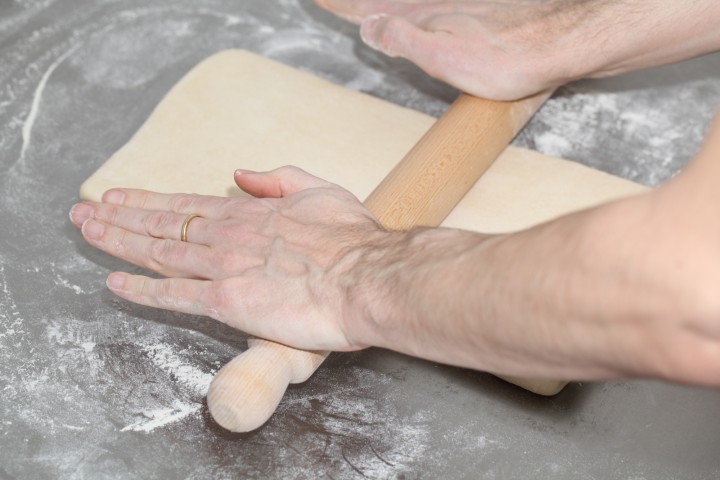
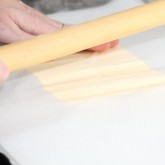
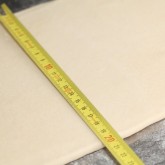
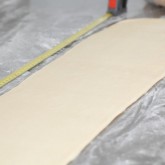
Now the dough with the sealed in butter needs to be rolled out. With a lightly floured rolling pin start rolling out, on a lightly flour dusted surface, the dough to a rectangle of 20 x 60 cm. Start rolling from the center of the dough towards the edges, and not from one side of the dough all the way to the other side. This technique helps you to keep the dough at an even thickness. You can also rotate your dough 180 degrees to keep it more even, because you tend to use more pressure when rolling away from you than towards yourself. You can use these techniques during all the rolling steps of this recipe. Aim at lengthening the dough instead of making it wider and try to keep all edges as straight as possible.
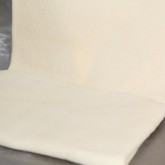
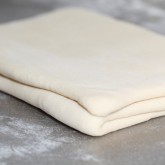
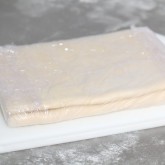
Fold the dough letter style, cover with clingfilm and refrigerate for 30 minutes (fold one third of the dough on top of itself and then fold the other side over it). Repeat the rolling and folding two more times (ending up with 27 layers of butter in total), each time rolling until the dough is about 20 cm x 60 cm. After each fold you should turn the dough 90 degrees before rolling again. The open ‘end’ of the dough should be towards you every time when rolling out the dough (you can see this in our croissant making video at around 3:40 minutes). After the second turn, again give it a 30 minute rest in the fridge. After the third turn you leave the dough in the fridge overnight until day 3, the actual croissant making day!
- Roll out to 20 cm x 60 cm
- Fold
- Refrigerate 30 minutes
- Rotate 90 degrees
- Roll out to 20 cm x 60 cm
- Fold
- Refrigerate 30 minutes
- Rotate 90 degrees
- Roll out to 20 cm x 60 cm
- Fold
- Refrigerate until day 3
- Rotate 90 degrees
- Roll out to 20 cm x 110 cm
Also see complete time table at bottom of page
Day 3
Dividing the dough
Take the dough from the fridge. Lightly flour your work surface. Now very gently roll the dough into a long and narrow strip of 20 cm x 110 cm. If the dough starts to resist too much or shrink back during this process you can fold it in thirds and give it a rest in the fridge for 10 to 20 minutes before continuing. Do not fight the dough, when the dough refuses to get any longer, rest it in the fridge! It is such a shame to ruin two days of work.
When your dough has reached its intended shape, carefully lift it a few centimeters to allow it to naturally shrink back from both sides. This way it will not shrink when you cut it. Your strip of dough should be long enough to allow you to trim the ends to make them straight and still be left with a length of about 100 cm.
Shaping the croissants
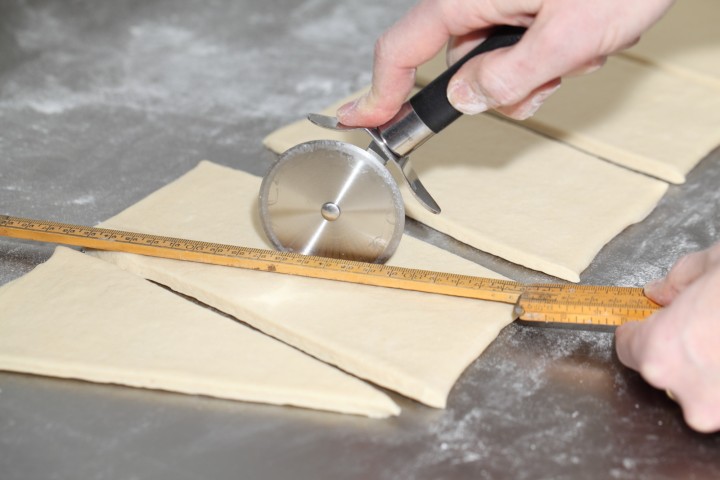
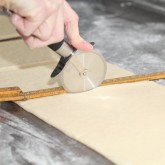
For the next stage you will need a tape measure and a pizza wheel. Lay a tape measure along the top of the dough. With the wheel you mark the top of the dough at 12,5 cm intervals along the length (7 marks total). Now lay the tape measure along the bottom of the dough and make a mark at 6,25 cm. Then continue to make marks at 12,5 cm intervals from this point (8 marks total). So the bottom and the top marks do not align with each other and form the basis for your triangles.
Now make diagonal cuts starting from the top corner cutting down to the first bottom mark. Make diagonal cuts along the entire length of the dough. Then change the angle and make cuts from the other top corner to the bottom mark to create triangles. Again repeat this along the length of the dough. This way you will end up with 15 triangles and a few end pieces of dough.
Using your pizza wheel, make 1.5 cm long notches in the center of the short side of each dough triangle.
Now very gently elongate each triangle to about 25 cm. This is often done by hand, but we have found that elongating with a rolling pin, very carefully, almost without putting pressure on the dough triangle, works better for us. You can try both methods and see what you think gives the best result.
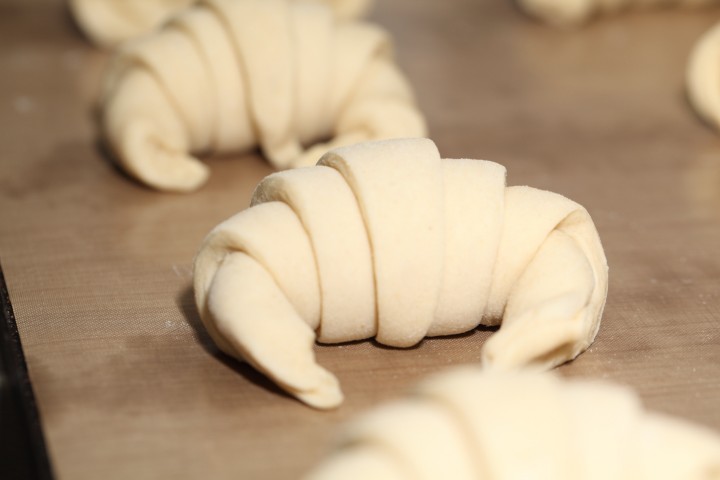
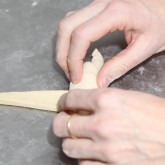
After you cut a notch in the middle of the short end of the triangle, try and roll the two wings by moving your hands outwards from the center, creating the desired shape with a thinner, longer point. Also try and roll the dough very tightly at the beginning and put enough pressure on the dough to make the layers stick together (but not so much as to damage the layers of course).

Proofing and baking
Arrange the shaped croissants on baking sheets, making sure to keep enough space between them so they will not touch when proofing and baking. Combine the egg with a teaspoon of water and whisk until smooth. Give the croissants their first thin coating of egg wash. You do not need to cover the croissants with anything, the egg wash will prevent the dough from drying out.
Proof the croissants draft-free at an ideal temperature of 24ºC to 26.5ºC / 76ºF to 79ºF (above that temperature there is a big chance butter will leak out!). We use our small Rofco B20 stone oven as a croissant proofing cabinet by preheating it for a minute to 25ºC / 77ºF. It retains this temperature for a long time because of the oven stones and isolation. The proofing should take about 2 hours. You should be able to tell if they are ready by carefully shaking the baking sheet and see if the croissants slightly wiggle. You should also be able to see the layers of dough when looking at your croissants from the side.
Preheat the oven at 200ºC / 390ºF convection or 220ºC / 430ºF conventional oven.

Right before baking, give the croissants their second thin coat of egg wash. We bake the croissants in our big convection oven for 6 minutes at 195ºC / 385ºF, then lowering the temperature to 165ºC / 330ºF, and bake them for another 9 minutes. Hamelman suggest baking the croissants for 18 to 20 minutes at 200ºC / 390ºF , turning your oven down a notch if you think the browning goes too quickly. But you really have to learn from experience and by baking several batches what the ideal time and temperature is for your own oven. Take out of the oven, leave for a few minutes on the baking sheet, then transfer to a cooling rack.
Latest way of baking; We heat up our double fan big convection oven at 200ºC, when heated up put the croissants in the oven and directly lower it to 175ºC. We bake them for 10 minutes at 175ºC, they will have a nice brown color by now, then lower the temperature to 150ºC, and bake them for another 6 minutes.
Best eaten while warm and fresh of course. Croissant we don’t eat or share within a day we freeze. We put them in the preheated oven (180ºC / 355ºF) for 8 minutes straight from the freezer. Nothing wrong with that, croissants eaten nice and warm, almost as good as the fresh ones…almost!
Croissant Time Table
Times are an indication and also depend on your experience with the recipe
Try to work swift but precise and take extra fridge time if needed!
Day 1 – Make initial dough
- 21.00 h – Knead for 3 minutes and store in fridge for 12 hours
Day 2 – Laminate the dough
- 09.00 h – Make butter slab and refrigerate till needed
- 09.05 h – Roll dough disc into square
- 09.10 h – Seal butter in dough
- 09.15 h – Roll out to 20 cm x 60 cm and fold
- Refrigerate 30 minutes
- 09.50 h – Rotate 90 degrees
- Roll out to 20 cm x 60 cm and fold
- Refrigerate 30 minutes
- 10.25 h – Rotate 90 degrees
- Roll out to 20 cm x 60 cm and fold
- 11.00 h – Refrigerate until day 3
Day 3 – Dividing, Shaping, proofing and baking
- 09.00 h – Roll out to 20 cm x 110 cm – part 1
- 09.05 h – Often needed! Take 20 min. fridge time if length not in one go
- 09.25 h – Roll out to 20 cm x 110 cm – part 2
- 09.30 h – Divide and shape the croissants
- 09.40 h – First coat of egg wash
- 09.45 h – Proof to perfection (indication 2 hours)
- 11.45 h – Second coat of egg wash
- 11.50 h – Bake for 15-18 minutes
- 12.10 h – Ready!











Laura says
Thank you very much for the excellent detail on making croissants. I am not an experienced bake and followed your advice on making the croissants at least three times with your 3 day recipe. I managed to get the layering correct and the crumb was good with airy light layers but my croissants are not as crisp as yours although they are light and airy. Would this be the result of under proofing or more likely the temperature of my oven that I will need to experiment with until I get the perfect croissant. Crisp on the outside and soft on the inside?
Thanking you for a great recipe with very detailed instructions.
Weekend Bakers says
Hello Laura,
Thank you for your kind comment. This is hard to judge for us without seeing of course, but we do guess that it would sooner be a case of under-proofing. Make sure the dough temp is correct and try to proof to the point where you really have that wobble.
To be sure also see our oven tips to check if your oven is indicating the right temperature: www.weekendbakery.com/posts…your-oven/
And last but not least make sure you use the right type of flour and butter, like we say in the recipe. This can make a big difference in the end result.
Here’s a page with some more info that might be helpful:
www.weekendbakery.com/posts…questions/
Enjoy your pastry baking!
Laura says
Thanks for the reply to my question. I purposely used an imported butter with more than 82% fat and I used a bread flour with more than 11% protene because I did not want to be unsure of the cause if my croissants did not turn out successfully.
I have since baked another batch and think I got closer to the correct oven temperature for my oven and will try again with a longer proofing time and maybe I will hit the sweat spot!
As soon as I am satisfied with my results I will post a photo. Hope you noticed I refer to when I am successful and not if as I am determined to get them 100%.
Happy baking and thanks for the excellent work!
Weekend Bakers says
Sounds like you are well on your way Laura, very good!
Always love to see the result pictures.
You can upload them here if you want to when the time is right:
www.weekendbakery.com/your-loafs/
Happy pastry baking!
Trini Suryowati says
Thank you so much for recipe and the knowledge share.
Weekend Bakers says
Glad you find it useful Trini!
Martin says
First of all, thank you for the extensive and clear instructions. I had never made croissants before. I used your instructions to make three batches of croissants over the past two weeks. Each one was an improvement on the previous.
The problem I currently run into is that my croissants seem to collapse during the second half of their bake in the oven. They seem to rise perfectly fine at first. I do not see any leaked butter, which I understand is a sign of under-proofing. Although I am not sure I also do not suspect over-proofing. The rise was for two to two and a half hours (two trays baked on after the other) at 24 degrees Celsius. The croissants were slightly wobbly when the tray was shaken, but seems fine structurally. When cut through, the crumb is intricate, but lacks large holes.
I’d really appreciate some input as I’m not sure what to change next time I will make croissants. If need be I can share some photo’s of the latest batch.
Weekend Bakers says
Hello Martin,
Sorry for the later than planned reply and thank you for your kind words and enthusiasm for the recipe. Yes, we would like to some pictures. Based on your description we suspect the butter has been (partly) absorbed by the dough.
To be more sure, pictures of in- and outside would help.
You can upload them here:www.weekendbakery.com/send-…your-loaf/
Enjoy your weekend and baking,
Ed & Marieke
Eliise says
I tried it and f*ed up pretty bad. My croissants are currently in the owen proofing and instead of looking like actual croissants they look like buttery buttery poop. I was ready to f* up so I’m not mad or anything, but for the next time, what have I done wrong?
Weekend Bakers says
Hi Eliise,
It is very normal and happens a lot to many bakers. The first try of this challenging bake is not immediately the biggest success.
Do not expect to get perfect croissants the very first time you try to make croissants, most people need to make them 3 to 4 times to get the general feeling for the process. There is no substitute for practice and experience. There is no way to hide little mistakes in your technique when making croissants, so work very precise and follow the instructions to the letter. One small mistake is no problem but several small mistakes add up!
Our advice:
Choose a cold day with a room temperature below 20 ºC / 68 ºF for your first attempt. This way you will have more time for the whole process and less chance of butter being absorbed by the dough. The key is to keep the butter solid between the layers of dough, this is what gives the croissant its flakiness.
More answers to possible questions you can find here:
www.weekendbakery.com/posts…questions/
Mia says
Hi, I’m at day 2 and just finished Rolling the third time. it’s in the fridge overnight.
when I rolled the dough, the butter actually broke inside. it didn’t leak but I have clumps of butter in between… what should I do? I’m afraid what’s gonna happen tomorrow for day 3? thanks
Weekend Bakers says
Hi Mia,
You should just go on with the process and hopefully it will be, maybe not yet perfect but still OK croissant. Like we say in the introduction: We use organic butter with a high fat content and low water content (about 82% fat). A higher water content tends to make butter hard, which promotes tearing and breaking and ruins the layers. Your butter needs to be pliable and at the same time not too soft at the moment of usage.
Abdul malek says
I shape croissants & how many days long keeping in the refrigerated after use?
Weekend Bakers says
Hello Abdul,
At the bottom of this article you can see our tips / method on how to use the refrigerator and freeze your croissants before baking:
www.weekendbakery.com/posts…nt-recipe/
Christine Chapman says
Hi , I have just read the recipe and comments! I am about to watch the video now. I will then bake croissants , providing I can get three clear days to do it properly! I will hopefully have a good photo by the weekend ! Thankyou for the recipe
Weekend Bakers says
Always looking forward to seeing your results Christine!
Pictures are easily uploaded here: www.weekendbakery.com/your-loafs/
Sarah says
I really love this recipe…3 days of work are a lot but at the end, have a such big and delicious result…is amazing! Thanks for the knowledge share!!
Weekend Bakers says
Thank you Sarah,
It is a good and somewhat relaxed way to get to grips with the challenges of this pastry, dividing it over three days. As you get more and more comfortable with it you can speed up the process and also give our 1 day version a try:
www.weekendbakery.com/posts…nt-recipe/
Happy pastry baking!
Sarah says
I tried the recipe and it became fantastic…!!
Since I’m from Mexico and here get the ingredients and the weather are no the best…but they became more than wonderful at my first time 🙂
Weekend Bakers says
Hi Sarah,
Great to read your comment! You can be very proud to get such good results under these circumstances. Hope you enjoy the baking, eating and sharing with many more batches of excellent pastry!
Greetings from Holland to Mexico 🙂
Lydia says
So its good good taste the recepi is perfect for first l do doubl than l do simpl fold and again simpl fold..next time send pictures
Weekend Bakers says
He Lydia,
We always love to see them. You can easily send them via this link:
www.weekendbakery.com/send-…your-loaf/
Hannah says
Can I use bakers flour?
Weekend Bakers says
Hello Hannah,
We do not have or use an exact same product as the one you are referring too, but if you mean a kind of all purpose flour then yes, it should be fine to use for this recipe.
Good luck with the result and happy baking.
Lydia says
Thank you so much for recepy ..will try – didnt yet -send you photo than ….
Weekend Bakers says
Hi Lydia,
We love to see pictures of your croissants if and when you give it a try. You can very easily send us your baking results this way:
www.weekendbakery.com/send-…your-loaf/
Farah says
Can I working w pure butter for laminating?
Weekend Bakers says
Hello Farah,
We only work with pure butter for this recipe, by which we mean diary butter made from milk. Our butter has a 82% fat content which works really well.
Joli says
No metric version of recipe? 😭
Weekend Bakers says
Hello Joli,
This is a recipe with ingredients given in metric. So we do not really understand your question?!
Helena Cheng says
Excellent recipe and instructions. Thanks so much for sharing!!
Weekend Bakers says
Glad you find it helpful, thanks for letting us know Helena!
Izaak says
This is a great recipe and after several batches I’m happy with the result I’ve achieved. Next time I’m going to leave the roll out to about 90 centimetres . I’d like to see if I can get a slightly bigger croissant. When I roll it out to your suggested measurement the pastry is very thin or it seems like it is. Thanks for the recipe it’s a beauty. Cheers Izaak
Weekend Bakers says
Hi Izaak,
After rolling this big slab the dough should still be around 5 mm thick, when sticking to the 20 x 110 measurement. If you think it is too thin you can indeed try to make it a little less long. Hope it will be great!
Happy pastry baking 🙂
Ntungu says
I have tried the recipe and thanks so much for this. First time I found one that is easy to follow and understand. Few questions:
1. I seem to have problems with leaking butter at the second round of laminating and beyond that. I have even tried putting the dough in the freezer for the butter to harden but that doesn’t seem to work. I am using White Bread Flour. Could that be the problem? Could it be the butter that I am using – Unsalted Cultured Butter.
2. The last roll 20cm X 110cm is also proving to be a challenge even after resting the dough midway through the rolling process and eventually the butter leaks. 🙁
3. When I roll, not sure if it is my unskilled technique, I find the dough ends up getting thicker on the edges and maybe explains the reason why I battle to get the right length, what am I doing wrong and how do I avoid this problem. Does the type of pin play a role?
Weekend Bakers says
Hello Ntungu,
1Make sure the butter does not get too soft and anticipate by putting it in the fridge before it leeks. The butter we use has a high fat content of 82%, so if yours has too, it should be good to use.
2Maybe indeed try a different flour, possibly with a bit less protein if you find the dough is too elastic and fighting back (aim for around 11% or try a combination of bread flour and white / pastry flour)
3See 2 and yes you are right there is a bit of technique involved. Try and watch our video to get an idea. Sometimes a heavier pin can help, although it is important to let the pin do the job and to not lean on it and on the dough.
For some more tips also see:
www.weekendbakery.com/posts…questions/
Good luck with it!
Charith says
What should be the thickness of the dough after the final sheeting?
Weekend Bakers says
Hello Charith,
You should aim for the dough being the exact measurements we give in the recipe, then the dough will have the right thickness too. An indication is around 5 millimeters. You can also watch our video to maybe get a better impression of what it should look like, but above all be sure to measure the dough slab and get that as close to the measurements given as possible. See: www.weekendbakery.com/posts…roissants/
Kimberly says
Hi,
do You freeze the leftover croissants after you’ve already baked them, or do you simply freeze the already shaped croissants, that haven’t been baked yet?
Kimberly
Weekend Bakers says
Hi Kimberly,
We do both actually. Freezing the baked croissants is very easy of course. Just put them in a bag or container, take them out when needed and give them a ‘pick me up’ in a preheated oven (around (180ºC / 355ºF) around 8 minutes if its straight from freezer to oven.
As for freezing shaped croissants you can find our tips and method on the subject at the bottom of the one day version of our croissant recipe.
See: www.weekendbakery.com/posts…nt-recipe/
Hope this helps. Enjoy your baking!
Marieke & Ed
Cynthia says
what kind of yeast should we use, regular or osmotolerant?
thanks
Weekend Bakers says
Hi Cynthia,
We use regular instant yeast and this works fine for us, plus it is readily available for most home bakers, but if you have osmotolerant it would work very well for this kind of recipe. With this osmo yeast you can use a bit less than the amount mentioned in the recipe. We would suggest using 7 or 8 grams instead of the 11 grams instant yeast we use.
Hope it works out great!
Gordon says
A metric system recipe! YES! God bless you!
Weekend Bakers says
Thanks Gordon for your support of the metric system. Hooray!
Arlene Wilk says
Do you recommend using active dry yeast or rapid rise instant yeast?
Weekend Bakers says
Hello Arlene,
We use instant dry and sometimes fresh yeast ourselves. We understand that rapid rise yeast is the same and can be used in the same way as ‘our’ instant dry yeast (so it needs no pre-activating and can be used directly with the flour and other ingredients). So we would suggest using the rapid rise, but if you want or need to use the active dry you need a bit more namely around 13 grams for this recipe instead of the 11 grams mentioned for the instant / rapid rise.
Happy baking!
Romina says
Hello, how would you replace yeast by sourdough? Thanks
Weekend Bakers says
We would recommend finding a recipe that is already a worked out version for sourdough croissants. We are not really a fan of the sour taste in pastry and for that reason we do not have enough experience to guide you to a good enough result.
Happy pastry baking!
Iwona says
Hello,
I am living in France and have found your website when looking for a croissants recipe, yours look really like from French bakeries !
I would like to try to prepare the croissants with your recipe, but with 250g of flour.
I have a question : what dimensions should a dough have in this case ? It won’t be 20×60 and 20×110 like in your case with 500g of flour, I guess ?
Thank you in advance,
Iwona
Weekend Bakers says
Hello Iwona,
Thank you very much 🙂
If you halve the recipe, the dough square should be 18.4 x 18.4 cm and the butter slab 12 x 12 cm. The same for the laminated dough, you must shorten only one side (otherwise you get a quarter of the original), so you end up with a 20 x 30 rectangle. The size of the final dough, right before cutting, should be 20 x 55 cm.
To help you further, also check out our page with croissant questions here:
www.weekendbakery.com/posts…questions/
Happy pastry baking!
Marieke & Ed
Chinmaya says
I tried this recipe couple of days back and am so excited to report how delicious they turned out…perfect layers and perfectly baked. Thanks a lot for the detailed instructions and this was my first time making these….lots of doubtful moments during the process..but all well in the end!
Thanks for all your work in inspiring amateur bakers like me….
Weekend Bakers says
Thank you Chinmaya for your very kind feedback. So glad to read it was a great success. For your next bake you can be more confident and enjoy the process even more.
You can also check out our one day version of the recipe with tips on retarding and freezing, which will give you more options to incorporate the process in with your other activities for example:
www.weekendbakery.com/posts…nt-recipe/
Ketaki says
Hello,
I am going to try this recipe! I am super excited. I love baking. I love to see the dough rising and the flakes and the sponge and what not. Every time I buy Croissant I tare and stare at the texture like a crazy person 🙂
I am ready to go on to my ultimate favorite baked item, the croissant!
I had a question about the Yeast. By instant yeast, do you mean the active dry (which means it needs to be proofed in warm water ) or the Rapid rise that can be mixed with dry ingredients.
Ketaki says
I made it !!! I made it!! It turned out awesome!
I used Instant ( Rapid rise ) yeast
I had hard time rolling final stage as my hands were hurting. So My husband chipped in. we couldnt keep the width to 20 cm. it expanded a bit. So The final dimension changed a bit.
End result was awesome so all good!
We ate some with Indian Chai.
Weekend Bakers says
Hello Ketaki,
Sorry for the late reply, we had to battle the flue over here 🙁
You did good using the rapid rise yeast. So glad it turned out so well. It is one of the most challenging pastries to make, but so rewarding, even the smell of the dough, the baking…with the first bite being the ultimate price :))
Happy baking, eating and sharing!
Bianca says
Hi,
I was wondering if you had any good tips for what to do with the raw dough off cuts?
Cheers!
Weekend Bakers says
Hi Bianca,
It is a bit of a challenge, because they also have different weights and need different baking times, but usually we put in small pieces of chocolate and roll them up and bake them separately if we have time, but there are more inventive ways to use them probably, twisting them and use cheese of almonds for example.
Chinmaya says
I am going to try this out this week…excited!
do you also have a recipe for chocolate or almond croissant?
Thanks…
Weekend Bakers says
Hello Chinmaya,
You add filling just before the shaping / rolling up stage. Be aware that any filling will affect the layers and you will need less filling than you probably think. With chocolate for instance you will need no more than 5 to 7 grams per croissant. Professional bakers use stick chocolate for this, but you can use your own good quality (dark) chocolate. Almond croissants are usually made with days old croissants that are filled and topped with almond paste and almonds then baked again.
We do not have a separate recipe for this on our website. We do have some other lovely pastries with this same croissant dough, see:
www.weekendbakery.com/posts…x-raisins/
www.weekendbakery.com/posts…y-caramel/
Enjoy your pastry baking!
Marina says
my croissants leaked butter while they were baking (there was a pool of it), why would this happen? Should I have chilled them before baking after they proofed? I got good lamination and layers, it was def flaky but they ended up slightly greasy (I think that was from sitting in the pool of butter…)
harold says
Marina.
Thats what happened to mine
Weekend Bakers says
We do not cool the croissants our self before baking. We proof at around 26C degrees and put them when they are ready for baking directly in the oven. Most of the time the problem of butter leakage is under-proofing. Make sure the croissants are fully proofed and very ‘wigly’ when you carefully shake them.
harold says
My third time at this bake.
1st time amazing
Second time not as good
Third time today on our 45 wedding aniversary, disaster.
followed the directions, understood about the laminating .
This time I used a different flour , have had great results with it on lots of baking. Used grass fed butter!
will go back to the first time ingrediants.
Weekend Bakers says
We have tested baking croissants with 3 to 4 different flours and all the croissants came out differently, from bad to brilliant. So testing different brands of flour when you do not get the result you want is certainly a good idea. Happy baking!
Seema Thomas says
Amazing I am not a baker .. I don’t come even from a country where baking is common ..but I did it 👍thanks a lot .. how do I post a pic to show u .. excited 😊
Weekend Bakers says
Hello Seema,
That sounds brilliant. And yes you can post your pictures here:
www.weekendbakery.com/send-…your-loaf/
But we just saw something is wrong with the page because of a recent update. We are going to fix it and hopefully it will be working again properly later today or tomorrow.
Darius says
Every time when I make a new recipe I try as much as I can to not stray from it at all. And guess what: works every time. Thank you for this recipe; I usually have croissants on Saturday morning every now and then. What I really enjoy about making them is how fast and easy is when you get the idea.
Keep up the good work
Weekend Bakers says
Hi Darius,
So glad to read your comment. It is one of our top tips always to make a recipe as stated the first time or few times and only change one thing at a time, always understanding why you want to change it.
You sure seem to have the idea so we also want to recommend to take a look at the one day version of this recipe, with tips on retarding and freezing, to give you even more flexibility:
www.weekendbakery.com/posts…nt-recipe/
Thank you and enjoy your pastry baking and sharing!
Tania says
Good morning.Thank you for the recipe.i want to try it today,but wanted to ask you,what if i put them to proof for the night in the wine fridge with the temperature around 15 degrees?Will i be able to cook them in the morning for breakfast?Thank you in advance!!!
Weekend Bakers says
Hi Tania,
It is maybe a good idea to look at our one day version of the croissant recipe and check under ‘Retarding & freezing your croissants’ at the bottom of the page.
See:www.weekendbakery.com/posts…nt-recipe/
We advice you to proof in the fridge, to avoid over-proofing and only use the 15C wine fridge if you are able to check it to see how quick the process goes. (which is usually a challenge while asleep, so when in doubt it is better to give it some extra proofing time early in the morning).
Good luck with it!
Tania says
Thank you so much!!!Will try it!!!
Ben says
How long do I let the dough rise on if I do not have the equipment to proof the dough? Say, if it’s 67 F in the home?
Weekend Bakers says
Hello Ben,
We guestimate the time for proofing to be about double the time indicated in the recipe, also depending on the temp of the dough itself. You can see the correlation between yeast activity and temperature here:
www.weekendbakery.com/posts…mperature/
Another option is to proof the croissants in the fridge overnight. You can check our method and tips for this at the bottom of this recipe under ‘Retarding & freezing your croissants’ :
www.weekendbakery.com/posts…nt-recipe/
Good luck with it!
Gabby says
If I wanted to do dough and lamination on the same day, how would I handle the rise? Mastering the Art of French Cooking has a similar dough, but does two rises at room temperature and then a chill. Not sure how to translate this single overnight rise into a quicker room temperature one.
Weekend Bakers says
Hello Gabby,
We can help you with the one day version of our recipe which you can find here:
www.weekendbakery.com/posts…nt-recipe/
You can also spread it over 2 days if you want and do step 3 on day 2 for example.
Next to this you can also find more tips on retarding and freezing the dough (to give you even more options) at the bottom of this recipe.
Happy pastry baking!