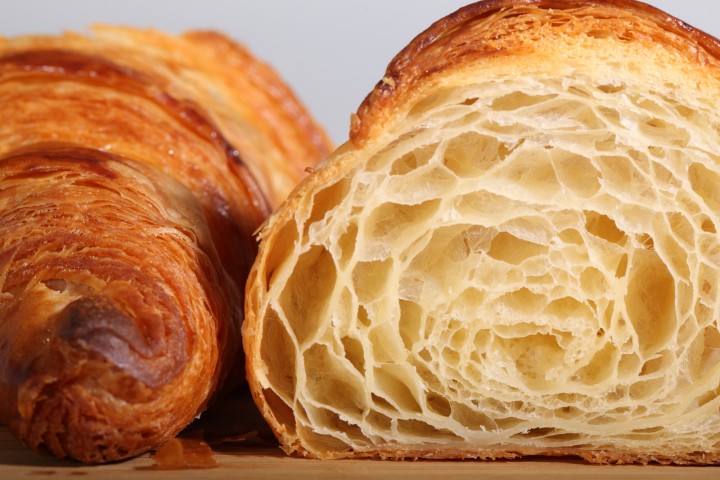
It’s all about the layers…
Klik hier voor Nederlandse versie
With this recipe we want to give you the exact directions on how we go about making classic French croissants. The recipe is an adaptation from the recipe for Classic Croissants by Jeffrey Hamelman. We started out largely following the instructions for his recipe, changed everything to our beloved metric system and found out some worthwhile croissant knowledge of our own along the way. Hopefully enough to justify sharing it all with you and inspiring you to give croissant baking a shot yourself.
Before you start we can recommend watching our croissant making video to get a general feel for the recipe. You can also check out our croissant making log where we keep track of our own croissant baking adventures. For answers to your croissant questions you can check out the Frequently Asked Croissant Questions section.
This recipe will yield about 15 good croissants plus some leftover bits which you can use to make a few, slightly odd shaped ones, or other inventive croissant-like creations.
If at first you don’t succeed, maybe you can take comfort from the fact that our first efforts were not very ‘croissant worthy’. But as you can see we persevered and got better…But we have to admit it is and always will be a tricky process. You have to work precise and be focused to get good results. So away with screaming children, hyperactive animals and all other things distracting! Put on some appropriate croissant making music and lets get to it…
Please read the following tips;
According to Raymond Calvel croissants laminated with margarine are formed into the crescent shape, while croissants laminated with butter are left in the straight form. We say, use whichever shape you like best, but do use butter!
The croissant recipe

Ingredients for the croissant dough
500 g French Type 55 flour or unbleached all-purpose flour / plain flour (extra for dusting)
140 g water
140 g whole milk (you can take it straight from the fridge)
55 g sugar
40 g soft unsalted butter
11 g instant yeast
12 g salt
Other ingredients
makes 15
280 g cold unsalted butter for laminating
1 egg + 1 tsp water for the egg wash
Day 1
Making the croissant dough
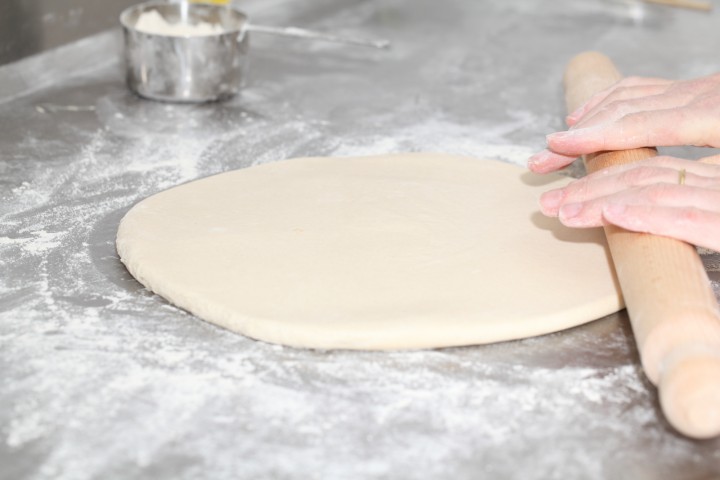
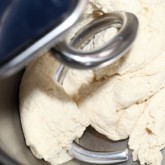
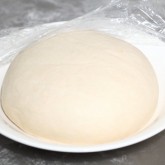
We usually do this part in the evening. Combine the dough ingredients and knead for 3 minutes, at low to medium speed, until the dough comes together and you’ve reached the stage of low to moderate gluten development. You do not want too much gluten development because you will struggle with the dough fighting back during laminating. Shape the dough like a disc, not a ball, before you refrigerate it, so it will be easier to roll it into a square shape the following day. Place the disc on a plate, cover with clingfilm and leave in the fridge overnight.
Day 2
Laminating the dough
Cut the cold butter (directly from the fridge) lengthwise into 1,25 cm thick slabs. Arrange the pieces of butter on waxed paper to form a square of about 15 cm x 15 cm. Cover the butter with another layer of waxed paper and with a rolling pin pound butter until it’s about 19 cm x 19 cm. Trim / straighten the edges of the butter and put the trimmings on top of the square. Now pound lightly until you have a final square of 17 cm x 17 cm. Wrap in paper and refrigerate the butter slab until needed.
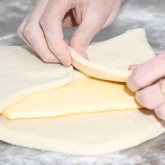
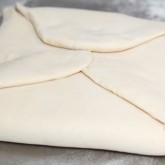
Take the dough out of the fridge. With a rolling pin roll out the dough disc into a 26 cm x 26 cm square. Try to get the square as perfect as possible and with an even thickness. Get the slab of butter from the fridge. Place the dough square so one of the sides of the square is facing you and place the butter slab on it with a 45 degree angle to the dough so a point of the butter square is facing you. Fold a flap of dough over the butter, so the point of the dough reaches the center of the butter. Do the same with the three other flaps. The edges of the dough flaps should slightly overlap to fully enclose the butter. With the palm of your hand lightly press the edges to seal the seams.
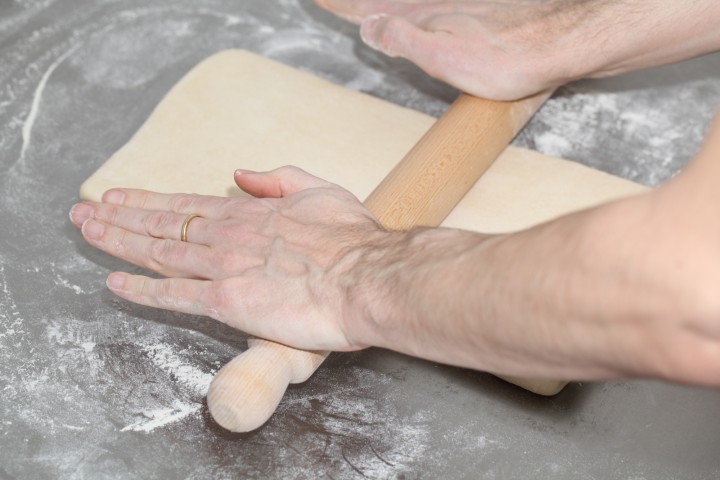
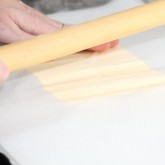
Now the dough with the sealed in butter needs to be rolled out. With a lightly floured rolling pin start rolling out, on a lightly flour dusted surface, the dough to a rectangle of 20 x 60 cm. Start rolling from the center of the dough towards the edges, and not from one side of the dough all the way to the other side. This technique helps you to keep the dough at an even thickness. You can also rotate your dough 180 degrees to keep it more even, because you tend to use more pressure when rolling away from you than towards yourself. You can use these techniques during all the rolling steps of this recipe. Aim at lengthening the dough instead of making it wider and try to keep all edges as straight as possible.
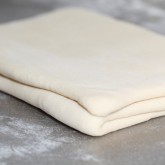
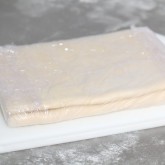
Fold the dough letter style, cover with clingfilm and refrigerate for 30 minutes (fold one third of the dough on top of itself and then fold the other side over it). Repeat the rolling and folding two more times (ending up with 27 layers of butter in total), each time rolling until the dough is about 20 cm x 60 cm. After each fold you should turn the dough 90 degrees before rolling again. The open ‘end’ of the dough should be towards you every time when rolling out the dough (you can see this in our croissant making video at around 3:40 minutes). After the second turn, again give it a 30 minute rest in the fridge. After the third turn you leave the dough in the fridge overnight until day 3, the actual croissant making day!
- Roll out to 20 cm x 60 cm
- Fold
- Refrigerate 30 minutes
- Rotate 90 degrees
- Roll out to 20 cm x 60 cm
- Fold
- Refrigerate 30 minutes
- Rotate 90 degrees
- Roll out to 20 cm x 60 cm
- Fold
- Refrigerate until day 3
- Rotate 90 degrees
- Roll out to 20 cm x 110 cm
Also see complete time table at bottom of page
Day 3
Dividing the dough
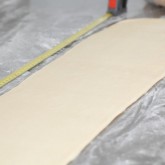
Take the dough from the fridge. Lightly flour your work surface. Now very gently roll the dough into a long and narrow strip of 20 cm x 110 cm. If the dough starts to resist too much or shrink back during this process you can fold it in thirds and give it a rest in the fridge for 10 to 20 minutes before continuing. Do not fight the dough, when the dough refuses to get any longer, rest it in the fridge! It is such a shame to ruin two days of work.
When your dough has reached its intended shape, carefully lift it a few centimeters to allow it to naturally shrink back from both sides. This way it will not shrink when you cut it. Your strip of dough should be long enough to allow you to trim the ends to make them straight and still be left with a length of about 100 cm.
Shaping the croissants
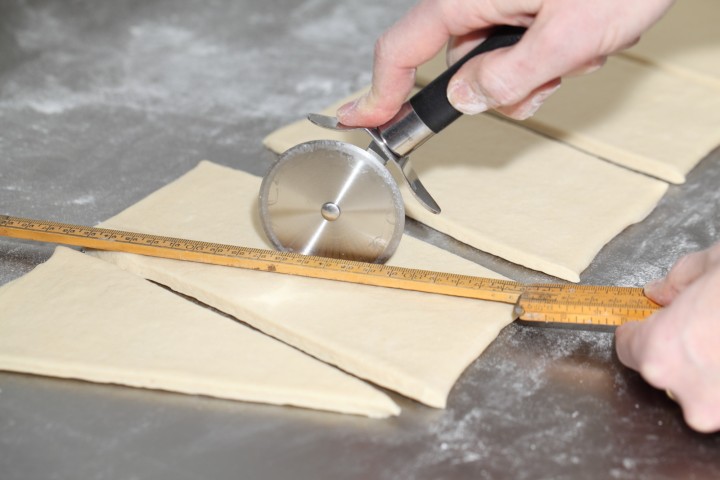
For the next stage you will need a tape measure and a pizza wheel. Lay a tape measure along the top of the dough. With the wheel you mark the top of the dough at 12,5 cm intervals along the length (7 marks total). Now lay the tape measure along the bottom of the dough and make a mark at 6,25 cm. Then continue to make marks at 12,5 cm intervals from this point (8 marks total). So the bottom and the top marks do not align with each other and form the basis for your triangles.
Now make diagonal cuts starting from the top corner cutting down to the first bottom mark. Make diagonal cuts along the entire length of the dough. Then change the angle and make cuts from the other top corner to the bottom mark to create triangles. Again repeat this along the length of the dough. This way you will end up with 15 triangles and a few end pieces of dough.
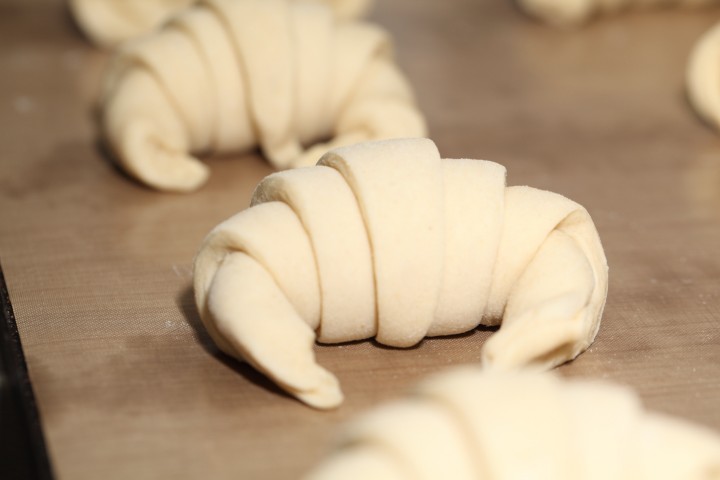
Using your pizza wheel, make 1.5 cm long notches in the center of the short side of each dough triangle.
Now very gently elongate each triangle to about 25 cm. This is often done by hand, but we have found that elongating with a rolling pin, very carefully, almost without putting pressure on the dough triangle, works better for us. You can try both methods and see what you think gives the best result.
After you cut a notch in the middle of the short end of the triangle, try and roll the two wings by moving your hands outwards from the center, creating the desired shape with a thinner, longer point. Also try and roll the dough very tightly at the beginning and put enough pressure on the dough to make the layers stick together (but not so much as to damage the layers of course).
Proofing and baking
Arrange the shaped croissants on baking sheets, making sure to keep enough space between them so they will not touch when proofing and baking. Combine the egg with a teaspoon of water and whisk until smooth. Give the croissants their first thin coating of egg wash. You do not need to cover the croissants with anything, the egg wash will prevent the dough from drying out.
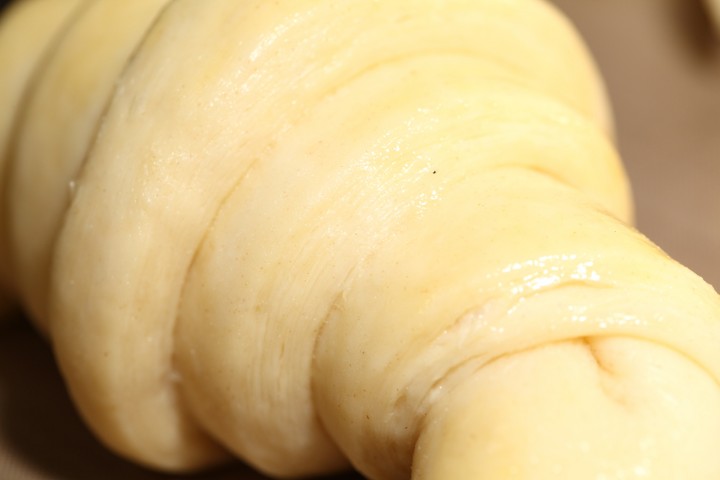
Proof the croissants draft-free at an ideal temperature of 24ºC to 26.5ºC / 76ºF to 79ºF (above that temperature there is a big chance butter will leak out!). We use our small Rofco B20 stone oven as a croissant proofing cabinet by preheating it for a minute to 25ºC / 77ºF. It retains this temperature for a long time because of the oven stones and isolation. The proofing should take about 2 hours. You should be able to tell if they are ready by carefully shaking the baking sheet and see if the croissants slightly wiggle. You should also be able to see the layers of dough when looking at your croissants from the side.
Preheat the oven at 200ºC / 390ºF convection or 220ºC / 430ºF conventional oven.

Right before baking, give the croissants their second thin coat of egg wash. We bake the croissants in our big convection oven for 6 minutes at 195ºC / 385ºF, then lowering the temperature to 165ºC / 330ºF, and bake them for another 9 minutes. Hamelman suggest baking the croissants for 18 to 20 minutes at 200ºC / 390ºF , turning your oven down a notch if you think the browning goes too quickly. But you really have to learn from experience and by baking several batches what the ideal time and temperature is for your own oven. Take out of the oven, leave for a few minutes on the baking sheet, then transfer to a cooling rack.
Latest way of baking; We heat up our double fan big convection oven at 200ºC, when heated up put the croissants in the oven and directly lower it to 175ºC. We bake them for 10 minutes at 175ºC, they will have a nice brown color by now, then lower the temperature to 150ºC, and bake them for another 6 minutes.
Best eaten while warm and fresh of course. Croissant we don’t eat or share within a day we freeze. We put them in the preheated oven (180ºC / 355ºF) for 8 minutes straight from the freezer. Nothing wrong with that, croissants eaten nice and warm, almost as good as the fresh ones…almost!
Croissant Time Table
Times are an indication and also depend on your experience with the recipe
Try to work swift but precise and take extra fridge time if needed!
Day 1 – Make initial dough
- 21.00 h – Knead for 3 minutes and store in fridge for 12 hours
Day 2 – Laminate the dough
- 09.00 h – Make butter slab and refrigerate till needed
- 09.05 h – Roll dough disc into square
- 09.10 h – Seal butter in dough
- 09.15 h – Roll out to 20 cm x 60 cm and fold
- Refrigerate 30 minutes
- 09.50 h – Rotate 90 degrees
- Roll out to 20 cm x 60 cm and fold
- Refrigerate 30 minutes
- 10.25 h – Rotate 90 degrees
- Roll out to 20 cm x 60 cm and fold
- 11.00 h – Refrigerate until day 3
Day 3 – Dividing, Shaping, proofing and baking
- 09.00 h – Roll out to 20 cm x 110 cm – part 1
- 09.05 h – Often needed! Take 20 min. fridge time if length not in one go
- 09.25 h – Roll out to 20 cm x 110 cm – part 2
- 09.30 h – Divide and shape the croissants
- 09.40 h – First coat of egg wash
- 09.45 h – Proof to perfection (indication 2 hours)
- 11.45 h – Second coat of egg wash
- 11.50 h – Bake for 15-18 minutes
- 12.10 h – Ready!









Lisa says
Hello,
I have made croissants quite a few times and after practice they have become better each time. What I can’t seem to achieve is the flaky layers you get in croissants from Montreal or France-where they are crispy and you can peel them apart layer by layer. Do you achieve that by folding and rolling more times than the three? Will it hurt the dough if I do that more times?
Thanks!
Weekend Bakers says
Hi Lisa,
Thank you for sharing your experience with the recipe. About the flaky layers:
To achieve this result it is very important not to damage the layers at any point during the process. Next to pressing on the dough, it could be you are still taking a bit too long and the butter starts to get warm and is absorbed by the dough (or your surroundings are very warm too). So if this is the case build in extra fridge time to cool the dough and then continue. Handle the dough with care, gently elongate without pressing too much or putting your weight into it. We execute the recipe exactly as described, we do not do any extra turns. We also would not advice this for you because the layers will only become more thin and delicate and more easily damaged.
Also make sure to proof to perfection, so no or almost no butter will leak out during baking, again important for those layers.
Best of luck and happy baking!
NK says
Hi ,
Thanks for the great details shared with us.
I made the recipe but had an issue while rolling the dough on the final day (3rd day). The dough was elastic enough and not resistance to rolling , however , The butter oozed out from the bottom of the dough and caused the dough to be too soft . I tried to refrigerate it again with no hope as the butter already sort of incorporated out and is not layered inside anymore. I just mixed it with some flour and shaped it not to loose the effort made. The result came like a dinner roll. While the taste is good but the consistency is no where near to croissant.
Coud the reason be that the dough needed more kneading on its first day?
The butter used have 83% fat content , and since flour 55 is not available , I mixed 300 gm of all purpose with 200 g of bread flour.
And I am intending to try it again , If I halve the recipe , does the dimensions go to half as well?
Thanks a lot
Douglas says
I’ll chime in, though you may want to wait for Marieke or Ed to answer you.
The butter oozing out tends to be due to two issues. The main one is that it is too warm in the area you are rolling the dough out. The second reason is when you placed the butter block on the dough, you didn’t seal the seams of the folded dough around the butter well enough. Kneading the dough more is not a likely solution to your issue.
I’m going to assume the issue was the first one: it was too warm. If you live in a warm area, like I do, you can try the following:
a) Refrigerate the dough for another 10 min whenever the butter seems to get wet-like.
b) Put your rolling pin in the freezer between roll-outs so that the pin is cold.
c) place bags of ice/freezable cold packs on your work surface between roll-outs. Wipe the water that is left behind before flouring the surface.
d) On day 3, once the dough is rolled to 110 cm in length, cut it in half and throw one of the halves into the fridge while you work on the other half as quickly as you can.
e) If you can afford it, turn your AC down to 68 F / 20 C for your work on Day 3.
Hope some of the above helps you on your next attempt.
Weekend Bakers says
Hello NK and Douglas,
The assessment of Douglas is perfect and we do not have much to add to this only that when you are new to croissant making you tend to take /need more time with each task and all the while the dough is getting warmer, so until you build up more speed the fridge is your friend (so take extra fridge time as needed) all the tips Douglas gives to cool things down will also give you that extra time you need at the moment.
And if you halve the recipe, the dough square should be 18.4 x 18.4 cm and the butter slab 12 x 12 cm. The same for the laminated dough, you must shorten only one side (otherwise you get a quarter of the original), so you end up with a 20 x 30 rectangle. The size of the final dough, right before cutting, should be 20 x 55 cm.
Good luck with it and happy pastry baking!
And thank you again Douglas!
NK says
Thanks Douglas & Weekend Bakers for the reply. I have just finished baking my second batch (second attempt) and your advices really helped to achieve a better result this time.
While the kitchen was cold , I think the problem was with sealing and the speed of rolling.
This time , I made sure the sealing is done properly and I placed the rolling pin in the freezer as suggested as an extra precaution.
The dimensions helped me to achieve the half batch process.
I think , I may try the full quantity next time , but divide the dough into two equal parts , and start rolling one of them while the other one is in the fridge . Its much easier to me than rolling a long rectangle at once.
This time , I have achieved a croissant like shape , flaky, layered and light. However , the shape is more like a spiral from inside rather then honeycomb design.
Any idea where could be the mistake? Is it with folding , proofing or oven temperature? This is what I can think of.
Thanks a lot 😉
Weekend Bakers says
Hi NK,
It is a great idea to divide the dough in equal parts and again use the fridge.
The honeycomb structure is only achieved when the layers are intact and the proofing and baking are also at their best. The first thing to try and improve is the rolling out. Try to gently elongate the dough, do not force it and above all do not put your weight into it or press on the dough too hard. Usually when you try to roll out dough that is ‘fighting back’ it also takes longer thus again time for the dough to get warmer and (part of the) butter being absorbed by the dough.
Plus keep in mind that on the one hand you are trying to keep everything cool during the rolling and laminating but proofing conditions are different so make sure your dough can proof in optimal conditions as described in the recipe too or keep in mind it might take a bit longer.
Best of luck and enjoy the process!
Douglas says
I’m having issues getting my dough to look like yours in Day 1 and the start of Day 2. It is no where near as smooth. Should I mix it and knead it a bit more? What is the consistency I should shoot for?
Also, when you are rolling the dough to 26 x 26 cm to prepare it for the butter block, how thick is your dough? In the photo, I’d guess 1 cm. My dough is closer to 2 cm when rolled out to that size after resting in the fridge overnight.
I’m thinking of using pastry flour instead of all-purpose for batch #3. Will the lower protein be an issue or might it help me in this case?
Douglas says
To the first paragraph/question, I notice the original recipe calls for mixing with a dough hook for 3 min on low, followed by 3 min on medium. That might fix my dough’s consistency issues.
Weekend Bakers says
Hope you are going to give it another try Douglas. And watching the video might help too in judging the consistency. Aim for low to moderate gluten development, how long this takes is also related to the type of kneader and hook you use, and make sure you use the right flour too.
See: www.weekendbakery.com/posts…roissants/
We also have a Q&A to help you with croissant questions that might help with some issues: www.weekendbakery.com/posts…questions/
Good luck with it!
Douglas says
Thank you. I’ll post again when I do attempt #3. Attempt #2 came out better but again the dough was just not as smooth.
Douglas says
So I got my dough to come together like yours by using mixing beaters for 3 min, on the lowest setting, mixing the yeast, water, milk and butter first, followed by spooning in the flour sugar mixture. Once mixed, I took out the beaters and put in the dough hooks and kneaded the batter for 3 minutes until it became a dough.
I did a mix of King Arthur Organic All-Purpose flour (11.7% protein) and Bob’s Red Mill Organic Whole Wheat Pastry Flour (8-11% protein). So I’m assuming my flour had a lower protein percentage than 11% but I didn’t notice any issues with the proofing (I used Saf Gold yeast). If anything, the slower/lower proof helped as the previous two batches kept ballooning overnight.
My third attempt came out the best yet. I still struggle with getting a perfect honeycomb structure – get a decent amount but visually you see a few layers were absorbed. But I’m dealing with it being 84 F outside and 70% humidity, so I still consider it good work under the circumstances.
About my comment on adding pastry creme, I recommend piping it into the croissant after it has cooled a few minutes out of the oven. If you add it at the rolling prior to the bake, the egg in the creme will cook again and stiffen. Apricot fruit spread/jelly/preserves is a nice filling as is chocolate, but only after you have tempered it.
I also figured out the difference between croissants and cornetti. The latter is the same as the former but with the addition of eggs, lemon zest, vanilla extract and a bit more sugar to the dough. Produces a less flakey, but sweeter result that goes oh so well with a good latte or cappuccino.
Weekend Bakers says
Hi Douglas,
So good to read you are making progress. It is a challenge using whole wheat flour (At least the type we have over here) it will need some tweaking and it will make the end result ‘heavier’ in general. But even without a perfect honeycomb the croissants must already be very tasty we are sure. And yes you are right jams, jellies and cream are injected after baking, chocolate (often sticks or pieces of a bar) are added when shaping.
So interesting to learn more about the cornetti, because we have never made them, only eaten when on holiday in Italy. And yes they are sweet but when fresh also perfect like you say with good coffee 🙂
Enjoy your pastry baking!
Nad says
Hi. can i know why when i put the butter into the dough its melting into the dough can i know why 😅
*soory broken english 😅
Weekend Bakers says
Hello Nad,
Several factors can be the cause of this. Most likely it is an accumulation of things going sideways. It starts with pressing too hard on the dough to try and lengthen it while it is already fighting back. Keeping at this for a while means, next to the pressing on the dough, you are taking too long and the butter starts to get warm and is absorbed by the dough. So in this case, while still learning and getting better and faster, until you do make sure you build in extra fridge time to cool the dough and then continue. Handle the dough with care, gently elongate without pressing too much or putting your weight into it.
You can see more answers to your questions here:
www.weekendbakery.com/posts…questions/
Good luck!
Paul says
That is for the detailed recipe and run down! Super helpful!!! I’m on day three in the morning and ready to bake. Can’t wait!
Weekend Bakers says
Hope they turned out like you were hoping and expecting Paul!
Veronica says
How did they turn out? I need to buy some yeast and I will be making them too (first ever attempt!!)
Thanks for detailed information. 🙂
Weekend Bakers says
Thanks Veronica, hope Paul will let us know…
Chefkophyo says
Great thanks for receipe
Weekend Bakers says
Hope you give it a try!
Shoba says
Hi. Can you plz help me. My croissants are good except that they are kind of ” doughy ” inside. They are honeycomed but close together. I wish i could send you photos so that you help me out. Thank you very much.
Weekend Bakers says
Hello Shoba,
We have two suggestions: First try to proof your croissants slightly longer and second also bake them a bit longer and also check the true temperature of your oven and see if any adjustments need to be made there. See our tips on the subject: www.weekendbakery.com/posts…your-oven/
If you want to send us photo’s you can do so here: www.weekendbakery.com/send-…your-loaf/
Good luck with it!
Sheena says
I have created the recipe with success a few ones now… If I double it, with that affect the outcome?
Weekend Bakers says
Hello Sheena,
Not at all, you can double the recipe no problem. But for practical reasons of measurement / rolling out and quality of the end result, it is best to divide the dough in two batches on day two and take it from there.
Dany says
Fourth time making these… I think I found the right butter after my fourth attempt. Our family is slightly addicted to these croissants.
The last batch I made, the croissant flattened some while baking. What would cause them to go flat?
Weekend Bakers says
Hi Dany,
Did you change anything compared to the more successful bakes? Maybe the flour or other factors like the temperature / surroundings?
Dany says
Sorry for the late reply. I was in Florida at the time… could the humidity and the warmer climate have anything to do with it?
Weekend Bakers says
Hi Dany,
They play their part, but unless the temp while proofing went beyond 26C (which would be very good) there is no problem on that front. If it was way too hot butter would have started to leak out and your croissants would not have been properly layered. The science behind and control of humidity in baking is rather complex, but in general high humidity (proofing cabinets for example have humidity levels of around 80%) is not considered a problem and of course for a home baker these factors are harder to control. If possible it is best to bake under stable conditions or the most favorable conditions possible. In warm / tropical climates this could mean that baking in the evening / night could be considered. You can also find other tips and suggestions, also in the comments of this FACQ posting:
www.weekendbakery.com/posts…questions/
Happy baking
ottoboot says
I make the dough put in freezer. After I want to use the dough take out of the freezer let sit on the counter for one hour and proceed as you do butter etc 3 times and so on .So you can make dough weeks ahead.
Weekend Bakers says
Thank you Otto, for sharing your method with us. Excellent and handy!
Elena says
I love it , best croissant I have ever made.
Thank you and Happy New Year !!!
Weekend Bakers says
Thank you for sharing. Happy pastry baking and Happy New Year Elena!
Tiffany says
If I were to divide the recipe in half would I still keep the length the same when rolling out the dough during the turns? Still roll the dough out to 20×60 cm? For the butter book as well. Or do I cut all those measurements in half. Thank you!
Weekend Bakers says
Hello Tiffany,
You do as follows:
If you halve the recipe, the dough square surface should be 18.4 x 18.4 cm and the butter slab 12 x 12 cm. The same for the laminated dough, you must shorten only one side (otherwise you get a quarter of the original), so you end up with a 20 x 30 rectangle. The size of the final dough, right before cutting, should be 20 x 55 cm (so halve the length, but still the 20 cm you need to cut out the croissant triangles).
Good luck with it!
Tiffany says
Thank you so much!
Faruque says
I like that. Very good
Lena says
Hello,
First of all, thank you so much for the wonderful recipe! This is my second time making it, and I accidentally forgot to refrigerate the dough after Day 1 — it was left overnight on the counter for 7-8 hours at about 64ºF/18ºC. Is this dough still ok to use, or would you recommend making a new batch instead?
Thanks so much, and Happy New Year!
Best,
Lena
Weekend Bakers says
Hi Lena,
We are probably a bit late with answering your question and you already made a decision…
If the dough did not rise too much and still looks sort of close to the one in our picture /video we would suggest giving it a try.
Happy New Year!
Ed & Marieke
louai says
when baking croissants in the oven should we turn the heat on from up and down or only down , your advise thanks
Weekend Bakers says
Hello Louai,
If you have a household oven start with preheating the oven at 200ºC / 390ºF convection or 220ºC / 430ºF conventional oven. Bake for around 6 to 8 minutes at this temperature (or till the point the croissants have the desired color) and lower the oven to around 165ºC / 330ºF and use this setting for the rest of the baking time, which will be another 8 to 10 minutes (all depending on the workings of your oven, so it is a bit trial and error to find out the ideal oven settings and time for you).
Good luck with it!
Douglas says
Marieke & Ed, Merry Christmas and thank you for your wonderful website.
Question, how would I fill these croissants with the pastry creme I made following your recipe? I want to make these croissants be similar to cornetti con crema that I grew up with.
Weekend Bakers says
Hi Douglas,
We have to say we never fill our croissants this way but, after baking you can either make a small hole and pipe in the cream or alternatively you can make a long slice down each croissant, with the advantage of having filling in every bite.
Hope it will be great. Happy New Year!
Greetings,
Marieke & Ed
david burnett says
How do you roll out the dough perfectly? Mine usually ends up being 8 inches + or – 2 inches on each side, and then you can see chunks of butter even after the 3rd fold.
I can never get it perfectly square, and it doesn’t stay that way.
Weekend Bakers says
Hi David,
It is a process that must be done precise and with a gentle touch and gentle adjustments (and often measure to stay close to your desired goal). You can watch our video for this too: www.weekendbakery.com/posts…roissants/
These are not the first croissants we made, so practice and you will get there.
Anthony says
Hello Guys,
I made the croissants as per the recipe – measuring them with a tape measure and all and they are just incredible! Some of them I froze raw and have defrosted and proved them overnight and then egg washed and cooked them. While they are still pretty good they aren’t to the same standard. I’ve still got a few in the freezer – have you got any tips on defrosting or cooking them from frozen?
Weekend Bakers says
Hi Anthony,
Yes we do. We have a one day version of the recipe and at the bottom of this article you can find your tips about freezing and retarding.
See: www.weekendbakery.com/posts…nt-recipe/
Happy pastry baking and Happy Holidays!
Marieke & Ed
Richard says
Just made this recipe as my first try at laminate pastry–the croissants are FANTASTIC! Thanks for the step-by-step directions and accompanying video. I made traditional and chocolate and can’t wait to go on to almond.
The introduction to the recipe mentions other flours and sourdough variations–do you have any recommendations/recipes for using other commercially available flours? Or a sourdough recipe?
Weekend Bakers says
Hi Richard,
Thanks for your enthusiastic comment on the recipe.
We have tried different flours and the type55 or something similar with around 11% protein works best in our opinion. We made croissants with different bread flours and each yields a different result. It is best to try different flours available to you at your location, because the difference with what we can buy here can be rather big, plus there’s the personal preference too.
As for a sourdough version we would recommend finding a recipe that is already a worked out version for sourdough croissants. We are not really a fan of the sour taste in pastry and for that reason we do not have enough experience to guide you to a good enough result.
Happy pastry baking this Holiday season!
Ed & Marieke
Natasha says
I am at the stage of rolling the dough with butter in it and the butter seem to just be slipping out everywhere and now it’s a huge mess of gooey stuff. Help?
muwereza ismail says
nice receipe, working for me well in uganda
Weekend Bakers says
Hello Ismail,
Glad to read you can use this recipe for your conditions too.
Happy pastry baking!
Weekend Bakers says
Hi Natasha,
Probably a bit too late, but maybe for next time:
The key is to keep the butter solid between the layers of dough, this is what gives the croissant its flakiness. So if your butter gets too soft, return the dough to the fridge and let it firm up before you continue. Work with cool ingredients on a cool day in a cool room if possible. If you are not an experienced baker yet you cannot work so fast, so take longer to do all the steps and the butter can get too warm. So use the fridge!
We have more useful answers to questions and tip for you here:
www.weekendbakery.com/posts…questions/
Good luck with it and keep practicing.
carmen says
I just baked a batch of croissants, they seems perfect, but when _I bake then the like broke, like the dough open one one side, what do you think it happened
Weekend Bakers says
Hi Carmen,
Without seeing your result and hoping we understand what you mean, it could either be a case of under-proofing (and) or the shaping of the croissants. Also the oven temperature could play a roll, so see if this needs adjusting. See tips about your oven here: www.weekendbakery.com/posts…your-oven/
Widi says
Hi, my work station is not as big as needed for me to be able to roll the dough as long as it stated in the recipe.
Should I divide everything by the half to work it? Or do you have other suggestion?
Thanks a lot.
Weekend Bakers says
Hi Widi,
Yes, dividing the dough in halve is the best suggestion we would have, and keep the width the same.
Good luck with it!
Andreea says
Hi
What function do I have to use if my oven has just fan forced and grill functions.
Thank you
Weekend Bakers says
Hello Andreea,
we advice fan forced. This is how we do it and maybe a starting point for you: We heat up our double fan convection oven at 200ºC, when heated up put the croissants in the oven and directly lower it to 175ºC. We bake them for 10 minutes at 175ºC, they will have a nice brown color by now, then lower the temperature to 150ºC, and bake them for another 6 minutes.
So you just need to test and see if your oven has to be adjusted a bit (higher) or the baking time should be a bit longer to get the right browning and baking result.
Good luck with it!
Andreea says
Thank you so much
I’ll bake them today and can’t wait to see the results. Thanks once again
borzas says
so, I left out the sugar by accident, I’ll get back to you with the results… they’re already in the proofing phase.
Weekend Bakers says
This should be no problem Borzas. How did they turn out?
Khalil hazin says
I am really proud off his reciep I want reciep for 5 kilos and 10 kilos and 20 kilos please if u can help me to get it Thanks for sharing
Weekend Bakers says
Sorry, we do not have this ready for you, but you can multiply all the ingredients and make a new list for each weight.
Khalil says
Ok another question if u can give me the salt crossiant
Weekend Bakers says
We do not have a recipe for a salt croissant.
Nanette says
Thank you so very much for this wonderfully clear recipe for croissants.
My first attempt isn’t perfect … slightly gooey in the middle … I may have underdone, or had the oven too hot … but they do taste delicious nevertheless.
Inspired by your talent and skills I’ll keep trying!
Many thanks!
Weekend Bakers says
Hi Nanette,
Sounds you are on your way to great croissants. it is always a very good sign when people can evaluate their own baking and pinpoint what can be improved with the next batch. Make notes and make slight changes and above all enjoy the process and eating, because like you say they are already delicious!
Happy pastry baking,
Marieke & Ed
Zazzi says
I made my first batch of croissants since culinary school (many many years ago). I did not think they would turn out because I started rolling when my butter was very cold and I could see and hear it cracking. Well they turned out great.
My question is: Can I shape them in the evening and then proof them overnight in the refrigerator, then bring them to room temperature the next morning and then bake. Or should I just bake from the refrigerator.
Thank you, your recipes are very easy to follow and turn out great.
Weekend Bakers says
Hello Zazzi,
Take a look at the one day version of our recipe. At the bottom of the article you will find our instructions on retarding and freezing croissants. Hope this is helpful.
See: www.weekendbakery.com/posts…nt-recipe/
Good luck with it!
Raija says
A perfect recipe! I followed it exactly as written (apart from one thing*) and my croissants are beautiful!
*I baked them late on the second day, I thought seven hours rest instead of overnight should work, and it did.
I’ve had two already, and that’s me, who doesn’t eat wheat!!
Will make plenty more for Christmas 🥐🥐🥐
PS, Can I reduce the amount of sugar?
Weekend Bakers says
Hello Raija,
Thank you very much, that sounds excellent. You can even try our one day recipe, maybe also good to incorporate in your busy Holiday schedule.
See: www.weekendbakery.com/posts…nt-recipe/
And yes, you can reduce the sugar, halve it for example, that will be fine (mainly just a difference in taste).
Happy Holiday baking to you!
Emese says
This recipe was delightful to make! I loved the process and the result came out perfect! I was surprised that they came out so perfectly ,because I made a mistake with the slob of butter. I placed it on the dough when it was supercold ,my mistake I did not check that it should be pliable, so it was very difficult to roll out as so the butter could make an even layer between the dough.
After the second fold it looked already better ,but i was thinking well next time I will pay more attention and not have it the butter that cold.
The results were just so beautiful , I could see the layers while proofing. I got mine just as airy and light as on the picture ! I also mad pain au chocolat from half of the dough😊!
I really loved the whole process, will be making them again and again 😊
My oven is not very strong, so I baked them for 10 minutes at 200°C ,then lowered the temperature 180°C ,taking 9-10 more minutes, and they came out golden ,crispy on the outside and perfectly airy in the inside.
Thank you so much for this lovely recipe!
Weekend Bakers says
Hi Emese,
Thank you for sharing your experience with us. In your case a bit too cold turned out OK (always preferable to too warm) and so glad you persevered and had such amazing results.
And glad your oven did the job too. Sounds like you made the whole process your own already, so maybe you could give the one day version of our recipe a try too:
www.weekendbakery.com/posts…nt-recipe/
Or what about these ones!: www.weekendbakery.com/posts…x-raisins/
Happy pastry baking!
Zanzoona says
Hi. I’m Zanzoona Hanem from Syria Damascus. You can also find me in Egypt coz I have 2 IDs..
Actually I loved all your recipes, they are all AMAZING.. I tried Croissant and Brioche and I made it from the first time, it was so delicious..
I’m thanking you dear friends from the bottom of my heart..
I hope I can find the recipe of Éclair, but I couldn’t find it. I’m so sorry and so sad, I really wanted to read your éclair recipe.
Have always success and auspicious..
Thank you.
Weekend Bakers says
Thank you again Zanzoona,
We are working on posting a recipe about choux pastry next, but we have been very busy and need to find the time to make good pictures to go with the recipe and instructions. So hopefully soon!
Enjoy your baking weekend!
Zanzoona says
Ok, I’ll be waiting for the éclair recipe, I’ll not going to any other site, coz simply YOU ARE THE BEST.. Have always great times 😘 😘 😘 😘 😘 😘 😘
Will F. says
I made these last weekend as my first ever attempt…repeat, ever…making croissants. I got to the last lamination stage and seriously thought they were going to fail as the 30 minutes in the fridge just wasn’t enough to re-harden the butter…and it started breaking through when I rolled it. Panic set in as croissants are my wife’s favorite pastry and these were a surprise for her birthday breakfast in bed the next morning. Needless to say, i persevered and they came out perfectly. I honestly don’t think that we’ve ever had better…my wife now refuses to buy croissants ever again unless it’s from a genuine Parisienne patisserie…in Paris no less. EXCELLENT recipe and instructions. Thank you! You’re to be commended for a great and detailed post. Perhaps it might help other nubies to add that not enough time in the fridge between the final 3 laminations will result in the softened butter breaking through…just a thought. About to make my second batch. Now with so much more confidence.
Cheers
Weekend Bakers says
Hello Will,
Thank you for your very enthusiastic account. So glad it all worked out, you should feel very proud of your results. And you are right, things like fridge time (in relation to temperature) are important among the list of things you have to practice to find out the exact way to adapt the recipe to your equipment, ingredients, surroundings / climate and hands.
Very best of luck with the second batch and happy pastry baking and sharing!
Tuomas Torvinen says
Hi!
I tried your recipe and it was perfect, I ended up resulting like your first post. Looking great but inner layers were a mess, had some trouble with the third lamination, I should have rest the dough when it was not stretching enough.
But my question is that when I double the dough, will I always double the yeast amount also? What about when doing four times the normal dough?
Thank you for your excellent work!! 😀
-Tuomas from Finland
Weekend Bakers says
Hi Tuomas,
Just give it a few more tries and get more comfortable with the process and you will see improvement. And yes, you double, triple etc all the ingredients, including the yeast.
Good luck with it!
Louis Correra says
Thank you for the great croissant recipe! My first time baking these turned it great thanks to the descriptive instructions and the video!
Weekend Bakers says
Hello Louis,
So glad you found it useful too.
If you feel confident with the recipe, you can take a look at the one day version:
www.weekendbakery.com/posts…nt-recipe/
Happy pastry baking!
Miles says
I have been using your recipe to great success, and now am thinking of making a bigger batch. If i made double the amount in this recipe, what would be the process of lamination? Should i split the dough in 2 or simply do it all in one batch.
Weekend Bakers says
Hello Miles,
The easiest method would be to divide the batch of dough in two. This way you would not have to do any recalculation of the measurements. This is the way we do it too.
Good luck with it!
Miles says
In the end i was lazy and just did it in one big batch. I slightly increased all the dimensions for the folds and was extra carefull not to tear the dough. Then split the dough in half for the final rolling out, then rolled each piece to 60x40cm and cut in half before cutting the triangles. They turned out great!
Weekend Bakers says
Great to read your method worked Miles.
Enjoy the pastry!
Caio says
Hello again,
Thank you for replying.
I wonder what is the temperature of your freeze when you leave the dough overnight.
Kind regards
Weekend Bakers says
Hello Caio,
We assume you mean the fridge for leaving the dough overnight.
It is around 5 to 6 degrees C / 42 F.
Hamza says
Hi,
We make 3 x 10kg dough mixes every day, and it’s becoming quite overbearing in the kitchen, so I’d like to roll them all, freeze them then defrost and prove them the next morning…
I was wondering if you guys have a method for freezing croissants before proofing and baking?
I’ve tried to freeze mine many times, but after shock freezing them… it seems as though the butter breaks apart when I defrost them the next morning.
Should I be adding any antifreeze/malt-extract additives?
Kind Regards,
Hamza
Weekend Bakers says
Hello Hamza,
We are afraid we cannot realy help you properly, because we do not have any experience with a shock freezer or using antifreeze. We freeze croissants, after shaping, but not on your scale. The method we use is described at the bottom of the one day version of our recipe:
www.weekendbakery.com/posts…nt-recipe/
Good luck with it!