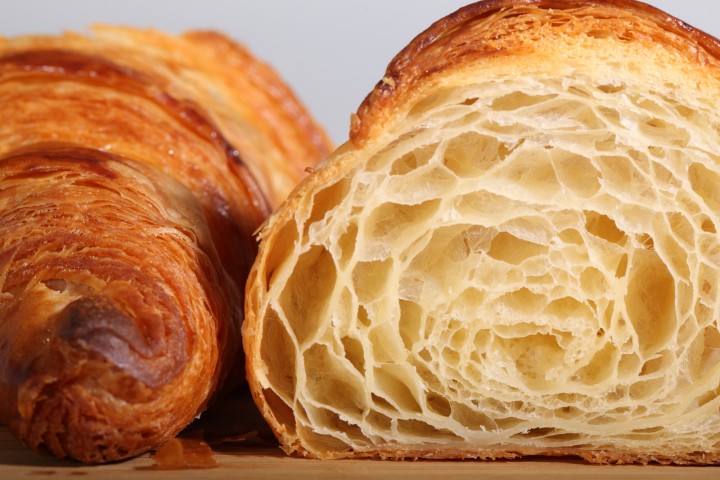
It’s all about the layers…
Klik hier voor Nederlandse versie
With this recipe we want to give you the exact directions on how we go about making classic French croissants. The recipe is an adaptation from the recipe for Classic Croissants by Jeffrey Hamelman. We started out largely following the instructions for his recipe, changed everything to our beloved metric system and found out some worthwhile croissant knowledge of our own along the way. Hopefully enough to justify sharing it all with you and inspiring you to give croissant baking a shot yourself.
Before you start we can recommend watching our croissant making video to get a general feel for the recipe. You can also check out our croissant making log where we keep track of our own croissant baking adventures. For answers to your croissant questions you can check out the Frequently Asked Croissant Questions section.
This recipe will yield about 15 good croissants plus some leftover bits which you can use to make a few, slightly odd shaped ones, or other inventive croissant-like creations.
If at first you don’t succeed, maybe you can take comfort from the fact that our first efforts were not very ‘croissant worthy’. But as you can see we persevered and got better…But we have to admit it is and always will be a tricky process. You have to work precise and be focused to get good results. So away with screaming children, hyperactive animals and all other things distracting! Put on some appropriate croissant making music and lets get to it…
Please read the following tips;
According to Raymond Calvel croissants laminated with margarine are formed into the crescent shape, while croissants laminated with butter are left in the straight form. We say, use whichever shape you like best, but do use butter!
The croissant recipe

Ingredients for the croissant dough
500 g French Type 55 flour or unbleached all-purpose flour / plain flour (extra for dusting)
140 g water
140 g whole milk (you can take it straight from the fridge)
55 g sugar
40 g soft unsalted butter
11 g instant yeast
12 g salt
Other ingredients
makes 15
280 g cold unsalted butter for laminating
1 egg + 1 tsp water for the egg wash
Day 1
Making the croissant dough
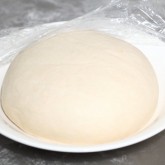
We usually do this part in the evening. Combine the dough ingredients and knead for 3 minutes, at low to medium speed, until the dough comes together and you’ve reached the stage of low to moderate gluten development. You do not want too much gluten development because you will struggle with the dough fighting back during laminating. Shape the dough like a disc, not a ball, before you refrigerate it, so it will be easier to roll it into a square shape the following day. Place the disc on a plate, cover with clingfilm and leave in the fridge overnight.
Day 2
Laminating the dough
Cut the cold butter (directly from the fridge) lengthwise into 1,25 cm thick slabs. Arrange the pieces of butter on waxed paper to form a square of about 15 cm x 15 cm. Cover the butter with another layer of waxed paper and with a rolling pin pound butter until it’s about 19 cm x 19 cm. Trim / straighten the edges of the butter and put the trimmings on top of the square. Now pound lightly until you have a final square of 17 cm x 17 cm. Wrap in paper and refrigerate the butter slab until needed.
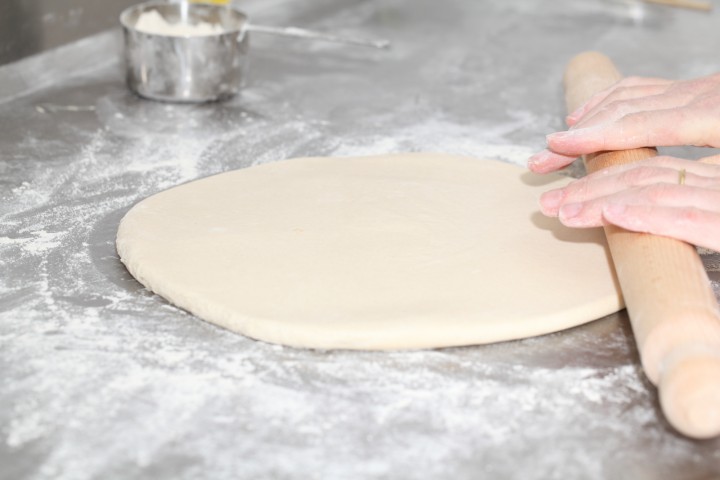
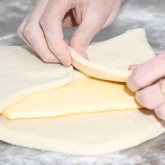
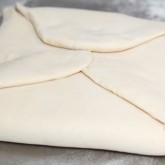
Take the dough out of the fridge. With a rolling pin roll out the dough disc into a 26 cm x 26 cm square. Try to get the square as perfect as possible and with an even thickness. Get the slab of butter from the fridge. Place the dough square so one of the sides of the square is facing you and place the butter slab on it with a 45 degree angle to the dough so a point of the butter square is facing you. Fold a flap of dough over the butter, so the point of the dough reaches the center of the butter. Do the same with the three other flaps. The edges of the dough flaps should slightly overlap to fully enclose the butter. With the palm of your hand lightly press the edges to seal the seams.
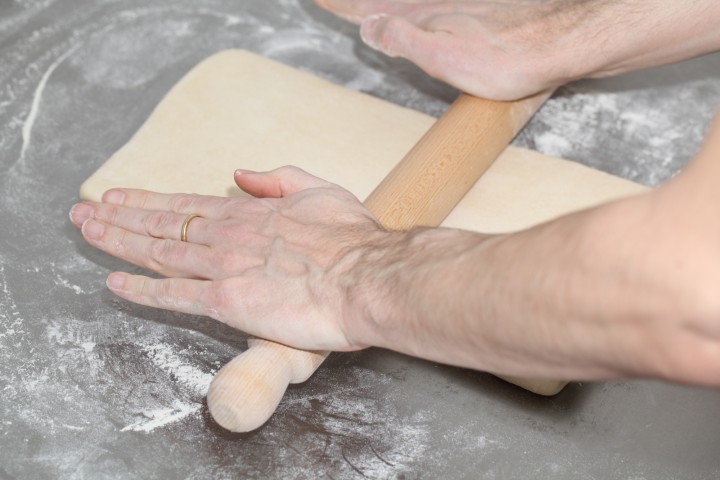
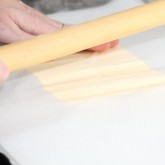
Now the dough with the sealed in butter needs to be rolled out. With a lightly floured rolling pin start rolling out, on a lightly flour dusted surface, the dough to a rectangle of 20 x 60 cm. Start rolling from the center of the dough towards the edges, and not from one side of the dough all the way to the other side. This technique helps you to keep the dough at an even thickness. You can also rotate your dough 180 degrees to keep it more even, because you tend to use more pressure when rolling away from you than towards yourself. You can use these techniques during all the rolling steps of this recipe. Aim at lengthening the dough instead of making it wider and try to keep all edges as straight as possible.
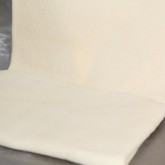
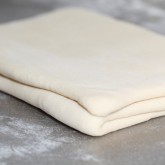
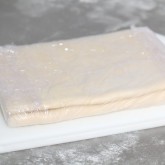
Fold the dough letter style, cover with clingfilm and refrigerate for 30 minutes (fold one third of the dough on top of itself and then fold the other side over it). Repeat the rolling and folding two more times (ending up with 27 layers of butter in total), each time rolling until the dough is about 20 cm x 60 cm. After each fold you should turn the dough 90 degrees before rolling again. The open ‘end’ of the dough should be towards you every time when rolling out the dough (you can see this in our croissant making video at around 3:40 minutes). After the second turn, again give it a 30 minute rest in the fridge. After the third turn you leave the dough in the fridge overnight until day 3, the actual croissant making day!
- Roll out to 20 cm x 60 cm
- Fold
- Refrigerate 30 minutes
- Rotate 90 degrees
- Roll out to 20 cm x 60 cm
- Fold
- Refrigerate 30 minutes
- Rotate 90 degrees
- Roll out to 20 cm x 60 cm
- Fold
- Refrigerate until day 3
- Rotate 90 degrees
- Roll out to 20 cm x 110 cm
Also see complete time table at bottom of page
Day 3
Dividing the dough
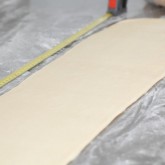
Take the dough from the fridge. Lightly flour your work surface. Now very gently roll the dough into a long and narrow strip of 20 cm x 110 cm. If the dough starts to resist too much or shrink back during this process you can fold it in thirds and give it a rest in the fridge for 10 to 20 minutes before continuing. Do not fight the dough, when the dough refuses to get any longer, rest it in the fridge! It is such a shame to ruin two days of work.
When your dough has reached its intended shape, carefully lift it a few centimeters to allow it to naturally shrink back from both sides. This way it will not shrink when you cut it. Your strip of dough should be long enough to allow you to trim the ends to make them straight and still be left with a length of about 100 cm.
Shaping the croissants
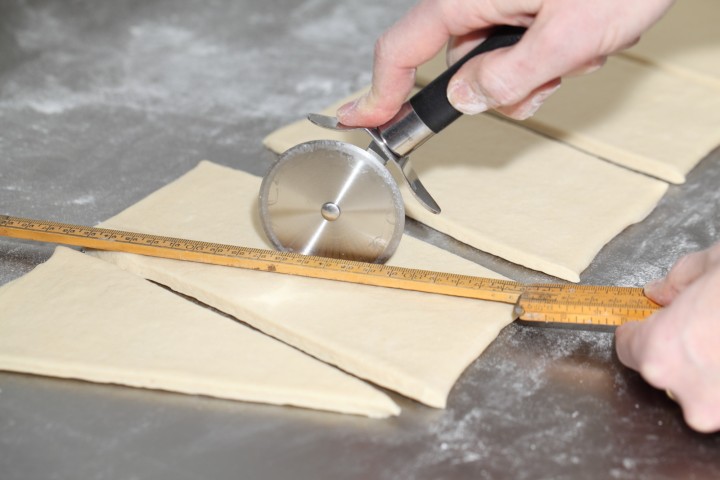
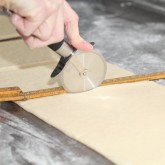
For the next stage you will need a tape measure and a pizza wheel. Lay a tape measure along the top of the dough. With the wheel you mark the top of the dough at 12,5 cm intervals along the length (7 marks total). Now lay the tape measure along the bottom of the dough and make a mark at 6,25 cm. Then continue to make marks at 12,5 cm intervals from this point (8 marks total). So the bottom and the top marks do not align with each other and form the basis for your triangles.
Now make diagonal cuts starting from the top corner cutting down to the first bottom mark. Make diagonal cuts along the entire length of the dough. Then change the angle and make cuts from the other top corner to the bottom mark to create triangles. Again repeat this along the length of the dough. This way you will end up with 15 triangles and a few end pieces of dough.
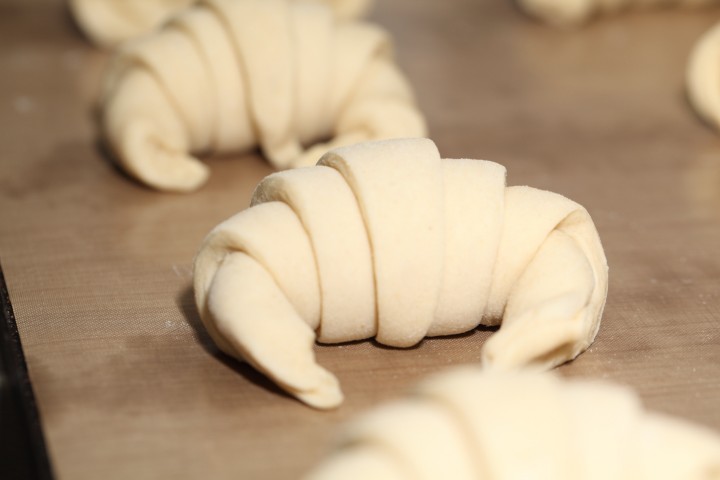
Using your pizza wheel, make 1.5 cm long notches in the center of the short side of each dough triangle.
Now very gently elongate each triangle to about 25 cm. This is often done by hand, but we have found that elongating with a rolling pin, very carefully, almost without putting pressure on the dough triangle, works better for us. You can try both methods and see what you think gives the best result.
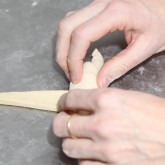
After you cut a notch in the middle of the short end of the triangle, try and roll the two wings by moving your hands outwards from the center, creating the desired shape with a thinner, longer point. Also try and roll the dough very tightly at the beginning and put enough pressure on the dough to make the layers stick together (but not so much as to damage the layers of course).

Proofing and baking
Arrange the shaped croissants on baking sheets, making sure to keep enough space between them so they will not touch when proofing and baking. Combine the egg with a teaspoon of water and whisk until smooth. Give the croissants their first thin coating of egg wash. You do not need to cover the croissants with anything, the egg wash will prevent the dough from drying out.
Proof the croissants draft-free at an ideal temperature of 24ºC to 26.5ºC / 76ºF to 79ºF (above that temperature there is a big chance butter will leak out!). We use our small Rofco B20 stone oven as a croissant proofing cabinet by preheating it for a minute to 25ºC / 77ºF. It retains this temperature for a long time because of the oven stones and isolation. The proofing should take about 2 hours. You should be able to tell if they are ready by carefully shaking the baking sheet and see if the croissants slightly wiggle. You should also be able to see the layers of dough when looking at your croissants from the side.
Preheat the oven at 200ºC / 390ºF convection or 220ºC / 430ºF conventional oven.

Right before baking, give the croissants their second thin coat of egg wash. We bake the croissants in our big convection oven for 6 minutes at 195ºC / 385ºF, then lowering the temperature to 165ºC / 330ºF, and bake them for another 9 minutes. Hamelman suggest baking the croissants for 18 to 20 minutes at 200ºC / 390ºF , turning your oven down a notch if you think the browning goes too quickly. But you really have to learn from experience and by baking several batches what the ideal time and temperature is for your own oven. Take out of the oven, leave for a few minutes on the baking sheet, then transfer to a cooling rack.
Latest way of baking; We heat up our double fan big convection oven at 200ºC, when heated up put the croissants in the oven and directly lower it to 175ºC. We bake them for 10 minutes at 175ºC, they will have a nice brown color by now, then lower the temperature to 150ºC, and bake them for another 6 minutes.
Best eaten while warm and fresh of course. Croissant we don’t eat or share within a day we freeze. We put them in the preheated oven (180ºC / 355ºF) for 8 minutes straight from the freezer. Nothing wrong with that, croissants eaten nice and warm, almost as good as the fresh ones…almost!
Croissant Time Table
Times are an indication and also depend on your experience with the recipe
Try to work swift but precise and take extra fridge time if needed!
Day 1 – Make initial dough
- 21.00 h – Knead for 3 minutes and store in fridge for 12 hours
Day 2 – Laminate the dough
- 09.00 h – Make butter slab and refrigerate till needed
- 09.05 h – Roll dough disc into square
- 09.10 h – Seal butter in dough
- 09.15 h – Roll out to 20 cm x 60 cm and fold
- Refrigerate 30 minutes
- 09.50 h – Rotate 90 degrees
- Roll out to 20 cm x 60 cm and fold
- Refrigerate 30 minutes
- 10.25 h – Rotate 90 degrees
- Roll out to 20 cm x 60 cm and fold
- 11.00 h – Refrigerate until day 3
Day 3 – Dividing, Shaping, proofing and baking
- 09.00 h – Roll out to 20 cm x 110 cm – part 1
- 09.05 h – Often needed! Take 20 min. fridge time if length not in one go
- 09.25 h – Roll out to 20 cm x 110 cm – part 2
- 09.30 h – Divide and shape the croissants
- 09.40 h – First coat of egg wash
- 09.45 h – Proof to perfection (indication 2 hours)
- 11.45 h – Second coat of egg wash
- 11.50 h – Bake for 15-18 minutes
- 12.10 h – Ready!










Kristin says
The only problem I encountered was the dough being too wide at the end and my dough tore and rippled in one spot. Any tips on where I went wrong?
Bob says
I’m a newby so but, this second time around when i rolled, i pushed the dough out (trying to copy the videos i’ve seen of the pros) rather than down and forward and it helped in not widening the dough compared to my first try.
Weekend Bakers says
Hi Kristin,
You probably pushed too hard / pressed too hard on the dough causing the rippling and widening. Try to gently elongate without pressing down too much.
Juliette says
Hi
This is the best crossiant recipe ever! Thank you so much. Can you help me though? How do I make chocolate croissants? I’m not sure at which stage to put the chocolate?
Thank you
BRENDAN says
At work, in a local bakery, we add the chocolate just before the “rolling up” stage. Put a few pieces in the centre third of the triangle, and roll al normal. We use rectangles for our choc danishes, and we have specific ‘stick’ chocolate: sticks that are about 5cm long, 1cm wide, and about 2mm thick. Three sticks in the centre followed by a letter-fold. For cheese and bacon, we line up all the triangles and sprinkle evenly with c&b, so I’d assume doing the same with choc-chips would yield a similar result.
Either way, the best time to add additional ingredients like choc, c&b, etc, without making plain croissants and adding them on request, is just before the finql shaping. You can also add a little c&b on top of the croissant after egg-wash but BEFORE prooving, but I don’t recommend doing this with choc as it’ll most likely burn.
Hope this helps.
Weekend Bakers says
Thank you Brendan for your excellent advice and sharing your experience!
Colin Stott says
This has got to be the most comprehensive instruction manual for making Croissants. I am on Day 2 and everything seems to be going well. Thank you so much.
Weekend Bakers says
Thank you Colin, hope all turned out well and you enjoyed the process!
Elisha says
Hello,
What would your recommended oven temp be if using a commercial combi steam oven?
Weekend Bakers says
Hi Elisha,
We cannot really advice you based on experience, we never use steam baking croissants.
Hope you can find out or start at a good point based on your own experience with other bakes in your oven.
Good luck with it!
Suhasini says
Can we make croissants Vegan ? Any tips! Thanks
Weekend Bakers says
Hi Suhasini,
We do not have the experience ourselves, but we are sure if you google the subject someone will have attempted to make vegan croissants. If you have vegan butter, you could give it a try and maybe brush the croissants with coconut oil instead of the egg wash.
Hope it will be a success!
Lawrence says
Just tried my first attempt using tartine and they were a bit doughy in the middle with not enough layers, but like the detail in your instructions thank you.
One question could you par- bake them and then freeze ? At what stage would you do this ?
Weekend Bakers says
Hi Lawrence,
We never par-bake croissants. We bake them and freeze them and give them 5 to 7 minutes in the oven and they are as good as fresh that way. It is tricky to par-bake because they need to stabilize or the interior will collapse, so you should at least bake them 2/3 of the way. We do have some tips on freezing (and retarding) unbaked croissants found at the bottom of the one day version of our recipe :
www.weekendbakery.com/posts…nt-recipe/
Enjoy the pastry baking!
Emilie says
Very good explanation! Can I please ask, what could be the reason that I still see bits of butter on my third fold?
The first time I did it it happened so I decided on a 4th fold, big mistake!
Thanks!
Weekend Bakers says
Hi Emilie,
Thank you. Can you explain what you mean by this exactly? Did the butter break up in pieces, are they visible through the dough?
And yes, you should stick to the 3 turns.
BRENDAN says
As a professional baker and pastry chef, I believe two things could cause this problem.
1- You were too rough with your rolling. If you’re too hard on the dough with your pin, you can cause the butter to bleed through the layer of dough surrounding it.
2- You didn’t knead the dough enough. When kneading dough for croissant, a fool-proof way to tell it’s ready is to pull off a small pinch of dough and gently strech it out. If it becomes thin and transparent without tearing, it’s good to go. Kneading dough causes strands of gluten to form, which gives the dough elasticity, and creates a tighter crumb in your product. Look at the difference between a scone and a loaf of bread, for instance: Scone dough is only mixed together until the ingredients are incorporated, actively avoiding the formation of gluten, which in turn gives a very short, crumbly product, whereas bread dough is thoroughly kneaded, giving what you kniw as the texture if bread. If the dough for your croissants was underkneaded, it would’ve had a very hard time stretching whike being rolled out. Rather than stretching, it would’ve torn in order to comoensate for the extra length. The thinner the layer, the more easily it’ll tear, which is most likely why you saw it happen after the second fold rather than the first.
Hope this helps.
Weekend Bakers says
Just to add to your excellent comment. We aim for moderate gluten development with this recipe. You do not want too much gluten development because you will struggle with the dough fighting back during laminating. It is a combination of the right flour and the right amount of kneading to get a dough that handles well. This can take a bit of trial and error / practice before getting it right.
John Doe says
how many steps are there
Rosanne says
I mixed my dough yesterday from a favorite recipe from the 1970’s. I came across your site as I was waiting for them to proof before baking. I need to convert oven temps. I am using convection so your suggestions are great!
Weekend Bakers says
Thank you very much Rosanne and enjoy your ‘retro’ baking, old favorites can be the best and most enjoyable bakes!
Dorothy Ferrigno says
I found your website by looking for conversion charts. It is the best find.
I hope I can convert all measurements to English.
Your pastries are outstanding, the best that I have seen.
I collect cookbooks, so I hope you have written one for sale.
Thank you!
Dorothy
Weekend Bakers says
Hello Dorothy,
Thank you very much for your very kind comment. We have no book of our own to offer. It would be interesting and fun to do but if we did ever make one, we would want it to be a book that contributes something extra and not ‘more of the same’ , which is hard to do of course looking at the many, many baking books already produced.
Greetings from Holland and enjoy your baking and reading,
Ed & Marieke
Sonia says
Made the dough last night and just finished the laminating process. Can’t wait to try them tomorrow!
Weekend Bakers says
Did they turn out like you hoped Sonia?
Sonia says
They are fantastic! Let’s just say I ended up making another batch on the same weekend because they are so good. I had bought 2 different types of butter that are 82% fat to see which I preferred but they are both great (President and Lactantia European Style).
Needless to say, I’ve been making them regularly since and I’ve been experimenting with fillings, chocolate, almond and now going to try a traditional Portuguese favourite sweet egg filling.
I’m ready to try the same day croissant recipe now.
I’m so happy that my passion for baking has been re-sparked, I’m a pastry chef but have been solely doing cake decorating for the past 5 years and it’s really getting boring.
I’m also on day 5 of a sourdough starter so I can try your tartine recipe. I’m so excited!
Thanks so much for all the great recipes.
Weekend Bakers says
Wonderful! If we were not enthusiastic about baking (and pastry!) already your words would convert us 🙂
Thank you so much and enjoy the baking and experimenting with fillings.
Ed & Marieke
kelly says
If I change instant yeast to natural yeast, how to measure the ingredient? Is it no good for taking more time to proof, and difficult to keep butter solid?
Thanks
Weekend Bakers says
Hi Kelly,
If you mean sourdough we would really recommend finding a recipe that is already a worked out version for sourdough croissants. We are not really a fan of the sour taste in pastry so we have very little experience with this and cannot confidently advice you how to change our recipe into a natural yeast version with good result.
You are right longer resting and proofing times are needed and we know it is even more of a challenge to make a good croissant this way, but of course it can be done.
Good luck with it and happy croissant baking!
Elly says
So thankful for these directions and tips. The croissants turned out amazing! Well worth the effort. We made 1/3 batch w/bittersweet chocolate, 1/3 w/ham-gruyere, 1/3 plain butter.
Weekend Bakers says
Thank you for sharing and very happy about your results Elly, sounds delicious!
Karina says
Very yummy!
Mona Wahlstrom says
I just love this croissants recipe and the fantastic way you explane how to do it in video text and picture. I startet to bake them two years ago. Cannot believe my own eyes when I see the result. As you say, it is necesary to pracsis, and allways remember to do it in cold temperature. Not so difficult when I live in Norway.
Mona Wahlstrøm
Weekend Bakers says
Thank you so much Mona. Beautiful Norway and baking croissants, we love both!
jimmy david says
thank u.Very good explanations. I will surely give my first try on Tue 14.03.17
regards
Jimmy
Weekend Bakers says
Let us know how it goes Jimmy! Always love to hear about results.
Sara Perry says
Excellent explanation,
can you suggest for the whole process a time table?
Thank you
Weekend Bakers says
We will add a timetable to the recipe soon. Thank you Sara!
Weekend Bakers says
We added the time table to the recipe (finally 🙂
We also will be posting a frequently asked questions topic to our site tomorrow.
Greetings,
Ed & Marieke
PY says
thanks for your very informative process. I shall muster the courage to try a second time after failing terribly at the first (different recipe and formula). since the idea is to prevent the butter from melting into the dough, wouldn’t this happen then the croissants are shaped and doing its final proof? so how does that work…i’m a bit confused at this last stage.
JL says
The butter does indeed soften during the proofing process, but not to the point in which it is liquified. You want the layers of butter to stay intact so that the dough still creates the flakey layers. Melting the butter would mean that the butter would pool at the bottom of the dough and escape from the layers you created during the laminating process.
Weekend Bakers says
Thanks JL for your addition.
Yes the butter stays intact if you make sure to stick to the mentioned proofing temps in the recipe.
Candy says
Hi there, I am going to try out this awesome recipe but I just have a quick question. What would you recommend if I can not bake off all croissant at once and I want to keep them for the following days and bake them fresh before serving?
Many thanks!
Candy
Weekend Bakers says
Hi Candy,
Check out our tips for retarding and freezing with the one day version of our croissant recipe: www.weekendbakery.com/posts…nt-recipe/
You can always find a way to adjust the recipe to fit your schedule.
Happy croissant baking!
Marieke & Ed
Ogi the Yogi says
I did it, I made croissants. I made the three day recipe and it turned out splendidly. The results exceeded any of my expectations, I was so terrified of making croissants. This was my first attempt and somehow somehow they turned out picture perfect and tasted absolutely wonderful, I used Plugra butter. I have a lot more experience baking bread sourdough and rye, which seemed miles away from something so delicate and precise as croissants! Anyway thank you so much for this recipe, it is definitely a keeper. The croissants tasted exactly as they would in a French bakery in France!
Weekend Bakers says
Dear Ogi,
Excellent! This is not just our recipe but surely also your experience with bread baking and your natural skills, leading to such fine results for your first bake. Great feeling when things turn out so well and as reward you get to eat something that tasted so delicious .
May we also suggest our one day version of this recipe for you with some tips on retarding and freezing (might come in handy): www.weekendbakery.com/posts…nt-recipe/
Many happy baking hours and tasty pastry!
Greetings,
Ed & Marieke
Tammy says
Hello Marieke & Ed,
I finally nailed it! With the weird weather in Melbourne (summer but below 20 degs last few days), it was just perfect for croissants baking and I just love using your recipe. I have become so comfortable with it that know your recipe by heart and I didn’t really use a timer now but constantly checking on the croissants when they were in the oven (like you kindly advised that each oven ‘behaves’ differently – I set mine at 190degs with fan force). Thanks for your generosity in sharing your recipe and took the trouble to guide us step by step on the whole process – highly appreciated.
Also, I experiemented with bicolored croissants using your recipe with my Malaysian culture – took out 1/4 of the dough and added pandan (screw pine leaves) paste into it. I also added some coconut filling inside. Everything looked so promising before baking (except that the 1/4 dough is not enough to cover the whole rolled up dough of 20x110cm) until I baked them. The emerald green coloured part has turned slightly brownish and inside is not well cooked even after 15 mins. I am pretty sure it was because of the oven temperature but I could be wrong. However, it tasted yummy though.
Nevertheless, just want to drop by and say again Thank You and also, wanted to comment that haters are our motivators ;).
Cheers,
Tammy
Weekend Bakers says
Thank you so much Tammy! For sharing your results and experimenting enthusiasm and for positivism.
We love it you used pandan (because of our connection with Indonesia here in Holland we do know steamed pandan cake with the lovely green color and light texture, but a lot of cake sold at markets will probably be with artificial coloring and not real pandan leaves. Of course it is not easy for us to find them over here). So great you tried this bicolor version. We have not tried this ourselves yet we have to say, but we are sure with some tweaking your results will get even better.
If possible we would love to see some results in the form of pictures sometime, if this would be possible. You can always share your bakes in yourloaves section: www.weekendbakery.com/send-…your-loaf/
Keep up the excellent baking and enjoy every minute of it!
Greetings from Holland,
Ed & Marieke
Weekend Bakery
Tammy says
Hi both,
I shared some photos of the good, bad and ugly croissants into the link you have sent above. Feel free to give me some feedback :).
Cheers,
Tammy
Sylvia Bennewies says
Hi there,
I made your croissants about 10 times,and wow,they are just sooooo delicious! Hard to believe,that there is a recipe for french croissants,better than the ones you buy!! I always thought,I can not make them with just basic ingredients,and I love and do baking,especially artisan breads for years. Thank you so much for this recipe and the whole process from the start to the end result. you rock!!!
Sylvia Bennewies says
Ps. I forgot to mention. I am from Switzerland and yes,you are right,we always love to get feedback for our spelling and the way we put our sentences together.But I think,we should be proud of what we do. Have a great weekend.
Weekend Bakers says
Thank you so much Sylvia, could not agree with you more about the basic ingredients and getting such wonderful results. We can still get very enthusiastic about it all.
Wishing you many enjoyable baking hours making loaves and croissants!
Greetings from the low countries,
Ed & Marieke
Chathurika says
Hi weekend bakery, I followed the steps and tips exactly the way you mentioned and I’m really happy even I’m new to baking it came out really nice. Thank you so much for the generous information. Keep up the good work!
Weekend Bakers says
Thank you so much for your enthusiastic comment Chathurika.
Good results inevitably lead to more baking! Enjoy 🙂
John Kaufman says
Clean up your copy writing. Put commas (,) and hyphens (-) where they belong. It doesn’t read right as it is.
JoLynn says
While I always appreciate a fellow grammar Nazi, I don’t think they were professing to have a collegiate level mastery of proper technical formatting. Also, if you are going to attempt to criticize someone else’s use of the English language, you should first ensure that yours is flawless.
I appreciate that you have a better comprehension of the English language than most, but perhaps don’t throw stones from your glass house.
Weekend Bakers says
Thank you very much. English is not our native language, but we always aim to improve. In the meantime we still hope to inspire people with our recipes and tips, wherever they bake.
Thank you JoLynn for sticking up for us.
Maria murphy says
My crossiant dough does not seem to be rising over night in the fridge?
Weekend Bakers says
Hi Maria,
Check if your yeast is working properly (otherwise buy new) and it could be your fridge is very cold and the yeast does nothing for that reason. You can judge from our pictures and the video what our dough looks like at any stage. Maybe you can let your dough ‘get up to speed’ for one or two hours before placing it in the fridge overnight, so shorten the fridge time.
Good luck with it!
Simon says
On the final roll out of the dough when its 110cm x 20cm , just before cutting out the croissants… what sort of thickness should the dough be..? To get it this size my dough was very thin and the resulting croissants thin and limp… not even close to your ones photographed….what am I doing wrong??
Simon
Weekend Bakers says
Hi Simon,
It is hard for us to guess what went wrong for you. Sticking to the recipe and the amounts mentioned should result in the right thickness of the dough (we would say it is around the 4 mm mark). Are you sure you did not change anything in the recipe, because otherwise we would not know.
Bosley Patch says
Love working with your recipes and appreciate all the hard work you put into the trials, its saved me a lot of time and ££££ s of ingredients in failures !!
Would you advise not to do these in a deck oven ? (Rofco) and if you did would you change the bake times? Ive always resisted trying crioissants ,, seems too much of a mission, however.. the time has come to give it a go!
Weekend Bakers says
Hi Bosley,
You say you want to try and bake the croissants in the Rofco. We do not do that, because we have the big convection oven that works so well for us and for that reason we cannot really advice you on settings for the Rofco. We do know one other baker who used to bake them in the Rofco and know that to get them perfect he adjusted the oven multiple times. But each Rofco is different too we know, so we would just start at what would seem the obvious temp for you and turn down as soon as you like the color.
Sorry we cannot be of more help on this. Good luck with it!
Eben says
Well I always use 160°c in a Combimaster for 20 minutes, it comes out great!
Weekend Bakers says
Thanks Eben
Jenna says
The only type of flour I can find is French 45 type flour. Will that work?
Jenna says
Also, if I may ask, why do we have to wait overnight to do the final rolling and shaping? Can they sit in the fridge for at least 5 hours and then can we roll and shape?
Weekend Bakers says
Hello Jenna,
Yes you can use the type 45 for this recipe. The overnight schedule is done for the right planning of the whole process so you can make your croissants on the third day in the morning, but of course you can take less time if this fits your timing better. Take a look at our one day version of this recipe too: www.weekendbakery.com/posts…nt-recipe/
Rubi says
I need to work on the rolling out process a bit more, and a little more on my technique, but my croissants turned out beautifully otherwise. Thank you for this great recipe.
Weekend Bakers says
Thanks Rubi. With each bake you will gain more experience and improve and in the meantime you will already eat excellent croissants!
Anna says
These turned out amazing! They had both a great rise and crumb, and just need to be rolled tighter next time. I wasn’t expecting such results. Thanks so much for the detailed information.
Weekend Bakers says
Hi Anna,
Thanks for the happy comment, that sounds excellent!
Andrew says
I have tried the recipe and everything went totally fine until i baked them, then they started tearing at the top when baking. What could be the cause of this? and how would i prevent this in the future?
Weekend Bakers says
Hi Andrew,
We must honestly say we do not really have an answer for you (we have not seen this happening ourselves) except maybe the croissants where under-proofed when they went into the oven. So next time try and proof them a bit longer.
Good luck with it.
Andrew says
Thank you for the feedback i will try this in the future, I was also wondering if the reason might be that the dough was to thin at the top.
Weekend Bakers says
We can say that an even thickness of the dough would indeed play a part in the end result. We do not know how thin your dough was at the top for it to result in tearing (the last tip being thinner would not make a big difference, but if the whole top layer is thinner, that would be something to avoid)
It is important to work really precise and proof to perfection for the best result, because one small mistake is no problem but several small mistakes add up to a not so good end result.
Enjoy the process and happy baking!
Tammy says
Dear Weekend Bakers,
**I copied and pasted here again on this post as I replied (on Ferb 4th) to my earlier post dated in Jan.**
Just baked some croissants using your wonderful recipe. These three days of preparing it were filled with excitement, worries and happiness (i was actually smiling as I rolled the dough, don’t worry i am not crazy) – it’s so therapeutic.
The results were good – quite flaky and buttery with a nice honeycomb-pattern inside.
I have a few questions though to improve my methods.
1. I followed your recipe to the T however during baking, the croissants did not puff up as much as I hope it will be. Could it be that I did not proof it to the max? I proofed them for a good 3 hours in draft-free oven until i quickly prepared for baking (as the temperature went up to 26degs inside the oven – thanks to Melbourne’s weather today it’s 36 degs here!). Could it be that it did not proof to the max? I did the jiggle test though and it wobbled nicely.
2. Also, I realized that the bottom tray did not flake much as the top tray – I have the same 2 fans convection oven as yours and using your latest oven temp as mentioned. What could be the culprit?
Nevertheless, many thanks for your step by step guide and video. I enjoyed myself tremendously when making this and will not stop myself until i get the perfect ones :).
Out of curiosity, would you happen to have some tips on how to make the bi-colored versions?
Thanks and with love from down under,
Tammy
Weekend Bakers says
Hi Tammy,
You just need a few rounds to figure out where that sweet spot of perfect proofing is. Sounds like you did amazing already this time, so no worries.
You can also try different flour, which can make a real difference and it would be good (if you do not know it already) to check the true temperature of your oven and see if any adjustments need to be made there. See our tips on the subject: www.weekendbakery.com/posts…your-oven/
We have never tried the bi-colored version…but intrigued to hear about your result if you do make them…
Happy croissant baking from Holland
Emilio says
I’m really excited to make this recipe, but I don’t have a stove oven. Is it possible to get around proofing at exactly 77 degrees during the last day?
Weekend Bakers says
Hi Emilio,
We do not know if you have a way to measure the temperature. The most important thing is not to go over 77 to 79 F because then butter can leak out.
See our tips on dough temp here and what tool we use to measure: www.weekendbakery.com/posts…mperature/
rita says
Hello) would you tell me please if I want to reduce amount of ingredients to make half portion of croissants, should I also diminish the sizes of rectangles of dough and butter in half, for example for 250 grams of flour should I make a 9X9 cm square of butter and 13X13 cm square of dough on second day?
Weekend Bakers says
Hi Rita,
If you halve the recipe, the dough should be 18.4 x 18.4 cm and the butter slab 12 x 12. Same for the laminated dough, you should only make one side shorter otherwise you get a quarter of the original), so end up with a 20 x 30 rectangle. And for the size of the final dough right before cutting for the half recipe it should be 20 x 55.
Happy baking!