

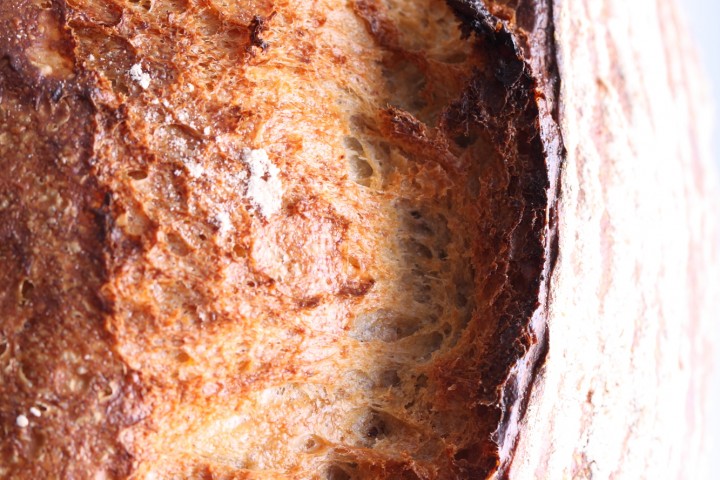
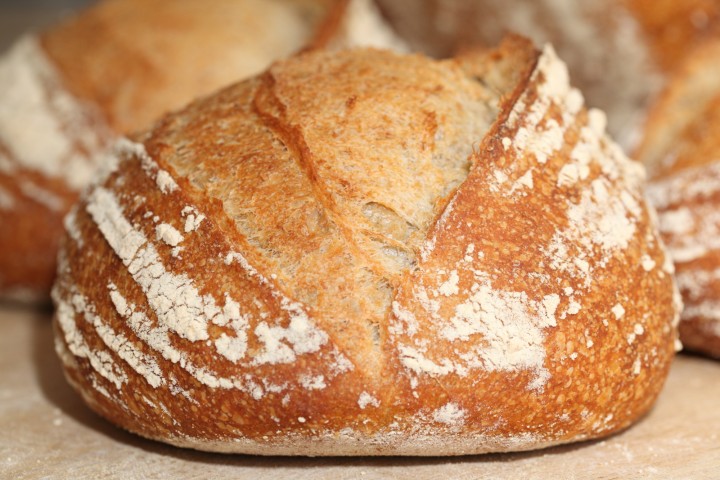
This Pain Rustique has become our daily bread
Klik hier voor de Nederlandse versie
After baking hundreds of pains rustiques you could say this recipe of our version of this rustic bread has been tweaked to the max. Of course the tweaking has been done to accommodate our equipment and ingredients and above all our taste. And I believe that the end result also has a lot to do with the hands of the maker (watch Ed’s hands at work making Pain Rustique). Give six people the same recipe and they all come up with very different loaves. So like with all other recipes, you have to make this one your own. But I believe this recipe can be a good starting point.
The recipe is very loosely based on Hamelman’s Pain Rustique but can actually be seen as a hybrid, sometimes also called ‘levain-levure’. It has sourdough in the preferment and yeast in the final dough. This way you get the best of both worlds: the extra flavor of the sourdough and the ‘speed advantage’ of a yeast based bread. Another point of difference is the shaping. Pain rustique usually has no preshaping or final shaping. Our version does have shaping and the final fermentation is done in bannetons.


For this recipe we are going to make a starter named a poolish. A poolish is a type of wet sponge usually made with an equal weight of water and flour and an extremely small amount of yeast or sourdough culture and NO salt. Making a poolish helps bring more taste and strength to your bread while using less yeast.
Note: We use European flour which absorbs a few % less water than American type flour. People using this type of flour should add 3-8 ml water to the final dough. If you dare, you can actually make the dough a few percentages wetter to get bigger ‘holes’ in your crumb. We lowered the amount of water in this recipe to make the dough easier to handle. Currently we are baking this recipe with about 67.5% hydration; so we use 80g water per loaf in the final dough.
Making the poolish
In a bowl stir together 180 grams of bread flour, 45 grams of whole wheat flour with 225 grams of water at room temperature with 10 grams of sourdough culture. Mix it well until you have a homogeneous slurry that looks like very thick batter. Cover the bowl with clingfilm and let the prefermenting begin. After 12 hours at room temperature it is ready for use. So if you want to begin your bread making in the morning, you make your poolish at 9 in the evening.
Our sourdough starter is not very sour by nature, it gives a very mellow sour note to the bread and we like it that way. We have found that the sourness depends on the ripeness of the poolish. This means that using an under-ripe poolish gives you the flavor advantages but not the added sourness. We tend to use the poolish before they peak out and collapse. When this points is reached all depends on ambient temperature and sourdough culture activity. An over-ripe poolish has a weaker gluten structure which will result in a weaker dough and less oven spring.
We use a sourdough culture which is made with 100% whole grain rye flour. A sourdough culture based on rye flour is easier to maintain, it does not go into a slurry when you forget about it, it is easier to stir because it has almost no gluten and it smells very very nice, a bit like fruit. It is also very forgiving in the amount you feed it. Normally we only feed it once a week, after the weekend baking, we just give it a few table spoons of water and rye flour, stir and ready!
If you want to make more than one loaf, just double or triple or quadruple the ingredients. We usually make 6 in one batch. That’s the maximum our bread mixer can handle.
| Ingredients for the poolish | ||||
|---|---|---|---|---|
| 180 | g | wheat (bread) flour | ||
| 45 | g | whole wheat flour | ||
| 225 | g | water (room temperature) | ||
| 10 | g | sourdough culture | ||
| Ingredients for the pain rustique | ||||
|---|---|---|---|---|
| makes 1 loaf | ||||
| the poolish from step 1 | ||||
| 225 | g | wheat (bread) flour | ||
| 70 | g | water | ||
| 7.5 | g | (sea) salt | ||
| 2.3 | g | instant yeast | ||
Making the loaf
Preheat your oven to 235 ºC / 455 ºF conventional setting (at what stage you preheat your oven depends on how long it takes for your oven to heat through, some take 30 minutes, some, like ours, with stone floors take a lot longer, up to two hours. The preparation time from this point until the bread actually goes into the oven is a little under 2.5 hours.
Ideally the temperature of your dough after mixing should be around 24-25 ºC / 75ºF. You should adjust the temperature of the water you add to reach this temperature of the total dough. For us this means in summer adding cold water to this recipe and in winter (when our little bakery can get much colder then the rest of our house) adding water up to 50ºC /122 F. You can measure the temperature of water and dough with a food thermometer. These measurements are important because they correspond with the proving times in the recipe.
Put the poolish starter and flour (no salt and yeast yet!) in the mixing bowl of your standing mixer and add 2/3 of the water. Now start mixing and gradually add the rest of the water and let the dough come together. Knead for only 1 minute until you have a shaggy mass (as Hamelman calls it). Leave it in your mixing bowl, cover and rest for 30 minutes. This process is called ‘autolyse’.

After the autolyse phase you now add the yeast and the salt and knead the mass for another 5 minutes (we use a spiral mixer for this job) and watch it turn into something a little bit more bread doughy. Cover and leave to rest for 40 minutes.
Take the dough out of the bowl and onto a floured work surface and do one stretch and fold (a full letter fold, left over right, right over left, bottom over top, top over bottom; see our bread movies to observe this technique if you are not familiar with it). Transfer to the bowl, cover and again leave to rest for 25 minutes.
Repeat the stretch and fold (full letter fold) part one more time (so 2 times in total) and again leave to rest for 25 minutes.
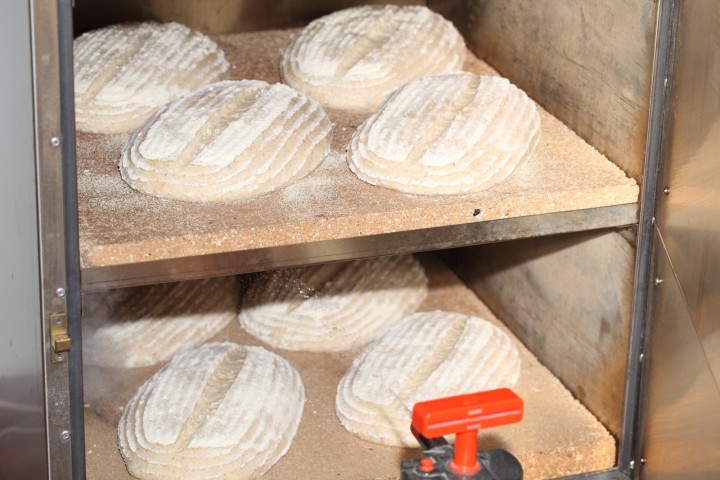
Now it’s time to shape. Shaping is a tricky subject. It’s something for which everybody develops his or her own technique over time. You can make a batard or loaf shape or a boule (ball). If necessary you can learn more on shaping from a good bread book, like the ones by Hamelman or Reinhart. We usually make batard shaped (oval) pains rustiques and use proving baskets/bannetons made of wicker.
Transfer the shaped dough in a proofing basket or baking pan, cover and leave to proof for 30 minutes. When you think it has risen enough, use your finger to carefully make a very small dent in the dough. If the dent remains, the bread is ready to bake, if the indentation disappears, the dough needs a little bit more time.
Now your loaf is ready for the oven. Slash the top of the loaf with a lame or bread scoring knife. To get a nice crust, try to create some steam in your oven by putting a small metal baking tray on your oven floor when you preheat the oven and pouring in half a cup of hot water immediately after putting the bread in the oven. Release some steam by setting your oven door ajar (perhaps with the help of a wooden spoon or oven mitt) 5 minutes before the bread is ready. If you are going to create steam with a baking tray, you maybe also want to turn your oven temperature a bit higher, because you are going to lose some heat in the process. During the baking process, as soon as the crust has the desired browning or you think the browning is going too fast, you can lower your oven temperature for the remainder of the baking time. Also check during baking, if your bread crust has the desired color or your loaf is very close to a heating element you can always temper your oven temperature during the baking process.
After 45 minutes of baking your loaf should be ready. Transfer onto a rack and leave to cool. This loaf also keeps very well in the freezer. But please make sure to eat at least some of it while fresh!
Pain rustique time table
day 1 21.00 h Make starter let ferment for 12 hours at room temperature
day 2 09.00 h Make final dough
- 09:00 h – Add flour and water to starter, mix for 1 minute
- 30 minutes autolyse
- 09:30 h – Add salt and yeast
- Knead for 5 minutes
- Rest for 40 minutes
- 10:15 h – First stretch and fold
- Rest for 25 minutes
- 10:40 h – Second stretch and fold
- Rest for 25 minutes
- 11:05 h – Shape
- 11:10 h Final proofing 30 minutes
- 11:40 h – Bake for 45 minutes at 235ºC / 455ºF
- 12:25 h – Your loaf is ready!
Note: If you like this type of hybrid method bread also check out the recipe for our Fluitje with Spelt


BEVERLY WOOD says
Ohmy..I am an amateur bread baker and new to letting sourdough starter alone rise and shape my bread. I live in SWFlorida and the humidity combined with the heat makes from scratch sourdough baking tricky if one does not have prior experience baking sourdough in less difficult climates. Thank you so much for this recipe using yeast. I made my first delicious loaf of perfect sourdough using this recipe and all the hints and tips were a great benefit. And if you ever can address the way differing climates effect from scratch sourdough bread making and how to overcome the challanges created by natural humidity and temperature issues I will be the first to read it!!! Once again..thanks!
Weekend Bakers says
Hi Beverly,
Thank you for sharing your experience with us. Sounds like a wonderful result. Maybe you could give our pain naturel all sourdough loaf a chance too and see how that goes: www.weekendbakery.com/posts…n-naturel/
Thanks for the tip about doing a piece on humidity. If you have not seen it yest, maybe there are already some helpful tips for you here: www.weekendbakery.com/posts…mperature/
Happy baking in Florida!
Mark says
Hi
Fantastic website – love the clear, detailed recipes and videos.
I made a pain rustique last week and it turned out wonderfully. The only deviation from your recipe was that I baked the loaf in my ‘Le cloche’ with the lid on for 30 mins and the lid off for 10 mins.
Looking forward to trying more of your recipes.
Many thanks
Weekend Bakers says
Hi Mark,
Thank you for the excellent feedback. We once had a ‘Le cloche’ but sadly the dome part broke. before that it gave good results.
Wishing you many more crusty loaves!
greetings from Holland,
Ed & Marieke
Sari says
By far the best homemade bread I have ever made! Also the first one with the sour dough culture. I am absolutely amazed about the result and feel so professional.
Thank you so much for this recipe and the whole site, which is very inspiring!
Weekend Bakers says
Hello Sari,
Thank you so much for letting us know about your experience with our recipe. Sounds absolutely wonderful.
Happy baking and sharing,
Ed & Marieke
Hazel tan says
I am eternally grateful. You have just busted the myth that gd and airy crumbs will need a very hard to handle high hydration dough, plus hardship kneading and long fermenting. I made a great bread with gd crumbs with minimum effort !
Weekend Bakers says
Hi Hazel,
So glad you like it, the bread and the method. Thank you for your excellent feedback!
Mette Celius says
Greetings from Norway ;D
This is an amazing bread! I made it with a poolish I had already made from one of Peter Reinharts recipes, and weighed up an amount what I thought equal to the weight of this one. Just slightly off I adjusted with more whole wheat flour till the dough seemed “right”. I also baked it in a castiron pot with lid on, both crust and crumb was amazing ;D
Cannot wait to try your recipe to see if the result is as great as this. Thank you so much for an amazing recipe!
Weekend Bakers says
Hello Mette,
Greetings from Holland.
That sounds wonderful. Hope you wrote down the specifics, so you can recreate this bread!
The cast iron pot gives such good results, creating an ‘oven in an oven’ it is one of the best inventions to get bread with excellent crust and crumb form the household oven, trapping the steam and retaining the heat.
Hope our recipe will yield equal good results.
Lots of loaves,
Ed & Marieke
Ichiro says
Can I Shape the dough, put in the banneton basket and retard in the fridge over night?
If i do so, on the next day, do i need to bring dough to room temperature before baking? Or i can just bake it straight from the fridge?
Weekend Bakers says
Yes you can. You just need to make sure the dough is proofed to perfection when you take it to the oven. So after taking it out of the fridge check if it needs some extra time to proof at room temp.
Ichiro says
Hi!
You mentioned that you used flour that are close to french flour, what is the highest hydration have tried making bread with french flour T65?
I’m using grand moulin de paris campaillette, the final dough would be very slacky when hydration is above 65%, do you encounter the same problem? Or there’s some method i missed out?
Cheers!
Weekend Bakers says
Hi Ichiro,
We made versions with higher hydration levels, but never over 70% for this loaf. Although we make small adjustments for each new bag of flour, we found that for this recipe the level of hydration close to 65% gives the best results. We assume your protein level is also enough (between 12 and 13% is OK) ? Otherwise you could add some extra gluten to give the dough extra strength.
Nanda says
Made this recipe today – thank you for teaching how to make bread. The dough was very wet (using Dutch flour from de Zandhaas) so I had to add about a half cup to get it a consistency that wasn’t overly wet (comparing it to the on in your bread movies). In the end the bread looked great when I took it out of the oven, it was about 98 C inside but seemed still a bit ‘raw’ inside. Put it back in the oven for another 10min. What temperature should it be inside? Also, it was lacking any good flavour, it was very bland. Is this loaf just a bit bland? Or would this have something to do with my starter? All in all a great looking loaf from the outside for the first time, but flavour and temperature inside not on point yet.
Weekend Bakers says
Hi Nanda,
Don’t know if you cut the bread while it was still very warm because it might look raw and you should always judge it when the bread has cooled completely. It is important to stick to the baking time (Combined with the right oven temp of course. Some ovens have big deviations when it comes to actual measured temperatures, see: www.weekendbakery.com/posts…your-oven/) So the inside temp of the bread is important but also the actual baking time so the inside structure of the loaf gets ‘set’.
We use the organic ‘tarwebloem’ from De Zandhaas together with organic whole wheat and this leads to a loaf with a complex and pleasant taste. We even did tests comparing this flour with other mills and taste testing with several people and De Zandhaas scored really well, see: www.weekendbakery.com/posts…ent-mills/
So, maybe you used another flour? Otherwise we cannot really account for it being bland.
Susan says
Hi Ed and mariekie,
I would like to try this recipe but need clarification on the SD culture to be used for making the poolish.
Does the SD culture need to be activated before I make the poolish or can I use my SD culture, which has been asleep/
inactive for a while, straight from the fridge? My rye SD starter has been in the fridge for about 4-5 weeks and is quite ‘still’.
Under your ‘Handy SD tips’, you mentioned that ‘… With this small amount of SD you create a fully active SD preferment
overnight which you can then use to build a final dough’.
It does not say whether the SD culture has to be first revived BEFORE it is used to make the poolish.
Can you please help.
Thanks.
Susan
Weekend Bakers says
Hello Susan,
You should refresh your sourdough culture the day before you are going to use it. Let it get active at room temperature and then use it in your preferment as stated in the recipe.
Make sure it is active again before using it. Normally, if kept in the fridge you should refresh it at least every three weeks, also when you are not baking and using it.
Good luck with it!
Susan says
Hi,
Thank you for clarification. I will discard and feed the day before using it to make the poolish.
Susan
sue e says
Thank you so much for the excellent information on your website. I’ve battled on for months now with sourdough much to my husband’s disgust. However, I came across the word ‘poolish’ – googled it and came up with your website. I’m delighted to say I made the best sourdough loaf yet! (Just need to work on a few more bubbles so may need to try your San Francisco recipe). I’ve also got a very promising poolish pizza in the oven so am well pleased.
Inspired by your articles, I’ve ordered the Jeffrey Hammelman book so can’t wait for that to arrive.
Happy New Year!
Weekend Bakers says
Hello Sue,
Thank you for your kind words! Hoping your husband is now less than disgusted and more of a fan of your bread. The book will be a great source for recipes and background info to understand the baking process.
Happy baking in 2016!
Laurène says
Hello,
This is my first time using my sourdough starter. I followed your recipe for a rye sourdough and after about 7 days and it tripling in size, I refrigerated it until I was ready to bake. I’m new to baking with a sourdough culture and figured this would be a good place to start.
I made my poolish using Organic King Arthur brand flour (whole wheat and I bleached white). This morning I found that the poolish was not at all aerated, although the consistency seemed correct.
I followed through with the recipe and once I added the flour and water in the mixer, after kneading the dough wasn’t at all shaggy, it had formed a ball.
For the folding, the dough seemed dry and didn’t stretch easily. I went through the steps regardless. For the final proofing, it didn’t seem to rise at all. I let it proof for a few extra minutes and put it in the oven. It came out ok, it puffed up a bit, but the bread is quite dense and not light and airy. The crust is nice, but maybe a bit hard.
I’m wondering what went wrong. I’m sure it has to do with my poolish. Once I had stored it in the fridge it shrunk considerably. Since taking the 10g out I’ve put back 10g, but it’s only doubled in size. I’m hesitant to put it back in the fridge now.
Could it have also been that my house was too cold? It was around 18C/67F today inside.
Any help would be great. I wanted to try out a bread before Christmas as I’ll be making it again in a few days.
Laurène says
So I’ve since tried again, this time the dough was wet abd sticky, it barely rose, and once again came out dense. I added some yeast to the poolish to avoid what happened last time in case it was a problem with my starter.
Is there anyone out there who has some advice?
Weekend Bakers says
Hello Laurène,
We think your culture is not active enough. The thing we suggest is to take a look at the flour you use for the culture, it must also be organic and maybe you should try whole rye like we do, in our opinion it works the best. Next to that your culture also has to mature and will get better as it gets older.
The cold temperature can also be a challenge. Try and let the poolish develop at a warmer room temperature of around 21C. Maybe consider a proofing box if temperatures are always so low in your house.
Hope this helps!
Ed & Marieke
kaisman says
isn’t it too short to make final proofing only 30 minutes?
another question- i have a teaspoon set for weight- how much is 2.3 g instant yeast- 1/2 teaspoon?
thanks in advance
Weekend Bakers says
Hello Kaisman,
When all the temperatures are correct, 30 minutes should be enough. Just test the bread like we describe above and if not yet ready give it another 10 to 15 minutes or maybe longer if needed depending on the temperature like we said. It’s a bit more than 1/2 teaspoon: You can find our conversions for yeast here: www.weekendbakery.com/cooki…nversions/
For these amounts we can really, really recommend buying a small scale – maybe a great gift from Santa which would make your baking life so much easier and your bakes wonderfully consistent 🙂
Happy baking!
Dorothy says
Hello.
I’m a professional baker in a small market in NY. We are planning on making our own bread for sandwiches, and I’m planning on using this pain rustique recipe. If I wanted to form this bread into individual, rectangular shaped loaves for sandwiches, what do you recommend for shaping? It’s a wet dough, so I have been having trouble getting a consistent size and shape. Do you have any recommendations for how to get consistent shapes and sizes for this recipe? I have been doing about 150 g per loaf, but the shaping is difficult.
Thanks for the great recipe! I love it.
Dorothy
Weekend Bakers says
Hi Dorothy,
When we make smaller versions of loaves like our pain rustique we either shape them into small boules or we shape them like short baguettes (called pistolets here) with two cuts and pointed ends. So you also shape like a baguette, fold to the middle, fold again, seal the seam and roll. Your weight of 150 g per roll sounds right. We make anything between 125 and 250 g.
Shaping will quickly get better with a few practice rounds.
Good luck with it and with all your activities and happy Holidays,
Ed & Marieke
garry says
Thank you, Thank you, Thank you,
I am 64 years young and have just move to Fiji from NZ. Fiji is a country of a white chemical thing called (Madrai) bread. I have spent the last five day from sunrise to sunset trying to find out how can I make real WW bread at home. I have never baked a muffin let alone bread so you can see how confused I was after looking at half a dozen web sites., what is Poolis? Is it for my goldfish? What a relief it was to my wife when I found Weekenbakery. Your name is a little misleading; you need to change your name to weekend bakery experts or Masters. I have deleted the dozen or so other bread? Sites off my browser bar and will stay with the Experts. God bless you all.
Weekend Bakers says
Wow Garry you make us blush. Thank you so much for your very kind words. So glad you have found us and like our recipes and tips. It must be a challenge, also with weather conditions and maybe supplies, to bake bread living on an island like Fiji. To us it sounds very exotic of course. We are in the middle of autumn here moving toward winter which means perfect baking weather.
Hope you will have a lot of fun discovering even more recipes and come to enjoy baking more and more like we do.
Happy baking & lots of loaves!
Ed & Marieke
Holland
Vince says
Hi there
Thanks again for this very informative website.
I just wanted to ask I be recently purchased a little spiral mixer ( dough capacity 10kg).
I wanted to try the pain rustique recipe but wanted to know whether I can do all ” the stretches and folds” in the revipe by switching on the spiral mixer for say 1 min or so.
A general question: can I use a spiral mixer for say 1 min for recipes that ask for a ‘street and fold’.
Regards
Vince
Weekend Bakers says
Hi, it is possible to replace the stretch & folds. However you end up with a bread with a different internal mouth feel and structure. The stretch and folds with intervals change the structure (to the better) of the bread. Give both methods a try and see what bread and method you like.
Rocky says
Just wanted to say how great your recipe is, I am making my third batch of pain rustique today. I followed the recipe very closely the first two times. With only minor adjustments, as I have no sourdough starter at the moment, I followed you instructions for a poolish with a small amount of yeast. I also noted my dough was stiffer than your videos and added a little more water.
It’s the by far best bread I have every baked. Thank you for sharing your knowledge and experience. I love the geekiness of the calculator. I hope to have a sourdough starter ready for the next batch and look forward to experimenting over time.
margie laughlin says
Are poolish & levain always interchangeable, if hydration is the same?
If my formula calls for 50% flour prefermented in a yeast poolish @ 100% hydration, can I replace this with the same amount of flour & water, plus sourdough starter?
Weekend Bakers says
Hi, not always, of course the sourdough give it a change in taste, but it also increases the proving times. And with longer proving times comes the need to bring more strength in your dough. A good recipe is a balance, you can not just swap one thing and expect the whole thing to work. So give it a try, see how it works, write down notes and adjust the next time you try it again. Happy baking!
Wendy says
A truly fabulous bread making method! I’ve been baking bread for many many years and the loaves I’ve baked using your clear and detailed instructions have been the best ever! (I’ve baked 3 loaves of the whole wheat levain and one pain rustique so far).
On one try, I added a quarter cup of ground flax seed to the levain, which gave it a nice moistness. And I find that in my convection oven, even with the temperature converted automatically to compensate for the convection, the baking times you suggest are too long. I am baking the loaves about 30 minutes and they come out beautifully.
Thank you so much for sharing your expertise so freely.
Weekend Bakers says
Hi Wendy, thank you for your kind words. The pain rustique is our ‘staple to go for’ bread recipe. Everybody seems to like the taste and looks of this bread!
Wendy says
Just wanted to check in again and remark how absolutely “bulletproof ” this method is! I’ve made the pain rustique several times now, with many variations- – all white flour, more wheat flour, added flax, etc — and it always comes out great. I still need to work on my scoring technique, however…I’ve never had loaves that rise so much in the oven before, so I never really understood the function of scoring the bread til now. 😉
Thank you for this website, I have recommended to many friends who could not believe that I’d made these loaves myself!
Weekend Bakers says
Hi Wendy, the pain rustique is our ‘to go to bread’ recipe. Everybody seems to like the clean, deep taste of this bread. Happy baking!
Jerry says
I’m a newbie to sourdough bread making so I googled around and found your site. I’ve made this bread several times now and it’s come out wonderfully each time! The thing I like about it the most (besides the flavor) is the elegant simplicity. The small amount of commercial yeast is added insurance and the result is a great “mild” sourdough taste which my family enjoys immensely. Thanks for posting the information and keep on baking!
Mike Harvey says
I discovered your site a few weeks ago & have now made this pain rustique several times – with great success if the speed with which my Grandsons devour it is anything to measure it by.
Your Rye Sourdough starter is one on the best I have made & used. Last night as I was preparing the Poolish for today’s batch I also made up a mix using Doves Multibran flour in place of Wheat, kept the same quantities for everything else. I ran my oven @ 220c and baked for 35 min.
The result is brilliant, good flavour, soft crumb just can’t stop nibbling it!
Regards
Mike
Mike Harvey says
24 hours on and now cold I think it probably needs about 20% white flour in next batch.
Weekend Bakers says
Hi Mike, a lot of kids seem to like the taste of pain rustique. A daughter of a friend of ours even likes a slice of bread better than a dessert or a sweet! Happy baking!
new_baker says
I would love to try this bread out. I currently have a sourdough starter that I use for tartine bread ( a mix of wholewheat and unbleached white flour). Can I still go ahead with the recipe as above using 10g of my starter or do you suggest I make a new starter with rye flour?
Weekend Bakers says
Hello, it is no problem to use this starter as a substitute for a rye starter, use the amount as given in the recipe (10g for each loaf). Happy baking!
eleni melirrytos says
Is it absolutely necessary to use yeast?
Weekend Bakers says
Hello Eleni,
If you do not want to use yeast, we refer you to our pain naturel recipe which is 100% sourdough with correct times for this method (which of you can also make with a percentages of whole wheat or whole spelt like in the pain rustique) : www.weekendbakery.com/posts…n-naturel/
Happy baking,
Marieke
Marjolein says
De eerste keer dat ik het recept maakte heb ik alles precies zo gedaan als het recept voorschreef. We vonden het brood allemaal ontzettend lekker! De tweede keer hadden we alleen geen volkorenmeel meer in huis maar wel viergranenmeel. Dat brood vonden we nog lekkerder! Er staat dus weer een voordeeg klaar met viergranenmeel en misschien voeg ik dit keer ook nog wat geroosterde tarwekiemen toe. Bedankt voor dit fijne recept! We zullen het vast nog heel vaak gebruiken.
Paul Johnston says
What a GREAT website!! I am so excited… I just started this recipe tonight and am confident that it will turn out nicely in the morning!! I am planning on making the Fluitje with Spelt next time… I grind all of my whole grains myself and was wondering with this recipe “pain rustique” when you add your whole wheat flour what kind of wheat are your using?? I normally use “Hard Red White” but there is also a “Hard White Wheat” and was wondering which wheat you are using in the pain rustique recipe?? I am planning on keeping a close eye on this website… it is FAB
Paul Johnston says
Well I made the your bread yesterday… but I also made a controlled bread that I have been making for quite a while… I wanted to compare the two… and I loved loved loved the flavor of the pain rustique much better… I used the “Hard Red Wheat” in the pain rustique and a young levain… the flavor was FAB… THANKS
Weekend Bakers says
Hi Paul, good to hear about your bread. The pain rustique is also THE staple bread in our house and within the rest of our family. It is relatively fast to make and has a nice balanced taste. Happy baking!
Weekend Bakers says
Hello Paul, in The Netherlands we can not buy wheat by type. You just get wheat. It is also almost impossible to get information about the gluten / protein content of flour let alone the type of wheat. We use organic ‘normal’ whole wheat of medium to strong gluten for our bread. This wheat is not as strong as the strong USA manitoba type wheat. Happy baking!
Ken Venick says
This looks interesting and I will give it a try. And if I wanted to eliminate the instant yeast from the recipe altogether, how much levain would go into the final dough mixture?
Weekend Bakers says
Hello Ken,
Next to the levain you would then also have to change proofing times. May we suggest using our sourdough pain naturel recipe instead: www.weekendbakery.com/posts…n-naturel/
Here quantities and times are tuned to the use of sourdough. You can also use a percentage of whole wheat flour in the preferment in this recipe if you want, like we do in the pain rustique.
Happy baking!
Marieke
Bjørn Ole says
Hi! I actually have the same questions as Ken. Yesterday I baked the sourdogh pain naturel for the first time, and it came out quite well despite me making a bit of a mess when taking the loaves out of my improvised bannetons.
I understand that I would have to increase the proofing times without yeast, but can you say anything about the effect of a larger poolish on proofing times and sourness? I would guess a larger poolish would both reduce the proofing time somewhat, and increase the sourness compared to a smaller poolish. But compared to your hybrid recipe i also guess it would be quite a bit more sour due to a longer final proofing. What do you think?
I will probably try both, but it’s also nice to try to speculate a bit in advance 🙂
I have been baking for just a few weeks now, and just started using my own sourdogh. It’s great fun and lots to learn! Thanks for a very inspiring site, I have been using it a lot lately!
Weekend Bakers says
You could use about the same amount of sourdough culture in the poolish, however you need to stretch all the times by a big amount and use something near the Pain Natural. So about 50 minutes between each fold, or keep the times the same and add an extra fold. The final proofing time will be close to 2 to 3 hours depending on the dough temp and room temp. The bread will get light sour note but probably not a hard acid taste. Happy baking!
Flor Criel says
Hi there,
If i want to make this bread without sourdough, how many dry yeast do I need to put in my poolish ?
Greets from Belgium
Weekend Bakers says
Hello Flor,
For a full yeast version of this recipe you add a quart teaspoon or 0.5 grams of instant yeast (or 1.5 g fresh yeast) to the poolish. Then 2.3 g instant yeast or slightly under 7 g fresh yeast to the final dough.
Happy rustic baking!
Ed & Marieke
Tom says
Thanks for this recipe, great results with taste and I am on bake number 5 with this.
I was struggling with shaping and felt the dough wasn’t strong enough so I increased another stretch and fold which has helped things massively, I am tempted to do another but feel the low yeast may cause a collapse.
It’s a lovely bake though and I am really pleased with the results.
Weekend Bakers says
Thanks for the wonderful feedback Tom. Adding an extra S&F is a good idea, knowing when to stop is also in the eye of the baker and the feel of the dough. Sounds like you are making the recipe your own.
Happy baking!
RB says
When does the Paine Rustique pass the ” window pane” test ?
What stage on the time table?
Thank you
good site good bread
Weekend Bakers says
Hello RB,
It doesn’t! You need to stick to the recipe and the times and temperatures given. Aiming for a window pane is more something to watch out for making tight crumb regular loaves, but with this type of bread with the more open crumb and irregular structure time and temperature are the key factors. The initial kneading together with the stretching & folding and resting will develop the dough as you go along.
Happy baking!
Cornelie says
Hi Marieke and Ed,
I love your site and your products! I have been working with many of your recipes: pain rustique, BB, wholeweat, etc. A question re. oven spring/rising: my pain rustique tastes lovely, but I don’t get a good oven spring, so quite a ‘flat’ bread. Could it be that my sourdough is not active enough (I fed it the evening before baking…) or could it be that my T65 French flour is not good for this bread? Or is it the temperature? I will continue trying to get it better, but maybe you have some thoughts about this too??
Thank you, Cornelie
Cornelie says
Hi again! I think I may have found out what caused the lack of oven spring. I have sprayed water into the oven right at the start, after having put the dough in the oven. That may have cooled of the dough too much… What do you think? Can that be the cause?
Weekend Bakers says
Hello Cornelie,
Yes, you could be right. We have a few suggestions for you. First you could try a mixture of T65 and T55 flour for this loaf (for the flour in the final dough) to maybe be a bit closer to our bread flour and make it a little bit lighter. Next to that you could try to set your oven just a little bit higher, because possibly you will loose some heat quickly by opening your oven, plus spraying the water in, when using a conventional oven.
Also check out our oven tips for some more suggestions: www.weekendbakery.com/posts…your-oven/
Happy baking,
Marieke & Ed
Graham Britton says
Hi,
Your website is amazing. I am picking up a Rofco oven this weekend, one came along at a convenient time, but consider myself an amateur/novice by your standards. I have the Hamelman book, most recipes use a mixer which unfortunately I dont have. Can you give me some guidance how far dough’s should be developed at each stage instead of using the mixer. I am familiar with slap and fold and english kneading techniques and folding generally but not clear how far to develop the dough at each stage using hand methods, for both this recipe of your own and generally as indicated in the Hamelman books.
Any help you can provide would be very much appreciated.
Thanks
Graham
Weekend Bakers says
Hi Graham,
That is great, you getting your hands on a Rofco like that. We are sure you are going to like it. Check out our Rofco oven tips here: www.weekendbakery.com/posts…ven-users/
As for dough mixing and development have a look at these tips, based on our own experience too: www.weekendbakery.com/posts…gh-mixing/
We have to say we are not focused on dough development like you describe it. We are more about the time and temperature (our recipes point to these tips too). It is true that in time, just by baking a lot, you get a feel for the dough, and also what it should look like, but it is not easy to describe without standing next to someone and looking at the dough and feeling it. So we cannot tell you much more than is already indicated in our recipes. Most of our recipes are based on moderate development in the first stage by mixing and getting the dough fully developed bij stretching and folding. Doing everything by hand doesn’t change the fact that the dough should be developed the same as with a mixer, it just takes you longer of course (about double the time if you are a good kneader).
We can recommend trying our Tartine style recipe which is totally mixer free ! See: www.weekendbakery.com/posts…yle-bread/
Hamelman is a very good source for more information we agree of course, we love his book and recipes. And lots of tips and info from us for you to browse through.
We wish you many happy baking hours with the Rofco!
Ed & Marieke
Nicole says
I make a lot of sourdough bread all very good but i can not get the crusty ear.must be missing something. Please help.
Thank your wonderful website
Nicole
Weekend Bakers says
Hi Nicole,
There are a lot of things that need to come together to get a crusty ear. Ingredients, equipment, time and temperature all work together to get this result. Were to begin? May we suggest reading our tips on scoring: www.weekendbakery.com/posts…onfidence/, how to get oven spring: www.weekendbakery.com/posts…your-oven/ and proofing to perfection: www.weekendbakery.com/posts…e-in-size/.
Using the right bread flour, a good quality (pref organic) with good protein content (12 tp13% is perfect for this loaf) will also help.
Good luck with the baking!
Marieke & Ed
Francesca says
My boule is in the oven and looking FABULOUS!!!!! My sourdough starter is still a baby, born less than 2 weeks ago so I decided to make this hybrid bread. I”m baking it in my regular home oven with a pizza stone underneath the loaf and 1/2 cup of hot water for the steam.
Followed the recipe exactly and will try making a double batch tomorrow. Is it advisable to make a larger loaf? Or should I make 2? Thank you for your fantastic website and recipes!
Francesca
Francesca says
This is a photo of my baked boule
fbcdn-sphotos-g-a.akamaihd.net/hphot…8014_n.jpg
Francesca says
Next Day:
My double loaf is in the oven and WOW its looking so good, nice and high!!!!!!!!
Thank you, thank you, thank you for all the hints and tips!
Weekend Bakers says
Great bake Francesca! Happy and proud! To answer your question about 1 or 2 loaves: remember when baking larger or smaller loaves that the baking times also need to be adjusted. So if you were to bake a large double loaf it would be about 1.5 kg and would need about 75 minutes to bake. With two loafs (provided your oven temp is stable) you can keep the baking time at 45 minutes plus you get practise shaping and scoring two times so we would advice doing that.
Happy baking!
Ed & Marieke
Lesley Broadbent says
Hi Marieke & Ed
I’ve made this loaf twice now. Last time, I had to go out while it was proving in the banneton and so I overproofed it, resulting in a collapsed loaf.
Today I made it and the dough came out really wet and even after the second stretch and fold it was really soft. I proved it for the correct amount of time in the banneton and when I tipped it out it was still rather flat. It was difficult to score it as it was so soft. Ovenspring was better than last time, but I think there was too much water in it. Obviously it depends on how wet the sourdough starter is, so maybe I’ll cut down on the water I add next time. By the way, I am using the same flour as last time (same batch too) so that’s not the problem.
Apart from that, it is a wonderful tasting loaf. Just the right amount of sourness to it and I like the addition of some wholemeal flour.
I’d better have another go! Thanks for the fantastic website, I don’t really use anyone else’s recipes now as I much prefer yours.
Lesley Broadbent