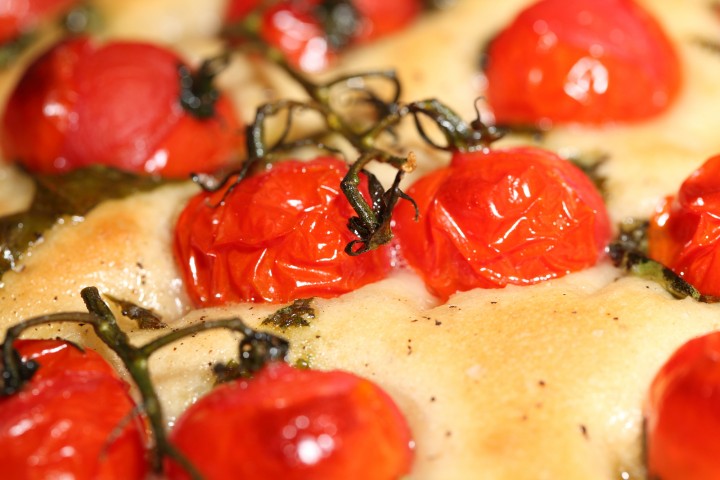
Focaccia: Making Bread “Under the Fire”
from the Latin “focacius”- fireplace
We tend to use rather less than more salt in our breads. It is just not necessary because the bread is allowed to develop so much taste that too much salt would just spoil it. But there are exceptions, pizza for example benefits from a salty crust and so does this tomato and basil focaccia.
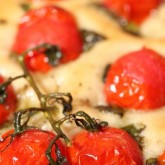
You can think of a lot of flavor combinations and toppings for this style of bread, but the sweetness of the ripe little tomatoes and the intense basil aroma together with a hint of garlic, makes this one of our favorite versions of the Italian flatbread. Not forgetting the color combination is also pleasing to the eye.
Making the Focaccia
I make this focaccia dough the night before and leave it in the fridge overnight. The water content is quite high so the dough will be a bit sticky. The focaccia dough structure will benefit from this. I also add lukewarm water, even though the focaccia dough goes in the fridge, so it gets a bit more development while it cools gradually.
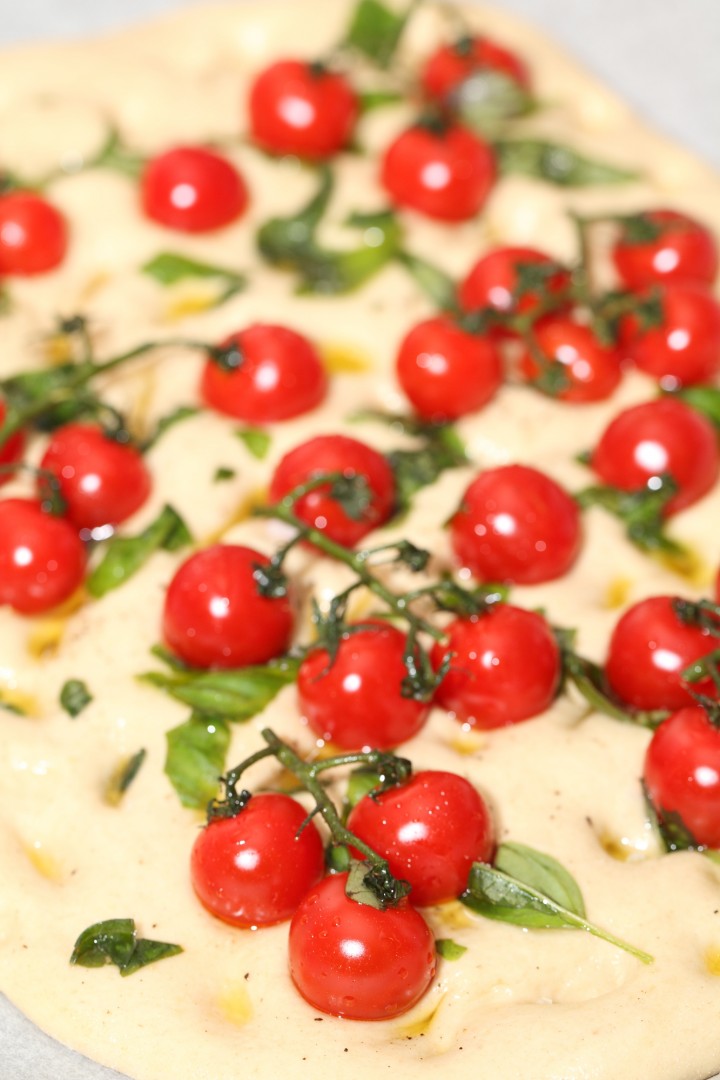
Ingredients for the Focaccia
makes one Focaccia
350 g bread flour
8 g sea salt
3 g instant yeast
approx 250 ml lukewarm water
45 grams / 3 tbsps olive oil
a handful of fresh basil leaves
24 vine tomatoes
sea salt flakes and black pepper
clove of garlic, sliced in halve
flour for dusting
Stir together the flour, salt, and instant yeast in a bowl. Add the lukewarm water and mix for 7 minutes, or until the dough is smooth and slightly sticky. Place the dough in a bowl sprayed with a bit of oil, cover with clingfilm and put it in the fridge. The next day get it out of the fridge and leave it for 30 minutes to acclimatise. Give it one set of stretch and fold to develop the dough a bit further and put it back in the bowl. Leave it to rest for 50 minutes.
In the meantime you can get your basil and olive oil. Shred the basil leaves with your fingers in smaller pieces, combine them with the olive oil and set aside.
Prepare your baking tray (about 30 x 40 cm / 12 x 16 inches) by lining it with a baking sheet or baking parchment and lightly spray or coat it with some oil. Spread out the dough on the baking tray (wetting or oiling your fingers will help) shape it into a rectangle.
Put the oil with basil leaves on top of the dough and with your finger tips make holes in the dough and spread the oil, making sure the oil also drips in the holes. Put the tomatoes on top and also press them into the dough.
I like to use the vine tomatoes, branches and all, because it looks nice, but you can also take them off first or even take their skins off by blanching them in hot water for a minute, whichever you prefer.
Preheat your oven at 220ºC = 430ºF. Now leave the focaccia to proof for about 30 minutes. Sprinkle with sea salt flakes and some black pepper. Take it to the oven and bake for about 20 to 25 minutes until golden brown on top. Out of the oven, rub the bread with the sliced clove of garlic and serve immediately.
Enjoy!,
Marieke
PS: I also love using wild tomatoes in all shapes and colors, purple, yellow, red and green, if and when I can find them.




HS says
For focaccia-style buns, do you think the recipe needs to be changed, or can I use the same one? Should I reduce the hydration? Thank you
Weekend Bakers says
Hello HS,
We have never made focaccia-style buns but if we did we would probably slightly reduce the hydration level. It is now at around 71% and we would go to about 67% for a first try. This means adding 235 grams of water instead of the 250 grams stated in the recipe. But it also depends on the absorption of the flour you use and your own experience with handling higher hydration dough. We would just give it a try with our suggestion or alternatively, if somebody else already has a good recipe for focaccia-style buns we would maybe go with that.
Hope it will be good!
Anna says
Hi,
I would love if you could put a time table for every of your recipes. Since i’m diabetic and need to eat at fixed times it’s urgent for me to plan when to cook. It would be a lot more pleasant if someone just could read how long it’s gonna take instead of searching the text over and over to be sure.
Thank you a lot.
I just finished (baking amd completely eating the loaf) of your pain rustique and it was awesome! Worked really great! Normally i’m not that into bread without nuts, carrots, seeds, etc. But this was so good we eat the whole loaf with two people and two dogs and a lot of Nutella, was a real good yummy feast!
Yours
Anna
Weekend Bakers says
Hi Anna,
You ‘stumbled upon’ one of our earlier recipes, and with most of the later ones we do include a time table. Glad you like it and find it useful. We will try to include them in other recipes too. There’s just not enough time at the moment to do everything we want and need to do…but our intentions are good.
Glad you like the PR so much, sounds wonderful. Thank you!
Chris says
If I wanted to make two, would I double everything including the preferment and the yeast?
Weekend Bakers says
Yes Chris, that is correct. When it is time to shape just divide it in two equal parts and make two rectangles as described.
Enjoy the baking and eating!
Jan says
Ok so today I gave this recipe a try, expecting not too much of my baking skills to work just because I wasn’t really feeling “it” today. Boy did that change as soon as I got my hands into this dought. I did make a slight change, I upped the yeast ( to 7 gr ) because I didn’t want to wait untill tomorow to eat this bread. I was feeling particulary impatient ( btw not always a very good quality in a baker ) today. but after the usual resting/rising period of 1,5 hours I give almost all my breads, the dough felt great and so my smile came back as I spread the dough out onto a baking sheet covered with parchement paper. it filled it out completely and very easily. Poked some holes in the dough, my smile got bigger and bigger, so much so that my wife was questioning if I had been drinking, wich I hadn’t yet, but we’ll get to that later. So after I poked some holes in this lovely dough, out came the olive oil in wich I put alot of garlic straight from my trusty pestle and mortar. Added some dried oregano course grounded black peper and salt. After your requested resting period or maybe a couple of minutes less, because by now I was too excited, I put this beauty in the oven and after 18 min a 180 turn ( just beacause my oven isn’t of the best quality ) and another 18 minutes, the smell was almost to hard to resist wenn I took it out. While my mouth was watering and by now also my wife was very interested in what I had been working on we decided it had cooled long enough , ofcourse it hadn’t but we didn’t care anymore. To put it short. DELICIOUS very nice structure even some gorgeous air pockets and that just in time for our HAPPY HOUR here ( I told you I’d come back to that ) everyone loved the small squares of foccacia I cut for them, the only complaint was that I could’ve used more garlic, and that was true so next time more garlic and maybe even some grated parmesan, we we’ll see and let you know how it turns out.
Again I’m so happy you put me on the right track to get this great bread out of this “amateur” baker. Next time I promisse I will try to do it exactly the way you described. But if like me there are more impatient bakers who just have to have a beautiful tasty foccacia today!! I can really recommend it.
As always thank you so much and keep up the great work you are doing with this website.
Jan – Chiang Rai – Thailand
Jan says
So yesterday I made the recipe the way you described it here, put it in the fridge and this morning took it out, let it rest, some stretching and pulling and in to the oven. And as usual you were right WOW what a nice bread this is and so easy to make ( once you’ve got your patience back and stop hurrying things along ) beautiful air pockets great structure a little bit of a tang in it from the slow rise/fermentation ( I guess?! ), and dare I say it a little sour-dough-ish taste. Everybody loved it no complaints about the lack of garlic this time, I made sure of that 😉 So this is gonna be my go-to foccacia bread from now on, so many variations on toppings and/or stuffing’s to be made with this, so no more searching the interweb, if you got a good thing going stick with it. No only my sweet baking leaves many room for improvement ( my wife and daughter love cookies an anything with chocolate in it ) so that’s gonna be my next step onto the ladder to baking perfection. And I hope I can count on your help/recipes for that 😉
Thanks again, keep up the good work.
Jan – Chiang Rai – Thailand
Weekend Bakers says
Hello Jan,
You are such a wonderful writer. The way you describe the whole process I immediately want to bake myself! I can almost smell it all the way from here :).
Thank you so much for sharing this with us and also for liking the recipe so much.
Keep up the fantastic baking and as far as cookies go I can also recommend one of our staple cookie recipes: you can find it here: www.weekendbakery.com/posts…koekjes-2/
Happy Baking in Thailand!
Marieke
Miriam says
Bedankt voor het geweldige recept, de focaccia was heerlijk.
Omdat onze basilicum nog staat te ontkiemen in de vensterbank heb ik Rozemarijn gebruikt, en die ‘s ochtends in de olijfolie gezet, erg lekker en aromatisch!
Weekend Bakers says
Hoi Miriam,
Oh, wat leuk! Ik ben bezig met een nieuw fociaccia recept dat ik deze week op de site hoop te hebben. Het is gebaseerd op heel nat ciabatta deeg dat je ongeveer op het bakblik schenkt als het ware, je zult het wel zien. Het resultaat is echt heerlijk.
Happy baking,
Marieke
PS: We hebben net op je prachtige biocosmetica.nl website rondgestruind en in de nabije toekomst kun je wel een bestelling va ons verwachten :O Wat een fantastisch leuke merken!!
Tina says
Hi I regularly visit your website – it is amazingly inspirational – please keep posting!
I make and sell my artisan bread at home, and made this foccaccia recently – have to say it was the best I have ever made, had lots of positive comments!
Thanks
Weekend Bakers says
Hi Tina,
Great you are inspired and the focaccia was a success. We are currently working on a ciabatta based focaccia recipe. The first results are very promising and when the recipe is well thought out enough, we will surely post it and hope you will give that a try too.
Happy baking,
Marieke