Semolina is derived from the Italian word semola, meaning ‘bran’
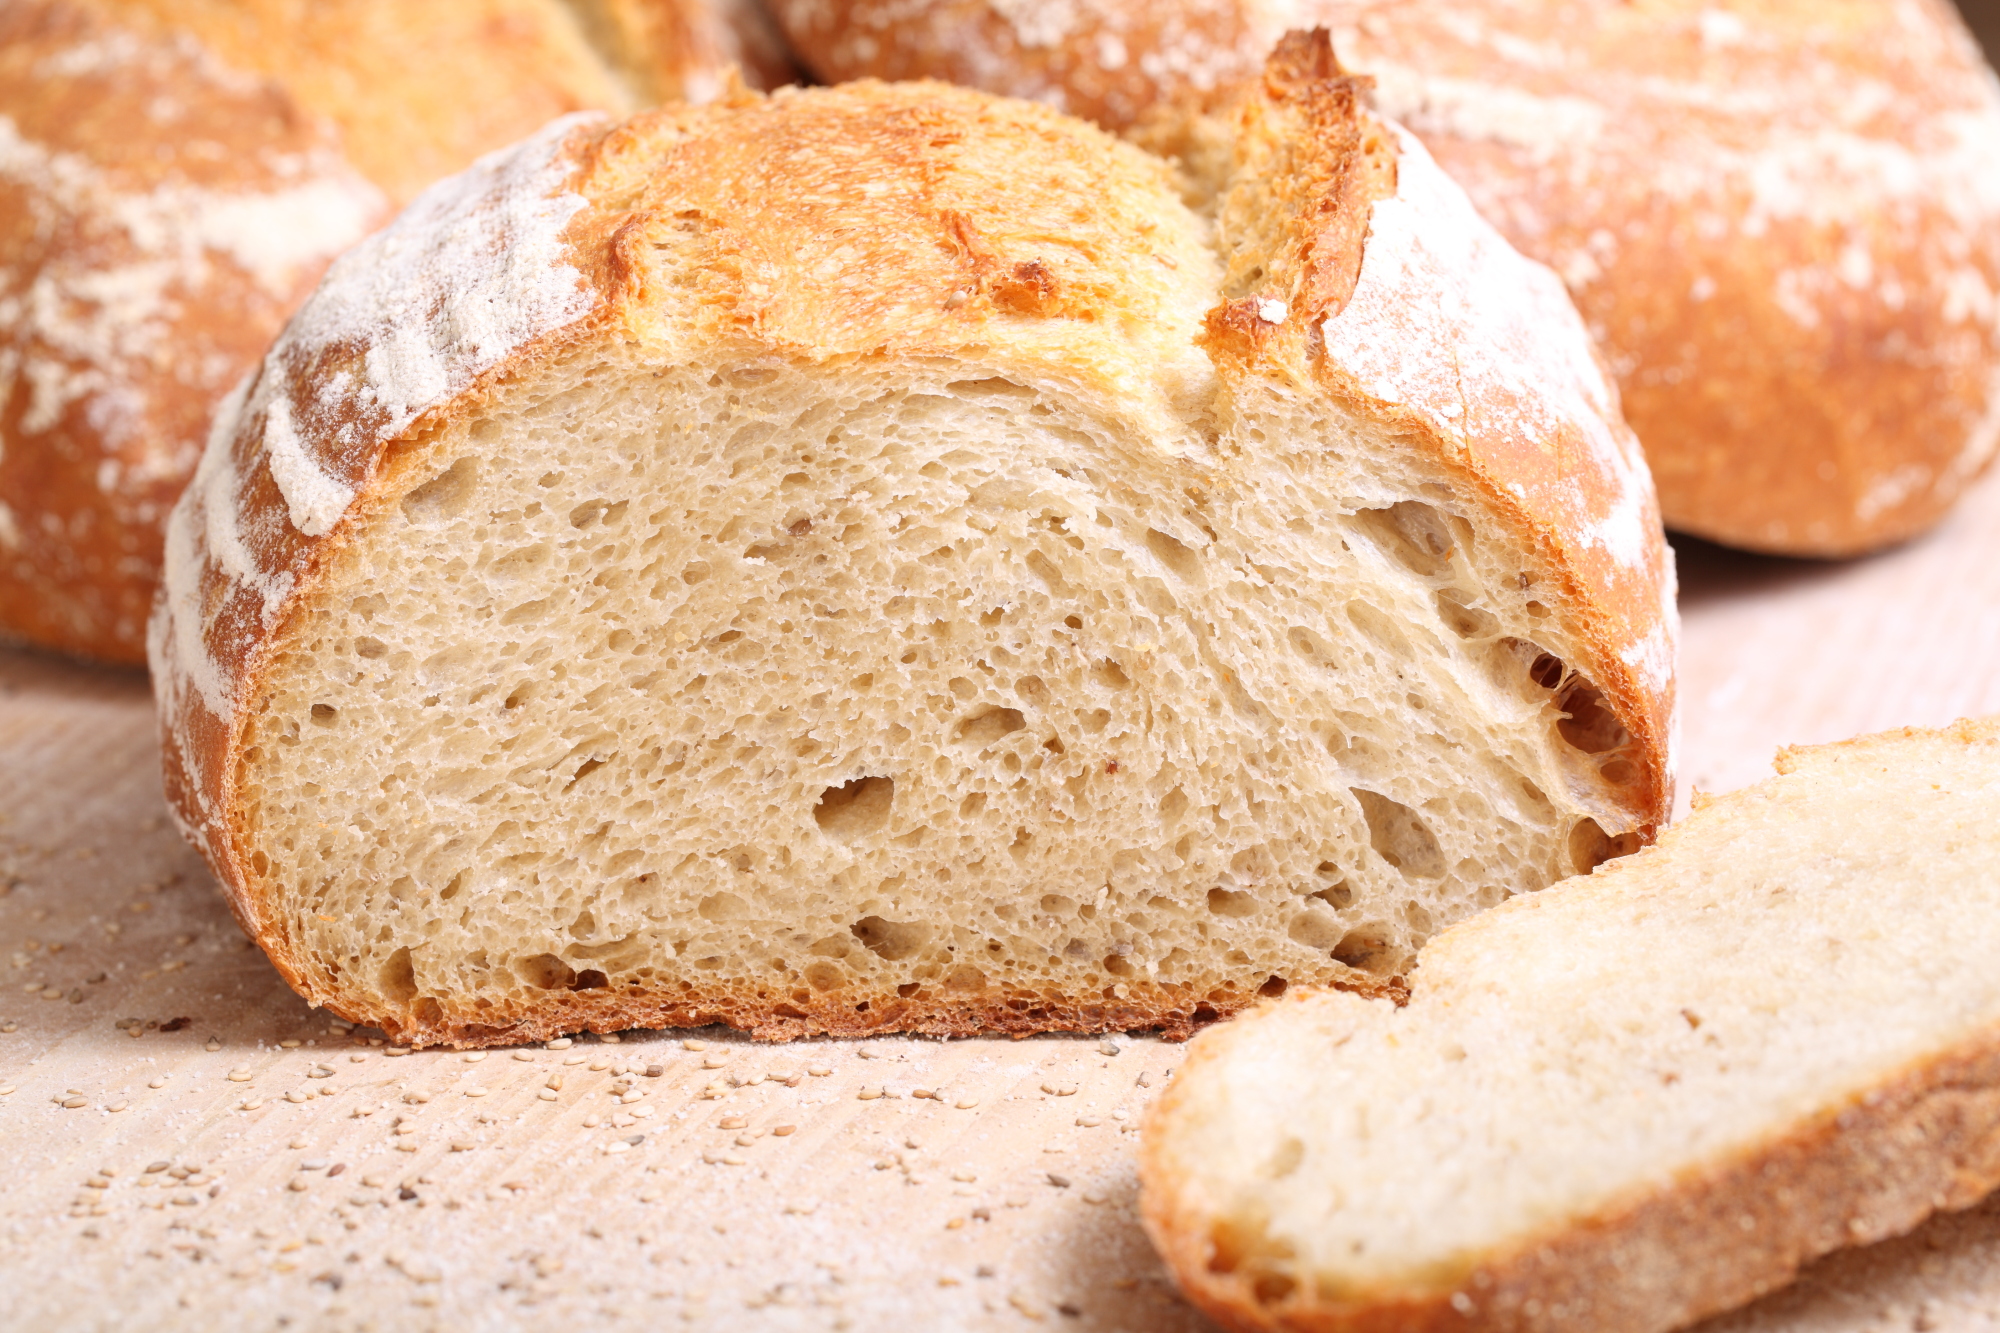
A fairly simple process for this yeast based loaf made with semolina to give it some extra gluten oomph. Yet, with the added toasted sesame seeds, it yields a more interesting loaf and with the tighter crumb it is great for sandwiches too. It can also be an excellent recipe for the more novice bread baker to get familiar with slightly wetter dough.
In our flour experiment we already showed what the addition of semolina can do for your baking result (also depending on what quality and protein content of the bread flour you use in combination with it of course). Semolina flour is made from hard (durum) wheat and contains lots of protein and is therefor considered a strong flour. It can help the bread get better oven spring and in general gives a different taste profile. So, it’s a great way to ‘upgrade’ your bread.
We especially find the combination with choco hazelnut spread irresistible. We add a relative small amount of seeds to this recipe for a mild nutty taste, but feel free to make up your own mind about the amount. Hope you enjoy the baking and eating too!


Before you start, you might also want to consult our tips for scoring bread with confidence and handling wet dough. You can check out the stretching and folding technique used for this dough in our baguette making video.
Note: The tiny amount of yeast in the preferment of 0.25 g is not that easy to weigh, so you can also take 1/4 of a teaspoon.
| Ingredients for the Preferment | ||||
|---|---|---|---|---|
| 65 | g | wheat (bread) flour | ||
| 85 | g | water (room temperature) | ||
| 0.25 | g | instant yeast | ||
| Ingredients for the Final Dough | ||||
|---|---|---|---|---|
| makes 1 loaf | ||||
| the preferment from step 1 | ||||
| 215 | g | wheat (bread) flour | ||
| 170 | g | semolina | ||
| 240 | g | water | ||
| 6.5 | g | (sea) salt | ||
| 2 | g | instant yeast | ||
| 10 | g | toasted sesame seeds | ||
Day 1 – Making the preferment
For this recipe we are going to make a starter or preferment. The preferment for this recipe is made with more water than flour (so very wet) and a small amount of instant yeast and NO salt. Making a preferment helps bring more taste and strength to your bread. This preferment is easy to stir with a dough whisk. It is made 12 hours in advance so if you want to make your bread at 9 o’clock in the morning you have to make the preferment at 9 in the evening before.


In a bowl stir together the flour and water at room temperature with the small amount of yeast. Mix it well until you have a homogeneous slurry of very wet dough, almost like a batter. Cover the bowl and let the pre-fermenting begin. After 12 hours at room temperature it is ready for use. It should look airy and have a nice smell.
Day 2 – Making the Loaf
Preheat your oven to 235 ºC / 455 ºF (at what stage you preheat your oven depends on how long it takes for your oven to get up to the right temperature, some take 30 minutes, some, like ours, with stone floors take a lot longer, up to two hours.
Put the preferment, flour, sesame seeds, salt and yeast in your mixing bowl and add 3/4 of the water. Now start mixing and gradually add the rest of the water and let the dough come together. Knead for 4 minutes with a standing mixer or about double that if you are kneading by hand. You are aiming for moderate gluten development at this stage. Transfer the dough to a greased bowl, cover and leave to rest for 60 minutes.
Take the dough out of the bowl and onto a floured work surface and do two stretch and folds (so two full letter folds, left over right, right over left, bottom over top, top over bottom one after the other) Watch our bread movies to observe this technique if you are not familiar with it. Transfer the dough to the bowl, cover and again leave to rest for 60 minutes.
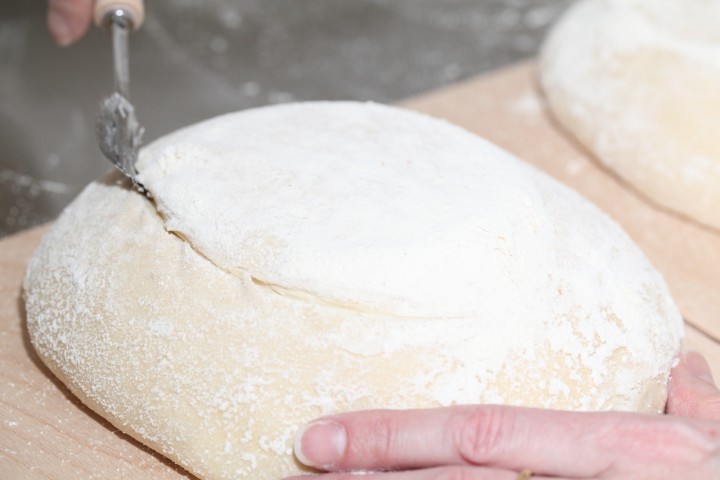
Now it’s time to shape. It’s something for which everybody develops his or her own favorite technique over time. You can make a batard or loaf shape or a boule (ball). For inspiration or instruction you can consult a good bread book or watch the videos on our website.


Shaping a boule, sliding the ball over your work surface toward you, guided by your pinkies (last pic)
Transfer the shaped dough in a proofing basket / banneton or bread pan, cover and leave to proof for 90 minutes. When you think it has risen enough, use your finger to carefully make a very small dent in the dough. If the dent remains, the bread is ready to bake, if the indentation disappears, the dough needs a little bit more time (10 to 15 minutes).


Now your loaf is ready for the oven. Slash the top of the loaf with a lame or bread scoring knife. To get a nice crust, try to create some steam in your oven by putting a small metal baking tray on your oven floor when you preheat the oven and pouring in half a cup of hot water immediately after putting the bread in the oven. Release some steam by setting your oven door ajar (perhaps with the help of a wooden spoon or oven mitt) 5 minutes before the bread is ready. If you are going to create steam with a baking tray, you maybe also want to turn your oven temperature a bit higher, because you are going to lose some heat in the process.
After 45 minutes of baking your loaf is ready. Transfer onto a rack and leave to cool. This loaf also keeps very well in the freezer. We usually keep all our bread we don’t eat the same day in our freezer and quickly thaw it in the microwave or put it in a toaster, directly from the freezer.
Happy Baking!


Semolina & Sesame Loaf Time Table
Day 1
Make ‘preferment’
Day 2
00:00 – Mix ingredients and knead for 4 minutes
60 minutes rest
01:04 – 2 stretch and folds (2 minutes)
60 minutes rest
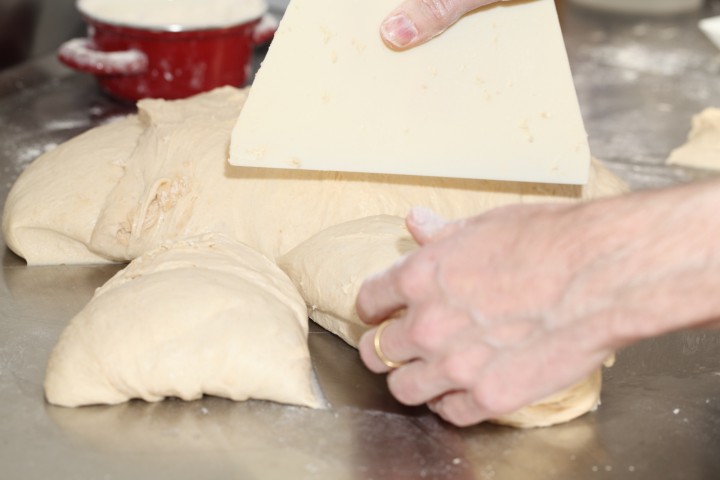
02:06 – (divide +) shape (4 minutes)
90 minutes proof
03:40 – into the oven
45 minutes baking time
04:25 – take out and leave to cool
I absolutely love this recipe! Perfect, delicious loaf the first try! Thank you so much!
Thank you Christine, for baking and liking our recipe. Wishing you many happy baking moments and wonderful loaves!
I have used this dough for baguettes and it works well.
Hello and thanks so match for this great website! I’d love to try this bread. Can you tell me the teaspoon equivalent of the instant yeast in this recipe? I use a scale for all my measurements, but it is not sensitive to such small amounts.
Thank you,
Suzella
Hello Suzella,
Great you want to give the recipe a try. We understand, this first amount is a tiny bit of yeast. The express it in teaspoons it would be slightly less than a third of a quarter teaspoon.
The second amount for the final dough, 2 grams, equals slightly less than 3/4 of a teaspoon.
You can use our baking ingredients converter for the yeast conversion too: www.weekendbakery.com/cooki...nversions/
Enjoy the loaf baking!
Hi,
This website is very helpful! The recipes are clear and very attractive!
I am trying some of them and I Have a question…
Is it possible to use Fresh yeast instead of instant yeast? If i Can, how should i Use it, should I Change the quantities?
Thank you for your answer.
Val
Hi Val,
Yes that is no problem. The general rule is the multiply the amount of instant yeast by 3. So 1 gram instant yeast equals 3 grams fresh yeast. It is our experience that fresh yeast may be a bit more enthusiastic, so we often use 2 to 2.5 times the amount of instant yeast and have also no problem with the proofing maybe taking a little longer if needed. Just something you can experiment with.
Thank you for your kind words and enjoy your baking!
Ed & Marieke
Thanks so much for your recipe and super clear easy to follow instructions. Am a newbie to this bread making world but recipes and websites like yours make the task simple and more enjoyable. The addition of sesame seeds is divine and I decided to turn them into mini bread rolls and wow! Now I want more and would like to know for a bigger loaf or more rolls, is it better to do 2-3 separate batches or could I be lazy and just double/triple the recipe? Has anyone tried?
Great to read your enthusiastic comment Pamela. And glad we can be a part of your baking adventure. No problem to double or triple the recipe in one go to make more rolls or loaves or a bigger loaf. Just take into account you always need to make sure you keep an eye on the dough and its development and use the right times to proof and temperatures and time for each bake (rolls take way less time in the oven than a loaf and a big loaf needs more time of course).
We also have lots of tips on subjects like, dough, use of ovens, proofing, kneading et cetera. Maybe browse through them some time: www.weekendbakery.com/posts...king-tips/
Enjoy your baking and sharing!
Ed & Marieke
I’ve been making bread for several years, I have been getting better and better at. But, since I found your website, I now make fantastic bread for a home kitchen. I’ve been trying for a long time to figure out how to not have that strong yeast flavor in my bread. I’ve tried the semolina recipe and the sour dough also, they both came out amazing othe first try!!
Thank you very much for sharing your knowledge, and I hope to see more recipes sometime
Thanks,
Jim
Hello Jim,
Thank you so much for your very kind feedback. This makes us very happy of course, to know the recipes work for you and even make you a better baker. Excellent!
Wishing you many happy baking hours and lots of crusty loaves,
Marieke & Ed
Why do you release the steam for five minutes before baking if you are using the tray with water method? I thought you need the steam to help with the oven spring. If you don’t release the steam and just place the dough in the oven, what happens?
If I want to add a line of sesame seeds to the crust of the bread, when should I apply the egg wash and seeds? I did it 25 min in and the seeds got pretty toasted but not burn’t. I’m not entirely sure it was the right time.
If the bread and the light flour coating brown a bit too much, should I temper the oven or reduce the temperature a little bit or both?
Thanks for this recipe. The four times I’ve done this, I got something successful but I didn’t make anything that looked like your photos until #4.
Hello Douglas,
You introduce steam in your oven to allow the dough to expand at the beginning of the baking process. The moisture keeps the outside moist and gelatinous. So while the inside of your bread wants to expand under the heat, it is not kept back by a dried out outer shell. This is known as oven spring.
Release the steam at a later stage of the baking process to allow the crust to form (retaining moisture would mean the crust stays soft).
Not using steam would mean the surface of the loaf will dry out in minutes, oven spring, usually occurring 5 minutes within the baking process will not really get a chance this way.
As for the seeds and the bread, you can temper your oven as soon as they have the right color and also make sure the bread is not too close to a heating element.
In our experience it always takes between about 3 to 10 times to make a recipe your own, depending on your experience and many other factors that might need adjustment.
Keep up the enthusiastic baking!
Hi Ed&Marieke,
Thank you so much for putting so much effort and love on your so informative website. I’ve learned so much from you. I made this bread over the weekend, baked in a small bread (at 180c for 40mins) tin. It was amazing, my kids end up eating most of it as a snack :). I am just wondering if the dough from this recipe would be ok to have a slow rise in the fridge in case we would also like to have some homemade bread during the week? Just to breakdown the preparation and rising time. I am curious about your opinion on overnight bread in general.
Another question, do you happen to have an recipe for Maisbrood? My son loves the Maisbrood from AH, I did too until I read the ingredients list. I have been experimenting myself but the end result is always very heavy.
Many thanks and keep up the great work!
Hello Shanshan,
Thank you for sharing your results with the recipe. And yes, you can do the slow rise in the fridge with this loaf. You may need a few turns to get it right. As a strating point, we recommend lowering the yeast in the final dough to 1 gram if you leave it in the fridge overnight. We do like this method and it gives good results (though a bit different) and it is the most excellent way to have fresh bread in the morning. The reason we do not do it that often is because of the amount of loaves we bake and the lack of fridge space.
Hope it will work out. Let us know about the results!
Thank you again and greetings from Holland,
Marieke & Ed
Hi Marieke & Ed,
Per your suggestion, I tried this recipe for the first time 2 days ago & it was just delicious. Everyone who tried it just loved it.
I might want to try divide the loaf into a few smaller rolls to serve as dinner rolls. What do you think?
Thank’s again!
-Shirley.
Hi Shirley,
Thank you for your enthusiastic feedback. Happy to hear.
Yes, it is a great idea to make smaller rolls with this recipe. You could divide the dough into 6 rolls for instance of around 130 g each or maybe even smaller ones (you decide of course). Make sure to adjust the baking time which will be somewhere around the 20 minute mark.
Happy baking and happy Easter time with your family and friends.
Ed & Marieke
Dear Ed & Marieke,
Thank you for your reply. Just in time for weekend baking, indeed.
Happy Easter to you and yours too.
-Shirley.
Hi, your recipes are great! I have tried the croissant and rondo/Semolina bread is next on list. Do you have one that includes quinoa? Thanks.
Hello Ai Ling,
Thank you for trying and liking the recipes. At the moment we do not have a recipe that includes quinoa, but we are sure there are good ones to find on the web. You can easily add some quinoa to a bread recipe but if you want to make a loaf that is heavily based on quinoa, you need some good instructions to get a nice loaf, because of the gluten free part.
Happy baking from Holland,
Marieke & Ed
I’m very interested in your site. I’ve recently progressed from making bread machine bread to using a Kitchen Aid mixer. I’ve had good results so far, (especially with the deli style rye the New York Times published a couple of months ago), and I really like the fact that you give recipes in grams. My question is where are you based? I’m in New York and am aware that European and American terms are different for flour. As a British ex-pat I know the difference, but could you clarify please?
Thank you.
Hello Nicola,
Thanks for your comment. We are based in The Netherlands. The bread flour we use for the above recipe ourselves is an organic wheat flour that is stone ground and has a protein content of around 12.5%.
We will look at the NYT recipe, that sounds like something we want to give a try too.
Happy baking in the USA and greetings from Holland,
Ed & Marieke
PS: IF you are interested in more rye recipes, we can recommend this one (note much more rye in this one than the NY recipe so for real rye lovers): www.weekendbakery.com/posts...h-raisins/
Hello,
This is an excellent website to learn from, especially for newbie baker like me. I just discovered it last week. My question is regarding yeast, I noticed that you use instant yeast instead of active dry yeast. Is the instant yeast better then active dry yeast in terms of the bread flavor or the bread crumb? Can someone substitutes active dry yeast in your recipes?
Thank you
Hi Elda,
Thank you very much. It is just that instant dry yeast is easier to get for a lot of people and also easy to use, we do not know from experience that their would be a difference in baking results. As a rule, you need about 20% more active dry yeast compared to the indicated amount of dry yeast. So for this recipe, 2 grams instant yeast, would convert to about 2.4 grams active dry yeast.
Good luck with it!
I’ve discovered your page recently, but already had time to fall in love with it! I tried the semolina and sesame bread and classic French baguette! Excellent with the videos and step-by-step instructions! Will continue using this web site and improving my baking skills:)
Thank you Lidia for your wonderful feedback, much appreciated 🙂
Many happy baking hours and crusty, tasty loaves!
Beautiful recipe and fantastic looking bread.
Could I do that with my wheat Sourdough starter instead of the poolish ?
Hi Ed & Marieke
I love your website very interesting !
i would like to ask you something you have articles about sugar or salt but foun nothing about oil.
can i use oil in my dough?
usually i make recipes that require oil (like piroskhi or peinerli-pide) can i use oil in bread recipes?
thanks !
Hello Demetris, thanks for your nice words. When baking fluffy buns or raisin buns we use mostly butter. We use sometimes some oil in pizza dough. It is no problem to add oil to the dough. We have no scientific experience with oil in dough. Happy baking!
I’m a big fan of your website! Having had immediate success using your instructions for baguettes, I gave this a go and it’s absolutely fantastic. The crust is thick and beautiful and it springs perfectly: the semolina gives it a slighly chewy (in a good way), rough texture. What with the sesame it’s glorious with a little butter and honey. Thanks!
P.S. I can only assume, what with the photography, that you are gearing towards one day bringing out a book of all these posts. Are you? You really should. My coffee table awaits it. 🙂
Thank you so much Tee! And about a bread book…well it would have to be something special to do something that has not been done before and above all we would need some more time to do it. Would be nice though…
Happy baking!
Marieke & Ed
Hi,
My big question is where do you buy Semolina flour in the Netherlands?
I saw it only in one place and it was a Turkish Grocery but it was so out of date which brought me to the understanding that it will be hard to find it.
Your site is always a pleasure.
Regards,
Yariv
Hi Yariv,
Normally a Turkish grocery is a very good place to find it..maybe try another one. Italian brands like De Cecco also have it and can be found in delicatessen and sometimes supermarkets. Another option is the mill, (like De Zandhaas where we buy our flour). In Dutch you can ask for griesmeel.
Hope you find it soon and will give the recipe a try!
Marieke
Thanks for this recipe. I will sure give this one a try.
Shouldn’t the weight of the flour and water in the preferment be reversed? 85 gr. flour and 65 gr. water instead of 65 gr flour and 85 gr. water. It would be kind of hard to form a “homogeneous ‘ball’ of very wet dough” out of the current recipe.
Keep up the good work (way too little updates recently, though) 😉
Hi Peter,
The amounts mentioned are correct, but due to some unexplained mystery (because we have been busy with biga’s lately maybe) we both made the mistake of turning it upside down and trying to explain what the less water more flour version looked like. You can clearly see in the picture that this will not be a ball any time soon. We corrected it already and want to thank you for ‘rubbing our noses in it’ ;). We do have more recipes we want to share in the near future and hope to do it more frequent.
Happy baking!
Ed & Marieke
Hello Marieke and Ed,
I think I miss something in your ingredients list; you put 0.25 g of yeast in the preferment but how much yeast is needed in the final dough mixture. In the description day 2 you say to put preferment and the other ingredients including yeast in a mixing bowl. I like to make the bread but only 0.25 grams of yeast can’t be not enough for an whole loaf?
Anyway the bread looks delicious!
Greetings, Carla
Thank you so much for noticing Carla! We already corrected it in the recipe and hope you will give it a try soon.
Happy baking!
Marieke &Ed