
Now and then we like to play with sugar instead of flour!
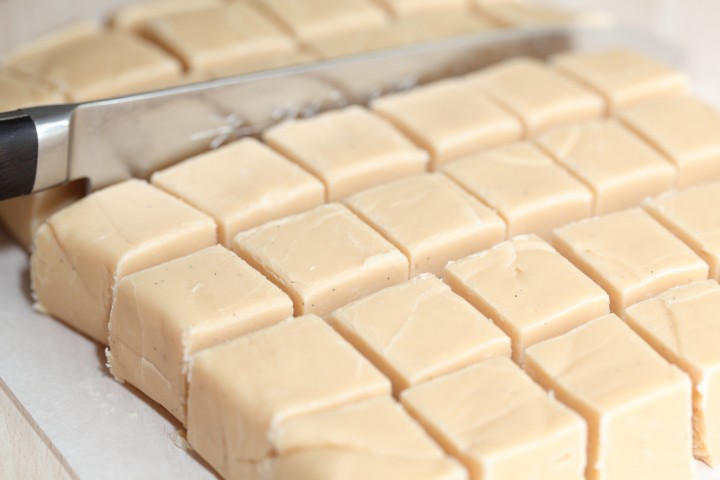
This is not exactly a baking recipe of course but you really have to try this anyway! It is so amazing and delicious, this soft, melt in your mouth fudge, that we did not want to keep the recipe from you. You need a good (digital) thermometer and a hand mixer to make it. Please do read the whole recipe and our tips before starting, to familiarize yourself with all the steps. As with bread baking, working precise and weighing and measuring carefully gives best results. Also, be careful, you are working with boiling hot sugar which can give very nasty burns!
You can make all kinds of versions with this basic recipe. You can add coffee, chocolate, powdered liquorice, spices, praline, mint, lemon, coconut, ginger, almond, any flavors you like. We love the version with added hints of freeze dried raspberry. But “plain old” real vanilla is still top favorite!
Ingredients for the Fudge
makes a nice slab of fudge
350 g regular sugar
20 g glucose
20 g butter
250 g cream
1/4 scraped out vanilla pod (about 5cm)
15 g white chocolate
How to make fudge
Put all the ingredients, except the white chocolate, into a good heavy saucepan. On a chopping board, run a sharp knife down the center of the 1/4 of a vanilla pod, split the pod, scrape out the moist seeds from each half and add this to the mixture.
Cooking
Place the saucepan on a very low heat at the beginning stage. You must dissolve all the sugar crystals before letting it come to the boil. Stir until your have a smooth liquid texture without any graininess. Feel for any left over crystals by rubbing with your spoon over the bottom of your pan, you should not feel any ‘sand’ in the mixture.


Only when all sugar is dissolved into a beautiful buttery creamy syrup you may increase the heat until it comes to rapid boil. If you boil it before all the sugar is dissolved your fudge will end up grainy. Do not take your eyes and attention of the mixture now, do not answer the phone or walk the dog. Keep stirring slowly but constantly or your mixture will burn at the bottom of your pan and ruin your fudge.
Your mixture must reach 119°C degrees, or else your fudge will not set and turn out sloppy. With this amount of mixture it takes, on our cooker, about 8 to 10 minutes. During cooking you will see the mixture go through a few stages, at first it will boil with lots of little bubbles. It also will come up to the rim of your sauce pan. This will take a few minutes and then it will come down and larger bubbles start to appear. Also the color will change into a nice deep golden color. Slowly keep stirring the mixture all the time. You can start measuring the temperature when the mixture has ‘come down’, away from the rim of your pan. At this stage it should be around 114°C degrees and will come up to the desired 119°C degrees within a minute or two.
Do not take your eyes and attention off the mixture while boiling!


Resting
Once your fudge has reached 119°C degrees immediately take it from the heat and put the pan on a cold hub of your cooker. Do not put the sauce pan on your counter top as the cold counter top will cool the mixture too fast on the bottom of the pan. Do not move the pan or stir any more while waiting for 15 minutes for the mixture to get below 90°C degrees. Any shock to the pan or stirring can prematurely start the crystallization process and you will end up with a coarse grain fudge.


Mixing
Now pour your fudge into a bowl. With a hand mixer on slow speed start to beat the mixture. The slow cooling while beating gives that wonderful smooth, melt in the mouth feeling to the fudge.
After 1 minute of beating you add the white chocolate, the mixture has cooled enough not to burn the chocolate but it will still melt. Within 1 minute the mixture should change from a translucent into a matte look and become more firm. Pause a few times during mixing, by turning off your hand mixer for 10 seconds, to allow time for the sugar to crystallize. With each pause the mixture should set a little bit more and get a more firm yet silky look. This whole process takes about 2 to 3 minutes.
Before it sets completely, with a spatula, tip the fudge mixture onto a clean cutting board and mold it into a nice square. When the fudge spreads out a little bit, ‘knead’ it with the spatula by folding the four edges onto the center and pressing it down again into a square a few times. With each fold the fudge sets a little more. Stop folding when the fudge can more or less hold its shape.
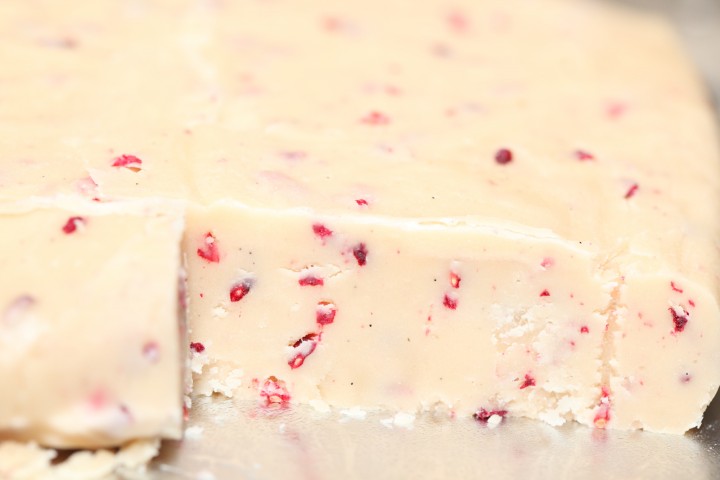
Also delicious with freeze dried raspberries added during mixing!
Waiting
Now comes the hard part, the waiting! While licking the spoons and beaters clean, leave it to cool at least 4 to 6 hours. During this time the fudge will set completely. Cover the fudge with some aluminum foil, it is best after 24 hours and keeps for at least 7 days in an airtight container after making. Stored in the fridge it will keep for several weeks, but the texture may alter a bit.
Enjoy!
Tips you must read before your first attempt at making fudge!
- Do not add any crystallized sugar to the boiling mixture, not even by accident, as this can ‘seize’ your mixture in a grainy substance.
- Keep the spoon you use to stir, dipped in the boiling mixture at all time so the ‘fudge’ on the spoon cannot harden and crystallize and ruin your fudge.
- carefully clean the sides of your pan with a spatula to remove sticking sugar grains away from the pan before going into a full boil.
- Do not stir your mixture any more after it has reach the 119°C degrees.
- Clean the tip of your thermometer after each measurement. We use a halve filled glass of water to ‘store’ the thermometer in between measurements and keep it clean.
- Pause a few times during mixing, by turning off your hand mixer for 10 seconds during mixing, to allow time for the sugar to crystallize.
Hello
I tried this recipe and my first attempt was a failure. My second attempt was ok untill the beating stage. After about a minute it turned into a coarse “bread crumb” consistency.
Have you read our tips Sonya, they are very important to get a smooth consistency. reading your comment we can imagine maybe a tiny bit of crystallized sugar came into contact with your mixture which is already enough to change the structure.
If you are very careful not to let that happen and keep everything very clean, you will get your smooth fudge!
Howdy, i read your blog from time to time and i own a similar one and i was just wondering if you get a lot of spam responses? If so how do you prevent it, any plugin or anything you can suggest? I get so much lately it’s driving me crazy so any assistance is very much appreciated.
Can it be done without glucose?
Hi Vicente,
Yes you can, but the fudge will probably not be as smooth but still very delicious we’re sure.
Hello. thanks for your reply. I’m looking to only use ingredients “that my grandmother uses to have in her kitchen”
🙂
A little inspired by Michael Pollan books… Aren’t those syrups very industrial stuff?
They look delicious though…
thanks
Fudge was invented around 1870, probably made with corn syrup, which also contains in part glucose. So a grandmother probably did not use glucose, but you can happily substitute glucose with a (corn) syrup. You probably have to use 30% more to compensate. The glucose helps to stop premature crystallization during the cooking process and gives the fudge a chewy yet smooth texture.
Hi,
Your website is great. Thank you for taking the time to share.
My question is about the fudge recipe. I am not clear on the difference between sucrose and regular sugar. Can you explain please.
Much appreciated.
Hello Judith,
Did you mean the glucose? With this we mean glucose syrup, this liquid sugar is also called confectioner’s glucose. It is added to the fudge recipe because it prevents the sugar from forming big sugar crystals this way getting a smoother texture.
Regular sugar is also called sucrose.
Very nice! Made some for my fudge loving son’s birthday. It was the first time I have made fudge and turned out lovely and smooth just as you said it would.
If I was being fussy I would like it to be slightly chewier – I took it to exactly 119 degrees C – would raising the temperature slightly do that?
Hi Jim, thanks for your comment. If you want a softer more chewier fudge you need to lower the temperature for 2 degrees C. So around 116C to 117C is the chewy stage! Happy fudging!
Hi,
I live in New York, but am originally from Pennsylvania. My maternal grandmother, who was Pennsylvania Dutch, made delicious fudge. I will be trying your recipe because I don’t have my grandmother’s.
Hi Lissa, love to hear if this fudge is any where near to the one of your grandmother’s.