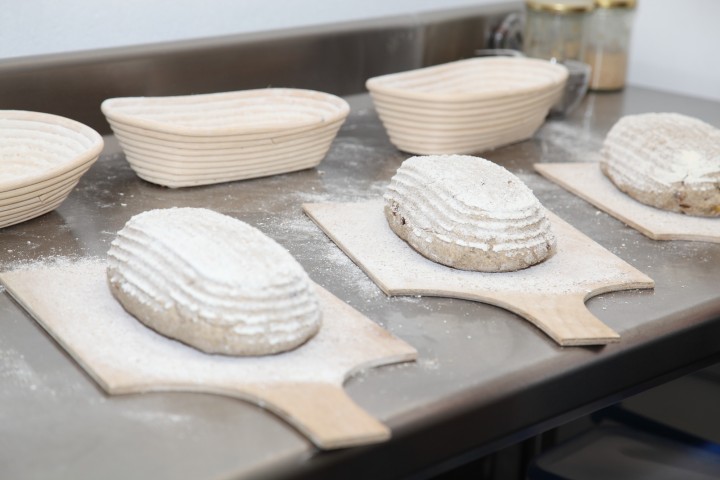
It feels great to master a recipe and get the same result time after time…
You have baked your most fantastic loaf ever! Everybody loves it. Next week you bake it again. But…this loaf turned out different. It’s not as well risen, it lacks a bit in salt and where are those big holes from last week? If you want your favorite recipes to work every time, there are some simple steps you can take to get the perfect loaf bake after bake. Here are some tips that work for us. They have improved our baking results dramatically.
- Remember that making bread is an exact science. If you repeatedly want to produce the same quality loaf, you have to measure your ingredients and write things down.
- Before you start, always read the entire recipe and make sure you have everything you need in place to create the optimal conditions for making a great loaf!
- Buy a dedicated bread notebook (the old version, made of paper) and write down the exact amounts, dates, time and temperature (room, oven, water and dough) each time you bake. We use a CDN ProAccurate Quick-Read digital thermometer to measure water and dough. Make notes on how every step turned out and how it can be improved next time. Keep score of what works and what doesn’t.
- Weigh your ingredients carefully and keep score of the amount of water you use each time. Especially when buying a new batch of flour, it could absorb more or less water than your previous batch.
- Even different brands (and therefor qualities) of the same type of flour can give dramatically different results
- For small amounts of yeast and salt it is of great help to use a precision scale that measures exactly the 0.2 grams of yeast you want to add to your starter/poolish for example.
- The weather and especially the temperature in the room can also play a role in baking results. You can help your dough by adjusting the temperature of the water you use to get a consistent dough temperature (with most recipes this is 24ºC / 75.2ºF).
- Measure your water by weighing instead of using a measuring jug. It is much more precise (for the record:1 ml of water is 1 gram).
- Buy one or more timers that alarm you when the next stage of your bread making wants you back to your dough or loaf. This way you won’t forget or be to late.
- When you have perfected a recipe, turn it into a document and print it out, so you can use this as your perfected guideline
- Keep the print out of your recipe together with a pen close to your work surface so you can make notes as you go along. Do not think you will write it all down later because you’ll probably forget.
- Practicing the baker’s percentage helps to understand the dough composition, and makes adjustments precise (Thanks to Anton).
If you have any more tips we would love to hear them!




Eveline says
Thanks for the great tips. I think it’s an excellent idea to keep a Bread Diary and and write down the exact amounts, dates, time and temperature (room, oven, water and dough) each time you bake. And I’m trying to do just that. But because in my scribbled notes it becomes a complex mix of ingredients, time, temperatures etc. Not te very clear and structured list that I would like it te be. Do you have tips for how to keep track of your baking in a neat way? I recently saw a cool dough mixing chart from the Baltic Bakehouse on instagram, that seemed like a handy chart – but didn’t include all the info I would need to write down. Any tips or examples very welcome!
Weekend Bakers says
Hi Eveline,
It is our experience that when you try to structure things you make things more complicated by doing so and you tend to keep score less and less. Writing things down in a notebook while kneading and baking is a ‘low threshold’ way to quickly write things down in a chronological way. Doing this in a spreadsheet or on your laptop with dirty dough fingers does not really work for us. What we do is not scribble too much in one and the same recipe, but give each try a new page in the notebook (PR version 1 , PR version 2 etc). And then, when the recipe is well worked out and we are satisfied, we do make a spreadsheet and use that as a reference, also for the amount of dough we want to make. We make a print of this sheet and occasionally scribble on it and now and then we adjust it and make a new print based on new insights.
Of course everybody needs to work out their own system, but hopefully the above is slightly helpful for you.
Enjoy the baking!
Martin says
TIP – Trust your senses. Use the finger poke test rather than following strict proving times. Check out E&M’s excellent post about the unreliability of waiting for dough to double in size (www.weekendbakery.com/posts…le-in-size).
For those who need to see a professional baker using the finger poke (just after he blows his nose!), check out Bill Buford’s visit to Bob the Boulanger in Lyons (www.youtube.com/watch…2A-Wj4cG0A).
Michalis says
Hi there weekend bakers,
I am straggling lately translating American bread recipes to European ones. It seems that the hydration is in general way-off. I would like to achieve tartine kind of crumb (extremely open), however I do not really believe that flours such as zandhaas molen tarwe T65 can handle hydration levels around 80% and give a nice puff. What is your experience with high hydration? How far can you push it? Do you have certain ambient temperatures and humidity levels you work with?
All best,
Weekend Bakers says
hi Michalis,
Have you seen our recipe for Tartine sourdough and the way we adapted it, including the hydration, to our European flour and home baking needs. We recalculated and adjusted the hydration level to be 70%.
See recipe here: www.weekendbakery.com/posts…yle-bread/
We work in different temperatures (see: www.weekendbakery.com/posts…mperature/) and we adjust to that too indeed, we also adjust with each new batch of flour we get, because there is a difference. So it is constant adapting and adjusting to get it right.
Greetings,
Marieke & Ed
phwriter11 says
I have started baking my own bread and your tips are very helpful. Today I think I must have panicked when I forgot to score the dough before putting it in the oven and slashed my bread in the oven instead of score:( It has deep cuts when it was baked. Should I just have left the dough unscored and let it spring on its own? Tomorrow I try again.
Weekend Bakers says
Hi there,
I am guessing you are not that happy with the result of the deep slashes, plus there is also the risk of burning yourself on the hot oven and loosing heat. If you forget to score all that will happen is the bread will tear / crack at its weakest points (if you score you make that automatically the weakest point). This will more often than not be at the side of the bread and not where you would want it. It will not look that great but otherwise the bread can still be very good. So my suggestion would be, whenever you forget, just leave it and there will always be a next time.
Happy baking weekend!
Marieke
Anton says
Tip to add: practicing the baker’s percentage helps to understand the dough composition, and makes adjustments precise.
Weekend Bakers says
Hi Anton,
Thank you very much for the addition, we will add it to the list.
Happy baking and a very happy and inspirational 2013,
Ed & Marieke
Gary Cook says
Hi
Just wondered what you thought was the best-sized brotform to order for general use, such as
production of the Pain Rustique? I’m looking at the video trying to imagine which size they
probably are. Any similar sized ones here? www.bannetons.com/index…on=angebot
Thanks!
Gary
Weekend Bakers says
Hi Gary,
Our most used banneton, also for the pain Rustique is the 750 gram one.
Marieke says
Hello Neal,
Thank you very much.
Great to hear these tips are being put to good use!
Hope to post some new tips soon.
Enjoy the baking with your class,
Marieke & Ed
Neal Johnson says
Thanks so much for these great tips. I teach bread baking in my farm kitchen. The classes are usually only 4 people so we are able to talk about all their questions. It is so good to have all these tips written down in one place that I can refer them to. Part of what I do is try to make them unafraid of yeast and the baking process so giving them the information will be great.
Thanks so much, I love your website.
Neal