
Plus our tips on retarding and freezing your croissants!
With this fast version of our original croissant recipe we want to show you how to do it all in one day and still get a very, very satisfying result. We want to stress that for novice croissant bakers it is a good idea to start with our original three day croissant recipe (perfect for weekend baking!) so you can concentrate on each stage and take your time with it to really learn the skills.
Remember, making croissants is one of the most challenging bakes to master, so follow our recipe, tips and directions carefully and only start experimenting when your croissants look a lot like the real deal.
At the bottom of this recipe we also share tips on how to retard and freeze your croissant dough.
Happy croissant baking!
Comparing the one day version and the original three day version, shows that taking less time yields a croissant that has a slightly less impressive honeycomb structure and is a bit less perky, but biting into one is still pure buttery joy!
Before you start we can recommend watching our croissant making video to get a general feel for the recipe.
The croissant recipe
READ THE ENTIRE RECIPE BEFORE YOU START!

Ingredients for the croissant dough
makes 15
500 g French Type 55 flour or unbleached all-purpose flour / plain flour (extra for dusting)
140 g water
140 g whole milk (you can take it straight from the fridge)
55 g sugar
40 g soft unsalted butter
11 g instant yeast
12 g salt
Other ingredients
280 g cold unsalted butter for laminating
1 egg + 1 tsp water for the egg wash
Step 1
Making the croissant dough
Combine the dough ingredients and knead for 3 minutes until the dough comes together and you’ve reached the stage of low to moderate gluten development. You do not want too much gluten development because you will struggle with the dough fighting back during laminating. Shape the dough like a disc, not a ball, so it will be easier to roll it into a square shape later on. Place the disc on a plate, cover with clingfilm and leave to proof at room temperature for 60 minutes.
Step 2
Laminating the dough
Start this step 30 minutes into the 60 minute proofing period of step 1.
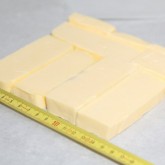
Cut the cold butter (directly from the fridge) lengthwise into 1,25 cm thick slabs. Arrange the pieces of butter on waxed paper to form a square of about 15 cm x 15 cm. Cover the butter with another layer of waxed paper and with a rolling pin pound the butter until it’s about 19 cm x 19 cm. Trim / straighten the edges of the butter and put the trimmings on top of the square. Now pound lightly until you have a final square of 17 cm x 17 cm. Wrap in paper and refrigerate the butter slab until needed.
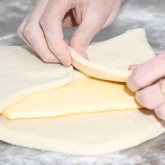
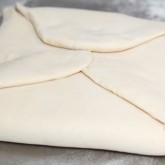
After 60 minutes of proofing unwrap the dough. With a rolling pin roll out the dough disc into a 26 cm x 26 cm square. Try to get the square as perfect as possible and with an even thickness. Get the slab of butter from the fridge. Place the dough square so one of the sides of the square is facing you and place the butter slab on it with a 45 degree angle to the dough so a point of the butter square is facing you. Fold a flap of dough over the butter, so the point of the dough reaches the center of the butter. Do the same with the three other flaps. The edges of the dough flaps should slightly overlap to fully enclose the butter. With the palm of your hand lightly press the edges to seal the seams.
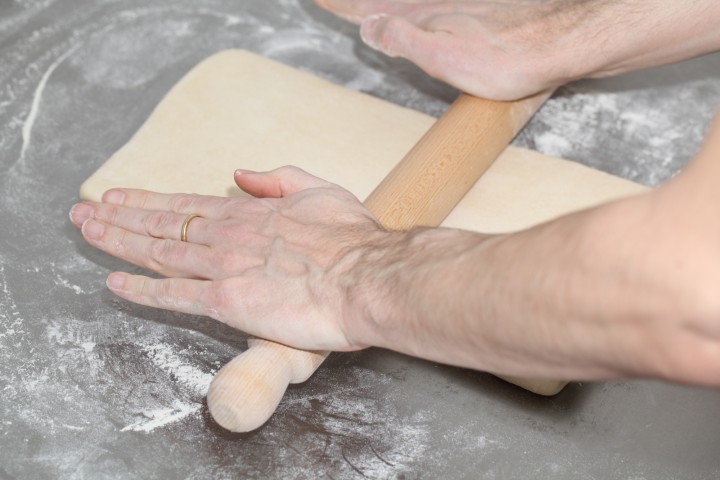
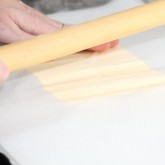
Now the dough with the sealed in butter needs to be rolled out. With a lightly floured rolling pin start rolling out, on a lightly flour dusted surface, the dough to a rectangle of 20 x 60 cm. Start rolling from the center of the dough towards the edges, and not from one side of the dough all the way to the other side. This technique helps you to keep the dough at an even thickness. You can also rotate your dough 180 degrees to keep it more even, because you tend to use more pressure when rolling away from you than towards yourself. You can use these techniques during all the rolling steps of this recipe. Aim at lengthening the dough instead of making it wider and try to keep all edges as straight as possible.
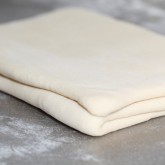
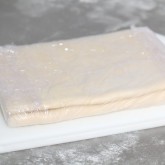
Fold the dough letter style, cover with clingfilm and refrigerate for 60 minutes to get the dough and butter to fridge temperature (fold one third of the dough on top of itself and then fold the other side over it). Repeat the rolling and folding two more times (ending up with 27 layers in total), each time rolling until the dough is about 20 cm x 60 cm. After each fold you should turn the dough 90 degrees before rolling again. The open ‘end’ of the dough should be towards you every time when rolling out the dough (you can see this in our croissant making video at around 3:40 minutes). After the second turn, give it a 30 minute rest in the fridge. After the third turn again give it a 30 minute rest.
- Roll out to 20 cm x 60 cm
- Refrigerate 60 minutes
- Rotate 90 degrees
- Roll out to 20 cm x 60 cm
- Refrigerate 30 minutes
- Rotate 90 degrees
- Roll out to 20 cm x 60 cm
- Refrigerate 30 minutes
- Rotate 90 degrees
- Roll out to 20 cm x 110 cm
Step 3
Dividing the dough
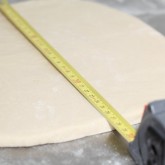
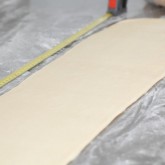
Take the dough from the fridge. Lightly flour your work surface. Now very gently roll the dough into a long and narrow strip of 20 cm x 110 cm. If the dough starts to resist too much or shrink back during this process you can fold it in thirds and give it a rest in the fridge for 10 to 20 minutes before continuing. This will relax the gluten and make rolling out the dough easier. Do not fight the dough, when the dough refuses to get any longer, rest it in the fridge!
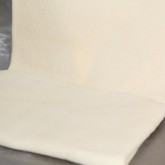
When your dough has reached its intended shape and length, carefully lift it a few centimeters to allow it to naturally shrink back from both sides. This way it will not shrink when you cut it. Your strip of dough should be long enough to allow you to trim the ends to make them straight and still be left with a length of about 100 cm.
Shaping the croissants
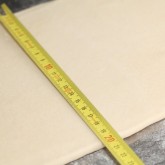
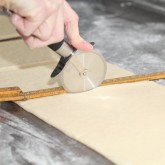
For the next stage you will need a tape measure and a pizza wheel. Lay a tape measure along the top of the dough. With the wheel you mark the top of the dough at 12,5 cm intervals along the length (7 marks total). Now lay the tape measure along the bottom of the dough and make a mark at 6,25 cm. Then continue to make marks at 12,5 cm intervals from this point (8 marks total). So the bottom and the top marks do not align with each other and form the basis for your triangles.
Now make diagonal cuts starting from the top corner cutting down to the first bottom mark. Make diagonal cuts along the entire length of the dough. Then change the angle and make cuts from the other top corner to the bottom mark to create triangles. Again repeat this along the length of the dough. This way you will end up with 15 triangles and a few end pieces of dough.
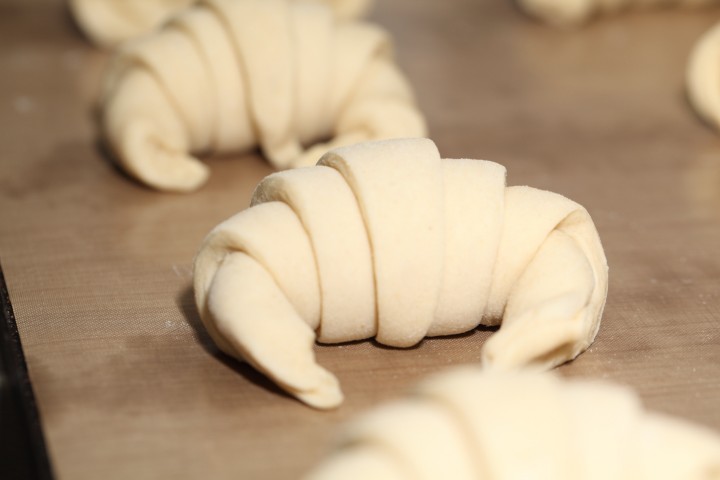
Using your pizza wheel, make 1.5 cm long notches in the center of the short side of each dough triangle.
Now very gently elongate each triangle to about 25 cm. This is often done by hand, but we have found that elongating with a rolling pin, very carefully, almost without putting pressure on the dough triangle, works better for us. You can try both methods and see what you think gives the best result.
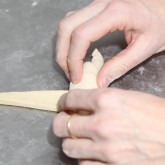
After you cut a notch in the middle of the short end of the triangle, try and roll the two wings by moving your hands outwards from the center, creating the desired shape with a thinner, longer point. Also try and roll the dough very tightly at the beginning and put enough pressure on the dough to make the layers stick together (but not so much as to damage the layers of course).
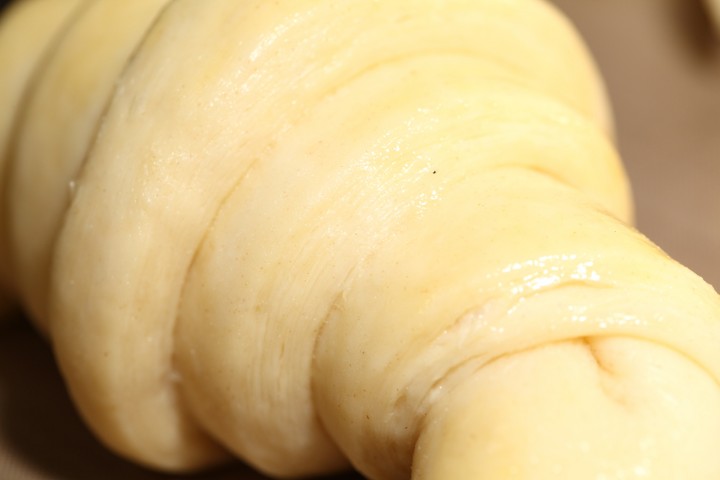
Check out the layers…
Proofing and baking
Arrange the shaped croissants on baking sheets, making sure to keep enough space between them so they will not touch when proofing and baking. Combine the egg with a teaspoon of water and whisk until smooth. Give the croissants their first thin coating of egg wash.
Proof the croissants draft-free at an ideal temperature of 24ºC to 26.5ºC (above that temperature there is a big chance butter will leak out!). We use our small Rofco B20 stone oven as a croissant proofing cabinet by preheating it for a minute to 25ºC / 77ºF. It retains this temperature for a long time because of the oven stones and isolation. The proofing should take about 3 hours, it takes longer than the 3 day recipe as the dough still needs to develop. You should be able to tell if they are ready by carefully shaking the baking sheet and see if the croissants slightly wiggle. You should also be able to see the layers of dough when looking at your croissants from the side.
Preheat the oven at 200ºC / 390ºF convection or 220ºC / 430ºF conventional oven.

Right before baking, give the croissants their second thin coat of egg wash. We bake the croissants in our big convection oven for 6 minutes at 195ºC, then lowering the temperature to 165ºC, and bake them for another 9 minutes. Hamelman suggest baking the croissants for 18 to 20 minutes at 200ºC, turning your oven down a notch if you think the browning goes too quickly. But you really have to learn from experience and by baking several batches what the ideal time and temperature is for your own oven. Take out of the oven, leave for a few minutes on the baking sheet, then transfer to a cooling rack.
Our current way of baking in our big double fan convection oven: We preheat at 200ºC, when heated put the croissants in the oven and directly lower it to 175ºC. We bake them for 10 minutes at 175ºC, they will have a nice brown color by now, then lower the temperature to 150ºC, and bake them for another 6 minutes.
Retarding & freezing your croissants
If you want to postpone your croissant baking by retarding your dough in the fridge, or storing the unbaked croissants in the freezer to bake at a later stage, follow these instructions for best results:
Retarding
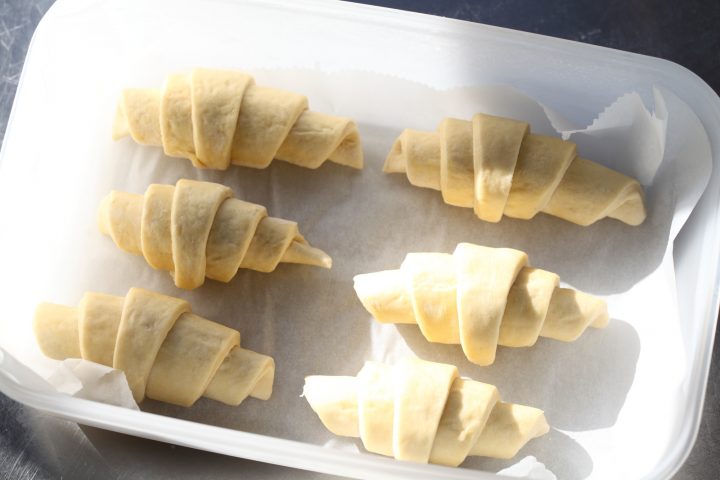
After shaping leave your croissants to proof for one hour at room temperature to kick start the proofing process. Then place them in the fridge overnight. Make sure no air can reach the croissants, otherwise they will dry out! It is best to place them in an airtight container on a piece of baking paper. Make sure the container is big enough to allow the croissants to expand without touching each other.
Practice and experience will teach you the optimum fridge time for the croissants to develop and proof (also depends on your fridge temperature). Always make sure the croissants are proofed to perfection before you bake them. This could often mean, allowing them extra time at room temperature after the night in the fridge. If you want perfect croissants, the right proofing stage is key, otherwise you could end up with croissants that are flat, butter leaking out, no beautiful layers and so on. When you are absolutely sure the croissants are ready for the oven, give them a thin coat of egg wash or brush with milk and bake them using the instructions from the recipe above.
Freezing
Storing your unbaked croissants in the freezer, again will result in a little bit of quality loss, but this is outweighed by the practicality of being able to decide for yourself when to bake the croissants.
We recommend the following method: Place the shaped croissants on a sheet of baking paper in a container and make sure they do not touch each other. Cover and proof croissants for one hour at room temperature to kick start the proofing process. Now place the container in the freezer.
When you want to bake them, plan ahead. It takes quite a while for the croissants to thaw. There are a few methods you can try out. The first is to take them out of the freezer and leave them to thaw in the fridge overnight. This way you can easily control the process. The next morning you can be sure the croissants will still be very cold. It will take at least three hours before they are ready for the oven. If you have a proofing cabinet you can use this to proof the croissants at around 24ºC to 26.5ºC, or you can use your slightly warmed oven (check the temperature with a thermometer) to use as a make shift proofing cabinet. See our tips and instructions on proofing and baking above.
Alternatively you can take them from the freezer and leave them to proof overnight at (cool) room temperature. There is a slight risk of over-proofing here, so for a first attempt we recommend taking them out late at night and checking them very early in the morning. Again practice and experience will lead you to the optimum time for your situation and to the optimum result. When you are absolutely sure the croissants are ready for the oven, give them a thin coat of egg wash or brush with milk and bake them using the instructions from the recipe above.
Advantage of developing your own optimum method will allow you to have super fresh croissants ready early in the morning, for brunch or any time you like!
Happy croissant baking!








Rose says
How long dos this take in total
Weekend Bakers says
Depending on experience and how you handle the dough, it will take at least 6 to 7 hours, so you should make sure to be able to take a whole day where you can concentrate on the recipe.
bri says
so glad to find this, i really wanted croissants last week but i didnt want to wait so long lol!
came out really delicious, of course i still need practice and my lower than ideal fat percentage salted butter did break , but it still came out so great.
starting the original 3 day version with better butter now!
queencafe777 says
Proofed for two hours in my kitchen aid oven with bread proofer.
Preheat oven st 440 convection. Baked convection 375 for 20 mins. Cover with foil if browning too quickly in the last 5 mins. Perfect
MC Candy & Bake says
The video mentions putting the dough in the freezer for twenty minutes, but I see no reference to that in this article. Could I get some clarification on whether or not this is recommended?
Ricardo says
Hi, I love this recipe and gives me great results but for some reason my croissants smells funky sometimes and I can’t explain the smell but seems that something is off… Does anyone have the same thing and knows the reason? Keep in mind that I’m always using fresh and top ingredients. Maybe I’m overproofing but once again this happens in the same day or 3 day recipe!
Cheers
Ricardo
Heela says
Hey,
I made croissant with the one day recipe and at the first time I rolled the dough with the butter it was rolled perfect, but in the second time the butter break. I used a butter with 82.5% fat. What can I do?
Hussein Ghandour says
Hello. You have to leave the dough for about 5mins on the bench/table after removing from fridge. It’s shattered because the butter was still very cold. Letting the dough come up to temps a bit will offset that.
Mary says
Thank you so much for posting your recipes. I have made both the 3-day and 1-day versions of croissants several times with great success. I plan to bake them for my family as a holiday treat this year.
In the 3 day recipe you mention that margarine can be used in place of butter. I would very much like to make a batch with margarine for my nephew who cannot tolerate dairy.
My first attempt was…less than satisfactory. I’m not sure if I got over confident and didn’t develop the dough enough before beginning lamination (it tore on one corner) or didn’t chill enough between each lamination steps or something else. I found the margarine very frustrating to work with as it was much softer than the butter straight out of the fridge. I also had several of the laminated layers peel away as I was rolling out the dough for the final shaping. I received several complements on them from the coworkers I gave the test batch to, so they looked and tasted ok but were incredibly frustrating to make.
I’m on the point of giving up making my nephew croissants for Christmas and making him some other pastry but I’d still like to master the croissant with margarine in the future.
Do you have any suggestions for working with margarine? I tried one brand that I saw recommended but I’m wondering if it simply was too different from butter in how it responds to refrigeration. Any idea what properties to look for in a margarine to have more success next time?
Mary says
I should have also added that I had to use water in place of the milk (due to no dairy) but I had done that previously on a batch that used butter and had no problems with it.
queencafe777 says
So much work and you are using margarine? No way I will do that. Spend a little more money to buy 85% full fat quality brand unsalted butter and you will get fantastic croissants! 👩🍳Thanks
nidhi says
She said she is making them for her nephew who cannot have dairy.
Perri says
The recipe says 40 g of butter. Is it supposed to be 400 g? I saw the same on the 3 day recipe.
Weekend Bakers says
See under ‘other ingredients’ just below the first ingredients list of the dough for the rest of the butter! 28o g
Perri says
Thank you! Not sure how I missed that.
The croissant enthusiast says
In my first attempt, I used a small batch i.e. 1 cup flour and adjusted all the other ingredients accordingly. The results were fantastic and I really enjoyed the croissants.
In my second attempt, I wanted to make a larger batch so I used 4 cups of flour and adjusted the other ingredients accordingly, but decided to go for more butter than necessary probably about 400-450 gms.
I immediately faced problems in the folding phase. The butter would not get incorporated well with the even dough, even though the lamination of the butter was perfect. Every time I folded the dough, butter would ooze out from the sides or the dough itself would tear in between exposing the butter.
I did somehow manage to roll the dough into croissant shapes by dusting flour wherever butter flowed out. I proofed them and baked them but noticed butter sizzling on the baking tray, indicating it had flowed out.
I’m pretty sure I proofed them enough since they did develop in size, but after reading your article, I guess the croissant pieces could have used a longer proofing period.
Weekend Bakers says
Hello CE,
Your assessment is accurate and whenever butter uses out something is wrong of course, so maybe the weather was different too that day and you needed more fridge time because the handling of the dough took you longer.
Keep making notes of what works and what doesn’t and just go on to the next badge!
Marilyn says
Despite making several times still a lot to learn the process. Some time I got perfect croissant sometimes I’m not fully satisfied the result. Depend of my mood when I’m under pressure it didn’t come as I wanted to be.
Weekend Bakers says
Hi again Marilyn,
We are all only human. What you describe is exactly what we and a lot of other bakers experience. Baking can be a form of relaxation and welcome distraction, but when you are stressed and your head is full of other stuff while busy with such a complicated bake, things will often not go exactly as planned. It is not something you can do on the side while also juggling several other things. Your self-understanding will only help you become a better baker!
Mehru says
I tried this recipe and failed terribly because temperature here in Pakistan is above 26 degrees. Dough left it’s place while rolling and butter came out and rolling pin and counter top were covered with it. I didn’t knew what to do with dough. Somehow i made croissants and they were very very bad. I was almost in tears. I’ve decided to try this recipe again in winter with all the tiny details keeping in mind
Weekend Bakers says
Sorry Mehru, it is such a challenge under your conditions, especially if you are still learning and are not that speedy with the process. You can check our tips here for next time, also about baking in a hot climate: www.weekendbakery.com/posts…questions/
Make sure to use the fridge a lot and work during the coolest period, so winter is a very good idea.
Just to let you know, most people, including us, have had very bad first croissants!
Let us know how it goes in winter,
Marieke
WKB
Kyobelot says
Hello,
What a excellent results of your 3 days croissant with the beautiful honeycomb.
I have a question on my croissant.
1. I proofed them at 25°c about 2 hours and 45 mins, they’re totally looked proofed to me (I checked by shaking the tray and they’re wobble and double in size) but when I baked them then its pools of each croissant and the result looked raw inside and hollow….they’re hard like biscuits, shape changed and they’re heavy instead of flaky and light croissant.
2. How do I know if my croissant is proofed (for real)?
Please help on these issues 🙏
What a shame I have got a very nice layers as I used the dry butter which contains 82% of fat and I worked fast on the lamination.
Thank you so much, you have a good day! 🥐🥐🥐
Weekend Bakers says
Hello Kyobelot,
It is hard for us to pinpoint what you might have done ‘wrong’ when you describe such a perfect process. With what you describe we have no other explanation that we can offer. You seem to be doing everything right. Maybe to only thing left is the working of your oven?
Good luck with it!
Krithika Radhakrishnan says
Hi , whenever I go by a three day recipe .. the croissant roll
gets squishy by the third day . One day croissants work better here in India where temperatures are high .
Do let me know why it gets squishy by the third day ?
Weekend Bakers says
Yes, we think it has to do with your climate, so you would have a better change at a good result shortening the process to 1 or 2 days and cool as much as you can, use cool tools and ingredients if possible too.
Kuljit says
Hi, I tried the croissants first time in my life 😊 and followed all the steps and I must say that they came out really well. Thanks for giving every little detail. Definitely the best recipe of croissants I found. My family loved the taste and texture of croissants. As I was making croissants for the first time , I may have done little mistakes but the outcome was beyond my expectation 👍🏻 I would recommend that if anyone wants to make croissants at home this is bestest recipe to try . I will try them every weekend to make the perfection. Thanks thanks and thanks. I never knew I could make croissants myself at home.
Weekend Bakers says
Hello Kuljit,
Very happy we could support you with our recipe to get such a wonderful result with your first even bake. You can be a proud baker, making yourself and the ones around you merry with fresh pastry 🙂
Diana B says
Hi, i would like to try your 3 day croissant recipe, however i would like to stuff the croissant with creme pat / custard. Can you advise if the custard must be placed in the croissant prior to baking or do i make a hole after baking in the croissant and fill? If i place the custard prior to baking, can i use your creme pat recipe or is there a specific type of custard/creme pat? Thank you
Weekend Bakers says
Hello Diana,
We would suggest filling (injecting) the custard after baking. You can use our recipe for this, but make sure the consistency is right for the piping.
Adding the custard before baking will very much affect the layers of your croissants. Custard and a bit of jam is also a wonderful combination.
Hope it will work out and it will be delicious.
Yesenia Castillo says
What is the name of the type rolling pin you are using? I would love to have one of that style!
Weekend Bakers says
Hello Yesenia,
This one is a simple pizza rolling pin made of beech wood. You can see it here: www.weekendbakery.com/websh…-wood.html
But we do also love to use a slightly heavier and thicker rolling pin (which we do not sell in our shop at the moment) and let the weight of the pin do the work, without really pressing on the dough.
You have to discover your own favorite for this recipe.
SanGS says
Hello! I haven’t tried your recipe yet but I can’t wait to do so. I wonder… can I freeze the already laminated dough and have it ready to use days or weeks after and then form the croissants? Would it affect the final result? Would you recommend it?
Thank you for the super detailed recipe!
Greetings from Mexico
Weekend Bakers says
Hello SanGS,
Yes you can do that, although it will always have some effect on the result, the most important thing is to work the dough AFTER it has fully thawed and work as precise as you can during the whole process. Because all food quality deteriorates over time in the freezer, we recommend using it within days rather than weeks.
Hope you will enjoy fresh croissants soon!
Greetings from Holland,
Ed& Marieke
SanGS says
Thank you so much for your response Ed & Marieke! I know there’s nothing like freshly baked croissants, hope the experiment works…
I will let you know how did my experience went when I get to try the recipe, both fresh and freezed.
Greetings!
SanGS
Weekend Bakers says
Love to hear about your results.
Enjoy the process and stay safe these times!
Supy says
Hi there,
I just made this croissant recipe yesterday for the first time. They were really good. Thank you for the recipe. Too bad I can’t share some of my croissant pictures. If I can, you will be proud as you are a super great instructor/ teacher for me.
Love from the US
Weekend Bakers says
We would love for you to share pictures of your croissants. Although there is no option to place pictures in a comment, we do have a ‘your loaves section’ on our website where we can showcase them.
To upload them : www.weekendbakery.com/send-…your-loaf/
Thank you for trying and liking our recipe and enjoy your pastry baking!
Greetings from the Low Countries,
Ed & Marieke
Katanahamon says
In both this and the three day recipe, I recommend parchment paper instead of waxed paper for beating the butter square. Perhaps waxed paper means something else in other countries, but in the US waxed paper is the thin, almost translucent waxy paper that is not very robust. First time I tried using it to beat the butter, the moisture in the butter (organic, 85%) caused the paper to melt into the butter..it was a nightmare to peel out all the little bits. So..parchment..just a tip!
Weekend Bakers says
Thank you for this, we understand what you mean. In Holland we usually only have one version of this type of baking paper and it we think it comes close to your parchment, because it is doing the job well without causing catastrophes.
Thank you for pointing this out to us and other bakers.
Katanahamon says
I was thinking there’s even another choice, the waxed white butcher paper. It’s pretty heavy, I bet it would work too. I haven’t seen it for sale except in bulk for professionals. Parchment works great though, and you can see just well enough through it to maintain your shape.
Katanahamon says
Edit..actually freezer paper is like butcher paper, I tried it, it still doesn’t work as well as parchment. Stick with parchment..
Harald says
Hello!
In step 1, it says: “Shape the dough like a disc, not a ball, before you refrigerate it, so it will be easier to roll it into a square shape later on. Place the disc on a plate, cover with clingfilm and leave to proof at room temperature for 60 minutes.” What refrigeration is this refering to? From what I understand, it is rolled into a square directly after proofing in room temperature?
Weekend Bakers says
Hello Harald,
Thank you very much for pointing this out. We have corrected this mistake, because the dough is resting for 60 minutes at room temperature for this one day recipe. So, you are absolutely right. Only in the original recipe does the dough go to the fridge.
Sorry about this and hope the rest of the recipe will be confusion free!
Adrián says
Thank you for your recipe!!!.
If I wanted to increase for a production 10 times larger, should I also increase the ingredients to 10 times?
Weekend Bakers says
Yes that is correct Adrián. But if you are a novice with the recipe, we would advice to start with one batch.
Adrian says
Thank you Baker! Another question for you, is possible modify recipe for bake croissant sweet or salted? Do you know proportions of salt or sugar for these?
Very, very thanks!!!
Weekend Bakers says
Hello Adrian, there are all kinds of variations possible, also to fill the croissants with sweet or salty fillings, you can just use the same dough for this.
Daffy says
Hi there! Thank you for such a detail and excellent tutorial. I had done mine recently and it turned out great! However I had some issue I like to ask. So I usually freeze my croissant right after shaping as it save me more space. However I notice that my croissant turn smaller compare to the one I proof and bake right away. Is that normal? Could I do something to make it turn as good as the one I proof and bake right away after shaping? Thank you so much!!
Weekend Bakers says
Hello Daffy,
It is important to ‘Kick start’ the proofing process of your shaped croissants by letting them proof for (at least) one hour before putting them in the freezer. This way our results are almost as good as with baking right away. You will always see some quality loss, but this method should do the trick.
Happy pastry baking!
Ina says
Hello! Thank you very much for these precise and concrete recommendations for perfect croissants! I would like to ask: is it possible to make a lower portion of croissants (15 is too much for us)? If yes, what would be the parameters of dough and butter rectangles? Thank you!
Weekend Bakers says
Hello Ina,
Yes you can make halve a batch for example:
If you halve the recipe, the dough square should be 18.4 x 18.4 cm and the butter slab 12 x 12 cm. The same for the laminated dough, you must shorten only one side (otherwise you get a quarter of the original), so you end up with a 20 x 30 rectangle. The size of the final dough, right before cutting, should be 20 x 55 cm.
But you can also make more and put them in the freezer, because you put in all the work already and the croissants will be gone in no time 🙂
Ina says
Thank you very much!
I will start with a half batch version for beginners 🙃
Alexander Luiz says
Hi, I love the look of these croissants.
Obviously time and temperature is everything in baking. A question around temperature of dough, what should it be OUT OF THE MIXING BOWL? And what should the temperature of the dough be when using it on day two (when we start laminating)?
Alex
Weekend Bakers says
Hi Alexander,
We aim for around 24C after mixing. When you start laminating with this recipe it is still day 1, this being a one day version, so the dough will have been in the fridge for 1 hour and is cold to the touch. You can start the laminating process right away, just gently roll it to the required shape and size, it will warm up very quickly (unless your workspace is very, very cold of course).
LJay says
Hello, thank you for the great instructions! My question is: I would like to make the croissant dough as a loaf in a Pullman loaf pan. If it is possible can you please tell me how to go about it, how to shape the dough, oven temp, time, etc ??
Thank you so much!
Weekend Bakers says
Hello Ljay,
We know that this is possible but we have actually never done this so we would advice you to search on the web . We would probably make 4 or 5 rolls and put them in the pan next to each other to form a loaf and to keep the dough structure well preserved.
Hope it will be a success!