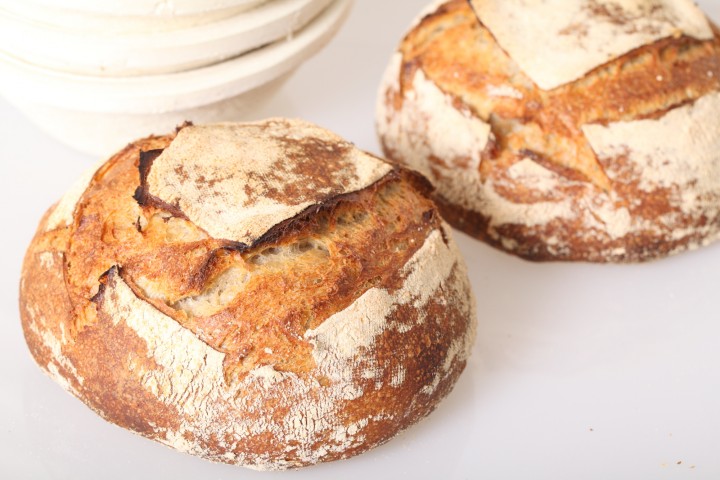
Daring to keep it simple can also produce great results…
Klik hier voor de Nederlandse versie
We started this recipe as a one-off experiment, thinking the result would not be that interesting, compared to the other bread recipes we already know and love. But the end result really surprised us. As you might expect, knowing some of our other favorite recipes, the key factors for this one are the same: time, timing and really good flour!
This recipe is the first to have a ‘dough calculator’ (see ingredients list). Other recipes will follow soon!
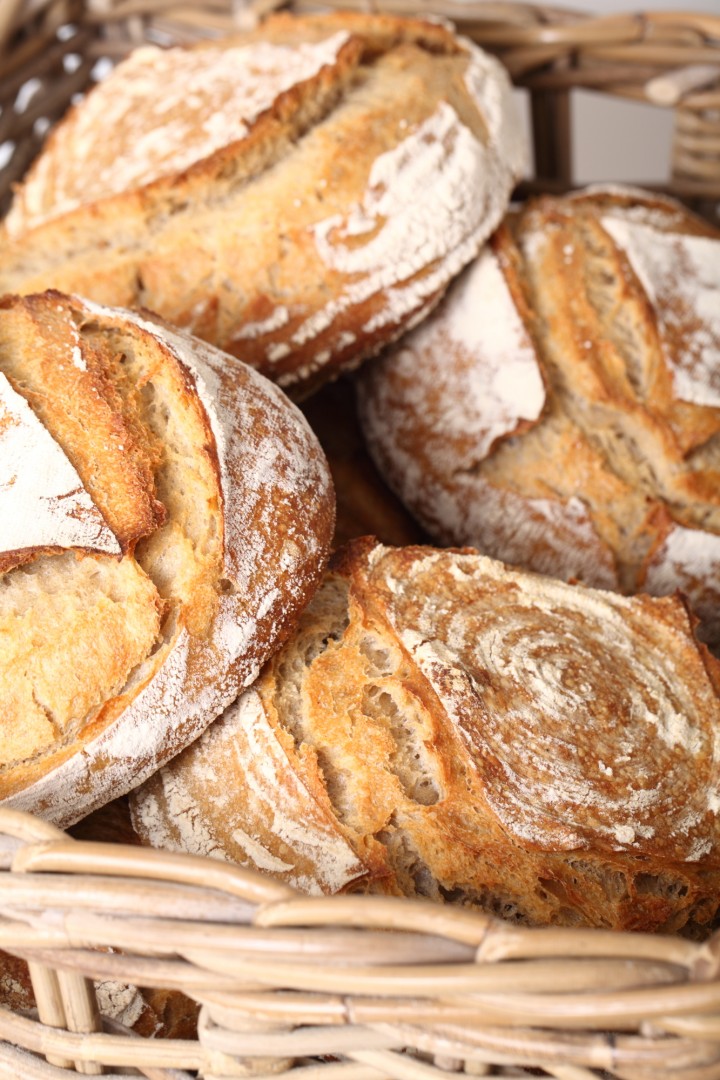
Although there does not seem to be strict definitions about French bread terminology, we simply call this bread ‘Pain Naturel’ or abbreviated PN. We chose this name because it stands for a basic yet full flavored sourdough bread, made just from ‘white’ bread flour. Using our own sourdough culture we found the bread gets a pleasant hint of sourness, which combines very well with the sweet flavor of the flour we use.
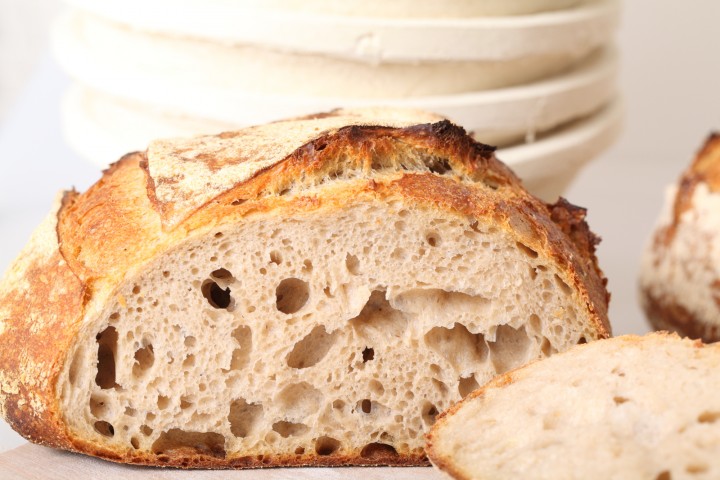
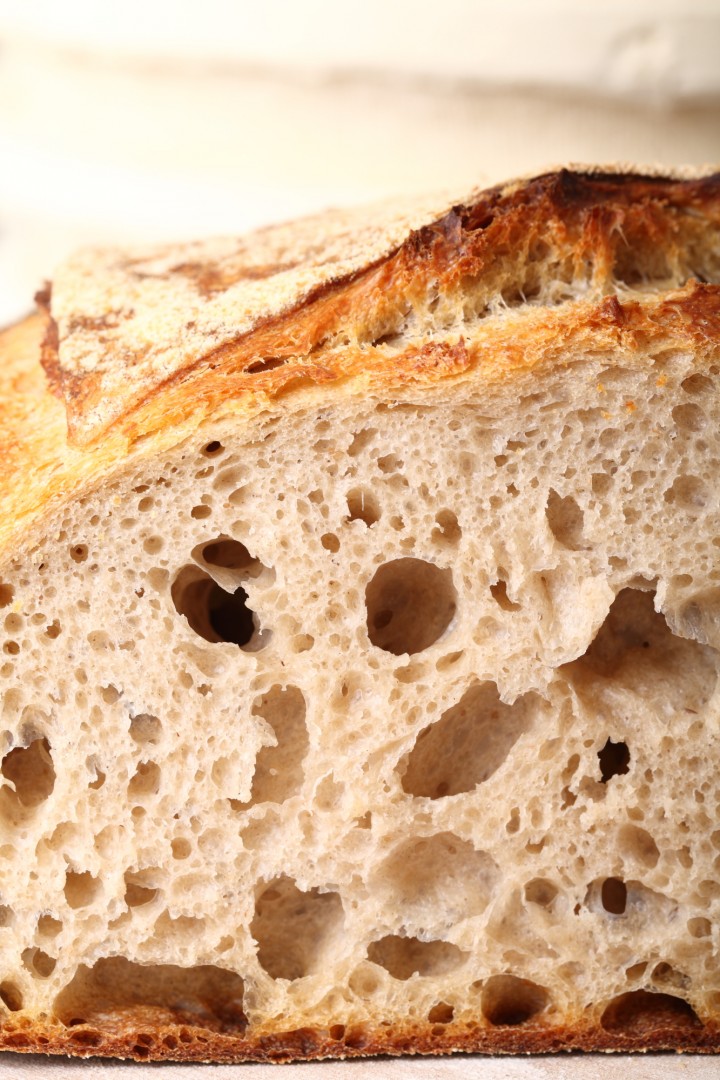
And especially because this bread is made with ‘white flour’ only, it is important to get the best quality, organic, stone ground flour you can get your hands on. When you do, we truly believe you will be rewarded with amazing taste and depth of flavor, better crumb structure and the crustiest of crusts.
Enjoy the recipe and let us know what you think. Also check out our handy sourdough tips to get the most out of your sourdough baking!
Before you start
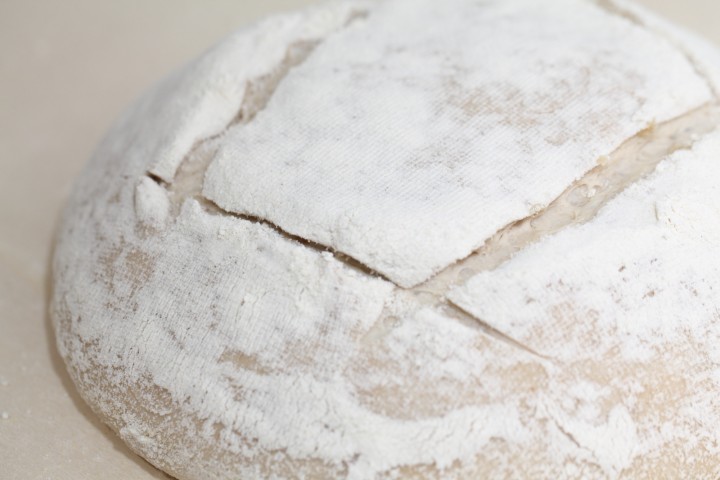
For this recipe we are going to make a starter named a poolish. A poolish is a type of wet sponge usually made with an equal weight of water and flour and a small amount of sourdough starter culture or yeast and NO salt. Making a poolish helps bring more taste and strength to your bread.
We use a sourdough culture which is made with 100% whole grain rye flour. A sourdough culture based on rye flour is easier to maintain, does not go into a slurry when you forget about it, is easier to stir because it has almost no gluten and smells very nice, a bit like fruit. It is also very forgiving in the amount you feed it, everything seems to be alright. Normally we only feed it once a week, after our weekend baking we give it a few table spoons of water and rye flour, stir, ready!
| Ingredients for the Poolish | ||||
|---|---|---|---|---|
| 115 | g | wheat (bread) flour | ||
| 115 | g | water (room temperature) | ||
| 15 | g | sourdough culture | ||
| Ingredients for the Pain Naturel | ||||
|---|---|---|---|---|
| makes 1 loaf | ||||
| the poolish from step 1 | ||||
| 340 | g | wheat (bread) flour | ||
| 180 | g | water | ||
| 7.5 | g | (sea) salt | ||
Making the Poolish
In a bowl stir together the 115 g flour, 115 g water at room temperature with the 15 g sourdough culture. Mix it well until you have a homogeneous slurry that looks like very thick batter. Cover the bowl with clingfilm and let the prefermenting begin. After 12 hours at room temperature it should be bubbly, light and ready for use. So if you want to begin your bread making in the morning, you should make your poolish at 9 in the evening.
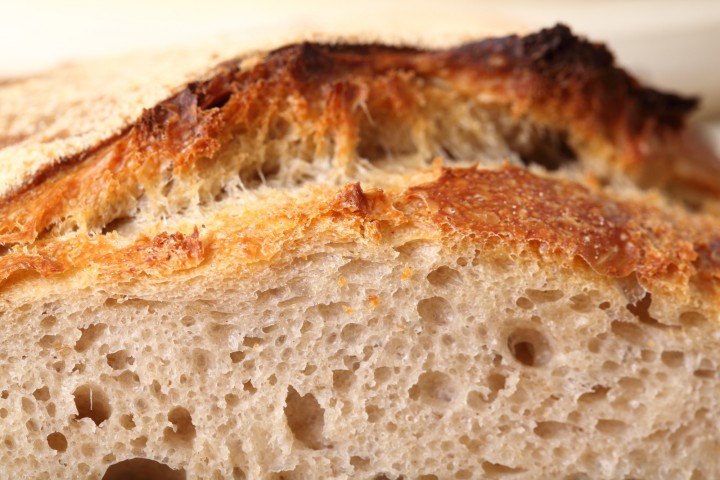
Note: We use European flour which absorbs a few % less water than American type flour. People using American type of flour should add 5-15 ml water to the final dough.
Making the Pain Naturel
Put the poolish starter and flour in the mixing bowl of your standing mixer and add 2/3 of the water (do NOT add the salt yet). Now start mixing and gradually add the rest of the water and let the dough come together. Knead for only 1 minute, leave it in your mixing bowl, cover with clingfilm and rest for 20 minutes (this technique is also referred to as autolyse).
Now add the salt and knead for another 4 minutes. Transfer the dough to a greased bowl, cover and leave to rest for 50 minutes.
Ideally the temperature of your dough after mixing should be around 24-25 ºC / 75 ºF. You should adjust the temperature of the water you add, so the total dough reaches this temperature. For us this means in summer adding cold water to this recipe and in winter (when our little bakery gets much colder then the rest of our house) adding water up to 50 ºC /122 ºF. You can measure the temperature of water and dough with a food thermometer. These measurements are important because they correspond with the proving times in the recipe.
After the first 50 minutes rest take the dough out of the bowl and onto a floured work surface and do one stretch and fold (a full letter fold, left over right, right over left, bottom over top, top over bottom; watch our bread movie or our stretch and fold method video to observe this technique if you are not familiar with it). Transfer to the bowl, cover and again leave to rest for 50 minutes. Repeat the stretch and fold (full letter fold) one more time (so 2 times in total) and leave to rest for 50 minutes (so this is the third and last of your three 50 minutes resting periods). During each stretch and fold the dough should feel firmer and less wet.
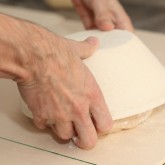
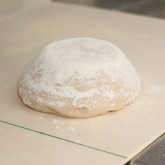
Now it’s time to shape. Shaping is a tricky subject. It’s something for which everybody develops his or her own favorite technique over time. You can make a batard or loaf shape or a boule (ball) shape like you see in the pictures. If necessary you can learn more on shaping from a good bread book, like the ones by Hamelman or Reinhart, or the Tartine Bread book. Or take a look at our boule shaping video.
Preheat your oven to 230 ºC / 445 ºF conventional setting (at what stage you preheat your oven depends on how long it takes for your oven to heat through, some take 30 minutes, some, like ours, with stone floors take a lot longer, up to two hours).
Transfer the shaped dough to a proofing basket / banneton, cover and leave to proof for 2 hours and 30 minutes (provided your dough has a temperature of around 24-25 ºC / 75 ºF, also check our tips on dough temperature). When you think it has risen enough, use your finger to carefully make a very small dent in the dough. If the dent remains, the bread is ready to bake, if the indentation totally disappears, the dough needs a little bit more time.
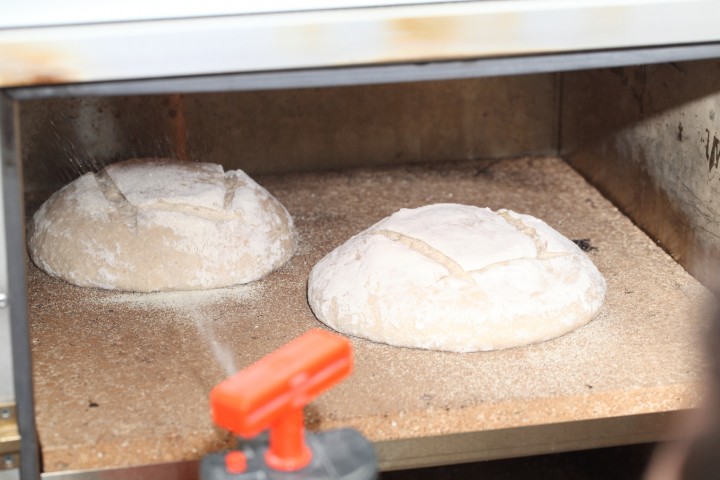
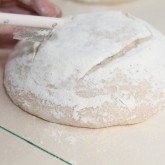
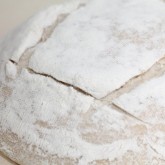
Now your loaf is ready for the oven. Slash the top of the loaf with a lame or bread scoring tool. To get a nice crust, try to create some steam in your oven by putting a small metal baking tray on your oven floor when you preheat the oven, and pour in half a cup of hot water immediately after putting the bread in the oven. Release some steam by setting your oven door ajar (perhaps with the help of a wooden spoon or oven mitt) 5 minutes before the bread is ready. If you are going to create steam with a baking tray, you may also want to turn your oven temperature a bit higher, because you are going to lose some heat in the process.
After 45 minutes of baking your loaf should be ready. Transfer onto a rack and leave to cool. This loaf also keeps very well in the freezer. But please make sure to eat at least some of it while fresh. This bread is great with just about anything, but also very tasty on its own.
Pain Naturel Time Table
Day 1 21.00 Make starter let ferment for 12 hours at room temperature
Day 2 0.900 Make final dough
- 09:00 – Add flour and water to starter, mix for 1 minute
- 20 minutes rest (autolyse)
- 09:20 – Add salt
- Knead for 4 minutes
- Rest for 50 minutes
- 10:14 – First stretch and fold
- Rest for 50 minutes
- 11:04 – Second stretch and fold
- Rest for 50 minutes
- 11:54 – Shape
- 12:00 Final proofing 150 minutes (2.5 hours)
- 14.30 – Bake for 45 minutes at 230ºC / 445ºF
- 15:15 – Your loaf is ready!




Brandon says
One the dough has proofed for 2.5 hours can it go in the fridge if your aren’t ready to bake right away?
Weekend Bakers says
Hello Brandon,
Yes that is possible. Keep in mind the bread will continue to proof a bit in the fridge, so there is a limit to the fridge time. Better to start the fridge process sooner and if needed give it some more time when taking it out of the fridge again.
Debby says
Sorry that I couldn’t find the answer anywhere. I’m confused. I’m at day 8 and will be baking my very first loaf tomorrow morning. In the ingredient list, it just states “the polish from step 1”. I can’t imagine it means the whole thing, otherwise you wouldn’t have any left for feeding for the next loaf.
Weekend Bakers says
Hello Debby,
Yes the recipe is correct, you build the poolish with the sourdough culture as you can see in step one. This sourdough culture or starter is the thing you maintain and refresh and use every time to make a new poolish or preferment.
You can also read about our method with the small amount of sourdough starter with our sourdough tips here:
www.weekendbakery.com/posts…ough-tips/
Hope it will be great!
Neil says
Hi,
My kitchen is overshadowed and unless the oven is on generally coldish. When I make bread I knead and prove in the stand mixer – i have a Kenwood Cooking Chef so can set the temp to 25c. I was wondering if it is necessary to do the 2 x stretch and fold steps, or could I do these in the mixer and then only need to remove the dough for final shaping and proving?
Great site 🙂
Neil
Weekend Bakers says
Hello Neil,
Yes that is no problem if this is more workable for you. We do find that there is a slight difference in S&F and dough development when doing it on a work surface or in a bowl. We prefer the work surface for a good stretch.
Hope the bread will be excellent!
Don’t know about your cold kitchen at the moment, but here in Holland it will be 34 C again for several days, so 25 C and a cold / cool kitchen sound wonderful to us!
Greetings,
Marieke & Ed
Tony Jones says
Hello
I made this as listed (but with 50g starter).
It was easy, it didn’t collapse when scored, looked great, soft crumb, and was tasty. (Happy family.)
The only thing to improve was that it maybe didn’t rise as well as expected in the oven, and almost no holes.
I can see it’s a very low hydration – do you think increasing the water would improve this, or do you have a better idea?
(Big fans of yours – did your pittas last weekend and have the 4-Day San Francisco on the go now!)
Weekend Bakers says
Hello Tony,
What flour did you use and what was the protein %?
Did you use extra flour during the process when handling the dough?
The amount of hydration in both recipes are almost the same btw. This is not considered a low hydration, but like we say in the recipe:
We use European flour which absorbs a few % less water than American type flour. People using American type of flour should add 5-15 ml water to the final dough.
Thank you again for trying and liking our recipe and above all have fun with the baking!
Tony Jones says
Hello WKB
I’m using British flour, so probably similar to your Dutch flour.
I’m making it again this weekend to have with my home-cured bacon (the easiest bit of home-cooking and the one that produces the biggest improvement of home versus shop-bought) so I think I’ll add 20ml of water to bring me to 70%.
Actually, I’m not that bothered by the lack of holes – surely in most cases holes are a problem!
Both the loaves we made with your recipes were soft of crumb and crisp of crust, and looked amazing, and that’s enough for me.
Enjoyed your reference to Haarlem elsewhere on your site – we had a lovely ride there once from Amsterdam and had a tasty lunch behind the cathedral.
Best wishes from Wales!
Tony
Weekend Bakers says
Thank you again Tony,
You are right about the holes. They should not be a goal in itself, the taste and crust are key.
We did understand that wheat grown in the UK in general is low in enzymatic working and in protein. We do not know if this is true for your flour, but we do know it ‘pays’ to test out some different bread flours, because you will find even between brands of the same type of flour there can be a big difference in end results.
We lived in Haarlem for quite a few years and loved it there. Great you enjoyed the visit.
We now live in the East of Holland and at the moment we do not bake (except for some pizza outdoors) because it is hot hot hot!
Greetings from the Low Countries!
Ed & Marieke
Brigitte Dumas says
Hello,
I was wondering what was the weight of the polish needed in your recipe? I’m not sure if adding the different ingredients will be correct as sometimes, it will be heavier with the process.
I bought a sourdough starter and it came with the steps to make the polish and I wanted to use it for your wonderful recipe.
Thank you
Brigitte
Weekend Bakers says
Hello Brigitte,
Adding up the ingredients for the poolish the total weight is 245 grams. Is this what you mean, because we are not sure we understand your question?!
Brigitte Dumas says
Thank you very much for the quick answer. I think that you answered my question. I wanted to know the weight for the poolish if I was making mine from a different starter and recipe.
Teresa says
Made my first loaf which was very tasty but did not rise very much. Tried my second loaf today and it looks much better. Can’t wait to try it. Also purchased a proofing basket. Instructions are very straight forward. Great recipe.
Weekend Bakers says
Thank you Teresa, great you are seeing progress, and with each bake you will get more familiar with the dough and how it’s supposed to feel and handle to get a good result.
Enjoy your baking!
Oxana Matthey says
Hi, I use type 80 flour, 12.5% protein ( Central Milling in US) and 50% hydration starter. If I want to enhance the sourness by proofing this bread in the fridge, how long should it be there (instead of 2.5 hours room temp in the recipe) ? 8-10 hours? Thank you.
Weekend Bakers says
Hello Oxana,
Yes, 8 to 10 hours is a very good starting point for fridge retarding with this recipe. Under-proofing can always be corrected with longer final proof too.
Hope it will be great too!
Maybe also try the SF sourdough with long proofing times and up to 34 hours fridge time.
www.weekendbakery.com/posts…ugh-bread/
Enjoy your sourdough baking!
Oxana Matthey says
Thank you so much for the science behind the bread making, especially the calculator. Will try this recipe mostly as you have it except will use more of my starter culture (I keep a lot, American style :)) and higher hydration. Got very encouraging results with your Pain Rustique. Thanks again!
Weekend Bakers says
We know it will be good Oxana! Glad you find our calculator so useful.
Keep up the great baking,
Marieke & Ed
WKB
Willem says
dear Weekendbakers, great bread, thank you! Tried it a few times and getting better. I am looking for a bit more rye based – if I would exchange some wheat by rye, what would the other implications be? water? timing? temperature? Or should I just look for a completely different recipe? Thank you! Willem
Weekend Bakers says
Hello Willem,
Up to 10% rye, there is no need to change anything else with this recipe, if you use more, then it could take some more water.
If you want to try a nice rye bread take a look at this one:
www.weekendbakery.com/posts…h-raisins/
Enjoy your baking!
Marieke
Willem says
thank you Marieke – both types just cane out of the oven – looking forward to breakfast!
Weekend Bakers says
Excellent. Enjoy the fruits of your baking!
Lukas Pechar says
Fantastic website, you have here. I’ve been reading this article for the past week or so. Finally have a strong sourdough starter and dying to try this recipe. I’m a little worried about the heat . Here in Gozo (sister island of Malta) we have quite a warm spell going on. Wish me luck. I’ll post back with my results.
Weekend Bakers says
Hello Lukas,
Hope it will be great. Use the fridge if needed to slow things down a bit and try to find the coolest spot in the house. You can also use very cold water to add to the dough. Sourdough can take a bit of warm weather, but there are limits. You can also take a look at our tips on dough temperature for some background / help. www.weekendbakery.com/posts…mperature/
Above all: Enjoy!
Ed & Marieke
Lukas Pechar says
Thanks for your reply. The bake was a 50/50 case. It did not raise very well but the taste and texture were amazing. I was happy with the result nonetheless. Today is the second loaf attempt. I’ll check the temperature guide thanks. Would you slow down the poolish in the fridge as well? Thanks again for your website, it is a treasure trove!
Weekend Bakers says
Yes, it is a good idea to let the poolish develop in the fridge. Maybe one or two hours at room temp to kick start it, then the rest in the fridge. It is a bit ‘trial and error’ to get it completely right, but once you have the right method, you can bake and get a good loaf every time!
Craig Fothergill says
The poolish was light and airy but on mixing the dought seemed quite stiff so I ended up using an extra 15gm of water. I come from the land down under and used Laucke unbleached bread flour 100%.
Is it allowable to use 2 tsp of bread improver.
I cooked it in a Dutch oven and it came out perfect with a nice crumb. What I like about sourdough is that it makes the best crunchy toast.
I’ll post a photo. Craig
Weekend Bakers says
Hi Craig,
Thank you for sharing your experience with the recipe. Can you tell us what this bread improver is you use? What is in it?
Greetings from the Netherlands,
Ed & Marieke
Patricia says
Hallo. Ik heb jullie dezemstarter gemaakt en na 7 dagen jullie pain naturel recept uitgeprobeerd. Ik moest door omstandigheden het brood bakken na 3 uur ipv 2,5 uur. Mijn brood zag er goed uit in het rijsmandje maar na het landen van mijn deeg op mijn hete pizzasteen was het deeg behoorlijk plat geworden en ook na 45 minuten in de oven….wellicht te lang laten rijzen?
Weekend Bakers says
Hallo Patricia,
Ja dat kan heel goed, vooral in combinatie met het warmere weer. Bij over-rijzen gaat de glutenstructuur van je deeg kapot en komt het ook niet meer tot een mooie ovenrijs. Ook het meel en de bloem die je gebruikt en de hoeveelheid en soort proteïne spelen hierbij een rol. Voor dit recept gebruiken wij als basis een goede biologische tarwebloem met een proteïne (gluten) gehalte van ongeveer 12.5%. Is het (veel) lager, of gebruik je bijvoorbeeld spelt, dan is het ook lastiger om een goed resultaat te krijgen.
Maar het overkomt iedereen, dus gewoon weer opnieuw gaan bakken en dat platte brood lekker in kleine plakjes roosteren of anders verwerken tot paneermeel bijvoorbeeld.
Succes ermee!
Patricia Viennet says
Bedankt voor de tips en ik ga zeker door met mijn starter. Ik had nog een vraag over de oven: wat is de beste stand hetelucht of boven en onder warmte en zal ik eventueel mijn brood kunnen bakken in een pan (Dutch oven) ?
Weekend Bakers says
Wij bakken al ons brood met onder en bovenwarmte, dus de conventionele setting. Het brood kan prima in de Dutch oven, we weten ook van andere bakkers dat ze hier hele goede resultaten mee hebben.
Veel plezier met het desem-bakken!
Preeti says
Hi, i tried making this bread today,
My starter was 10 days old and I used fresh starter for poolish using apf.
Since I stay in a warm place I kept the poolish for 4-5 hrs outside till it was airy and bubbly. Later I kept overnight in the refrigerator.
After 12 hrs, I took it out of the fridge and once it was at room temperature, I followed the process of autolyse, stretch fold and shaping and then baked at 230 degrees for 40 minutes along with boiling water in a loaf pan.
However it has come out very hard. 🙁
I am not sure what went wrong? Pls help
Weekend Bakers says
Hello Preeti,
We think your poolish might have been over-ripe. Did it look ‘soupy’ and thinner then this means the gluten are already damaged and it will not help with the end result to get a good loaf. If it is really warm in your home and humid too, we advice you to ferment the poolish in the fridge and use it straight from the fridge or maybe after one hour at room temperature, but not longer. It is better to use it under- than over-ripe. Just look for some activity with some bubbles.
Keep in mind the times given, also for proofing, need to be changed / shortened if the temperature of your room and dough are (much) higher.
Good luck with it!
Cecilia says
Hi,
Instead of a polish can you use lievito madre, Italian style sourdough?
Weekend Bakers says
Hello Cecilia,
Yes you can, but you have to look at the amount of flour and water in the preferment and make sure you use the right amounts in total. The Poolish is equal amounts water and flour (100% hydration) but this could be different for your lievito (usually 50 tp 60% water), so we expect it has lower hydration / water content and in that case you need to adjust this in the final dough.
Sanne says
Thank you so very much for this recipe. This is one of the best and versatile recipes I came across. I used the calculator for multiple batches and changed flours as a felt like. Buckwheat, oat flour, rye, spelt, wholewheat and several type of white flours. A retarded fermentation in the fridge also works very well. It all basically works every time. I only adjust water quantities if necessary.
Usually I make three big rectangular breads in loaf tins (busbrood). I also experimented with putting the retarded loafs in a cold oven. So as to maximize the oven spring. Also works very well.
Anyway, just wanted to say thank you and wanted to let you know that there is so much more possible with this recipe. Cheers, Sanne.
Weekend Bakers says
Hi Sanne,
Very happy with your comment and the experience you have with this recipe. Your versions and methods are an inspiration to us and other bakers. We actually never use the cold oven method. Would be good to give it a go and see how this works for us.
Thank you so much and enjoy the baking!
Ed & Marieke
WKB
Pat says
Could you please explain what is meant by the cold oven method. Thanks.
Weekend Bakers says
Hi Pat,
The method we read about the most is baking the bread, starting with a cold Dutch oven pan and placing the pan also in a cold oven. The dough should be close to perfect proofing, but just under, so you get a nice oven rice / spring. Then you set the oven temp, so the dough and the pot warm up as the oven heats up. This way the yeast probably also gets a nice final boost which , together with the slight under-proofing, gives the good oven-spring.
Pat says
Many thanks. I’ll give it a try.
sanne says
Hi Pat,
What I meant with the cold oven method is indeed putting the dough in a cold oven and then start the heating process. I generally only use this method with bread in a baking tin (rectangular shape, much like a caketin) and an overnight, retarded fermentation in the fridge (about 10 hours). In the morning I take out the tins and put them in the oven with a baking tin filled with water on the bottom of the oven as well. You do need to open the oven door at a certain point to let the steam out. The baking time is slightly (but not very much) longer of course.
Good luck with giving this a try.
Best,
Sanne
Weekend Bakers says
Thanks Sanne,
For sharing your method!
Pat says
Many thanks for you response and feedback. I tried this today in a bread tin as suggested and it is perfect. Love your website!
Weekend Bakers says
Thank you again Pat, great to get this feedback.
Enjoy your baking!
Sarah says
Hi there! I’ve made this bread a couple of times now successfully but I’m a little curious about the kneading time- I knead by hand, and I’ve seen many bakers recommend that you ignore the kneading time in the recipe and knead until you see the window pane effect in the dough. Would you all recommend this, or sticking to the 4 minutes because the stretch and folds help to develop the gluten more? Thanks and greetings from Spain!
Aliya says
Thank you for your lovely recipe-I followed it to the letter!
The starter was very active
the poolish was very active
the folding seemed to tighten up the dough very well
the dough proved very well with lots of air bubbles and rose to the top of the baneton-when I pressed it the dent remained and popped out slowly.
All seemed well until I went to put it in the dutch oven from the proving basket-it was very wet and wouldn’t hold it’s shape so I have to drop it into the dutch oven from a bit of a height-there is no way it would have held its shape if I had put it on the counter and slid it into the dutch oven. I lost a lot of air pockets and the bread was pretty flat because of this1what do you think I did wrong?
thanks so much
Weekend Bakers says
Hello Aliya,
It all sounds very good till that moment of dropping the dough. We think one factor could be the flour you used. Maybe the way it absorbs liquid is different from the flour we use and it would work better if you used a few % less water next time. Because you say it was very wet you say we think this would be the best option to try next time. The bread flour we use is an organic wheat flour with around 12.5% protein. Our loaves are also slightly flat when they go into the oven, but then, with steam and heat, they get a good rise again in the oven. You could try a different flour to see if this also gives a different result.
Aliya says
Thank you for your reply.
The flour I use is an organic bread flour with 14.9% protein.
I will try little less water. Many thanks
Devy says
I have very similar problem. The gluten seemed disintegrated towards the end. Although I had a few deviations from the recipe:
– used plain flour (empty shelves at the supermarket since March), so I added more flour until the dough took shape
– it’s winter in Australia, so day 1 = autolyse, then day 2 = knead in the bowl, day 3 = stretch and fold, then bake
Is there such thing as fermenting too long..?
So I put the doughy mess into a loaf pan. It rose and perfectly edible, but it didn’t have those good looking open crumb.
Please advise!
Thank you.
klod says
Auto lyse : it’s not exactly what you explain; is when you mix water and flour (and salt if you wants to) but WITHOUT ferment.
You let it rest for 30min to several hours. And thén add your ferment and go on with thé recipe.
It makes your dough smoother as it really absorbs water.
I am bakerman 🙂
Your recipe sounds nice
But y ou could add a bit more water
Enjoy
Weekend Bakers says
In essence it is like you say, the combining of water and flour BUT with the exception of recipes using liquid levain or poolish. In these cases the high percentage of the water that is present in the preferment, makes that if the remaining flour and water were mixed without including this preferment, there would not be enough water to hydrate the flour. Also see ‘Bread’ by Hamelman for this explanation.
Thank you for your suggestions.
Regina says
Hello, I have a lot of sourdough starter in my fridge. How do I convert our make use of my sourdough starter into the poolish in this recipe to reduce the 12 hours fermentation time for the poolish?
Weekend Bakers says
Hi Regina,
Is this active sourdough that you refresh / feed regularly? How do you normally use it? As part of a one day recipe?
Regina says
Hello there,
Yes it is active sourdough I refresh and keep in the fridge. When I need the ration for a recipe I take it out and add water and flour in equal amount for the recipe. The rest of it in the container I top up with flour and water stir and put back into the fridge for next use. I have about 11/2 cup in the fridge. It is a collection from the day I started making my sourdough bread.
Weekend Bakers says
So if we understand correctly, your active sourdough is also equal amounts flour and water. If this is active and bubbly and not soupy indicating damaged gluten, then you can take 245 grams of it and add it to the rest of the ingredients when you start making the final dough on day 2.
Regina says
Thanks this is perfect 😊
Weekend Bakers says
Hope it will work out Regina!
Joyce Johnston says
Hello.
I chose you starter recipe because it seems easier and less wasteful.
I like that you can use it right out of the fridge, and then refresh.
My starter is on day 5. it already looks amazing. I have a grain mill, so am using freshly milled rye flour every feeding.
What recipe should I try first?
Can I follow your same recipes with freshly milled white wheat or red wheat?
And? I have a family and will need to bake several times per week. Is it possible to take out for use every day?
Weekend Bakers says
Hello Joyce,
Great! Looks like in a few days you will be ready to use your culture, give it at least till day 7 or 8 before you use it.
If you want to use it rather sooner than later you could start with these sourdough pitas : www.weekendbakery.com/posts…ough-pita/
You can give the sourdough a first test and at the same time if it is not yet op to speed you will still end up with something acceptable.
After that we suggest to go for one of these two recipes:
www.weekendbakery.com/posts…n-naturel/
or
www.weekendbakery.com/posts…i-boulles/
Yes, you can use the wheat too and take out your culture for every day use, but it is best to leave it at room temperature so it can develop overnight each time before use the following day.
Enjoy the sourdough baking and good luck!
Marieke & Ed
G says
Hi,
Thank you for the recipe. I baked a bread last weekend with my 2-week old started but it tastes too sour. Do you have any tips to make the taste more delicate?
Thanks!
G
Kay says
I get this when I do the 2nd rise on the counter. Try to do bulk fermentation in the fridge?
Weekend Bakers says
Hi Kay,
Retarding your dough in the fridge will only promote more sour notes. So, maybe you can get some tips from this post too:
www.weekendbakery.com/posts…ough-tips/
Weekend Bakers says
Yes we do, see our tips in this post under ‘less sour please!’:
www.weekendbakery.com/posts…ough-tips/
Hope it will give the desired delicacy.
Irma says
Hello Ed and Marieke,
Wat een geweldige website, English én Nederlands! Ik woon in Canada en ging op zoek naar informatie over zuurdesem brood, zo heb ik jullie gevonden en kan ik dit met zowel mijn Nederlandse alsook Canadese vrienden delen.
Ik ben in 2017 begonnen met mijn zuurdesem experiment, probeerde dit recept meteen in het begin wat resulteerde in een mislukt brood, helaas.
Heb toen elders een hybrid sourdough recept gevonden wat een kleine hoeveelheid droge gist voorschrijft, na enkele jaren vond ik het tijd om weer eens een echt zuurdesem brood te proberen en…. ja hoor FANTASTISCH goed gelukt.
Ik maak dit brood nu wekelijks en share jullie website met vrienden en kennissen, Samen met een potje van mijn 4 jaar oude mijn starter.
Dank voor jullie website en keep up the good work!
Weekend Bakers says
Hallo Irma in Cananda!
Wat leuk om je bericht te lezen. Wat fijn dat je nu een goed resultaat had. Je hebt vast de afgelopen jaren ook veel bakervaring opgedaan die je nu ook helpt met hoe je met je deeg omgaat, hoe het er uit moet zien enzovoorts. En fantastisch dat je starter cultuur al zo lang meegaat.
Dankjewel voor je heel aardige woorden en voor het delen van de ‘bakvreugde’ onder familie en vrienden.
Keep healthy and happy en het beste voor jullie en jullie fantastische en prachtige land!
Lots of loaves from the Low Countries,
Ed & Marieke
Elizabeth Gilmore says
I’ve just got a loaf in the oven, abut to take it out. It’s looking good. The 45 minutes is not quite up, but it has gone very brown. 45 minutes at 230C seems a long high cooking time – I’m cooking it in a standard electric oven. How can you stop the crust from browning too much?
Weekend Bakers says
Hi Elizabeth,
Temper your oven as soon as the crust has the desired colour. So turn it back to 170 or 180. Also if the browning happens too quick, maybe it is possible to bake on a lower tier in the oven.
Good luck!
Elizabeth Gilmore says
Thanks very much. I did turn it down, but only to 200, I will go a bit lower and for longer next time. It was totally delicious.
Thank you for your recipes and instructions.
Liz
Weekend Bakers says
It will work well, you will see. Enjoy the process!
Patrick Gleason says
Enjoying your recipes.
Weekend Bakers says
Thanks Patrick, much appreciated!
Willem says
Today my first sour dough pain naturel, unfortunately a big bake failure today. Created the poolish yesterday evening but didn’t see much change this morning. Still created the dough as in the recipe above. Not much of a rise in the stages between the stretch and fold and also not in the end rise. In the end the bread was as flat as a pancake and wasn’t even cooked. Strange as the starter doubled the past days after every feed within 24 hours. The starter is of a 100% rye flour as in yoiur recipe. Any idea what could have made this not working? Despite the failure we did try the crust and taste was excellent 🙂
Martin says
To the word, exactly what happened to me yesterday. I’m very curious about what might have gone wrong…
Weekend Bakers says
Hello Willem and Martin,
A few questions / suggestions for you:
Did you feed /refresh the starter culture the day before you used it in the poolish. Was it stored in the fridge? Did it look OK and smell nice or did it have a slight hint of acetone or did it smell off putting even?
Are your starter cultures still very young, even only less than a week old (maybe need to mature a bit more). If so keep feeding and refreshing it and do another bake with it, always making sure it smells and looks OK.
And what about the poolish? Could it be this was over-ripe when you used it? Was it a bit soupy and did you see a rim in the bowl where it had risen too, then withdrew or slightly collapsed?
Next try just also use the poolish a bit sooner (a few hours), maybe a bit under-proofed, that is no problem and see if it makes a difference.
Do not give up. We all have had flat pancake bakes, sometimes not really sure what happened. It is part of the process so do not let that discourage you. If all else fails start up a new culture next to this one. They are all different with different ‘compositions’ so maybe your other one will be a more enthusiastic type.
If you have not done so, also check out our tips:
www.weekendbakery.com/posts…ough-tips/
Willem says
Starter was feeded daily for 12 days and wasn’t stored in the fridge. It took however aprox 24 hours to double so perahps it wasn’t ready yet. Smell was very good to my opinion. Poolish was more of a soft slury and as mentioned didn’t look as if a lothad happened. It didn’t seem to have been risen. Perhaps the used patent flour was part of the problem?
A well, part 2 is on its way now. Starter was feeded yesterday and was doubled within 12 hours and smelled wonderfull. Poolish has been created just now and i have used whole grain flour from higher quality. Hope this helps.
Will keep you updated and thanks for the tips.
Weekend Bakers says
Hi Willem,
We guess it was a success! You did well with the flour too. It depends a bit on the protein content of your patent flour but for bread you better use tarwebloem / strong bread flour with at least 12 % protein for better results and stronger gluten building for your dough to be able to take the longer proofing times.
You are on the road to excellent bread we are sure!
Willem says
bread was a success indeed. crust a bit top hard but that will be fixed the next time with a lower temperature when the loaf has the colour i want. i alzo am going to do a session in the dutch oven. curious if this will help to increase the oven rode.
Weekend Bakers says
We have seen very nice and impressive results with the Dutch oven bakes.
Celia says
Thank you!
Weekend Bakers says
Enjoy the slow sourdough baking process Celia!
Rianne van der Loo says
Hi, we bake this recipe for years with great pleasure. Now since a couple of months, the bread tears open at the bottom during baking. We do cut the top before it goes into the oven, but still it breaks open at the bottom. Do you know what could cause this and how we can prevent this? Thanks!
Weekend Bakers says
Hello Rianne,
Normally we suggest to cut a bit deeper and at an angle and also further to the sides. Maybe the flour you use now is different from what you used to use, this can also contribute. Another cause can be under-proofing.
Hope this helps a bit. Luckily the bread will still be delicious we expect!
Thank you for using this recipe and enjoy your baking these challenging times.
Greetings,
Ed & Marieke
WKB
Rianne van der Loo says
Thank you! I will definitely look into this and experiment. And it still tastes great for sure!! 🙂
Marie-Ève says
Hi! I’m new to this but very excited to try. I made my own starter a couple of weeks ago and it’s now reliable so it’s time to start baking. However, my biggest challenge is I can’t find white bread flour (pandemic shortages). Here’s what I have: All-purpose white flour, whole-wheat bread flour, white kamut flour and leftover rye flour that I feed my starter with (along with the all-purpose) . Any suggestion on what I can use for this loaf for best results?
Second question: Can I bake this loaf in a Dutch oven?
Thanks so much!
Marie-Ève
Weekend Bakers says
Hello Marie-Ève,
We would suggest to start with a 50/50 combination of the all purpose and kamut flour. Yes you can bake this in a Dutch oven very well.
We hope your bread will be good and you will enjoy the baking and eating.
All the best,
Ed & Marieke
WKB
Marie-Ève says
Hi! I wanted to report back and say I baked this loaf twice using 50% white kamut and 50% all purpose flour. It’s been a success both time, thank you for this recipe! It’s my first success with sourdough, so I’m very happy! I knead it by hand since I don’t have a standing mixer and I bake it in a Dutch oven. Delicious!
Weekend Bakers says
Thank you for the wonderful feedback Marie-Ève! Great to read about this particular mix of flours and the result you can get with it!
Jodi says
Hi,
I made this recipe last week with great success using my own starter. Yesterday when I tried again I tripled the recipe and the loaves came out very flat. I had been feeding the starter regularly and it ‘floated’ in water so I assumed I was good to go. Did I perhaps do something wrong when I tripled the recipe? I didn’t think it was rising well throughout the process so I wasn’t surprised at the result. What happened?
Weekend Bakers says
Hello Jodi,
It is hard to judge for us. You can just triple the recipe and make three loaves, that is no problem. Did you change anything else? Did you feed the starter the day before? Did you use a different flour, was it much colder in your home than last time?
Think about what might have changed compared to your first bake.
Jodi says
Thanks for your response. I tried again the following week and had success. Question: after the autolyse, at what points during the stretch and folding phases and the final proofing can you stretch the times a bit. Sometimes I cannot be in the house exactly at the suggested times. So for instance can I go longer between the 50 minute increments? Or let the final proofing go lower?
Jodi
Weekend Bakers says
We would not recommend taking much longer resting times between the S&F. The recipe is well balanced and if you do not have time for your baking, you might want to wait or maybe use the fridge to retard the dough, especially the final proofing can be prolonged this way.
Good luck with it!
Khalena says
Thank you for this recipe. My first year doing sourdough and had many many failed attempts at getting a loaf to rise and be edible. This recipe I stayed up til 3am making it but totally worth it – it worked perfectly! Made another loaf today and same perfect results. I feel like I understand sourdough better and am more confident in my sourdough adventures. Thank you thank you thank you!
Weekend Bakers says
Hi Khalena,
We are so glad the recipe seems to work for so many bakers out there. Very happy we can be part of your baking success, but it is your skills and hands that make it a good loaf! This skill and knowledge will be with you and can be past on for many years.
Enjoy your sourdough baking and sharing!
Celia says
Hi
Thank you for sharing your recipes and tips, I’m learning so much! I’m wondering at what points this process can be delayed, put in the fridge, during preferment or bread making or both?
Thank you
Weekend Bakers says
Hello Celia,
Thank you, very nice to get your comment. You can do both. We recommend starting with retarding after shaping, making sure the bread is well covered so it does not dry out. You need to do a bit of ‘trial and error’, start with a short overnight period.
Making sure the bread does not over-proof so check it early in the morning. If the process is going too slow this way, next time you can kick start the process by proofing an hour at room temp before the fridge or you can increase the yeast a little bit. With a few (maybe even one) tries you will have it perfect for your own conditions.
Hope it will be great!
Celia says
Hi Ed and Marieke,
Thank you for your response. I have one more question for you please.
Can I use a cast iron casserole dish to make this bread? If so, what would be the baking times and instructions please?
Thanks again
Weekend Bakers says
Yes you can, and you can just stick to the baking time given. The only thing you have to do is about halve way the process remove the lid of the dish so the bread can get some nice color. be very careful with the hot pan so get your oven gloves ready and be aware of what you do at all times!
Chris says
Hallo Ed en Marieke alweer, sorry it’s me again, hope you don’t mind. Ik vraag me af iets, Ik maak brood elke keer met en 50% poolish, ie, 50% of the total flour of my bread content is my poolish reserved for 48 hours. Here I notice that you are using only 25% of the total amount.
QUESTION 1: Is this a personal choice, or a necessity for this type of bread?
QUESTION 2: If I may continue to use 50% poolish, should I stay with the 13% taken from the starter or could I double this to 26% for my 50% poolish?
Groetjes, Chris. (PS Rye starter going well on 4th day, thanking you for all the comments and your website).
Weekend Bakers says
Hello Chris,
You can use any amount of poolish up to 50% you like, so it is a choice.
Sorry we do not really understand the 13 and 26% question. Is it related to this recipe?
Great news about the starter, keep on going ans it will soon be ready to be used.
Chris says
Hi, Ok, In this recipe you are taking 15g of starter and using this with 115g of flour for the poolish. This is the 13% amount of starter. So I was wondering if one can simply use 25% which would be 28g of starter. How did you settle on this amount, was it by trial and error and experience?
My Rye culture has done nothing for two days now, that is day 5 and now day 6. Temperature is a constant 21c (can not go any higher in the water heater cupboard but it is consistent). Continue discarding and feeding?
Thankyou for your help by the way, it is appreciated.
Weekend Bakers says
Hi Chris,
The answer is you stick with the 13%. You look at the total amounts for one loaf. Although you shift a percentage of the ingredients to one side, it needs the same amount of yeast or sourdough to rise, so you do not need to double it.
Yes, keep refreshing and feeding the culture for a few more days and give it an extra stir two or three times a day for extra oxygen. Make sure the smell and look are OK. If nothing happens within the next few days, maybe you need to start again with a fresh batch of flour. Sometimes it takes a few turns to ‘catch’ the right ‘milieu’ combination of life yeast and bacteria to get a good culture. It is our experience that with 2 or 3 tries, you always get there.
Marleen says
Ik ben vorige week begonnen met mijn starter volgens jullie recept, en wil vanavond het voordeeg gaan maken. Volgens deze planning is mijn brood dan klaar om 15.15, wat een beetje laat is om te lunchen. Is het de volgende morgen dan nog net zo lekker? Hoe bewaar ik dit brood het beste?
Weekend Bakers says
Hallo Marleen,
Ja, je kunt het gewoon in een goed afgesloten trommel bewaren. Je kunt het ook nog even 5 minuten in een oven van 175C opwarmen om de korst nog wat knapperiger te maken. Ook kun je het brood als het is afgekoeld heel prima in de vriezer bewaren (eventueel al gesneden) en er uit halen wat je nodig hebt. Wij bewaren ons brood in de vriezer en gebruiken ook de magnetron om een lekker dikke boterham snel te ontdooien (kort op hoge stand). Omdat dit brood zoveel vocht bevat kan het dat prima hebben. Je moet zelf door ervaring kijken wat jouw voorkeur heeft.
Geniet ervan!
Nunya Bidnez says
Hoi.
Where are flour types, with suitable levels of protein and other than ‘patentbloem’, found in Amsterdam?
Weekend Bakers says
Hello Nunya,
We would suggest ordering online if possible now. This mill would be the best to order online with a big selection of flour and also good quality: www.de-zuidmolen.nl/
But it may take longer now to get it delivered.
Our favorite mill with excellent flour, but very probably for another time in the hopefully near future,because they do maybe not deliver to consumers is located north of Haarlem in Santpoort and called De Zandhaas.
Some supermarkets sell organic flour now, the quality is OK too, depending on what you are baking. Look for organic / biologische tarwebloem and also volkoren tarwemeel or volkoren speltmeel. With the tarwebloem and also a combination with the tarwemeel or speltmeel you can bake excellent bread.
Another option would be to go to an organic supermarket like ekoplaza, Odin, Ekodis or Marqt.
We do not know how inconvenient it is at the moment to buy flour in the Amsterdam region at the moment, because we live in the East of Holland, but we hope you will find what you are looking for soon.
Nunya Bidnez says
Jammer.
The Bakery Lab in A’dam offers a sourdough starter (gratis but of an ‘unknown’ origin!?!) and repackaged flours from Zeelandia. Certainly fresher than what is on offer in ‘natuurwinkels’.
It is disappointing to read of David’s experience in sourcing flour: (www.weekendbakery.com/posts…ent-654745) and that in Germany the offer is extensive (Heel Holland Bakt? With what ingredients?)
Weekend Bakers says
Thank you for adding this tip Nunya,
We have to say we are not the biggest fans of ‘factory flour’ but in this case people will be happy to be able to bake and get their flour if nothing else is to be obtained. Could be this flour is not just ‘straight up’ flour but ‘enhanced’ with other ingredients to aid professional bakers to make their bread rise quicker, have a longer shelf life and so on. We still hope some home bakers will be able to source their flour from a mill close to home and support their miller this way. Maybe contact them on the phone and who knows they will even deliver to your doorstep these days. Some mill shops will be closed, but will also have distribution points where one hopefully still can buy their flour. Like mill De Vriendschap in Weesp near Amsterdam for instance:
www.weesperwieken.nl/ww/in…php/nieuws
Saskia Frankena says
My experience after 20+ years of baking sourdough bread is that the best flours are organic flours grained in a mill. Preferably use rye too. I think it has to do with the organisms that come along with it. Above of that I have so so experiences with organic flour from healthfood stores. Besides that it is really expensive, it often is not grained fine enough and I suspect sometimes just stored too long.
There are many, many mills in the Netherlands, usually operated by volounteers, that offer good quality. I have had satisfying experiences so far with De Vriendschap in Weesp, De Zuidmolen in Groesbeek and De Witte Molen in Nijmegen.
For mills in your area check: vrijwilligemolenaars.nl/
Weekend Bakers says
Thank you Saskia,
We thank you for this kind addition and your tips and very much recognize and agree with the content of your comment.
Agota says
Hello, I would like to try this recipe for my first sourdough bread.
I have an active starter since several days already, feeding it regularly every 12 hours since 2 days now at 50% hydration. Can I ask you if it’s ok to use it for the 15g of sourdough culture needed in this recipe or I should calculate how to adjust my starter hydration according to this recipe?
Thanks so much for your attention and time
Agota says
Sorry, maybe my question was a little bit “stupid” but I have started my first sourdough starter only 7 days ago so I am learning so much everyday and the hydration topic got me very confused. (I am based in Italy and seems like all italian recipes requires the starter at 50% hydration, rather than 100%.) I have developed my second starter at day 6 starting feeding it at 100% hydration and it seems to be going well. So if you answer me regarding this recipe would be fantastic (as I have only bread flower left at home and would like to try using your recipe to make my first loaf. Because of a strict quarantine we are only going to do grocery shopping every two weeks) Thanks so much in advance
Allan says
Hi Agota, there are no stupid questions. If you make the poolish (levain) according to the recipe then consider that with 100% hydration, the 15g of starter would be 7.5g flour and 7.5g water. So with your 50% hydration starter your only going to be short a couple of grams of water in the poolish. I can’t see that making much difference in the overall loaf.
As an example of the reverse, I’ve made Silvia Colloca’s recipe which uses a different ratio starter (neither 50% or 100%, more like 80% if I remember correctly) and used my 100% hydration starter with no problems.
Good luck with your first loaf.
Weekend Bakers says
We completely agree with Allen, thank you very much for your excellent explanation.
Agota, we hope your loaf will be great and enjoy your sourdough making and baking!
Allan says
I’ve been making bread for a couple of years now and switched to sourdough in November last year. My results were mixed, but always edible. When I found this recipe, I thought I’d give it a try. The results have been fantastic and I consistently get a great loaf. I’ve discovered that the best flour I can get at a reasonable price here in Australia is about 11% protein so add some gluten flour. I’ve also branched out and modified the recipe with equally great results. My variation is:
180g water
140g rye or whole meal
20g gluten flour
180g white flour
5g salt (I prefer a less salty loaf)
My mother is a simple white flour mother which is easy to maintain. I use 50g in my levain but otherwise follow the recipe above.
This is a brilliant and simple base formula that allows for variations and experimenting. It’s also easy to make bread regularly. A great recipe for beginners to develop their techniques. Thank you I love it.
Weekend Bakers says
Hello Allen,
Thank you so much for sharing. Looks like you made the recipe your own.
We also love the variations and experimenting as soon as you have a certain recipe ‘in your fingers’ you know what it needs and what it needs to look like and you can change it up and still get a good result.
Glad we could be a part of your baking joy with our recipe.
Wishing you all the best from Holland and be safe!
Ed & Marieke