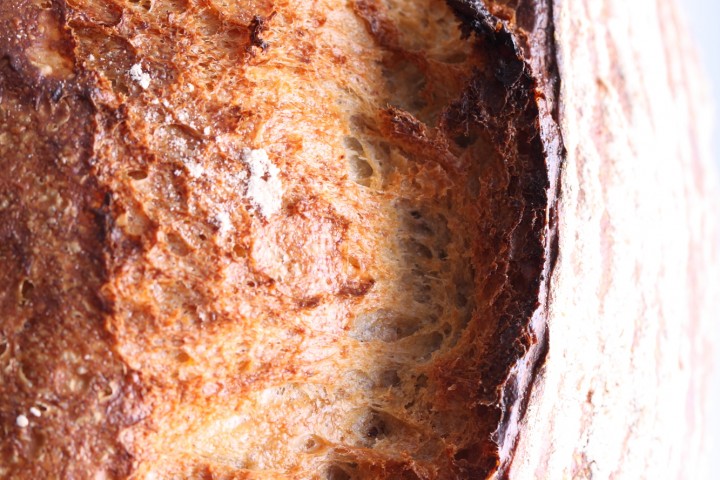
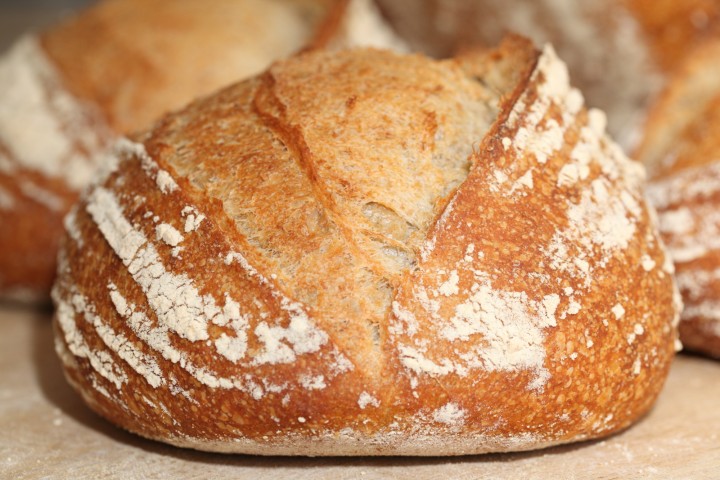
This Pain Rustique has become our daily bread
Klik hier voor de Nederlandse versie
After baking hundreds of pains rustiques you could say this recipe of our version of this rustic bread has been tweaked to the max. Of course the tweaking has been done to accommodate our equipment and ingredients and above all our taste. And I believe that the end result also has a lot to do with the hands of the maker (watch Ed’s hands at work making Pain Rustique). Give six people the same recipe and they all come up with very different loaves. So like with all other recipes, you have to make this one your own. But I believe this recipe can be a good starting point.
The recipe is very loosely based on Hamelman’s Pain Rustique but can actually be seen as a hybrid, sometimes also called ‘levain-levure’. It has sourdough in the preferment and yeast in the final dough. This way you get the best of both worlds: the extra flavor of the sourdough and the ‘speed advantage’ of a yeast based bread. Another point of difference is the shaping. Pain rustique usually has no preshaping or final shaping. Our version does have shaping and the final fermentation is done in bannetons.
For this recipe we are going to make a starter named a poolish. A poolish is a type of wet sponge usually made with an equal weight of water and flour and an extremely small amount of yeast or sourdough culture and NO salt. Making a poolish helps bring more taste and strength to your bread while using less yeast.
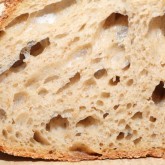
Note: We use European flour which absorbs a few % less water than American type flour. People using this type of flour should add 3-8 ml water to the final dough. If you dare, you can actually make the dough a few percentages wetter to get bigger ‘holes’ in your crumb. We lowered the amount of water in this recipe to make the dough easier to handle. Currently we are baking this recipe with about 67.5% hydration; so we use 80g water per loaf in the final dough.
Making the poolish
In a bowl stir together 180 grams of bread flour, 45 grams of whole wheat flour with 225 grams of water at room temperature with 10 grams of sourdough culture. Mix it well until you have a homogeneous slurry that looks like very thick batter. Cover the bowl with clingfilm and let the prefermenting begin. After 12 hours at room temperature it is ready for use. So if you want to begin your bread making in the morning, you make your poolish at 9 in the evening.
Our sourdough starter is not very sour by nature, it gives a very mellow sour note to the bread and we like it that way. We have found that the sourness depends on the ripeness of the poolish. This means that using an under-ripe poolish gives you the flavor advantages but not the added sourness. We tend to use the poolish before they peak out and collapse. When this points is reached all depends on ambient temperature and sourdough culture activity. An over-ripe poolish has a weaker gluten structure which will result in a weaker dough and less oven spring.
We use a sourdough culture which is made with 100% whole grain rye flour. A sourdough culture based on rye flour is easier to maintain, it does not go into a slurry when you forget about it, it is easier to stir because it has almost no gluten and it smells very very nice, a bit like fruit. It is also very forgiving in the amount you feed it. Normally we only feed it once a week, after the weekend baking, we just give it a few table spoons of water and rye flour, stir and ready!
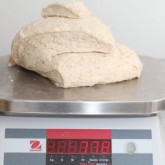
If you want to make more than one loaf, just double or triple or quadruple the ingredients. We usually make 6 in one batch. That’s the maximum our bread mixer can handle.
| Ingredients for the poolish | ||||
|---|---|---|---|---|
| 180 | g | wheat (bread) flour | ||
| 45 | g | whole wheat flour | ||
| 225 | g | water (room temperature) | ||
| 10 | g | sourdough culture | ||
| Ingredients for the pain rustique | ||||
|---|---|---|---|---|
| makes 1 loaf | ||||
| the poolish from step 1 | ||||
| 225 | g | wheat (bread) flour | ||
| 70 | g | water | ||
| 7.5 | g | (sea) salt | ||
| 2.3 | g | instant yeast | ||
Making the loaf
Preheat your oven to 235 ºC / 455 ºF conventional setting (at what stage you preheat your oven depends on how long it takes for your oven to heat through, some take 30 minutes, some, like ours, with stone floors take a lot longer, up to two hours. The preparation time from this point until the bread actually goes into the oven is a little under 2.5 hours.
Ideally the temperature of your dough after mixing should be around 24-25 ºC / 75ºF. You should adjust the temperature of the water you add to reach this temperature of the total dough. For us this means in summer adding cold water to this recipe and in winter (when our little bakery can get much colder then the rest of our house) adding water up to 50ºC /122 F. You can measure the temperature of water and dough with a food thermometer. These measurements are important because they correspond with the proving times in the recipe.
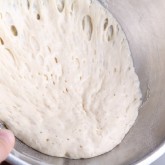
Put the poolish starter and flour (no salt and yeast yet!) in the mixing bowl of your standing mixer and add 2/3 of the water. Now start mixing and gradually add the rest of the water and let the dough come together. Knead for only 1 minute until you have a shaggy mass (as Hamelman calls it). Leave it in your mixing bowl, cover and rest for 30 minutes. This process is called ‘autolyse’.
After the autolyse phase you now add the yeast and the salt and knead the mass for another 5 minutes (we use a spiral mixer for this job) and watch it turn into something a little bit more bread doughy. Cover and leave to rest for 40 minutes.
Take the dough out of the bowl and onto a floured work surface and do one stretch and fold (a full letter fold, left over right, right over left, bottom over top, top over bottom; see our bread movies to observe this technique if you are not familiar with it). Transfer to the bowl, cover and again leave to rest for 25 minutes.
Repeat the stretch and fold (full letter fold) part one more time (so 2 times in total) and again leave to rest for 25 minutes.
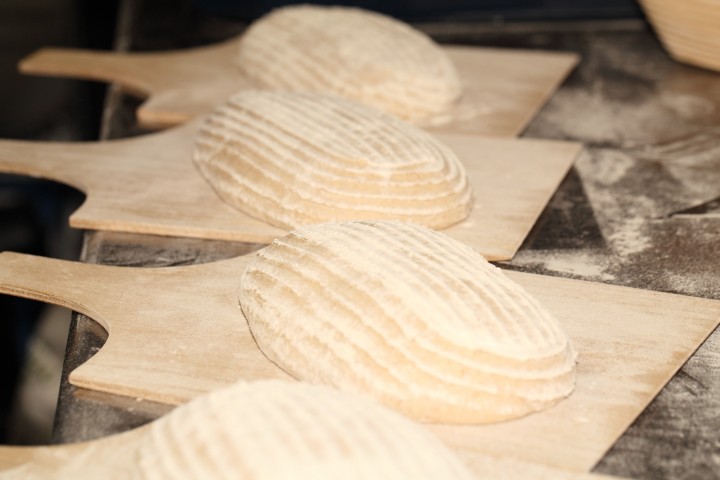
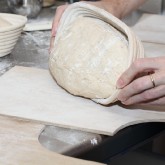
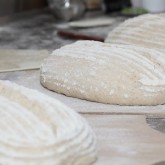
Now it’s time to shape. Shaping is a tricky subject. It’s something for which everybody develops his or her own technique over time. You can make a batard or loaf shape or a boule (ball). If necessary you can learn more on shaping from a good bread book, like the ones by Hamelman or Reinhart. We usually make batard shaped (oval) pains rustiques and use proving baskets/bannetons made of wicker.
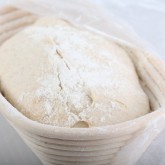
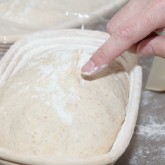
Transfer the shaped dough in a proofing basket or baking pan, cover and leave to proof for 30 minutes. When you think it has risen enough, use your finger to carefully make a very small dent in the dough. If the dent remains, the bread is ready to bake, if the indentation disappears, the dough needs a little bit more time.
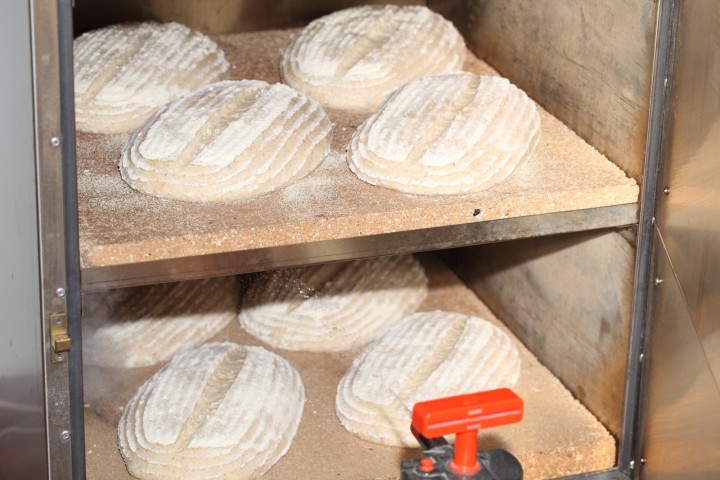
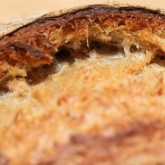
Now your loaf is ready for the oven. Slash the top of the loaf with a lame or bread scoring knife. To get a nice crust, try to create some steam in your oven by putting a small metal baking tray on your oven floor when you preheat the oven and pouring in half a cup of hot water immediately after putting the bread in the oven. Release some steam by setting your oven door ajar (perhaps with the help of a wooden spoon or oven mitt) 5 minutes before the bread is ready. If you are going to create steam with a baking tray, you maybe also want to turn your oven temperature a bit higher, because you are going to lose some heat in the process. During the baking process, as soon as the crust has the desired browning or you think the browning is going too fast, you can lower your oven temperature for the remainder of the baking time. Also check during baking, if your bread crust has the desired color or your loaf is very close to a heating element you can always temper your oven temperature during the baking process.
After 45 minutes of baking your loaf should be ready. Transfer onto a rack and leave to cool. This loaf also keeps very well in the freezer. But please make sure to eat at least some of it while fresh!
Pain rustique time table
day 1 21.00 h Make starter let ferment for 12 hours at room temperature
day 2 09.00 h Make final dough
- 09:00 h – Add flour and water to starter, mix for 1 minute
- 30 minutes autolyse
- 09:30 h – Add salt and yeast
- Knead for 5 minutes
- Rest for 40 minutes
- 10:15 h – First stretch and fold
- Rest for 25 minutes
- 10:40 h – Second stretch and fold
- Rest for 25 minutes
- 11:05 h – Shape
- 11:10 h Final proofing 30 minutes
- 11:40 h – Bake for 45 minutes at 235ºC / 455ºF
- 12:25 h – Your loaf is ready!
Note: If you like this type of hybrid method bread also check out the recipe for our Fluitje with Spelt




Mary G says
Thanks for this recipe. I have been looking for a way to use my sourdough discard instead of wasting it, to add flavor to a faster loaf made with commercial yeast – in short: I have been looking for this recipe!
I made a great loaf yesterday; for the poolish in this recipe I substituted some leftover biga and sourdough discard — I think they are *basically* the same thing. Great flavor and then great rise from the commercial yeast, and so much faster & easier than scheduling a traditional sourdough bake. My flour was a little thirstier than yours though, so an extra 10 grams of water helped.
Thanks again! 😀
Weekend Bakers says
Thanks Mary, that sounds excellent and you did well adding the extra water you need, there can be so much difference in absorption between flours and the total amount needed also depends on the hydration level of your biga and sourdough of course.
Enjoy your baking!
Leslie Valmadre says
Your bread site is wonderful. I particularly enjoy your dough calculator as it is the first one I have seen that calculates weights and percentages based on the final bread dough flour so the poolish calculations makes sense as part of the total dough.
I bake both sourdough and yeasted loaves and your hybrid formulas are great for speedy loaves with good flavour and texture and crust. Thank you for sharing all your experience and knowledge.
Weekend Bakers says
Thank you so much Leslie,
It is so great to read a comment and think ‘ that is exactly how we want people to understand and use it’. Wonderful!
Wishing you many more enjoyable baking moments and crusty loaves with enviable texture.
Greetings,
Marieke & Ed
Anna Gustova says
Hello, I just want to thank you. I decided to try some sour dough baking a few months ago, with help from some books and websites, but the bread never came out even half-way right. I had problems with my starter, but even when I had got over those – and the starter seemed to stay nice and bubbly, the actual proofing and baking stages all went wrong one way or another.
But then I found your site, and the pain rustique recipe, and finally had a breakthrough. So far I have made four loaves in a row, all of them good, with great praise from my husband. I can see plenty of room for improvement, e.g. the bread is well risen and the crust crunchy, but the crust – not the crumb, is a bit heavy and dark, though if I take the bread out before that happens, the inside isn’t cooked properly. But I’m working on it, and now have much more confidence.
I was probably about to give up, but your site has set me on a proper baking path.
Weekend Bakers says
So great to read your comment Anna! You are doing well and if you are looking to improve a few things, we can point you in the direction of our tips:
www.weekendbakery.com/posts…king-tips/
Check out the ones about the oven and temperature especially and do not be afraid to proof your loaves well!
Enjoy your baking journey and the sharing with your family,
Ed& Marieke
Peter Lee says
Hi ?
I would like to no in the Pain Rustique recipe,the temp of 235C is this fan or conventional oven temp.
Weekend Bakers says
Hello Peter,
It is conventional oven temperature. We will make it more clear in the recipe.
esther says
I already have a starter at home, how many grams should I addd of my own starter to this recipe?
thank you
Weekend Bakers says
Hello Esther,
You can use your own starter culture that is no problem. You can just stick to the recipe and build the poolish with 10 grams of your own culture.
Heather Izzard says
Hi
As I have very disabled hands and cannot knead anymore. This recipe is a God send. Thank you.
I’ve just this week changed from a gas oven to electric fan heated oven.
It says I must not add water to the oven to avoid warping.
Can you advise me on ways to allow the bread to retain its moisture?
Is it best to use the fan or not?
I make 3 loaves per week and never buy bread and I’m desperate to keep baking.
Many thanks for your help.
Weekend Bakers says
Hello Heather,
We think maybe it is best to try and bake a loaf with the use of the fan and then compare the result with your former bakes. Are you not able at all to use steam in this oven, for example by using a tray with water at the bottom of the oven?
This bread has a higher hydration level, so this also helps, but if possible with the help of a tray, it would be best to add steam to avoid the other layer of the bread drying out too soon by the fan.
You can also increase the amount of water in the dough, but this will only help a tiny bit and may also effect the handling of the dough.
Let us know how it goes and if we maybe help you some more after you tried a few bakes.
Best of luck with everything!
Caren says
Dear weekend bakery,
Thank you for your amazing bread recipes. I very much enjoy baking them and am getting a good feel for when the poolish is ready for phase two (smell and look). I just baked this bread yesterday again and it is delicious, thanks to your brilliant recipe. I have two questions:
1) What is your advice if I wanted to make this sourdough only?
2) Any chance for a 100% rye recipe? I loved the 70% one
Thanks 🙂
Weekend Bakers says
Hi Caren,
We would suggest taking this recipe as a base for your 100% sourdough baking:
www.weekendbakery.com/posts…n-naturel/
You can also use some whole wheat or spelt or rye in the poolish to mix it up.
At the moment we only have this rye bread that comes close and is our favorite because we also grew up with it:
www.weekendbakery.com/posts…rye-bread/
It goes in the oven for a very long time (overnight at low temp) and the smell is amazing. Because it is almost 100% rye it takes very different dough handling and shaping (lack of gluten).
Hope you will enjoy your rye bread baking!
Leslie Valmadre says
Great bread site with great recipes and advice for straight sourdough breads and for hybrids which is often my preferred baking method.
I have a problem however with your WKB calculator. I usually keep my poolish at 28c so to use your calculator I change all ingredients to 28c temp then put in other temps as appropriate. The resulting dough temp is of course too high with 55c water so I choose a lower temp (should be 32c in my case for a FDT 25c). As soon as I input a lower water temp using the drop down selector it returns all the poolish temps to a default 21c so I get incorrect results again. Am I doing something wrong in the way I am using the WKB. Given the poolish is a separate element in the finish dough mix shouldn’t there be an option for inputting its temperature after fermentation and befor mixing in to final dough?
Weekend Bakers says
Hello Leslie,
Thank you very much for letting us know. We have fixed at least part of the problem and will continue to look at it and test it to make it better.
And great to read you like the recipes.
Norm says
When I make this Poolish where do I get the 10g sourdough culture from?
Weekend Bakers says
Hello Norm,
Lots of bakers make their own sourdough culture and maintain this and use it regularly in baking.
This is our culture and method which you can maybe give a try:
www.weekendbakery.com/posts…asy-steps/
Alternatively, if you not (yet) have a sourdough culture you can make this bread with instant yeast in your poolish. For this recipe you would use 0.5 grams or a quarter teaspoon of yeast (yes a very small amount).
Hope the bread will be great!
Craig Whitley says
Spent the last 4 days perusing your very well laid out web site. Kudos!
Just had a slice of this bread and it was wonderful.
It may be the bread baking equivalent of training wheels on a bicycle, but I followed the recipe to the letter and gram, and I got a great rise, a great crumb and fantastic taste.
My only issue is it will not last long so the next bake will be multiple loafs.
I did use King Arthur flour and I believe you are correct about USA flours. It probably would take a small amount of additional water without any problem. It is fantastic as is however.
Thanks for the recipe!
Weekend Bakers says
Hi Craig,
Thanks for your enthusiastic comment, great to read your positive feedback and success with the PR recipe.
Making multiple loaves is such fun, also because you get to practice the different actions like the Stretch & Fold and shaping several times and it really helps you become a better baker quicker.
And making more loaves never seems to be a problem, because there will always be more than enough people who will happily eat your fresh baked bread.
Enjoy the baking and sharing!
Ed & Marieke
Craig Whitley says
Just baked this fantastic bread again and did some playing around. As you mentioned our USA made flours can handle more water, so I upped the water in the main dough from 70 to 80 grams.
I have wanted to try the Tangzhong method and made the following change. From that 80 grams of water I took 40 grams adding 8 grams of flour in a small pan and whisked smooth then heated until the whisk marks remained in the Tangzhong Roux. I added the remaining 40 grams of water to the Tangzhong to cool it then added that to the Poolish and followed the rest of your recipe as written. This added only 5 minutes to the prep.
I’ve never though my doughs handled like they should or appear in the various videos but this one was perfect and it was quite obvious if I wanted to add more water it would have been quite happy.
When we sliced into the bread {did not allow it to cool as much as we should, does anyone???} it was very moist and soft while still firm if that makes any sense.
Thanks again for this great recipe which seems to tolerate people like me playing with it.
Weekend Bakers says
What a great read Craig,
Thank you for sharing. We can honestly say we have never tried the Tangzhong method in this way or with this recipe. Great to ‘hear’ it turned out so fabulous. And yes, it makes sense, bread being soft yet still firm (you should try that with any supermarket loaf and see what happens :O) and regaining its shape after you press it with your hand, even pinch it. The signs of a well-developed well-baked bread.
Enjoy the journey!
Gloria W. says
Just baked my 2nd loaf of this recipe, still haven’t got it to look like yours. Taste is the best!! It’s probably become our #1 favorite for flavor and crumb, but not getting the height, nor anything that resembles an ‘ear’- not even close. Will bake it again, will set it up for probably either a Tuesday or Thursday bake, and see if I can figure out where I’m losing the oven spring, height. I will say I DO baked it, twice, didn’t bake it on my stone, plus, I added 6g olive oil, so the bread would be easier on our teeth. However, as I’m using American flours, and a tiny bit of Rye, I believed the thirst of these flours would easily make up for a 6g liquid addition. Any suggestions on getting better structure? Last night, I made sure my Poolish was at high rise, fully ready, and, my Instant Yeast is new. Thanks for any thoughts.
Weekend Bakers says
Hi Gloria,
Sounds like you are doing a lot of things right already. We do not know how much rye you add, but it will, even with a little bit extra, play a roll in the appearance of the loaf. Also, the bread flour that you use is of more importance that you might think. To show this take a look at our posting about a flour test:
www.weekendbakery.com/posts…nt-part-1/
So it might help with your result to try a different flour brand or quality.
Other key factors are the correct workings of your oven and the temperature of the dough while proofing, the correct shaping and proofing to the right moment when it needs to go into the oven.
These things that might help you further we also collected here as a collection of our top tips:
www.weekendbakery.com/posts…king-tips/
Hope this helps you with the improvements. In the meantime still enjoying very good homemade bread of course!
Greetings,
Ed & Marieke
Anne Marie says
I love this recipe but my loaf always seems to come out very brown. Do you think it would be better to lower the temperature or shorten the cooking time in order to avoid this? (Otherwise it looks just like yours!)
Weekend Bakers says
Yes exactly Anne-Marie,
As soon as the crust has the right coloring lower the temperature to around 180 to 190C for the rest of the baking time, but make sure to bake it the full 45 minutes. If possible, place the bread on a lower tier in your oven so it is not too close to the heating elements.
We expect it will be perfect next time. Enjoy your baking!
Oli says
I’ve made this loaf many times before but today I’ve had a bit of a nightmare which i’ve only seen before when making a proper sourdough
Basically after two stretch and folds the dough was still very slack with little gluten formation – stretching and folding it would almost break apart. I’ve tried a couple more stretch and folds to see if i can get it to improve but it’s still bad and shaping it just ends up with a really sticky dough.
I figure it’s probably related to the temperature in my kitchen (around 25-26C) – I made the poolish with cold water to try to ensure it didn’t overdevelop and left it for 11hrs but i figure it’s probably ended up too acidic which has caused problems in the dough in gluten formation. Do I need to shorten the preferment further in these situations? Note i’m using european bread flour
Weekend Bakers says
Hello Oli,
It is hard for us to judge what went wrong exactly, because we do not think the temperature (alone) could be the cause. It is always better to use an under-developed poolish, especially with these higher temperatures. You did good using cold water and can try next time to shorten the fermenting and also using colder water in the final dough, just to be sure.
But the problem can also be caused by (different) flour you used and /or maybe something being the matter with your sourdough culture.
So all we can say is, trace your steps, see what exactly was different this batch and go back to conditions and products you used which led to good result.
Hope the next loaf will be great again!
Erdem says
If someone decides to make two loaves is it enough to double only ingredients for pain rustique or both (poolish and pain rustique) Let’s say for two loaves do we need 360 gram wheat flour, 90 grams whole wheat flour, 20 grams sourdough etc..
Weekend Bakers says
Hello Erdem,
When doubling a bread recipe you always double (triple, etc) everything, so that also goes for the poolish.
If you open the dough calculator under the ingredients list, you can fill in the number of batches and you will automatically see the right amounts for the number of loaves you want.
Happy baking!
Steven says
Hi all,
dumb beginner’s question about stretching and folding: why do we wait so long between S&F’s and why can’t we just do it all at once and let the dough rest?
Greetings from Berlin,
Steven
Weekend Bakers says
Hi Steven,
If you try your suggested method, you will probably find your answer.
In general: The dough needs to rest and relax and will further develop between s&f’s.
Depending on the recipe and flour used, the dough will cooperate to a certain point and then start to ‘oppose’. After a bit of rest it starts to cooperate again so you can stretch it with damaging / tearing the dough.
Enjoy your baking journey!
Marieke & Ed
Fadel Burshan says
Thank you
James H Erickson says
With regard to your comments about adding steam to the oven, I’ve found that a cast iron vessel in the bottom of the oven works better than a baking pan. The cast iron absorbs more heat so it turns the water to steam better. I use at least 1 cup of water. A cast iron skillet is great. I currently am using a cast iron griddle because there isn’t room under my baking steel for a skillet. Yesterday I double steamed. One cup when I loaded the oven, a second cup 3 1/2 minutes later. There was enough heat in the griddle to instantly turn both cups to steam. Be careful not to burn yourself with the steam when pouring the water into the skillet. I use a long handled cup to keep my hand well away from the steam. By the way this is not an original idea. I learned the technique from reading “Amy’s Bread”. Jim
Weekend Bakers says
Hi James,
Thank you so much for sharing this with us and other bakers. And you are right about the cast iron and using enough water to create a good amount of steam, being rewarded with a nice shiny crust in the end.
Enjoy your baking,
Ed & Marieke
Mark says
I’ve used this recipe regularly and it is one of my favourites from your wonderful website. This time, I decided to experiment slightly by replacing the 45g of wholewheat flour in the poolish with 45g of rye flour. The poolish wasn’t quite as lively as usual the next morning, probably due to the lower gluten. The loaf, however has turned out very well and is now cooling – can’t wait to try it!
Mark says
Just tried it. I think I’ll be making this variation again.
Weekend Bakers says
Great Mark, thanks for sharing your variation. And thank you for sharing your result / picture on www.weekendbakery.com/your-loafs/
Enjoy your baking and lots of loaves!
Ed & Marieke
Dominic Field says
The bakers’ percentage for the water is wrong I think, although the actual gram weights seem right. The Baker’s percentage of water for the complete loaf adds up to approx 73%. ( 295 water/ 405 flour x 100=72 .84 per cent)
The poolish part of the recipe has water @50%- this must be a typo?
Weekend Bakers says
You made a little mistake adding up the flour; 180 + 45 + 225 = 450 grams of flour. So 295 water / 450 flour * 100% = 65.5%. Also the poolish part has a hydration of 100%, 225 flour and 225 water = 225 / 225 * 100% = precisely 100% hydration. But in the dough calculator you see 50% after the amount of water, because this is a bakers percentage of this specific amount (225) of water against all the flour (450). Kind regards, Edwin
Dominic Field says
oops, sorry!
Ömer Seyfi Salur says
I am making almost good pain naturele & pain rustique allmost every day. And I am very happy of the results. Do not come to a conclusion that Ihad stoped baking breads. I do like the matter more every day.
Weekend Bakers says
Dear Mr. Salur,
Thank you for your lovely comment. Very glad to read your enthusiasm for baking is only increasing.
Wishing you a wonderful baking time and many more beautiful loaves!
Ed & Marieke
Weekend Bakers
Frances Kirlin says
In the morning, after I mix the polish with the final dough, can I substitute the dry yeast with sourdough starter instead? and if so how much at this point?
Thanks ,
Frances
Weekend Bakers says
Hello Frances,
If you want to make an all sourdough loaf it is better to turn to another recipe, because a few things have to change when you do this. So take a look at our pain naturel or make the pain rustique according to the schedule of the pain naturel:
www.weekendbakery.com/posts…n-naturel/
Happy sourdough baking!
Wendy says
Hi,
I’m in the process of making this, and the dough is very wet (I’ve just done the first stretch and fold). Is this normal? The poolish was also very wet (actually had a little puddle of water around the edges when I pulled it out this morning). Much wetter than what I had with your Tartine recipe. Just wondering if all this is normal, or if I should do something to fix this before I do the final shaping.
Also, I don’t have an electric beater. How much hand mixing/kneading is necessary when you say to mix for 5 minutes in the electric?
BTW, I just found your site last week and am loving it. I’m very new to baking. I’ve made your Tartine twice this week (my first time using sourdough starter), and it’s great!
Thanks,
Wendy
Weekend Bakers says
Hi Wendy,
Reading what you describe, we think you probably did not incorporate the ingredients well enough (the poolish needs to be wet, it is 100% hydration after all with equal parts water and flour, but it is a bit strange you would see water, we have never seen it ourselves). Or did you leave it much longer than we suggest in the recipe? And maybe need to do some more kneading with the final dough too. It is hard to judge this, without seeing you at work, but a good indication for the kneading by hand is 10 to 12 minutes.
If you already did the Tartine, this should be no problem for you too, so we hope it will turn out good, or you will give it another try.
Maybe our top baking tips can also help you with the most important baking issue you can encounter as a novice bread baker:
www.weekendbakery.com/posts…king-tips/
Keep on baking!
Marieke & Ed
Wendy says
Hi – thanks for your response. I think I must have mis-measured because I made it again yesterday and it the poolish was much drier from the start. I have to say, however, that the first one was totally delicious (which is why I made it again)!
Weekend Bakers says
Hope you keep on practicing with this recipe, because this is THE way to learn and get to know the dough and how it behaves and what it needs. And, it also helps to have no distractions when baking because indeed something can easily go wrong in baking when somebody or something distracts you from the task at hand (we know from experience!).
Good luck with it and happy baking!
K F Khan says
Dear Marieke & Ed,
Your recipe is a remarkable innovation, my compliments. I am having difficulty with the wetness in the crumb no matter what I do.
The taste is wonderful.
I have tried higher temperature, lower, longer baking! Nothing works. Now going for 3% lower hydration.
Best regards
F Khan
Weekend Bakers says
Hello K F,
Because every flour absorbs moisture differently it is indeed a good idea to try and make a version with a few % less water and see how that goes. You can also try different (brand of) flours and compare the results. The difference in baking results can be significant.
Hope you will get your desired loaves soon!
Greetings,
Marieke & Ed
Jolly says
I am Retail Baking Cert III student, finished semester 1. All we used so far is commercial yeast. Next semester is artisan and sweet yeast products.
However, I have prepared my starter and baked 3 batches of Tartine style sourdough breads.
1. With mix of millet, whole meal, rye and bakers flour. Outcome was very dense and hard bread.
2. With whole meal and Bakers, 70:30, dense and relatively hard but can be eaten.
3. Repeat of 70:30 but kept out of fridge overnight after moulding, retarded in fridge for 4 hrs, time to go for walk, out of fridge for an hour and half with home heating on, Melbourne is cold. Rising was good but not great. Beautiful bread with tough crust but soft moist crumb, though dense but seems aerated. Just want to check on sourdough breads in market to compare my product.
How do I send photos here?
Thinking of making poolish without commercial yeast.
Weekend Bakers says
Hi Jolly,
May we ask if you made this bread already and stuck exactly to the recipe? This is what one of our most important tips is for good baking results. Variations and deviations after good results with the original recipe and based on the knowledge / reasons why you want to change anything and what results you are aiming for.
This tip and others can be found here:www.weekendbakery.com/posts…king-tips/
If you want to send us photo’s you can upload them via the yourloaves section:
www.weekendbakery.com/send-…your-loaf/
Good luck with everything
Ömer Seyfi Salur says
Hi, Marieke & Ed, I am making every day Tartin Bread and whole wheat flour bread. And sometime I will send you some more pictures. For that thnkyou very much.
Weekend Bakers says
Hello again Mr. Salur,
Thank you , that sounds excellent. The Tartine style bread has such great taste and we love the method. We always look forward to seeing pictures of your results.
You can send them by mail or upload them here: www.weekendbakery.com/send-…your-loaf/
Happy baking in Turkey!
Ömer Seyfi Salur says
I have one question about the “POOLISH”, when we preapare it in some instences we use whole wheat flour. If we use the rye flour imstead whole wheat flour will it be wrong for it not to have gluten in it.
Weekend Bakers says
Hello Mr. Salur,
You are right, using rye instead of wheat in your poolish will have a big impact on your bread, mainly because of the (lack of) gluten. There can be a reason of course for people to use rye instead of wheat, but keep in mind that your loaf will be very different in taste, texture and appearance.
Greetings,
Marieke & Ed
Elisabeth de Souza says
Hi both of you
Came across your website by chance and decided to try your Pain Rustique. Brilliant ! Love the taste and the texture, it will definetely become one of my favourites. Second batch in the oven now.
I have a couple of questions:
My loaves tend to spread out and be quite flat, how can I make them a bit taller?
Can I bake them in bread tins?
What size proofing baskets should I go for, 20 or 25x15x8?
Can I use spelt flour in this recipe?
I have used fresh yeast instead, 12 gms for 2 loaves
Thanks for your very clear instructions and great bread
Elisabeth
Surrey UK
Weekend Bakers says
Hi Elisabeth,
Great to read your comment.
First of all look at your flour and look for the protein content. It should be at least 12% for bread baking so you can develop enough gluten strength for the bread to hold its shape . Also make sure you develop the dough correctly by kneading and stretching and folding the right way. Of course you can use bread tins too and this will give your loaves extra support.
You can use spelt, but begin with substituting only the whole wheat for spelt. Baking with more spelt will give you a whole other set of challenges.
Using fresh yeast is around 7 grams per loaf in the final dough so your 12 grams sounds about right for two loaves.
Also: Check out our bread baking tips on many subjects like flour, kneading, gluten, temperature, your oven etc.that can help you here: www.weekendbakery.com/posts…king-tips/
Happy baking from Holland,
Marieke & Ed
Peter says
Hi Marieke and Ed,
What is your opinion about final prooving overnight in the fridge? Is it possible with this hybrid bread? For how many hours? And what should be the temperature of the fridge?
I did it a few times with a yeast based bread, but in about 10 hours time it came out overdeveloped. Sourdough bread came out right.
Thanks for the great website where I always come back for inspiration!
Best wishes,
Peter
Weekend Bakers says
Hello Peter,
The answer is yes, but we do not have the exact instructions for you on how to get the perfect result. You do not need to adjust your fridge, but you do need to figure out the amount of yeast in the final dough and the time in the fridge to avoid over-proofing. So start with a much smaller amount. It is better the loaf needing a bit of extra time the next day than being too far and ending up with worst-case a collapsed loaf! So a bit of trial and not too much error maybe, but once you get it right, it is a great way to quickly get fresh bread in the morning.
Good luck with it!
Ed & Marieke
Dan Spangenberg says
Great looking bread! I do have a couple of questions.
When you say sourdough culture, are you referring to an active 1:1 sourdough starter? I guess the ratio of the starter isn’t of much consequence since your amount of starter is only 2.2%
If you proof it in wicker banneton baskets, are you turning them over to remove the dough right before scoring and baking? I have some brotform baskets but haven’t had much success with them. The loaf always seems to stick or or deflate when I flip them over to bake. They are very well floured. Maybe I am proofing in them too long?
My last question is what is the orange handle plastic thing in the bottom of the photo of the oven (or is that a proofer?).
Also what kind of oven are you using? I need a new oven and am considering one of the Moffat Turbofan models with programmable steam injection. Comments?
Thanks for the blog and great information!
Weekend Bakers says
Hi Dan,
The answer to both question 1 and 2 is yes.
As for the sticking we would suggest taking a look at this for some tips:
www.weekendbakery.com/posts…-banneton/
Flour your basket carefully and also flour the top of your loaf before you put it in the banneton. Use excess flour in the beginning so you do not get the sticking problem and slowly adjust to less with each baking session.
We would suggest also to look at the type of flour you are using. What you describe could very well be a lack of gluten (development). First make sure you have the right bread flour (at least 12% protein). Check regularly to avoid over-proofing.
Also look at our article on gluten to learn more: www.weekendbakery.com/posts…ut-gluten/
The orange thing is the top of our plant sprayer with which we create steam in our stone oven (it is a Rofco made in Belgium see rofco.be)
We do not have any knowledge for you regarding Moffat ovens.
Enjoy the baking!
Abe says
Two words… “Rice Flour”. Wave goodbye to sticking.
Weekend Bakers says
Thank you Abe, for your suggestion.
Sarah CT says
Hi, I’m a complete beginner, never made bread, and just at day 1 of your sourdough starter instructions!
I’ve just bought a bread machine, and was hoping to use it with your recipies, but it looks like your recipies are not suited for bread machine. Am I right?
There are recipies coming with the machine, but I don’t like them at all as they all use “Surebake” yeast which is expensive granules made of dried yeast, flour, with some emulsifiers, flour treatment agent, vegetable oil… 🙁
I’m French but leave in New Zealand, where it is almost impossible to find bread that won’t make you sick (maybe because they all use this Surebake thing!!)
My question is: is there a way to use your recipies (using sourdough starter) with a bread machine?
Sorry for the naive/stupid question, and thank you for your amazing website!
Weekend Bakers says
Hi Sarah,
Thanks for your comment. It is a bit of a challenge to answer your question, but we will try. You can adapt techniques and quantities from our recipes, but the kneading process and timings of our recipes, as far as we know do not correspond with a bread machine.
Our limited experience with a 35 euro bread machine some years ago where that all loaves came out a bit the same in the sense that they all have the same shape and crumb.
You need to be inventive and do things like short kneading and turning the machine off, leaving the dough to develop, then go on from there.
The basic idea of the machine is to just press start, go to bed and wake up with fresh bread. But you are right, lots of stuff is added to develop the bread.
So, we would advice you to get googling and find people who already where inventive with their bread machines and made decent loaves with only 4 ingredients. On the other hand we would like to encourage you to also try to make a loaf without the machine and see how you like your hands on the dough.
Good luck with it!
Greetings from Holland,
Ed & Marieke
il conte says
Made it today – results were perfect. Easy and quick (I already had the Poolish made in the frig and just brought it to room temp before adding it to the mix). I substituted a half teaspoon of molasses for the sourdough culture (didn’t have any) which gave nice taste and color. Baked in a convection oven at 425 degrees for 28 minutes until the interior temp of the batard shaped loaf reached 200 degrees. Great crust and chewy crumb with large holes. Brought me back to my days in Italy and the great breads we took for granted there.
Weekend Bakers says
Hello Il conte,
Thank you for sharing this wonderful result and the memories that go with it.
Enjoy the baking and eating!
skinny jake says
I had great success with this recipe. The poolish is key, and using it successfully has improved my bread immeasurably. Merci beaucoup pour le pain rustique !
Weekend Bakers says
Hi Jake,
That sounds excellent, thank you for the enthusiastic feedback.
STT says
Hi can I fully use wholemeal flour? Or will my water ratio have to change? I would like to use majority wholemeal flour but in the past i find its proportion is different to using plain bakers flour
Weekend Bakers says
Hi SST,
Yes you can, but the result will be very different, it will be much denser and more compact. The recipe already has a rather high hydration level of around 66% but we would go up to 70% to start with. We would also suggest to take smaller steps and use a combination of bread flour and wholemeal and slowly increase the amount of wholemeal and monitor the result.
Jessica says
Hi,
I would like to try your Pain Rustique.
Was wondering what type of bread flour you use? What’s the protein %?
Can I use T55 or T65 type flour?
If I am living in Singapore where it’s hit n humid year round, how do I adjust for humidity n temperature?
Thanks!
Maggie says
HI there; Am trying your pain rustic and everything looked great until the final rise, which is taking WAY longer than 30min. My kitchen is nice and cozy. Is this normal?
Weekend Bakers says
Hi Maggie,
Just take the time you need. You say your kitchen is nice and cozy but it would help to know the exact dough temperature to determine the time needed for proofing. So if your kitchen feels cozy to you, but your dough is ‘only’ 21 or 22 degrees Celsius, it could take double the time. Just check out our posting on dough temperature to see how important this is in bread proofing and baking: www.weekendbakery.com/posts…mperature/